Let’s be honest: walk into a high-end photography studio in Manhattan or London, and you’ll likely see a sea of gear that looks more like a NASA control room than a portrait set. There are massive softboxes, tiny reflectors, grids, booms, and assistants scurrying around like they’re diffusing a bomb.
They want you to think it’s magic. They want you to believe that the $2,500 price tag is for some guarded, ancient secret passed down from the masters of the Renaissance.
It’s not.
In the world of professional photography, the "secret" is actually just a very disciplined system of controlling light. Whether you are a photographer looking to level up your game or an executive wondering how to prepare for a headshot session, understanding these lighting fundamentals will change the way you look at a portrait forever.
At Shut Your Aperture, we believe in keeping it simple. You don’t need a six-figure studio to get world-class results; you just need to know which knobs to turn and where to point the light.
The Psychology of the "Power Look"
Before we talk about f-stops and softboxes, we have to talk about the "vibe." An executive portrait isn't just a picture of someone’s face; it’s a marketing tool. It needs to scream authority, competence, and: most importantly: approachability.
The best lighting for executive portraits strikes a balance between these three things. If the light is too harsh, the subject looks aggressive. If it’s too flat, they look bored and unprofessional. High-end studios use lighting to sculpt the face, creating shadows that define the jawline and highlights that make the eyes pop.
When you see a stunning headshot on a site like perfectcorporateheadshots.com, you aren't just looking at a high-res photo. You’re looking at a carefully constructed image designed to make you trust the person in the frame.
Professional Corporate Headshot Tips: Starting with the Key Light
The foundation of every high-end portrait is the Key Light. This is your main source of illumination, and it dictates the entire mood of the shot.
In executive portraiture, the key light is almost always a large, soft source. Why soft? Because soft light is forgiving. It hides skin imperfections, softens wrinkles, and creates a gradual transition between light and shadow.
High-end studios typically use a large Octabox or a Parabolic Reflector positioned about 45 degrees to the side of the subject and slightly above eye level. This creates what we call "Rembrandt Lighting": a small triangle of light on the cheek furthest from the light source. It’s a classic look that adds depth and dimension.
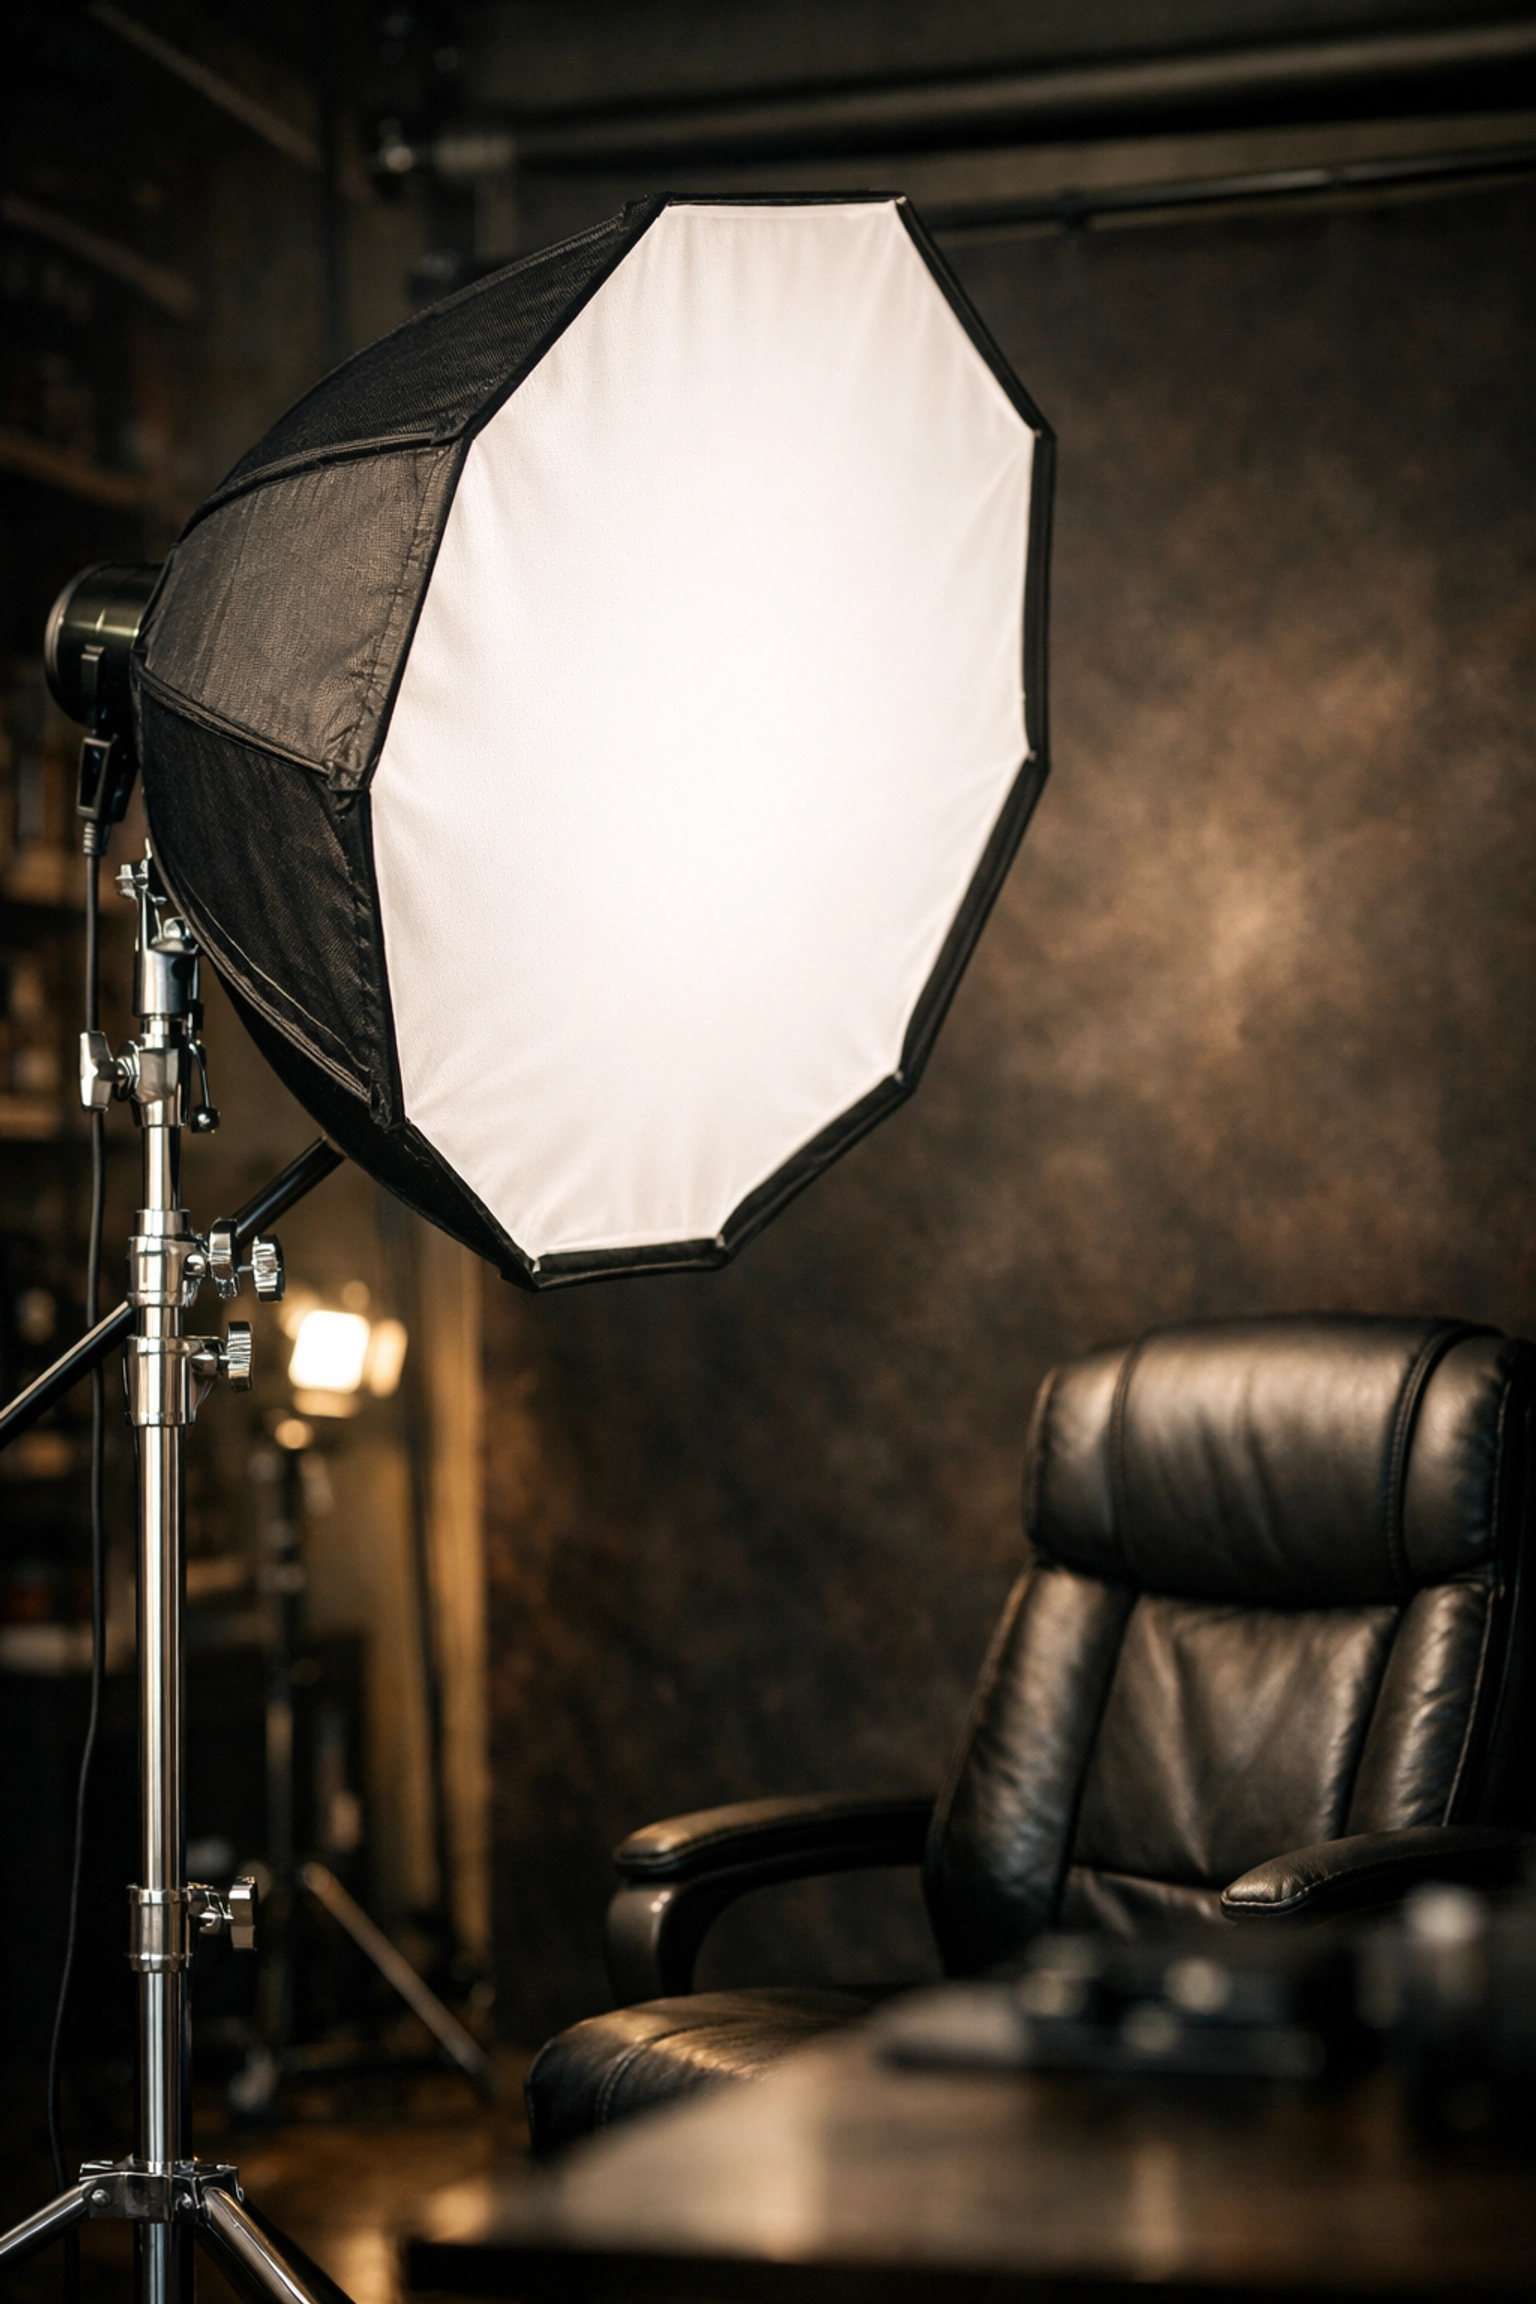
Alt text: A professional key light setup featuring a large Octabox positioned for a corporate executive portrait.
If you’re just starting out, check out some Shut Your Aperture resources for a deeper dive into the physics of light. But the short version? Move the light closer for softer shadows, and move it back for more contrast.
The Fill Light: Why Deep Shadows Are Your Enemy
In "edgy" editorial photography, deep, black shadows are cool. In the corporate world, they are a disaster. You don't want a CEO looking like a villain from a noir film.
This is where the Fill Light comes in. Its only job is to "fill" in the shadows created by the key light. It shouldn't be as bright as the key light; it just needs to bring back enough detail so the viewer can see the entire face.
You can achieve this with a second, less powerful light or even just a white foam core board. If you want to see how the pros do it, perfectcorporateheadshots.com shows off plenty of examples where the shadows are "open": meaning you can see detail in the dark areas without losing the shape of the face.
Best Lighting for Executive Portraits: The 3-Light Setup
Once you have your Key and Fill, you’re 80% of the way there. But that last 20% is what separates the amateurs from the pros. This is where the Kicker (or Rim Light) and the Background Light come into play.
1. The Kicker / Hair Light
A kicker is a small light placed behind the subject, usually on the opposite side of the Key Light. It "kicks" a sliver of light onto the hair and shoulders. This creates separation from the background. Without it, a person with dark hair can easily blend into a dark background, making them look like a floating head.
2. The Background Light
High-end studios don’t just let the background go dark. They use a dedicated light to create a "halo" or a gradient on the backdrop. This adds a sense of three-dimensional space. Just like searching for [hidden-gem-locations-for-travel-photography] requires an eye for depth, setting up a background light requires an eye for layering.
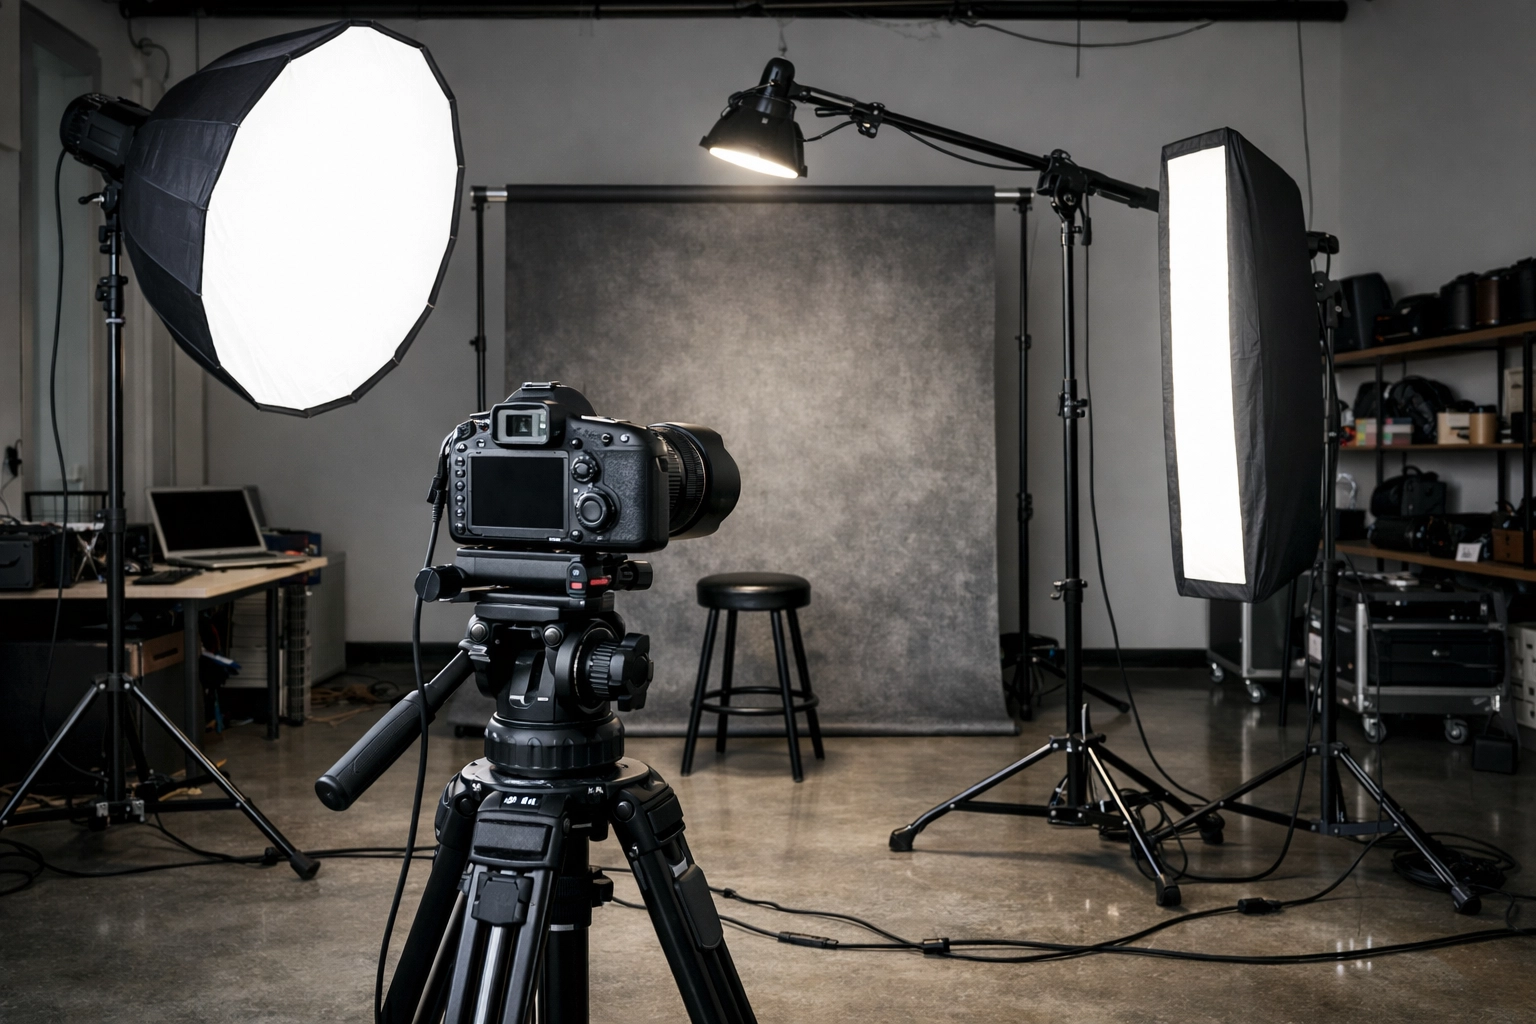
Alt text: A 3-light setup diagram showing key, fill, and hair light placement for a professional executive headshot.
Clamshell Lighting: The "Beauty" Secret for Corporate Success
If you want a look that is incredibly flattering and makes the subject look five years younger, use Clamshell Lighting.
This setup involves two lights (or a light and a reflector) placed directly in front of the subject. One is angled down from above, and the other is angled up from below. They meet in the middle like an open clamshell.
This is one of those executive portrait lighting secrets that high-end studios use for female executives or anyone who wants a "glowy," clean look. It fills in every wrinkle and creates beautiful, double catchlights in the eyes. It’s the "Instagram filter" of the professional lighting world.
How to Prepare for a Headshot Session (The Non-Lighting Stuff)
You can have the best lighting in the world, but if the subject shows up unprepared, the photo will fail. When we talk to clients at perfectcorporateheadshots.com, we always give them a few "pre-game" tips:
- Sleep and Hydration: No amount of lighting can fix exhaustion. Drink water and get 8 hours.
- Clothing: Solid colors work best. Avoid "loud" patterns that compete with the lighting for attention.
- The Mindset: Relax. A good photographer will guide you, but if you’re stiff, the light will catch those tense muscles in the neck and jaw.
For more on the gear side of things, you might want to look into www.proshoot.io to see what the current industry standards are for high-end corporate work.
Light Ratios and The Technical Stuff Made Simple
"Ratio" sounds like a math word, and most photographers hate math. But in lighting, it’s simple. It’s just the difference in brightness between your Key Light and your Fill Light.
- 1:1 Ratio: The Key and Fill are the same brightness. This results in very flat, "shadowless" lighting. It’s great for passports, but boring for executives.
- 2:1 Ratio: The Key is twice as bright as the Fill. This is the "sweet spot" for most corporate work. It provides enough shadow for shape but keeps things professional.
- 4:1 Ratio: The Key is four times brighter. This is getting into "moody" territory: great for architects or creative directors, maybe too intense for a CFO.
Understanding these ratios is like knowing [using-rare-textures-for-tangible-aesthetic-photography]. It’s about adding layers and tactile feel to a digital medium.

Alt text: Side-by-side comparison of different lighting ratios used in corporate headshot photography.
Modifiers: Softboxes vs. Umbrellas
High-end studios love their modifiers. A "modifier" is just anything you put in front of a light to change its quality.
- Octaboxes: These are the gold standard. They produce a round catchlight in the eye that looks natural (like the sun).
- Beauty Dishes: These provide a slightly "crisper" light. They are harder to use because they show more skin detail, but on the right subject, they look incredibly high-end.
- Scrims: Sometimes, the "secret" isn't a flash at all. It’s just a giant piece of silk used to soften natural light coming through a window.
If you’re looking to build your own studio kit, check out www.edinstudios.com for gear recommendations that won't break the bank but will deliver that "high-end" look.
Finishing Touches in Post-Processing
Even with perfect lighting, every executive portrait needs a little love in post-production. This isn't about "fixing" the person; it's about polishing the image.
We always recommend using Luminar for these finishing touches. You can find it here: https://skylum.evyy.net/BXVoBJ. Its AI tools allow you to enhance the eyes, soften skin textures realistically (without making them look like plastic), and adjust the lighting "re-lighting" in post if you didn't quite nail the ratio in-camera.
Professional retouching should be invisible. If the viewer can tell the photo was photoshopped, you’ve failed. The goal is to make the subject look like they are having their best skin day ever.
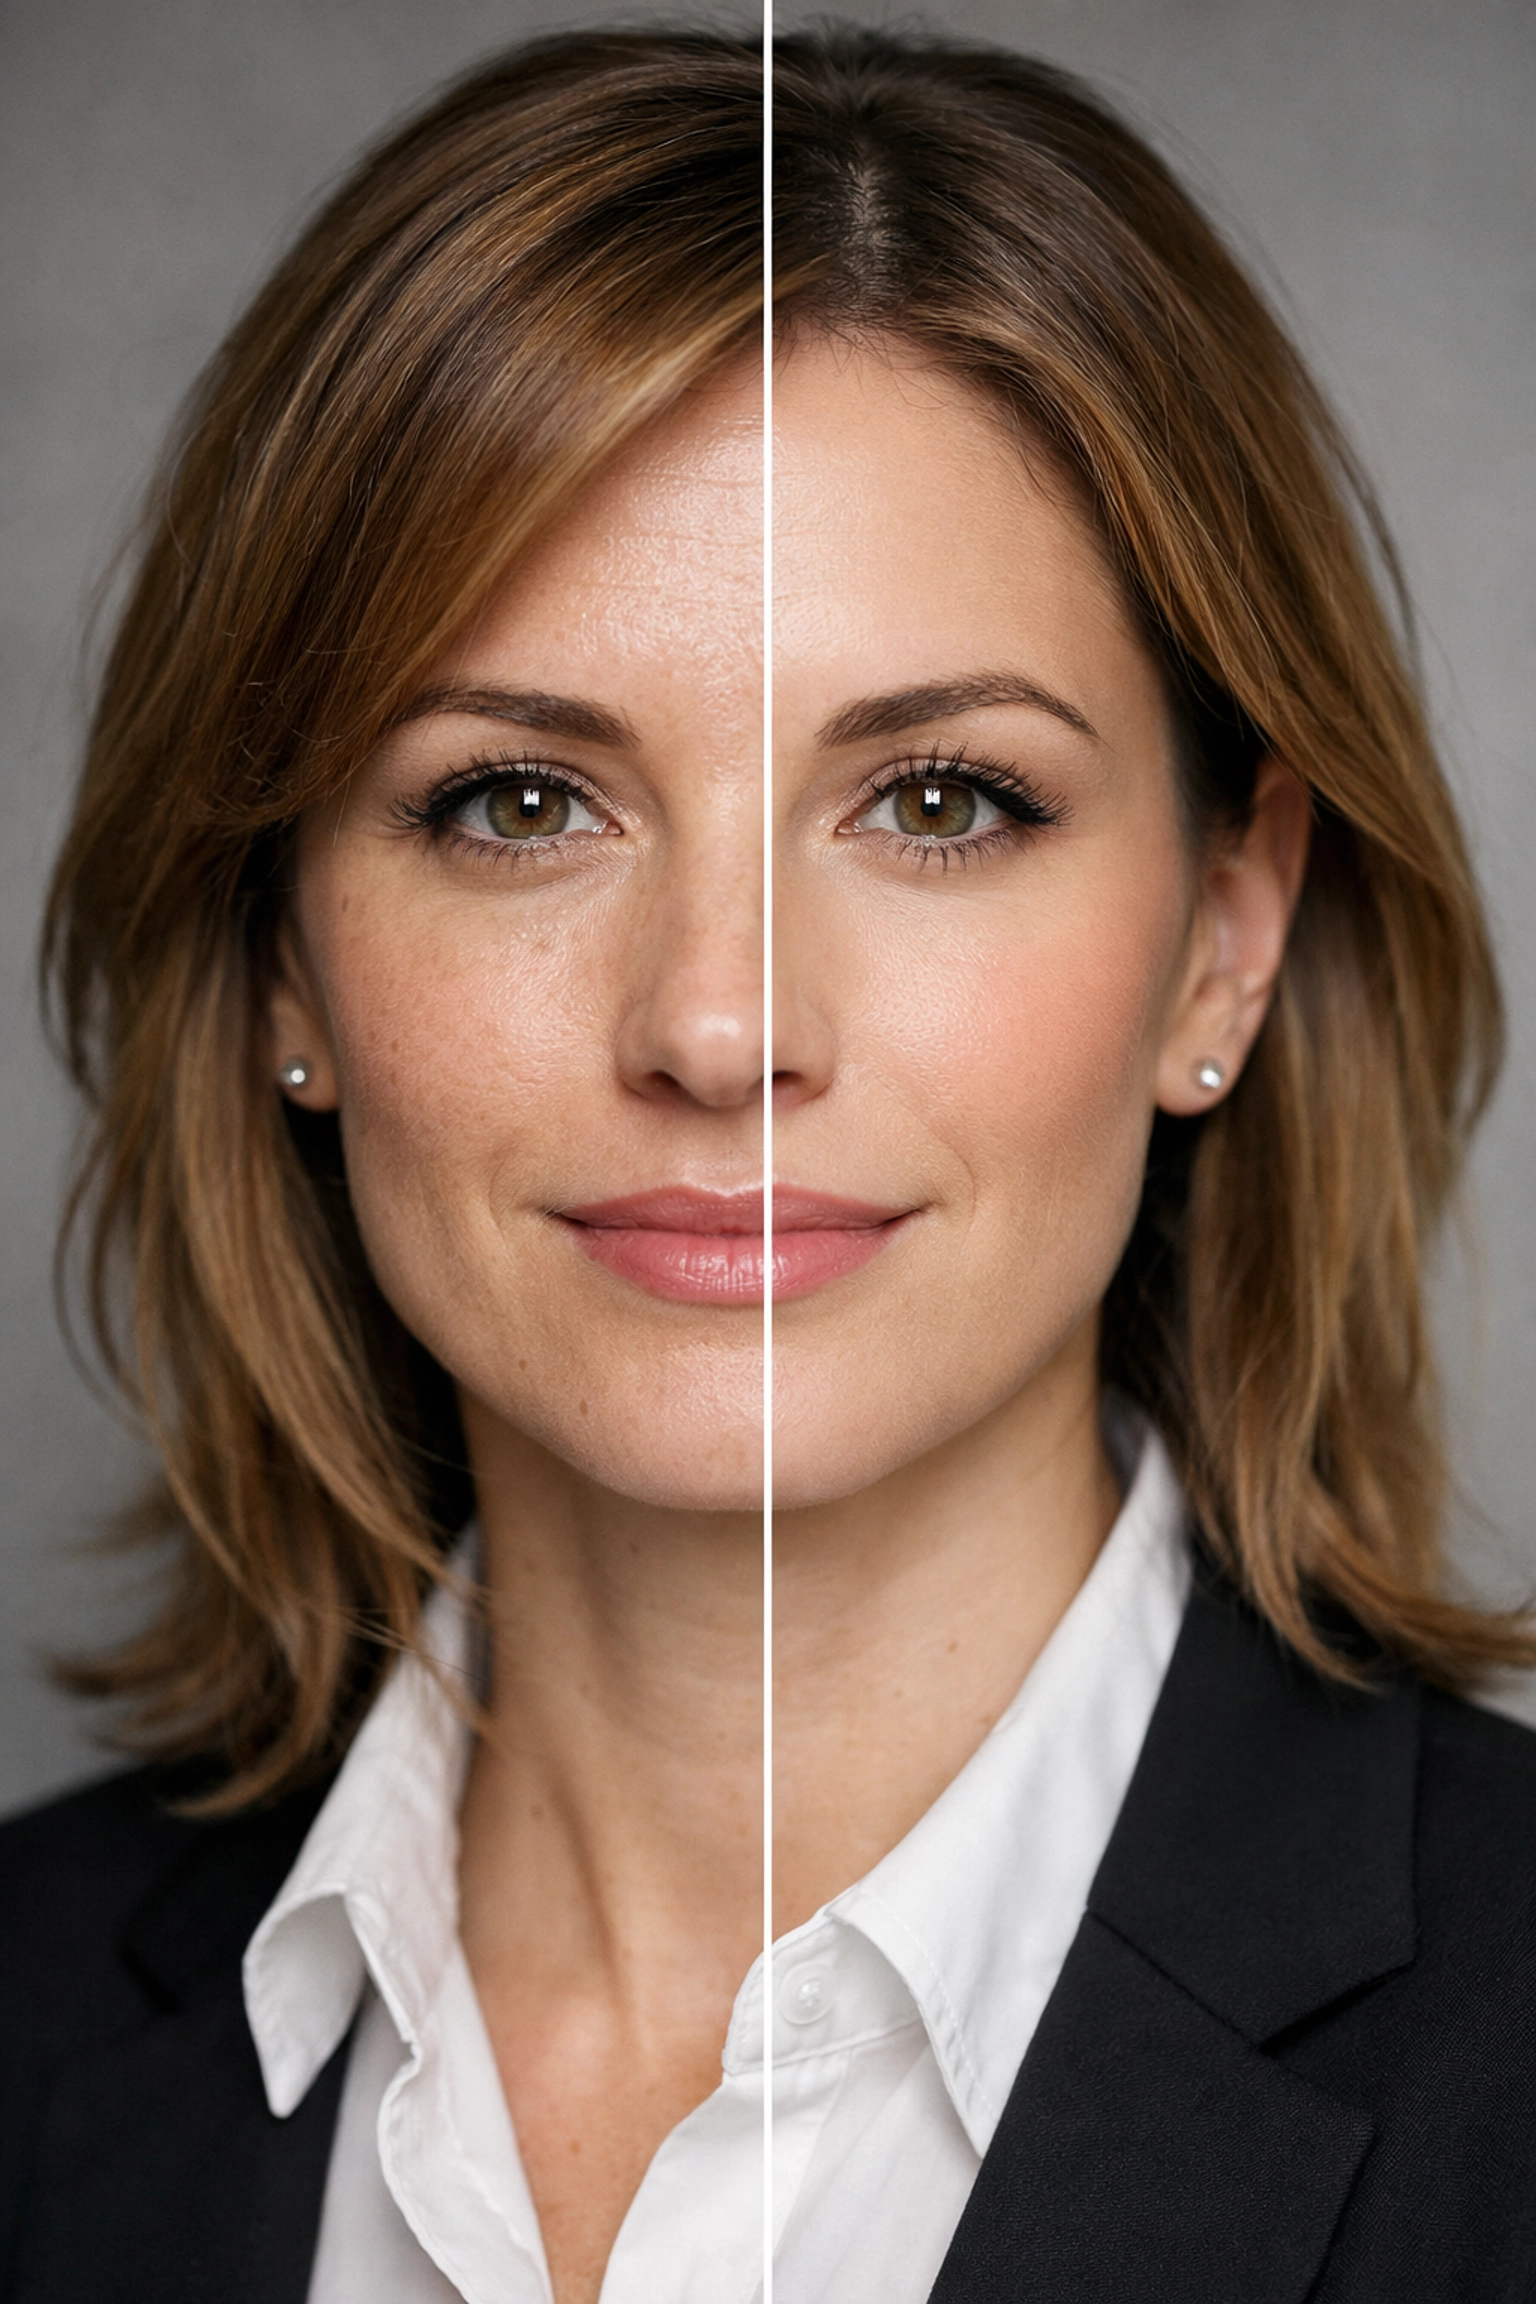
Alt text: A subtle before-and-after retouching comparison of an executive portrait using Luminar AI tools.
Why This Matters for Your Brand
Whether you're an individual or a company, your headshot is often the first interaction a potential client has with you. If your lighting looks cheap, your brand looks cheap.
Investing in professional corporate headshot tips and high-end lighting techniques isn't just about making a "pretty" picture. It’s about establishing dominance in your niche. If your competitors have grainy, poorly lit selfies and you have a sculpted, three-dimensional portrait from a place like perfectcorporateheadshots.com, you've already won.
Think of your portrait like a [secluded-paradises-to-enhance-your-photography-portfolio]. It’s a rare, high-value asset that sets you apart from the crowd.
Wrapping It Up
The "secrets" of high-end studios aren't really secrets: they are just a commitment to quality. By mastering the Key light, using Fill to keep shadows open, adding a Kicker for separation, and choosing the right modifiers, anyone can achieve a world-class look.
Don’t be intimidated by the gear. Start with one light, learn how it falls on the face, and then add more layers as you go. For more inspiration on photography techniques, whether it's for the boardroom or [finding-hidden-gems-for-stunning-travel-photography], keep exploring the resources at blog.edinchavez.com and www.edinfineart.com.
Now get out there, shut your aperture, and start lighting like a pro.
Skylum’s Aperty is purpose-built for portrait retouching with AI skin, eye and detail enhancement. Luminar Neo’s Portrait AI complements it for full-body and editorial work. Tagged as affiliate per FTC.