

Updated October 2026. Pick one street photography project before you leave the house. Give it a finish line. A folder of three hundred unrelated frames is hard to learn from; six photographs answering the same question are easier to judge. You will see what worked, what you missed and what to try on the next walk.
These twenty projects are assignments, not a list of subjects to collect. Each has something to make and something to check afterward. Choose one, use a camera or phone you already know, and work a route you can walk safely. You do not need to complete the whole list in a weekend.
Edin Chavez’s photographs illustrate public-life details, color, timing and viewpoint. They are not proof that every frame was made for these assignments, and their captions do not invent settings or private stories about the people pictured.
Make a small project, not another endless walk
Write one sentence before shooting: “I am making six photographs about reflected movement.” That sentence stops a pretty sunset, a stranger’s hat and every passing car from pulling you into different projects. Keep those distractions for another day.
Choose the output too. A six-frame sequence needs variety; a pair needs a clear relationship. Do not measure success only by the number of sharp files. At review, ask whether the photographs answer your original question. Cut a technically good frame if it weakens the set.
The exercises below build on Canon’s street and urban composition guidance: observe a scene, consider background and scale, use changes in viewpoint, and work respectfully. Our street photography practice guide covers the basic method; our street settings guide handles the camera decisions. This page gives you projects to use those skills.
1. One color, six different jobs
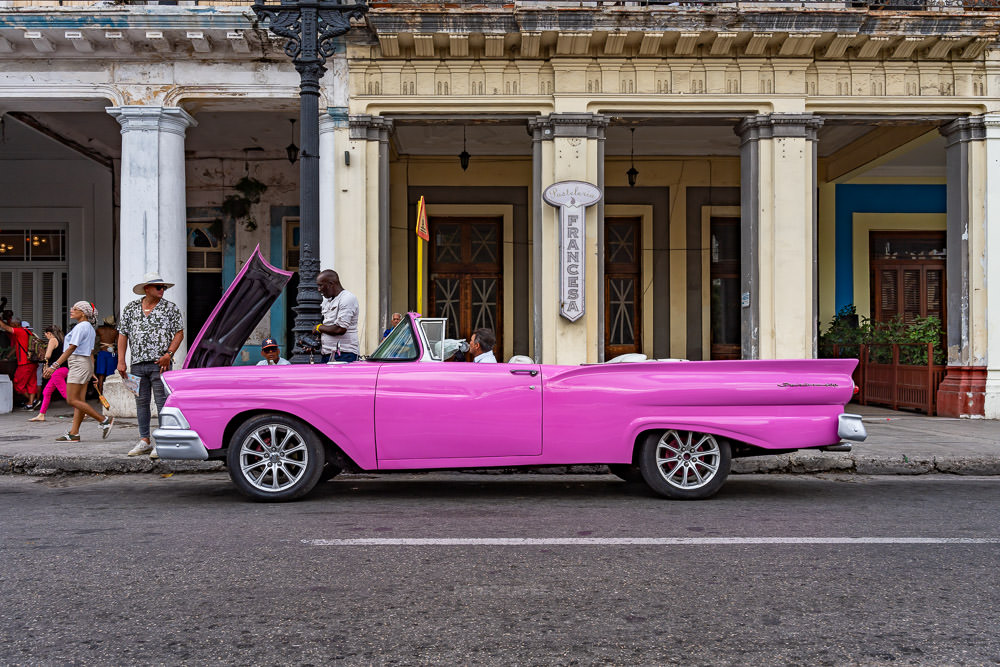
Choose a color and find six ways it works in public life. A jacket, painted wall, vehicle, sign, umbrella and small detail can belong together without being six versions of the same photograph. Include a wide frame, a medium view and a close detail.
Make the color important to the composition, rather than merely present somewhere. If the red object disappears into a busy background, change position or wait for separation. Do not move someone else’s property to improve the picture.
Finish: six photographs. Review: does the color connect them while the situations remain different?
2. Wait for one clean stage
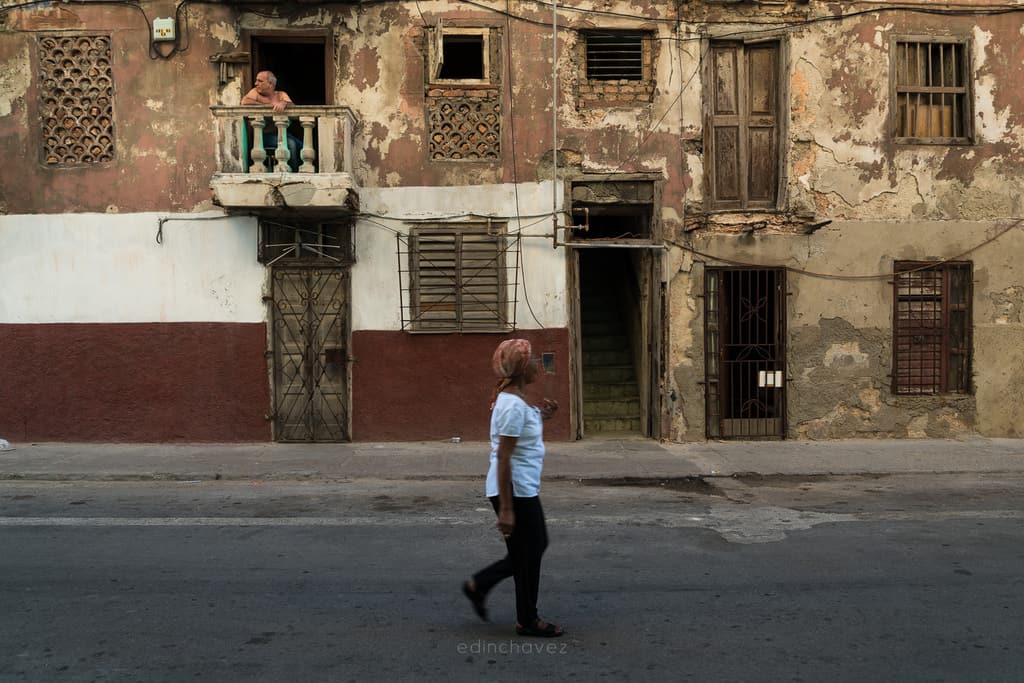
Find a background with a useful shape, patch of light or clear opening. Watch where people naturally pass. Choose the camera position before a subject arrives, then make a small series as the scene changes. Stay out of doorways and pedestrian routes.
The task is to compare timing, not to insist that someone perform. A person may align with a doorway in one frame and merge into a sign in the next. Keep those comparisons during editing. Edin’s Cuba composition tutorial describes thinking about the frame and waiting for the moment.
Finish: one contact sheet and two final frames. Review: what changed because you waited?
 Save
3. Shadows without their owners
Make three photographs where a shadow carries the frame. Look at its direction, shape and relationship to the surface. You can include the person or object casting it, but try a version without them too. Do not stare into the sun or walk backward into a road for an angle.
A shadow can simplify an ordinary scene into lines and shapes. Check exposure against the bright surface, then inspect whether the shadow has the weight you intended. Dark is a choice; losing every useful detail is not automatically stronger.
Finish: a three-frame set. Review: do the shadows communicate without an explanatory caption?
4. Reflections only
Use windows, polished surfaces or puddles as your view of the scene. Make the reflected image the subject instead of a decorative extra. Try one frame that clearly reveals the reflective surface and another that leaves the viewer unsure where the real space ends.
Check the edges for your own reflection, passing traffic and bright signs. A small change in height can rearrange the whole picture. Stay on safe ground; do not step into a street or restricted doorway for a cleaner puddle.
Finish: four photographs. Review: does each reflection add a relationship you could not get directly?
5. Three layers, one readable frame
Build a photograph with foreground, middle distance and background. Start with the farthest layer, then look for a nearer element that frames or contrasts with it. Wait for movement only after the static parts make sense.
Depth alone does not make a good photograph. The layers must separate rather than pile into clutter. Try a step sideways or a different camera height. Choose enough depth of field for the relationships you want; a wide aperture that erases the background may work against this assignment.
Finish: three frames from the same area. Review: can you identify the job of every layer?
6. A shape that keeps returning
Choose circles, triangles, arches or rectangles. Make a series in which that shape appears at different scales: a wheel, doorway, painted marking or shadow. Include public activity where it adds something, but you do not need a face in every street photograph.
Avoid filling the folder with ten similar windows. Look for a repeated form doing a different job. A circle might enclose, interrupt or echo another element. That is the relationship worth photographing.
Finish: five photographs. Review: is the set about a shape, or simply a catalog of objects?
 Save
7. One block, five frames
Choose a short public stretch and tell a small visual story without leaving it. Make an establishing view, a scene of activity, a detail, a quieter frame and a closing view. The order is yours; the important part is that the photographs work together.
Do not invent what a business, resident or passerby is thinking. Describe visible activity if you write captions. A small project can be honest without making a grand claim about the whole neighborhood.
Finish: a five-frame sequence. Review: could a viewer follow the set without a paragraph explaining every image?
8. Hands doing something
Photograph a visible action through hands: carrying a bag, holding a lead, playing an instrument or exchanging an object. Keep enough surrounding information to make the action understandable. Do not use a close crop to imply something that did not happen.
Ask when making a close, directed portrait or working in someone’s personal space. A public setting is not permission to intrude. If an ordinary candid situation becomes uncomfortable, step back and choose another subject.
Finish: four different actions. Review: does the gesture remain readable without a face?
9. A person and a large space
Make three photographs where a small human figure gives scale to architecture or open space. First frame the space alone. Decide where the figure would make the relationship clear, then wait from a safe position.
This is not a reason to hide behind a long lens and pursue someone. Let people pass naturally through the composition. Check whether the figure separates from the background and whether the surrounding space has a clear structure.
Finish: a three-frame series. Review: does the person change how the space feels or reads?
10. Street text with context
Build a set around signs, lettering and public messages. Include how the words meet the surroundings: an arrow beside a parked vehicle, a shop name above a doorway or a notice against a changing street. Read the complete message before choosing the crop.
Typography can create a visual joke, but editing can also change meaning. Avoid cropping a sentence into a false claim or presenting a passerby as endorsing a sign merely because they walked past it.
Finish: four photographs. Review: are the words and scene working together honestly?
11. Photograph the pause
Look for the spaces between obvious action: an empty bench after a crowd leaves, a briefly quiet crossing or someone waiting in an ordinary setting. Pay attention to edges and small gestures rather than demanding a dramatic event.
A quiet frame still needs composition. Choose what holds the eye and what the surrounding space contributes. Do not label a stranger lonely, desperate or angry from one expression. Your task is to photograph a visible moment, not assign a biography.
Finish: three photographs. Review: does stillness have a clear visual role?
12. Motion and a stable anchor
Choose a scene where movement can contrast with something stationary. Compare a frame that freezes movement with one that allows blur. Adjust shutter time for the actual scene, and inspect your results rather than treating one number as a universal recipe.
Keep a doorway, pavement pattern or other anchor readable when that is the intention. Panning is a different exercise: the moving subject may stay clearer while the background streaks. Make that distinction before deciding whether a blurred frame succeeded.
Finish: one pair. Review: which version communicates the movement more clearly?
13. High and low, safely
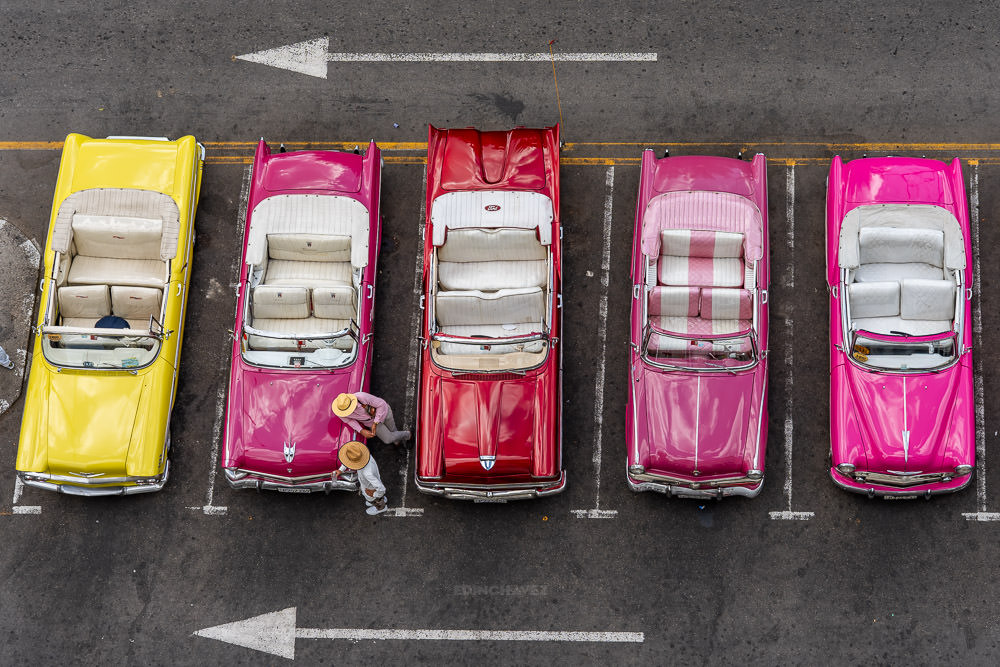
Photograph the same public scene from ordinary standing height and a different permitted viewpoint. A low angle can separate a subject against a simpler background; an elevated view can reveal patterns on the ground. Neither is automatically more interesting.
Use accessible steps or a public lookout, not a roof, barrier or private stairwell without permission. Keep the route open. Compare the relationship between subject and background, not simply how unusual the camera position was.
Finish: two pairs. Review: what did the changed viewpoint reveal or remove?
14. Glass as a boundary
Photograph a scene through glass so reflections and the world beyond it become part of the frame. Decide whether you want a clear subject behind the glass, reflected activity, or both. Focus on the chosen distance and check the result.
Respect privacy and property rules. A window is not an invitation to photograph a private interior, and a store may have its own photography rules. Public shopfront details and reflections can give you a project without intruding.
Finish: three photographs. Review: is the glass doing something useful rather than merely lowering contrast?
15. Animals in public life
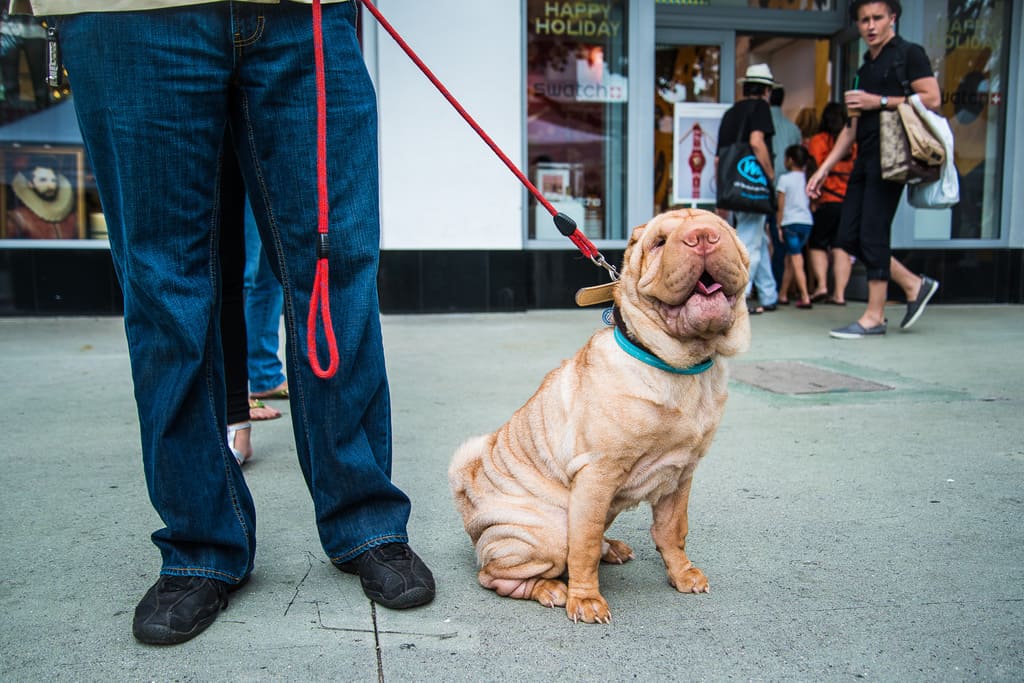
Photograph the relationship between an animal and its surroundings: a lead connecting dog and owner, a pet waiting near a doorway or a bird against public architecture. Work without startling, feeding or putting the animal at risk.
The scene around the animal matters. Check whether a gesture, object or human presence gives the photograph context. Avoid reaching toward an unfamiliar pet while concentrating on your camera. Ask the owner before arranging a closer portrait.
Finish: three photographs. Review: would the picture still say something beyond “a dog” or “a bird”?
 Save
16. One lens, varied distances
Use one familiar lens or one phone camera setting for the whole walk. Make a wide context frame, a medium scene and a detail without changing lenses. Move only where it is safe and respectful; not every distance is available to you.
The constraint helps you learn what a frame includes at different positions. It does not prove that this focal length is the best for everyone. If moving closer would intrude, make a different photograph rather than treating the exercise as an order to approach.
Finish: six frames at varied distances. Review: did the constraint improve your decisions?
17. Weather as the connection
Make a short series connected by visible weather: umbrellas, wet pavement, wind-blown clothing or a sheltered public space. Look for how people and objects respond, without assigning emotions that the image cannot establish.
Keep yourself and the camera safe. Check the manufacturer’s protection guidance; a weather-resistant label is not permission to soak equipment. Do not stand near traffic to chase a reflection or expose people in distress for the sake of completing the set.
Finish: four photographs. Review: is the weather visible across the set without relying on a caption?
18. A portrait with permission
Ask someone whether they would like a portrait and explain the intended use. Accept no without negotiation. Choose a setting that adds information and keeps the person comfortable. A simple direction can be useful; do not pretend the resulting photograph was candid.
Canon’s street portrait guidance recommends conversation, a simpler composition and attention to natural moments. Make a wider environmental frame as well as a closer one. Do not promise delivery unless you have a practical way to follow through.
Finish: one permitted portrait pair. Review: does the setting help the portrait rather than distract?
19. Return to the same frame
Visit the same safely accessible place on another day or at another time. Keep the camera position similar enough to compare the results. You are studying changes in light, movement and use of space, not waiting for a repeat performance from a particular person.
A frame that felt empty in midday light might become readable when shadows give it structure. Keep a note of what changed. If the location’s access rules change, respect them; the project does not give you continuing permission.
Finish: a three-visit comparison. Review: what did returning teach you that a longer first visit would not?
20. Edit a story in five frames
Choose photographs from one outing and reduce them to five. Start with more candidates, then remove repeats. Look for differences in distance, action, color and rhythm. A close detail can change the pace after a wide scene.
Keep editing consistent enough that the set belongs together, but do not force every photograph into the same contrast or color treatment. Do not add, remove or crop elements in a way that falsely changes a documentary moment. Preserve the originals and distinguish a creative composite from a record of an event.
Finish: a five-frame sequence. Review: which photograph earns its place, and which is only your personal favorite?
 Save
Make the review part of the project
After the walk, write what you noticed, what failed and what you will change. Pick one specific adjustment: a cleaner background, a different time of day, more variety in distance or more patient timing. That is more useful than promising to “get better” next week.
Carry the same project through several outings before replacing it. A first attempt can teach the route; a second can improve timing; a third can reveal whether the idea still interests you. Keep the scope small enough that you can finish, edit and learn from it.
For guided practice, Street Photography at Shut Your Aperture Academy, taught by Edin Chavez, lists Composition on the Move, Light in the City and Editing & Presenting Street Work modules. Those fit the process here: make a clear frame, work with light, then turn an outing into a set. The course listing is not a promise of legal advice or permission to photograph anyone.
A carry option, only if your current setup needs one
A comfortable, compatible strap can make a practice walk easier to sustain. It does not choose a project or improve your timing. Check the camera’s attachment points, the strap’s supported load and the manufacturer’s instructions before using any carry system. Inspect the attachments regularly.
The black Peak Design Slide Lite SLL-BK-3 is a comparison option for an existing camera. The checked B&H listing identifies that exact model; no hands-on test, price or stock promise is made here. Use the strap you already trust if it works for your kit.
Frequently asked questions
Do I need a new camera for these projects?
No. Use a phone or a camera you know. Choose an assignment that fits its controls and the place you can safely access. Learn from framing and timing before buying for an unspecified problem.
Should a street project include people?
It can, but public-life traces, shadows, lettering and the use of space can also carry a set. Decide what the project is about rather than inserting a face into every frame.
Is there one correct shutter speed for street photography?
No. Choose it for the movement you want to freeze or blur, available light and your own support. Inspect the actual frame. A quiet detail and a fast-moving subject ask for different decisions.
Can I photograph anyone I see outside?
Access, privacy, property, event and publication rules vary by place and use. Check the relevant local rules. Ask when appropriate for a close portrait, respect refusal, and do not treat this article as legal advice.
How many photographs should I keep?
Use the assignment’s small output as a starting point, not a delivery rule. Keep enough variation to answer the question. Remove repetitions even when they are technically good.
Should I turn every street series black and white?
No. Choose it when tonal relationships improve the set, not to rescue confused framing. Compare a color version, especially in a project where color is the connection between photographs.
Photography by Edin Chavez. Sources: Canon street guidance, urban composition, portraits and Edin’s Cuba composition tutorial. Affiliate links may earn a commission at no extra cost to you. Check fit and current terms.

