We’ve all been there. You see a sunset that looks like it was painted by the gods, you pull out your camera, click the shutter, and… the result looks like a muddy potato. It’s frustrating. You’ve got the gear, you’ve got the passion, but the images just aren't matching the vision in your head.
At Shut Your Aperture, we believe photography isn't some mystical gift you're born with. It’s a craft. And like any craft, it requires the right tools and a hell of a lot of practice. We aren't just another blog; we are building the number one photography school online to turn your "meh" shots into masterpieces.
If you’re tired of "getting lucky" with your photos, it’s time to get intentional. Here are 50+ daily photography tutorials and tips designed to level up your skills, from mastering the basics to conquering advanced post-processing.
The Core Foundation: Master Your Gear
Before you can get creative, you have to stop fighting your equipment. Most people stay in "Auto" because manual looks scary. It’s not. It’s just math, and once you get it, you’re free.
1. How to Use Manual Mode Camera
Learning how to use manual mode camera is the single biggest jump you will ever make. It gives you total control over how much light enters the sensor and how motion is captured. Start by setting your ISO to 100, your Aperture to f/8, and then adjust your Shutter Speed until the light meter hits zero. That’s your baseline. Practice this in your living room today.
2. The Exposure Triangle
Think of it as a three-legged stool: ISO, Aperture, and Shutter Speed. If you change one, you have to adjust the others to keep the stool level. Understanding this balance is the key to every successful exposure.
3. Understanding ISO
ISO is your camera's sensitivity to light. Use low ISO (100-400) for bright days and high ISO (1600+) for dark rooms. Just remember: the higher the ISO, the more "noise" or grain you get. If you're looking for the best tech to handle high ISO, check out the Canon EOS R5 vs Sony A7R V comparison to see which sensor reigns supreme.
4. Aperture and Depth of Field
Aperture (the f-stop) controls how much of your image is in focus. A low number (like f/1.8) gives you that blurry background (bokeh) everyone loves. A high number (like f/16) keeps everything sharp from front to back.
5. Shutter Speed and Motion
Want to freeze a bird in flight? Use a fast shutter speed (1/2000s). Want to make a waterfall look like silk? Use a slow shutter speed (1/2s or slower) on a tripod.
 )
)
Alt Text: Professional camera lens showing wide aperture for shallow depth of field tutorials.
50+ Daily Tutorials to Build Your Skills
Let’s break these down into bite-sized daily challenges. Spend one day on each. By the time you’re done, you’ll be a different photographer.
Week 1: Composition & Vision
- The Rule of Thirds: Place your subject on the intersections of a 3×3 grid.
- Leading Lines: Use roads, fences, or shadows to point the viewer’s eye toward your subject.
- Negative Space: Leave a large part of the frame empty to emphasize the subject.
- Frame Within a Frame: Shoot through a window, a doorway, or even tree branches.
- Perspective Shift: Get low. Lay on the ground. Or get high and shoot straight down.
- Symmetry: Find reflections in puddles or perfectly centered architecture.
- The Golden Ratio: A more advanced version of the rule of thirds that follows the Fibonacci spiral.
Week 2: Mastering Light
- Golden Hour: Shoot one hour after sunrise or one hour before sunset. Everything looks better in orange.
- Blue Hour: The 30 minutes after sunset. Great for cityscapes.
- Hard Light: Shoot at noon. Embrace the harsh shadows and high contrast.
- Soft Light: Find a shaded spot or wait for a cloudy day for even, flattering light.
- Backlighting: Place the sun behind your subject to create a "halo" effect.
- Window Light: Use a single window for dramatic, moody portraits.
- Silhouettes: Meter for the bright background and let your subject go completely black.
Week 3: Street & Urban Exploration
Street photography is about the "decisive moment." It’s fast, it’s raw, and it’s a great way to learn.
15. Candid Portraits: Capture people being themselves without posing.
16. Urban Geometry: Focus on the shapes of buildings.
17. Reflections: Look at shop windows or wet pavement.
18. Motion Blur: Use a slightly slower shutter speed to show the hustle of the city.
19. Street Shadows: High-contrast black and white shots of long shadows.
20. Night Street Life: Capture the neon lights and movement of the city after dark. For more inspiration, dive into these 30 creative street photography ideas.
 )
)
Alt Text: Cinematic street photography tutorial showing reflections and neon light techniques.
Week 4: Portraits & People
- Eye Contact: Focus specifically on the eyes. If the eyes aren't sharp, the portrait is failed.
- Environmental Portraits: Show the person in their element: a woodworker in his shop, a baker in the kitchen.
- The "Posed" Candid: Give your subject an action to do so they stop staring awkwardly at the lens.
- Using Reflectors: Use a simple white board to bounce light back into shadows on a face.
- Depth of Field in Portraits: Shoot at your lens’s widest aperture (lowest f-number).
- Group Posing: Learn to stagger heads so everyone is visible and the composition feels natural.
- Directing: Practice giving clear, confident instructions to your subjects.
Week 5: Nature & Landscapes
- Foreground Interest: Don’t just shoot the mountain. Put a rock or a flower in the foreground.
- Long Exposure Water: Use an ND filter to blur waves or waterfalls.
- Star Trails: Learn to stack multiple long exposures to show the Earth’s rotation.
- Macro Flowers: Get close. Really close. Focus on the textures of petals.
- Weather Hunting: Mist, fog, and storms create more drama than clear blue skies.
- Panoramic Stitches: Take multiple vertical shots and stitch them later for massive resolution.
- Minimalist Landscapes: Find a single tree in a field and make it the hero.
Week 6: Technical Deep Dives
- Histogram Reading: Learn to read the graph on your screen to ensure you aren't "clipping" your highlights.
- Focus Stacking: Take multiple shots at different focus points to get everything sharp in a macro shot.
- Bracketing: Take three shots (one dark, one normal, one bright) to capture the full dynamic range.
- Custom White Balance: Stop relying on Auto WB. Use a gray card.
- Back Button Focus: Separate your shutter button from your focus button for better control.
- Cleaning Your Gear: A tutorial on how to safely clean your sensor and lenses.
- Choosing the Right Lens: Understand why a 35mm is better for street and a 85mm is better for portraits.
Week 7: The Art of Editing
Editing is where the soul of the photo is born.
42. RAW vs JPEG: Learn why you should always shoot RAW for maximum data.
43. Color Grading: Using highlights and shadows to create a specific "vibe."
44. Dodging and Burning: Manually brightening and darkening parts of the image to lead the eye.
45. AI Power: See how modern tools are changing the game in our guide to AI photo editing tools and techniques for 2026.
46. Skin Retouching: Learn how to remove blemishes without making people look like plastic dolls.
47. Using Luminar: Luminar is an incredible tool for quickly enhancing skies and lighting with AI.
48. Black and White Conversion: It’s more than just desaturating; it’s about managing tonal contrast.
49. Crop for Impact: Sometimes the best photo is hidden inside a larger, mediocre one.
50. Organization: How to use keywords and folders so you don't lose your best work.
Why You Need a Photography School
You can watch a thousand YouTube videos, but without a structured path, you're just throwing spaghetti at the wall. This is why we created our dedicated learning platform. For deep-dive courses that go beyond a simple blog post, head over to Shut Your Aperture Academy. We break down complex topics into simple, actionable steps that actually stick.
 )
)
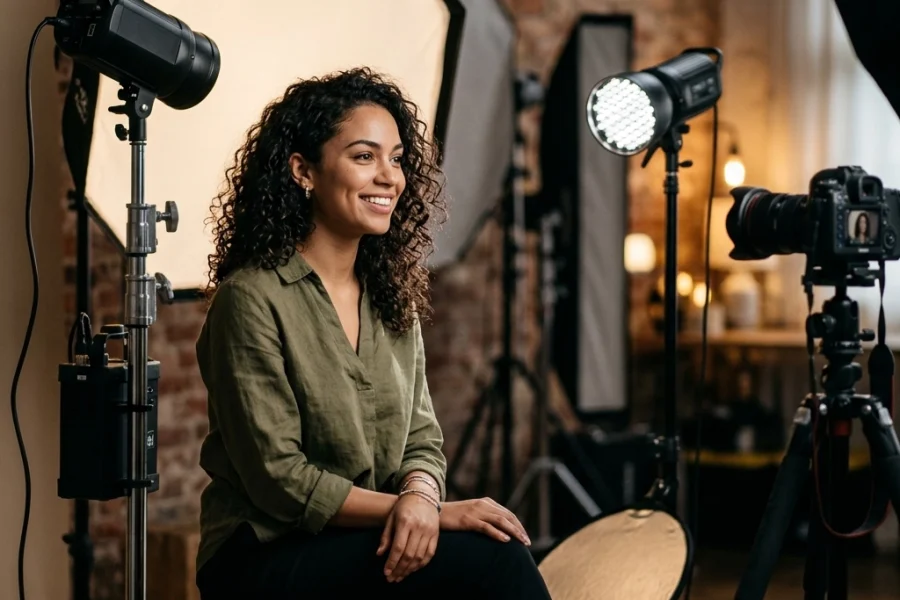
Alt Text: Photography student learning manual mode settings in a professional workshop setting.
Pro Gear Tips for 2026
If you’re wondering if your current gear is holding you back, you’re not alone. The tech is moving fast. We recently looked at the question: Does ultra-high resolution really matter in 2026? The answer might surprise you. It’s not always about the megapixels; it’s about the dynamic range and the glass you put in front of the sensor.
If you’re a product photographer, you might be using specialized gear. We’ve put together a specific guide on OM System OM-1 Mark II settings for product photography that covers everything from lighting to focus peaking.
For those who want to stay on the pulse of the industry without spending hours reading manuals, check out our daily briefings:
Beyond the Basics: Finding Your Voice
Once you know how to use manual mode camera and you’ve mastered the 50 tutorials above, you’ll reach a plateau. This is where most people quit. They think they’ve "learned photography."
The truth? You’ve only learned the language. Now you have to write the poem.
Finding your style comes from shooting thousands of photos and seeing what resonates with you. Do you prefer the dark, moody tones of a rainy city? Or the vibrant, airy feel of a California beach? Look at the work of masters. Visit Edin Fine Art to see how professional-grade landscapes are composed and processed. Study the intentionality behind every frame.
Daily Photography Habit: The "50-Shot Rule"
Every day, take your camera out and take 50 photos. Don't worry about them being good. Just worry about the settings. Change your aperture for 10 shots. Change your perspective for the next 10. By the end of the month, you’ll have 1,500 photos. At least 15 of them will be great: and those 15 will teach you more than any book ever could.
Refining the Craft with Post-Processing
A RAW file is like a block of marble. It has all the potential in the world, but it needs a sculptor.
When you start editing, don't overdo it. The "clown vomit" look of over-saturated HDR is a phase every beginner goes through. Try to move past it quickly. Focus on natural skin tones and believable light. Using software like Luminar can help you mask out sky regions or enhance details without destroying the integrity of the image.
If you need more technical guides on specific editing workflows, PhotoGuides.org is a stellar resource for deeper dives into specific software functions.
 )
)
Alt Text: Photography tutorial comparison showing the power of post-processing and color grading.
Level Up Your Game
Photography is a journey, not a destination. Even the pros are constantly learning new tech and new ways to see the world. Whether you are browsing Edin Chavez’s personal blog for inspiration or grinding through tutorials here at Shut Your Aperture, the key is to never stop clicking.
You have the tutorials. You have the gear. Now, stop reading and go shoot something. The world looks better through a lens: go show us what you see.
For the full experience and to join a community of photographers who are actually getting better every day, check out learn.shutyouraperture.com. We’ll see you in the field.