Photography news moves fast. One morning you’re reading about a new sensor, and the next, you’re looking at AI features that seem like they’re from a sci-fi movie. But here’s the truth: gear is great, but technique is what actually puts food on the table (or at least puts a smile on your face when you look at your portfolio).
I’ve been digging through the latest tutorials and industry updates from this morning to see what actually matters for your growth. We aren't just talking about specs; we’re talking about the hands-on skills that change how you shoot. Whether you’re just starting out or you’re a seasoned pro looking for a refresh, these ten takeaways are designed to get you out of your chair and behind the lens.
If you are looking to dive deeper into the basics before we start, check out our Photography 101 guide to mastering your first camera.
1. Use Small “Photo Skills” Projects to Level Up Fast
It is easy to get overwhelmed by the idea of a "big project." We often think we need to travel to Iceland or hire a top-tier model to improve. The latest news from Digital Camera suggests a much more effective approach: tiny, focused skills projects.
The idea is to pick a very specific, mundane subject: like glass marbles, rustic bridges, or light trails: and shoot it in five different ways. Why? Because when you limit your subject, you force your brain to find new ways to be creative. You start looking at angles, focal lengths, and lighting variations you’d normally ignore if you were distracted by a stunning landscape.
How to do it today:
Pick one theme. Let’s say it’s "flowers." Don't just take a pretty picture. Shoot one macro, one underexposed for mood, one with a long exposure for motion blur, and one using a Dutch angle. This kind of "boxed-in" creativity is the fastest way to master composition.
2. Tame Difficult Light with Systematic Exposure Control
Camera sensors are smarter than ever in 2026, but they still get fooled by snow, backlighting, and high-contrast scenes. This morning’s tutorials emphasized that we shouldn't trust the LCD screen on the back of the camera: it’s a liar. It’s often too bright or too dark depending on your environment.
Instead, you need to live and breathe by the histogram. Aim for a "right-skewed" histogram where you have as much data as possible without "clipping" your highlights. If you’re struggling with this, our guide on how to master manual mode will walk you through the specifics.
Pro Tip: Practice exposure compensation. Shoot the same scene at 0, -1, and +1 EV. Look at the raw files later. You’ll be surprised at how much detail you can recover when you intentionally underexpose to save your highlights.
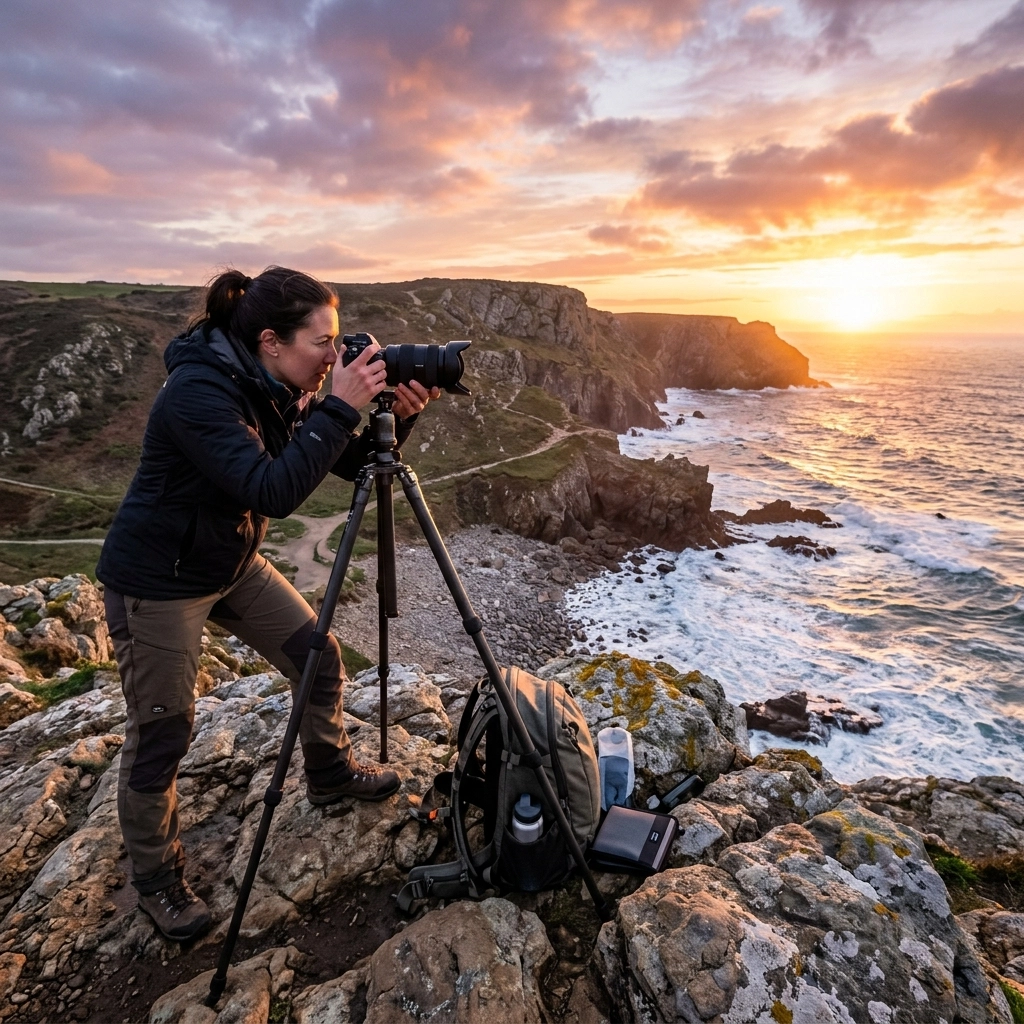
3. Shoot More Expressive Seascapes and Waves
Seascape photography is a staple, but it’s easy to fall into the "everything looks the same" trap. Recent updates from professional "apprentice" features show that the secret isn’t just a long exposure; it’s the rhythm of the water.
You need to time your shots with the tide. Don’t just click and hope. Watch the waves. Capture the moment the water crashes, then capture the moment it recedes to find those leading lines in the white foam. Use a circular polarizer to cut through the glare on wet rocks. This simple filter makes colors pop in a way that’s nearly impossible to fake in post-production.

For more on getting these shots right, head over to The Ultimate Guide to Landscape Photography.
4. Add Mood in Post with Simple Blending Tricks
You don’t always need a fancy preset to make an image look professional. A classic Photoshop trick that’s resurfacing in today’s tutorials is using the "Multiply" blending mode to inject instant atmosphere.
If your sky is looking a bit flat or your image feels too "airy," duplicate your layer and set the blend mode to Multiply. This will instantly darken the image and saturate the colors. By using a gradient mask, you can keep the effect on the sky while leaving your foreground untouched.
If you prefer a more automated but still powerful workflow, Luminar offers some of the best AI-driven mood adjustments available right now. It allows you to relight scenes or add atmospheric fog with a single slider, which is a massive time-saver for busy pros.
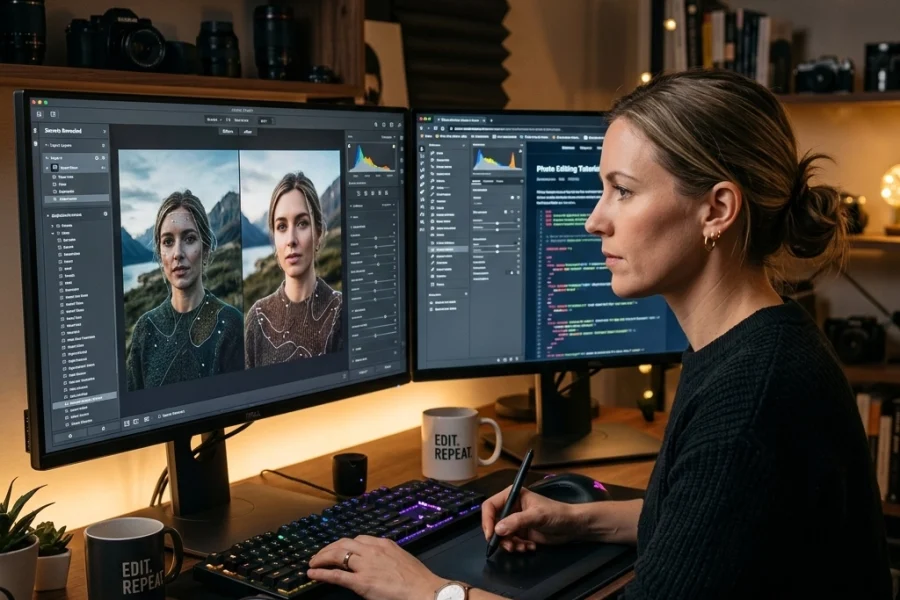
5. Make Lightroom & AI Tools Work For You, Not Instead of You
We talk a lot about AI here, and for a good reason: it’s changing everything. But the common mistake people make is letting the AI make the creative decisions. The latest software updates for 2026 emphasize "Masking -> People" tools in Lightroom and Adobe Camera Raw.
These tools can instantly find the hair, skin, and eyes of a subject. It’s a miracle for retouching. However, the news today warns against "over-smoothing." If you let the AI handle 100% of the skin softening, your subject will look like a wax figure.
The Golden Rule: Use AI to build the mask, but use your own eyes to set the sliders. You can learn more about avoiding these pitfalls in our article on 7 mistakes you’re making with AI photo editing.

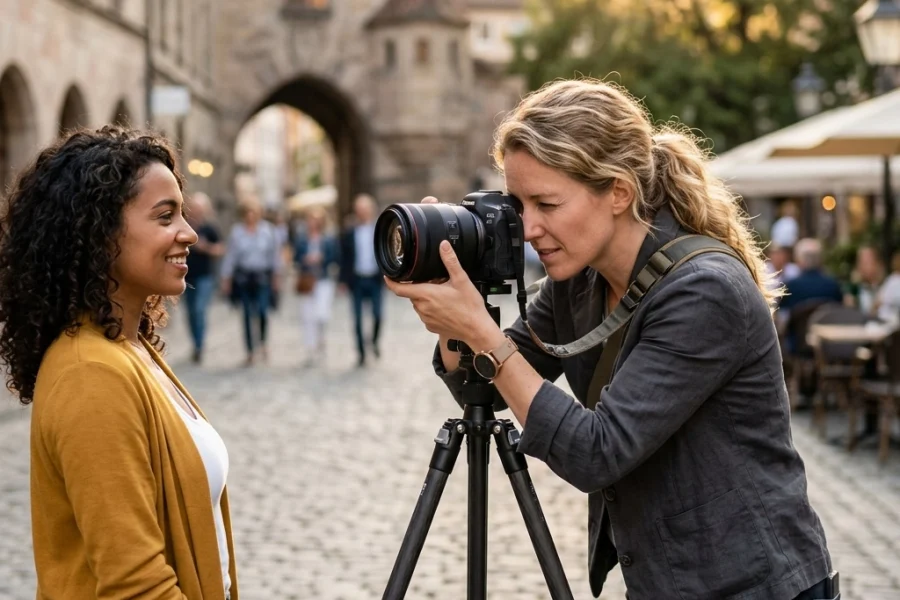
6. Master One Reliable Speedlight Setup for Events
Flash is intimidating. Most beginners avoid it because it looks "fake" or "harsh." But event photography news today highlights that a simple, repeatable speedlight setup is your best friend.
If you’re indoors, don’t point the flash at your subject. Point it at a neutral-colored ceiling or a wall behind you. This turns the entire room into a giant softbox. Set your flash to TTL (Through The Lens) mode, dial in -1 EV of flash compensation, and raise your ISO until the background light looks natural. This creates a "fill" look that highlights your subject without making them look like they were caught in headlights.
7. Think Wider and Closer for Macro & Product Work
Macro photography usually involves long focal lengths, but the trend right now is "wide-angle macro." Using ultra-wide probe lenses or wide-angle lenses that can focus close allows you to show the subject and its environment.
Instead of just a tight shot of a bug, you get a shot of the bug with the entire forest behind it. This provides context and tells a much bigger story. If you don't have a $2,000 probe lens, you can mimic this by using your widest lens and getting as close as the minimum focus distance allows. Use a small LED light to highlight the subject so it doesn't get lost in the wide frame.
8. Prepare Your Technique for Higher Resolution and Smarter AF
The rumors about the Sony a7R VI and Canon EOS R6 V are swirling, and they all point to one thing: more megapixels and more "intelligent" autofocus. While this sounds great, higher resolution actually makes your mistakes more obvious.
When you have a 60 or 100-megapixel sensor, even the slightest camera shake looks like a blurry mess. You need to adjust your shutter speed rule. Instead of 1/focal length, try 1/(2x focal length). If you are shooting at 50mm, stay above 1/100s to ensure those pixels stay sharp.
Stay updated on the latest gear shifts with our 2026 mirrorless camera comparison.

9. Study Storytelling, Not Just Settings
It’s easy to get obsessed with f-stops and shutter speeds, but this morning’s features on masters like Paul Nicklen and Robert Frank remind us that storytelling is the only thing that makes a photo stick in someone’s memory.
Before you press the shutter, ask yourself: What is the story here? Is it the struggle of a climber? The quietness of a morning street? If you can’t answer that, your photo is just a "snap."
Study the masters. Take ten photos from a photographer you admire and write down exactly where your eye goes first. Is it a leading line? A pop of color? A look in a subject's eye? For more on this, check out PhotoGuides.org for deep dives into photographic theory.
10. Print Big and Learn the Craft of Output
The final takeaway from today’s news is the resurgence of fine-art printing. In a world where photos live on Instagram for six seconds, a physical print is a statement.
Printing exposes every flaw in your technique. You’ll see the noise you missed on your screen, the slight color cast, and the sharpening halos. Treating your work as something that will eventually be a 40×60" print changes how you shoot in the field. It makes you more careful, more deliberate, and ultimately, a better photographer.
For inspiration on what world-class printing looks like, take a look at Edin Fine Art.

Why Photography News Matters for You
It’s easy to dismiss "news" as just marketing for big companies, but if you look closer, the tutorials and updates provide a roadmap for where the industry is going. Staying informed helps you stay relevant. Whether it's mastering the latest Lightroom tools or understanding why everyone is talking about the latest 2026 photography news, knowledge is your most valuable gear.
If you want to take these ten points and turn them into a real-world practice plan, we’ve got everything you need to get started over at Shut Your Aperture Learn.
Putting it Into Practice
Don't try to master all ten of these today. Pick one. Maybe this week is your "small project" week. Maybe you finally pull that speedlight out of your bag and try bouncing it off a wall. The key is consistent, intentional practice.
Photography is a journey of a thousand bad photos before you get to the great ones. By paying attention to the techniques being shared in the community right now, you can shorten that learning curve significantly.
Check out Edin Chavez’s blog for more personal insights on the professional photography world, and keep shooting. The more you "shut your aperture" and focus on the craft, the better your results will be.