
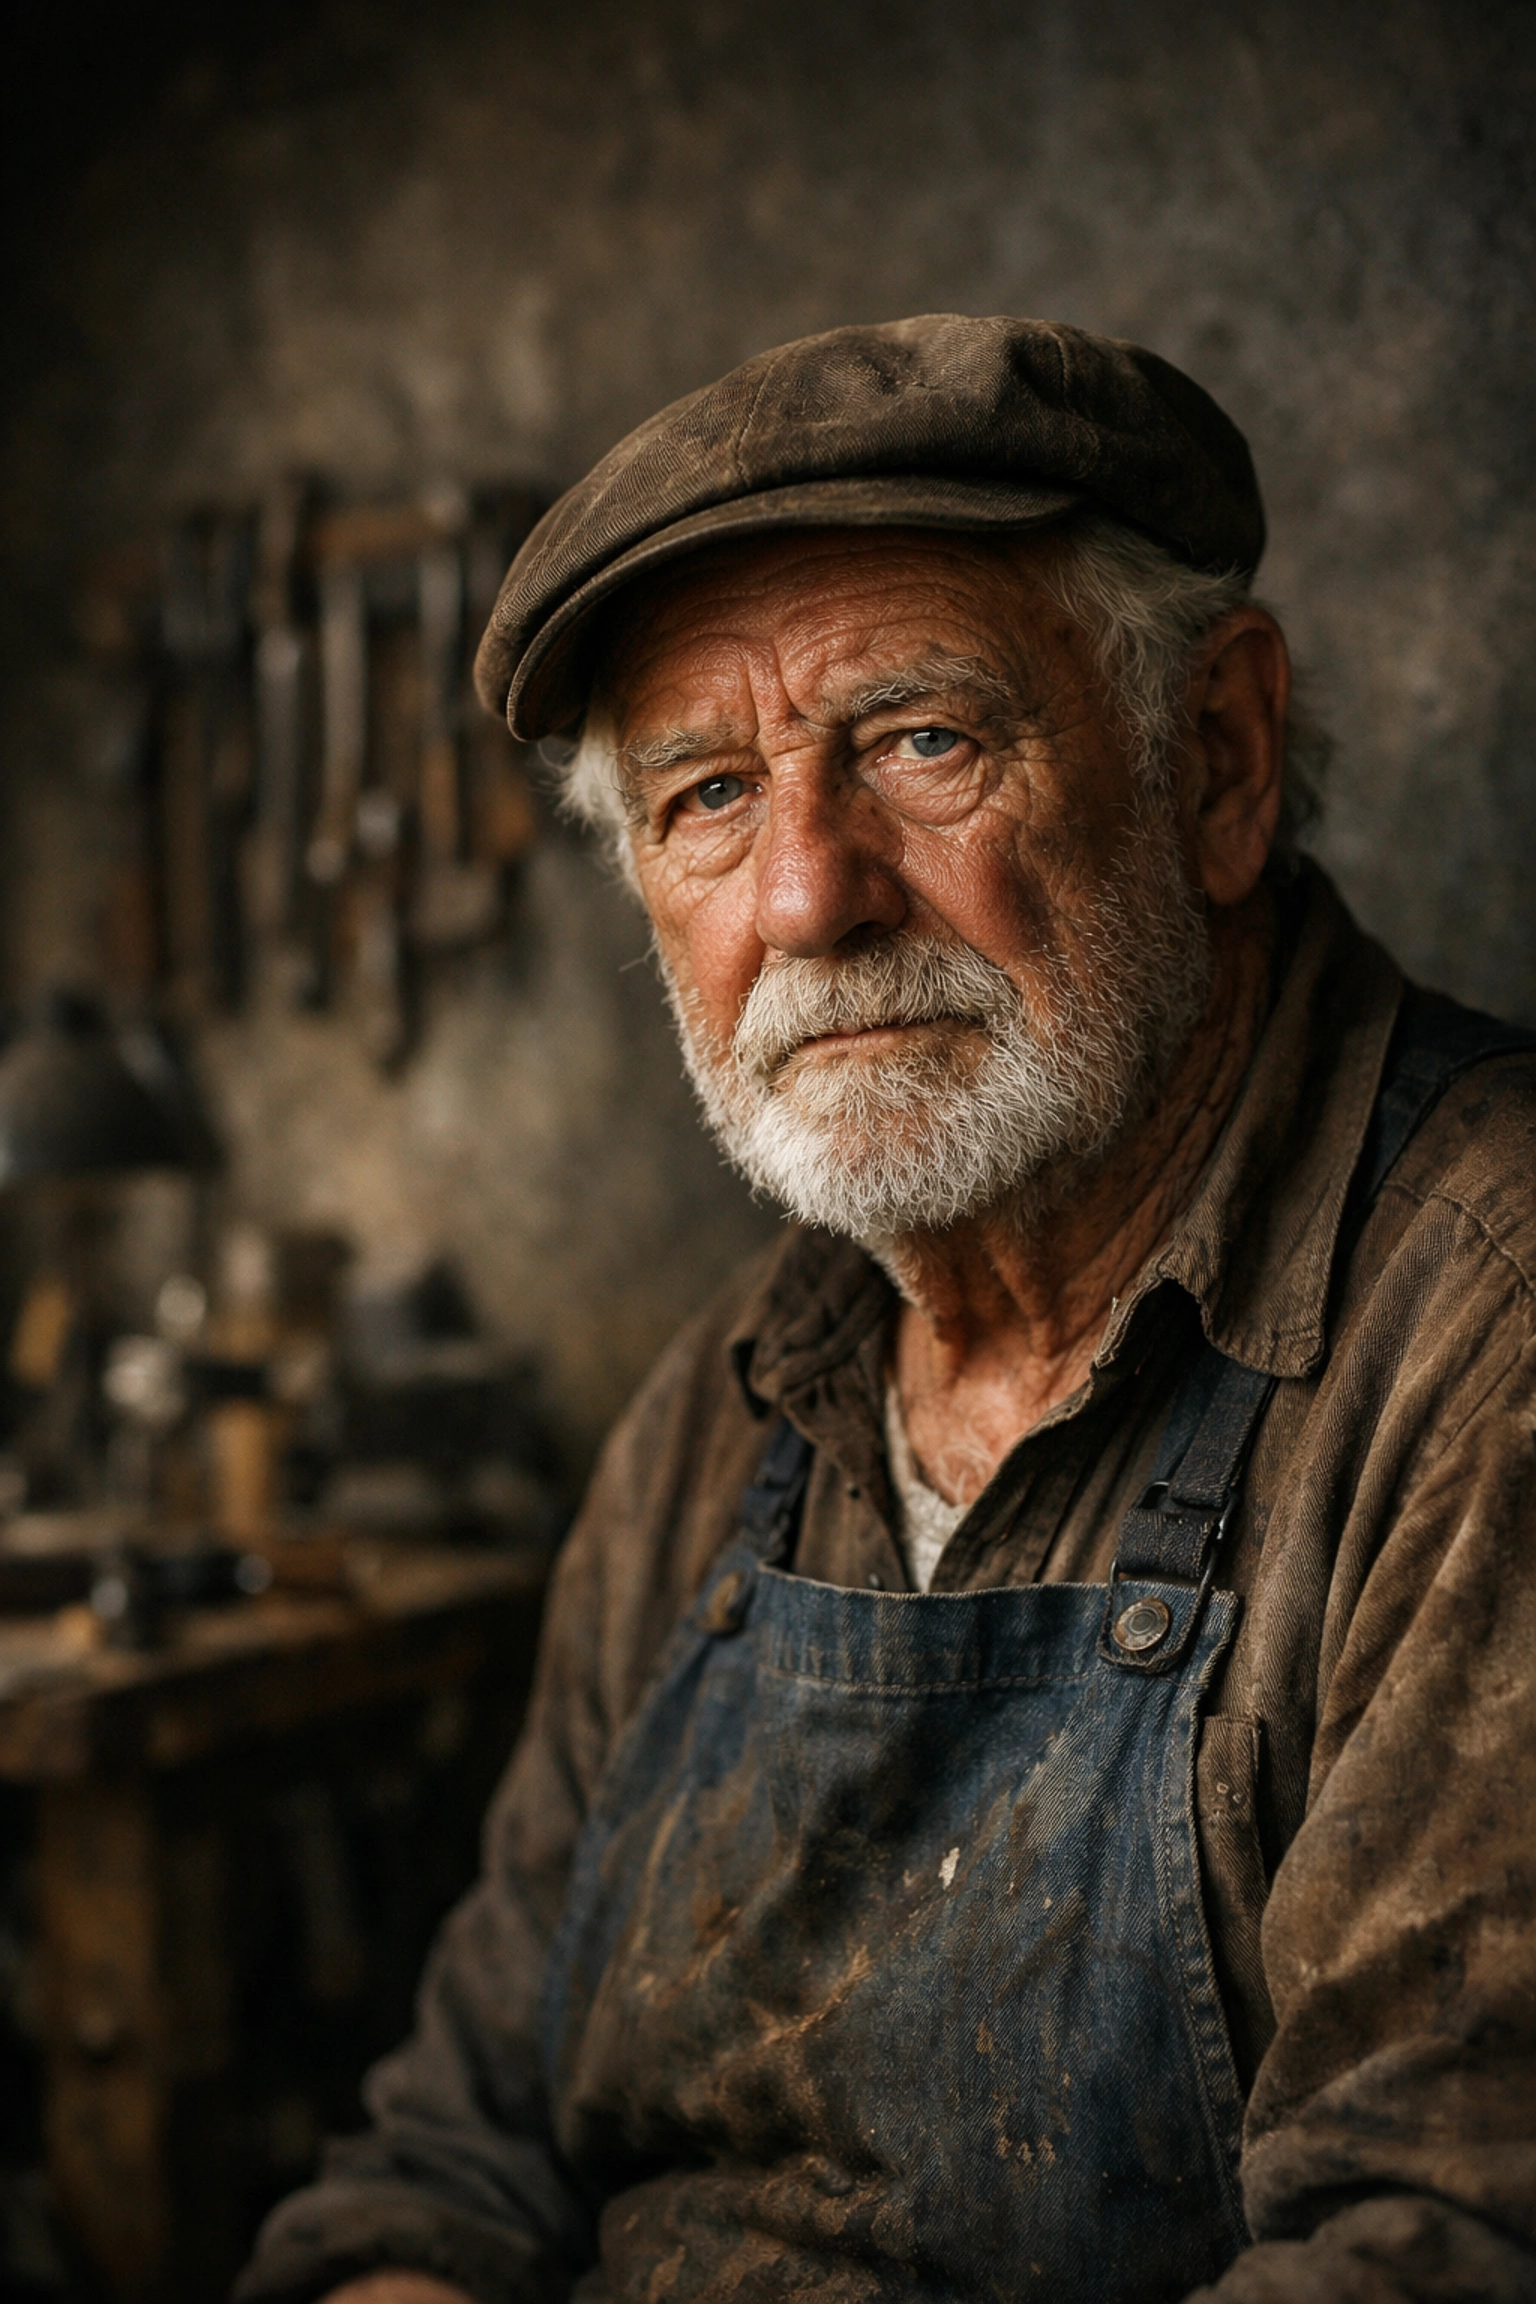
Listen, we’ve all been there. You point your camera at a friend, and suddenly they look like they’re posing for a 1980s DMV photo. It’s awkward. It’s stiff. It’s… well, it’s not exactly the "soul-capturing" masterpiece you had in mind.
Portrait photography is one of those things that looks incredibly easy from the outside but is secretly a complex dance of technical skill and human psychology. It’s not just about having a fancy camera; it’s about understanding light, mastering your gear, and, most importantly, making the person in front of your lens feel like a rockstar.
Whether you're looking to turn pro or just want to take better photos of your family that don't involve "forced smiles," this guide is for you. We're going to dive deep into the techniques that will actually move the needle for your photography.
Getting the Settings Right (The Boring but Necessary Part)
Before we get to the creative stuff, we need to make sure your camera isn't fighting against you. If you leave your camera on "Auto," it’s going to try and make everything bright and sharp, which is usually the opposite of what you want for a stunning portrait.
The Power of the Wide Aperture
The most iconic "look" in portrait photography is a sharp subject with a beautifully blurred background (the "bokeh" effect). To get this, you need to use a wide aperture. We’re talking f/1.8, f/2.8, or even f/4.
Using a wide aperture does two things: it lets in more light (great for indoor shots) and it creates a shallow depth of field. This makes your subject pop and hides that ugly dumpster or distracting car in the background. If you’re struggling with the technical side of how light works, you might want to brush up on some basics over at PhotoGuides.org.
Shutter Speed and ISO
You don't want motion blur in a portrait unless it’s intentional. As a rule of thumb, keep your shutter speed at least double your focal length. If you’re shooting with an 85mm lens, don't go below 1/160th of a second.
For ISO, keep it as low as possible (ISO 100 or 400) to avoid grain. However, modern cameras are so good that you shouldn't be afraid to bump it up if the light is fading. A grainy photo is better than a blurry one every single time.
Choosing the Right Glass
If you’re still using the 18-55mm kit lens that came with your camera, I have some news for you: it’s time for an upgrade. While you can take portraits with any lens, certain focal lengths are built for the job.
The 85mm: The King of Portraits
If you ask any pro, the 85mm prime is usually their favorite. Why? Because it compresses the facial features in a way that is incredibly flattering. It doesn’t distort the nose or forehead, and it provides a creaminess to the background that is hard to beat. Check out some examples of professional gear setups at www.proshoot.io to see what the big players are using.
The 50mm: The "Nifty Fifty"
The 50mm is the best bang-for-your-buck lens you can buy. On a crop sensor camera, it acts like a 75mm or 80mm, making it perfect for portraits. It’s small, light, and usually very affordable.
What to Avoid
Try to stay away from wide-angle lenses (anything wider than 35mm) for close-up headshots. Wide lenses distort things. Unless you want your subject to have a giant nose and a tiny head, keep the wide-angle stuff for landscape photography or environmental portraits where you show the whole scene.
The Secret Sauce: Lighting
You can have a $10,000 camera, but if your lighting sucks, your photo sucks. It’s that simple.
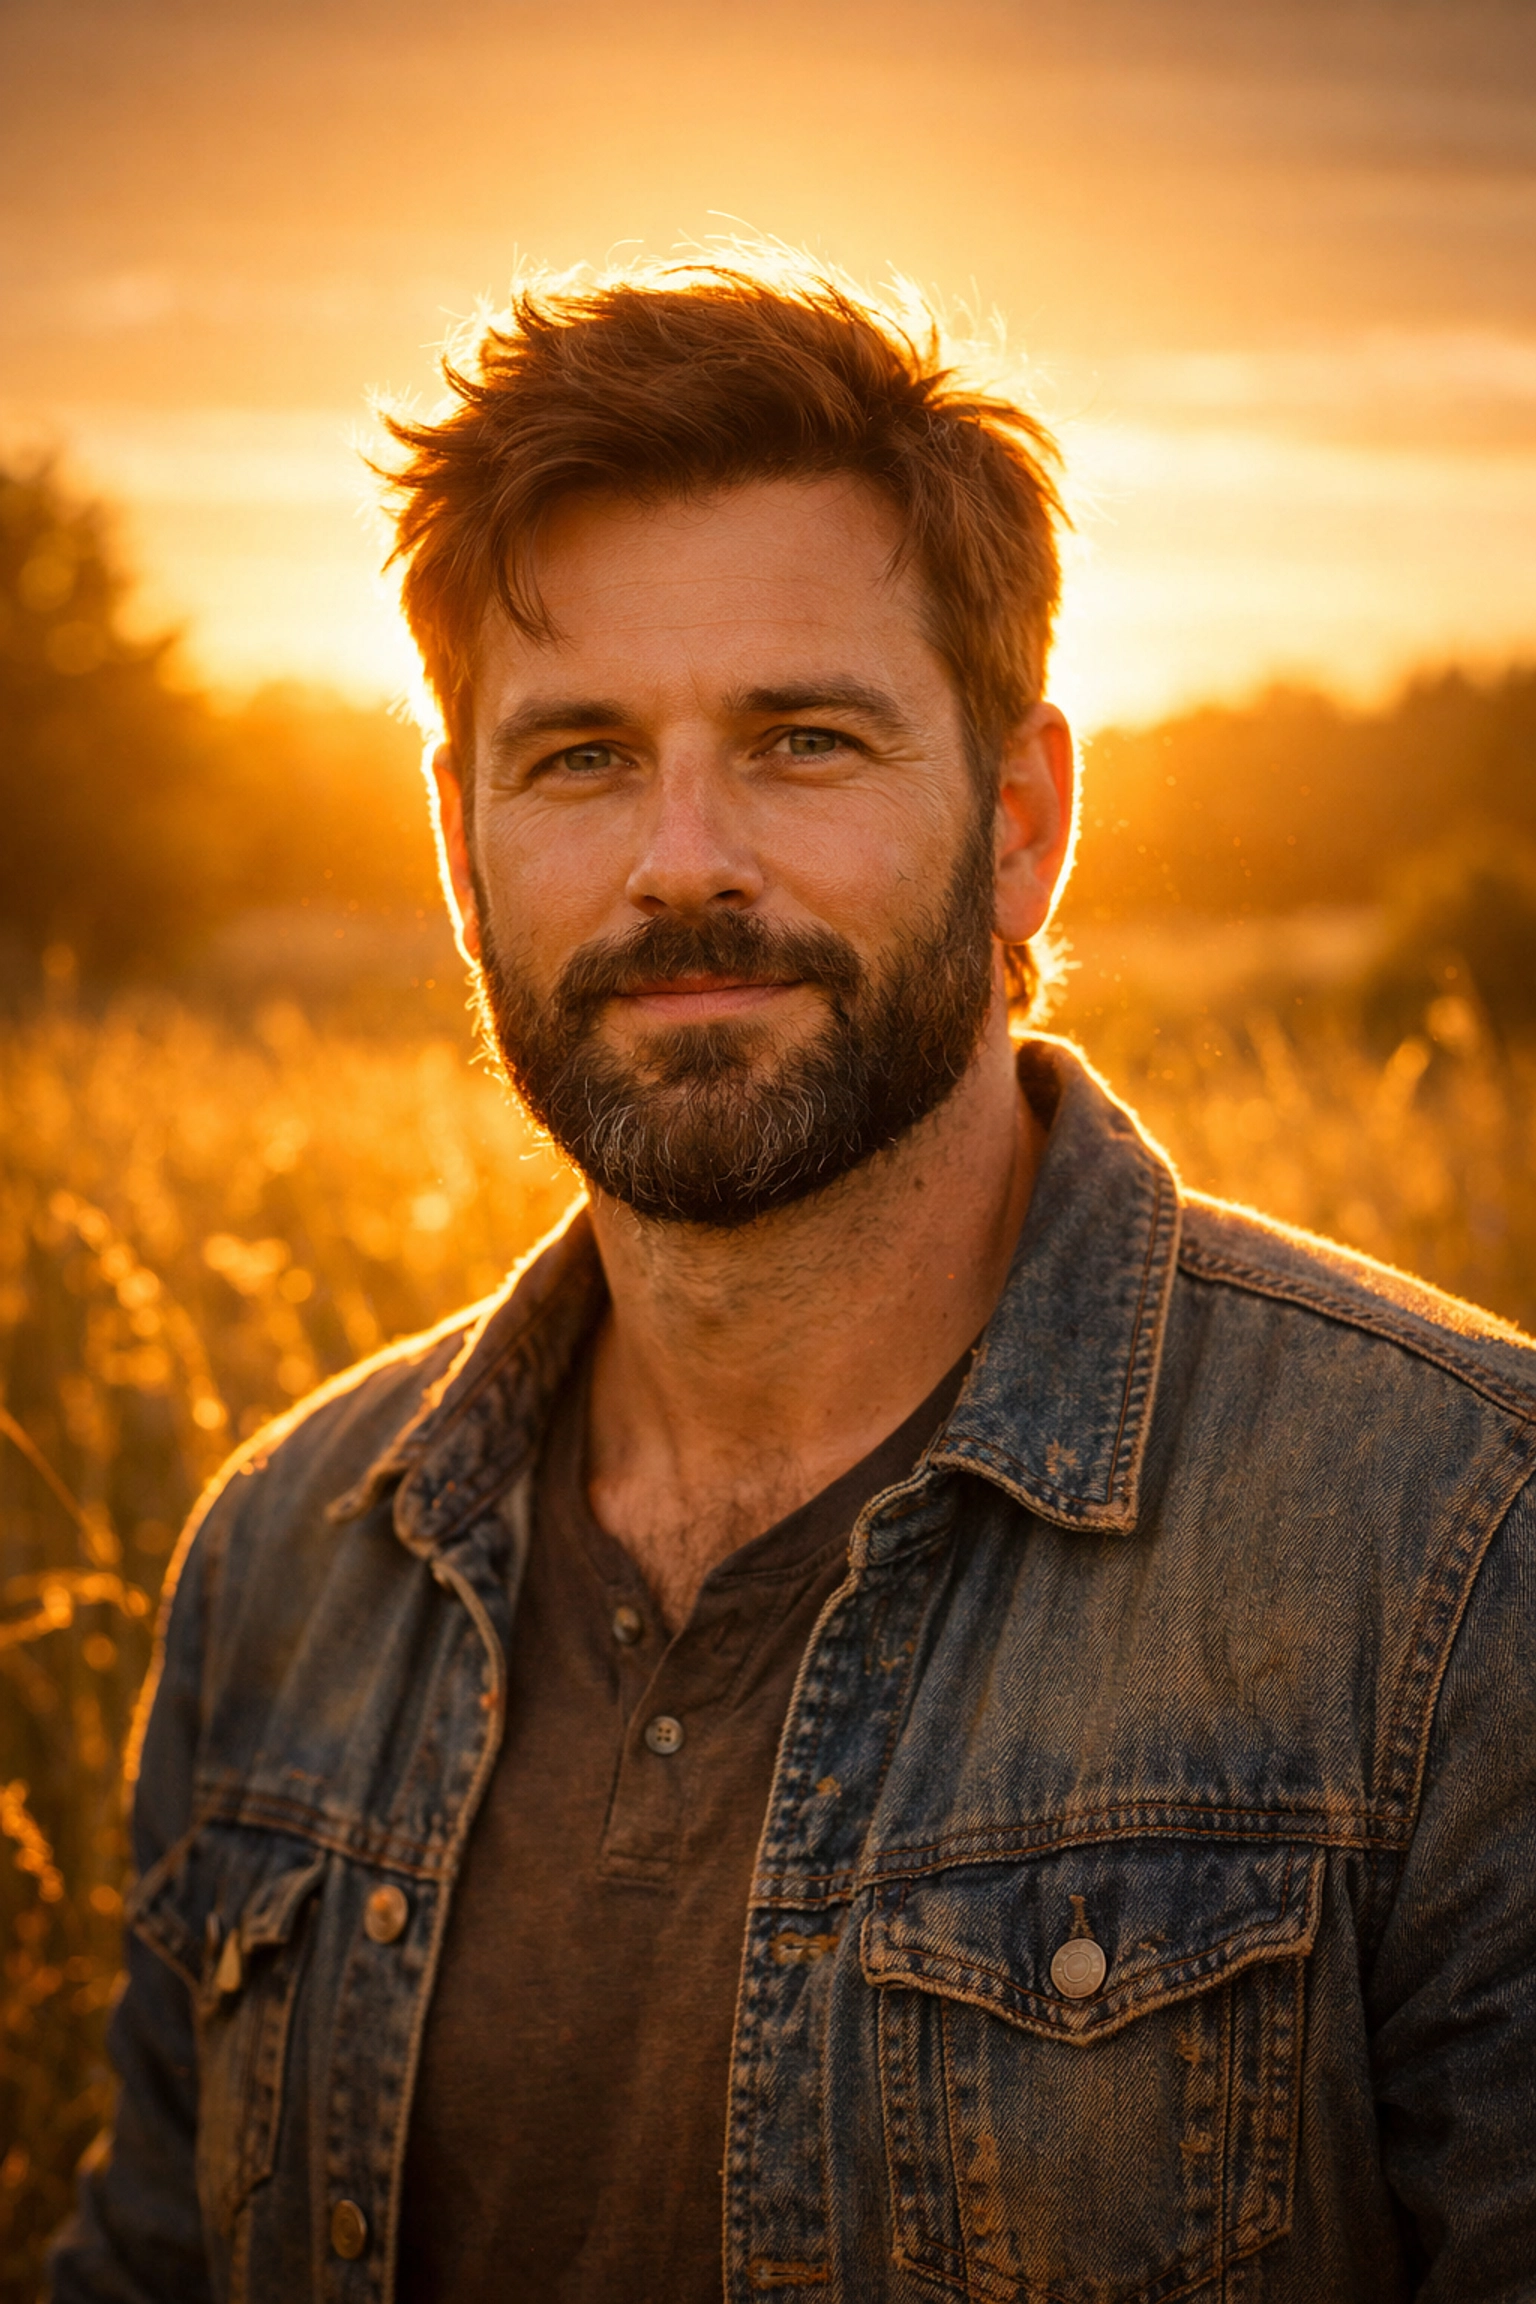
The Golden Hour
There’s a reason photographers obsess over the hour before sunset. The light is soft, warm, and hits your subject from a low angle. It’s naturally flattering. If you’re shooting outdoors, aim for this window. If you're looking for some hidden gem locations for travel photography, keep in mind how the sun hits those spots during the late afternoon.
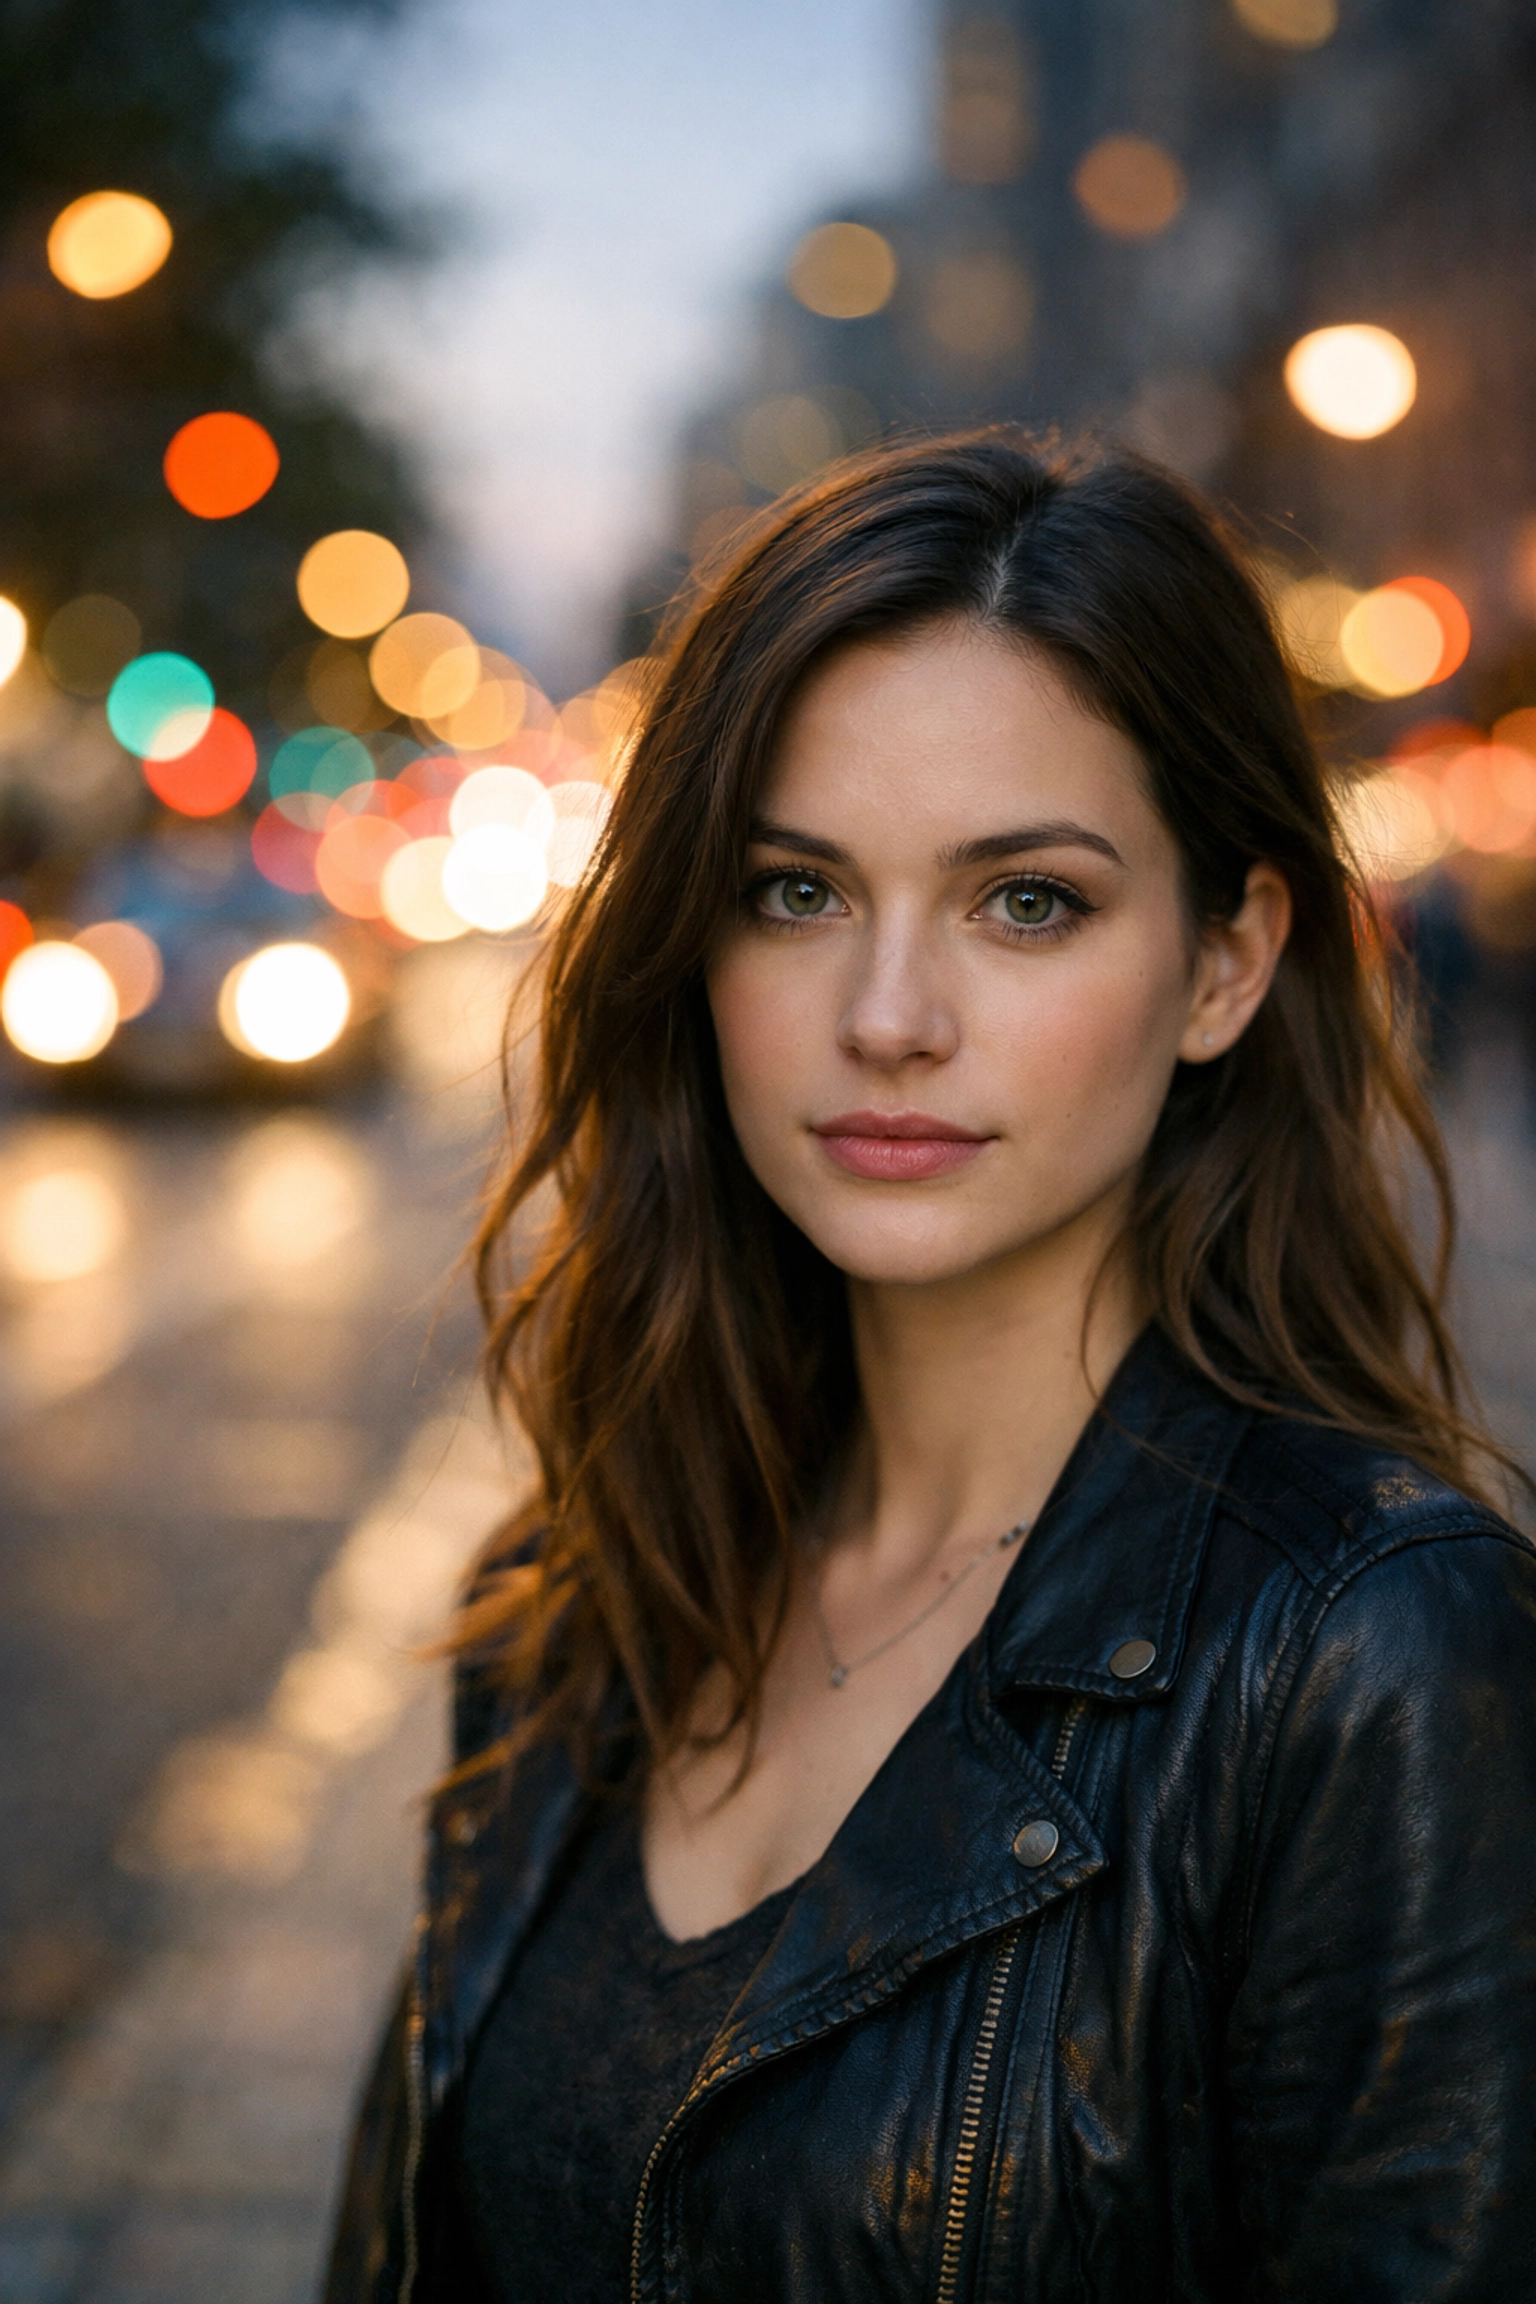
Backlighting for Drama
One of my favorite techniques is putting the sun behind the subject. This creates a beautiful "rim light" around their hair and shoulders, separating them from the background. Just be sure to expose for their face so they don't turn into a silhouette (unless that’s what you’re going for). You can see some of this dramatic lighting in action on www.edinfineart.com.
Dealing with Harsh Midday Sun
If you have to shoot at noon, find some "open shade." This is the area just inside a shadow (like under a tree or the side of a building) where the light is still bright but not direct. It’ll save you from those nasty "raccoon eyes" shadows under the brows.
Composition: Don't Just Center Everything
The quickest way to make your portraits look like a pro took them is to stop putting the subject’s nose right in the middle of the frame.
The Rule of Thirds
Imagine a tic-tac-toe grid over your viewfinder. Place your subject’s eyes on one of the top intersections. This creates a much more balanced and interesting composition.
Focus on the Eyes
This is the "Golden Rule" of portraits. If the eyes aren't in focus, the photo is a "delete." In most modern mirrorless cameras, you can use "Eye-AF" which tracks the eye automatically. If you're using an older DSLR, use a single focus point and aim it right at the eye closest to the camera.
Leading Lines and Framing
Use the environment to lead the viewer’s eye to your subject. A fence, a road, or even the branches of a tree can act as leading lines. You can also "frame" your subject using windows, doorways, or foliage. I talk a bit about this in my post on finding hidden gems for stunning travel photography.
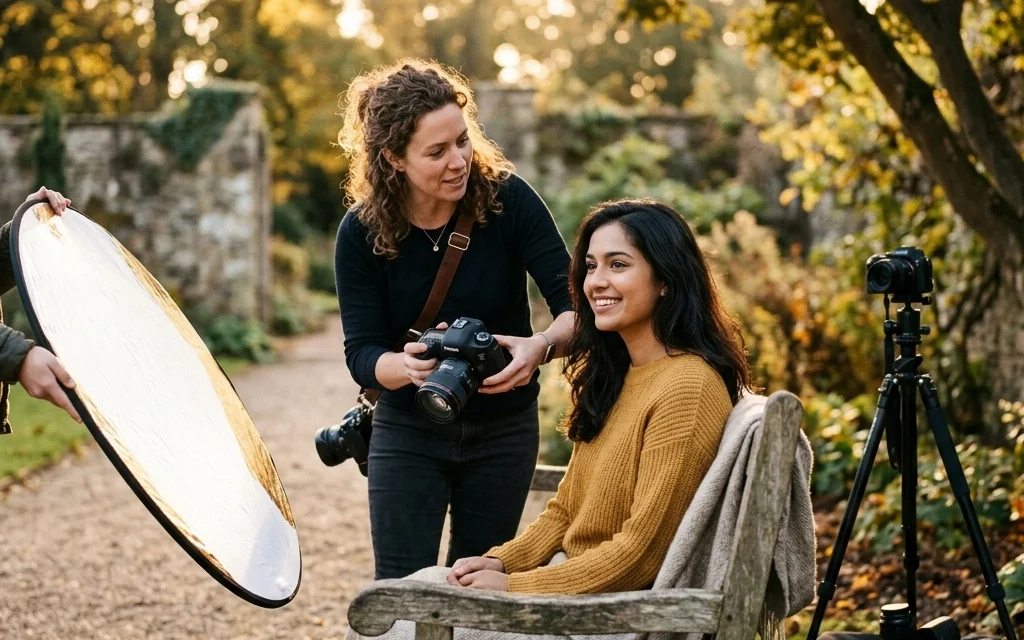
Posing: The Art of Human Connection
This is where most photographers struggle. You’re not just a button-pusher; you’re a director.
Make Them Move
Static poses look… well, static. Instead of telling someone to "stand there and smile," give them an action. "Walk toward me," "look over your shoulder," or "run your hand through your hair." Movement creates natural expressions and keeps the energy high. For more tips on professional directing and studio setups, check out www.edinstudios.com.
The "Chicken Neck"
It sounds weird, but tell your subject to push their chin out and slightly down. From the side, it looks like a turtle or a chicken, but from the front, it defines the jawline and gets rid of any unwanted double chins. It’s a game-changer.
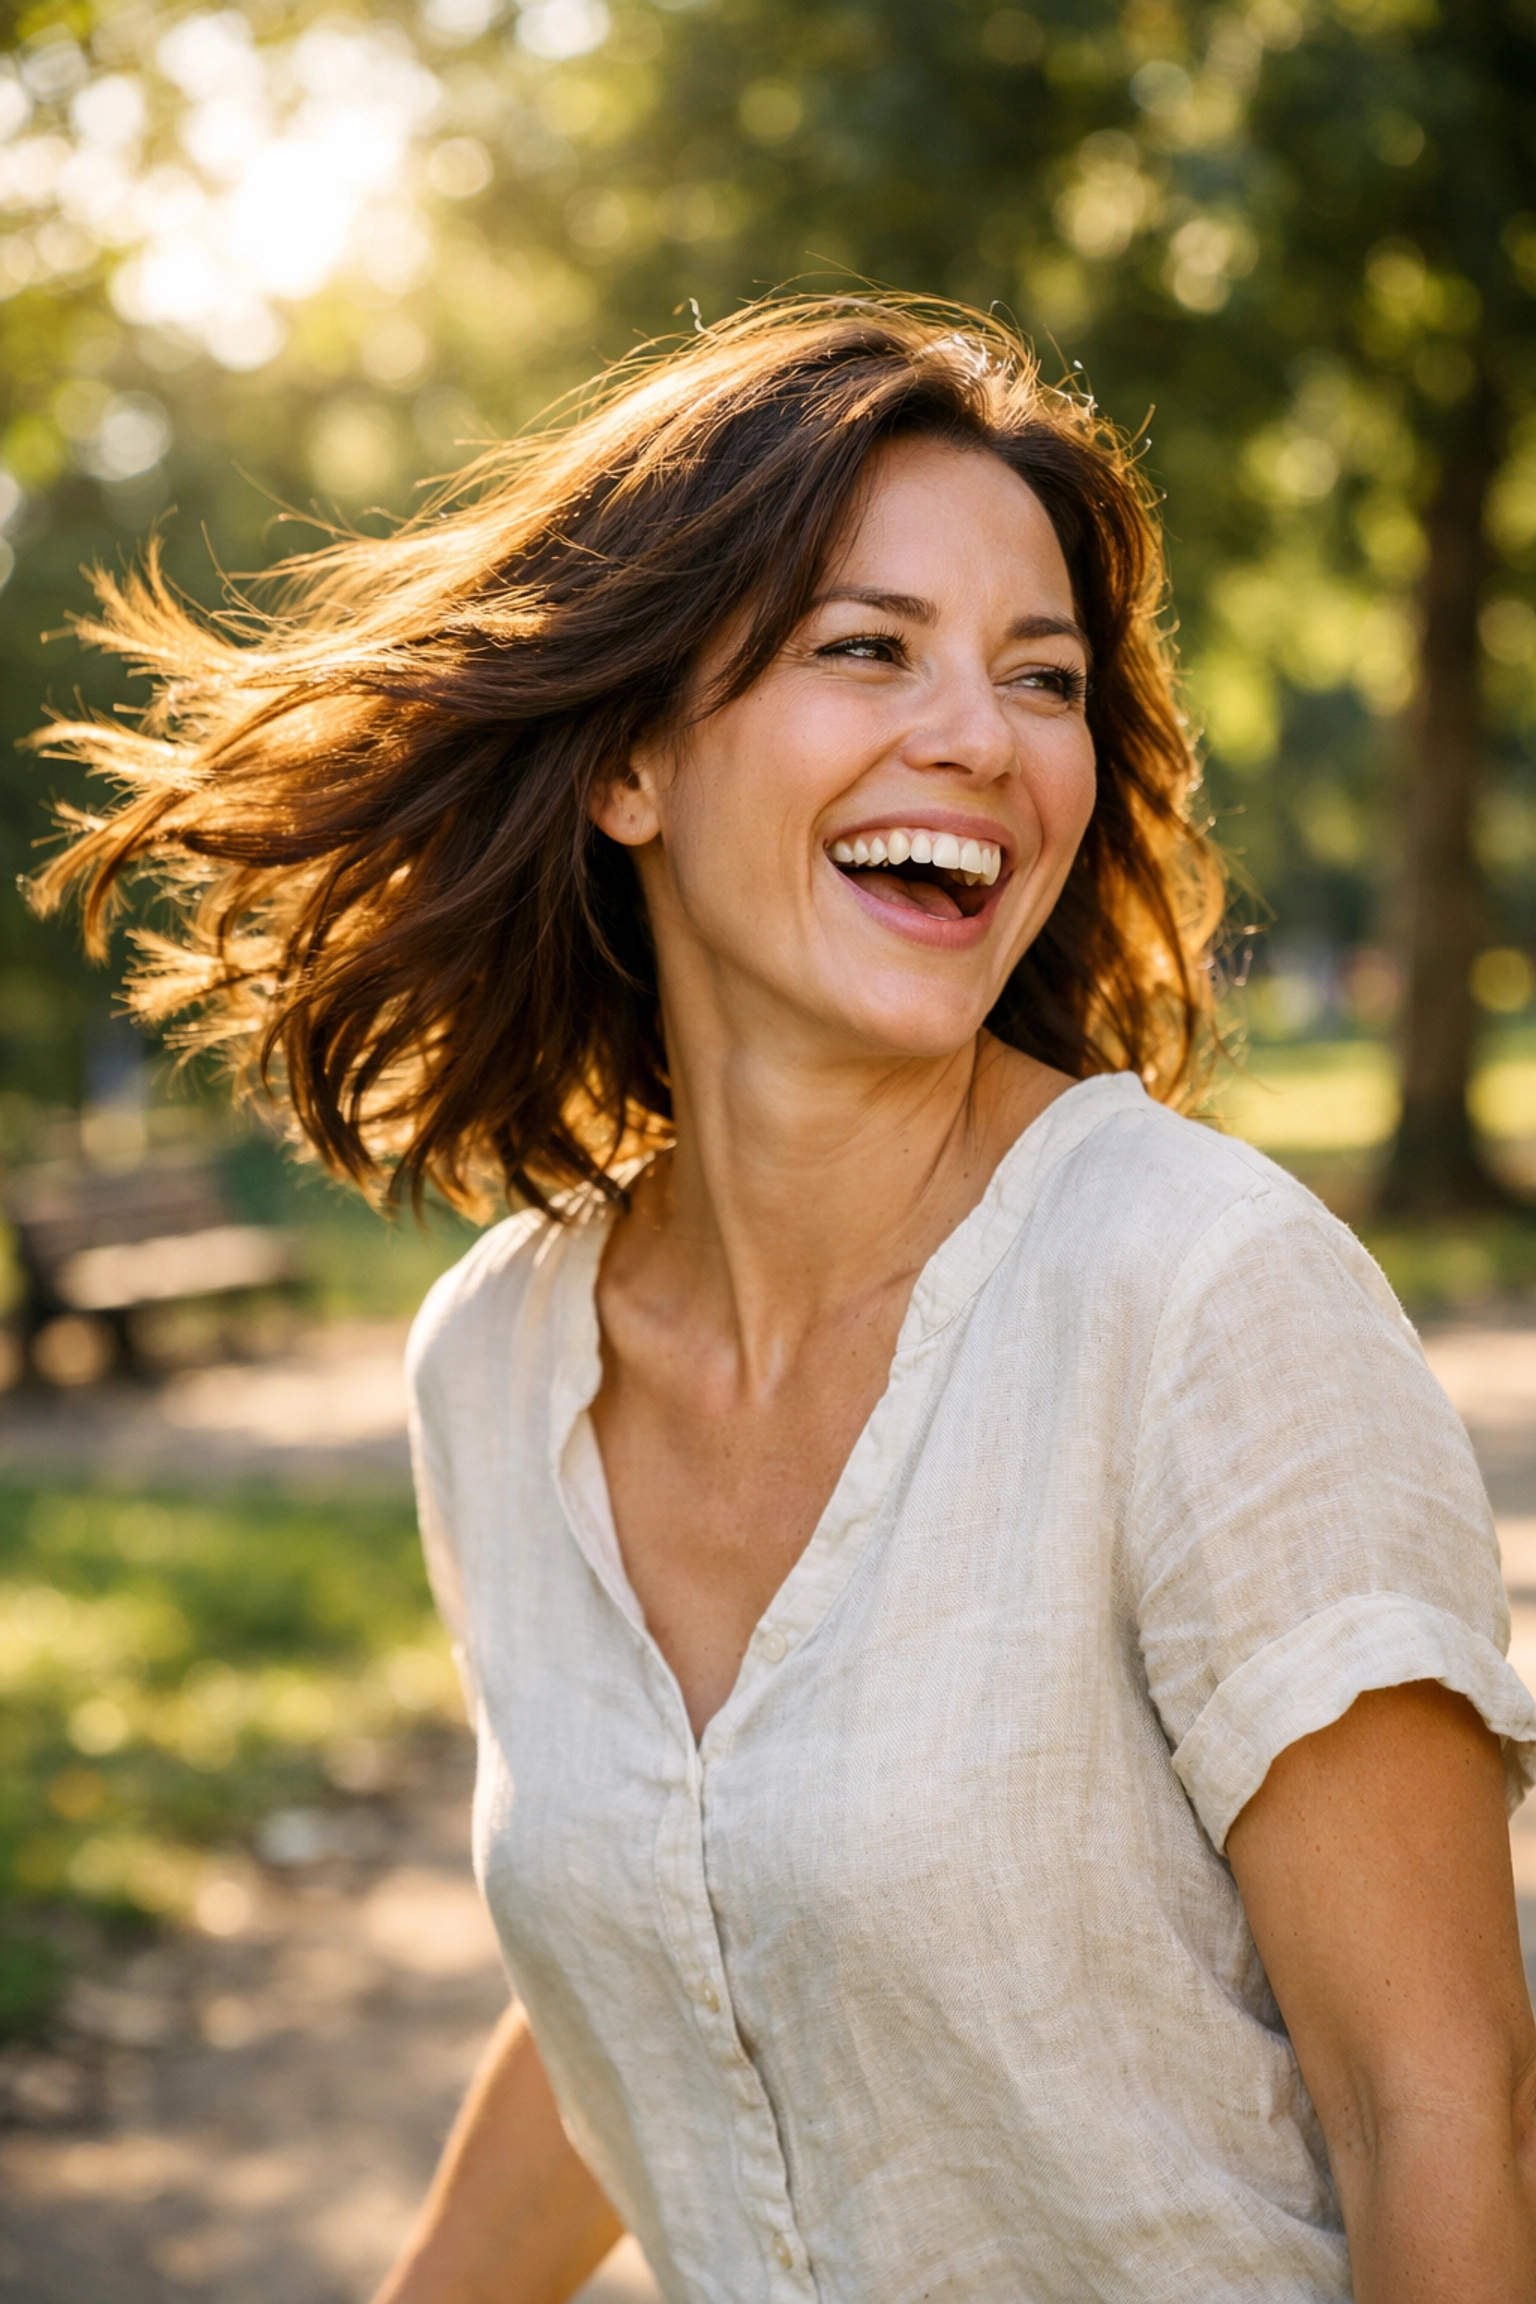
Candid is King
Some of the best portraits are the ones where the subject didn't know you were clicking. Keep shooting between "poses." Catch the laugh after they make a mistake or the quiet moment when they’re looking away. Those are the shots that feel real.
Backgrounds Matter
A bad background can ruin a perfect portrait. You want a background that complements the subject, not competes with them.
Keep it Simple
A cluttered background is a distraction. Look for simple textures, solid colors, or natural elements. Sometimes, using rare textures for tangible aesthetic photography can add a unique layer of depth to your portraits without being overwhelming.
Depth and Distance
The further your subject is from the background, the more blurred that background will be. If you want that buttery bokeh, don't have your subject stand right against a wall. Pull them forward, away from the backdrop, and let the lens do the work.
Post-Processing: The Final Polish
Every pro photo you see has been edited. It’s not "cheating", it’s finishing the process. When I'm working on my files, I'm looking to enhance the mood, not change the person.
Natural Skin Retouching
Don't go overboard and turn your subject into a plastic doll. Use software like Luminar to subtly enhance the eyes, soften the skin slightly, and bring out the colors. The AI tools in Luminar are especially good at identifying faces and making those micro-adjustments that would otherwise take hours.
Color Grading
The colors in your photo set the mood. Warm tones feel happy and nostalgic; cool tones feel moody and modern. Consistency is key here. If you're doing a series, make sure the colors match across all images. You can find more inspiration on styling and color over at blog.edinchavez.com.
Common Mistakes to Avoid
- Ignoring the Background: Watch out for "trees growing out of heads." Always check the perimeter of your frame before you click.
- Too Much Flash: Direct on-camera flash is usually harsh and unflattering. If you use flash, bounce it off a wall or use a softbox.
- Being Too Quiet: Talk to your subject! If you’re silent, they’ll get in their own head and start feeling awkward. Keep the conversation flowing.
- Shooting from Too High: For adults, shooting at eye level is usually best. For kids, get down on their level. Shooting from too high up can make people look small or diminished.
Putting It All Together
Portrait photography is a journey. You’re going to take a lot of bad photos before you start taking great ones, and that’s okay. The key is to keep experimenting. Try new lighting setups, explore lesser-known vistas for enigmatic photos, and don't be afraid to break the rules once you know them.
Remember, at the end of the day, a portrait is a collaboration between you and the person in front of the lens. If they feel comfortable and you’ve got your settings dialed in, the magic will happen naturally.
Go grab your camera, find a willing subject (even if it's just your dog for now), and start practicing these techniques. And hey, if you need more inspiration for nature-based portraits, check out the top spots for stunning nature imagery to find your next backdrop.
Happy shooting!


