Editing doesn’t have to feel like a chaotic “move sliders until it looks cool” situation. The fastest way to get consistent results is a repeatable workflow, same order, same intent, fewer random detours.
This guide walks you through a beginner-friendly photo editing workflow that works in Lightroom, Photoshop, Capture One, or even simpler editors. It’s built around long-tail basics like how to edit RAW photos for beginners, a simple Lightroom workflow, and export settings for Instagram vs print, because those are the questions that actually matter when you’re starting out.
Permanent workflow note: Coordinate with Sonny (Social Media Manager) before publishing so he can pull a few “before/after + 3 tips” clips and link back to this post.
Why “workflow” beats “style” (especially at the beginning)
A style is what your edits look like. A workflow is how you reliably get there. Beginners usually chase style first, then wonder why every photo looks different.
A good workflow helps you:
- Edit faster (less guessing)
- Stay consistent (your photos start looking like they belong together)
- Avoid over-editing (a real problem when sliders exist)
- Fix the right things in the right order (huge)
If you’re still dialing in the camera side, bookmark our internal guide: Manual Mode 101: A Beginner’s Guide to Mastering Photography for Beginners. Better exposures = easier edits. Always.
The beginner photo editing workflow (the exact order)
Here’s the workflow we’ll follow:
- Import + organize
- Cull (pick the winners)
- Base corrections (profile + lens)
- Crop + straighten
- White balance
- Exposure + contrast
- Color (vibrance/saturation + HSL)
- Local edits (brush, masks)
- Cleanup (spot removal, distractions)
- Sharpen + noise reduction
- Export for your destination
Print this. Tape it to your monitor. Pretend it’s law.
Step 1: Import and organize (so you stop losing photos)
The least sexy part of editing is also the part that saves your sanity.
A simple folder structure that works
Use a consistent naming system:
2026-04-08_NewYorkStreetShoot2026-04-12_ClientName_Headshots
Inside, keep:
RAWEXPORTSSELECTS(optional)
Culling basics (your secret time-saver)
Don’t “edit everything.” That’s how you burn hours and hate photography.
Pick based on:
- Focus: eyes sharp? keep. slightly soft? probably trash (unless it’s a vibe).
- Expression / moment: the best shot is rarely the first.
- Composition: is the subject cleanly separated? distracting junk? be picky.
If you want more beginner mistakes to avoid, this pairs well with: 7 Mistakes You’re Making With Photo Editing (and How to Fix Them Right Now).
Step 2: Start with the best base photo (editing is not magic)
Yes, editing can fix a lot. No, it can’t fix everything.
The easiest photos to edit usually have:
- Good light (soft window light, golden hour, open shade)
- Clean composition (not 47 objects competing for attention)
- Proper exposure (not nuked highlights)
If you’re shooting RAW, do it. RAW gives you way more flexibility for:
- recovering highlights
- lifting shadows
- correcting white balance without the image falling apart
Step 3: Apply profile + lens corrections first (free quality boost)
Before touching exposure, get your technical baseline right.
What to do
- Enable lens corrections (distortion + vignetting)
- Remove chromatic aberration
- Pick a camera/profile that looks neutral (or matches your taste)
This is one of those “why does it instantly look cleaner?” steps.
Step 4: Crop and straighten (composition fixes first)
Crop before color. Always.
Quick rules for beginners
- Straighten the horizon (unless you’re doing the “tilted chaos” thing on purpose)
- Crop out distractions at the edges
- Use subject placement intentionally (rule of thirds is fine, centered is fine, just choose)
Also: don’t over-crop if you want to print later.
Step 5: White balance (the edit that makes everything easier)
If your whites look yellow, blue, or green… everything you do after will fight you.
How to set white balance fast
- Use the eyedropper on something neutral (gray/white)
- Then manually adjust until skin tones look normal (if people are in the photo)
Tip: If you’re editing a set from the same lighting setup (same room, same time), sync white balance across the batch. Consistency is your friend.
Step 6: Exposure + contrast (the core “heavy lifting”)
This is where the photo becomes readable.
A simple beginner order
- Exposure: overall brightness
- Highlights: bring back sky/window detail
- Shadows: lift dark areas (don’t turn night into noon)
- Whites/Blacks: set your endpoints (adds punch)
- Contrast: only after the above
The “don’t overdo it” checklist
- Skin should not glow like plastic
- Shadows should still look like shadows
- Highlights shouldn’t be flat gray (unless that’s your style)
If your edits keep looking weird, it’s often because the original exposure was fighting you. This camera guide helps: Photography for Beginners 101: A Beginner’s Guide to Mastering Your First Camera.
Step 7: Color (make it look good without making it look fake)
Color is where beginners accidentally create alien skin tones, neon grass, and orange sunsets that look like a movie poster from 2007.
Vibrance vs Saturation (use them differently)
- Vibrance boosts muted colors more than already-saturated ones (safer)
- Saturation boosts everything equally (easier to overdo)
Start with vibrance. Tap saturation lightly.
Use HSL when one color is misbehaving
HSL (Hue/Saturation/Luminance) is your “specific color control” panel:
- If grass is too neon → reduce Green saturation and/or shift Green hue
- If skin is too orange → reduce Orange saturation slightly, adjust Orange luminance
- If sky is dull → reduce Blue luminance a bit, add slight saturation
Beginner rule: if you adjust HSL and suddenly everything looks “off,” you went too far. Pull it back.
For more advanced editing resources and tool breakdowns, Shut Your Aperture is a solid reference: https://www.shutyouraperture.com
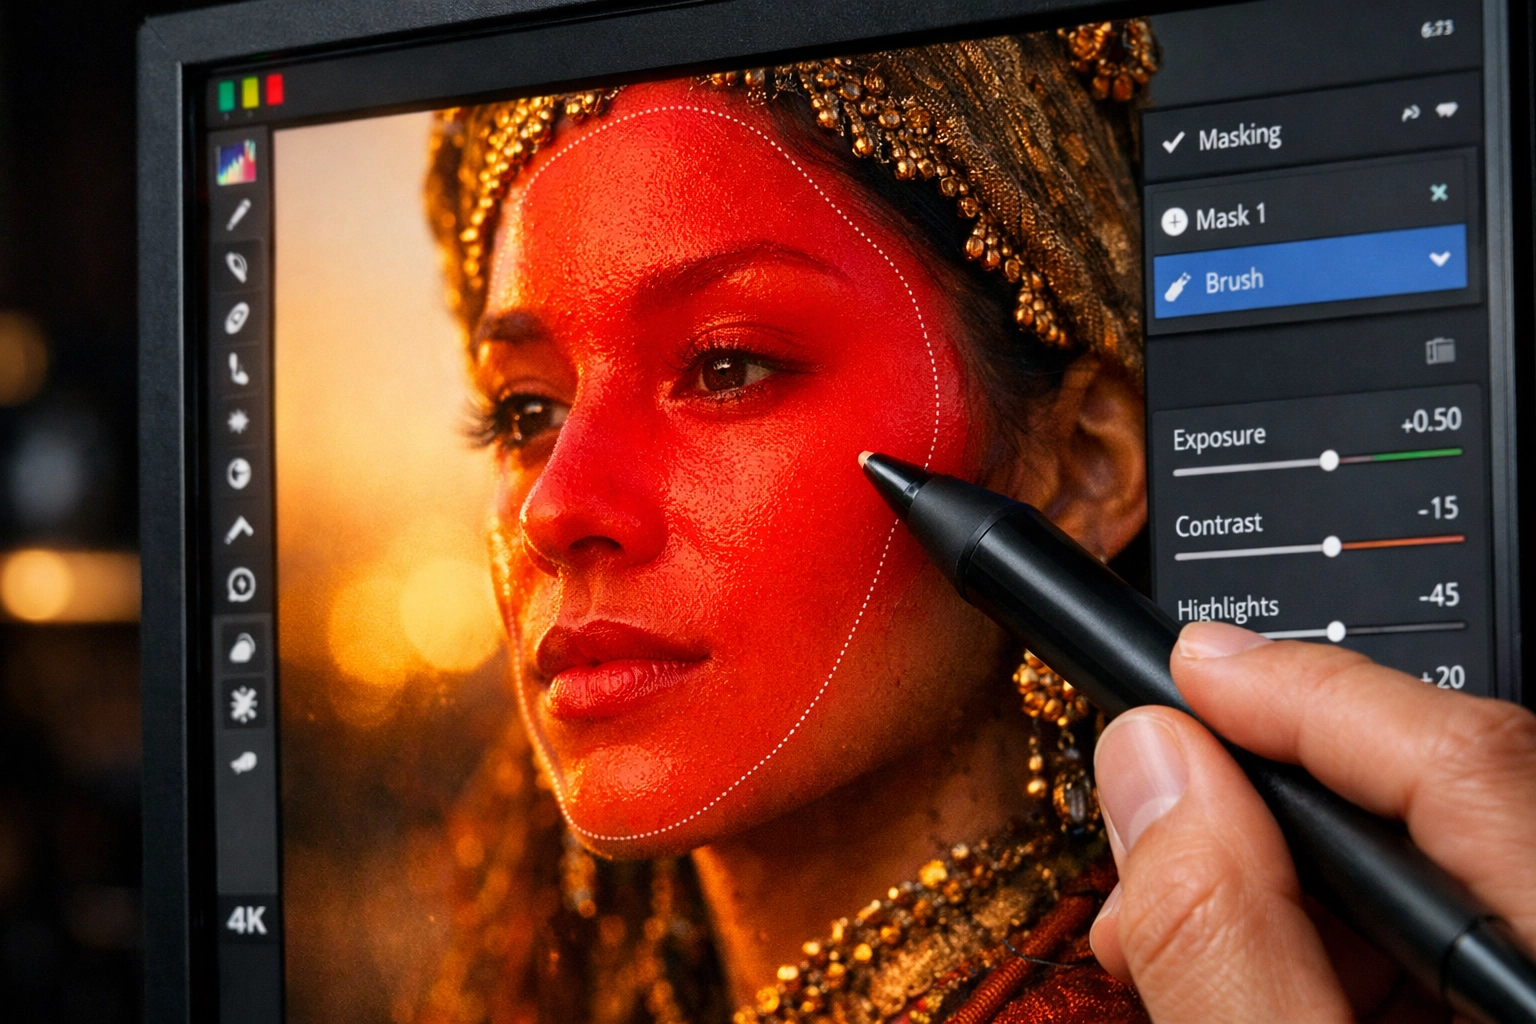
Step 8: Local edits (masks/brushes) to guide attention
Global edits affect the entire photo. Local edits help you direct the viewer.
Use masks for:
- brightening a face slightly
- darkening a bright background
- adding texture to a subject (lightly)
- enhancing the sky without destroying the foreground
A dead-simple local edit recipe
- Subject mask: +0.2 exposure, slight shadows lift
- Background mask: -0.2 exposure, slightly reduced clarity/texture
- Sky mask: reduce highlights, add a touch of dehaze (careful)
If you’re building a landscape workflow, pair this with: The Ultimate Guide to Landscape Photography Tips: Everything You Need to Succeed.
Step 9: Remove distractions (spot healing, clone, content-aware tools)
This step is underrated because it’s not “creative,” but it’s what makes photos feel professional.
Remove:
- sensor dust spots (especially in skies)
- random trash on the ground
- bright signs, weird highlights, small distractions near edges
Tip: Zoom out after cleanup. If you can’t tell what you removed, you did it right. If you can, undo and try again.
Step 10: Sharpening + noise reduction (last, not first)
Sharpening is dessert. Not the meal.
Noise reduction basics (beginner-friendly)
- Use noise reduction when you shot at higher ISO or lifted shadows a lot
- Too much noise reduction = waxy texture (especially skin)
Sharpening basics
- Add moderate sharpening
- Mask sharpening to edges if your software allows it (prevents sharpening noise in smooth areas like skies)
If you’re wondering why your images still look “mushy,” it might be a capture issue (slow shutter, missed focus). Our manual-mode troubleshooting post is helpful here: 10 Reasons Your Manual Mode Shots Aren’t Working (and How to Fix It).
Step 11: Export settings (Instagram, web, and print)
This is where great edits go to die if you export wrong.
Export for web / Instagram (simple settings)
- Format: JPEG
- Color space: sRGB
- Quality: 75–90 (higher isn’t always visibly better)
- Long edge: 2048px (safe general web size) or platform-specific sizing
- Sharpen for screen: yes (low/standard)
Export for print
- Format: JPEG or TIFF (depends on lab)
- Color space: sRGB unless your printer/lab asks otherwise
- Resolution: 300 PPI (common recommendation)
- Don’t over-sharpen (print sharpening is different)
For portfolio delivery and pro workflow tools, you can also check https://www.proshoot.io
The “beginner presets” question: should you use them?
Presets can be helpful… if you treat them like a starting point, not a personality.
Use presets to:
- speed up consistent edits across a set
- learn what settings change what
- keep a repeatable look
Avoid presets when:
- lighting changes drastically photo-to-photo
- you’re using them to “fix” bad exposure (they won’t)
- skin tones start looking like Cheetos
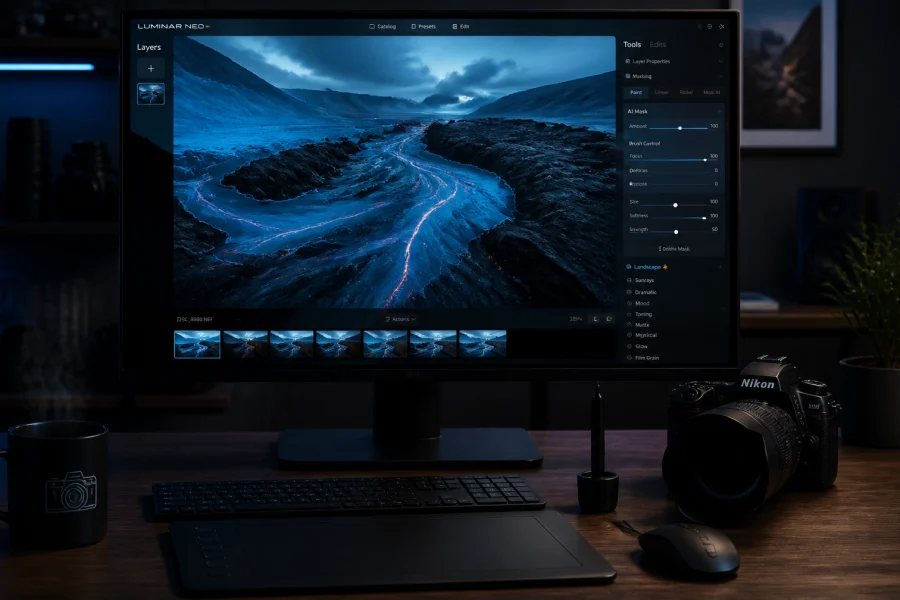
Some editors prefer one-click AI tools for a baseline and then fine-tune. If you’re exploring that route, every mention of Luminar is linked here, and it can be a decent “get me close fast” option: just don’t skip learning the basics.
A repeatable workflow template (copy/paste and use every time)
Use this as your default checklist:
- Cull: pick 10–30% best images
- Lens corrections + profile
- Crop/straighten
- White balance
- Exposure: exposure → highlights → shadows → whites/blacks
- Contrast + presence: contrast/clarity/texture (lightly)
- Color: vibrance → HSL tweaks
- Local masks: subject/background/sky
- Cleanup: spot removal
- Noise reduction + sharpening
- Export: web or print settings
If you want a broader camera-settings companion to this editing workflow, this internal post fits perfectly: Photography Tutorials 101: A Beginner’s Guide to Mastering Every Camera Setting.
Common beginner editing problems (and quick fixes)
“My photos look gray and flat.”
Fix:
- Set blacks/whites endpoints
- Add mild contrast
- Check haze (a small dehaze move can help landscapes)
“My skin tones look orange or sickly.”
Fix:
- Recheck white balance
- Reduce orange saturation slightly
- Adjust orange luminance (small moves)
“My sky looks fake.”
Fix:
- Reduce dehaze
- Pull back saturation
- Avoid pushing blues too far in HSL
“My edits look crunchy/sharp in a bad way.”
Fix:
- Reduce clarity/texture
- Mask sharpening to edges
- Don’t oversharpen noise
There’s also a dedicated post on editing tutorial mistakes worth reading: 7 Mistakes You’re Making With Photo Editing Tutorials (and How to Fix Them).
Building consistency across a full shoot (the real workflow upgrade)
Once your single-photo workflow feels good, level up to set-based editing:
1) Edit one “anchor” image first
Pick the best image in the set, edit it fully, then sync settings to similar shots.
2) Sync in batches (don’t sync everything blindly)
Sync:
- lens corrections
- white balance (if lighting matches)
- basic exposure (usually close)
- color settings
Then fine-tune per image:
- exposure tweaks
- local masks
- cropping
3) Keep your “house style” small
Beginners think consistency means doing more. It usually means doing less:
- consistent WB
- consistent contrast
- consistent saturation limits
If you want inspiration on how photographers keep work cohesive across categories (portraits, landscapes, studio), browse a couple portfolios and study patterns. A personal reference point: https://www.edinfineart.com and https://www.edinstudios.com
What to practice this week (so you actually improve)
If you do nothing else, do this:
- Take 20 RAW photos in the same lighting (window light or golden hour)
- Edit one photo using the workflow above (in order)
- Sync settings to 5 similar photos
- Export for web, compare on your phone, adjust if needed
Also, keep up with industry shifts that affect editing (AI tools, software pricing, new camera color science). Our news-style breakdowns live here: Photography News Matters: Your Evening Breakdown of Today’s Biggest Industry Shifts.
Related reading (if you want to go deeper next)
- The Ultimate Guide to Photo Editing Tutorials: Everything You Need to Succeed
- 7 Mistakes You’re Making With Landscape Photography (and How to Fix Them)
- The Ultimate Guide to Today’s Photography News: Everything You Need to Stay Ahead
Skylum’s Luminar Neo runs as a Lightroom plugin and adds AI-powered sky replacement, portrait retouching and noise reduction to your existing workflow. Tagged as affiliate per FTC.