Best Photography Spots in Cusco: 5 Scenes to Start With, 11 in the Full Guide
Updated
Cusco gives you glowing stone, steep streets and mountain weather that can change a frame in minutes. The trick is choosing what you want to photograph before you start running between landmarks. A plaza at dusk, a shaded doorway and a high-mountain landscape are different shoots. Give each one its own time.
The full Cusco Photography Guide is $47. The rebuilt 67-page PDF has 11 photo-led location chapters, named-place GPS pins, tappable Maps links, composition ideas, shot lists and starting camera settings. It also includes a separate written Machu Picchu planning section, without a Machu Picchu image. Keep it on your phone or tablet so the planning notes travel with you.
Get the full Cusco Photography Guide
This post gives you five scenes to work with. The PDF holds the other six detailed location chapters and the longer planning notes. Start here, decide which kind of light and subject you want, then use the guide to build a trip that leaves room to shoot.
Plan a photograph, not a race
A long location list can look impressive and still leave you with a weak day. Pick one main subject for each light window. If you want the plaza with evening color, arrive with enough time to walk around, check the background and decide what belongs in the frame. Do not spend that window in a car because you tried to squeeze in another stop.
Cusco city streets, archaeological visits and Sacred Valley landscapes do not belong in one rushed circuit. The mountain chapter is a separate decision again. Keep walking time, transport, site opening hours and your energy in the plan. A map makes distances look easy. Your body gets the final vote, especially before you have adjusted to altitude.
Pro tip: write down one wide photograph, one tighter composition and one detail for each session. That gives you a reason to look closely without turning the day into a checklist.
1. Plaza de Armas: build around the stone and light
 Save
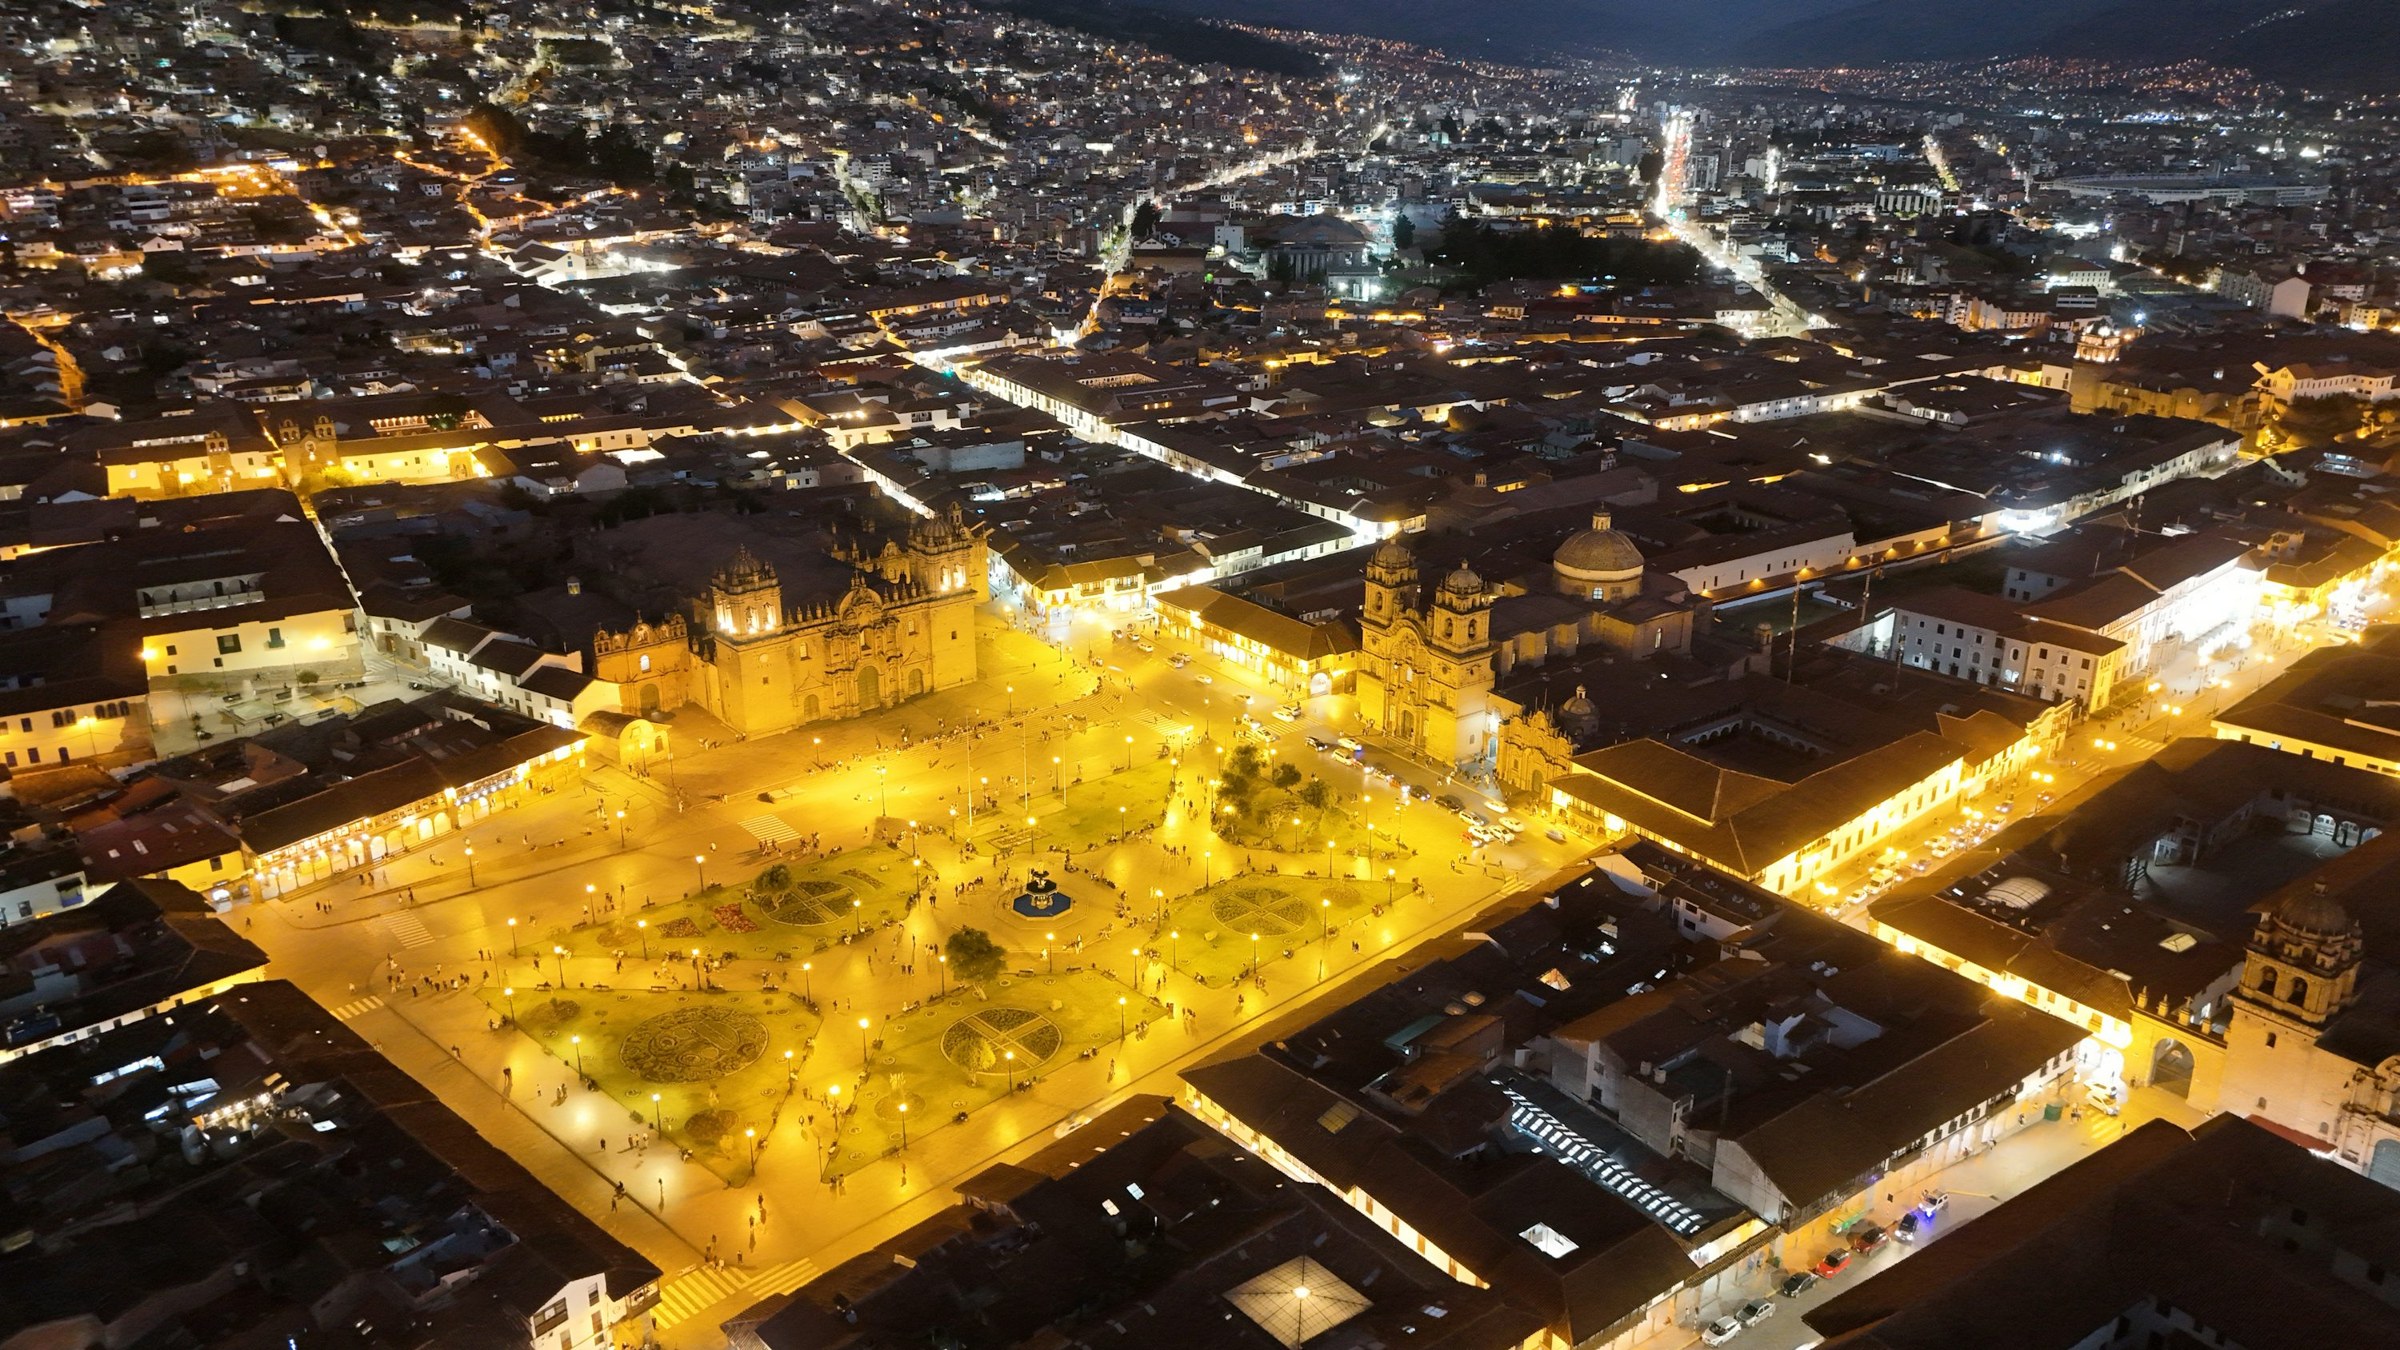
Plaza de Armas is a strong starting point for an architectural photograph. You have an open square, surrounding facades and repeated shapes that can organize the picture. You do not need to fit every building into one frame. Choose the part that catches your eye and make the rest support it.
A pavement edge or arcade can lead the viewer toward the main facade. Keep the camera level when straight verticals matter. If you tilt upward, make that choice deliberate and leave room around the towers so a later crop does not cut into them. Before you press the shutter, scan the corners for traffic, signs and half-cut people.
Early daylight can suit quieter architectural frames. In the evening, compare the illuminated buildings with the remaining color in the sky. That balance changes, so watch the light instead of chasing an exact recipe. Wet pavement can add reflection, but shelter and a safe route back matter more than the reflection.
For still architecture, begin near f/8 and set shutter speed and ISO for the light. If a walking person supplies scale, around 1/250 second is a useful first test. Look at playback. Sharp stone does not help if the person you wanted is blurred beyond recognition. Bright lamps can clip even when the rest of the square feels dark.
Pro tip: pick one dominant facade before choosing your foreground. An arcade, pavement line or single person works best when it points toward a clear subject.
The guide's pin identifies Plaza de Armas. It does not promise balcony access or the elevated position used in a source photograph. Work from open public space and ask before using a private terrace. A religious service is not a photo session.
2. San Blas: slow down and work the street
 Save
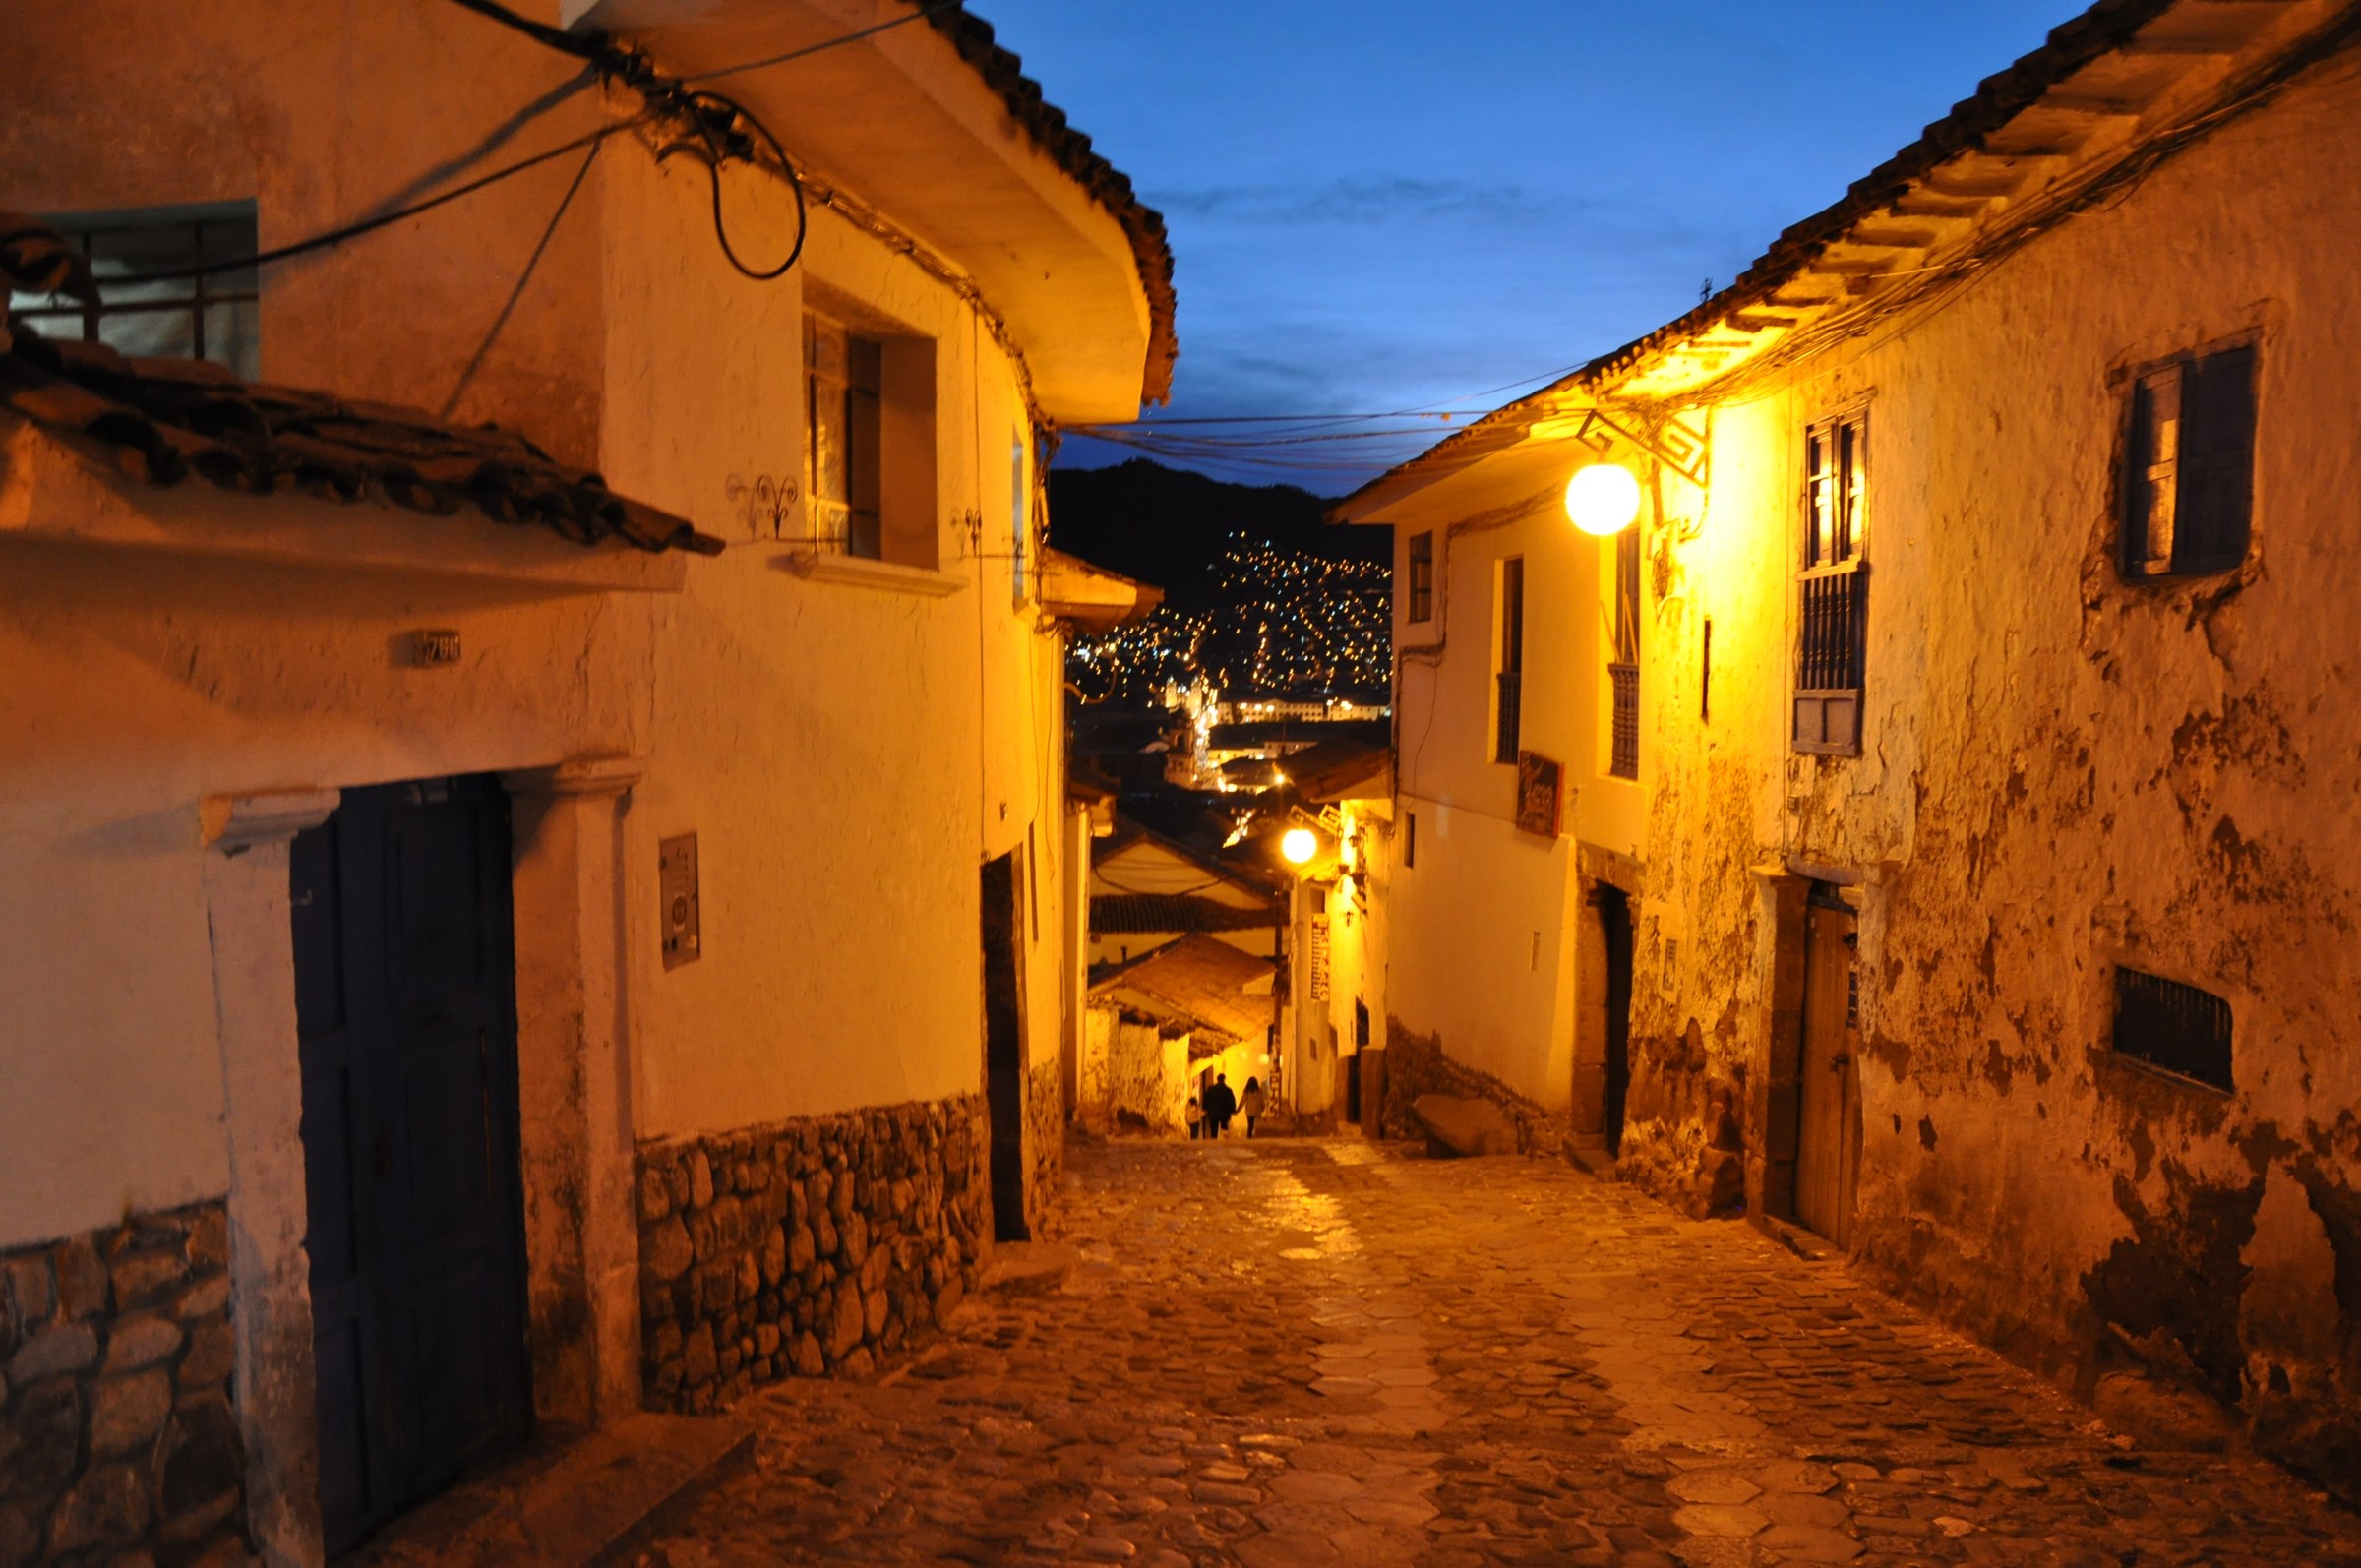
San Blas is about smaller scenes: steps, doorways, painted surfaces and the way a person moves through a narrow street. Use the neighborhood as a place to explore, not one exact camera point. Choose a short cluster of streets and give yourself time to notice what changes.
The strongest street frame often starts with a background. Find a doorway, step pattern or patch of light, decide where a person would improve the composition, then wait without blocking the route. Leave space in the direction of movement. You are building a relationship between the person and the street, not collecting a stranger as decoration.
A tighter view can remove clutter better than an ultra-wide lens. Try stepping back or choosing a longer focal length from a lawful public position. Compare the bright side of a street with the shaded side. Soft cloud can make painted walls easier to expose; hard light can give you a useful edge between sun and shadow.
Begin around 1/250 second for walking people, then adjust upward if movement demands it. Use f/5.6 to f/8 when the street needs to remain part of the picture. In deep shade, raise ISO before accepting blur just to keep the number low. Check the face, the nearest step and the background at playback.
Pro tip: make your background photograph first. If the frame is weak without a person, fix it before waiting for someone to walk through.
Keep doorways and steps clear. Ask before a close portrait and accept a refusal. A workshop, courtyard or church interior is not an extension of the public street. Uphill walking can take more energy than you expect, so leave room for breaks and a familiar return route.
3. Qorikancha: let the curve carry the frame
 Save
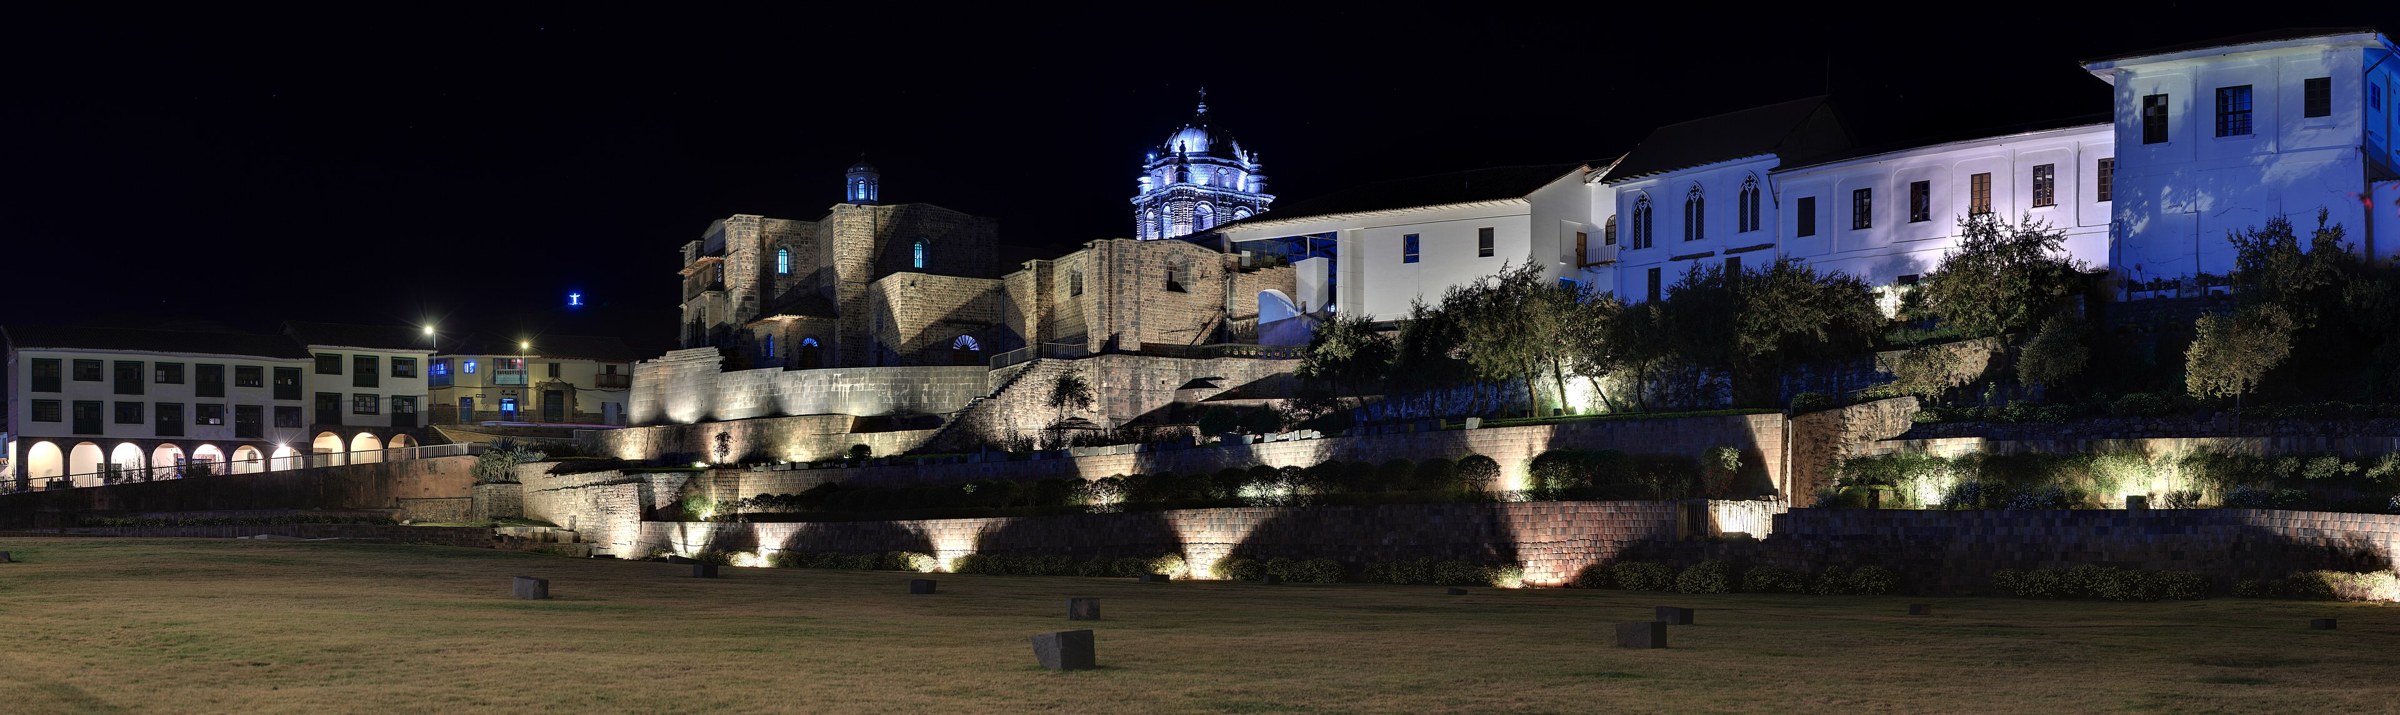
Qorikancha gives you curved stone and later architecture above it. That contrast is enough to make a photograph. You do not need a complicated composition or a long historical claim to explain why the shapes work together.
Start with the stone curve as your main line. Look for a frame where the viewer can read it without a sign, parked vehicle or unrelated foreground taking over. Then decide whether a tower, doorway or person adds useful context. If you move tighter, the fitted-stone pattern can become the subject on its own.
Light direction matters. Side light can separate surfaces and show relief; softer light can suit detail without deep shadows. Make a test exposure for the pale sky and look into the stone shadows. You want texture, not a bright blank top half and a dark bottom half that needs rescuing later.
For an exterior frame, f/8 is a practical starting point. Choose shutter speed for your lens, hands and conditions. If an interior visit permits photography, use a steady stance and raise ISO before reaching for flash. Do not assume that tripods, flash or a commercial setup are allowed because a photograph exists online.
Pro tip: make one frame where the curve is unmistakable, then one close detail. The wide picture explains the place; the detail explains what caught your eye.
Check admission for the exact part you intend to visit. The main temple/convent and the separately listed site museum are different visitor destinations. A ticket listing for one does not establish access to every room, garden or courtyard. Keep a public-side alternative in your plan.
4. Chinchero: photograph the terrace rhythm
 Save
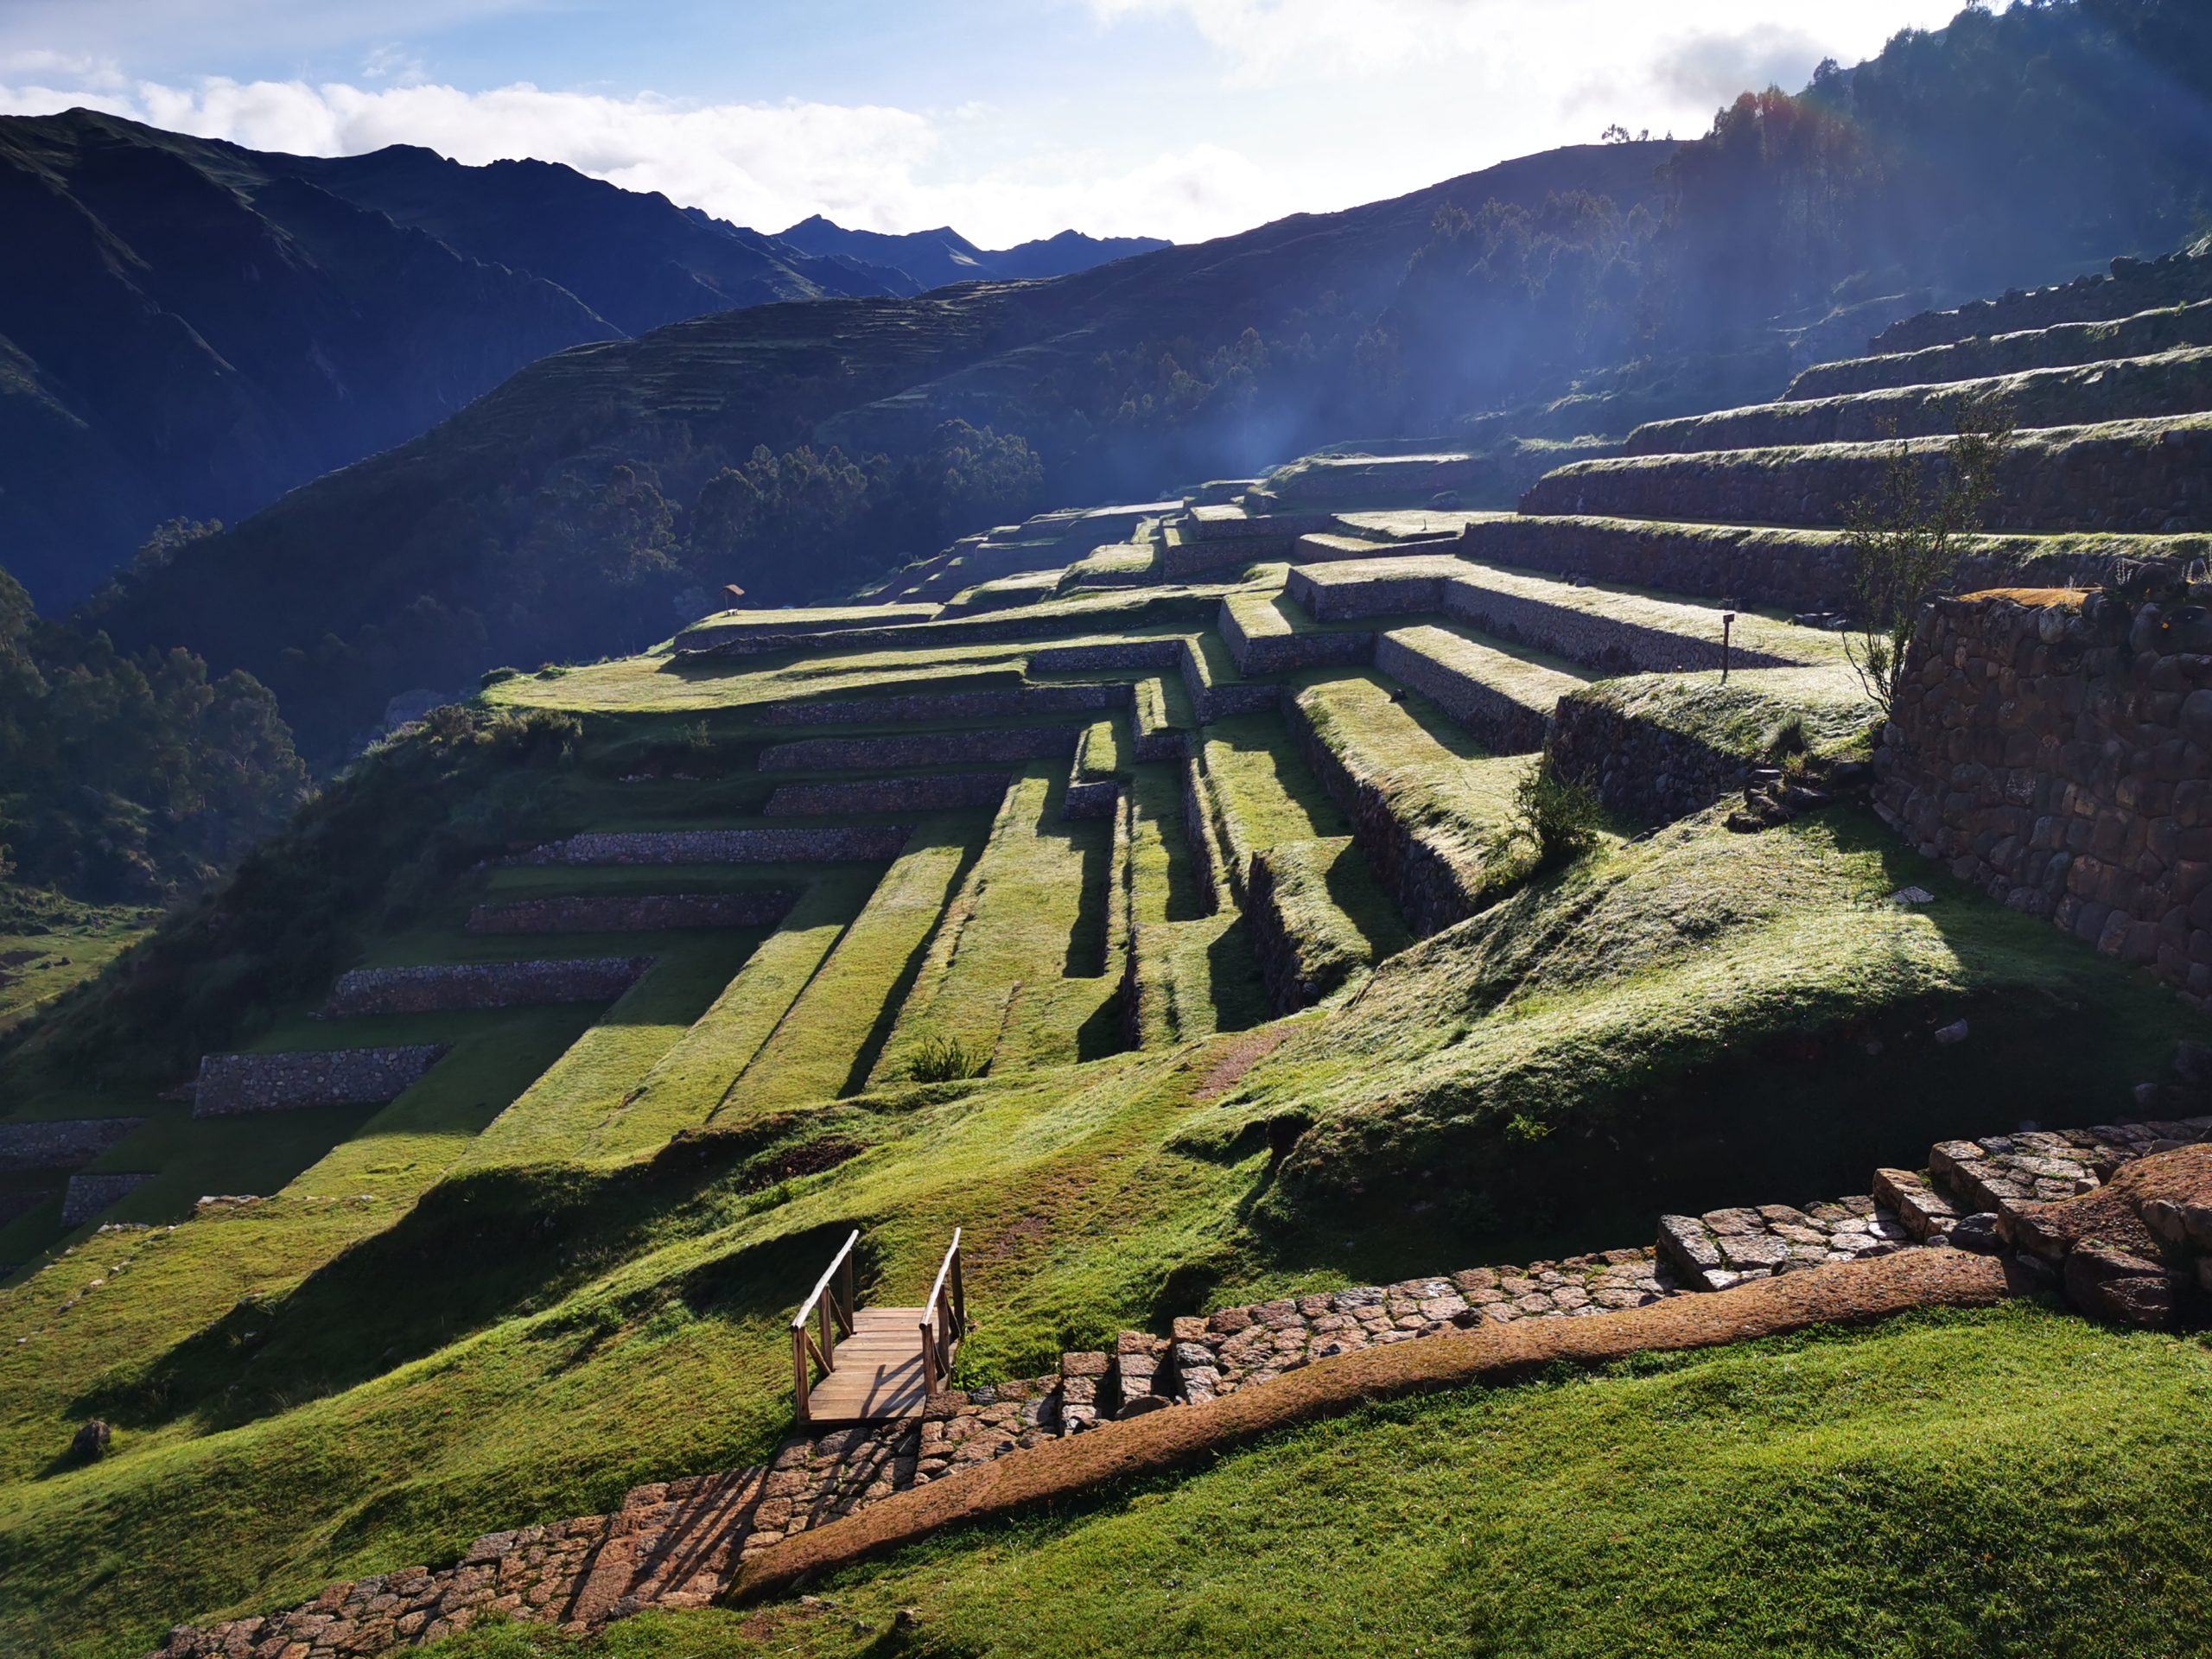
Chinchero brings terraces, Inca stonework, a colonial church and a highland setting into the same location. The photographic opportunity is the structure: repeated steps, changing directions and the way light separates one level from the next.
Begin with one stepped diagonal. Let it organize the image before adding more hillside or sky. Empty ground can dilute the frame just as easily as an oversized patch of bright sky. Walk the open visitor route, compare a few lawful positions and choose the cleanest arrangement.
A person on an authorized path can show scale. Keep that person separate from the important stone edges so the shape remains readable. Another useful frame is a tighter study of curved steps. You do not need to include every part of the site to show its character.
Look for side light that separates the terraces, and watch moving cloud shadows. They can change which part of the scene carries the most contrast. Start around f/8 for a still wide frame, choose a shutter speed that works handheld and raise ISO when cloud or wind demands it. Check terrace detail rather than assuming everything at distance will be sharp.
Pro tip: take the empty-ground test. Cover the lowest part of your preview with your hand. If the picture becomes stronger, reframe before you shoot again.
The named-site pin is a planning anchor, not the source photographer's position. Recheck current opening hours and equipment rules before visiting. Stay behind barriers and off archaeological walls. An evening sky does not give you permission to remain after closing, and a visitor ticket does not settle commercial-shoot or drone permissions.
5. Vinicunca: make room for weather and scale
 Save
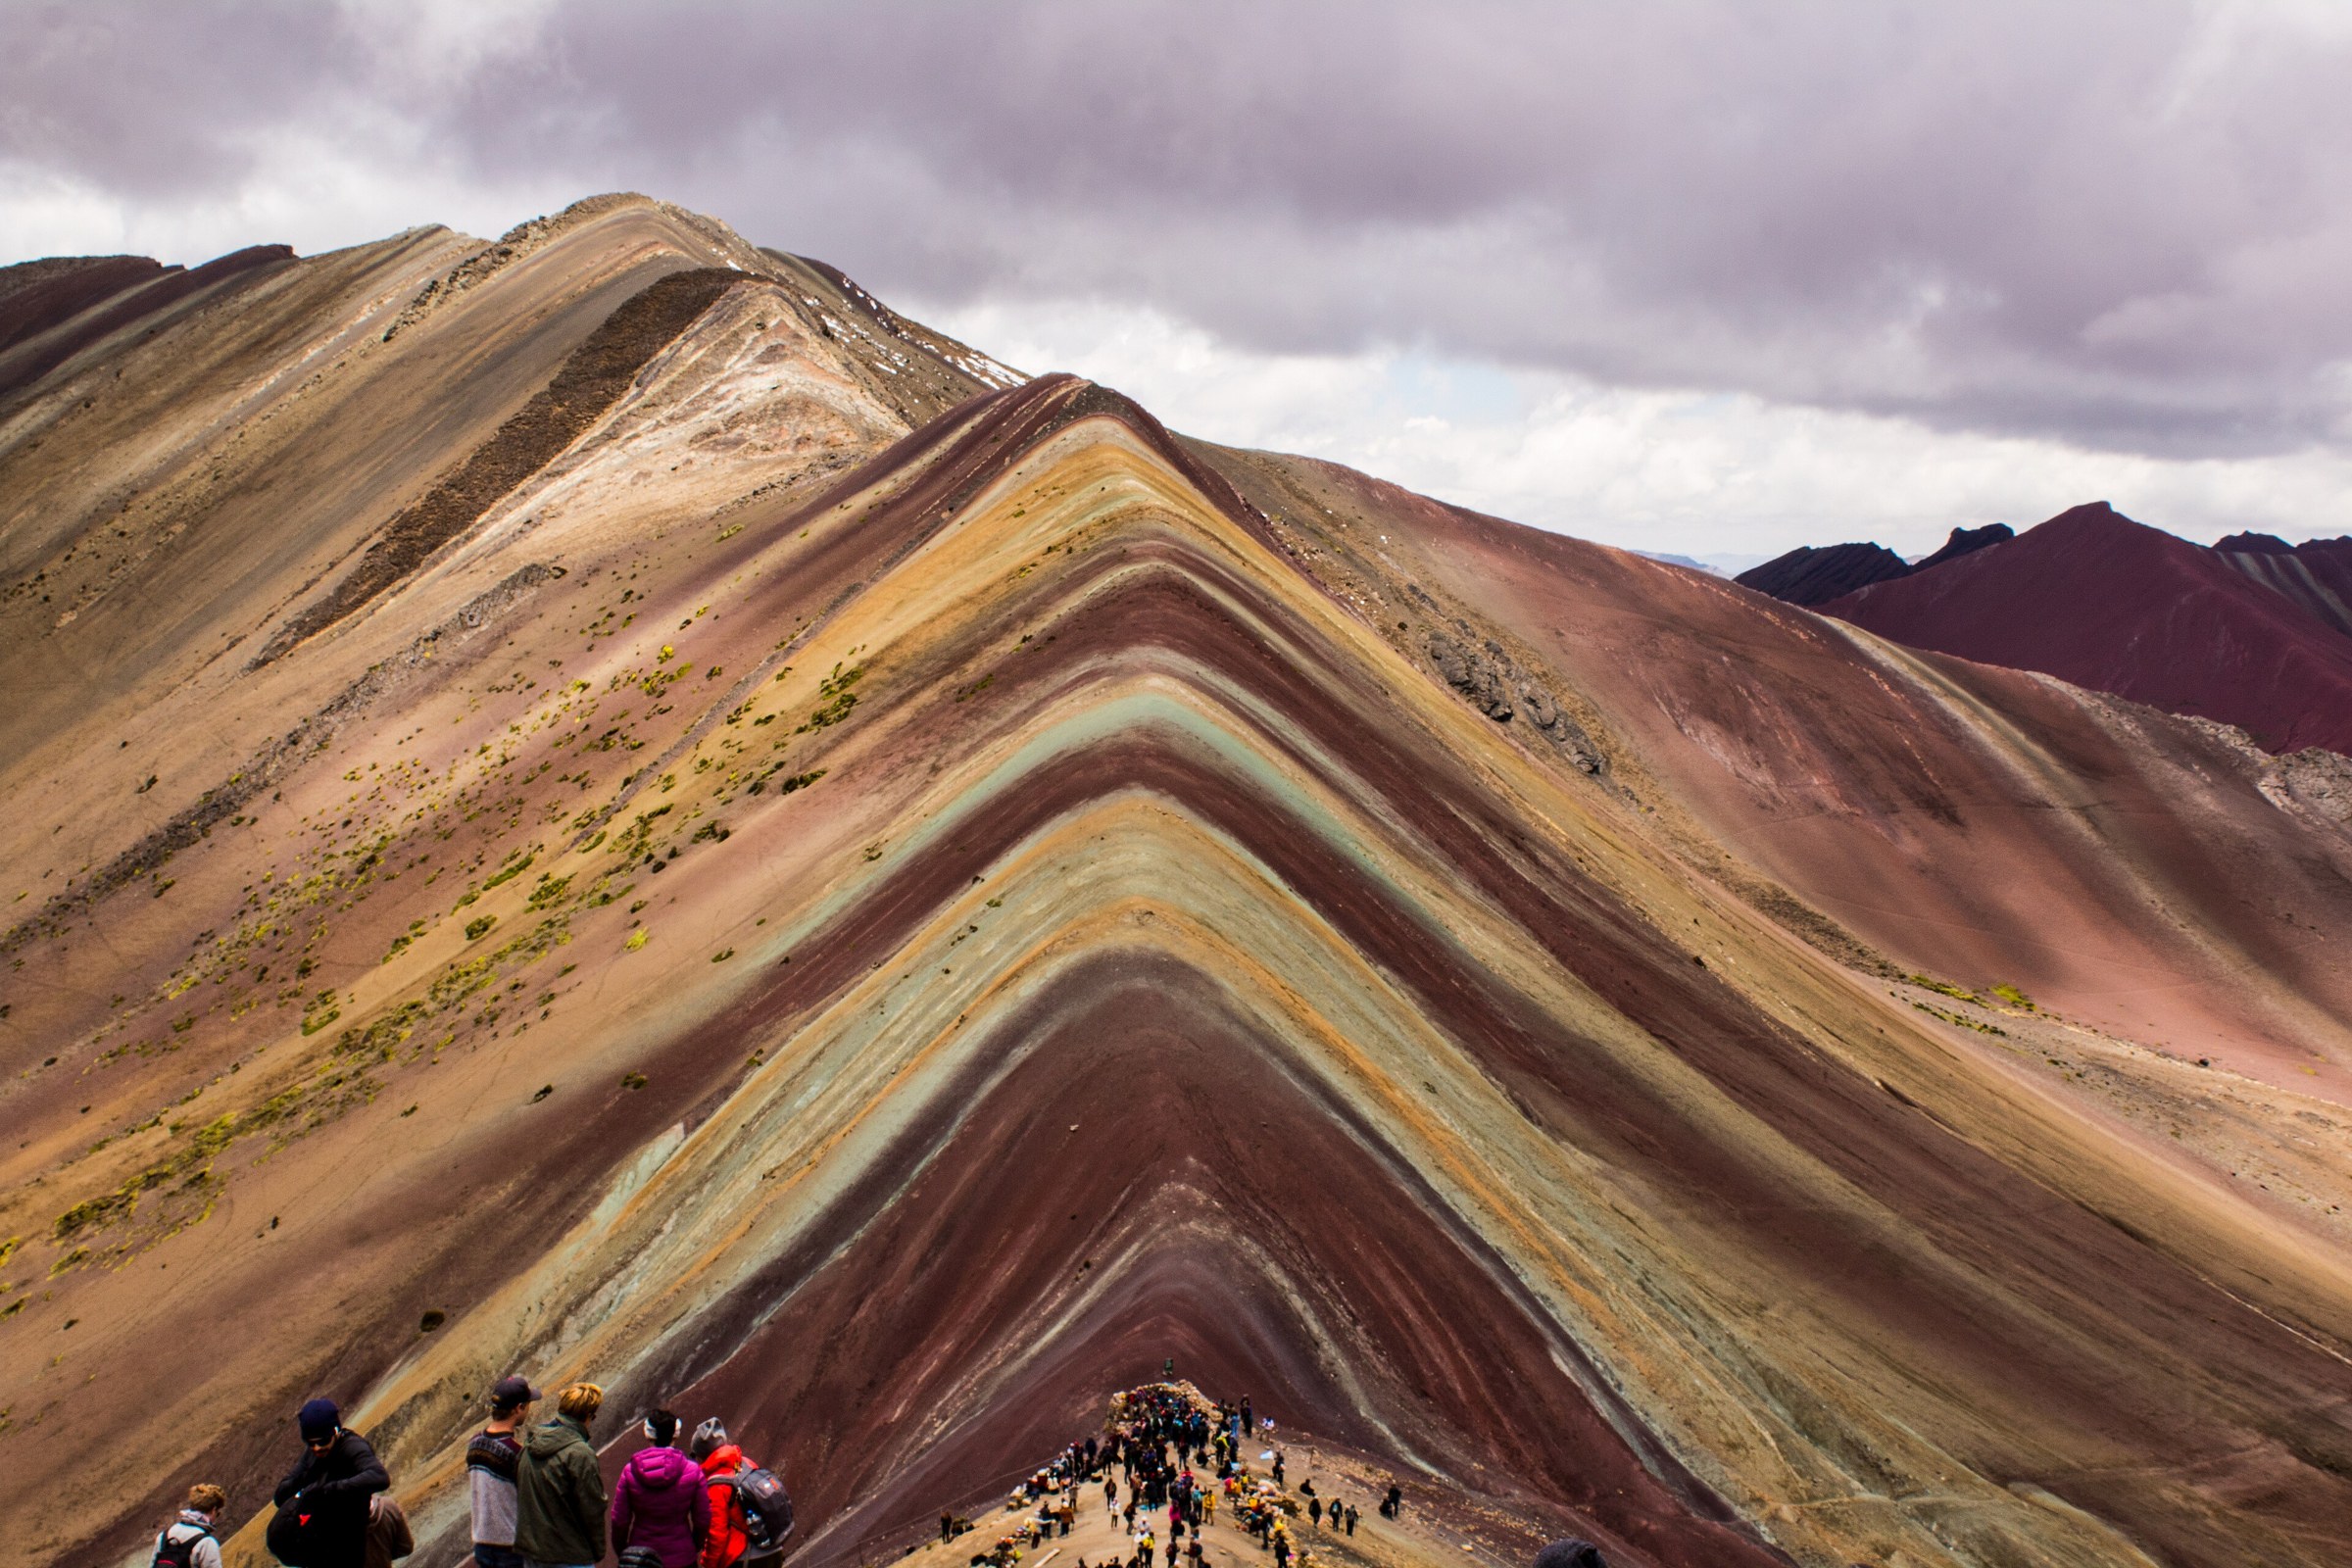
Vinicunca is a high-mountain shoot, not another quick city stop. Its colored slope can be the main subject, but the surrounding terrain gives it scale. A very tight frame may show the bands while losing the reason the scene feels large.
Start with a wider composition that explains the slope and its skyline. Then use a longer lens for texture or diagonal bands if conditions permit. A person can show scale from an open, authorized route. There is no reason to move someone into a risky position to make the photograph look bigger.
Weather changes the light, visibility and safety. Cloud or snow can hide the stripes. If the landmark is partly covered, look at the mountain layers or make a photograph about the weather rather than pretending the view matches the source image. A different frame is better than pushing a bad situation for the one you expected.
Begin near f/8 and choose a shutter fast enough for wind and handheld work. Watch bright clothing, snow and pale cloud. Keep editing restrained. Color should explain the mountain, not make it look more saturated than the scene supported.
Pro tip: photograph the context before the detail. A wider mountain frame tells you whether the bands need more surrounding terrain or a simpler crop.
Allow time to acclimatize and get qualified medical advice for your own risk. Confirm current transport, trail conditions, entry and weather locally. The GPS pin identifies the mountain, not a trailhead or driving endpoint. A guide, horse or tour does not remove altitude risk. Turn back and seek appropriate help if illness or unsafe weather develops.
What stays in the full guide
These five scenes are the starting point. The 67-page PDF adds the detailed chapters for Sacsayhuaman, Cristo Blanco, Pisac, Ollantaytambo, Moray and the Maras salt ponds. Each chapter has a source photograph, composition ideas, shot options, starting settings and a named-place map pin.
The longer notes help you separate city walks from paid-site visits and mountain days. Packing, season, altitude and photography-permission sections keep the trip practical. The GPS links identify the named subjects; they are not tested camera positions, parking guarantees or access permissions.
There is also a written Machu Picchu section covering visit planning, transport and equipment checks. We have chosen not to use a Machu Picchu image here or in that section. The destination deserves its own planning instead of being treated as a rushed extra stop.
Get the full 11-chapter Cusco Photography Guide for $47
Keep the camera kit simple
A wide-to-normal zoom gives you room to change from an architectural view to a tighter street frame without constant lens swaps. A longer lens can help simplify roof patterns or mountain layers, but take it because your planned photographs need it, not because an empty pocket in the bag needs filling.
Carry spare power, memory cards, lens cloths and rain protection. Leave room for water and the things you need to stay comfortable. Support equipment only helps where the site permits it. For a walking session, a light handheld kit may keep you looking at the scene instead of managing the bag.
Use RAW if it fits your workflow, protect important highlights and check focus at playback. The guide's settings are starting scenarios, not the source photographs' EXIF. The useful habit is making a test frame and adjusting, not copying numbers as if the light cannot change.
Cusco photography Q&A
Is the PDF a tour or a printed book?
No. It is a downloadable 67-page photography-planning PDF. Transport, admission and a guide are not included.
Does this post include every location?
No. This post introduces five scenes. The paid PDF has 11 detailed photo-led location chapters, plus the separate written Machu Picchu planning section.
Can I follow the GPS pins to the exact photograph?
The pins locate the named subjects. They do not establish the source photographer’s position, a legal camera setup, a parking space or an open route. Choose your composition and check access on site.
Can I photograph all five in one day?
Do not build that expectation. City streets, Chinchero and Vinicunca call for different plans. Allow for transport, opening hours, acclimatization, weather and the time it takes to make a photograph.
Should I carry a tripod everywhere?
Only where current rules permit it and your session needs it. Do not assume that a visitor ticket allows every type of support equipment or a commercial shoot. A handheld alternative keeps more options open.
What should I check before leaving?
Check the current admission, opening hours, weather, transport and equipment rules for the actual place you plan to visit. Recheck the return route too. A source photo and an old map cannot promise today’s access.
Take the full plan with you
Pick the scenes you want, give them time and let the light decide the final frame. Five spots get you started. The full guide gives you the other six chapters and the longer notes in one offline reference.
Download the Cusco Photography Guide
#Cusco #Peru #SacredValley #TravelPhotography #LandscapePhotography #StreetPhotography #PhotographyGuide
www.ShutYourAperture.com
Location and field notes drawn from the reviewed Cusco v2 guide. Source photographs are teaching examples, not claims that Edin made those images. Check current local access and conditions before travel.