If motion blur is killing your shots, our shutter speed guide breaks down the exact speeds for handheld, panning, and freezing action.
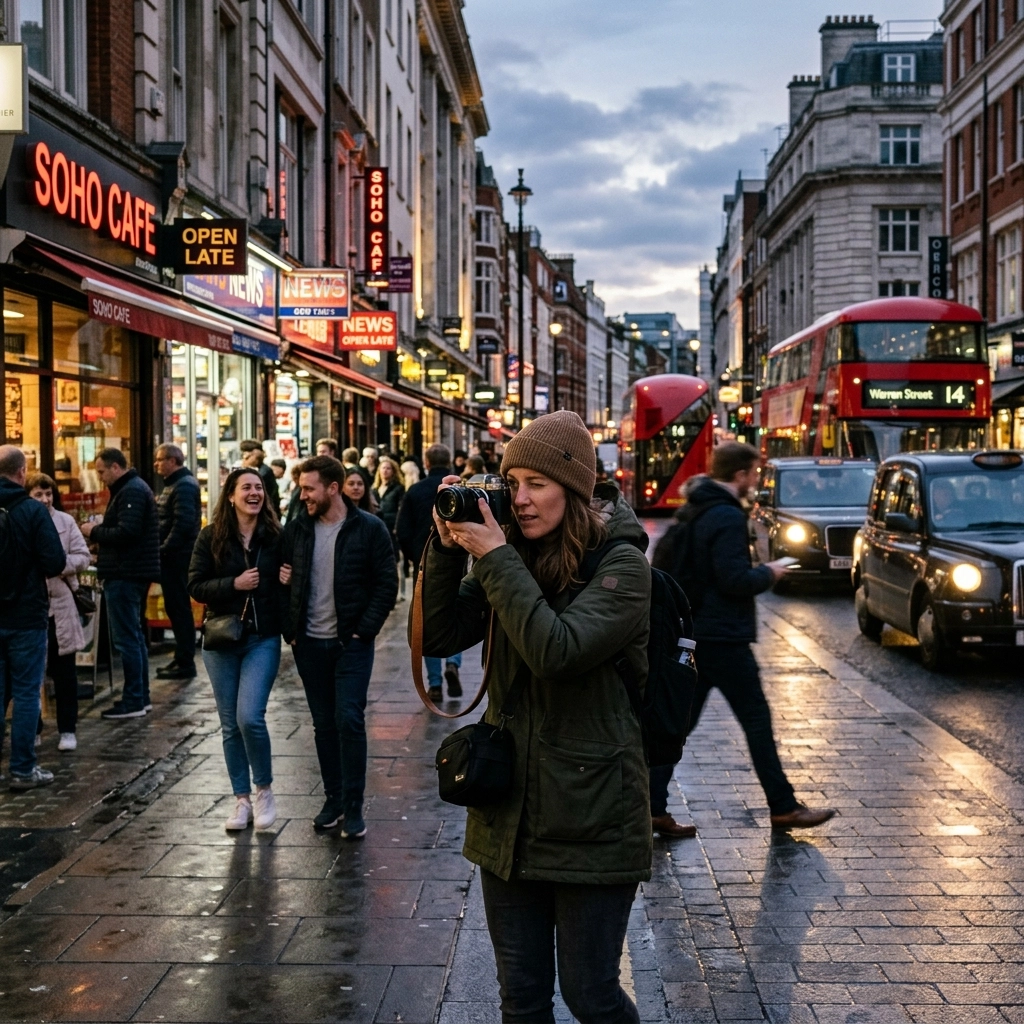
Street photography is the ultimate adrenaline rush for a photographer. There is no controlled lighting, no models who follow your every command, and no chance to ask the sun to move two inches to the left. It is raw, chaotic, and beautiful.
Most people think street photography is just about pointing a camera at a stranger on a sidewalk. While that’s a big part of it, the genre is much wider than most realize. It’s about capturing the soul of a city. Sometimes that soul is a person; sometimes it’s the way the light hits a brick wall at 5:00 PM.
If you’ve been feeling stuck or intimidated by the urban jungle, this guide is for you. We’re going to dive into actionable street photography ideas, technical setups, and the mindset you need to stop overthinking and start shooting.
What Exactly Is Street Photography?
Before we get into the ideas, let’s define the playground. Street photography is any photography that features the human condition within public spaces. You don’t even necessarily need a person in the frame for it to count. An empty park bench with a discarded newspaper can tell a more profound story about humanity than a hundred smiling portraits.
It’s about being an observer. You’re a fly on the wall in a world that is constantly moving. If you’ve mastered landscape photography, you already have the patience. Now, you just need to apply it to a faster environment.
1. The "Wait and See" Technique
One of the biggest mistakes beginners make is hunting for shots. They walk miles, swinging their camera around, and end up with blurry, poorly composed photos because they were moving as much as their subjects.
Instead, find a "stage." Look for a spot with incredible light, a cool background, or interesting geometry. Maybe it’s a colorful mural or a shaft of light hitting a subway entrance. Once you find your stage, stop. Plant your feet.
Wait for the "actor" to walk into your frame. This allows you to nail your composition and focus beforehand. When that person with the red umbrella or the sharp suit walks through your light, you’re ready. This is how you get those "lucky" shots that actually took fifteen minutes of standing still.
2. Street Photography Without People
If the idea of photographing strangers makes your palms sweaty, start with the urban landscape. Cities are filled with character even when the streets are empty.
- Urban Geometry: Look for leading lines in alleyways, the symmetry of skyscrapers, and the repeating patterns of windows.
- Decay and History: Abandoned buildings or peeling paint tell the story of a city’s past.
- Found Objects: A lone shoe on a curb or a lost toy in a park. These are small details that evoke big emotions.
3. Play with Reflections and Silhouettes
The city is a hall of mirrors if you look closely enough. Shop windows, puddles after a rainstorm, and polished metal surfaces offer a chance to create layers in your images.
Try to align a reflection so it merges with the world behind the glass. It creates a dreamlike, surreal quality that moves away from standard "snapshot" territory.
Silhouettes are another powerful tool. Find a strong light source (like the setting sun at the end of a street) and expose for the highlights. This turns your subjects into black shapes, focusing the viewer’s attention on their posture and the overall composition rather than their facial features. If you struggle with this, checking out 7 mistakes you’re making with landscape composition can actually help you understand how to frame these shapes better.
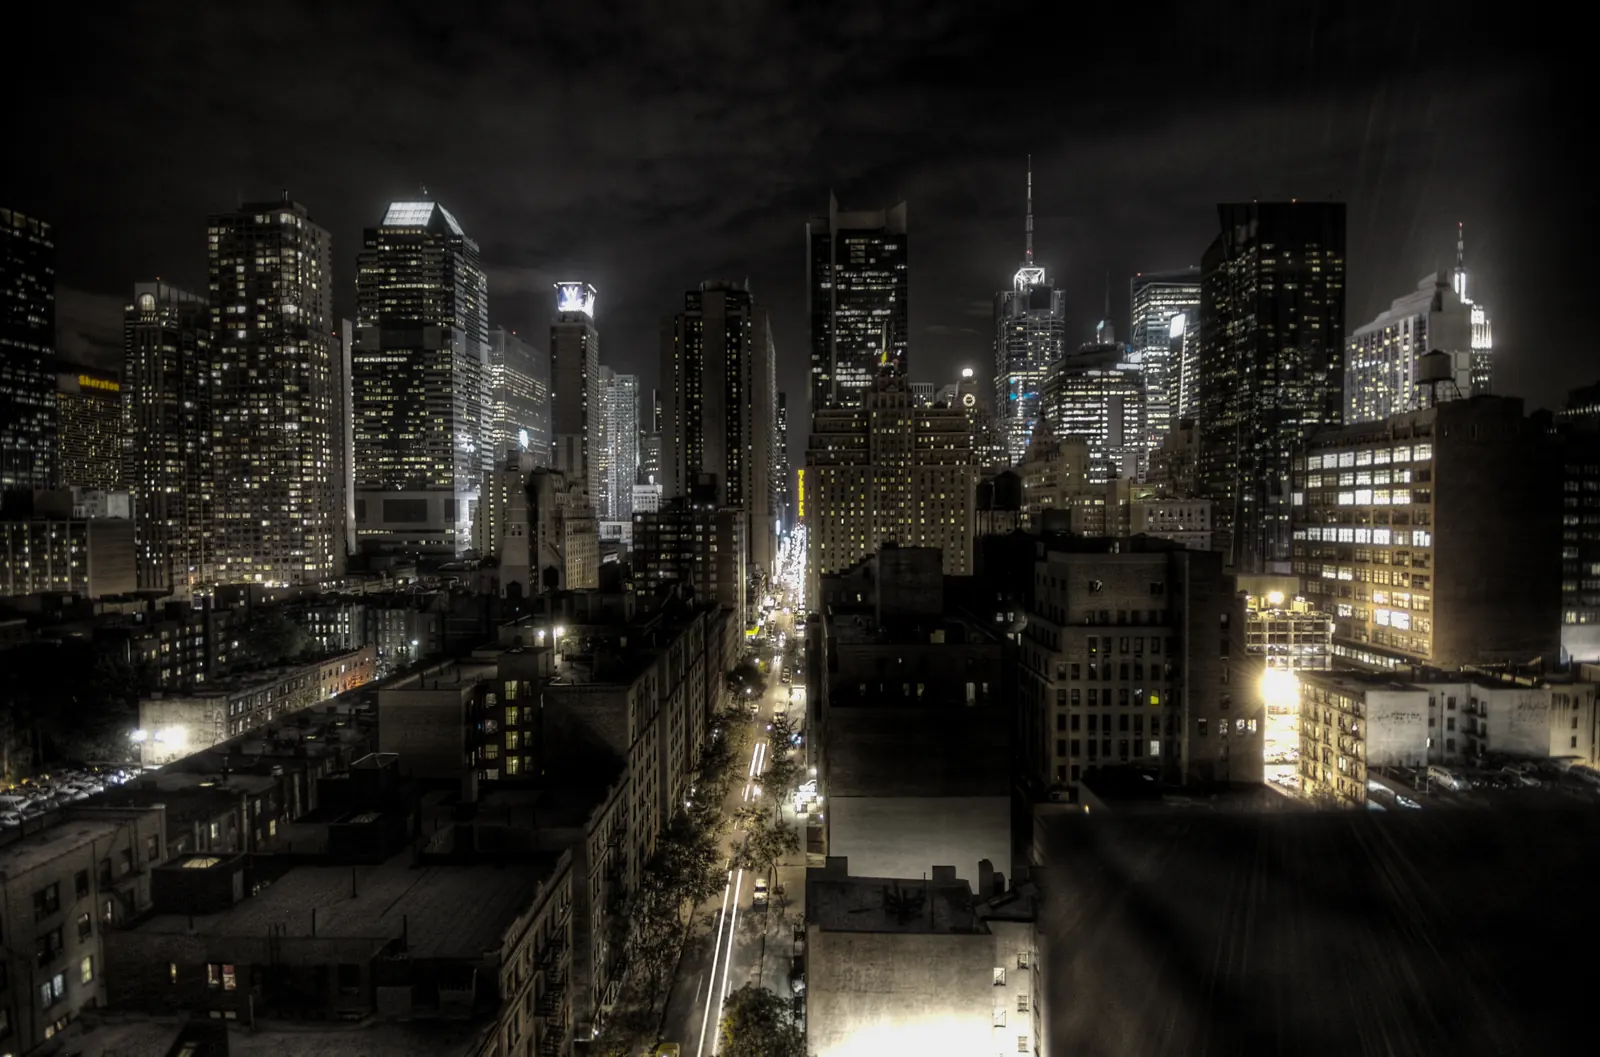
4. The Night Shift: Neon and Shadows
When the sun goes down, the city transforms. The harsh light of the day is replaced by neon signs, street lamps, and car headlights. This is where street photography gets cinematic.
Night photography requires a bit more technical "know-how." You’ll likely need to bump up your ISO, but don’t fear the grain, in street photography, grain adds grit and character.
Focus on the contrast between the deep blacks of the shadows and the vibrant colors of the city lights. Wet pavement acts as a giant reflector, doubling the amount of light and color in your frame. For more on how to handle difficult lighting, you can see how we analyze evening photography news for the latest gear trends that help with low-light performance.
5. Movement and Motion Blur
Cities are defined by movement. Why try to freeze everything? A sharp subject in a sea of blurred people conveys the frantic pace of urban life.
To do this, use a slower shutter speed (around 1/15th or 1/30th of a second). You’ll need a steady hand or a nearby lamp post to lean against. If you can keep the camera still while a crowd rushes past, you’ll get a haunting, "ghost-like" effect where the environment is tack-sharp but the people are a blur of motion.
Essential Gear for the Urban Photographer
In street photography, less is almost always more. You want to be invisible, or at least, not look like a "professional photographer" on a high-budget shoot.
- Mirrorless Cameras: They are smaller, quieter, and less intimidating. In 2026, the tech has reached a point where ultra-high resolution isn't always the most important factor, portability is king.
- Prime Lenses: A 35mm or 50mm lens is the gold standard. They are fast (great for low light) and force you to move your body to get the shot, which makes you a better observer.
- Comfortable Shoes: This isn't a joke. You will walk five to ten miles in a single session. If your feet hurt, your creativity will die.
Mastering the Technical Side
While street photography is about "vibe," you still need to know your settings. If you’re constantly fiddling with your dials, you’ll miss the moment.
The "Sunny 16" Rule (And Its Modern Equivalents)
In bright daylight, try using Aperture Priority mode. Set your aperture to f/8 or f/11. This gives you a deep depth of field, meaning more of your scene will be in focus. If you're shooting in that beautiful late afternoon light, be careful not to make the same golden hour mistakes that landscape photographers often fall into.
Zone Focusing
This is a "pro move." Manual focus your lens to a specific distance (say, 10 feet). Anything that walks into that 10-foot range will be in focus. This eliminates the "hunting" time of autofocus and lets you fire the shutter instantly.
The Ethics of the Street
Let’s address the elephant in the room: Is it legal? In most countries, including the US, you have the right to photograph anything that is visible from a public space.
However, legal doesn't always mean "cool."
- Be Respectful: If someone looks genuinely upset or asks you not to take their photo, just don't do it. There are eight billion people on earth; find another subject.
- The Smile Technique: If someone catches you taking their photo, don't look away guiltily. Smile, nod, or even show them the photo. Most people are flattered or simply curious.
- Don't Punch Down: Avoid taking photos of people in vulnerable situations (homelessness, injuries, etc.) unless you are doing a specific documentary project with a higher purpose.
For more deep dives into the philosophy of photography, check out PhotoGuides.org.
Post-Processing: Bringing the City to Life
The raw file is just the beginning. Urban environments can often look a bit "flat" straight out of the camera because of the gray concrete and smog.
When editing, focus on:
- Contrast and Shadows: Crushing the shadows slightly can add drama.
- Color Grading: Use split-toning to add blues to the shadows and oranges to the highlights for that classic cinematic look.
- AI Tools: We’ve seen a massive shift in how we process images recently. Check out these AI photo editing tools to see how you can speed up your workflow.
If you want a powerful yet simple way to edit your street shots, I highly recommend using Luminar. Its AI-driven accent tools are incredible for pulling detail out of a chaotic street scene without making it look "over-processed."
Overcoming Your Fear
The biggest barrier to street photography isn't gear or lighting; it's fear. The fear of confrontation or looking weird.
Here’s a secret: People are mostly in their own worlds. They are thinking about their grocery lists, their jobs, or their phones. They aren't thinking about you.
Start by wearing headphones (even with no music playing). It creates a "bubble" around you and makes you feel more like an observer and less like an intruder. Eventually, the camera will feel like an extension of your arm, and the fear will be replaced by the thrill of the hunt.
How to Keep Improving
Street photography is a muscle. If you don't use it, it gets weak. Try a "Project 365" where you take one street photo every day for a year. Or, head over to blog.edinchavez.com to see behind-the-scenes stories of professional shoots in the field.
If you’re serious about leveling up your game, you need to invest in your education. At Shut Your Aperture Learn, we offer deep dives into everything from composition to the technical nitty-gritty of your specific camera body.
Final Thoughts
The city is constantly changing. A street corner that looks boring today might be a masterpiece tomorrow under different light or with a different person walking by.
Don't wait for the "perfect" day. Grab your camera, put on your walking shoes, and go see what the world has to offer. Whether you're capturing the grand architecture for Edin Fine Art or the grit of a rainy alleyway, every shot you take is a piece of history.
Get out there and shut your aperture.


