Best Photography Spots in Acadia National Park: 5 Top Locations With GPS
Updated
The best photography spots in Acadia National Park are not all the same kind of outing. Cadillac Mountain needs its own access plan. Bass Harbor has a small parking lot. Jordan Pond rewards patient composition, while the ocean stops demand respect for waves and slippery granite. This free guide keeps the route to five places, with named GPS landmarks, Maps links, access notes and settings you can adjust to the actual light.
Use these pins to find the named landmark or trailhead, not as exact tripod positions. Stay on established routes, check NPS safety guidance and current closures, and keep room in the plan for weather and full parking lots. A photograph is not worth a wet-rock scramble, a blocked road or a rushed return in darkness.
Jump to the five spots
1. Cadillac Mountain Summit
 Save
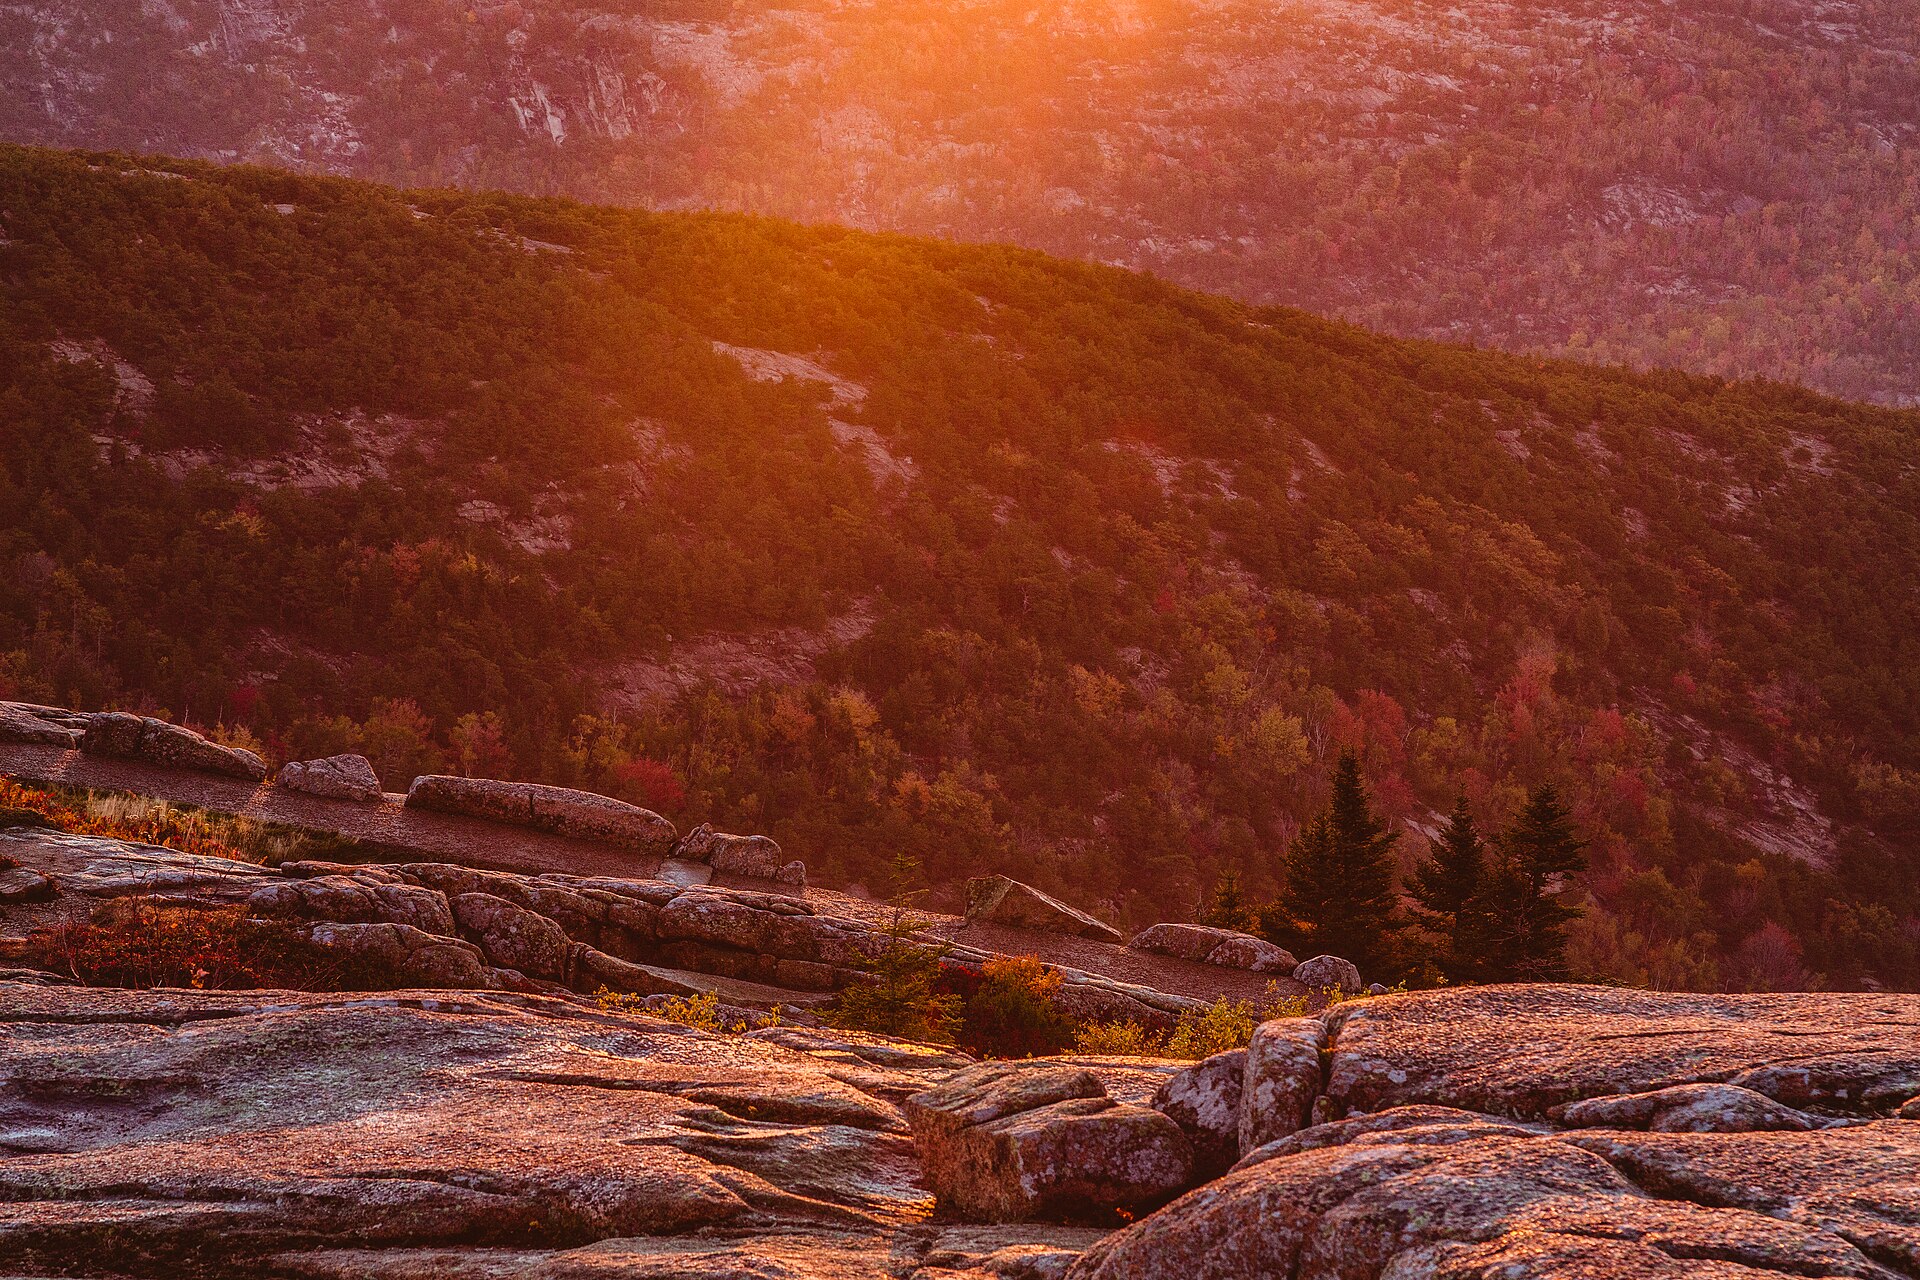
Cadillac Mountain gives you granite foregrounds, wooded islands and a wide view across Frenchman Bay. Instead of trying to include the whole panorama, decide what carries the photograph: the shapes of the islands, the color in the sky or the texture of the nearby rock. A longer lens can simplify the island layers, while a wide-to-normal zoom gives more space to a carefully chosen foreground. Sunrise is a good reason to be ready early, not a promise of clear horizons or rich color.
Access: For 2026, NPS requires a vehicle reservation to drive Cadillac Summit Road from May 20 through October 25. The $6 reservation is separate from the park entrance pass. Thirty percent of sunrise and daytime reservations are released at 10 am Eastern 90 days ahead; 70 percent at 10 am Eastern two days ahead. Sunrise entries have a 90-minute window, daytime entries 30 minutes, and neither permits re-entry. There is no Island Explorer service on this road. Check the official page for your dates, vehicle restrictions and current road status; the end of the reservation season does not guarantee the road is open. NPS details.
Composition and safe starting settings: NPS describes paved walks and overlooks at the summit, but not an entirely flat, barrier-free summit experience. Stay on durable surfaces and respect restoration areas. Set up a tripod where people can pass. Wind can undermine sharpness, so review a magnified frame and shorten the exposure or raise ISO when needed. A starting aperture around f/8 to f/11 works for many daylight landscapes; use focus and depth of field deliberately rather than stopping down by habit. Carry a headlamp and warm layers for a pre-dawn visit.
Landmark GPS: 44.3525816, -68.2251036
Named destination: Cadillac Mountain
Cadillac Mountain, Bar Harbor, ME 04609, USA
Open Cadillac Mountain in Google Maps
2. Bass Harbor Head Light Station
 Save
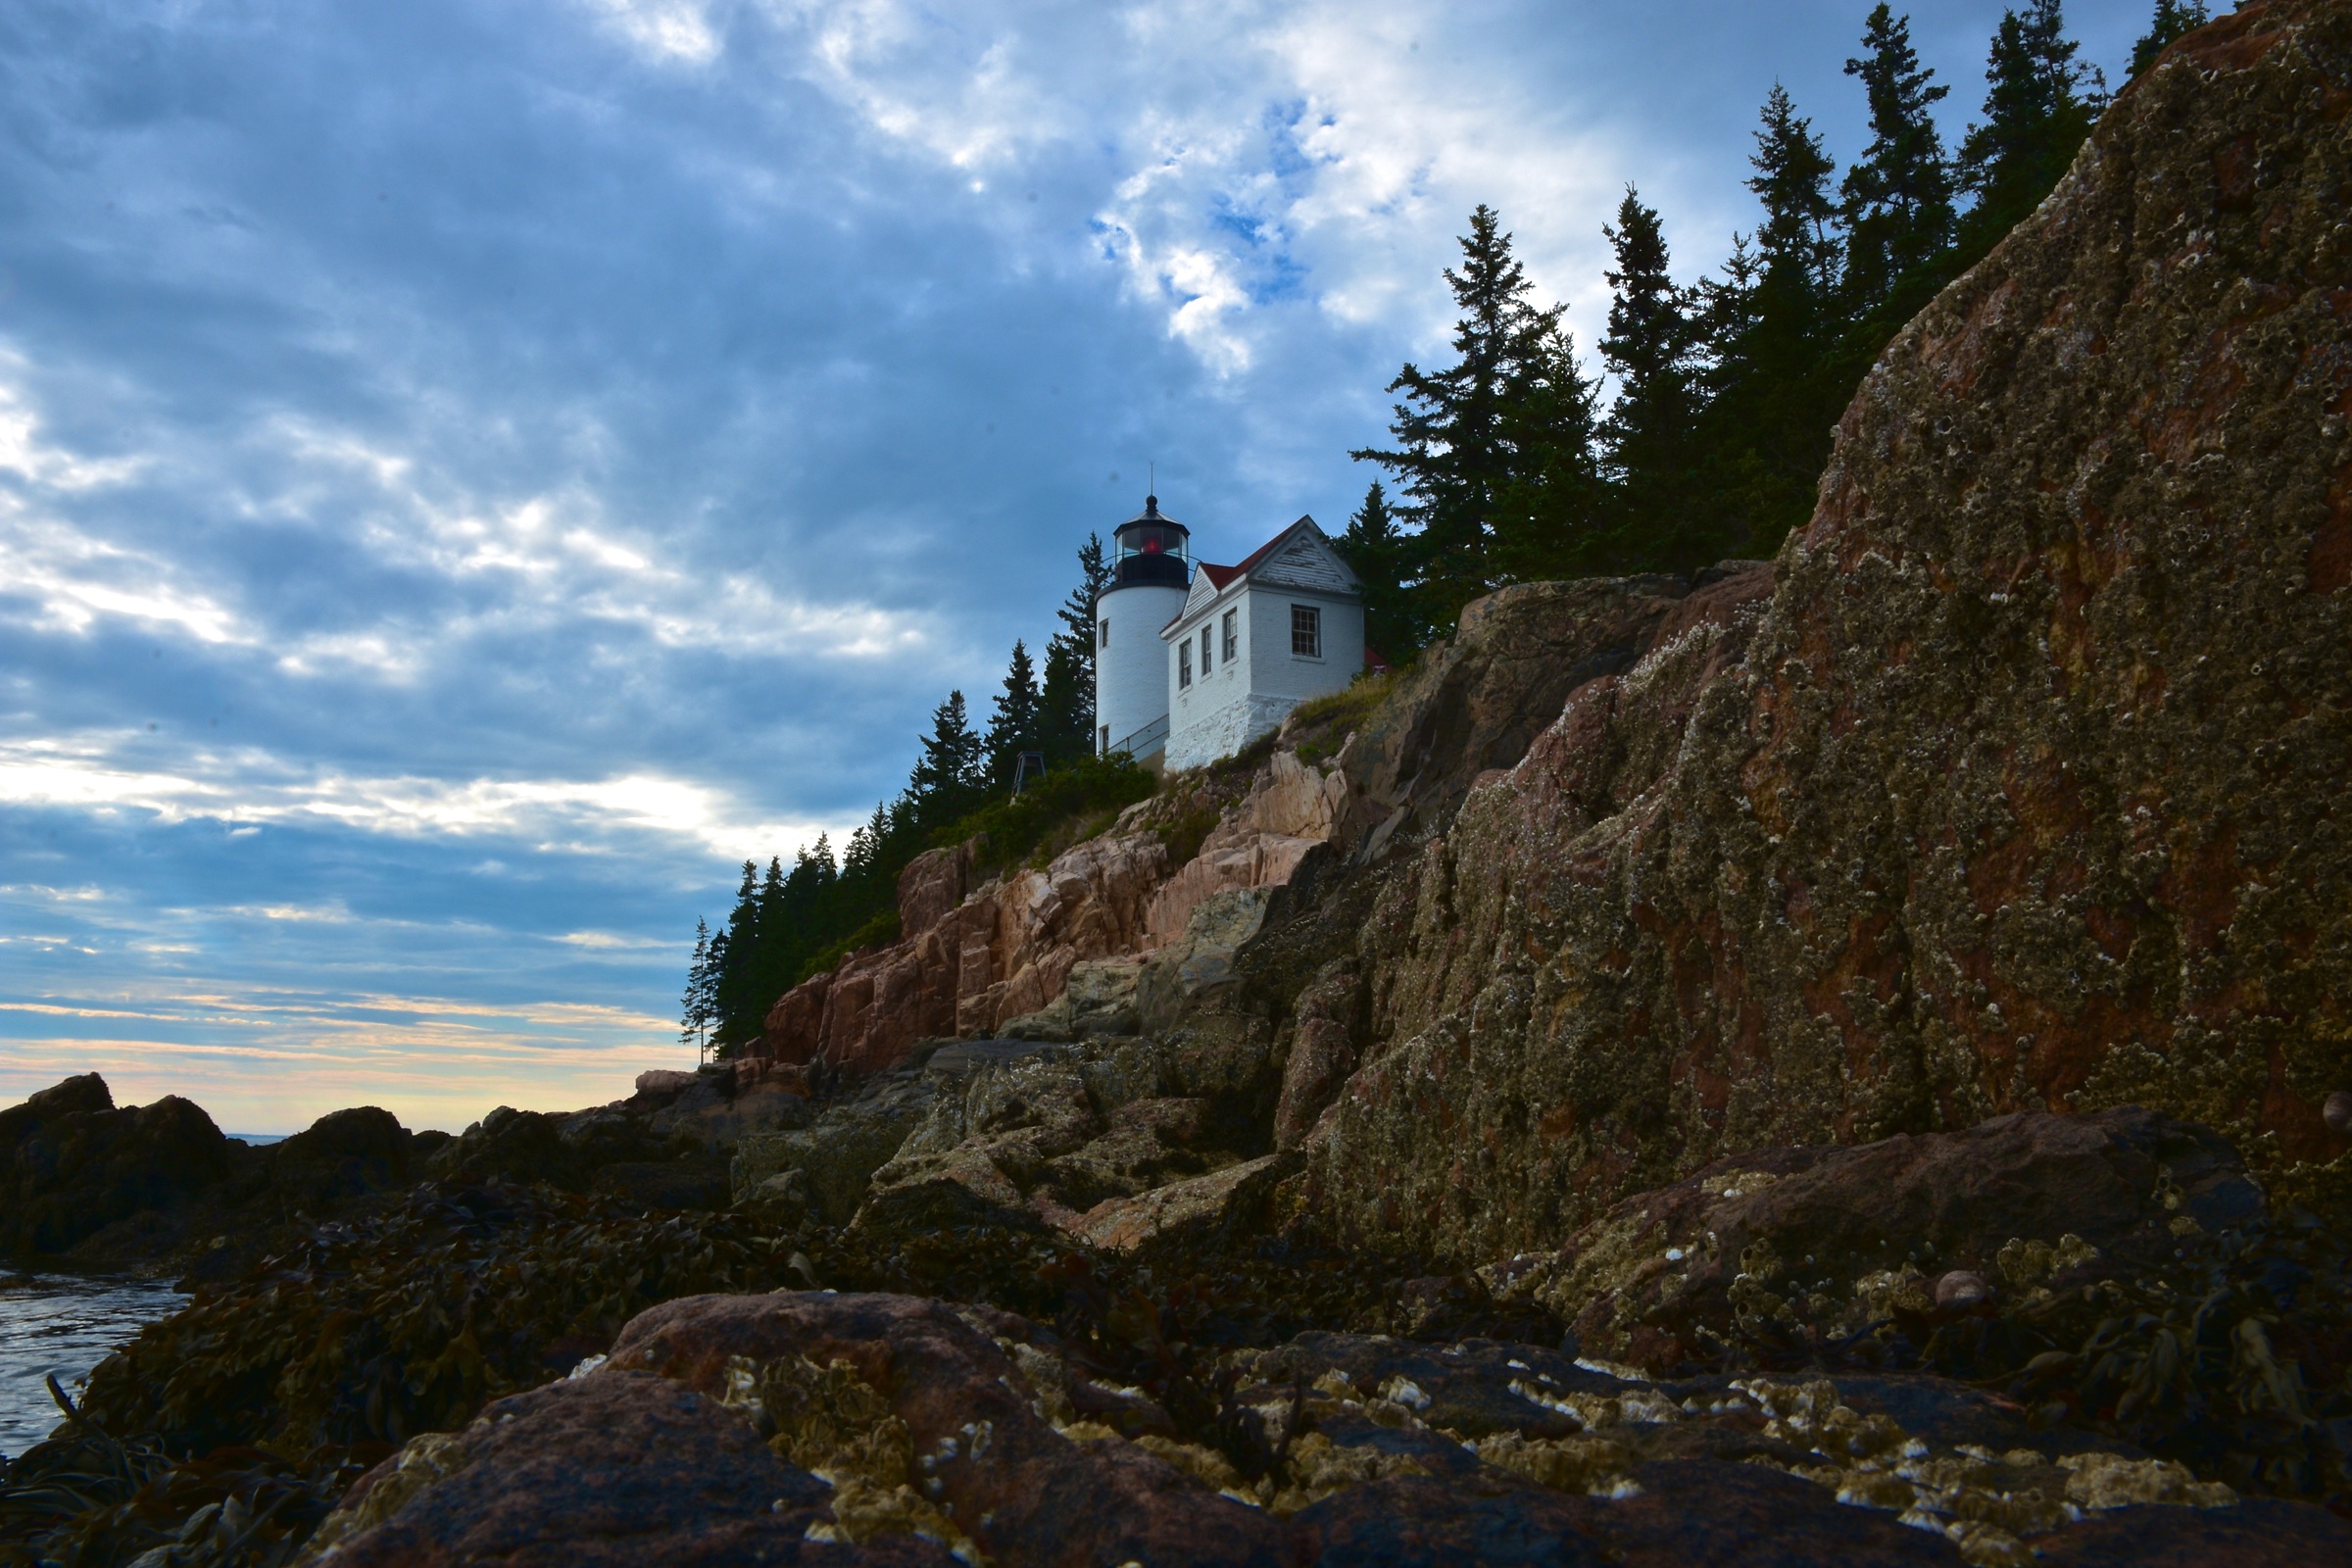
Bass Harbor’s white light tower above the rocky coastline is a strong subject in changing coastal light. A close view of the tower, a broader frame of the headland and a quiet detail of the granite are different photographs. Do not assume that the most shared rock-level composition is the only worthwhile one. Sunset and twilight can work well, but clouds, season and your legal viewing position decide where the bright sky actually falls in the frame.
Access: The light station is in Tremont, at 116 Lighthouse Road. NPS warns that its single small parking lot can fill, especially near sunset, and prohibits roadside parking along the entrance road and 102A. Buses, trailers and RVs cannot use the narrow access road and lot. There is no public transportation to the light station. The tower’s interior is not open to visitors. Use the designated overlook, paved walkway and signed shoreline-view route rather than treating every rock as a photography platform. NPS details.
Composition and safe starting settings: NPS lists an accessible packed-gravel overlook, a steep paved lighthouse approach and a cliff-view route with 37 wooden steps and 27 stone steps. Choose what suits your mobility and the conditions. Avoid the old advice that you must scramble on shoreline boulders for the shot. Start with a normal zoom and a safe established viewpoint. Compare a shorter exposure that keeps water texture with a longer one only when your support and position are secure. Keep a cloth handy for spray and leave before the route becomes unsafe in darkness.
Landmark GPS: 44.2220514, -68.3373004
Named destination: Bass Harbor Head Light Station
116 Lighthouse Rd, Bass Harbor, ME 04653, USA
Open Bass Harbor Head Light Station in Google Maps
3. Jordan Pond
 Save
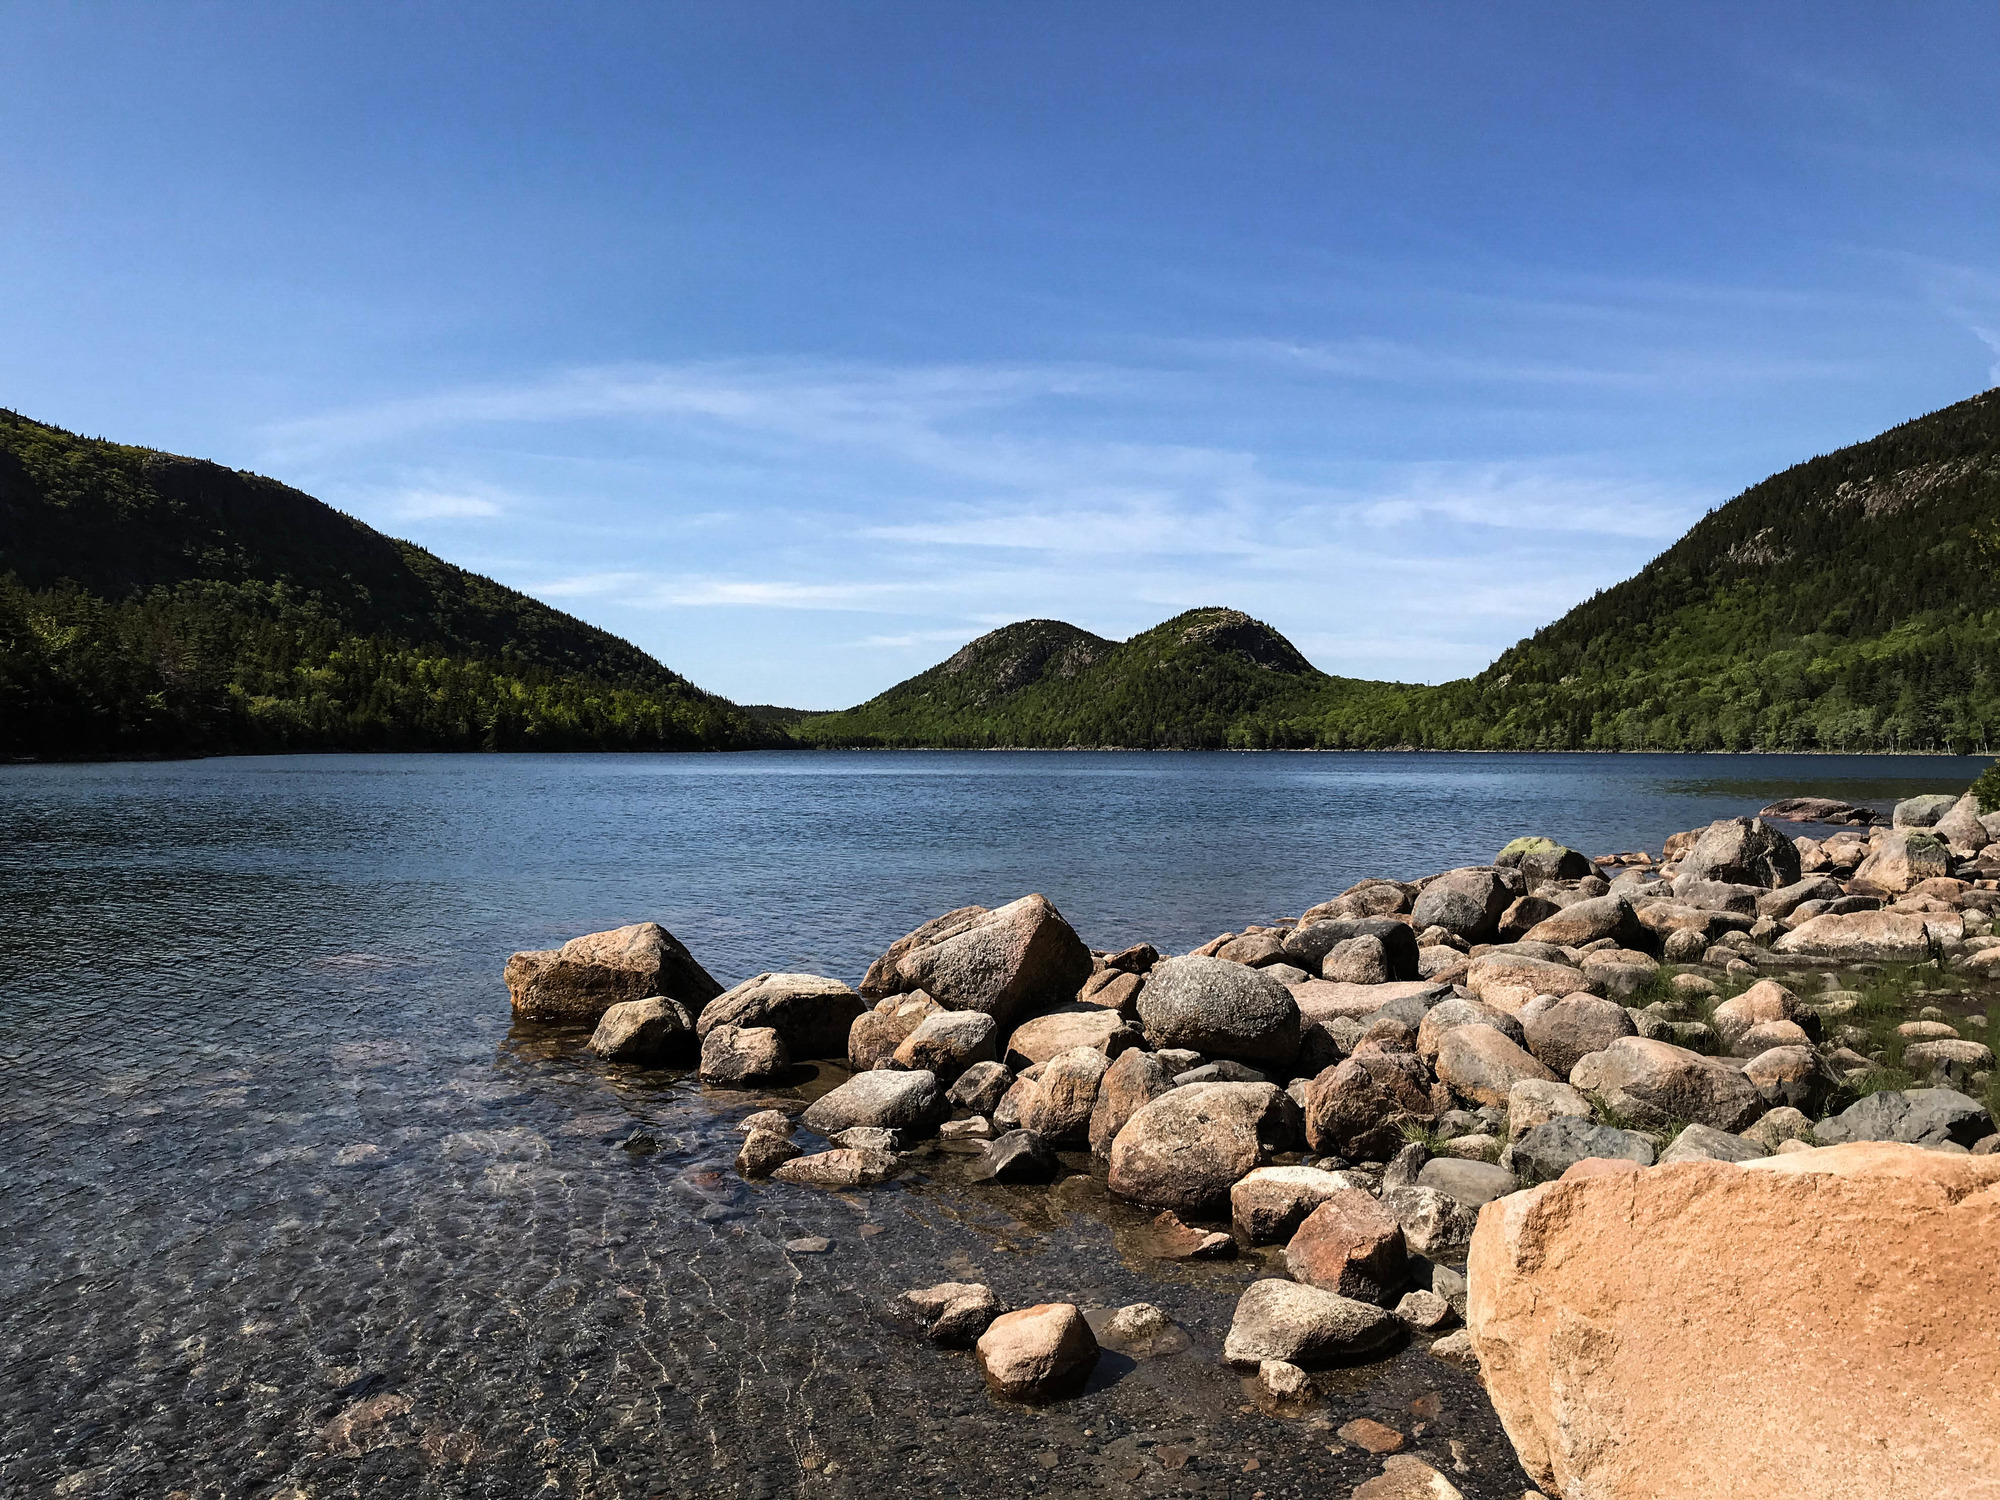
Jordan Pond is the quieter counterpoint to the coast. From the southern end, the Bubbles can anchor a composition across the water. Start with their relationship to the shoreline, then decide whether a reflection or a foreground rock adds anything. A perfectly still surface is never guaranteed. A breeze may break the reflection but add a useful pattern, and soft cloud can hold detail in both the sky and the surrounding trees.
Access: The pin below marks Jordan Pond Path Trailhead near the south shore, not the middle of the lake. You do not need to circle the whole pond for the familiar northward view. NPS says the area is reached from the two-way portion of Park Loop Road and is served by the seasonal Island Explorer. Afternoons and parking lots can be congested. Some paths offer accessible views, but conditions vary. Check the current trail and transport information instead of assuming every shoreline approach is easy. NPS details.
Composition and safe starting settings: Jordan Pond supplies drinking water to Seal Harbor. No swimming or paddleboarding is allowed, and photographers should not wade in to move a foreground or clear a branch. Stay on designated paths and respect revegetation areas. Boardwalks and rocks can be slippery. Try f/8 to f/11 and low ISO for a stationary frame, then set the shutter for the light and moving foliage. Rotate a polarizer while watching the reflection: removing all surface reflection can erase the very feature you came to photograph.
Trailhead GPS: 44.3229493, -68.2537108
Named destination: Jordan Pond Path Trailhead
Seal Harbor, ME 04675, USA
Open Jordan Pond Path Trailhead in Google Maps
4. Otter Cliff
 Save
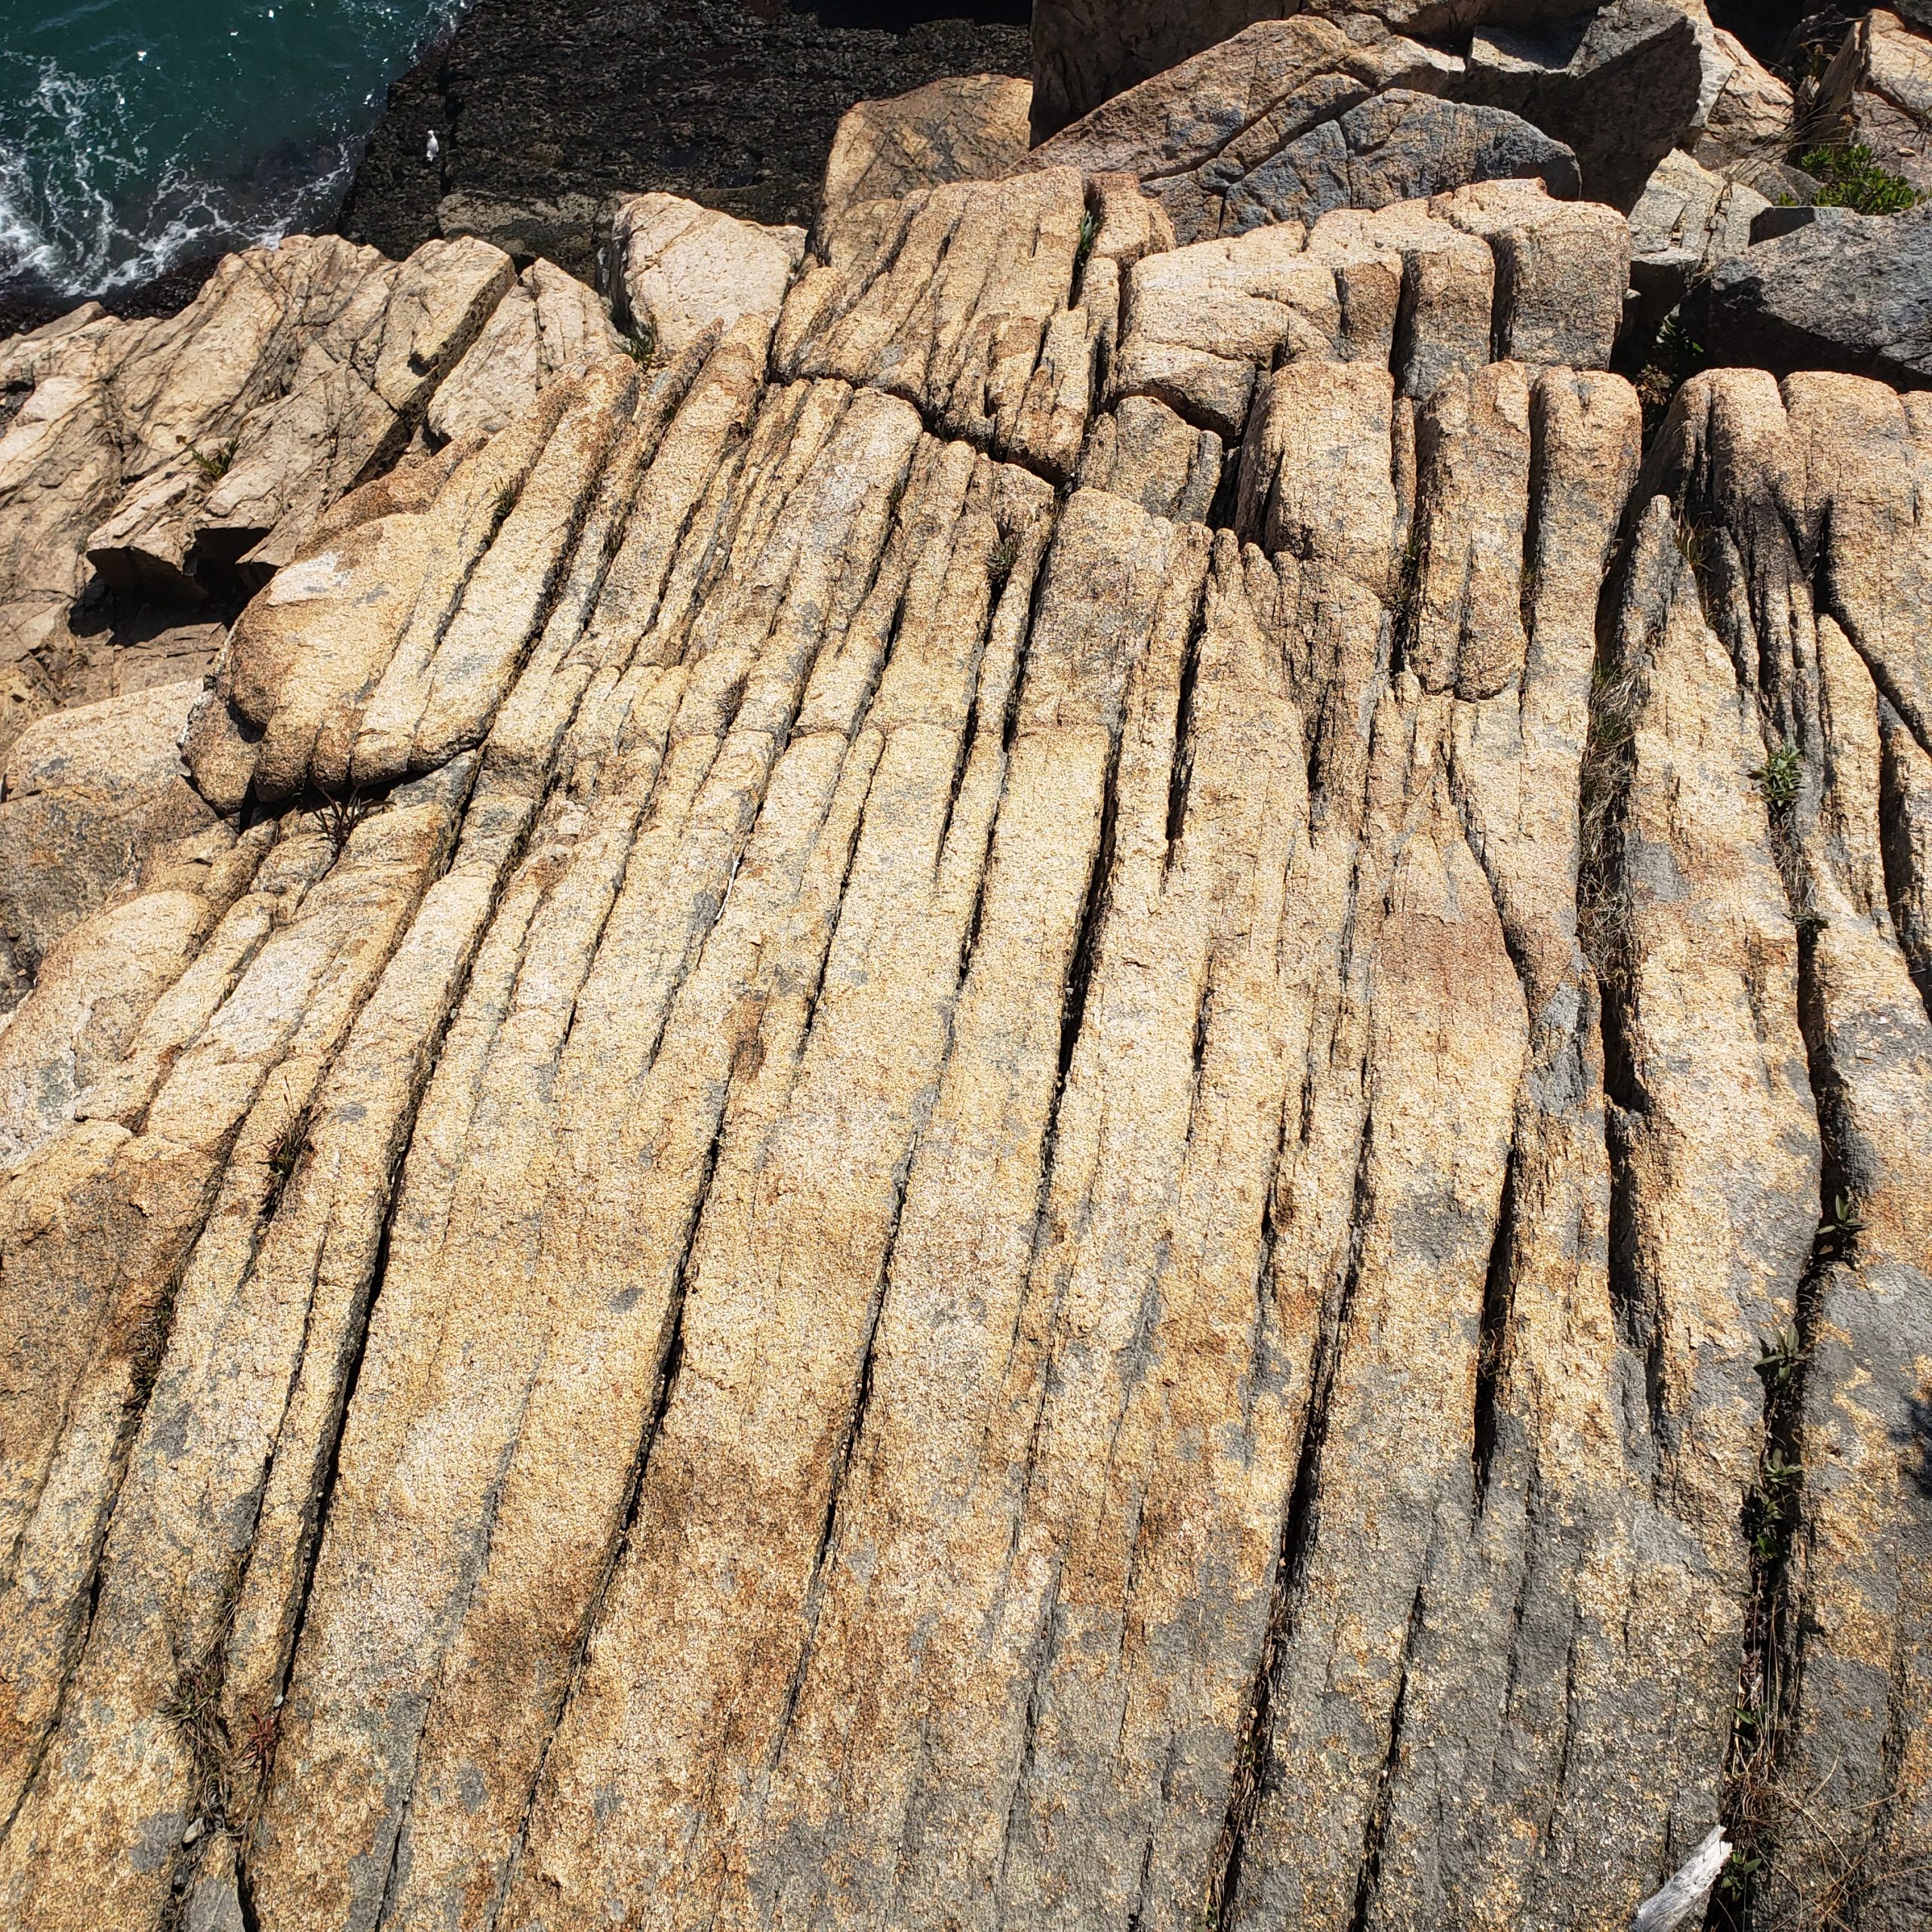
Otter Cliff brings the shape of the coast into the picture: dark evergreens, pink granite and the ocean beyond. Look along the coastline rather than straight down from an exposed edge. A longer view can show the relationship between cliff and water without needing a risky foreground. Early light is an option along this side of the park, but a cloudy day can be just as useful for studying rock color and the pattern of the surf.
Access: Use designated parking and Ocean Path to reach the area. NPS describes Ocean Path as a mix of paved, packed-gravel and uneven rocky sections, with stairs and steep drops near the cliffs. The full path is 2.2 miles one way, 4.4 miles round trip; a short stop here is not the same outing as walking the whole route. Check transport and road status. Keep camera bags and tripod legs clear of the path and leave space for people to pass without stepping toward the edge. NPS details.
Composition and safe starting settings: Do not descend cliffs or follow climbers’ access routes to reproduce a photograph. NPS warns that high tide and heavy seas increase danger here. A dry-looking ledge is not proof it is safe from a wave. Work well back from exposed edges, watch the ocean and turn around when conditions change. Try a faster shutter to separate individual waves, then consider a longer exposure from a protected established viewpoint. Use a normal zoom first; a clean, distant composition beats a dramatic foreground that puts you in danger.
Landmark GPS: 44.3106773, -68.1890329
Named destination: Otter Cliff
Otter Cliff, Bar Harbor, ME 04609, USA
Open Otter Cliff in Google Maps
5. Thunder Hole
 Save
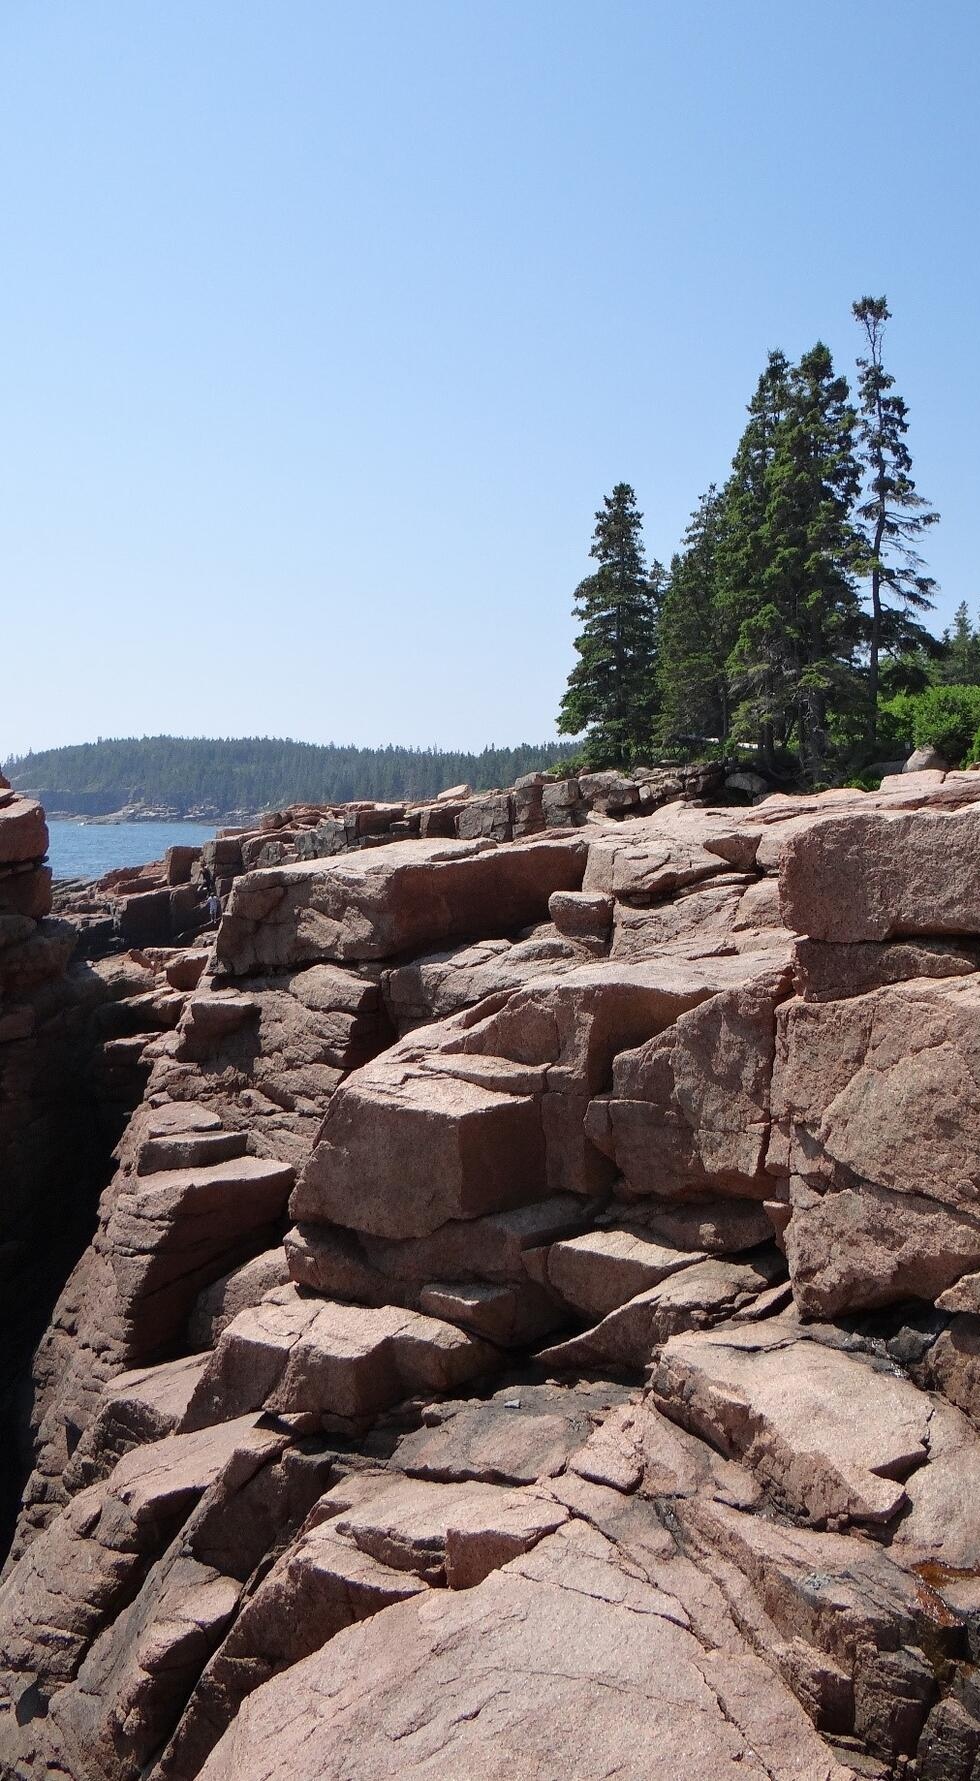
Thunder Hole is a narrow inlet where waves can force air out with a loud report. It is a place to watch changing water, not a scheduled performance. NPS recommends one to two hours before high tide for the best chance of hearing the roar, but the tide alone cannot guarantee it. Wave direction, wind and sea state matter. Quiet water is still worth a photograph when the granite shapes and color carry the composition.
Access: The site has parking on Park Loop Road, a seasonal Island Explorer stop and access from Ocean Path. An upper viewing deck is wheelchair accessible; the lower route involves 55 steps and is not accessible. NPS warns that lower decks and stairs can be wet or icy and that parts of the walkway close during storms. Use signed open viewpoints, obey barriers and check current notices. A tide plan does not override a closure. NPS details.
Composition and safe starting settings: Keep a safe distance from spray and never turn your back on the sea while concentrating on a screen. NPS reports spray over 40 feet high and warns of rogue waves even in calm weather. Do not climb beyond rails or step onto wave-washed granite for a lower camera angle. A short shutter can freeze the water’s form; a longer one may suit quieter movement. Shield the camera, check the lens and keep enough awareness to leave immediately if the sea or footing changes.
Landmark GPS: 44.3206118, -68.1885579
Named destination: Thunder Hole
Bar Harbor, ME 04609, USA
Open Thunder Hole in Google Maps
Plan the route around access, not a checklist
Five locations do not mean five perfect-light stops in one day. Start with the photograph that matters most, then leave room for parking, walking and weather. Cadillac has a timed vehicle-entry system during its reservation season. Bass Harbor is a separate west-side drive with limited parking. The Ocean Path stops can share a route, but walking between them adds time and uneven footing. Do not treat map pins as a promise of parking beside the composition.
Use official NPS fees and pass information for the people traveling in your party. The 2026 fee page lists standard entrance passes from $20 to $35 and a separate additional fee for non-US residents 16 and older unless admitted with an Annual or America the Beautiful Pass. Eligibility and pass type matter. Cadillac’s vehicle reservation is a separate requirement, not an entrance ticket.
Autumn color, sunrise and coastal weather deserve flexible plans. Foliage timing shifts from year to year; no fixed week guarantees peak color at Jordan Pond. Watch the actual forecast and recent conditions. Winter road closures, ice and shorter days can change a short outing into a serious one. Bring an offline map, water, warm and rain layers, a headlamp and enough time to return without rushing.
Camera settings that fit the light
Use RAW if you want more room to edit a bright sky and shaded granite. At each stop, choose the composition before changing filters. For daylight depth, f/8 to f/11 and a low ISO are useful starting points, not rules. Set the shutter from the meter and your intended water or foliage movement. Review the histogram, focus and frame edges. Bracket strong contrast when useful, from a stable safe position.
Long exposures are a choice, not proof of a better photograph. Wind, surf and moving leaves may make a shorter exposure more effective. An ND filter only helps when you need less light to reach the shutter speed you want. A polarizer can reduce glare, but check what it does to pond reflections and wide skies. Keep spray off the front element and avoid changing lenses in wind-driven moisture.
Gear to compare
A standard zoom, a dry lens cloth and weather protection cover many needs on this route. Add a longer lens when you want island layers or tighter coast details, not simply because a gear list says so. Carry only what leaves room for safety essentials. A tripod helps in low light only when it does not block a path or push you toward an unsafe edge.
Photography rules and care for the park
Read Acadia’s current photography policy before planning an organized shoot or workshop. Most shoots with eight or fewer people need no permit when they occur in public areas, use only hand-carried equipment, require no exclusive use, have no adverse impact and add no administrative costs. Do not assume commercial use automatically needs a permit, or that a small camera makes every activity exempt. Workshops and guiding can have separate requirements.
Keep drones out of the plan unless you have verified the specific park authorization required. Stay on established routes, respect revegetation areas, carry out litter and do not move wildlife or natural features for a frame. Around the coast, check tides and weather, keep watching the water and honor every closure. Around Jordan Pond, protect the drinking-water supply and never wade for a composition.
Frequently asked questions
Do I need a vehicle reservation for Cadillac Mountain in 2026?
Yes, to drive Cadillac Summit Road from May 20 through October 25, 2026. The $6 vehicle reservation is separate from a park entrance pass. NPS releases 30 percent at 10 am Eastern 90 days ahead and 70 percent at 10 am Eastern two days ahead. Recheck rules for later years.
Does the Island Explorer reach all five photography spots?
No. There is no Island Explorer service on Cadillac Summit Road and no public transportation to Bass Harbor Head Light Station. Jordan Pond and Thunder Hole have seasonal bus access. Check current routes and dates rather than assuming a bus runs before sunrise or after sunset.
Do I need to scramble on rocks to photograph Bass Harbor Head Light?
No. NPS provides designated overlooks and viewing routes. Shoreline scrambling is not required for a worthwhile photograph and can be dangerous on slippery granite or near waves. Choose an established viewpoint that suits your mobility and the conditions.
When should I photograph Thunder Hole?
NPS suggests one to two hours before high tide for the best chance of hearing the roar, but it is not guaranteed. Light, wave direction and weather affect the scene. Remain on open designated viewpoints and obey closures; rogue waves can occur even in calm weather.
Can I wade into Jordan Pond for a reflection photograph?
No. Jordan Pond supplies drinking water to Seal Harbor. Do not wade or swim for a composition. Work from established paths and permitted viewpoints, avoid restoration areas and take care on slippery rocks and boardwalks.
More photography planning
This free guide stays at five locations. A full Acadia field guide is in production. More spots and field notes will follow. Browse the National Parks Photography Guides for related trips, and the Photography Academy for lessons to practice before you go.
Access facts checked against NPS in October 2026. Photographs illustrate their named subjects, not guaranteed weather or present-day access. Settings are starting points. Individual photo credits and licenses apply to the images credited below them. No claim is made to original U.S. Government works.
What to Pack
A landscape kit built around wide views, steady support, and changing light is a useful starting point. Compare the gear and choose what fits your camera, budget, and conditions. These links lead to B&H Photo Video and Amazon.
| What & Why | B&H | Amazon |
|---|---|---|
Sony 16-35mm f/2.8 GM Check the camera mount before buying. Choose a focal length that fits the photos you plan to make. | Shop B&H → | Shop Amazon → |
Peak Design Travel Tripod Check the load rating, packed size and local tripod rules before buying. | Shop B&H → | Shop Amazon → |
Breakthrough X4 CPL Check the filter type and lens thread size before buying. Use a filter only when the effect fits your photo. | Shop B&H → | Shop Amazon → |
Breakthrough X4 10-stop ND Check the filter type and lens thread size before buying. Use a filter only when the effect fits your photo. | Shop B&H → | Shop Amazon → |
Sony NP-FZ100 battery Use the battery type specified for your camera. Bring a spare if your shooting plan calls for one. | Shop B&H → | Shop Amazon → |
SanDisk Extreme Pro 128GB Check the card format and speed requirements specified for your camera. | Shop B&H → | Shop Amazon → |
Koh microfiber cloths Compare this option with your current kit. Check compatibility and the product details before buying. | Shop B&H → | Shop Amazon → |
B&H and Amazon links are affiliate links. We earn a small commission on purchases at no extra cost to you.