Best Photography Spots in Bryce Canyon National Park: 5 Top Locations With GPS
Updated
The best photography spots in Bryce Canyon National Park begin with the amphitheater rim, but each view offers a different arrangement of hoodoos, forest and distant plateaus. This free route keeps the list to five places: Sunrise Point, Sunset Point, Inspiration Point, Bryce Point and Thor’s Hammer. Use the landmark GPS and Maps links to find the named destinations, then choose a safe, permitted position for the actual photograph.
Do not read a landmark pin as a tripod station or a promise of parking. Check NPS current conditions before driving or descending below the rim. Snow, ice, thunderstorms and trail closures can change a short photo stop. Photographs below show credited scenes, not guaranteed weather or current access.
Jump to the five photography spots
1. Sunrise Point
 Save
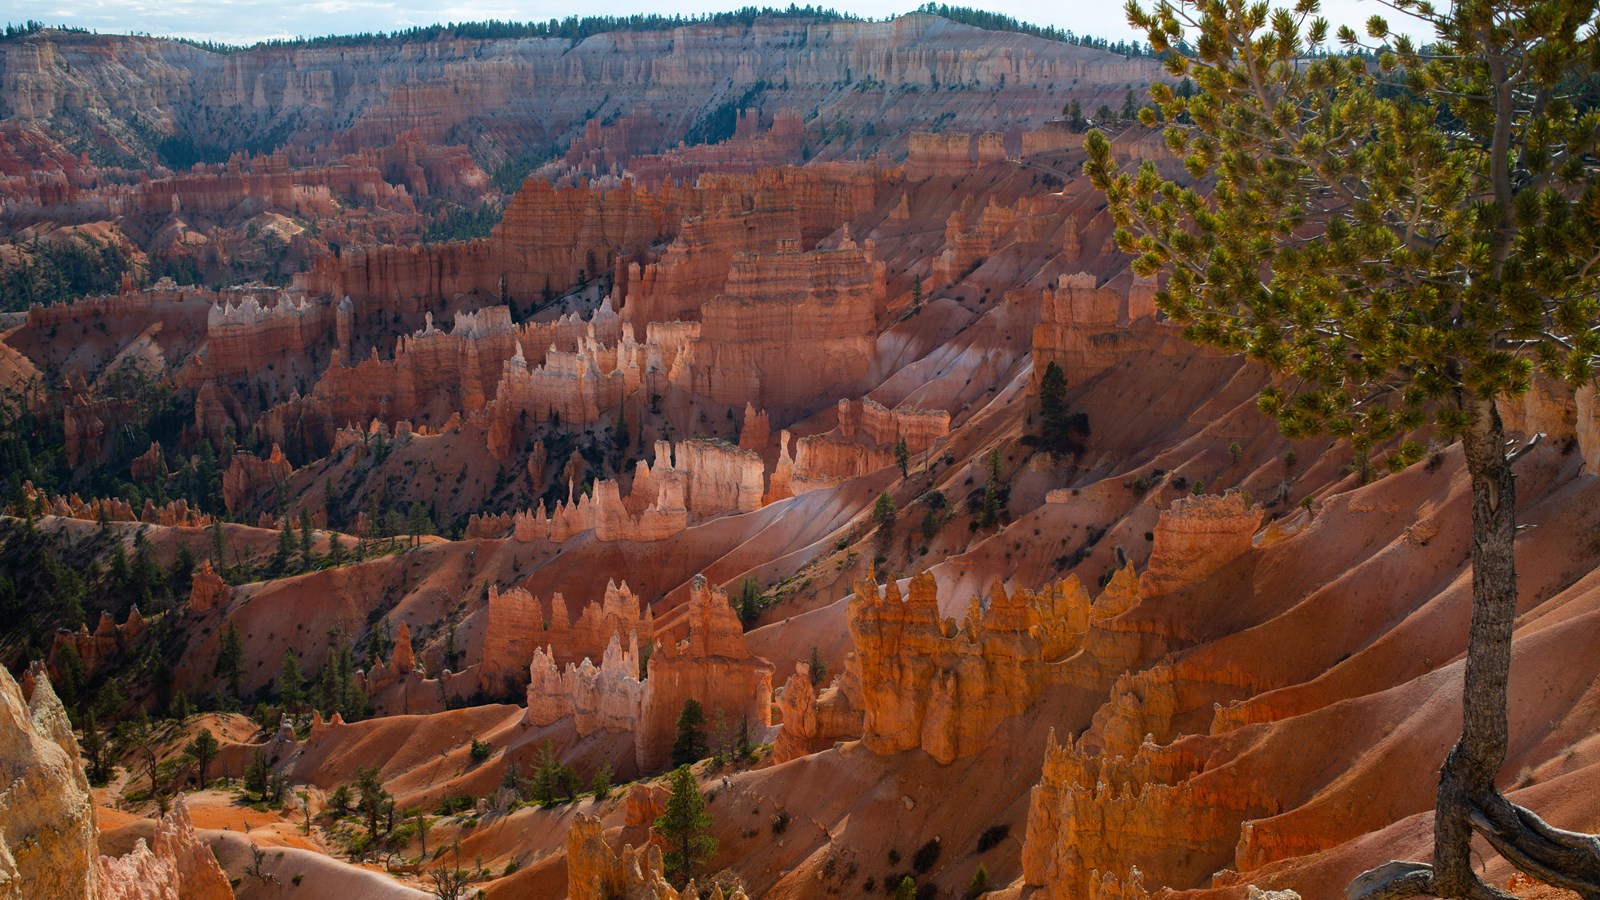
Sunrise Point is the northernmost of the four main amphitheater viewpoints. Look for relationships between the tall fins, smaller hoodoos and open space beyond them rather than trying to include every formation. A normal zoom can organize layers more clearly than an automatic ultra-wide frame. At first light, compare the warm rock faces with the shaded gullies. If the sky is blank, give it less space and let the rock carry the picture.
Access: NPS describes Sunrise Point at about 8,100 feet, slightly above the Rim Trail. It is a viewpoint, not the start of an obligatory canyon hike. The paved half-mile rim section between Sunrise and Sunset Points has minor elevation changes, although severe weather affects accessibility. Choose an open, established path and leave the exposed roots and fragile rim undisturbed. Do not climb onto a tree or rock edge to reproduce someone else’s composition. NPS destination details.
Composition and starting settings: Start around f/8 to f/11 at low ISO for daylight depth, then meter for the bright rock and sky. Review a magnified frame for focus and wind movement. A tripod can help before dawn, but it should not force people toward the edge. NPS notes that the viewpoint can work at both daybreak and day’s end, so the name should not limit your plan. A second visit with different cloud or direction of light may give a more useful frame than rushing to another stop.
Landmark GPS: 37.6282617, -112.1630026
Named destination: Sunrise Point, Bryce Canyon National Park, Utah
Open Sunrise Point in Google Maps
2. Sunset Point
 Save
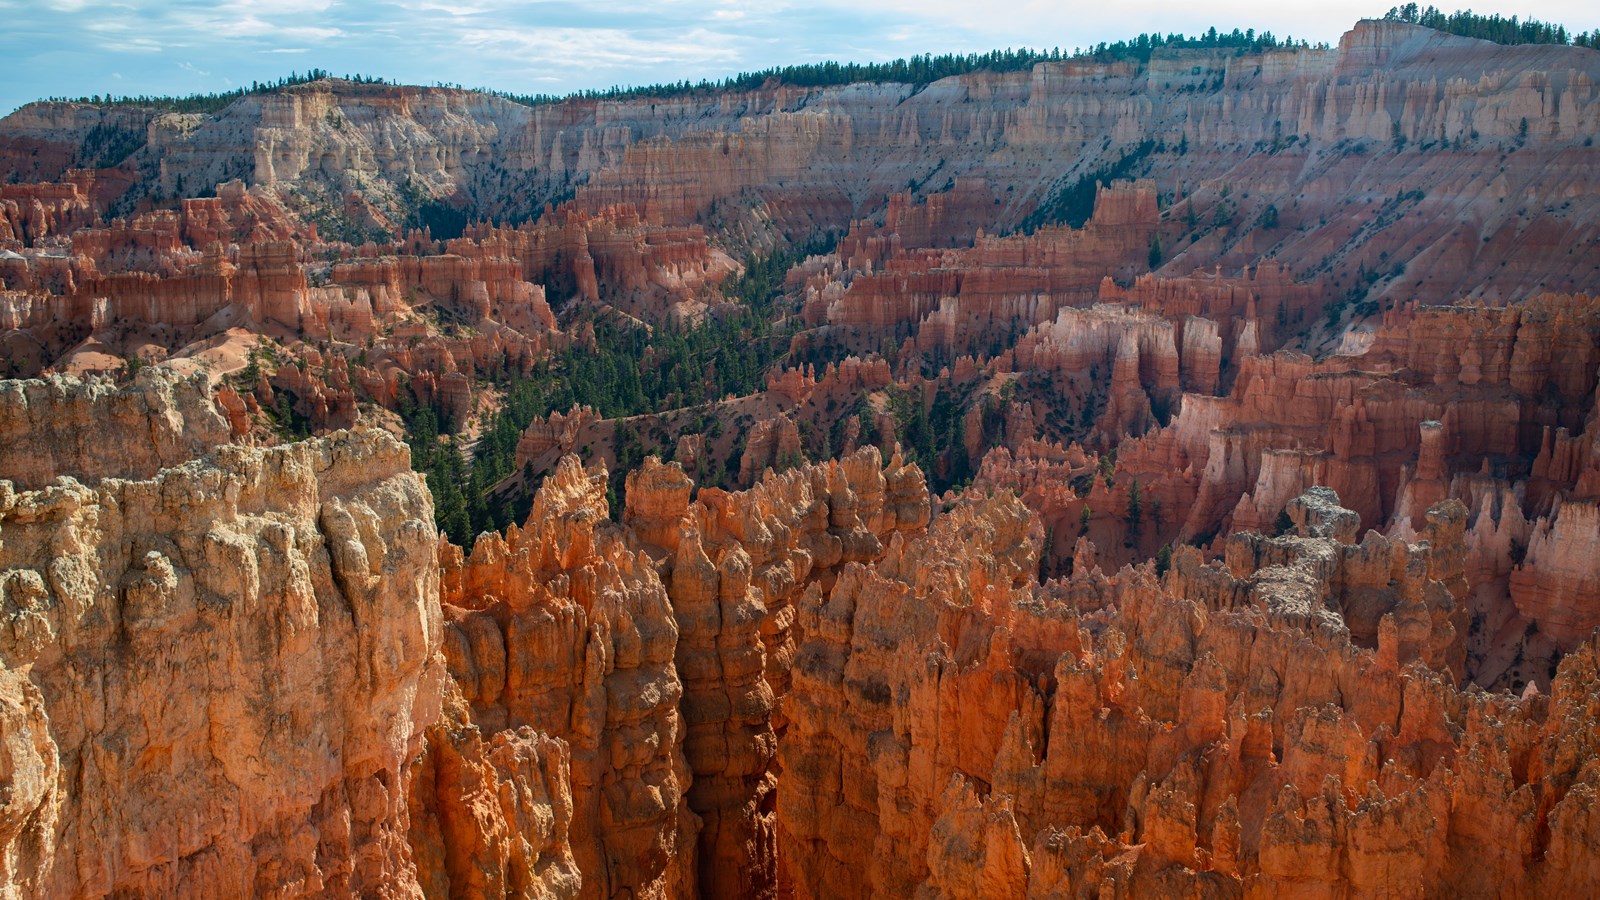
Sunset Point looks over the Silent City, where dense rows of hoodoos and fins create a busy field of shapes. Pick one strong diagonal or a brighter group of towers, then build the frame around it. Watch where dark trees cut across the rock; a small change along an open path can separate distracting overlaps. The view can be worthwhile in morning light as well as later in the day. Do not expect the point’s name to tell you exactly where the sun will sit.
Access: The Navajo Loop begins and ends here, but the overlook and a below-rim hike are different outings. The nearby paved Rim Trail connects to Sunrise Point. Use designated parking or the seasonal shuttle when it is running. Oversized vehicles have restrictions during shuttle operation. NPS identifies Thor’s Hammer below this viewpoint, particularly along the Two Bridges side of the Navajo Loop. Treat that as a separate trail decision, not a shortcut down the slope. NPS destination details.
Composition and starting settings: A midrange zoom around 24-70mm is a useful starting choice for the repeating formations; a longer lens can isolate a small patch of lit limestone. Try a frame without sky if the contrast is too strong. Keep a natural color balance and protect bright rock highlights. If you bracket exposures, keep the camera stable without blocking the overlook. At twilight, check the return route before concentrating on a long exposure.
Landmark GPS: 37.6233516, -112.1672079
Named destination: Sunset Point, Bryce Canyon National Park, Utah
Open Sunset Point in Google Maps
3. Inspiration Point
 Save
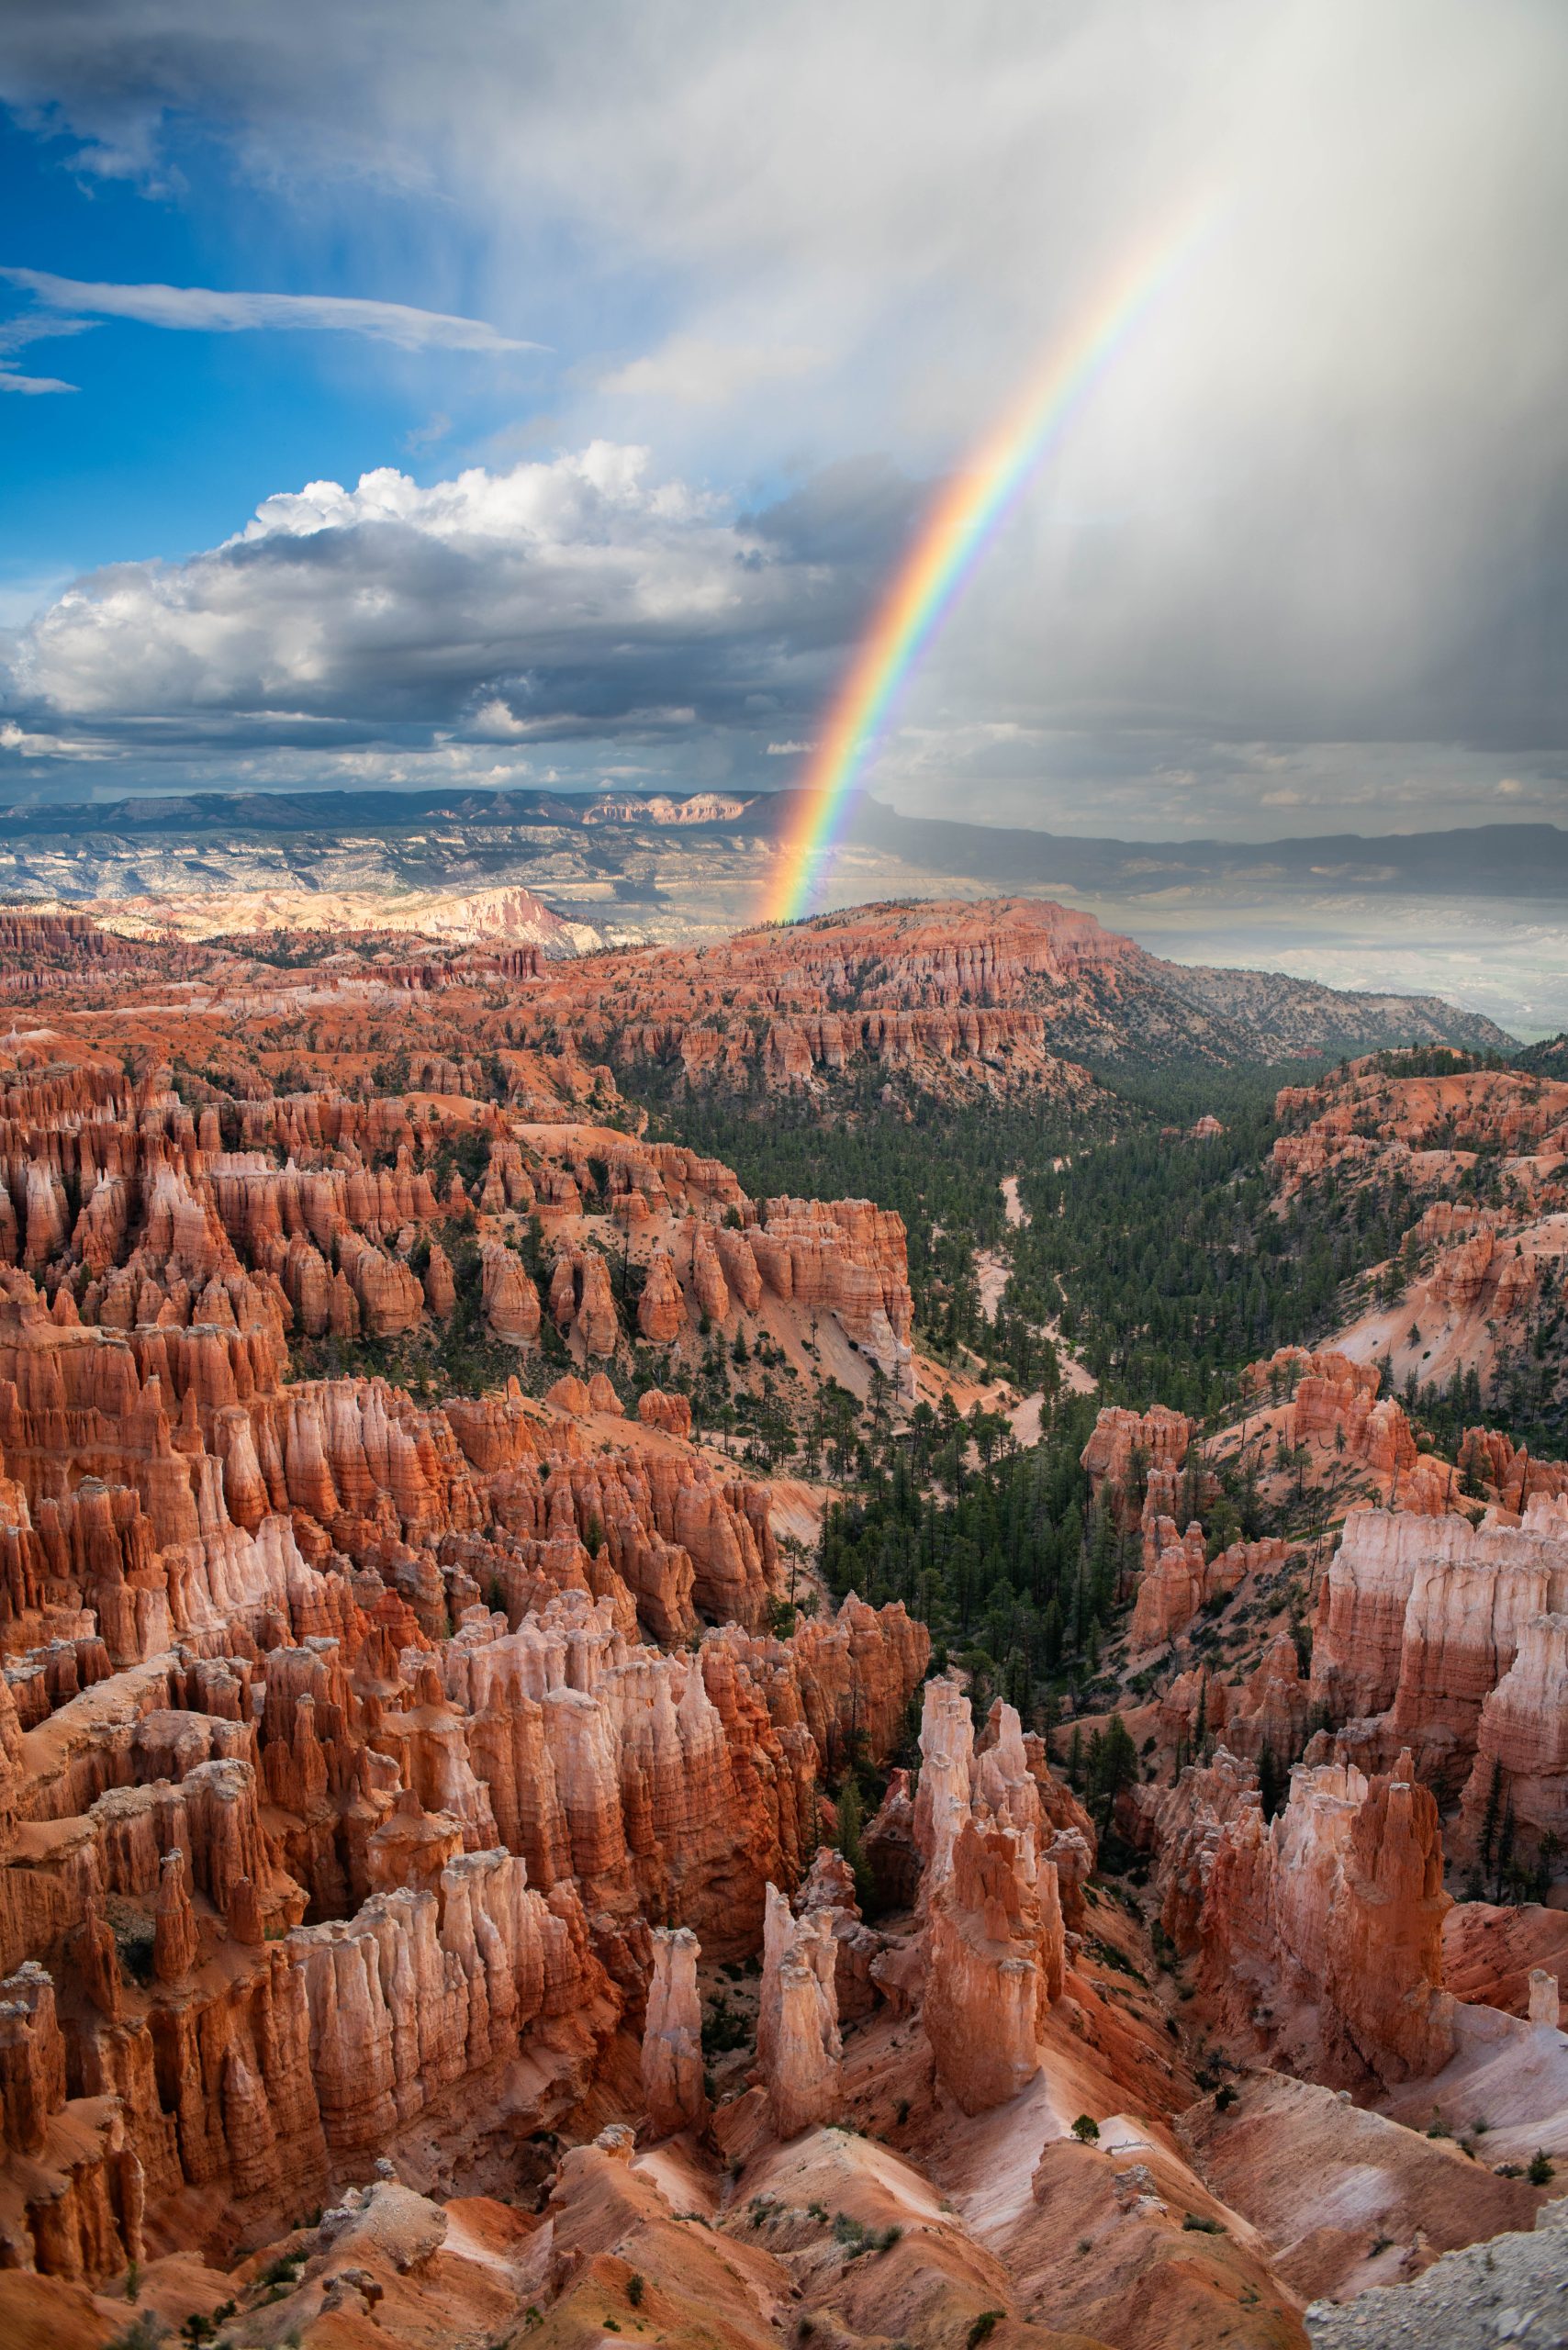
Inspiration Point offers three levels of overlook. Each changes the overlap of the amphitheater’s fins and hoodoos, so compare views rather than assuming the highest is always best. Look north toward the dense Silent City and use the darker forest to separate the orange and white rock. A tighter frame can show the rhythm of repeated towers. A wider frame can explain their relationship to the plateau, provided the foreground adds something.
Access: The GPS below marks Lower Inspiration Point, a named arrival/viewing landmark. It is not the uppermost view or the camera position of every photograph. NPS places the area just before mile 3 of the main park road. Stay on signed paths and behind barriers. The Rim Trail is about 0.7 miles from Inspiration to Sunset Point and 1.5 miles toward Bryce Point. NPS closes the Bryce-to-Inspiration section in winter because of narrow trail and snow cornices. NPS destination details.
Composition and starting settings: Use depth deliberately: f/8 to f/11 may suit a layered daylight landscape, but a distant detail may not need foreground sharpness. In gusty conditions, a shorter exposure and a modest ISO increase can beat a blurred low-ISO frame. Scan the corners for railings, stray branches or half-cut formations. Do not move beyond the rim barrier to eliminate one. Changes in cloud can create shifting light across the rock; wait and review instead of changing position constantly.
Landmark GPS: 37.6158212, -112.170205
Named destination: Lower Inspiration Point, Bryce Canyon National Park, Utah
Open Inspiration Point in Google Maps
4. Bryce Point
 Save
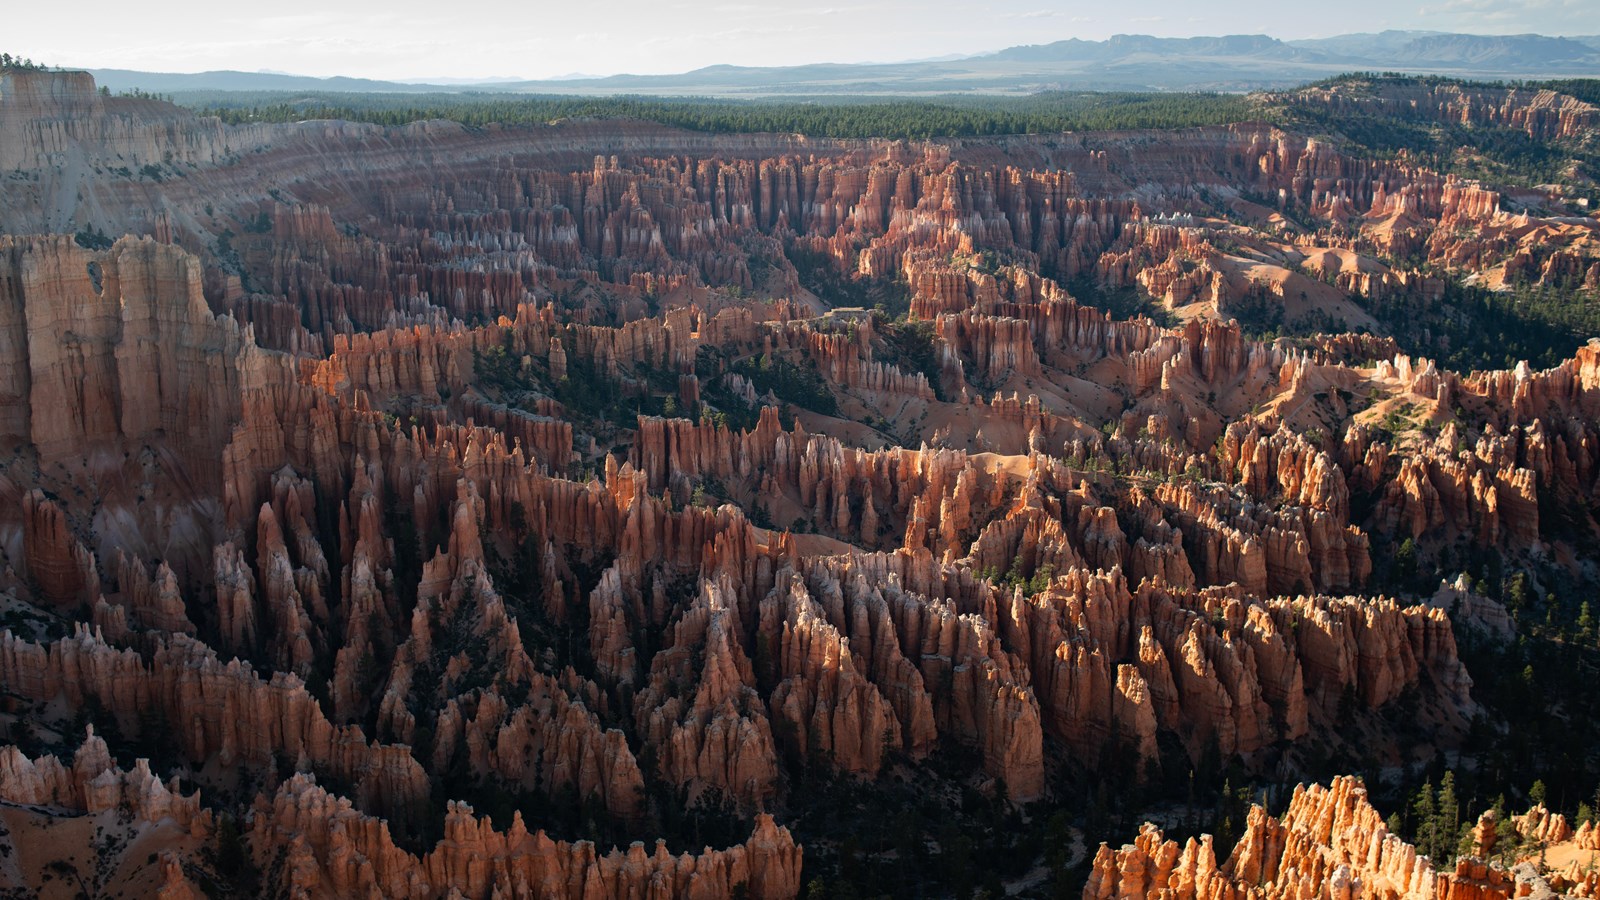
Bryce Point looks north across the length of the main amphitheater from its southern end. The scale can be hard to communicate with one wide frame. Start by identifying the layers: nearby white limestone, the red formations below, forest and distant plateau. Compare a broad landscape with a tighter section of hoodoos. Side light can reveal the depth of the gullies, while softer light lets color and repeated shapes take the lead.
Access: Follow the signed spur road from mile 3 of the main park road, subject to current closures. NPS describes a two-mile spur to the viewpoint. The pin below is the named scenic viewpoint rather than the similarly named bus stop or a generic road coordinate. The Rim Trail toward Inspiration Point closes in winter. The strenuous trails descending below Bryce Point are not necessary for the rim photograph and should not be added casually to a dawn stop. NPS destination details.
Composition and starting settings: For a panorama, overlap frames generously and keep exposure and white balance consistent. First check that a single composition cannot tell the story more clearly. Use a stable stance or tripod that leaves the path open. For individual formations, a normal-to-long lens often makes stronger shapes than including everything. Snow can lift the brightness of foreground rock dramatically, so meter and review the histogram instead of trusting the previous stop’s settings.
Landmark GPS: 37.6043935, -112.1565495
Named destination: Bryce Point, Bryce Canyon National Park, Utah
Open Bryce Point in Google Maps
5. Thor’s Hammer
 Save
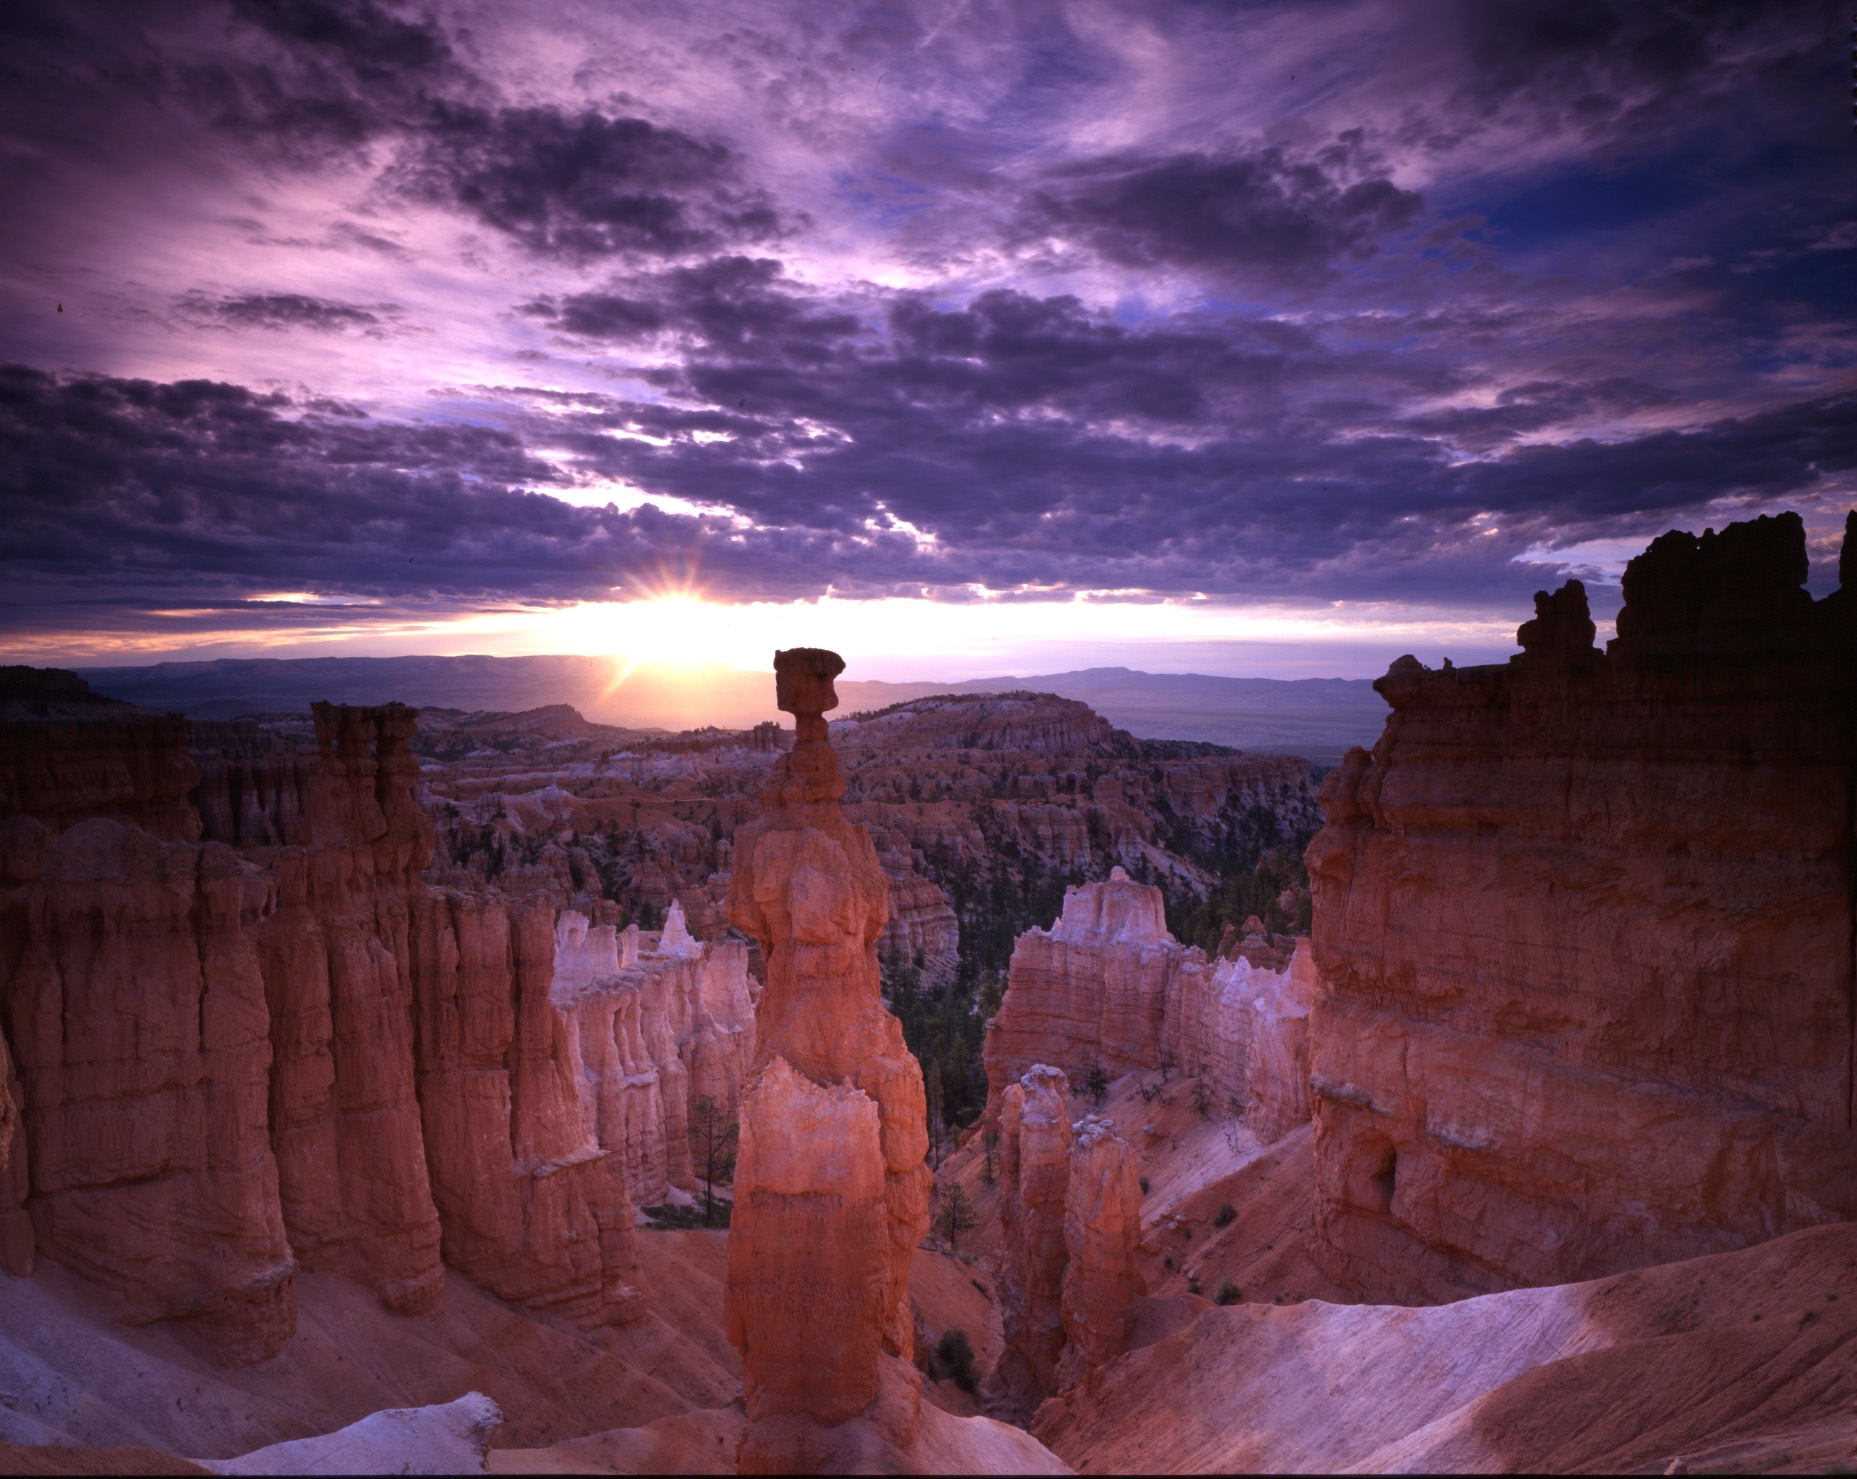
Thor’s Hammer is a distinctive hoodoo below Sunset Point. Its small cap above a narrow column makes a clear subject when separated from the rock behind it. Look for a background that lets the outline read without needing to approach the formation. The classic view is associated with the Two Bridges side of the Navajo Loop. You can also assess it from the rim; whether to descend depends on the open trail, your footing and the return climb.
Access: The GPS marks the named rock formation, not a walking destination on top of it. Start from the signed Sunset Point/Navajo Loop trailhead and follow only open established trail. Never follow a straight-line phone route across the slope to the pin. NPS describes the Navajo Loop as a 1.3-mile loop with about 515 feet of elevation change. The Wall Street side closes in winter; the Two Bridges side is generally open year-round, subject to current conditions. Check closures before committing to a below-rim route. NPS destination details.
Composition and starting settings: Compare a portrait frame that emphasizes the column with a landscape frame that gives it space against the canyon. A normal zoom is a sensible first option. Keep a shutter speed suitable for handheld work if a tripod would obstruct the narrow trail. At dawn, carry a headlamp and identify the return route before setting up. Stay clear of falling-rock areas, do not linger in narrow passages and turn back if snow or ice exceeds your equipment or ability.
Landmark GPS: 37.6213718, -112.1638057
Named destination: Thor’s Hammer, Bryce Canyon National Park, Utah
Open Thor’s Hammer in Google Maps
Plan the light and the ride separately
Choose one main dawn composition rather than trying to photograph all five in the first minutes of sunlight. The overlooks share the amphitheater, but parking, walking and finding a clear composition take time. Scout in daylight when possible. A headlamp, warm layers, water and an offline map matter more than an extra lens when you arrive before sunrise.
The NPS shuttle schedule is not a sunrise transport plan. In 2026 the published season ran April 3 through October 18, and service began at 8 am. Hours varied from a 6 pm to an 8 pm finish. That season has ended as of this October update. Check the current year’s dates before a later trip. Plan lawful parking and access for dawn, and never assume a bus will get you back after dark.
The shuttle is optional and included with park admission. It is useful during operating hours, especially for one-way rim walks. Vehicles 23 feet or longer have parking restrictions while shuttles operate. Viewpoint parking can fill or temporarily close; use signed lots and do not stop in the road for a camera setup. Read NPS parking guidance before bringing an oversized vehicle.
Season, exposure and safety
Snow against orange hoodoos changes both the photograph and the outing. Ice can make rim paths and below-rim switchbacks hazardous. NPS closes the Bryce-to-Inspiration Rim Trail section in winter; an open road does not mean every connected trail is open. Check conditions at the visitor center and online. Do not step onto a snow cornice or cross a barrier because a composition looks close.
Summer thunderstorms can make the exposed rim dangerous. Leave exposed viewpoints when lightning threatens, not after you finish a bracket. Carry sun protection and water at this high-elevation park. Allow time for the climb back from below the rim. A short-looking map distance is not an easy walk when the path is steep, icy or above your normal altitude.
For daylight landscapes, use RAW, a low ISO and a starting aperture near f/8 to f/11 when depth calls for it. Choose shutter speed from the actual light, wind and support. Before sunrise, use a tripod only where it does not block a path. For stars, test a wider aperture and a shutter speed short enough for your focal length rather than copying a long-exposure water recipe. Zoom in on a test frame to check star shape and focus.
Do not treat midday as unusable. Tighter rock details, shaded color and cloud-filtered views can still work. A polarizer may change glare but can make a wide blue sky uneven. Rotate it while looking through the camera, then compare an unfiltered frame. An ND filter is optional, not a requirement for photographing stationary hoodoos.
Entry and photography rules
Check current NPS entrance fees for your party. The standard 7-day pass is $35 per vehicle, $30 per motorcycle or $20 per person on foot or bicycle. Current NPS policy adds a $100 fee for each non-US resident aged 16 or older unless admitted with an Annual or America the Beautiful pass. Pass eligibility and the people traveling matter, so use the official page before budgeting.
NPS photography guidance now treats commercial and non-commercial image-making alike. In most cases, eight or fewer people need no filming or photography permit when working in public areas with hand-carried equipment, without exclusive use, harm to resources or visitors, or additional NPS administrative costs. Activities outside those conditions need park review. A paid workshop or guided service may have separate authorization requirements. Do not use the old claim that a commercially used tripod automatically needs a permit.
NPS prohibits drones and other aircraft-based remote-controlled equipment within Bryce Canyon. An FAA certificate does not override that rule. Stay on established routes, keep clear of fragile edges and never move natural features or wildlife for a photograph. Leave tripods and bags where visitors can pass safely.
Frequently asked questions
Does the Bryce Canyon shuttle run before sunrise?
No. The published 2026 shuttle schedule began at 8 am. Its season ran April 3 through October 18, with closing hours varying by date. Check the current schedule before a later trip and arrange lawful dawn access separately.
Can I fly a drone to photograph Bryce Canyon?
No. NPS prohibits drones and other aircraft-based remote-controlled equipment within Bryce Canyon National Park. FAA certification does not override the park rule.
Do I need a permit for ordinary photography?
In most cases, eight or fewer people do not need a filming or photography permit when using hand-carried equipment in public areas without exclusive use, harm to resources or visitors, or extra NPS administrative costs. Commercial and non-commercial work are treated alike. Check the current NPS policy for activities outside those limits.
How do I reach Thor’s Hammer safely?
Use the signed Sunset Point/Navajo Loop trailhead and only open established trail. The map pin marks the rock formation, not a route onto it. NPS identifies the Two Bridges side as a viewing route. The Wall Street side closes in winter, and other closures can change access.
Are all five spots suitable in winter?
Do not assume so. Snow and ice affect roads, viewpoints and trails. NPS closes the Bryce-to-Inspiration Rim Trail section in winter, and the Wall Street side of Navajo Loop also closes. Check current conditions and use only open routes within your ability.
Get the Bryce Canyon photography guide
This free route stays at five places. Continue planning with the Bryce Canyon Photography Guide, a $47 digital PDF with ten photography spots across 36 pages. See the live product page for current guide details.
Find related trips in the National Parks Photography Guides, and practice technique before the trip with the Photography Academy.
Access facts checked against NPS in October 2026. Individual photo credits and rights apply to their images. No claim to original U.S. Government works. Settings are starting points, not a guarantee of a particular result.
Gear to compare
Start with a normal zoom, warm layers and a headlamp. Add a wide or longer lens when it solves a composition you actually want. Carry a tripod only when you can place it without blocking a path. Keep enough room in the bag for water and weather protection.
What to Pack
A landscape kit built around wide views, steady support, and changing light is a useful starting point. Compare the gear and choose what fits your camera, budget, and conditions. These links lead to B&H Photo Video and Amazon.
| What & Why | B&H | Amazon |
|---|---|---|
Sony 16-35mm f/2.8 GM Check the camera mount before buying. Choose a focal length that fits the photos you plan to make. | Shop B&H → | Shop Amazon → |
Peak Design Travel Tripod Check the load rating, packed size and local tripod rules before buying. | Shop B&H → | Shop Amazon → |
Breakthrough X4 CPL Check the filter type and lens thread size before buying. Use a filter only when the effect fits your photo. | Shop B&H → | Shop Amazon → |
Breakthrough X4 10-stop ND Check the filter type and lens thread size before buying. Use a filter only when the effect fits your photo. | Shop B&H → | Shop Amazon → |
Sony NP-FZ100 battery Use the battery type specified for your camera. Bring a spare if your shooting plan calls for one. | Shop B&H → | Shop Amazon → |
SanDisk Extreme Pro 128GB Check the card format and speed requirements specified for your camera. | Shop B&H → | Shop Amazon → |
Koh microfiber cloths Compare this option with your current kit. Check compatibility and the product details before buying. | Shop B&H → | Shop Amazon → |
B&H and Amazon links are affiliate links. We earn a small commission on purchases at no extra cost to you.