Updated October 2026
Rainer Mirau’s landscape photographs reward a slow look. The original Photographer of the Week feature appeared in December 2015, with a short first-person biography and a portfolio of mountains, forests, waterfalls, shorelines, and wetlands. This update keeps those eleven photographs and gives you a closer way to read them: look at the foreground, the shape of the light, the space between objects, and the details that make each frame work.
This is an archive feature, not a new interview. The biography below is attributed to Mirau’s own account, and location names come from the original image captions where available. Two photographs had only filenames as captions, so their locations remain unnamed here. No camera settings, exposure times, or new first-hand field experience have been invented for this update.
The useful thing about studying a portfolio is that you can see decisions across different subjects. A mountain scene and a small woodland stream do not look alike, but both need a clear arrangement of shapes. I want you to look beyond the destination. Ask what the photograph does with the place, and what would change if the camera moved a little or the frame became tighter.
The photographer behind the original feature
In the biography published with the 2015 feature, Mirau said he was born in Vienna in 1976 and had lived since childhood in Baden, near the Vienna Forest. He described early backpack-and-tent travel and later trips by camping van through the Alps and Northern Europe. Those details explain the original introduction; they are not a newly verified travel itinerary.
His own About Me page describes his interest in landscape photography beginning with trips to Scandinavia. He learned using his father’s Olympus OM-1 and books by photographers including Andreas Feininger, Ansel Adams, and Fritz Pölking. The page also describes returning to photography in 2005 after a period focused on sport. This is his published account of how the interest developed, not a claim about the equipment used for every photograph below.
On his landscape-photography page, Mirau emphasizes preparation: studying maps, thinking about a region, and seeing it for himself. He also leaves room for unexpected photographs. That balance is worth carrying into your own work. Planning can put you in a useful position, while attention lets you notice a frame you did not arrive expecting to make.
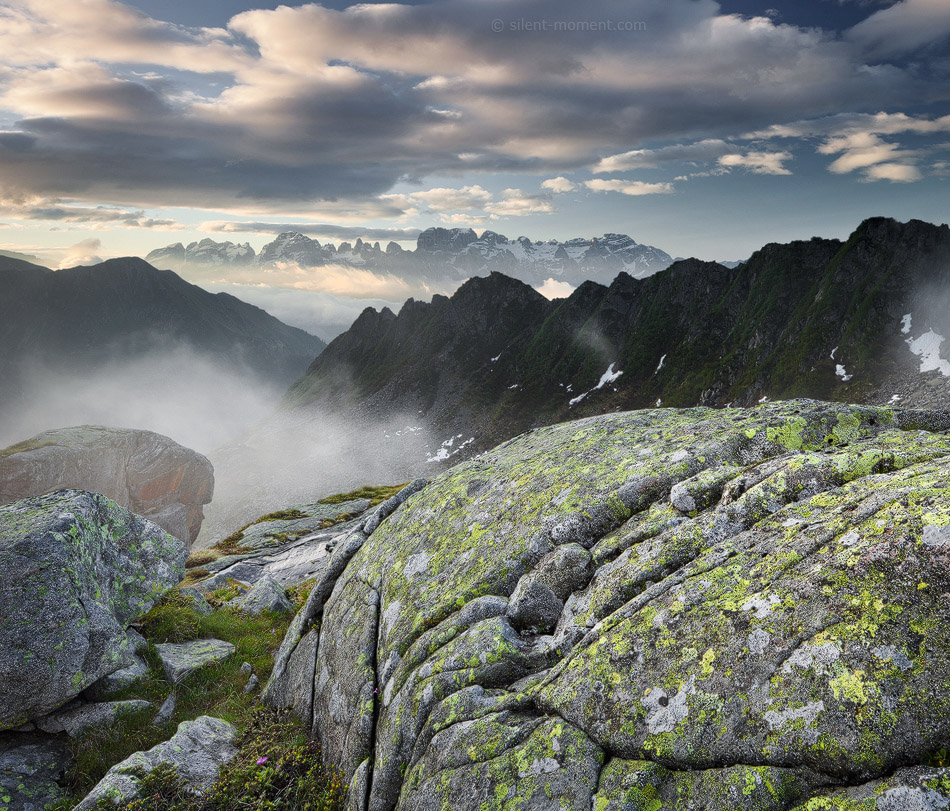
Mountain layers: Val Nambrone and the Brenta massif
 Save
SaveThe foreground stone gives this mountain photograph a physical starting point. You can read its cracks and patches of lichen before your eye moves into mist and darker peaks. The distant landscape does not need the same level of detail. The difference between near texture and far softness helps the frame feel deep.
When you work with a rocky foreground, check how much of the frame it deserves. Too little and it becomes an incidental strip; too much and the mountains lose their role. Compare the shapes at the bottom with the shapes on the horizon. They should support each other rather than fight for attention.
Look at the sky as another layer, not a separate decoration. Bright openings in the clouds can pull the eye upward. In your own frame, watch whether the brightest part leads toward the mountains or away from them. A small change in placement can make the light feel connected to the subject.
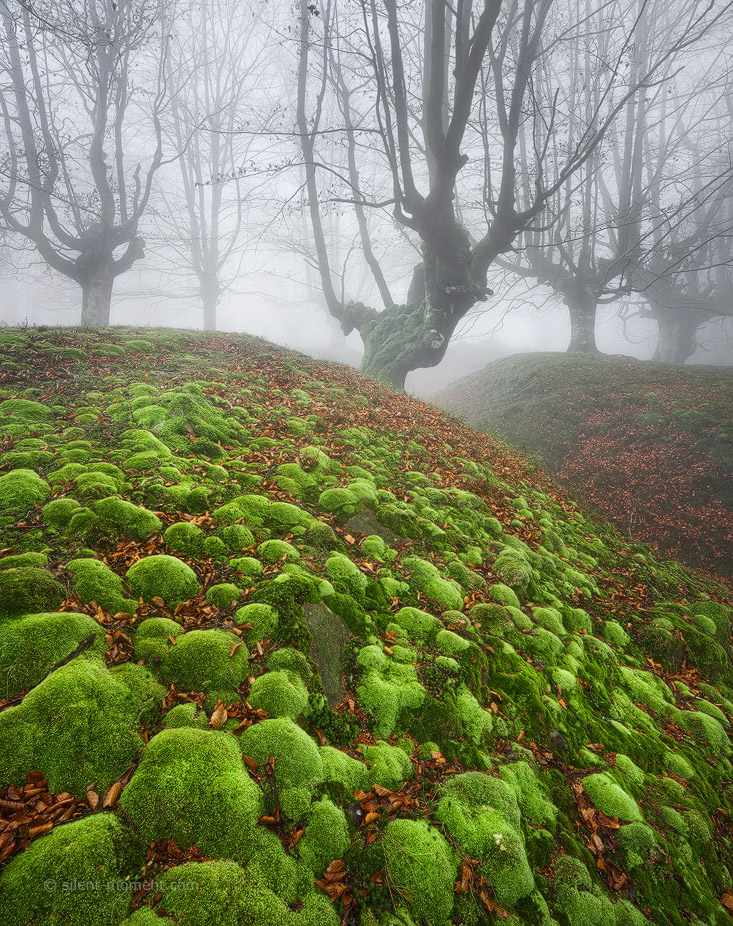
Fog and moss: the beech forest at Gorbea
 Save
SaveThe green moss gives this frame weight near the viewer, while the fog simplifies the background. The trees farther away remain part of the composition without becoming equally sharp or dark. That is a useful example of depth created through contrast and visibility rather than through a single obvious leading line.
Tree spacing matters here. Look at where trunks overlap and where a lighter gap remains between them. In a woodland, moving the camera a short distance can change those relationships more than changing a lens setting. Search for separations that keep the main trunks readable, then check the edges of the frame for accidental cuts.
Do not force every distant tree to become as clear as the foreground. The fog is doing compositional work. Heavy contrast or haze removal can weaken the very separation that makes the scene quiet. Judge the whole image before trying to recover detail everywhere.
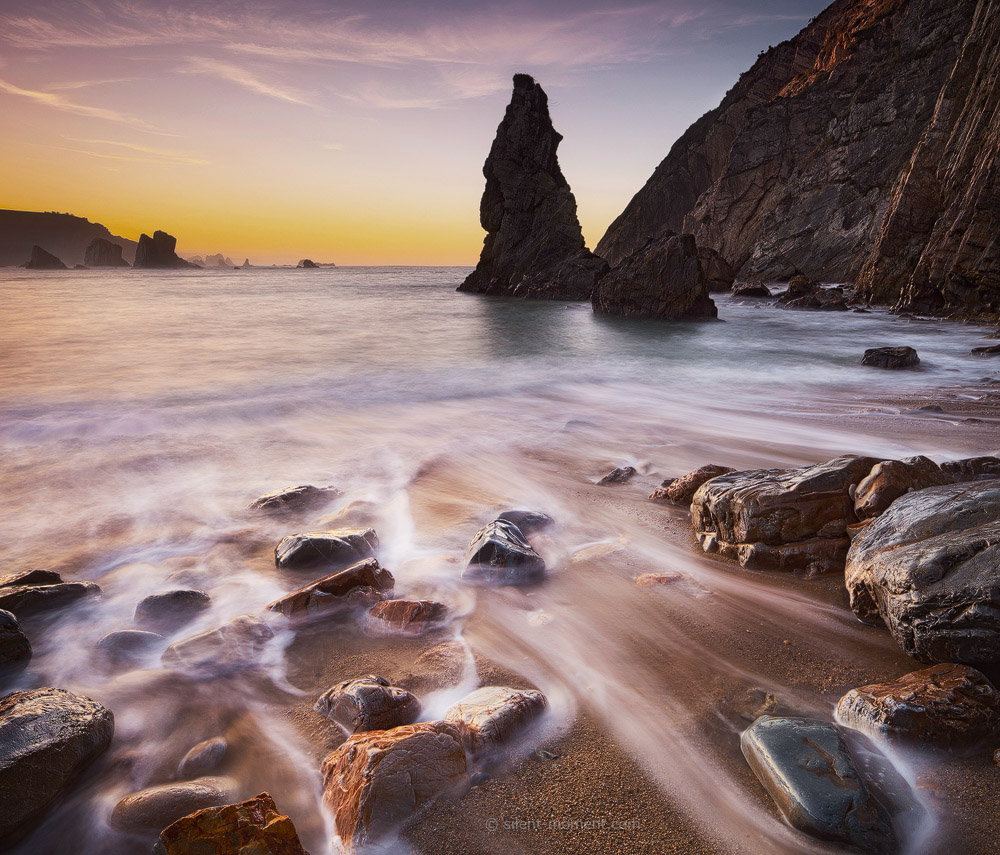
Coastal movement: Playa del Silencio
 Save
SaveThe water around the foreground rocks looks softer than the rocks themselves. That visual difference gives the photograph movement without making every part of it restless. The tall rock formation provides a clear destination farther into the frame, and the warm horizon gives it room to stand apart.
Study the foreground edges. Some rocks enter from the bottom and sides, which makes their placement important. In your own seascape, check whether a cropped rock feels deliberate or simply unfinished. A useful foreground shape should connect to the rest of the picture, not look like an obstacle at the edge.
The appearance of water does not tell us an exact shutter speed. Do not copy a guessed number from a portfolio image. Decide how much movement you want to describe, make a test in your own conditions, and compare the resulting shape and texture. The visual outcome is the useful reference here.
Waterfall structure: Brúarfoss
 Save
SaveThe water creates several directions, but they lead toward a connected center. Darker rock divides the bright flows and gives them shape. Without those darker areas, the cascades could become one featureless bright mass. The balance between flow and boundary is what makes the water readable.
Watch highlights when photographing a waterfall. The brightest water needs enough distinction to show its direction. At the same time, do not make surrounding rock so dark that it loses all separation. The two areas depend on each other: water shows movement, and rock gives that movement a structure.
Look for a position that gathers the flows rather than scattering them across the frame. Sometimes a tighter view removes competing branches of water. Sometimes the wider setting explains where the flow goes. Choose according to the shape you want the viewer to follow.
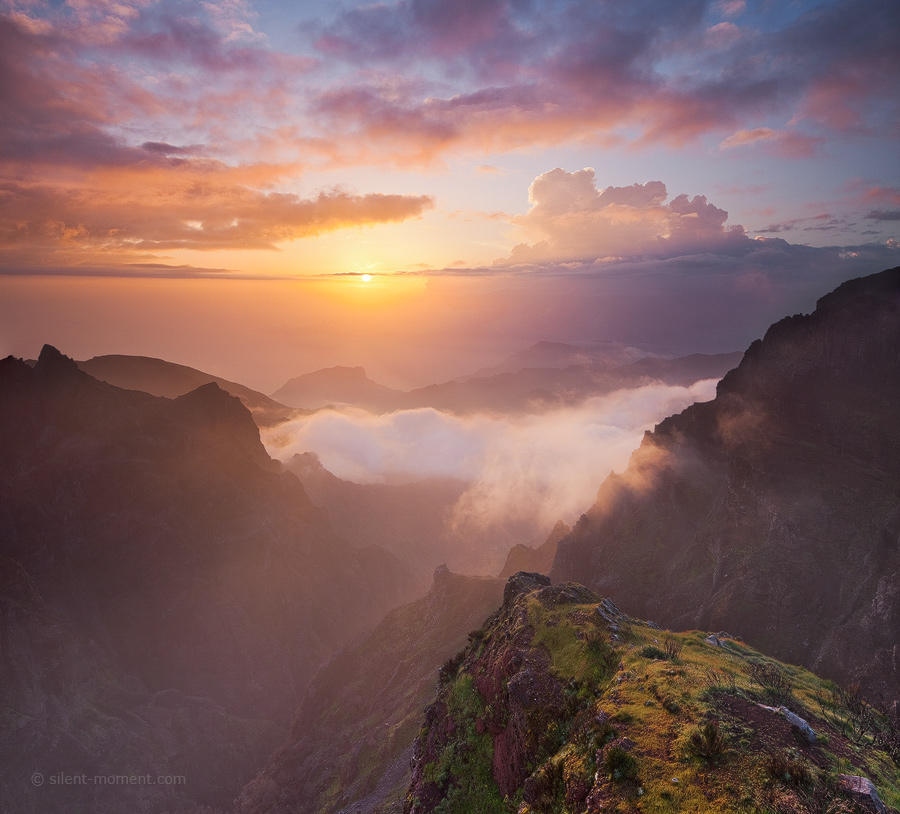
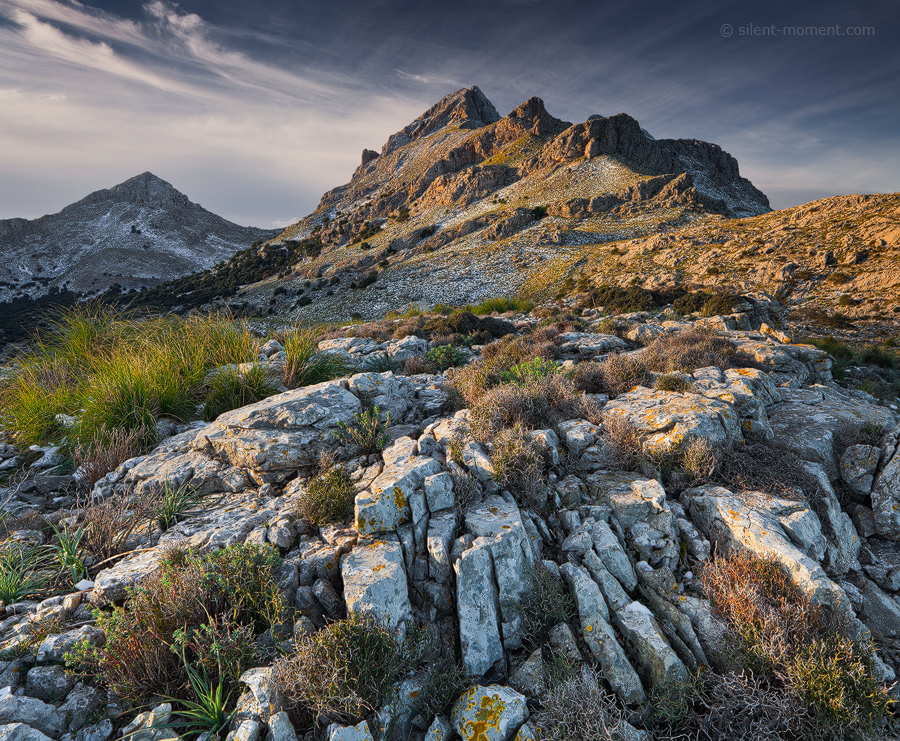
Two unnamed mountain views
 Save
SaveThis image uses light and mist to separate the landscape into large areas. The warm sky carries attention, while the valley remains softer. A bright sun or bright opening can dominate quickly, so compare its visual weight with the foreground. The landscape still needs to be more than a dark border around the light.
Do not assume that a dramatic sky makes the composition complete. Check the ridges, the bottom edge, and the direction of the mist. Ask whether those shapes give the eye a path or simply fill the remaining space. The best version may be the one with less empty sky and a more deliberate foreground.
 Save
SaveThe second unnamed view gives the foreground much more texture. Stone and low vegetation lead toward a crag, with warmer light on parts of the mountain. Compare the sharp, close detail with the larger distant shape. Both can be interesting, but the frame needs a reason for the eye to move between them.
A foreground does not have to point like an arrow to create direction. Repeating surfaces, edges, and changes in brightness can do that work. In your own scene, check whether those smaller forms reinforce the main subject. Remove a distracting corner if it keeps pulling the eye out of the photograph.
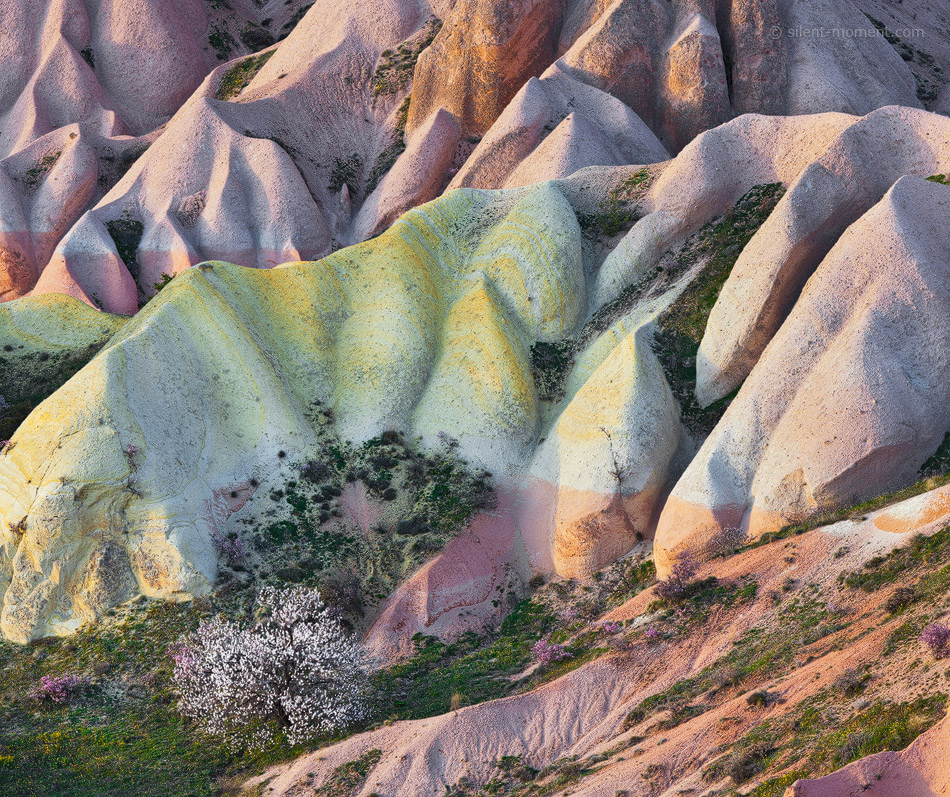
Eroded forms: the Rose Valley near Göreme
 Save
SaveThe repeated rounded formations make this photograph feel almost abstract. Color changes follow the surfaces instead of creating separate blocks unrelated to the land. The frame asks you to look at the rock itself, which is a reminder that a landscape does not always need a broad horizon.
Try reading the photograph as a pattern before reading it as a place. Where do the shapes repeat, and where does one break the rhythm? That difference can create a point of attention. In a similar scene, consider whether a tighter crop removes context usefully or simply makes the pattern confusing.
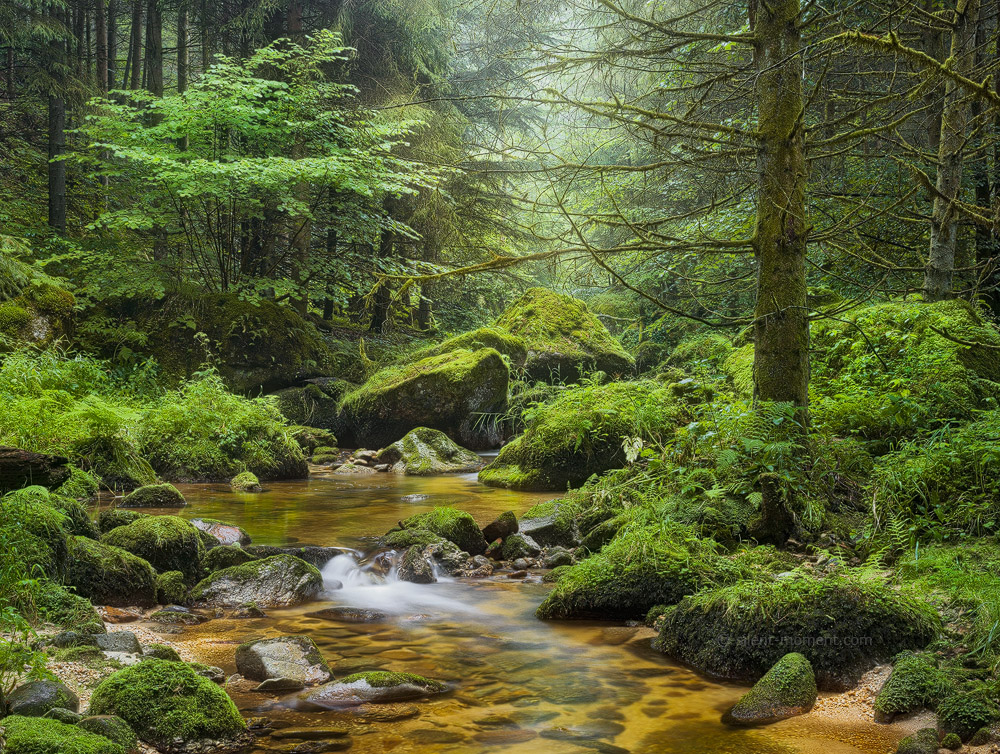
Small-scale depth: Gießenbach in the Stillensteinklamm
 Save
SaveThis stream photograph uses a small setting to create depth. Mossy stones hold the foreground, while the water moves between them into the trees. The greens are varied rather than one flat shade. Darker trunks and spaces keep the woodland from becoming a wall of equally bright foliage.
When photographing a stream, check every bright patch near the edge. A small piece of sky or pale water can steal attention from the flow you want people to follow. Change position or framing before assuming you will fix the distraction later. Keep the water’s direction clear without removing the surrounding texture that gives it a place.
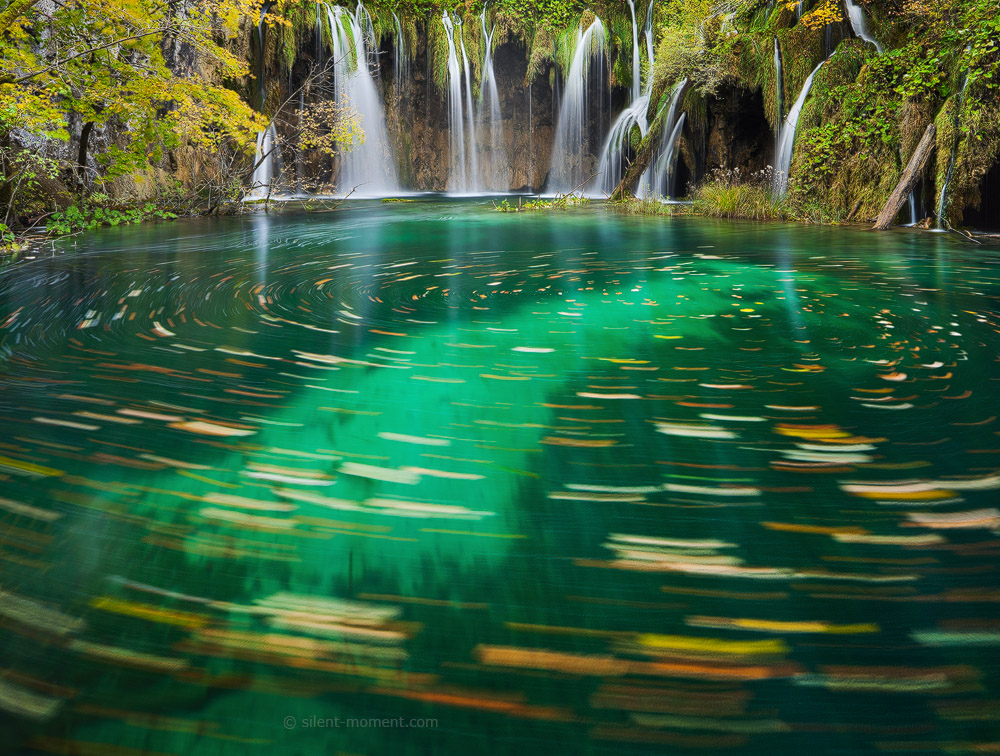
Water and color: Plitvice Lakes
 Save
SaveThe falls are bright and active, while the turquoise pool gives them a calmer base. Leaves and reflections add smaller marks on the water. The frame works through differences: vertical flow above, a broader color field below, and vegetation around both.
Be careful with water color in your own edit. A strong hue can be attractive and still overwhelm the structure. Look for variation in the pool and preserve enough distinction between reflections and clear water. An intense color is most useful when it supports the photograph rather than replacing the subject.
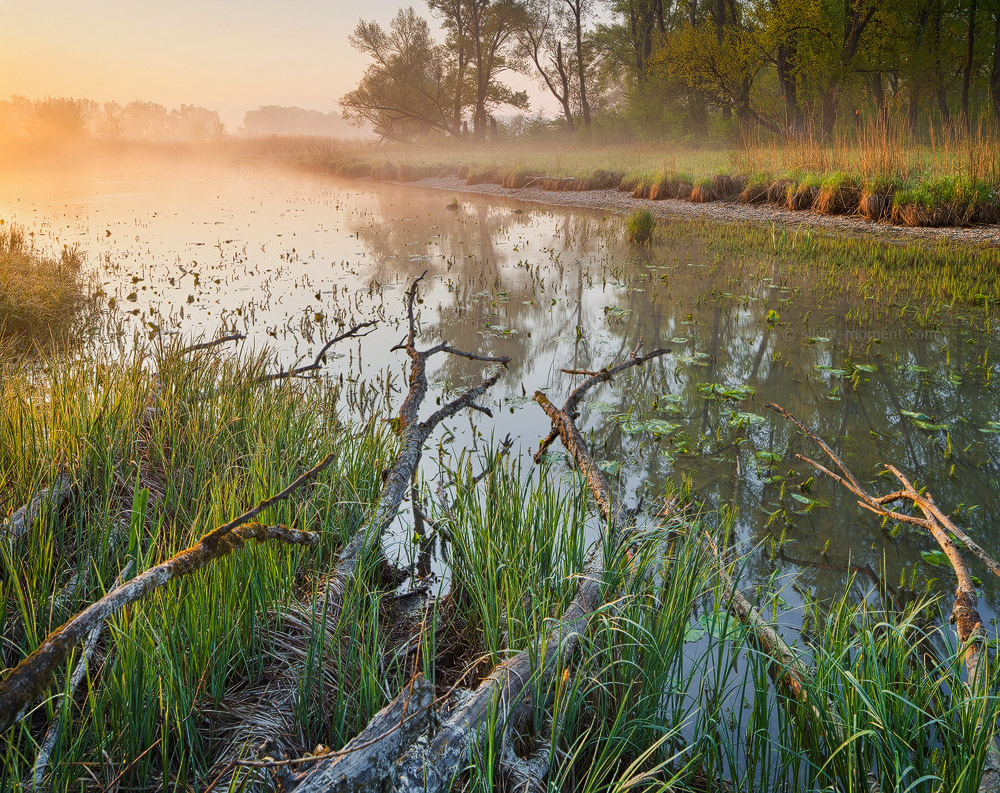
Wetland detail: Kühwörter Wasser
 Save
SaveThis frame is quieter than the waterfalls, but it contains plenty to read. The branch in the water, the reeds, and the distant trees create different distances. Mist softens the farther side without removing it. The reflection gives the lower half its own structure rather than acting as empty space.
Look at how foreground lines interact. A branch can guide the eye, but it can also become tangled with reeds or a frame edge. In a wetland scene, check those intersections slowly. You may need to move only a little to separate a useful line from a distracting overlap.
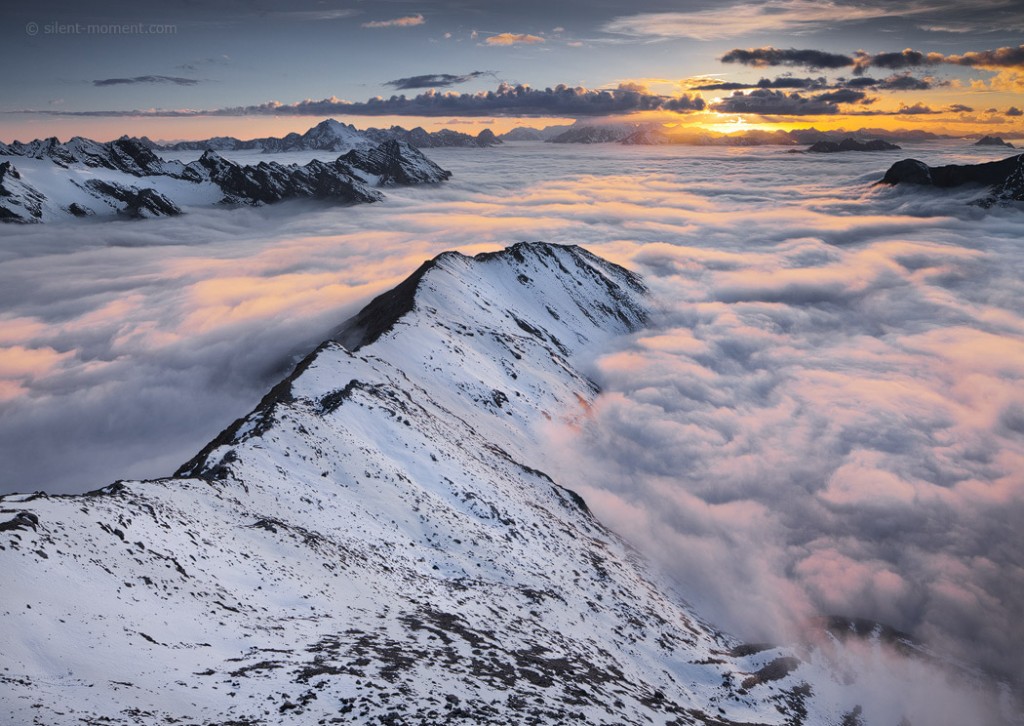
Above the cloud layer: Monte Scorluzzo
 Save
SaveThe ridge provides a strong diagonal, while the cloud layer gives the frame a softer surrounding field. Distant peaks interrupt that field without competing with every foreground detail. Warm light near the horizon adds contrast to the colder snow.
Study where the ridge enters and where it leads. A diagonal can carry the eye effectively, but its endpoint matters. In your own mountain frame, make sure the line leads into something meaningful. Check the snow highlights and preserve shape instead of turning the whole ridge into a bright white strip.
Turn portfolio study into your own practice
Choose one idea from this gallery before your next outing: foreground-to-background separation, tree spacing, the direction of water, repeated rock forms, or a restrained treatment of mist. Work on that idea in a place you can reach responsibly. You do not need to reproduce the destination or copy the photograph to learn from the decision.
Keep notes with your selects about what worked and what you would change. Save the original files, working edits, and final exports clearly, then back up important work independently. The drive below is an optional tool for that storage workflow, not equipment attributed to Mirau or to the photographs in this gallery.
For a more deliberate approach to composition, light, and editing, explore the Shut Your Aperture Academy. A portfolio like this is a useful starting point. The next step is recognizing the same relationships in front of your own camera and making choices you can explain, rather than relying only on a beautiful location.
Frequently asked questions
Who is Rainer Mirau?
He is a landscape photographer whose published biography describes being born in Vienna in 1976, growing up in Baden, and developing his interest through trips to Scandinavia.
Is this a new interview?
No. The original feature appeared in December 2015. This update preserves its gallery and adds image-specific composition tips and attributed biographical context.
Are the locations of every photograph known?
No. Most original captions identify a place, but two images had only filenames. Their locations remain unnamed rather than guessed.
Can I copy the camera settings from these photographs?
The archive does not supply verified camera settings or exposure times. Study the visual decisions and test settings in your own conditions instead of treating guesses as data.
Can I reuse these photographs in my own work?
Viewing a portfolio does not grant reuse rights. Ask the rights holder for permission or a license covering your intended use before republishing or using an image commercially.
Source note: Original 2015 portfolio and location captions; published biography; photography approach; photographer’s portfolio. Gallery remains the featured photographer’s work, not new photographs by Edin.