By Edin Chavez
Updated October 2026
Tokyo can fill your frame in a second. Signs, trains, towers, people, windows, reflections. That does not mean every busy photograph is a good one. Pick the thing you want people to see first. Give it a clean shape, a strong background and enough room to breathe. Then wait for the light or the moment that makes the frame worth keeping.
The best plan is not a race through a giant list of locations. It is a handful of different photographs: a crossing with real movement, a tower against a changing sky, a temple with shape and color, a river full of blossom, a quieter architectural frame. You want variety, not fourteen versions of the same bright sign.
These seven Tokyo photography spots give you a place to start. The full Tokyo Photography Guide covers 14 subjects across 53 pages, with real photographs, practical access notes, shot ideas, camera starting points and linked landmark references. This post leaves room for the rest of the guide. Start with the photographs you want to make, then build the day around the access and light they need.
Make a plan for Tokyo: 14 subjects across 53 pages.
1. Shibuya Crossing: find the pattern before the crowd
Shibuya is a pattern before it is a sea of people. The crossing stripes, building edges and illuminated screens give you a structure. Watch it before you shoot. When the pedestrian signal changes, the people move through a composition that is already there. You do not have to chase every person to make the scene work.
From a safe sidewalk position, choose a clean relationship between the zebra stripes and the buildings behind them. Decide whether the photograph is about a person, the flow of people or the geometry of the crossing. Those are different frames. A person needs enough separation to read. A flow can be more abstract. The geometry needs you to watch the edges and keep the scene from becoming a pile of disconnected lines.
Photography tip: Choose the shutter according to the job. For an ordinary moving pedestrian, start around 1/250 second and adjust. For intentional movement, a slower shutter can turn the crowd into color, but use it from a safe stationary position. Never stop in the crossing to make a tripod photograph.
Elevated views are a different visit. They come with their own access, equipment rules and weather limits. A photograph made from above does not tell you that every rooftop is open or that your preferred gear is allowed. Check the current operator information before paying, and have a ground-level plan if the weather changes.
Try one wide frame that shows the crossing pattern, then one tighter frame with a clear subject. You may find that a small section of Shibuya says more than the whole district crammed into a wide shot. Bright screens are powerful, but they can also steal attention. Let them support the subject rather than automatically become it.
2. Tokyo Tower: give the light some scale
Tokyo Tower has a strong shape and color. A tight frame can make the lattice feel almost graphic. A wider frame needs something around it: roofs, trees, temple architecture or the city itself. Without those layers, it can become a bright object floating in black sky.
Scout an accessible public path while there is still daylight. Look for foreground shapes that will remain useful after dark. A tree that gives the tower scale can be an asset; a branch cutting through its tip may be a distraction. Make those decisions before the light gets difficult and you are trying to solve every problem at once.
Photography tip: Protect the brightest tower lights. A dark scene can tempt you to brighten the entire exposure until the illuminated structure loses detail. Take a test, inspect the tower itself and adjust. Let some surrounding shadows stay dark when that helps the photograph.
Illumination changes. Do not plan around a promise that a particular color will appear every night. Check the current lighting schedule, then respond to what you actually find. A clear handheld frame is better than a missed photograph while you wait for a lighting scheme that was never guaranteed.
Start with a standard focal length and see how the tower sits in the city. Then try a longer lens to simplify the layers. If support is permitted and does not block a route, test a slower shutter. If not, raise ISO and keep the image sharp. A public path is not blanket permission to occupy it with equipment.
3. Tokyo Skytree: make the skyline do some work
 Save
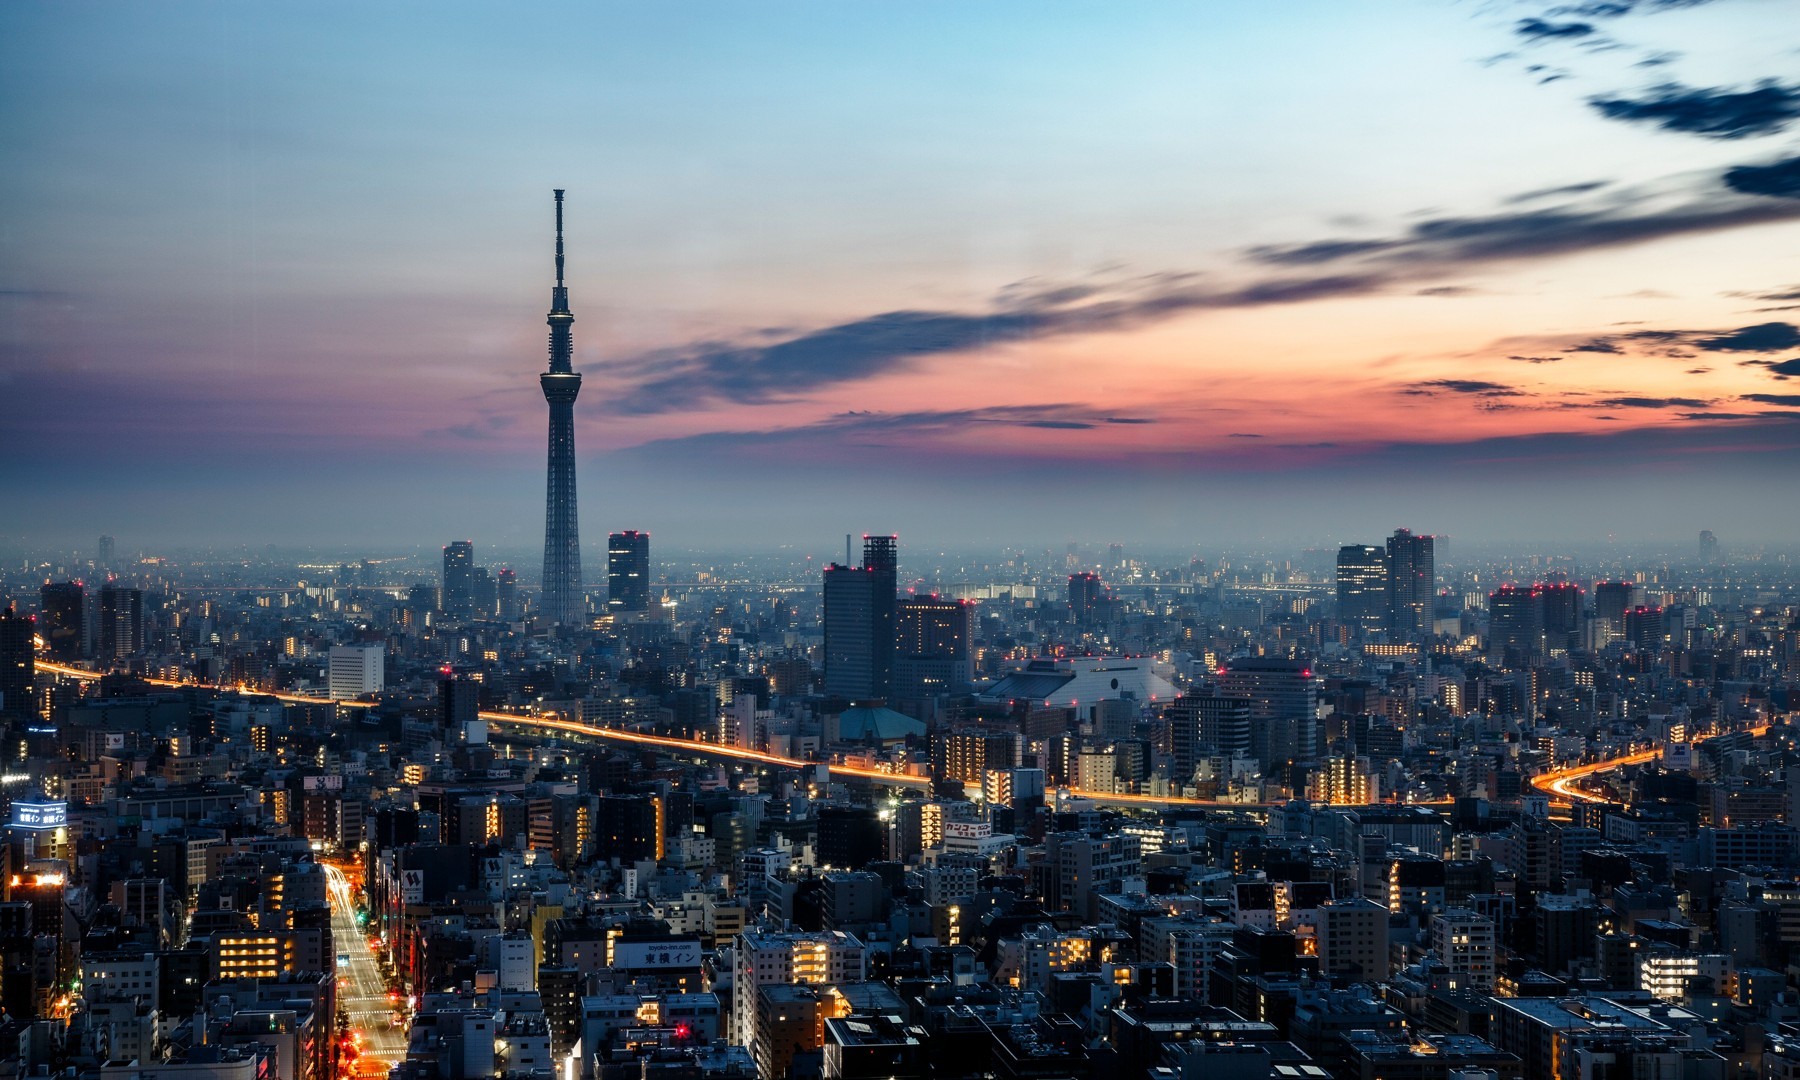
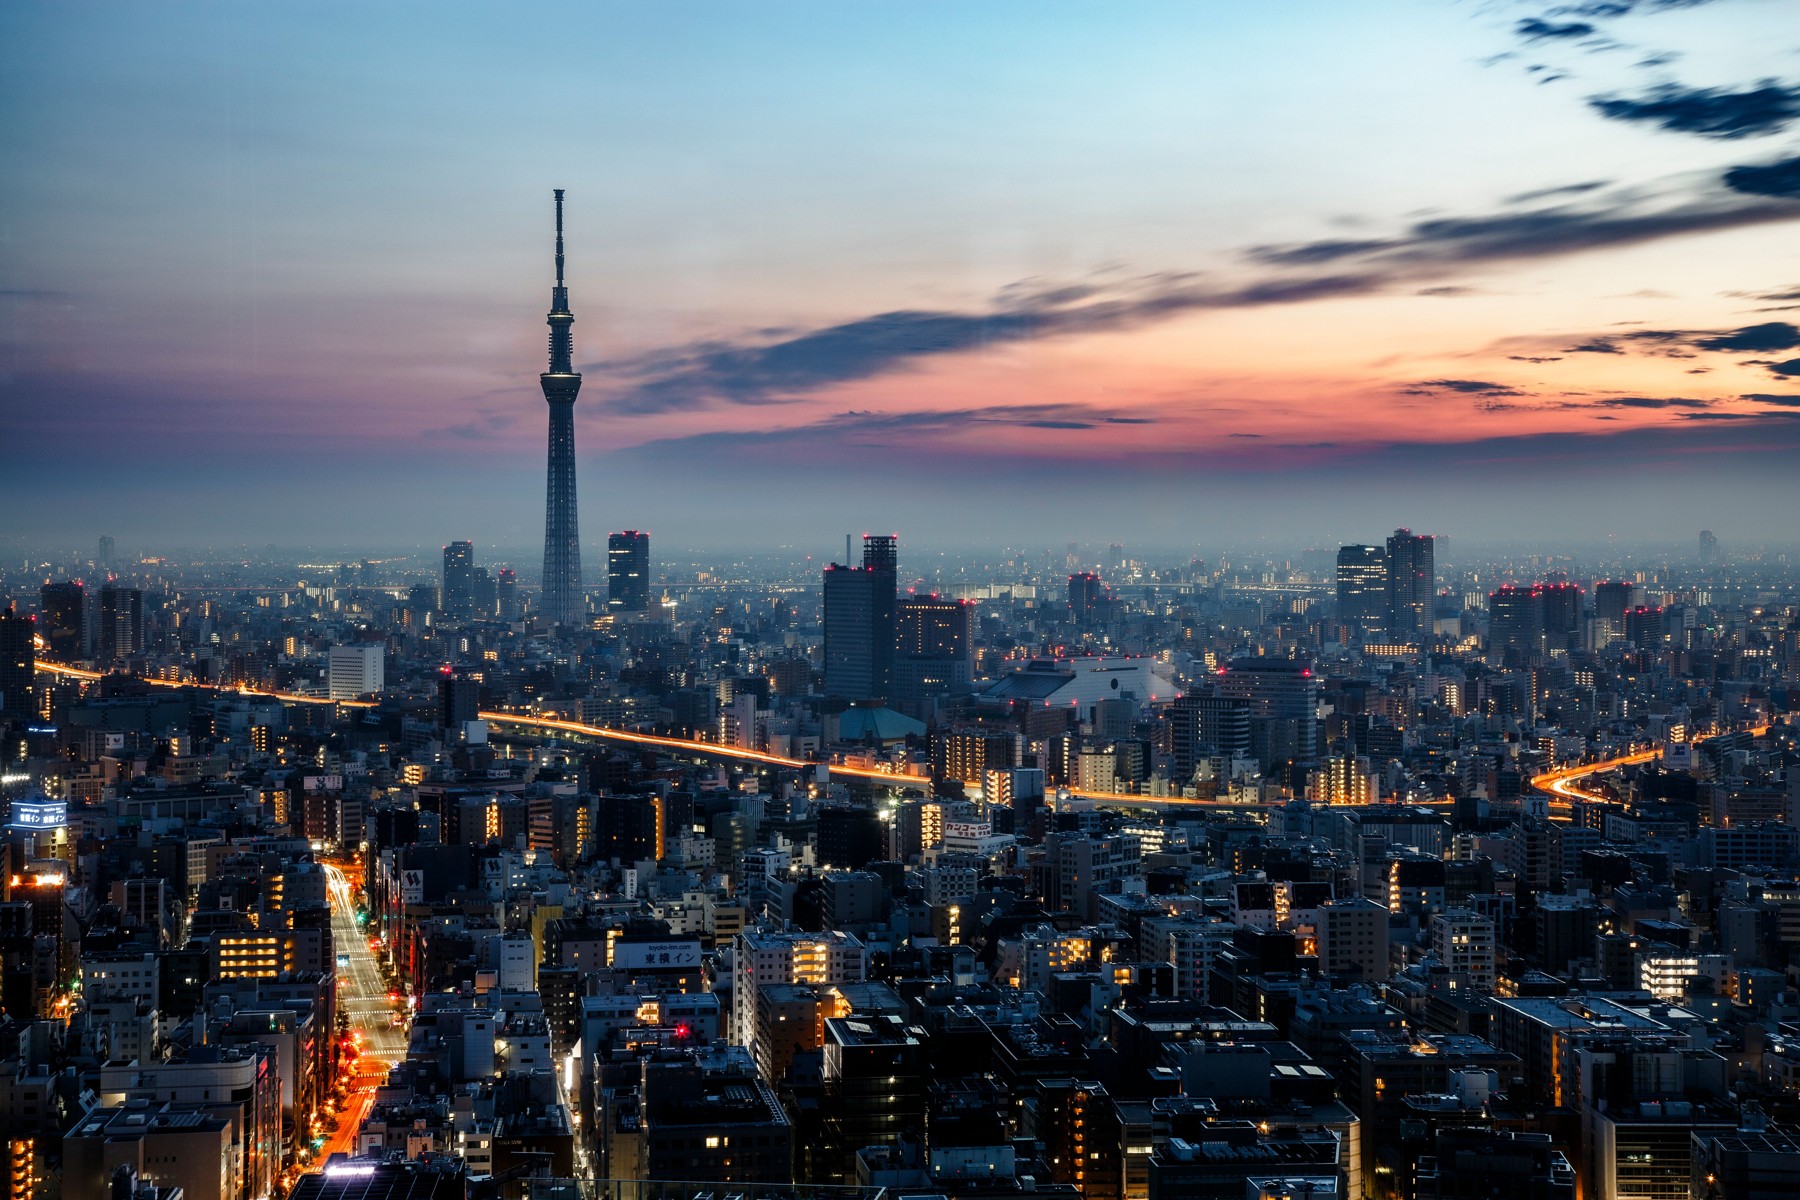
SaveSkytree can turn into a needle in a lot of empty sky. The skyline around it gives the photograph a base and a sense of scale. Think about the lower half of the frame as carefully as the tower. Water, roofs, roads or nearby buildings can tell the eye how to travel toward the subject.
Blue hour and sunset can give the scene color separation. The city lights start to show while there is still shape in the sky. That balance is the opportunity. It is also temporary. Find your position in advance, make a test frame and be ready to work when the scene changes instead of arriving at the best moment and spending it setting up.
Photography tip: Check the tower’s separation from the background. If a bright building or busy roofline competes with it, move or change focal length. A small shift can make the subject read more clearly than a dramatic exposure adjustment.
A reflection is a bonus, not a promise. Wind, traffic and water movement can turn a mirror into texture. Use the conditions you have. A rippled reflection can make a stronger frame than a forced attempt to copy a still-water photograph. Keep the horizon level and leave enough space around the reflection to crop a small tilt later.
Ground-level exterior photography and a paid observation-deck panorama are different plans. An elevated stock photograph does not identify a publicly accessible camera station. Check the actual deck rules before buying a ticket or carrying support equipment. Through glass, dark clothing and a careful lens position can help reduce reflections, but no trick works equally well with every window.
Make a wider frame to establish the tower and its city, then a tighter one that simplifies the layers. The strongest set shows you made decisions, not that you stayed in one position and held down the shutter.
4. Senso-ji: respect the shape of the gate
 Save
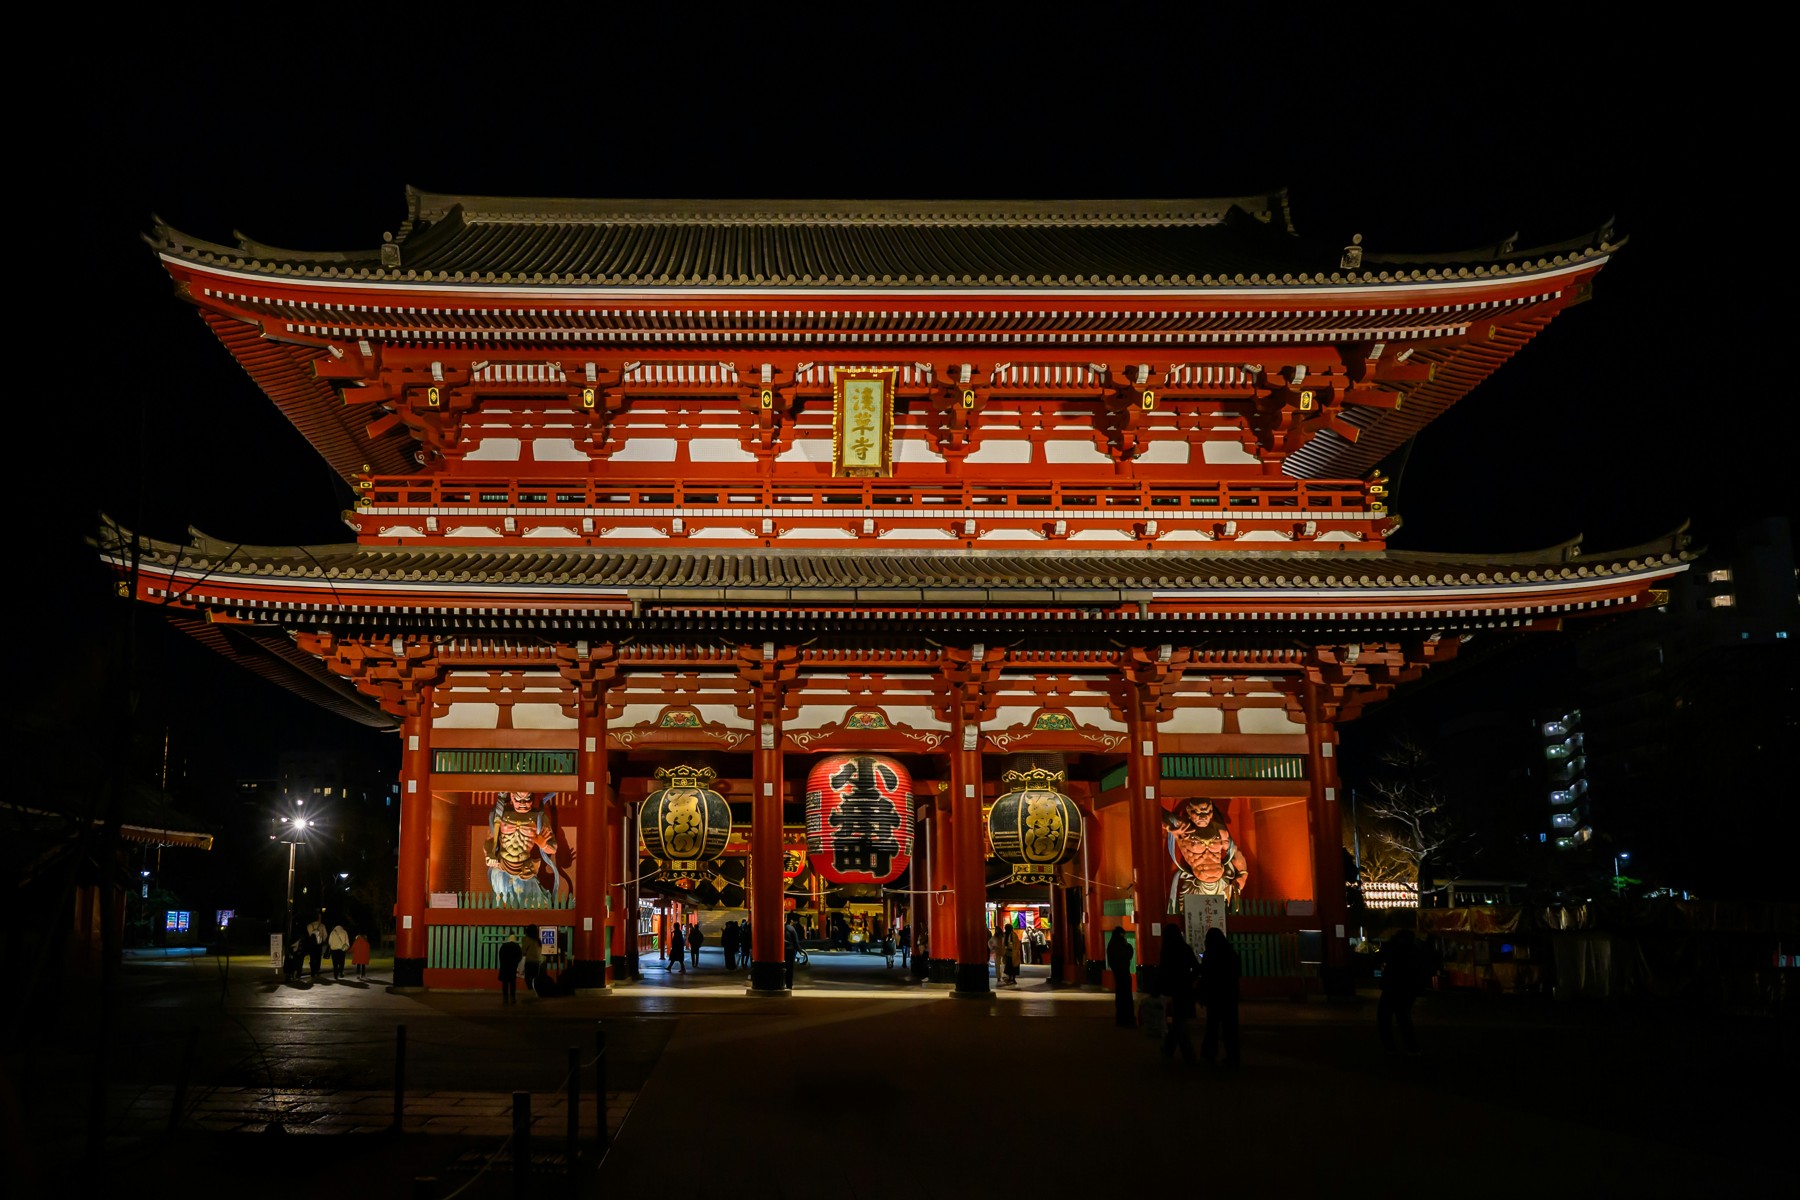
SaveHozomon gives you a strong center, deep red and repeating architectural detail. It is easy to see why it works at night. The harder part is leaving the gate enough room. Cut the roof awkwardly, crowd the lantern or ignore the edges and the photograph loses the shape that made you stop in the first place.
Start with a frame that holds the gate clearly. Look for symmetry, but do not confuse symmetry with standing exactly in the middle of a busy route. A slightly off-center photograph can be better than one made while blocking everyone else. Wait for a clean opening, take the frame and move when the space needs you to move.
Photography tip: Do an edge check before looking for another subject. Are the roof ends intact? Does a bright lamp pull your eye out of the frame? Is a person cut awkwardly at the bottom? A few seconds spent fixing those things can improve the photograph more than another lens change.
Then make a different picture. A pagoda against a simpler patch of sky. A roof detail. A relationship between a lantern and the building behind it. Give the set a second job instead of repeating the gate photograph from six almost identical positions.
Worship, ceremonies, barriers and staff directions come first. Exterior access and the hall’s visitor arrangements are not the same thing. Carry a handheld plan and follow the current signs. A photograph of an illuminated gate is not a promise that all temple spaces are open after dark or that a commercial setup is allowed.
At night, choose a shutter that keeps the architecture sharp and leaves you ready for people moving through the scene. Raise ISO when you need to. Stabilization can reduce camera shake, but it does not freeze a visitor. Review a test at full size before spending the evening repeating a soft frame.
5. Meguro River: let the blossom frame the water
 Save
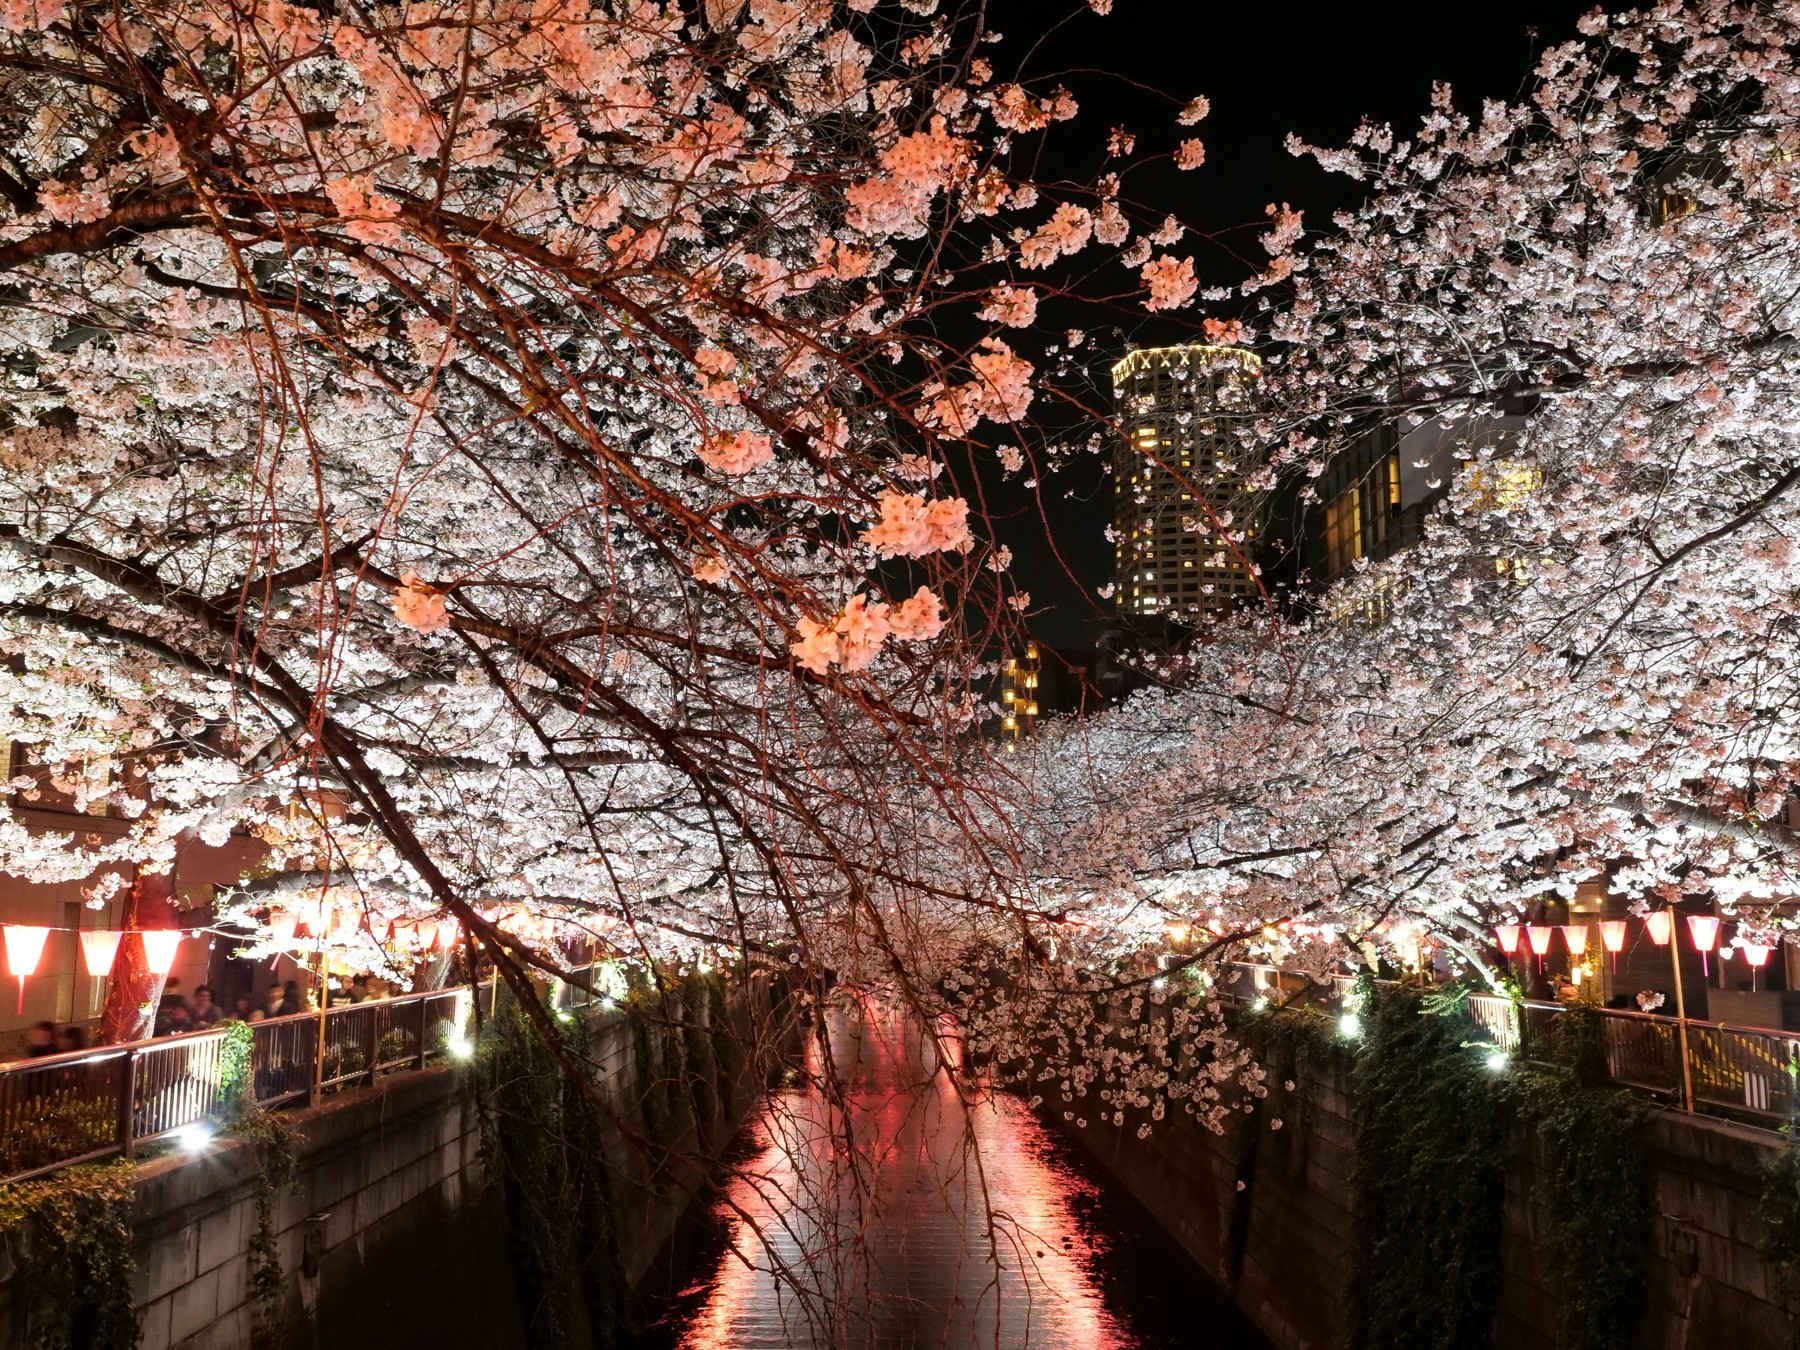
SaveCherry blossom changes the way a river photograph works. The flowers can become a canopy, an edge or the main subject. At Meguro River, the stronger composition often comes from the relationship between blossom, water and light rather than a single branch filling the entire picture.
Choose the depth of the frame. A wide photograph can show the canopy and the canal running through it. A tighter one can hold a lantern, a patch of flowers and a reflection. Watch for gaps where a dark branch or a bright sign interrupts the flow. Move along a permitted route until those parts line up more cleanly.
Photography tip: Check focus on the flowers you actually want to hold. A bright scene can look sharp on a small screen even when the important near branch is soft. Review the first frame at full size, then adjust focus, aperture or your position before repeating it.
Blossom timing is seasonal and weather-dependent. Do not plan a trip around a fixed calendar promise that peak bloom or illumination will happen on your exact evening. Check the current season’s information. A night-sakura source photograph shows a real scene, not a guarantee of this year’s dates, lighting or access.
Crowds matter. Keep bridge approaches and walking routes open, and do not lean into a canal edge for a better angle. A smaller kit makes it easier to move and easier to stop briefly without turning your setup into a roadblock. If a wide frame becomes impossible, work tighter and let the blossom itself carry the picture.
Try one photograph with water as the leading layer and one with the flowers as the leading layer. That small change creates variety without needing to run to another part of the city. The point is to come home with a set, not to tick a location and leave before you have really seen it.
6. Imperial Palace: separate the moat from Nijubashi
The outer-palace views reward a quieter frame than the neon streets. Stone, water, rooflines and trees give you layers instead of signs. The sunset view of Tatsumi-yagura above Kikyo Moat is a different composition from the stone bridge and Fushimi-yagura at Nijubashi. Treat them as separate subjects and separate viewpoints.
This distinction matters in the photograph as much as the planning. A turret beside a moat is not automatically a bridge photograph. A bridge pin is not the camera position of a sunset turret image. Name the subject you can actually see, then choose the route and lens that fit that subject.
Photography tip: Use a longer focal length when the foreground is fighting the architecture. It can simplify masonry and roof layers and remove an unhelpful patch of grass or pavement. Watch that the tighter frame still gives the subject room. A close crop is useful only if it improves the relationship between the shapes.
Reflections depend on wind. If the water is still, leave enough room for the mirrored forms. If it ripples, let the texture become part of the scene. There is no need to force a perfect reflection just because another photograph had one. Warm sunset can separate white walls from trees; blue hour can give a different mood. Work with the real light, not a replacement sky.
The public outer-garden side is not permission to cross into controlled palace grounds. Inner visits and the East Gardens have separate arrangements. Check the current information for the part you intend to visit. Respect fences, police directions and any security closure. Keep a plan that works from a lawful exterior position.
7. Odaiba: wait for the sky, not a lighting switch
Odaiba gives you a wide bay photograph and a chance to compress city layers. Rainbow Bridge, the mainland skyline and water can all play different roles. Decide what leads. If the bridge is the subject, give its structure room. If the skyline is the subject, choose the lens that makes the buildings work together.
Scout before sunset. Find the legal standing area, check the foreground and identify a way back. Then watch the sky deepen. You do not need to decide that the best photograph happens at one precise minute. Sometimes the earlier color is stronger; sometimes the balance between the sky and city lights is better later.
Photography tip: Test more than one shutter speed. A longer exposure from permitted support can smooth water, but a faster frame may keep interesting texture. Compare the results rather than assuming the smoothest water is always the best photograph.
Wind, illumination and closures change what is possible. Do not lean past barriers or work too close to the water to remove one foreground object. If support is not permitted, choose a handheld exposure and raise ISO. A bay photograph can still be strong without a tripod.
Make a wide frame that explains the location and a tighter one that stacks the city layers. Keep the horizon level in both. The differences between those frames make the set more useful than a collection of nearly identical exposures with slightly darker skies.
Build a Tokyo day around photographs, not pins
Choose one main subject for each block of time. Temple architecture needs its own pace. A paid deck needs current rules and a weather alternative. Night streets need a small kit and enough patience to see a pattern. Travel time, crowds and your return route are part of the plan, not things to discover after the light is gone.
If the sky stays flat, change the photograph. Look for color, detail, reflections or a tighter relationship instead of forcing a wide sunset composition. If a location is crowded, try a frame that uses the crowd or move to a quieter detail. The skill is adapting without pretending the conditions are something else.
Review a small set at the end of the day. One image can establish Tokyo, another show scale, another put you in the street and another hold a detail. Look for repetition. If every picture has the same lens, angle and light, you know what to change tomorrow.
Tokyo photography Q&A
What is a good first Tokyo night photograph?
Tokyo Tower, Senso-ji exterior architecture and a clear neon street composition are strong starting subjects. Choose according to access and the light you find. A simple, sharp frame is a better first result than an elaborate setup you cannot use legally.
Should every Tokyo photograph be made at night?
No. Night is excellent for city lights, but daylight may be better for architectural detail and blossom color. Match the light to the subject. Strong photography is not a filter applied to every location.
Can I use a tripod on every observation deck?
No. Equipment rules are venue-specific. Check the current operator restrictions before buying a ticket or packing support. Have a handheld alternative for any deck or crowded public route.
Is a map link an exact camera position?
Not in this guide. Links identify landmarks or districts. They do not guarantee a tested tripod station, a private terrace, an entrance or permission to stand in a controlled area.
Can I count on cherry blossom and perfect reflections?
No. Bloom, weather, wind and seasonal arrangements change. Check current information and build a second composition that works without a mirror reflection or peak blossom.
What does the full Tokyo guide include?
It covers 14 subjects across 53 pages, with real photographs, access notes, timing advice, shot ideas and linked landmark references. This post introduces seven subjects; the fuller guide helps you build a more varied trip.
Recommended Tokyo photography kit
Start with a camera you know and a lens you will actually use. A standard zoom gives you flexibility between architecture, street scenes and skyline layers. A small wide lens can help in tight spaces; a longer lens can simplify a distant skyline. A compact camera such as the Ricoh GR IV is an editorial travel option when you want a lighter street kit.
Carry spare batteries, a reliable memory card, a lens cloth, simple rain protection and comfortable shoes. Support equipment is optional and access-dependent. Do not carry a tripod expecting it to override a deck, temple or crowded-walkway rule.
A compact street-camera option
Ricoh GR IV: an editorial option for a light street-photography kit, not a hands-on testing claim. Use the camera you know if it already fits your needs.
Compare the Ricoh GR IV on Amazon | Compare the Ricoh GR IV on B&H
Get the Tokyo Photography Guide
If Tokyo is on your calendar, make a plan that leaves time to see it. The full guide gives you 14 subjects and 53 pages of photographs, access notes and shot ideas. Choose a few photographs you really want, then use the extra options to adapt when the weather, light or access changes.
Get the Tokyo Photography Guide – $47 PDF
Researched location advice; access and camera rules can change.
For the foundations, see our shutter-speed guide and aperture guide.
Disclosure: This post contains affiliate links. As an Amazon Associate, we earn from qualifying purchases. Purchases through affiliate links may earn us a commission at no extra cost to you.
Explore Tokyo with a local photographer
Want photographs of yourself in the city after shooting your own frames? Tokyo Evening Photography Tour visits Shinjuku and offers a choice of Shibuya Crossing or a skyline view. The photographer takes your portraits; this is not a camera-skills workshop. Check the current route and start time before booking.
Tour links are affiliate links. I may earn a commission if you book through them, at no extra cost to you.