
Updated October 2026
Better photos start with better decisions, not a bigger camera bag. Decide what the photograph is about. Find light that helps that subject. Put yourself in the right place. Then choose settings that record what you want people to see. If you do those things deliberately, an ordinary walk can become useful practice instead of another folder full of pictures you never open.
The original version of this guide encouraged manual exposure, getting outside, changing subjects, scouting, shooting early, staying after sunset, practicing, and learning with other photographers. Those ideas still matter. But there is no single mode, time of day, or purchase that makes every photograph good. Use these photography tips as a repeatable process, whether you shoot with a phone, a compact camera, or an interchangeable-lens camera.
1. Give the photograph one clear job
Before you raise the camera, finish this sentence: the interesting thing here is _____. It might be a face, a reflection, a patch of light, a shape, or a relationship between two people. If you cannot name it, pause. A scene can be interesting without making a clear photograph from where you are standing.
Build the frame around that answer. A portrait might need a clean background and attention on the eyes. A landscape might need a foreground that leads into the distance. A street photograph might depend on a gesture arriving at the right moment. You do not need to include everything that made the place feel exciting. Sometimes removing half the scene makes the remaining half much stronger.
Try making two versions: one that includes the surroundings and one that gets closer to the subject. Compare them later without defending the version you worked harder to make. Which photograph communicates faster? That question is more useful than asking which one looks more complicated.
2. Look for light before looking for settings
Notice the direction, size, color, and contrast of the light. Side light can reveal texture. Light from behind can create a rim or silhouette. Open shade can give a face softer illumination than direct midday sun. A window can become a simple portrait setup if you turn the subject toward it and keep the background under control.
Walk around the subject when access and safety allow it. A few steps can change a busy background into a clean one or put the light on the useful side of a face. Turning your own body is often more effective than changing a menu setting. When the light is poor for your idea, change the idea or find a different position instead of expecting editing to fix everything.
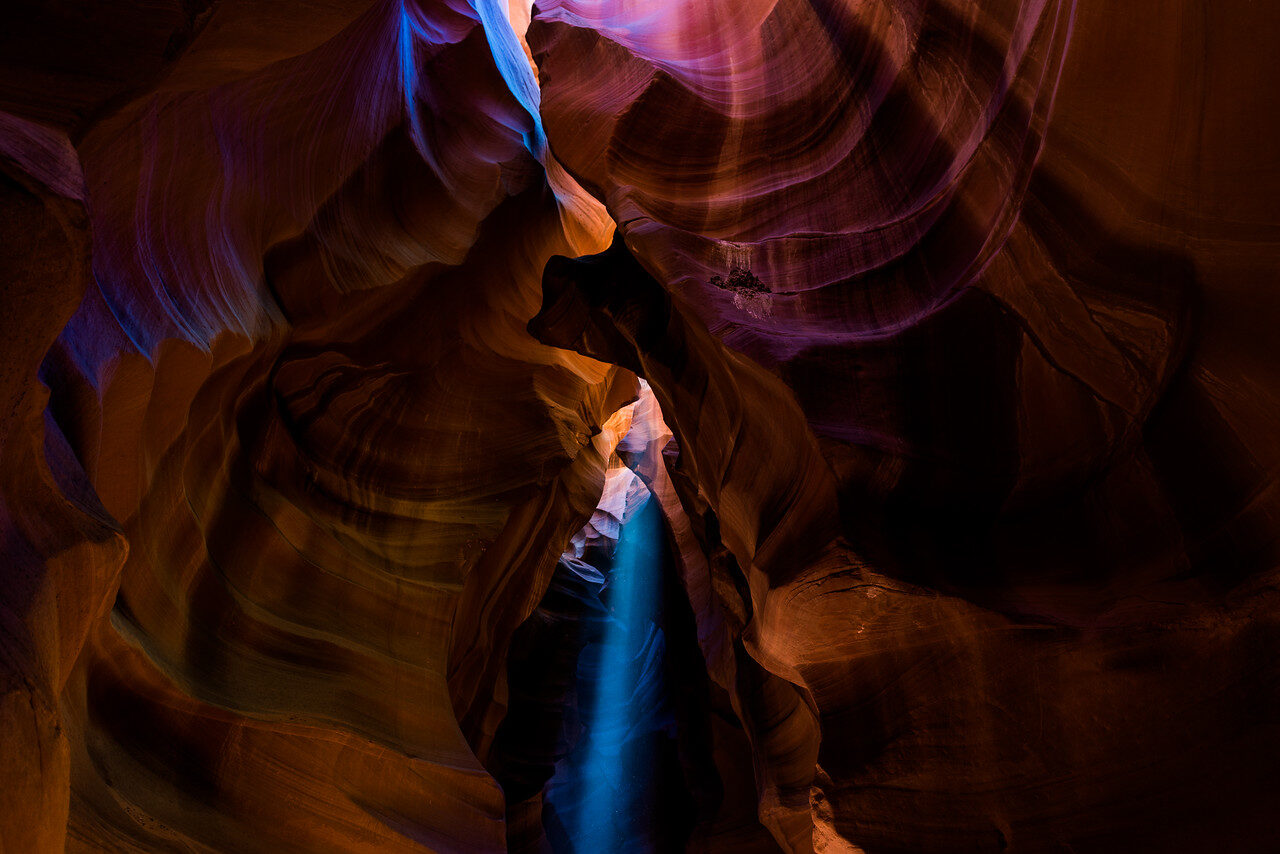
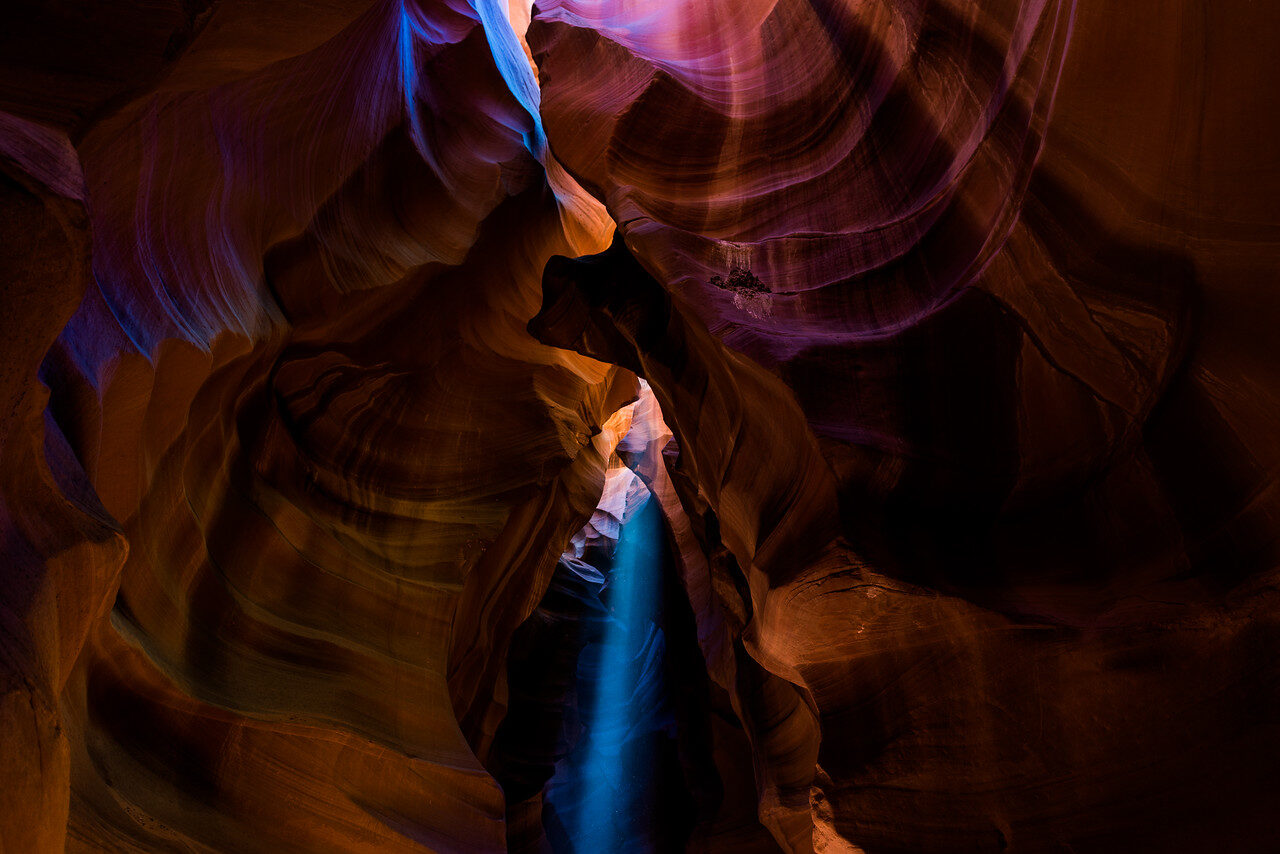
Sunrise and sunset can be useful, but do not treat them as a guarantee. Clouds may block the color. A shaded street may work better in the middle of the day. In a canyon, the angle of light matters more than a generic golden-hour rule. Look at what the light is actually doing, not what the clock says it should do.
 Save
3. Learn exposure without making manual mode a religion
Aperture, shutter speed, and ISO work together, but each also affects a different part of the result. Aperture helps control depth of field. Shutter speed controls how movement is recorded. ISO changes the camera’s signal response and the brightness of the recorded result; higher settings often bring more visible noise and less room for recovery. The balance matters more than a favorite number.
Use aperture priority when depth of field is your main decision and the light is changing. Use shutter priority when movement is the main problem. Manual exposure is useful when you want settings to stay consistent, or when the meter keeps changing its recommendation in a way that does not fit your subject. Manual with Auto ISO is a different setup from fully manual exposure with fixed ISO; learn how your camera handles both.
Start with the constraint you cannot sacrifice. For a moving subject, that may be a sufficiently fast shutter. For a landscape with nearby and distant detail, it may be enough depth of field. For a deliberate motion blur, it may be a slow shutter and a stable camera. Let the other settings support that choice. No exposure mode excuses you from checking the result.
4. Choose shutter speed for the subject, not a memorized rule
A slow shutter can make moving water smooth, but it can also ruin an expression or blur a person walking through the frame. A fast shutter can stop action, but the speed needed depends on how fast the subject moves, its direction, its distance, and how tightly you frame it. Treat any suggested setting as a starting point, not a promise.
When you want sharp handheld photographs, watch both subject movement and your own movement. Image stabilization can help with camera shake, but it does not freeze a moving person. A tripod stabilizes the camera; it does not stop wind in leaves or a child turning their head. If the subject is blurry while the background is sharp, the solution may be a faster shutter rather than a different focus setting.
Make an intentional test. Photograph the same moving subject at several shutter speeds and examine the difference at a useful viewing size. Keep the example that explains what you wanted. Technical sharpness and expressive motion are different goals, and either can be right when chosen deliberately.
5. Put focus where the story needs it
Do not leave focus to chance when a particular part of the subject matters. For a portrait, make sure the intended eye is sharp. For a small object, choose the detail that explains its shape or function. For a landscape, check nearby and distant areas rather than assuming a small aperture made everything sharp.
Single autofocus can suit a stationary subject. Continuous autofocus is often more useful when the distance changes. Eye detection can help, but inspect whether the camera found the correct person and the correct eye. Camera brands use different names and controls, so practice with your own model before an important shoot.
Depth of field is affected by aperture, focal length, subject distance, and how you view the final photograph. A wide aperture is not automatically better for portraits, especially when several faces sit at different distances. Stop down when the photograph needs more of them in focus. If you cannot get the result you want, change your position or arrangement instead of repeatedly taking the same failed frame.
 Save
6. Clean the edges and the background
Look around the whole frame before pressing the shutter. Check for bright distractions, cut-off hands, poles behind heads, and objects entering from the edge. You may not notice them while concentrating on the subject, but the viewer sees them immediately. A small change in height or position can remove a problem before it becomes an editing task.
Composition guides such as thirds, symmetry, diagonals, and leading lines are tools, not scoring systems. Use them when they help the photograph. A centered subject can work. An off-center subject can work. What matters is the relationship between the subject and everything around it.
Try a lower viewpoint, a higher viewpoint where safely accessible, and a tighter frame. Do not step into traffic, climb barriers, disturb wildlife, or damage a place for an angle. If a position is not safe or permitted, it is not part of the shoot. A strong photograph is not worth creating a problem for yourself or other people.
7. Scout, return, and give the scene time
Showing up and taking the first available frame is only one approach. Walk the area, notice possible backgrounds, and work out where the light may fall. If a location is close to home, return at a different time or in different weather. Familiarity lets you pay attention to the photograph instead of spending all your energy finding your way.
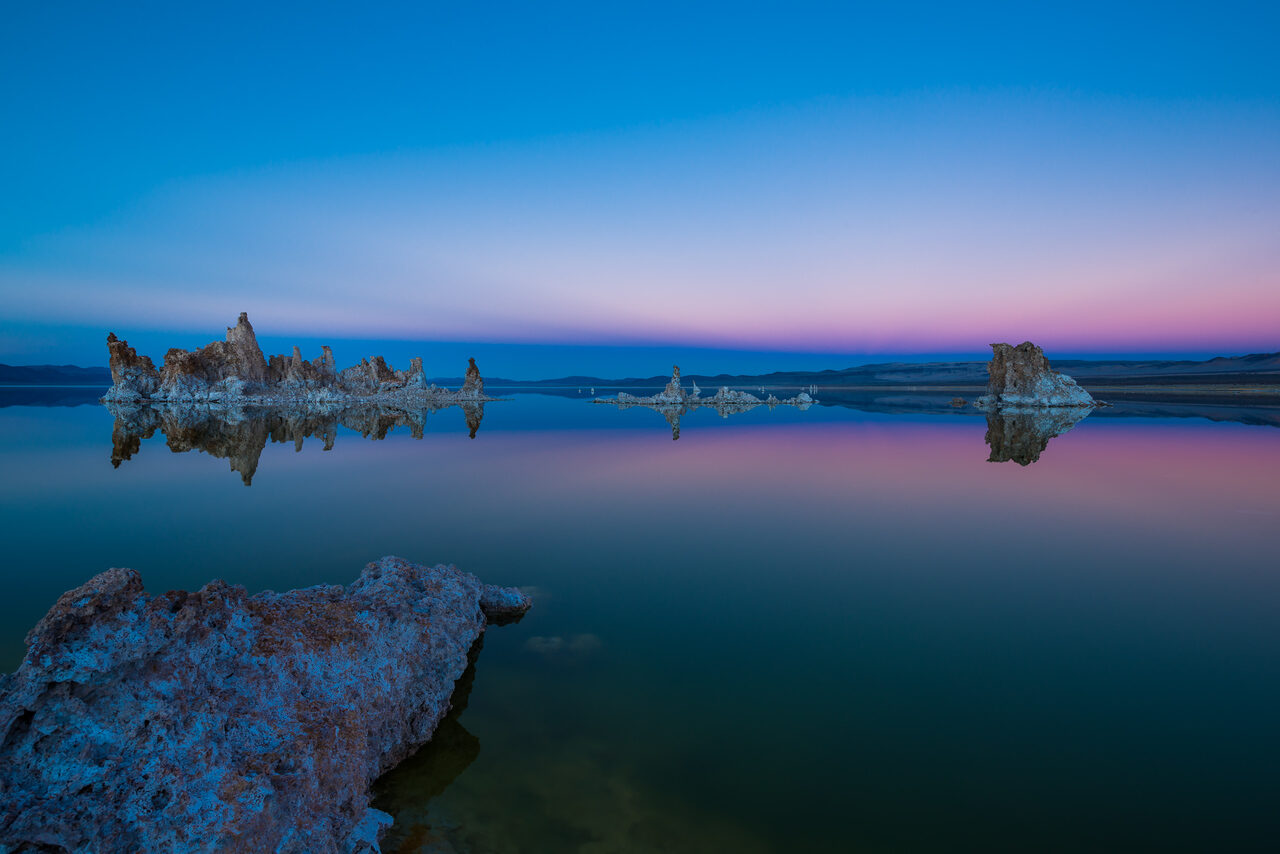
At sunset, do not pack up automatically when the sun disappears. The sky and artificial lights may balance differently afterward. At sunrise, arrive with enough time to set up before the light changes. Bring what you need to leave safely in low light, and check access times rather than assuming a park, gate, or path will remain open.
Waiting is not the same as doing nothing. Refine the composition, watch for distractions, and compare the light as it changes. If nothing useful happens, leave with the information you gained. Scouting can improve the next visit even when the current visit does not produce a finished photograph.
 Save
8. Practice one problem at a time
A focused exercise is easier to learn from than a long walk with no goal. Spend one outing finding clean backgrounds. Spend another photographing the same subject from different heights. Try a fixed focal length or stay within a small area. Limits make you look harder instead of relying on novelty to carry the photograph.
If portraits are comfortable, try a landscape. If landscapes are comfortable, work on a simple portrait with a willing subject. Ask permission where appropriate, respect a refusal, and do not treat strangers as props. A new subject teaches you to notice problems your usual subject does not present.
Keep the exercise small enough to repeat. Ten deliberate photographs with a clear question can teach more than hundreds made without looking back. Write down the problem you are working on, the choices you tried, and the result. That short record gives your next practice session somewhere to begin.
9. Review the photographs that did not work
Pick a small set after each outing. Look at the best frame, a near miss, and a clear failure. Ask whether the problem was light, timing, focus, shutter speed, composition, or simply an unclear idea. Avoid saying that everything was bad. A specific diagnosis gives you a specific fix.
Check photographs at normal viewing size and, when sharpness matters, at a larger view. Pixel-level inspection alone can distract from a photograph that communicates well. On the other hand, a tiny screen may hide missed focus. Use both views for different questions.
Make an edit, then step away and look again. Correct white balance and exposure thoughtfully, crop when it strengthens the frame, and avoid pushing every slider because it is available. Editing can support good observation, but it cannot give you a missed gesture or a camera position you never tried. Keep original files and an independent backup before experimenting with major changes.
10. Buy support for a real problem, not for motivation
Before buying anything, name the photographs your current setup prevents you from making. If camera movement is spoiling long exposures, a tripod may help. If your bag is too heavy to take outside, adding another lens may make the problem worse. If you do not understand your current camera, a more expensive body will not remove the learning curve.
 Save
11. Learn with photographers who give useful feedback
Ask for feedback on a specific question. Does the background compete with the face? Does the foreground lead into the landscape? Is the motion clear? A question gives another photographer something useful to discuss. Collecting compliments is pleasant, but it does not tell you what to practice next.
Photo walks, workshops, and small creative groups can introduce ways of seeing that you would not find alone. Listen without copying every preference. You can learn from someone whose photographs look different from yours. The aim is to make your decisions more deliberate, not to turn every photographer into the same photographer.
ShutYourAperture Academy offers technical courses and artistic workflows to help you improve light, composition, and image-making. Use structured study when random tips leave gaps, then take one idea outside and practice it. The value is in making stronger photographs with more confidence, not collecting another set of videos you never use.
A simple plan for your next outing
Choose one subject and one skill. Give yourself a short, realistic block of time. Make a wide frame, a closer frame, and a different angle. Check the edges, focus, and exposure before leaving. At home, select three photographs and write one sentence about what worked and one about what needs changing. Repeat the exercise before adding another problem.
That is how practice becomes progress: notice, choose, photograph, review, and return. You do not need an extraordinary destination every time. You need to pay attention to the place and the light in front of you.
For deliberate slow exposures: Peak Design Aluminum Travel Tripod
A tripod can help keep the camera still for landscapes, blue hour, and planned motion blur. This aluminum travel model is one option if packed size matters. Check your camera and lens load, plate compatibility, working height, and current retailer details before choosing it. You do not need this specific tripod to practice these tips, and it will not freeze a moving subject.
Affiliate links may earn a commission. Retailer prices and availability can change.
Questions about taking better photos
Do I have to shoot in manual mode?
No. Aperture priority, shutter priority, and manual exposure can all produce strong photographs. Learn what aperture, shutter speed, and ISO do, then choose the mode that gives you useful control for the subject and changing light.
Will a better camera improve my photography?
It can solve a specific limitation, such as autofocus performance or a feature you genuinely need. It does not replace clear subjects, useful light, timing, composition, or practice. Identify the limitation before buying.
What should I practice first?
Start with a clear subject, a clean background, and reliable focus. Work on one problem per outing and compare the results afterward. Small repeatable exercises make it easier to see what changed.
Is sunrise always the best time to take photos?
No. Sunrise can offer useful light, but the best time depends on the subject, weather, location, and access. Open shade, window light, midday light, and blue hour can all work when they fit the photograph.
Why are my photos blurry even with a tripod?
A tripod reduces camera movement, but moving subjects, wind, missed focus, and vibration can still cause blur. Check which part is blurry, then adjust shutter speed, focus, technique, or support for that specific problem.
Technical reference: Nikon exposure basics. Photographs selected from the owner’s fine-art collections.

