Street photography is the Wild West of the photography world. It’s raw, it’s unpredictable, and frankly, it can be pretty terrifying when you’re starting out. You see these "pros" on Instagram or YouTube posting incredible, candid shots of strangers in New York or Tokyo, and you wonder: How did they get that close? Why didn't they get punched? And why do my photos look like blurry messes of people's backs?
The truth is, most experts gatekeep the real "secrets." They’ll tell you it’s all about the gear or "having an eye," but that’s mostly a load of trash. The real secrets to mastering urban shooting have more to do with psychology, anticipation, and knowing how to manipulate your camera settings so you don't even have to think about them.
In this guide, we’re going to strip away the fluff. We’ll talk about what actually works in 2026, from the tech you should be using to the mental hurdles you need to hop over. If you're still struggling with the basics, you might want to check out our photography for beginners 101 guide first, but if you're ready to hit the pavement, let's dive in.
The Biggest Secret: The "Fishing" Technique
Most beginners hunt. They walk miles and miles, camera in hand, eyes darting everywhere, trying to find a "moment." The problem? By the time you see the moment, it’s already gone. You’re reacting, and in street photography, if you’re reacting, you’re losing.
The real pros use what we call the "Fishing Technique."
Find a great background, a shaft of light between two buildings, a colorful wall, or an interesting piece of street art. Then, you sit and wait. You let the "fish" (the subjects) swim into your frame. This allows you to compose your shot perfectly beforehand. You’ve already handled your exposure, your focus point is set, and all you have to do is wait for the right person to walk into that patch of light.
It feels less like stalking and more like art. Plus, when you stay in one spot, you become part of the furniture. People stop noticing you, which is exactly how you get those authentic, candid expressions.
Zone Focusing: Why Autofocus is Your Enemy
Here is something the camera manufacturers don't want to admit: even in 2026, with all the AI-powered mirrorless tech, autofocus can still fail you in a split second. In the street, a split second is an eternity.
Experts often use "Zone Focusing." This is an old-school technique that is still the fastest way to shoot. You set your camera to manual focus and use a narrow aperture (like f/8 or f/11). By doing this, you create a "zone" where everything from, say, 5 feet to 15 feet is in focus.
Now, you don't have to wait for a lens to hunt for focus. You just see someone walk into your "zone," and you click. If you’re struggling to understand how to balance these settings, mastering how to use manual mode is non-negotiable for this style of shooting.

Stop Shooting at f/1.4 (Seriously)
We all love bokeh. That creamy, blurred-out background is the drug of the photography world. But in street photography, shooting wide open is a recipe for disaster.
If you’re shooting at f/1.8, your depth of field is paper-thin. If your subject moves two inches, they’re out of focus. More importantly, street photography is about context. If you blur out the entire city, you might as well be shooting in a studio. The "urban" part of urban shooting matters. You want to see the storefronts, the signs, and the grit of the city.
Most experts shoot at f/5.6 or higher. It gives you a safety net for focus and keeps the story of the street in the frame. If you're coming from a portrait background, this feels wrong, but trust me: it’s the key to keepers. You can learn more about finding the right balance in our portrait photography techniques guide.
The Psychology of Invisibility
The biggest hurdle in street photography isn't technical: it's mental. It’s the fear of confrontation.
The secret to not getting yelled at isn't being "sneaky." Being sneaky makes you look like a creep. If you’re hiding behind a pole or using a massive 70-200mm zoom lens from across the street, people will notice you, and they will be uncomfortable.
Instead, act like you belong there. Wear boring clothes. Don't make eye contact immediately after taking a shot: keep looking past the person at the building behind them as if they just happened to be in your way. If someone does catch your eye, a simple nod and a smile go a long way.
And here’s a pro tip: If you’re using a camera like the Fujifilm X100VI, you look like a tourist or a hobbyist, not a "professional." People are much less threatened by a small, retro-looking camera than a giant DSLR with a battery grip. Check out some Fujifilm X100VI settings that can actually be tweaked for the street.
Using AI to Your Advantage in 2026
We’ve moved past the era where "AI" was a dirty word in photography. In 2026, the best urban shooters are using AI to save shots that would have been trashed five years ago.
Between high ISO noise from shooting in dark alleys and the motion blur of a moving crowd, your raw files can be messy. Tools like Luminar have become essential for cleaning up urban shots without making them look "fake." The AI-driven noise reduction and "Relight" features allow you to fix the lighting on a subject's face if they walked through a shadow at the wrong time.
However, don't overdo it. The grit is what makes the street real. If you’re making mistakes with AI photo editing, you'll end up with a plastic-looking image that loses the soul of the city.

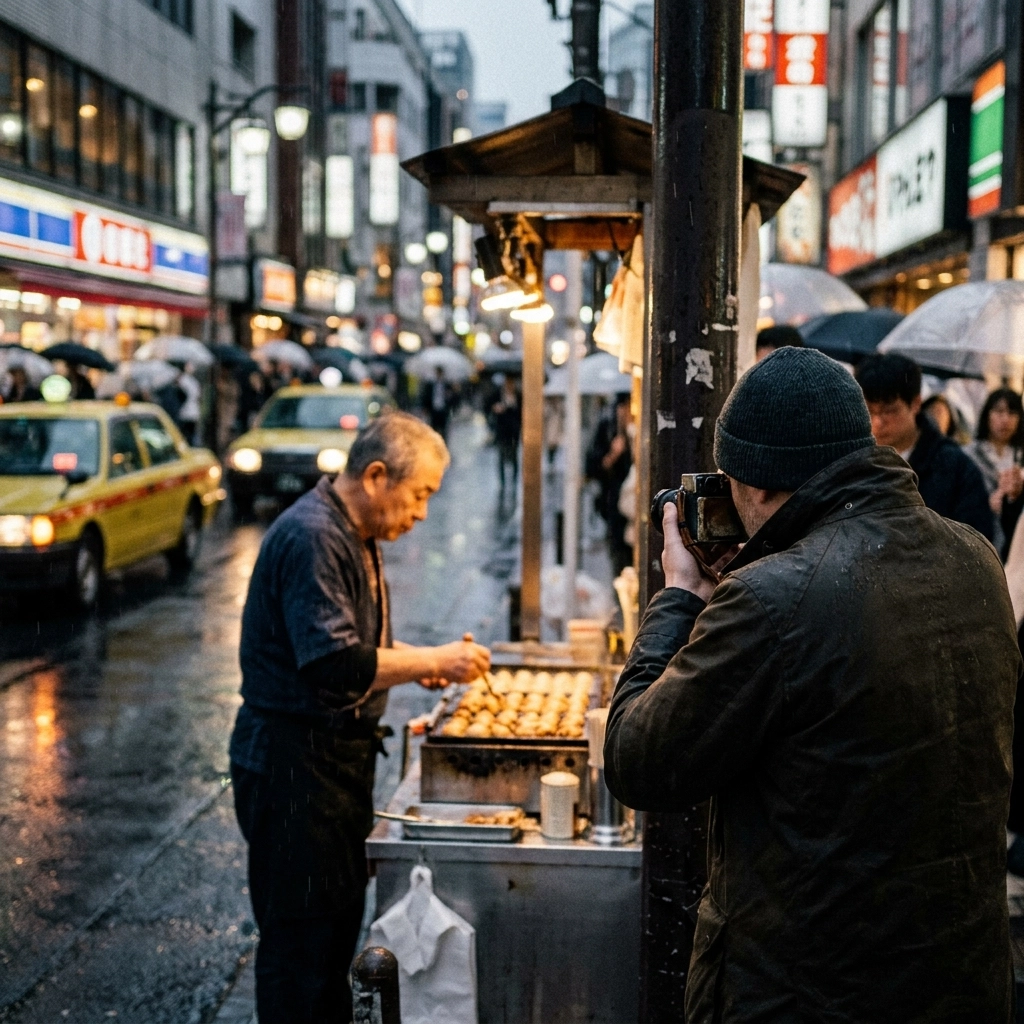
Why You Should Shoot at Night
Everyone loves "Golden Hour," but the city truly comes alive after the sun goes down. Neon signs, car headlights, and wet pavement create a cinematic look that you just can't get at 2:00 PM on a Tuesday.
Night street photography is where your gear really gets tested. This is where you’ll want to look into the best mirrorless cameras for 2026, as modern sensors can handle insane ISO levels with minimal grain.
When shooting at night, look for "pools" of light. A street lamp or a glowing shop window acts as your spotlight. Wait for someone to walk into that specific area. This is the ultimate "Fishing Technique" scenario.
The Myth of the "Perfect" Camera
If you go to any photography forum, you’ll see people arguing about megapixels and dynamic range. Ignore them.
The best camera for street photography is the one that doesn't get in your way. For some, that’s a smartphone. For others, it’s a high-end mirrorless body. The "secret" is knowing your gear so well that you can change settings while looking through the viewfinder.
If you’re still shopping for your first setup, don’t get distracted by the marketing hype. Look for something small, fast, and quiet. You can find some solid advice on how to choose the best mirrorless camera in 2026 that covers exactly what to look for in a street rig.
Composition: Look for the "Layers"
A common mistake in urban shooting is having a "flat" image. One person walking across a wall. It’s fine, but it’s boring.
To take it to the next level, you need layers. You want something in the foreground (maybe a blurred-out mailbox or a street sign), your main subject in the midground, and an interesting architectural element in the background.
Layers give the viewer’s eye a journey to take through the image. It makes the city feel deep and alive. This is a concept often used in landscape photography too, and you can see how it applies in our ultimate guide to landscape photography.

Don't Be Afraid of the "Boring" Stuff
Experts know that street photography isn't always about people. Sometimes, the street itself is the story. Shadows, discarded umbrellas, the way light hits a fire escape: these are all valid subjects.
Urban shooting is about capturing the feeling of the city. Sometimes a person ruins the shot. If you find a perfect geometric shadow, don't feel like you "have" to wait for a person to walk through it. Capture the abstract.
This mindset shift helps you keep shooting even on days when the streets feel empty. For more on capturing these types of environmental shots, check out some pro tips on PhotoGuides.org.
Post-Processing: Keeping it Authentic
When you get home and pull your shots into your computer, the temptation is to crank the contrast and saturation. Resist it.
The goal of street photography is usually to represent a moment in time. If you over-process, it looks like a digital composite. Use Luminar to enhance what's already there: bring up the shadows slightly, sharpen the details, and maybe add a slight film grain to give it that classic street feel.
If you find yourself spending more than five minutes on a single street photo, you’re probably overthinking it. Street shots are supposed to be a bit "unpolished." That’s where the magic lives. You can see more about why this matters in the latest AI photography news.
Legalities and Ethics: The "Hidden" Rules
Depending on where you are in the world, the laws change. In the US, generally, if you are in a public space, you have a legal right to photograph anything in plain view. However, "legal" doesn't always mean "ethical."
Don't photograph people in vulnerable situations. Don't be a jerk. If someone asks you to delete a photo, usually it’s better to just do it and move on. There are a billion other photos to take; one shot isn't worth a physical altercation.
If you're interested in the more formal side of photographing people, like professional corporate headshots, the rules are completely different, but for the street, the "Golden Rule" applies: treat people with respect.
The Secret Habit: Curating Your Work
The real reason the experts seem so much better than you is that you only see their top 1%.
A pro might go out for four hours, take 500 photos, and only keep two. Beginners often try to "save" mediocre shots because they like the memory of taking them. You have to be a ruthless editor of your own work.
If it’s out of focus, toss it. If the composition is messy, toss it. By only showing your absolute best work, you build a reputation for being a great photographer. For more help on how to avoid the common pitfalls that lead to bad shots, read our piece on 7 mistakes you're making with manual mode.

Putting it All Together
Street photography is a marathon, not a sprint. You’re going to have days where you feel like a total failure, and you’re going to have days where you feel like Henri Cartier-Bresson reborn.
The "secret" is just showing up. The more you're out there, the more "lucky" you get.
If you want to dive deeper into the technical side of things and really master your craft, head over to Shut Your Aperture's learning portal. We have deep dives on everything from camera settings to the art of the print.
Now, grab your camera, put it in manual mode, and get out there. The street is waiting.
Summary Checklist for Your Next Outing:
- Check your settings: Aim for f/8 and a fast shutter speed (1/500s or higher).
- Pick a spot: Find your "fishing hole" and stay there for at least 20 minutes.
- Watch the light: Look for high-contrast areas and shadows.
- Be respectful: Smile, nod, and don't be "sneaky."
- Edit ruthlessly: Only share the shots that truly tell a story.
Street photography is about the human experience. It's messy, it's beautiful, and it's always changing. Whether you’re shooting with the latest AI-powered mirrorless camera or a film camera from the 70s, the goal is the same: capture a moment that will never happen again.
For more inspiration, check out the fine art urban work at Edin Fine Art or read more behind-the-scenes stories on Edin Chavez's blog.
Happy shooting!