Updated October 2026.
Most of us spend our whole photography lives working between a few feet and a few miles. Wide angle, standard, telephoto. Then you look at a dead leaf at 1.2 millimeters wide and the whole idea of what a photograph can show gets turned upside down. This is an epic series, and it is worth slowing down for. In this post I want to walk you through the images, explain how a scanning electron microscope photo is actually made, and, more useful for you, give you real tips for taking your own decaying plant macro photography with the gear you already own.
“Withered plant” by Tomoya Matsuura
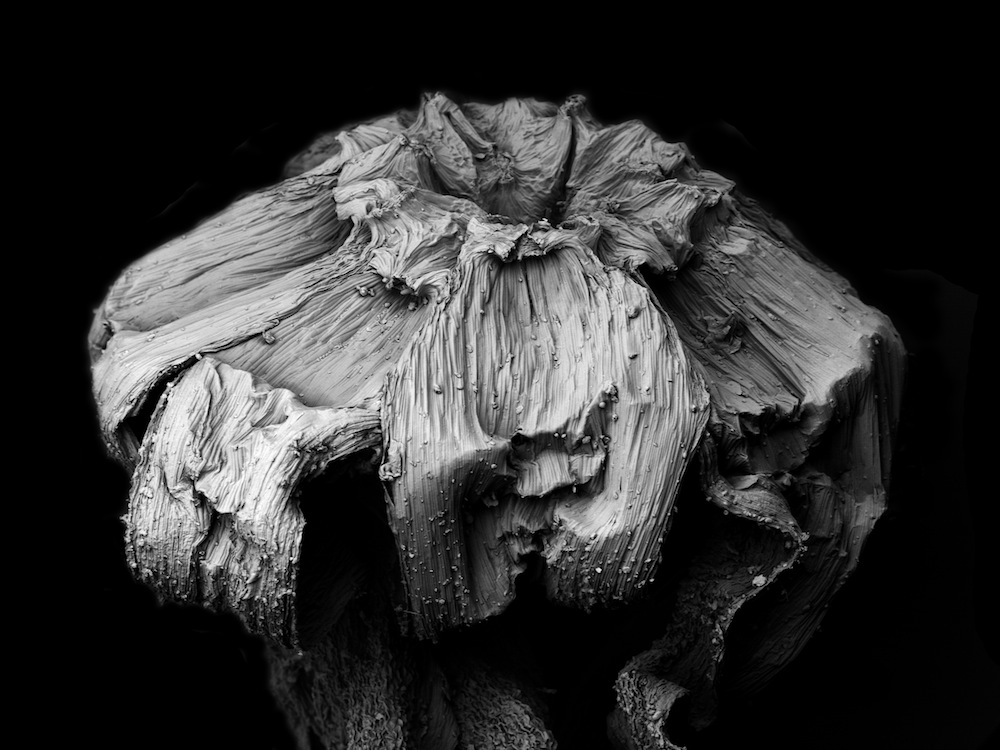
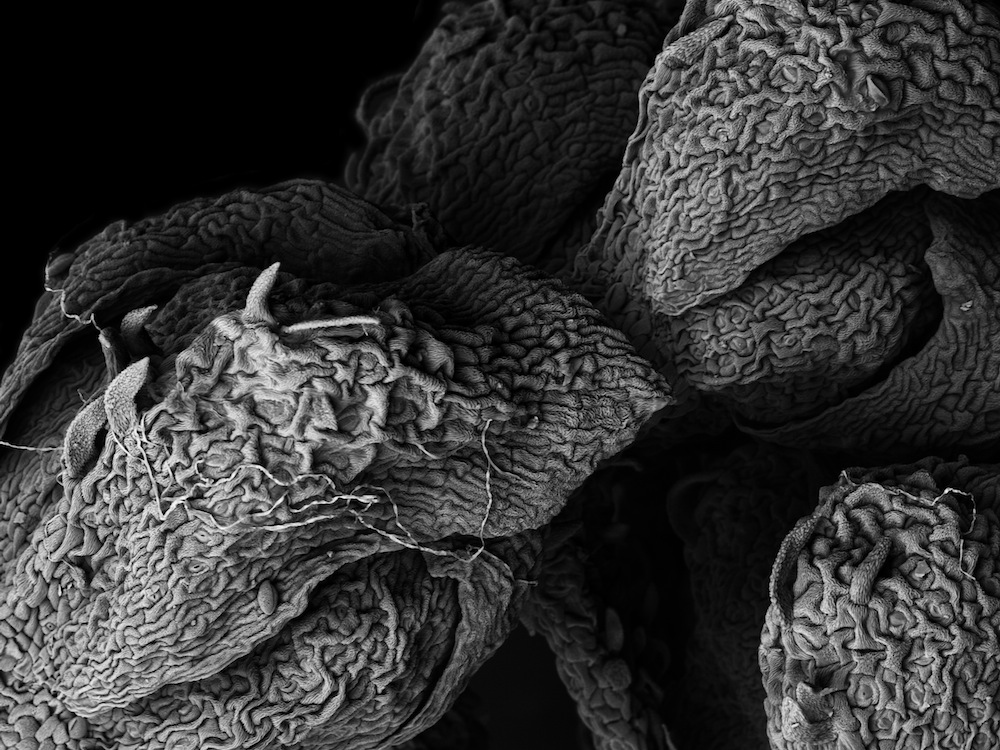
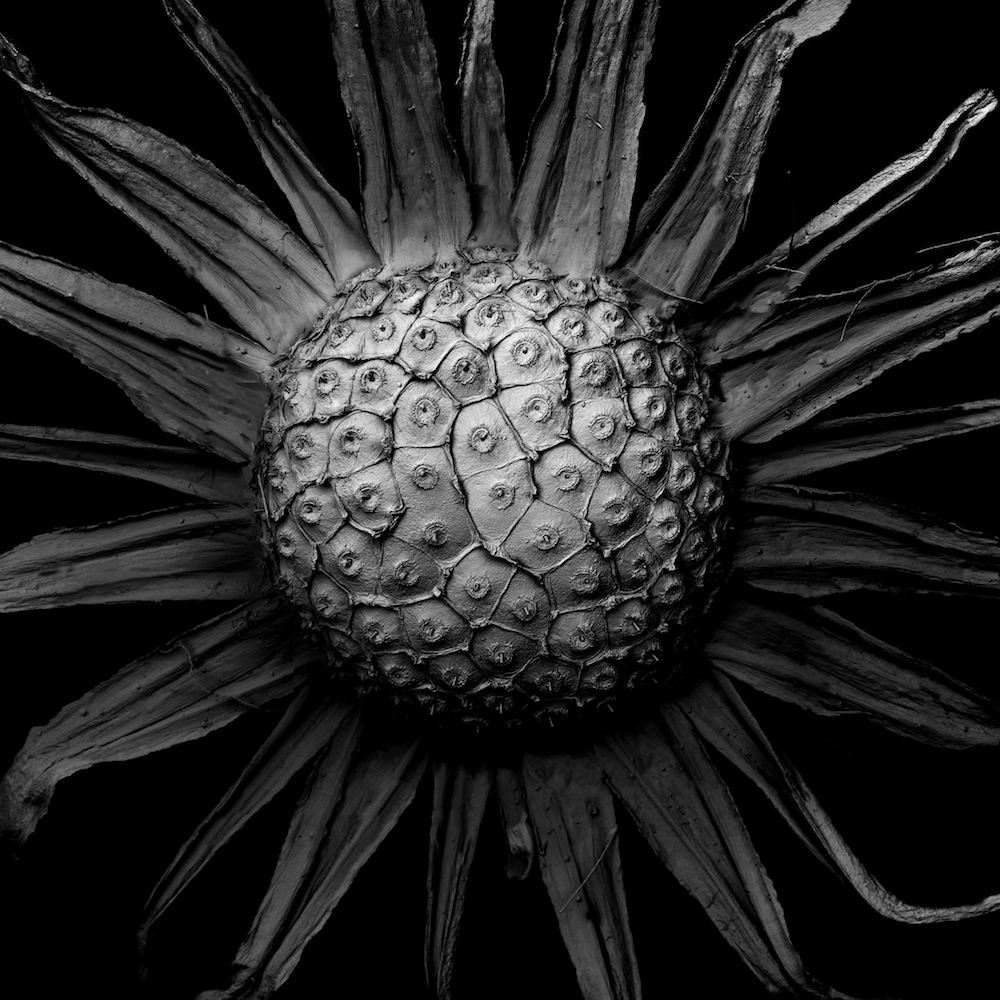
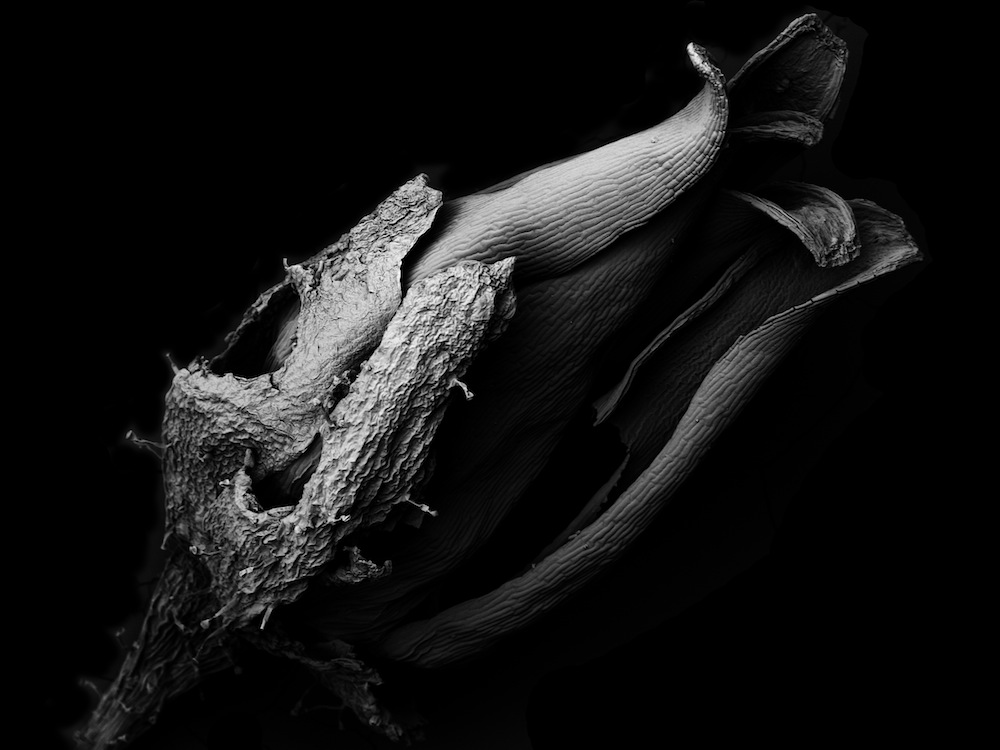
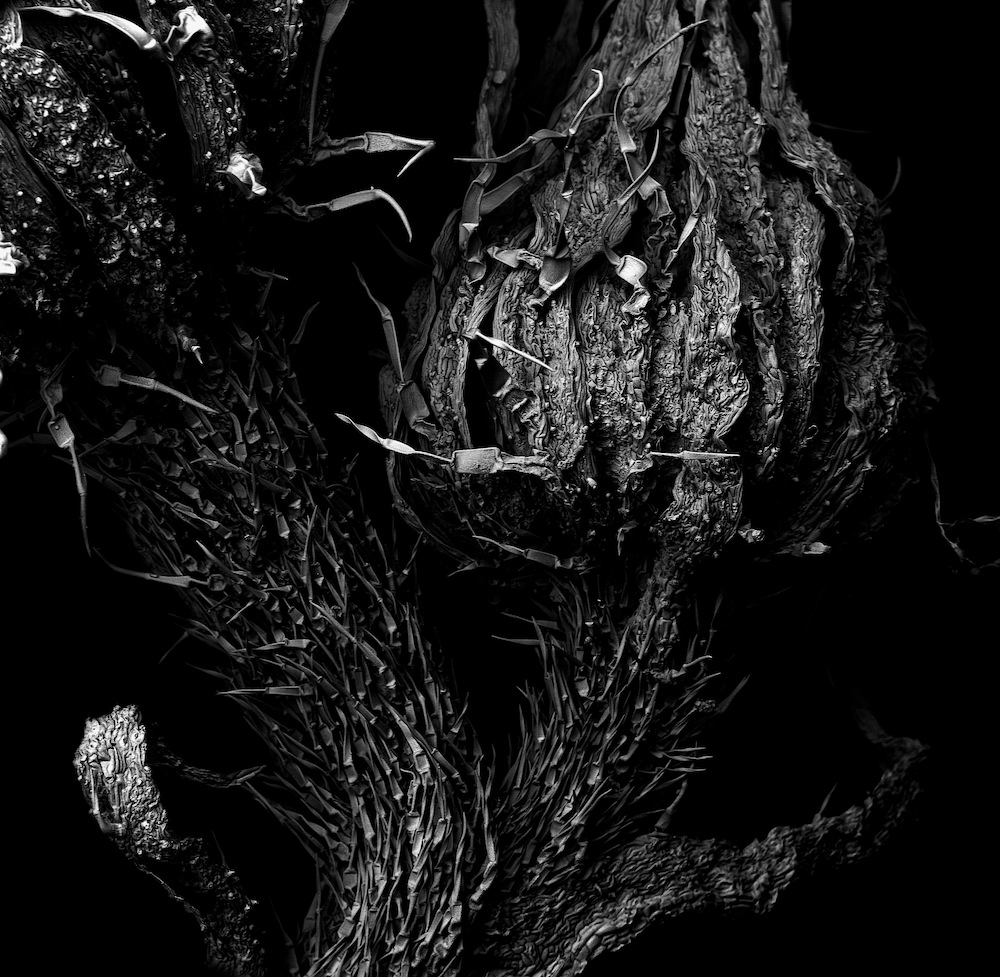
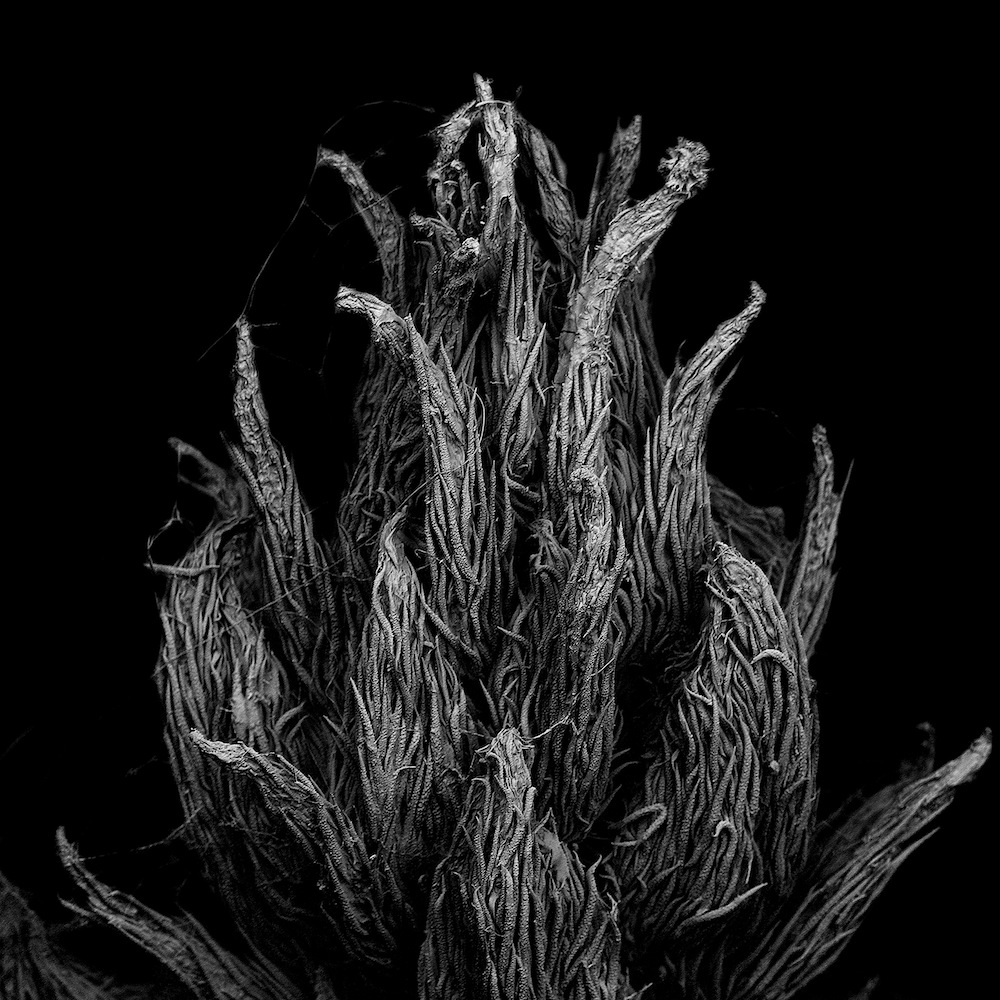
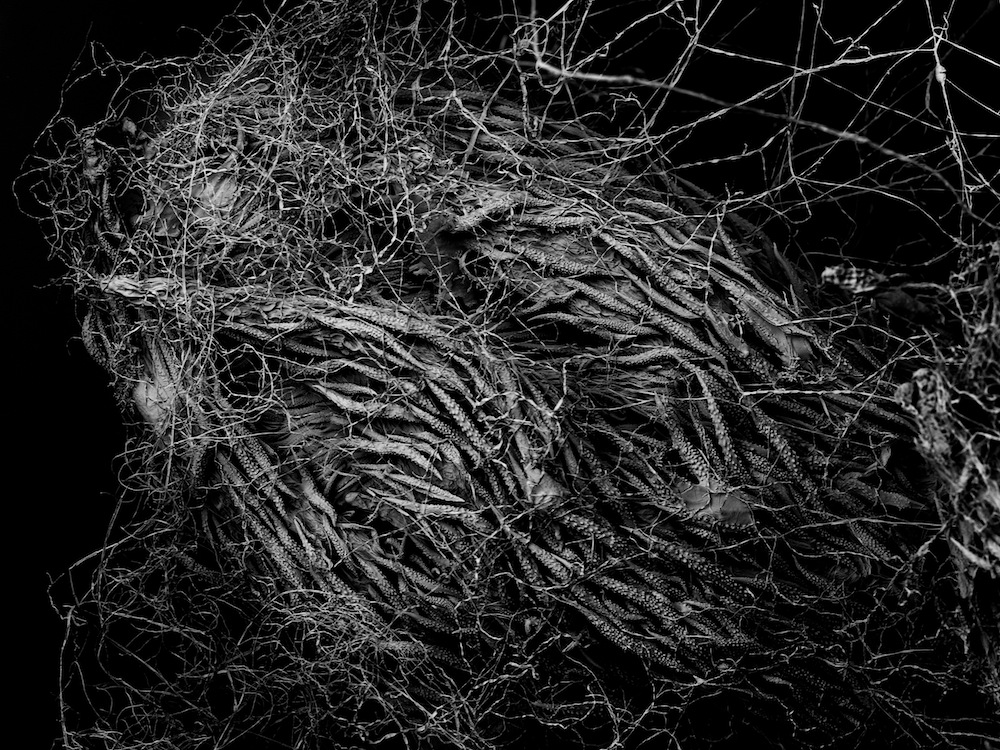
This is a collection of images taken with a Scanning Electron Microscope that depict the cycle of life in nature.
There lies an even deeper natural world in each and every small plant that we see every day in nature. These plants repeat the cycle of birth and death in perpetuity. Though unseen by the naked eye, this cycle is host to a range of expressions, rich activity, and a sense of motion. The Scanning Electron Microscope used to produce the images has a higher resolution than traditional optical microscopes, showing the structure of plants in extremely fine detail.
In the near future, these works will be exhibited outdoors, on the faces of buildings. By exhibiting images of the flora growing near those installation sites and turning that subject matter into large murals, I hope to bring the everyday, yet majestic, natural world into the forefront and invite viewers to see how plants are another living being with which we coexist.
Captured size: width 0.6~5mm.
All of the images in this post belong to Tomoya Matsuura and are shown here with credit and a link to his own pages. I did not shoot them and I have never operated an electron microscope, so everything I say about the process below comes from how the technique is generally described, not from hands-on time at the instrument. The tips in the later sections are about what you can do with a normal camera.
 Save
SaveWhat a scanning electron microscope actually does
A normal camera records light bouncing off a subject. A scanning electron microscope, or SEM, does not use light for the picture at all. It fires a very fine beam of electrons across the surface of a sample, line by line, and a detector counts the electrons that bounce or knock loose from each spot. The instrument turns those counts into brightness values and builds the image one point at a time. If that sounds a bit like how a flatbed scanner or a rolling slow scan works, you are on the right track.
Because electrons have a much shorter wavelength than visible light, the detail you can resolve is far finer than any optical lens can give you. That is the line in the artist statement about higher resolution than traditional optical microscopes. It is also why the images feel so sharp from front to back. SEM pictures have a huge depth of field compared with an optical microscope at the same scale, so a bumpy surface can stay in focus across the whole frame. Anyone who has tried to photograph a bug with a macro lens at f/2.8 and watched the focus fall off a millimeter later knows how big a deal that is.
A few more things are worth knowing:
- The sample lives in a vacuum. Electrons scatter in air, so the chamber is pumped down. That is hard on living or wet material, which is one reason dried and withered plants make such good subjects.
- Non-metal samples are usually coated. To stop an insulating sample from building up charge under the beam, labs commonly sputter on a very thin layer of metal such as gold.
- The raw image is grayscale. The detector measures how many electrons arrive, not what color anything is. Any color you see in an SEM picture is added afterward, so it is an artistic or scientific choice, not a measurement.
- The field of view is tiny. The file names in this series list the captured width, from about 0.64 mm up to roughly 6 mm. A whole frame is smaller than a grain of rice.
 Save
SaveWhy decay looks so beautiful at this scale
Decaying plants are the perfect subject for this kind of photography, and the reason is simple. A living leaf is smooth, moist and soft. As it dries and withers, the cells collapse, the surface cracks, ridges form, and the fine structure that was hidden under moisture gets exposed. You end up with texture, repeating patterns and deep shadows. That is exactly what a good photograph is made of.
Look at the series and notice what you are really seeing: pattern, repetition, rhythm and contrast. Take away the fact that it is a plant under a microscope and these are abstract landscape compositions. Ridges become mountain ranges. Cracks become canyons. A pore is a crater. That is the most useful thing a photographer can take from this work. Scale is a trick of the frame. If you can see it as shapes and light, you can photograph it.
 Save
SaveEight lessons for your own decaying plant macro photography
You do not need a microscope. Here are the tips I would hand you if you wanted to start shooting this kind of subject next weekend.
1. Start with dried, dead and fallen things
Withered leaves, seed heads, dried flowers, curling bark, rotting fruit skins, old pine cones. They hold still, they do not mind being moved, and they carry far more texture than fresh green material. A backyard in late autumn is a gold mine.
2. Use a real macro lens, or fake it with extension tubes
A true 1:1 macro lens gives you a subject the size of your sensor. If you do not own one, extension tubes between the body and a lens you already have cut the minimum focus distance and let you get much closer. A reversed lens on a cheap adapter ring is the budget route, and it works, but it takes patience.
3. Fight the shallow depth of field with focus stacking
This is the one technique that gets you closest to the SEM look with normal gear. At high magnification, even f/11 gives you a razor thin slice of sharpness. So you shoot a series of frames, moving the focus a tiny bit each time, and blend them in software. Many cameras have a built-in focus bracketing mode. On a tripod, with a focusing rail for fine steps, the results get really clean. Stacking is how you get that front to back sharpness the electron microscope delivers for free.
 Save
Save4. Control the light, not just the exposure
Side light is your best friend. It rakes across the surface, throws small shadows into every crack and makes texture pop. Overhead or flat light makes decay look dull. A small LED panel, a window with a white card for fill, or a desk lamp with a piece of parchment paper as a diffuser is plenty. Move the light, not the plant, and watch how the scene changes. The black-and-white SEM images get their drama from contrast between lit ridges and dark valleys, so think in those terms.
5. Shoot on a tripod and use a remote or a timer
At macro scales, a breath moves the frame by a lot. A steady tripod, a two second timer or a remote release, and electronic first curtain or mirror lock-up if your camera has them all cut vibration. Do not shoot macro handheld if you want crisp stacks.
 Save
Save6. Think in monochrome, then add color on purpose
Because SEM images start in grayscale, the best way to practice that look is to shoot or convert your own macros to black and white. Pay attention to tonal range. Then, if you add color, do it as a creative choice, and tell people you did. Color that is applied afterward is a style decision, not documentation.
7. Compose for pattern, not for object
Fill the frame. Get rid of the background. Use the diagonal of a ridge to lead the eye. Leave a little negative space only when you need it. A good macro frame often has no obvious horizon or subject, only a flow of shapes.
8. Shoot a series, not a single frame
Matsuura’s project works because it is a set of images that talk to each other. Twelve frames, one subject, a clear idea. When you find a subject you like, shoot it from many angles and distances and then edit down to a tight set. A series is easier to exhibit, easier to post and a lot more memorable than one random macro.
 Save
Save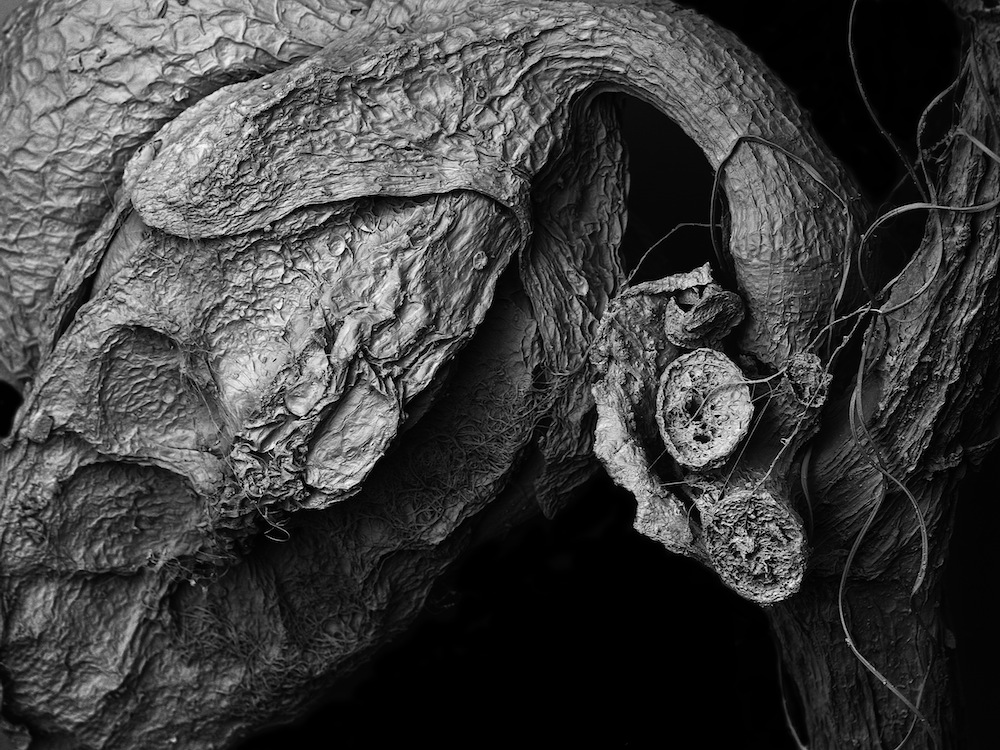 Save
SaveThe idea behind the series: exhibit it outdoors, big
Another thing I love here is the plan the artist describes. These works are meant to be shown outdoors on the faces of buildings, as large murals of the plants that grow near each installation site. That is a lovely idea. It takes something nobody normally sees, makes it huge, and puts it right next to the real plants people walk by every day.
For photographers there is a practical lesson. If you plan to print big, shoot with that in mind. Stack your frames, keep the files clean and use the highest resolution your camera offers. A mural turns every flaw into a feature. Resolution matters, but so does a subject with real detail, which is why SEM and macro work scale up so well. Large prints of texture-heavy subjects hold up far better than soft, low-detail scenes.
 Save
SaveHow to photograph SEM-style work or any screen or print of it
If you ever see a show of work like this, you will probably want to photograph it. A few quick tips: turn off your flash, use a polarizing filter to cut glare on glass or glossy prints, shoot at an angle to avoid your own reflection, and always respect the venue’s photo rules. Ask before sharing images of other artists’ exhibits, and always credit the artist.
 Save
SaveA quick workflow for a homemade macro series
- Collect. Pick a handful of dried plants from one place so the series feels connected.
- Set up. Plain background, tripod, side light, lens at its sharpest aperture, which is often around f/8 to f/11 at macro distances.
- Shoot a stack. Use focus bracketing or step the rail by a small, equal amount. Add a few extra frames at each end.
- Blend. Use stacking software such as Helicon Focus or Zerene, or the stacking function in your editor. Check the edges for halos.
- Edit as a set. Match contrast and tone across the series, convert to monochrome if you like and crop to a consistent ratio.
- Print or post with context. Add the field of view, like Matsuura does in his file names. It gives viewers a sense of scale.
 Save
SaveCommon mistakes to avoid
- Shooting too wide open. A shallow slice of focus at macro scale looks like a mistake, not art. Stop down or stack.
- Using flat light. The subject has texture. Show it.
- Moving the subject between frames. Stacks fail if the plant shifts. Use a clip, a stand or a little museum putty.
- Over-sharpening. Macro files hold a lot of detail. Heavy sharpening adds crunchy halos.
- Forgetting to credit. If you share someone else’s work, link to them. If you edit your own images in a heavy way, say so.
 Save
Save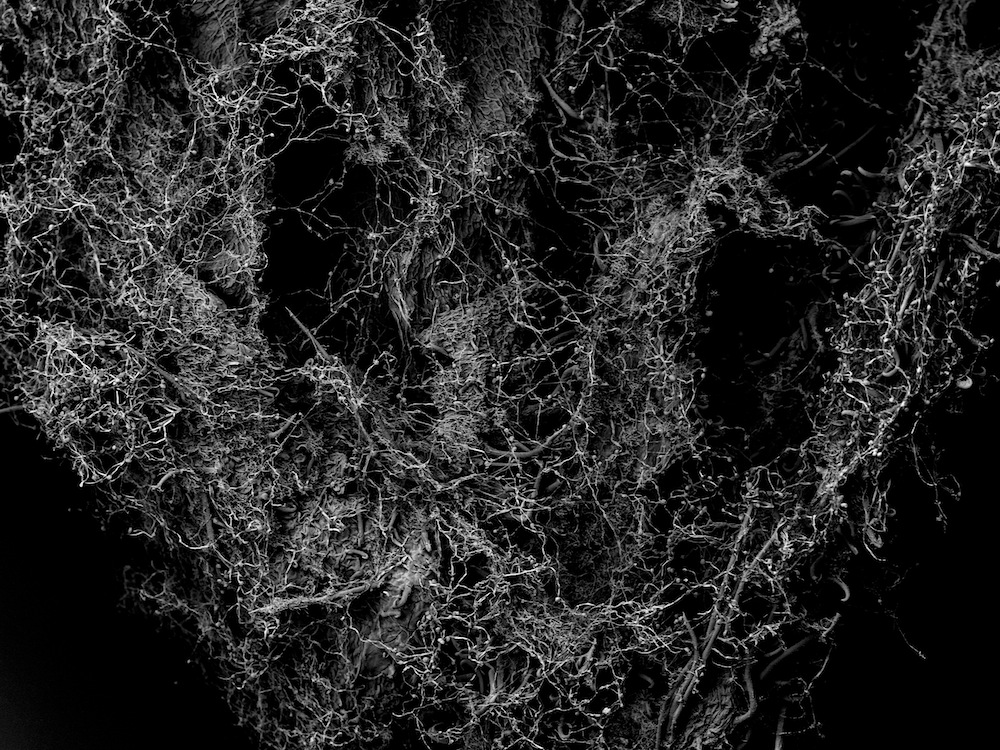 Save
SaveMore from the artist
If this series caught your eye, go look at the rest of Tomoya Matsuura’s work on his Tumblr and Facebook pages. Artists like him make us rethink where good photography comes from. The tools can be expensive, but the lessons about light, pattern and looking closely are free.
Learn the fundamentals first
Macro work is unforgiving. Exposure, focus and light have to be right or the whole thing falls apart. If you want to build those basics before you spend a weekend shooting leaves, our school at learn.shutyouraperture.com walks through them step by step.
Frequently asked questions
What is a scanning electron microscope?
A scanning electron microscope, or SEM, scans a focused beam of electrons over a sample and builds an image from the electrons that come back. It resolves far finer detail than an optical microscope and has a very large depth of field.
Are SEM images in color?
Not by default. The detector measures how many electrons arrive, so the raw image is grayscale. Any color you see has been added afterward as a creative or scientific choice.
How big is the field of view in this series?
The artist lists the captured width as roughly 0.6 to 5 mm, and the file names in the series range from about 0.64 mm up to around 6 mm.
Can I get a similar look with a normal camera?
You can get close to the sharpness and texture. Use a macro lens or extension tubes, side light, a tripod and focus stacking, then convert to black and white. You will not match true electron microscope resolution.
Who shot the images in this post?
All of the images are by Tomoya Matsuura. They are shown with credit and links to his pages. Shut Your Aperture did not shoot them.
Gear box: macro photography starting points
These are research starting points, not rankings. Check current models, reviews and prices before you buy.
- A macro lens: See macro lenses at B&H or on Amazon.
- Extension tubes: Browse at B&H.
- A macro focusing rail: See rails at B&H.
- A sturdy tripod: See tripods on Amazon.
- A small LED light panel: See LED panels on Amazon.
Affiliate disclosure: some links above are affiliate links. If you buy through them, Shut Your Aperture may earn a small commission at no extra cost to you.