Best Photography Spots in Arches National Park: 5 Top Locations With GPS
Updated
Red sandstone is easy to photograph. Making it look powerful takes better light, a clean frame and enough time to stop rushing. These five Arches National Park photography spots give you a focused route: Delicate Arch for the big sunset scene, Double Arch and Landscape Arch for early light, then Balanced Rock and the Windows for shape and shadow.
Each stop below has a named GPS landmark, a Maps link, access notes and camera settings to start from. The coordinates mark the formation, not a parking space or permission to leave the trail. Pick a route you can enjoy safely rather than trying to squeeze all five stops into one day.
Planning several parks? Browse the National Parks Photography Guides. For more practice with exposure and editing, explore the Photography Academy.
Quick jump to the 5 spots
Before you shoot Arches: the essentials
- Entry in 2026: NPS has removed the advance timed-entry reservation requirement for this year. A valid entrance pass is still required; parking congestion can still limit access. Check official information again for a trip in a later year.
- Fees: Check the NPS Fees & Passes page for current entrance and pass prices, residency eligibility and payment rules. Do not assume that an old annual-pass price applies to every visitor.
- Light: NPS lists Double Arch and Landscape Arch as early-morning subjects, and Delicate Arch, Balanced Rock and the Windows as late-afternoon subjects. These are planning suggestions, not fixed daily lighting guarantees.
- Night photography: Artificial light may not be used to illuminate arches, landscapes or other park features. Carry a headlamp for safe route-finding, keep it out of other photographers’ exposures, and do not light-paint even briefly.
1. Delicate Arch
 Save
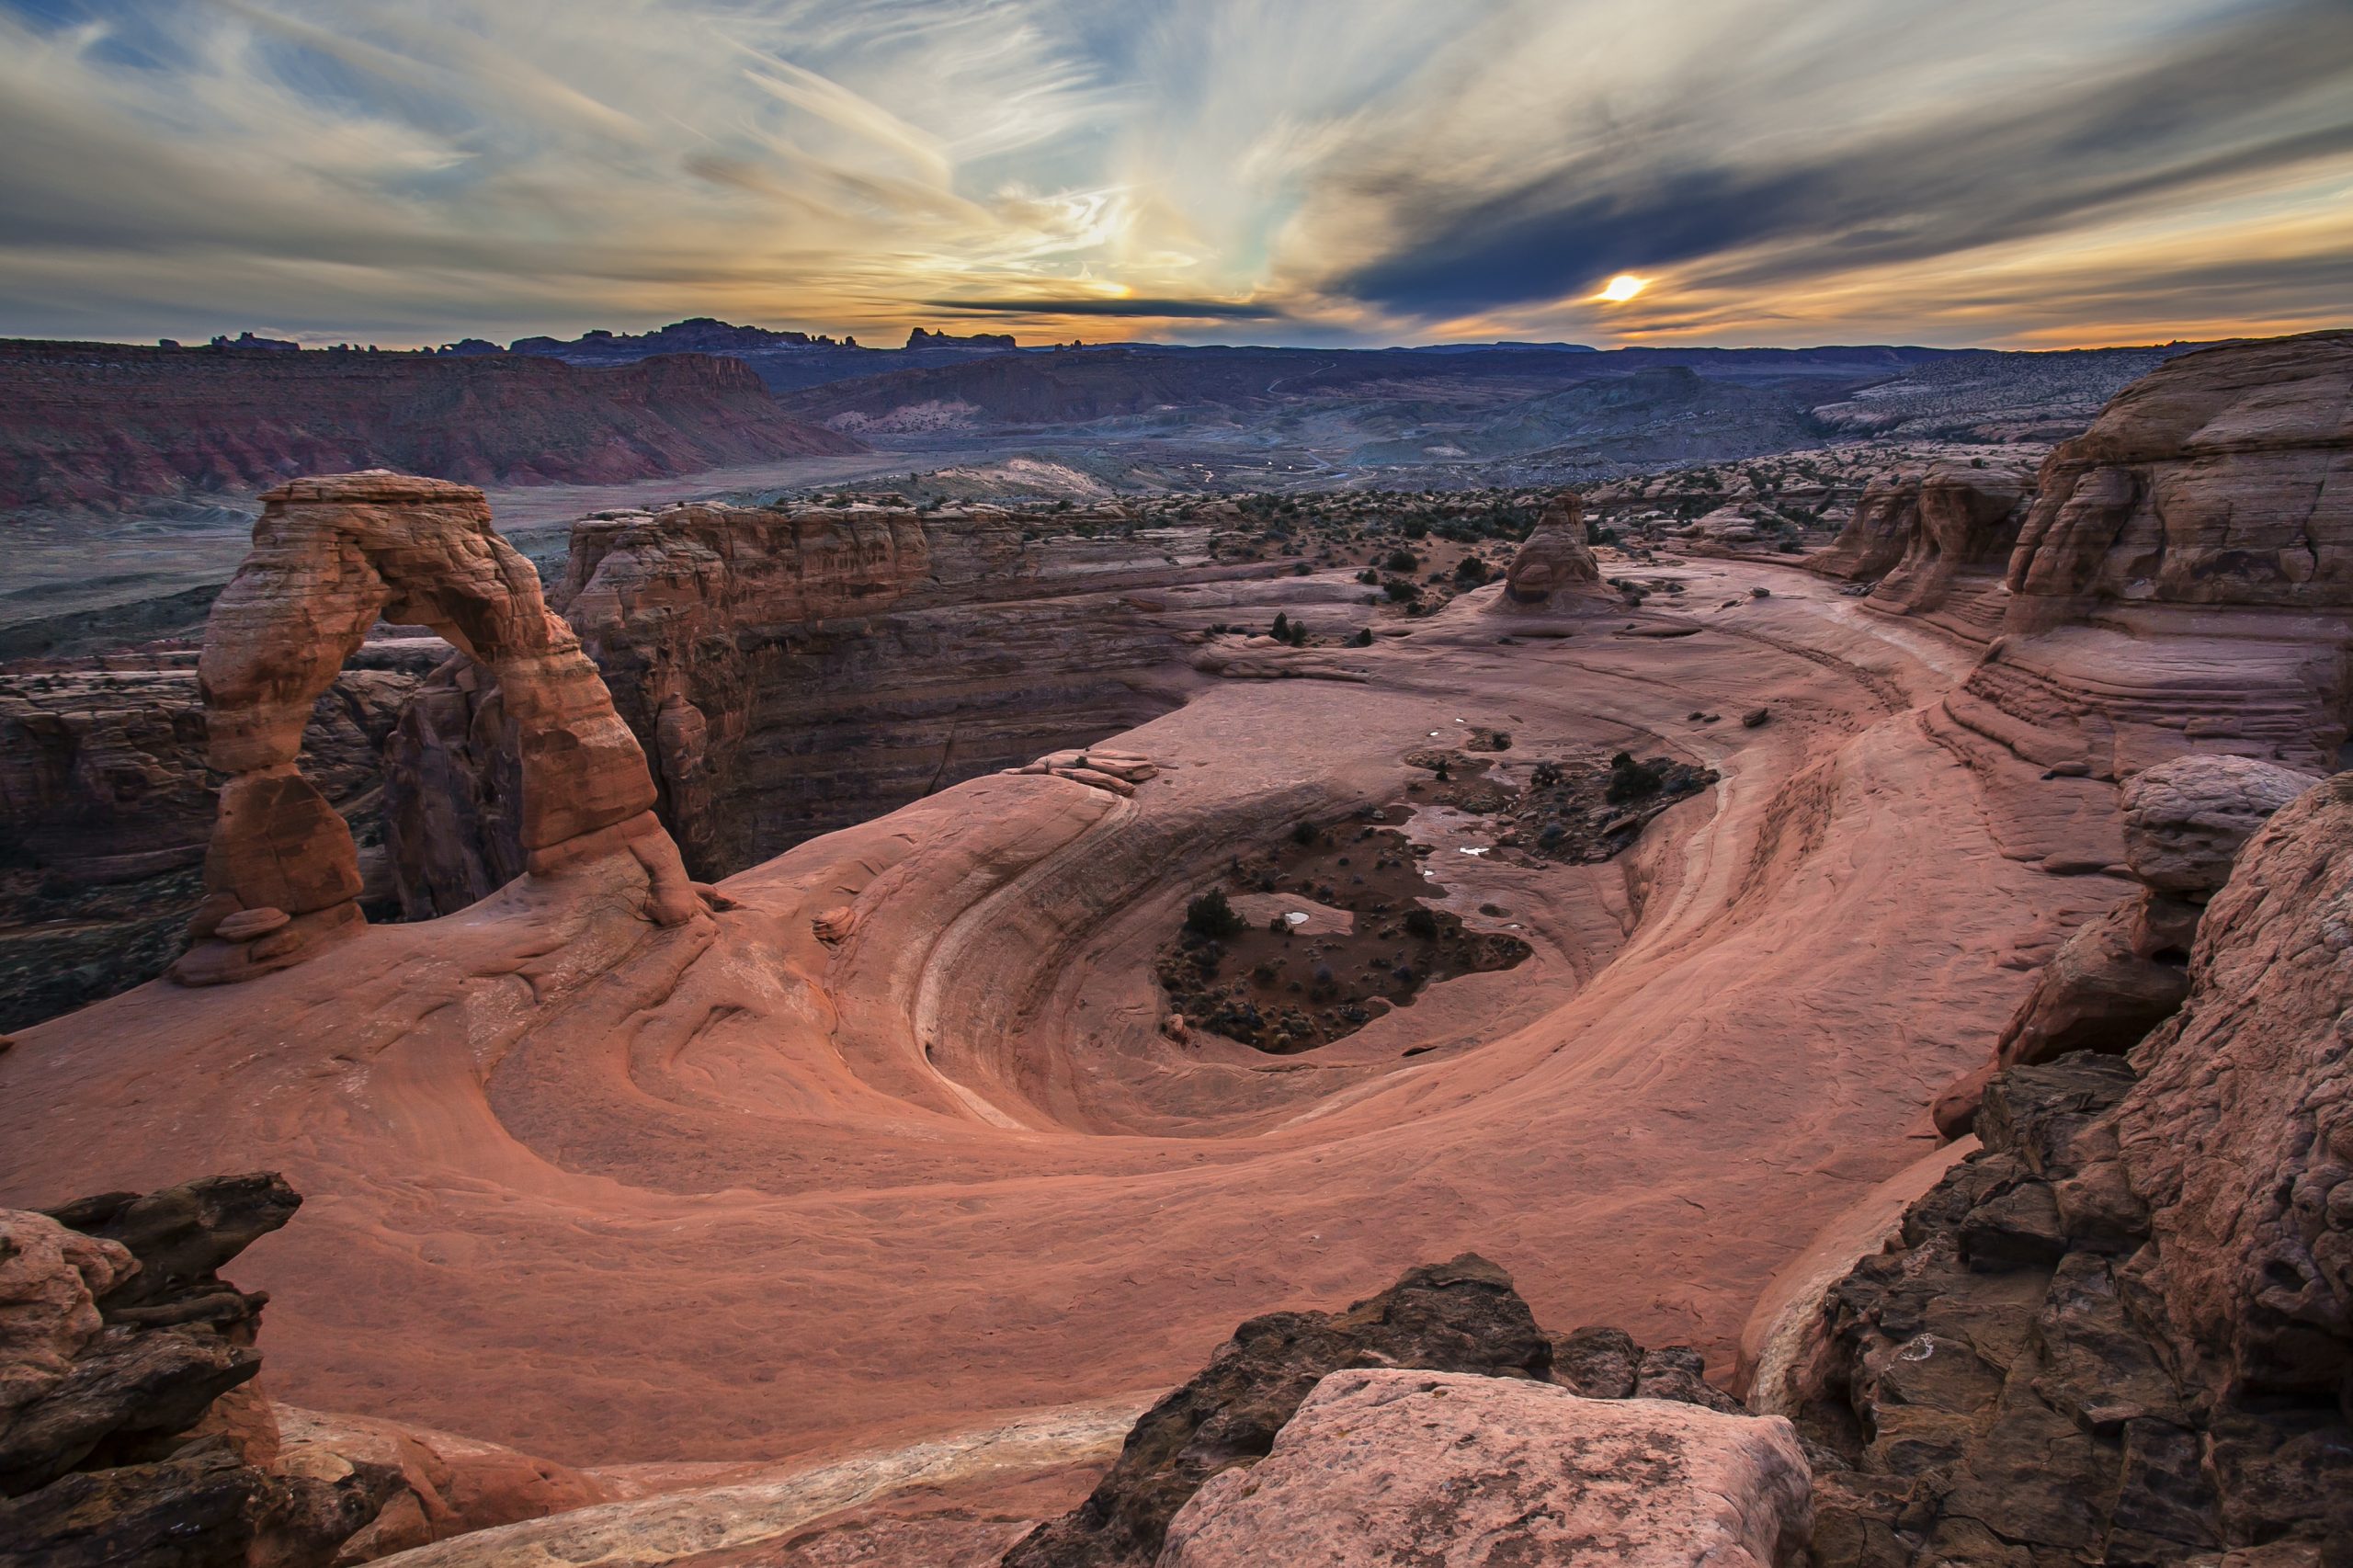
Late afternoon is the classic starting point for photographing Delicate Arch. Watch the rock and sky separately: warm sandstone can fade before the sky reaches its richest color. A wide lens includes the slickrock setting; a normal zoom makes a simpler frame. Avoid promising a specific minute of front-light or a fixed Milky Way alignment, which depend on season and camera position.
Access: NPS describes a 3-mile round trip with 480 feet of climbing from the Wolfe Ranch trailhead. The exposed route can be dangerous in heat or ice. Choose your turnaround time before starting, carry water and a headlamp, and allow for a slower return in darkness. Do not descend steep slickrock for a supposedly better angle. NPS trail and access details.
Starting settings: Start near f/8 to f/11 at a low ISO for a stationary daylight landscape. Choose the shutter speed from the meter and wind conditions, then check the histogram. Use a tripod only where it does not block the route. Bracket a high-contrast sky if needed rather than relying on one fixed exposure.
Landmark GPS: 38.7436297, -109.4993124
Named destination: Delicate Arch
Utah, USA
Open Delicate Arch in Google Maps
2. Double Arch
 Save
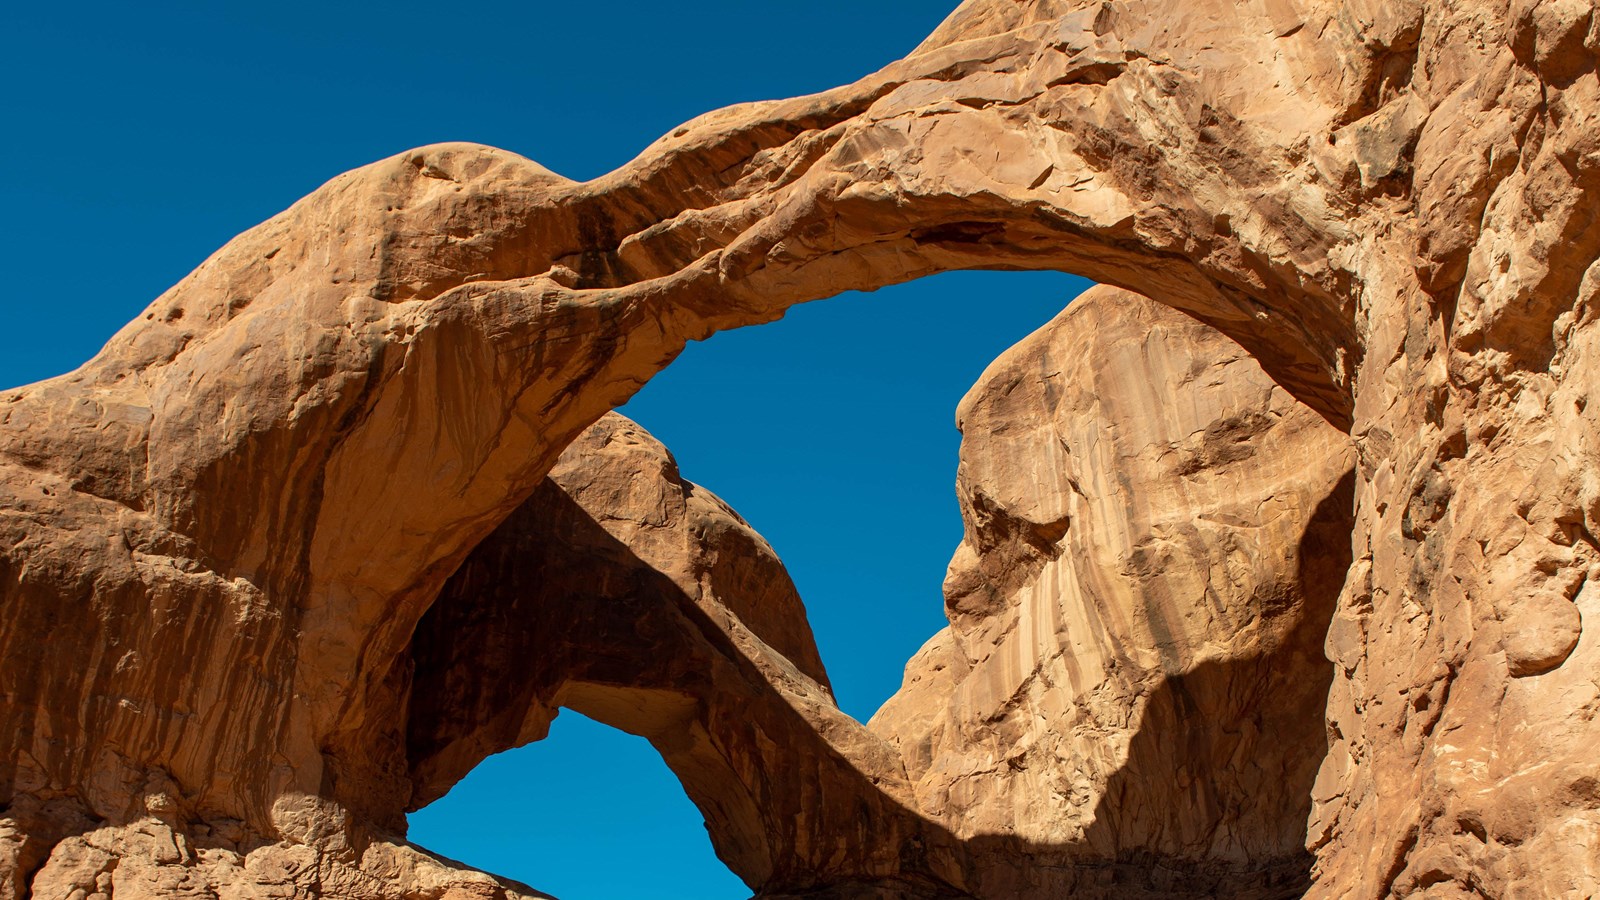
The two spans make Double Arch a strong wide-angle subject. NPS lists it among the early-morning photography locations. Work with the overlapping shapes and the patch of sky between them, then try a tighter frame of the rock rather than assuming the widest lens is always better.
Access: The Double Arch trail starts in the Windows area. NPS describes a hard-packed, barrier-free surface, with slopes and sand at the end. That does not mean every position beneath the formation is accessible. Stay on the established route and do not scramble onto rock ledges to clear people from the frame. NPS trail and access details.
Starting settings: Try f/8 to f/11 for depth, with ISO adjusted to the available light. If the foreground is dark and the sky bright, bracket exposures from a safe position. Keep the frame edges clean: very wide lenses can make an incidental person or tripod near an edge distracting.
Landmark GPS: 38.691617, -109.5403916
Named destination: Double Arch
Arches National Park, Moab, UT 84532, USA
Open Double Arch in Google Maps
3. Landscape Arch
 Save
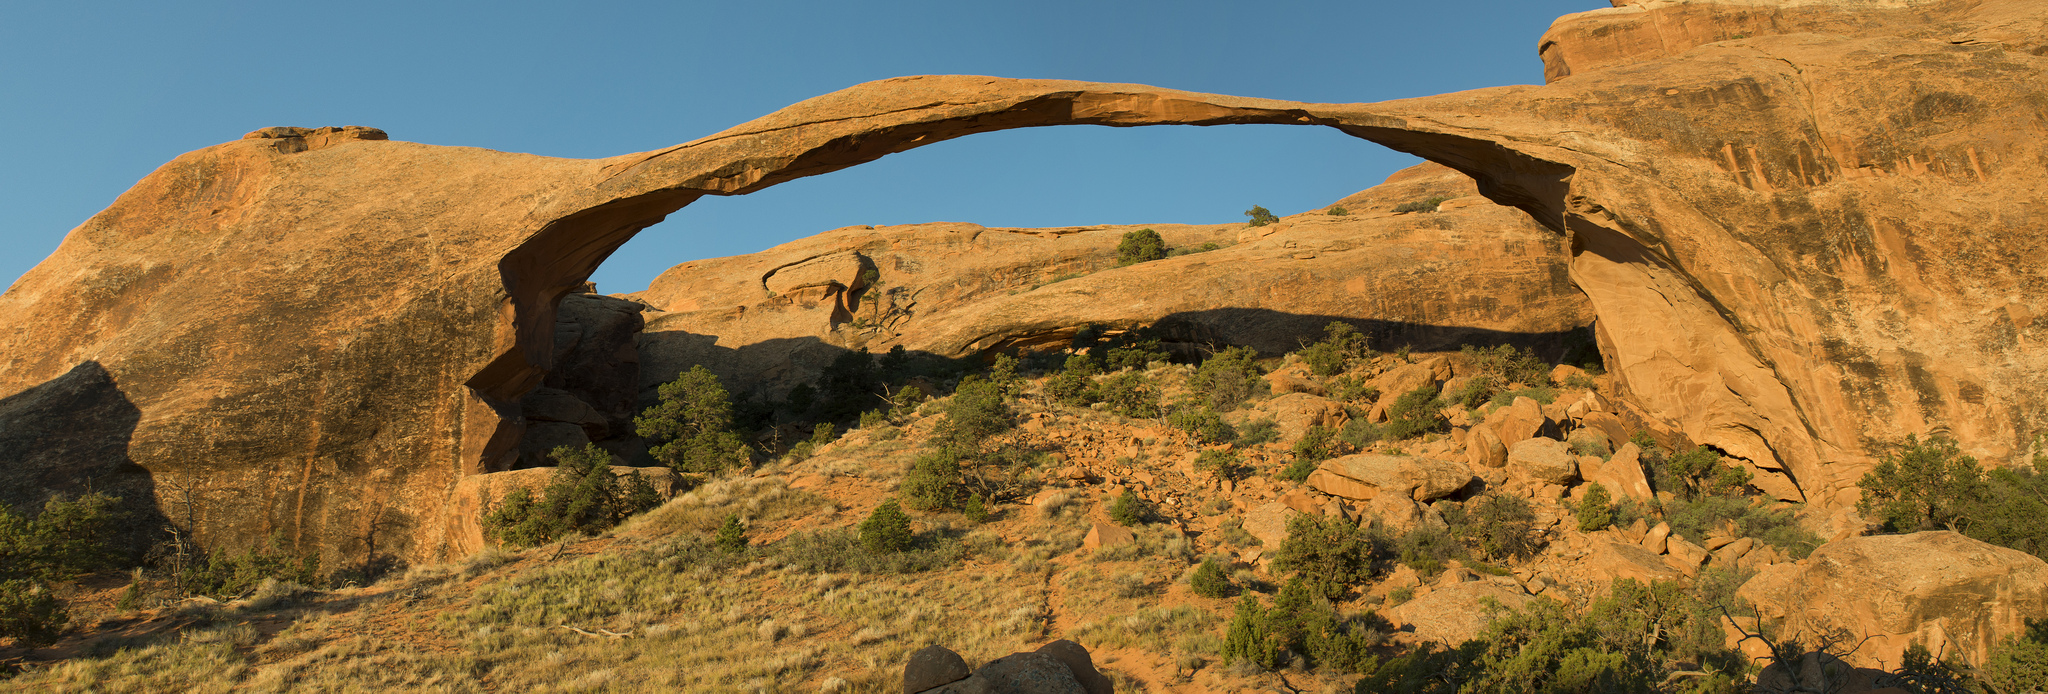
Landscape Arch is a morning subject on the NPS photography list. Its thin span works best when separated clearly from the rock behind it. Start with a full-span composition, then use a longer lens to study the narrow section without leaving the viewing area.
Access: The NPS Devils Garden page gives 1.9 miles round trip for the relatively easy trail to Landscape Arch. The route becomes difficult beyond the arch; that is different from saying all trail beyond it is closed. Stay behind barriers and out from beneath the span. Check current conditions before setting out. NPS trail and access details.
Starting settings: A normal zoom may be enough to include the span; focal length depends on your position and sensor. Begin at f/8 or f/11, low ISO and a metered shutter speed. Inspect focus across the frame and avoid a strong polarizer setting that creates an uneven sky.
Landmark GPS: 38.7904729, -109.6071298
Named destination: Landscape Arch
Utah, USA
Open Landscape Arch in Google Maps
4. Balanced Rock
 Save
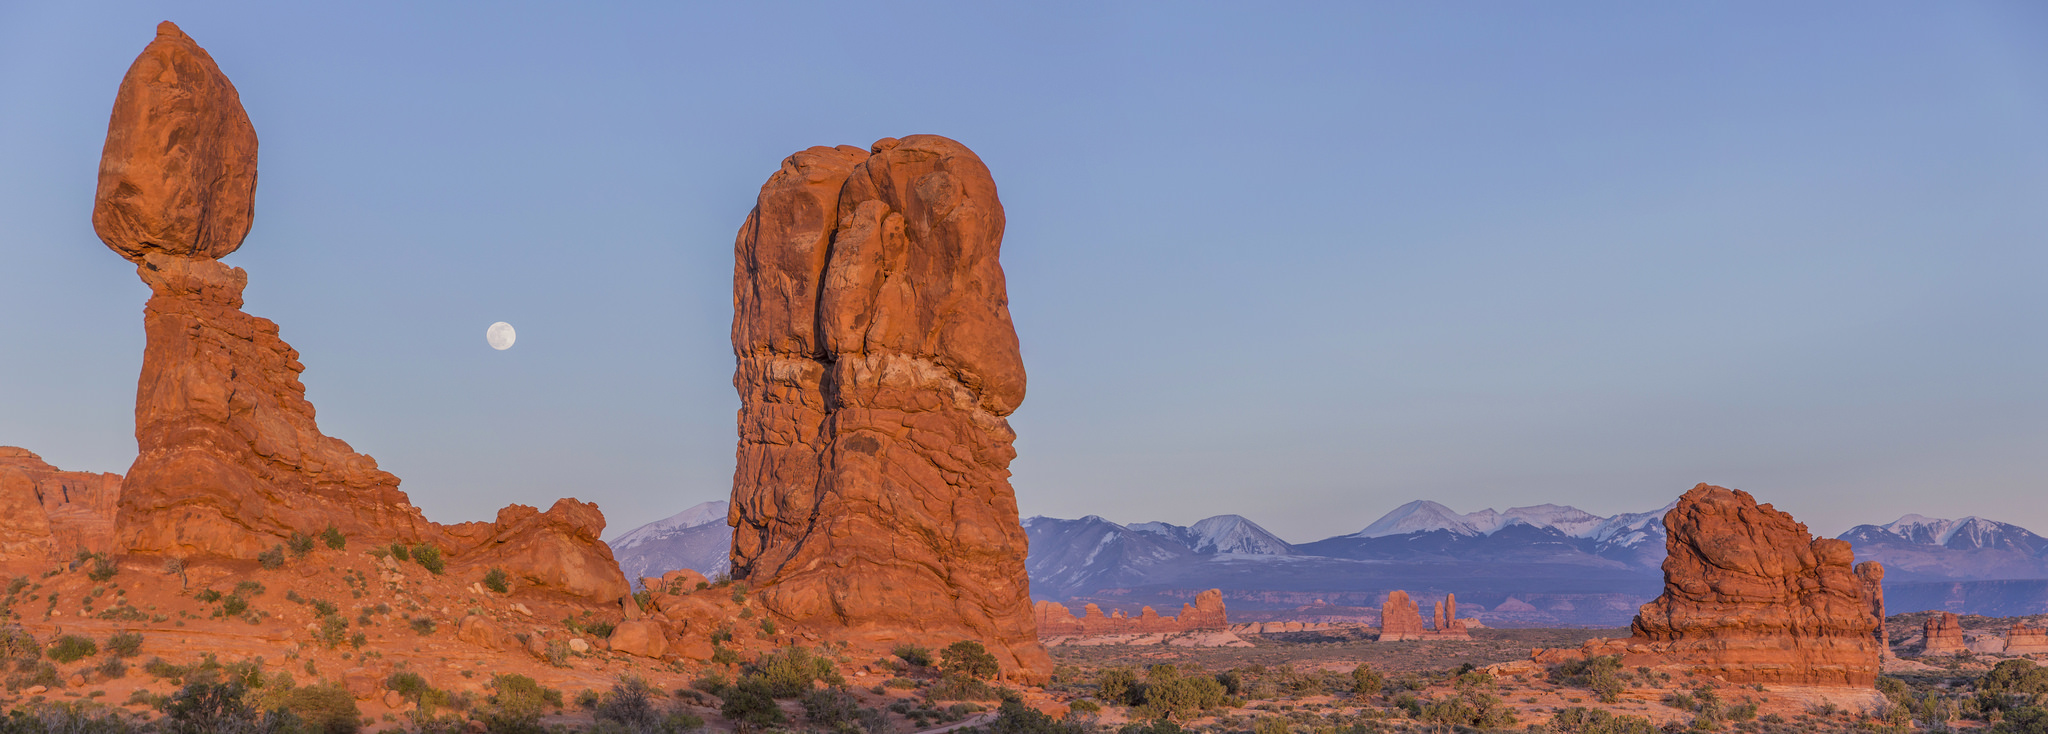
Balanced Rock is one of the NPS late-afternoon photography suggestions. Its outline changes as you move around the established trail. Look first for a clean separation between capstone and background, then decide whether you want warm rock color or a silhouette against the sky.
Access: Use the designated parking and established path. A roadside location is not permission to stop on a traffic lane or walk across fragile desert soil. Confirm current trail conditions and accessibility with NPS; keep tripod legs out of the walking route. NPS trail and access details.
Starting settings: For a silhouette, meter the sky and review the rock outline. For texture, expose for the sunlit sandstone without clipping highlights. A normal zoom and f/8 to f/11 are useful starting points. Increase ISO or shorten the exposure when wind shakes the camera.
Landmark GPS: 38.7012882, -109.5645496
Named destination: Balanced Rock
Arches Scenic Dr, Moab, UT 84532, USA
Open Balanced Rock in Google Maps
5. The Windows
 Save
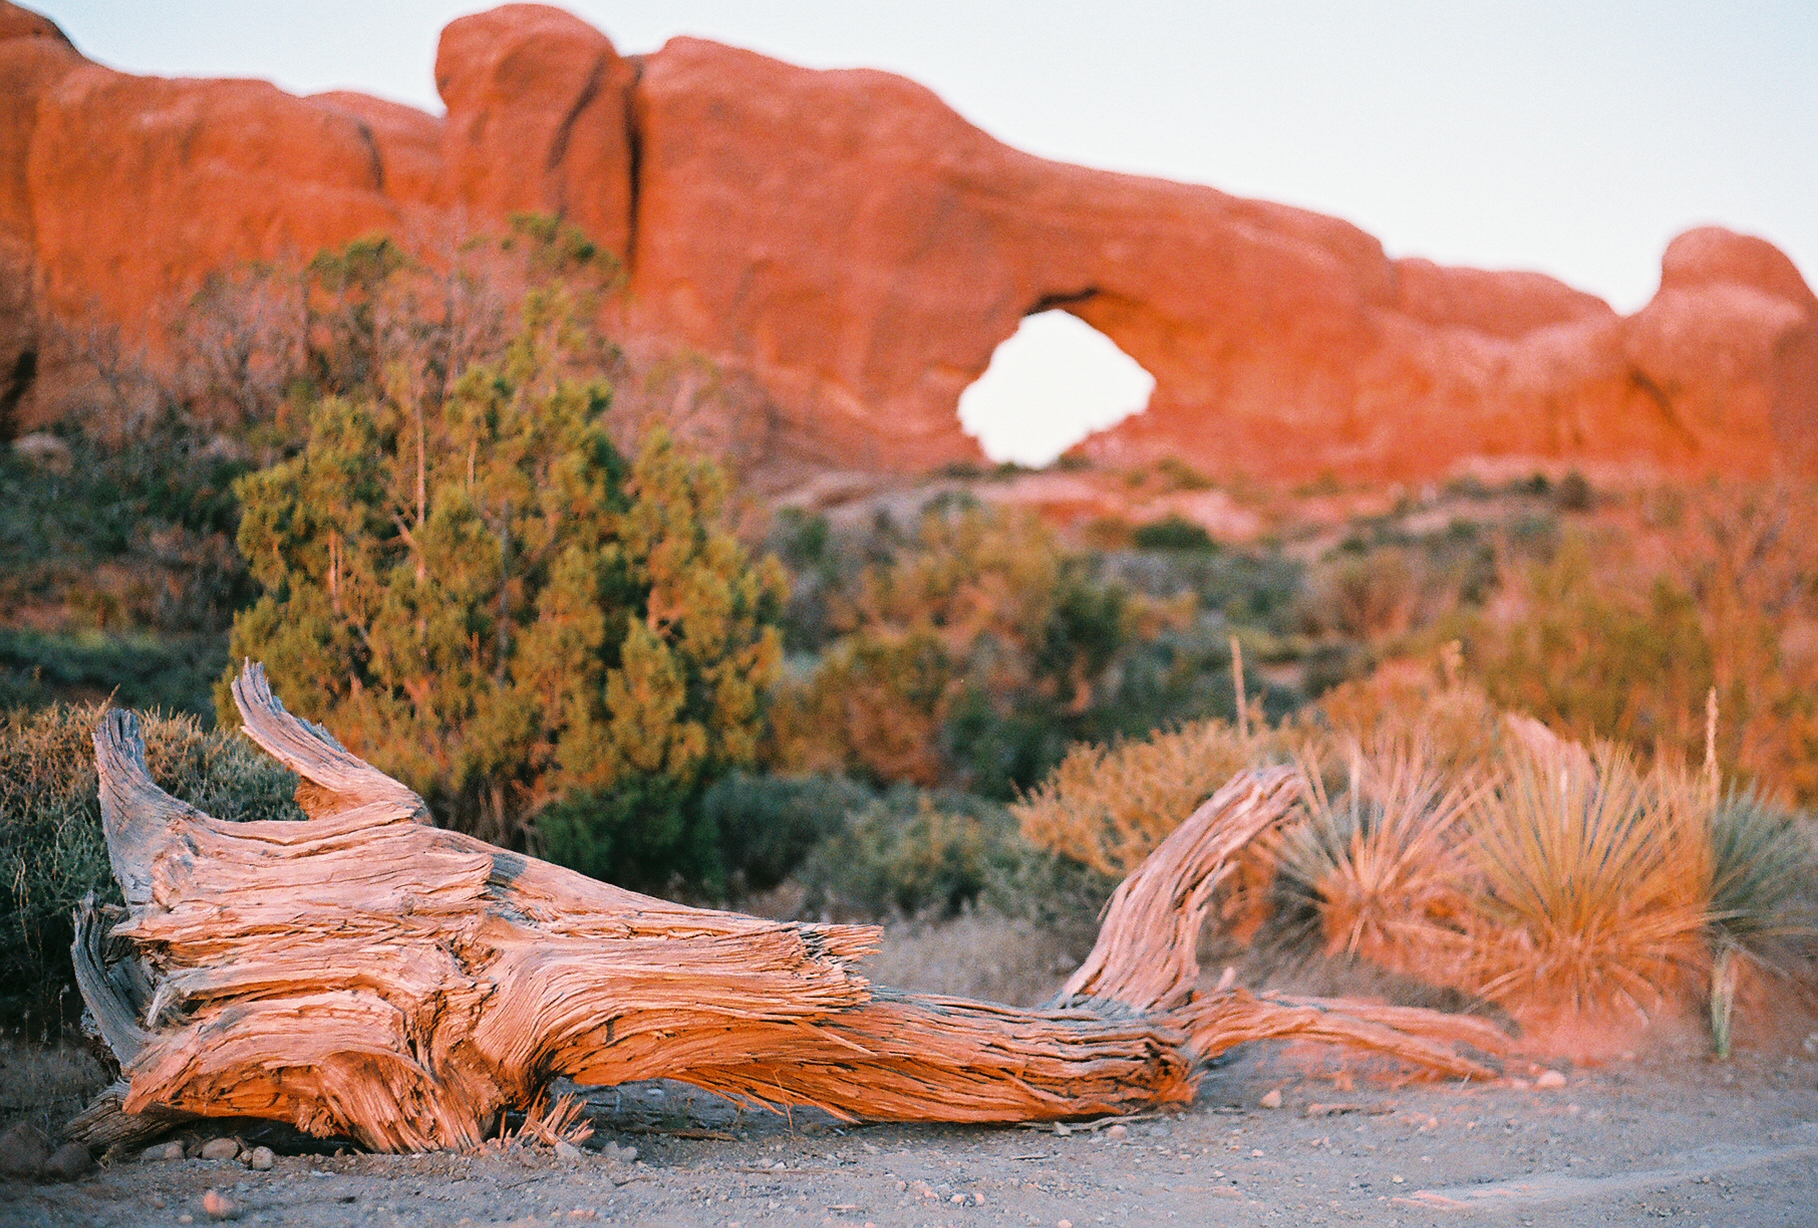
Treat North and South Window as one stop on this five-location route. NPS lists the Windows for late-afternoon photography. The openings offer shape, shadow and framed views, but the best position depends on your mobility and current access. Do not climb beyond a safe established route to reproduce a popular through-the-window frame.
Access: NPS describes the first 100 yards of the Windows trail as flat and hard-packed; beyond that are stone steps, uneven surfaces and elevation gain. This is not an entirely barrier-free walk. Use signed routes, respect closures and leave room for people passing through the openings. NPS trail and access details.
Starting settings: A wide-to-normal zoom lets you balance the dark opening with the bright landscape outside. Try f/8 to f/11, focus carefully and bracket if the contrast is beyond the sensor. Review the brightest sky and the shadow detail separately rather than assuming an HDR preset will fix everything.
Landmark GPS: 38.6857117, -109.5328291
Named destination: North Window Arch
Moab, UT 84532, USA
Open North Window Arch in Google Maps
Plan the light, weather and route
Spring and fall are useful starting seasons for a desert photography trip, but judge the actual forecast rather than a calendar label. Summer heat makes exposed hiking demanding; winter ice can turn a familiar slickrock route into a hazard. A sunrise plan is not automatically safe, and sunset does not guarantee cooler conditions for the hike in.
Choose one demanding hike or a few shorter stops instead of forcing all five into a checklist. Leave time to park, walk without rushing, watch the light and return safely. Carry drinking water, sun protection, layers, a headlamp and an offline map. Tell someone your route; do not rely on mobile reception.
For night photographs, scout in daylight and plan the sky for your exact date and position. A dark moonless sky can help, but cloud, haze and the horizon still matter. Keep artificial light off the landscape and avoid occupying a route with a long exposure.
Gear to compare
Bring only what you can carry safely on the chosen trail. A tripod helps at low light but is not permission to block the path. A strap and tripod are optional comparisons, not requirements for a good photograph. Product links above are affiliate links; purchases may earn us a commission at no extra cost to you. As an Amazon Associate we earn from qualifying purchases.
Current access and photography rules
Confirm 2026 entry rules, fees and pass eligibility, NPS photography guidance and current permit policy. Rules for ordinary photographs differ from authorizations for guiding a workshop. Do not launch or land a drone without checking and complying with park restrictions; an aerial-looking image grants no flight permission.
Stay on established trails, respect barriers, do not climb on arches and protect biological soil crust. Never wait for parking in a travel lane. Turn back when conditions exceed your preparation, even if that means missing the light.
Frequently asked questions
Do I need timed-entry reservations for Arches in 2026?
No advance timed-entry reservation is required in 2026, according to the NPS announcement of February 18, 2026. A valid entrance pass is still required. Parking limits and traffic can affect your visit; check official information again before travel, especially for a later year.
When should I photograph Delicate Arch?
NPS lists Delicate Arch as a late-afternoon photography subject. Allow enough time for the 3-mile round-trip hike and 480 feet of climbing, crowd delays and a safe return. Heat, ice or storms may make the hike a poor choice regardless of light.
Do I need a photography permit?
Under current NPS guidance, most photography involving eight or fewer people needs no permit if it uses hand-carried equipment in public areas, requires no exclusive use, causes no adverse impact and creates no additional administrative costs. Commercial use alone is not the deciding factor. Ask the park about larger, unusual or organized commercial activities and workshops.
Can I light-paint the arches at night?
No. NPS prohibits artificial light used to illuminate landscapes, rock formations and other park features. Use lights only for permitted personal route-finding or minimum-impact camping, not as subtle fill on an arch.
Which of these five stops is easier to access?
Balanced Rock is visible from the park road and has a short trail with a paved beginning. Double Arch has a hard-packed, gently sloping approach, though sand and slopes may require assistance. The Windows trail becomes uneven after its first 100 yards. Check NPS accessibility information for your own needs.
More photography planning
This free article keeps its route to five locations. Additional locations belong in the full guide rather than expanding this list. For a wider trip, browse the National Parks Photography Guides and the related guides below.
- National Parks Photography Guides
- Best photography spots in Acadia National Park
- Travel photography destinations
Photo sources and practical notes
The landscape photographs are credited to their actual photographers, not to Edin Chavez. NPS photographs are public-domain U.S. Government works; no claim is made to those original works. Photos illustrate composition and do not guarantee present-day access, weather or an identical view. Settings here are starting points, not exposure prescriptions.
What to Pack
A landscape kit built around wide views, steady support, and changing light is a useful starting point. Compare the gear and choose what fits your camera, budget, and conditions. These links lead to B&H Photo Video and Amazon.
| What & Why | B&H | Amazon |
|---|---|---|
Sony 16-35mm f/2.8 GM Check the camera mount before buying. Choose a focal length that fits the photos you plan to make. | Shop B&H → | Shop Amazon → |
Peak Design Travel Tripod Check the load rating, packed size and local tripod rules before buying. | Shop B&H → | Shop Amazon → |
Breakthrough X4 CPL Check the filter type and lens thread size before buying. Use a filter only when the effect fits your photo. | Shop B&H → | Shop Amazon → |
Breakthrough X4 10-stop ND Check the filter type and lens thread size before buying. Use a filter only when the effect fits your photo. | Shop B&H → | Shop Amazon → |
Sony NP-FZ100 battery Use the battery type specified for your camera. Bring a spare if your shooting plan calls for one. | Shop B&H → | Shop Amazon → |
SanDisk Extreme Pro 128GB Check the card format and speed requirements specified for your camera. | Shop B&H → | Shop Amazon → |
Koh microfiber cloths Compare this option with your current kit. Check compatibility and the product details before buying. | Shop B&H → | Shop Amazon → |
B&H and Amazon links are affiliate links. We earn a small commission on purchases at no extra cost to you.