Iceland photography is not about collecting the same famous frame at every stop. It is about deciding what the light, weather, water, and land are doing, then making a photograph that holds those things together. A dramatic location gives you a subject. It does not give you a finished composition.
This guide replaces the old tour pitch with a practical way to plan a photography trip: choose a realistic region, leave room for weather, work carefully around waterfalls and beaches, and judge a tour by its actual photographic value. There is no promise of northern lights, no claim that winter is easy, and no reason to put a camera ahead of your safety.
Start with a photographic goal, not a huge itinerary
Before looking at hotels or tours, write down the photographs you want to make. Waterfall studies, black-sand coastlines, mountain shapes, and northern lights are different projects. They may overlap, but they do not all need to happen on the same trip. Pick a main subject and a second subject that works when conditions change.
For a first trip, a smaller area with repeat visits usually offers more photographic value than a race around the country. A second visit to a waterfall lets you respond to a different sky. An extra night near a mountain gives you another chance at clear visibility. One rushed visit gives you one set of conditions, whether those conditions suit the photograph or not.
Build the route around overnight bases rather than a list of pins. Include the drive, finding legal parking, walking with equipment, scouting, shooting, eating, and returning before you become exhausted. Do not turn a map’s driving estimate into a complete day’s schedule. Weather, road conditions, and stops can change the plan.
I would rather have time to make one thoughtful photograph than return with twenty hurried variations of a postcard. Decide what matters before you arrive. Then let the actual conditions tell you which part of that plan is worth following.
Choose the season for the kind of light you want
Season changes the rhythm of the trip. Longer days give you more working time, but they also demand a sleep plan if you want to photograph late light and return for another session. Darker months create opportunities for night photography, while cold, wind, ice, and disrupted travel can make the route harder. Neither choice is automatically better.
If your main goal is daytime landscapes, think about the appearance of the land and the time you can comfortably spend outside. If your main goal is the aurora, you need darkness, suitable sky conditions, and auroral activity. Those ingredients do not arrive on command. Visit Iceland’s northern-lights information is a better starting point than a tour promising a guaranteed show.
Do not book a whole trip around a single night-sky forecast made far in advance. Give yourself daytime subjects that you actually want to photograph. If the night stays cloudy, the trip should still make sense. A mountain hidden by cloud can become a study of layers and texture instead of a failed attempt at a famous view.
Check current conditions close to departure and again during the trip. An article can help you plan your approach, but it cannot certify a road, beach, or trail for the day you visit. Keep the live SafeTravel Iceland information in your planning routine, and follow local closures and signs.
Photograph ice and black sand without chasing the surf
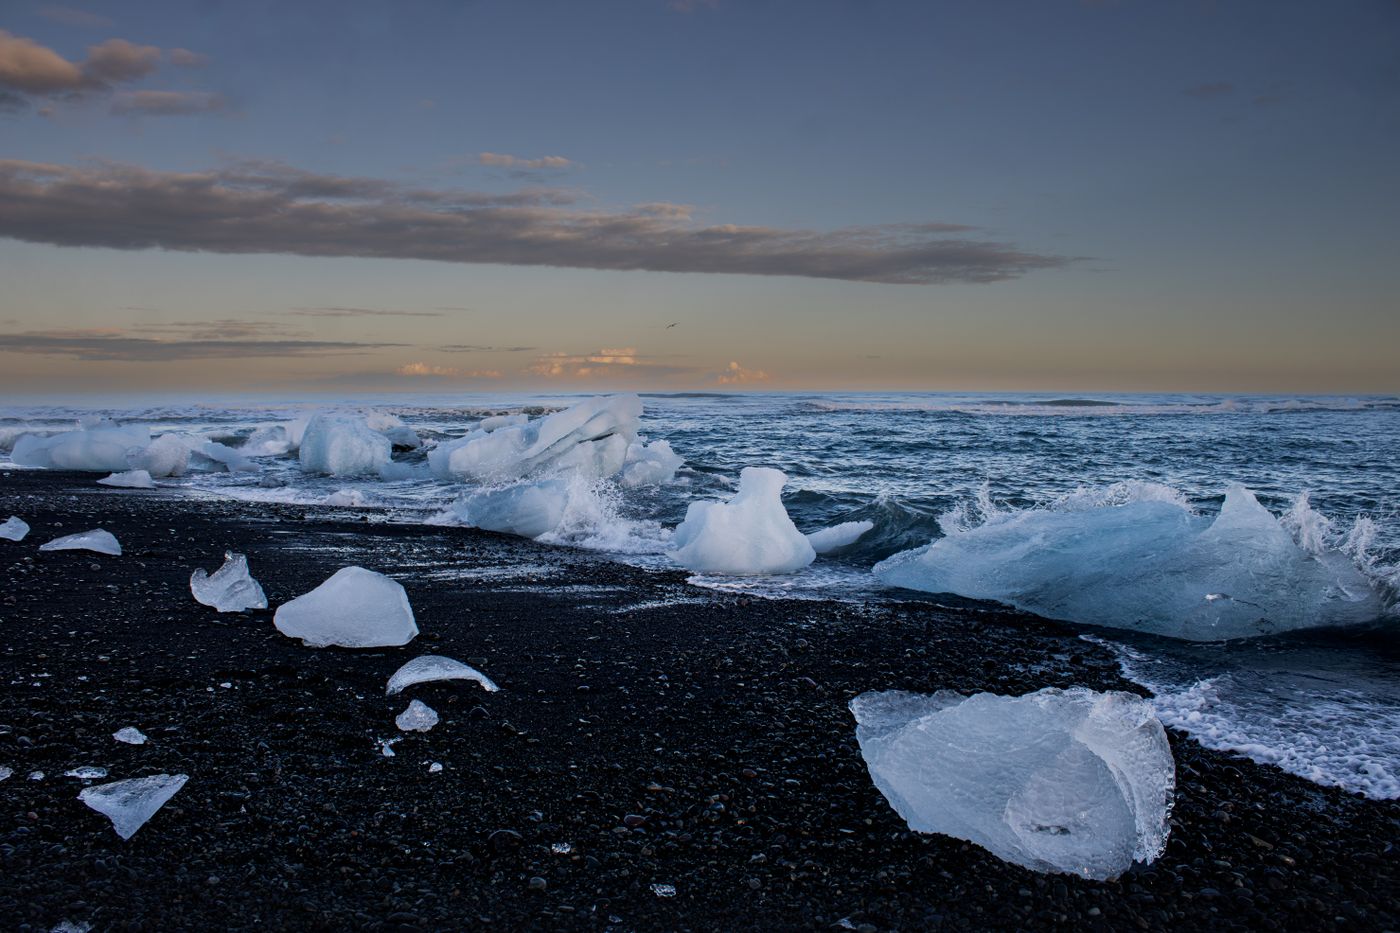
The contrast between pale ice and dark sand can carry a photograph almost by itself. Start with the shape of an individual piece of ice. Look for a clean silhouette, a translucent edge, or a reflection that separates it from the surrounding beach. A wide view is useful only when the surrounding shapes add something.

Work from a safe position and use focal length to simplify the scene. You do not need to stand beside every piece of ice to photograph it. A longer lens can isolate the subject from farther back. Moving closer to the water for a dramatic foreground is not a sensible trade when the conditions are uncertain.
Shutter speed changes the language of the image. A fast exposure emphasizes splashes and sharp edges. A slower exposure makes moving water smoother while stationary ice remains defined. Try different speeds only from a position where doing so is safe. A tripod and a filter are never a reason to stay in an exposed place.
Check bright ice for clipped highlights. Photograph RAW if your workflow supports it, review the histogram, and avoid assuming that the rear screen shows accurate exposure in every light. A slightly darker preview can be easier to work with than a large area of ice with no recorded detail.
Conditions and ice arrangements change. Do not expect an old photograph to describe today’s beach. Do not climb on ice, move pieces into the surf, or turn away from the sea while concentrating on camera controls. A photograph should come from the scene you can safely observe, not from rearranging a hazardous shoreline.
Waterfalls: control spray, edges, and movement
Skogafoss and other Icelandic waterfalls are strong subjects because they give you scale, direction, and motion. They also give you spray. Keep a dry lens cloth available, protect the camera as needed, and check the front element between frames. One unnoticed droplet can spoil the sharpest part of a photograph.

Begin with the edges of the frame. Are you cutting through a useful rock shape? Is a bright patch of sky distracting from the waterfall? Does the foreground explain the size of the scene, or is it just empty space? Fix those decisions before spending ten minutes changing filters.
There is no universal waterfall shutter speed. A brief exposure can show the force and texture of the falling water. A longer exposure can make the flow read as a continuous shape. Start with an exposure that protects the bright water, then adjust speed to suit the image. If the scene includes moving grass, remember that a long exposure changes that part too.
Use an aperture that gives the depth you need without automatically closing the lens as far as it goes. Focus carefully and inspect important detail. If foreground and background will not both look sharp, change the composition or make a deliberate technical choice rather than hoping a small aperture solves everything.
Stay on permitted paths. Wet rock and ice can turn a short walk into a dangerous one. Do not assume a route behind a waterfall is open or safe because somebody posted a photograph from there. Local restrictions and the conditions in front of you matter more than an old image.
Kirkjufell: make the mountain shape work
A distinctive mountain encourages photographers to repeat the same framing. That is a useful starting exercise, not the only possible photograph. At Kirkjufell, consider how the mountain’s outline relates to the river, waterfall, cloud, and surrounding land. The subject should read clearly without every element competing for attention.

Try a vertical frame if a waterfall or river creates a strong line through the foreground. Try a tighter mountain study when the sky is interesting but the foreground is busy. Compare the spacing around the peak. A small change of position can separate shapes that otherwise seem joined together.
Leave space for other visitors. Do not spread tripod legs across a path or expect everyone to stop moving while you work. Set up where you can photograph without creating a bottleneck, and wait patiently when people enter the frame. Sometimes a person gives the landscape useful scale. Sometimes the clean composition happens a minute later.
If the mountain is hidden, look for another photograph instead of trying to force the expected one. Water patterns, reflected light, and cloud edges may be stronger subjects that day. Your trip does not fail because the landmark refuses to look like a brochure.
Vestrahorn and mountain landscapes: simplify the foreground
Mountain landscapes reward restraint. A foreground can lead the eye toward the peaks, but it can also become a tangle of competing detail. Look for a small number of useful shapes: a curve in the land, a patch of texture, or a clear tonal contrast. Remove anything that does not support the mountain.

Check access terms, opening information, and any charges through the actual site or operator before making a visit. Do not assume every viewpoint is public, free, or continuously accessible. Park where allowed, stay on permitted routes, and avoid trampling vegetation to reproduce somebody else’s foreground.
Wind affects the image as well as your comfort. Keep the tripod low when practical and do not extend a center column just because it is there. If the equipment is unstable, shorten the exposure, find a more sheltered permitted position, or pack up. A heavier camera does not make a lightweight tripod immune to gusts.
Make a wide frame, then a tighter one. The wider image explains the place; the tighter image can concentrate on the mountain’s texture and light. This simple comparison keeps you from treating the widest lens as the automatic answer to every large landscape.
Black beaches and volcanic areas need current safety information
Reynisfjara is not a casual waterline photography location. SafeTravel warns about sneaker waves and falling rock. Its guidance says to stay well back from the water, never turn your back on the sea, and respect warning lights and closures. Calm-looking intervals do not establish that the next wave will be small.
Read the current official black-beach safety information and the signs on arrival. Beach access can change at short notice. A permitted viewing area may be the only place to visit in hazardous conditions. Do not use a generic distance in a photography article as permission to ignore a closure.
The same principle applies to volcanic activity. Do not treat an eruption as an attraction with guaranteed access. Check official alerts, permitted routes, and local instructions. A viewpoint shown online may be closed or unsuitable when you arrive. Keep the plan flexible enough that leaving is an easy decision.
Respect moss, vegetation, private land, and marked barriers. Stay out of restricted areas even when there is nobody nearby to enforce the rule. The landscape is the subject, not a prop that exists for your camera.
How to choose an Iceland photography tour
A sightseeing tour and a photography workshop are not interchangeable. A sightseeing tour may stop at beautiful locations without giving you much time to scout or work. A photography workshop should explain its instruction, group size, schedule, and how it responds to conditions. Judge the actual itinerary rather than the adjective in the title.
Ask how many photographers share the guide, whether the guide teaches camera technique and composition, and how long the group normally spends at a location. Ask whether sunrise, sunset, or night sessions are included or optional. Find out what happens when weather prevents the planned activity.
Check walking requirements, transport, accommodation, meals, equipment, and cancellation terms. Confirm whether specialist activities use appropriate local guides. A cheap headline price can describe a very different experience from a trip that includes lodging and instruction. Compare the complete offer, not just the first number you see.
The existing Viator tour listings can help you compare options. Verify each listing’s current dates, inclusions, reviews, and terms. This is a marketplace link, not a claim that every result is a photography workshop or that a particular departure is available. Northern lights remain a possibility, not a promise.
Pack for changing conditions, not for a gear photograph
Bring a camera you can operate without hesitation, a useful wide-to-normal lens, and a longer lens if it supports your project. Add a tripod for situations that need it, weather protection, dry cloths, spare batteries, and a reliable way to store the day’s files. Match memory cards to your camera rather than buying the fastest label without checking compatibility.
Practice the basic controls before leaving. You should be able to change shutter speed, focus, and exposure without a long menu search. Carry less equipment if a huge bag will keep you from walking safely or responding quickly. A compact kit you know is more useful than a complicated kit you resent carrying.
After each session, dry and check equipment as appropriate, recharge batteries, and make independent copies of the files when practical. Do not erase the only copy to create space. Review a few images at useful magnification so a focus or spray problem does not continue unnoticed for the whole trip.
A travel tripod worth comparing
The Manfrotto Befree Advanced aluminum tripod with 494 ball head and twist locks is one travel-support option. Compare its packed size, working height, plate compatibility, and suitability for your actual camera kit. A travel tripod is not a guarantee of sharp images in Icelandic wind. Keep the setup low when needed and stop when conditions are unsafe.
Affiliate links may earn us a commission at no extra cost to you. Check current prices and availability.
Build the skills before the flight
A trip gives you opportunities. Practice helps you use them. Work on framing, exposure, and reading light close to home so those decisions feel familiar when weather gives you only a short opening. Make a small series of the same local subject in different light and compare what actually improved the photograph.
The Academy’s Landscape Photography course works on light, composition, and building a visual signature. It is a useful way to prepare for Iceland without spending the whole trip learning where your camera settings are. The goal is to come home with images that reflect your decisions, not just proof that you reached a famous place.
Iceland photography questions
What is the best season for Iceland photography?
Choose the season for your subjects and working conditions. Longer days suit extended daytime sessions; darker months create night-sky opportunities but add cold and weather challenges. There is no single season that guarantees the photographs you want.
Can an Iceland tour guarantee northern lights?
No. Darkness, suitable sky conditions, and auroral activity must align. Read the operator’s terms and plan daytime subjects so the trip still works without an aurora display.
Do I need a photography workshop or a sightseeing tour?
Choose a workshop if you want instruction and time to work on images. Check group size, guide teaching, location time, walking requirements, inclusions, and weather alternatives. A scenic itinerary alone does not prove that it is a photography workshop.
Is it safe to photograph at the waterline on Reynisfjara?
Do not treat the waterline as a safe photography position. SafeTravel warns about sneaker waves and falling rock. Stay well back, never turn your back on the sea, and follow current signs, warning lights, and closures.
What camera gear should I pack?
Bring familiar equipment suited to your subjects: a camera, useful lenses, suitable support, weather protection, dry cloths, spare batteries, compatible cards, and a backup plan. A manageable kit is more useful than excess equipment that slows you down.
Photo sourcing: licensed Pexels images. Safety and trip-planning references are linked above.