Updated October 2026
The best camera is the one in your pocket, and right now that is a phone that shoots better than the DSLRs I carried ten years ago. I mean that. Phones are the camera that is with you when the light turns perfect and the bag is back at the hotel.
These eight DIY smartphone photography tips come from that habit. Some of them started with a short COOPH video by photographer Richard Schabetsberger, who walked around Salzburg, Austria, bending a phone into creative tricks with nothing but household objects. The video is still below, and it is worth the two minutes. Then use the tips here to build your own versions of those tricks in your own city.
Tip 1: Shoot through something
The fastest way to make a phone picture look like it came from a bigger camera is to put something between you and your subject. A wet window. A sheet of colored plastic. A glass of water. A leaf held right against the lens.
Schabetsberger uses this trick all over the Salzburg video, and it works because it breaks the flat, sharp, everything-in-focus look that gives phone shots away. Foreground blur adds depth. Color tint adds mood. Reflections add a second layer of story.
Try this today. Hold a clear drinking glass against the lens, fill it a third of the way with water and tilt it slowly while you watch the screen. You will see the scene flip, bend and glow. Stop when it looks good and take the shot. Do it ten times and you will keep two. That is a normal ratio.
Tip 2: Make your own lens flare and light leaks
You do not need a filter app. Hold a prism, a crystal, a CD, or even the clear plastic lid from a takeout container just off the edge of the lens, angled toward a light source. Rainbows and soft streaks slide into the frame.
The trick is to keep the effect at the edge. If it sits across your subject, it hides the picture. If it rolls in from a corner, it frames the picture. Move the object a few millimeters at a time and watch how the streak changes before you press the shutter.
This works best with strong, low sun. Early morning and late afternoon give you the angles you need. Midday sun is too high and too harsh for this kind of play.
Tip 3: Use reflections on purpose
Puddles, car windows, shop glass, sunglasses and polished tables are free mirrors. Phones are great at this because you can drop the lens right to the ground, closer than any big camera will ever go.
Lay the phone on its side at the edge of a puddle, lens an inch from the water, and frame the street upside down in the reflection. Flip the image later if you want, or leave it flipped and let people look twice. The frame feels bigger and stranger than the real street.
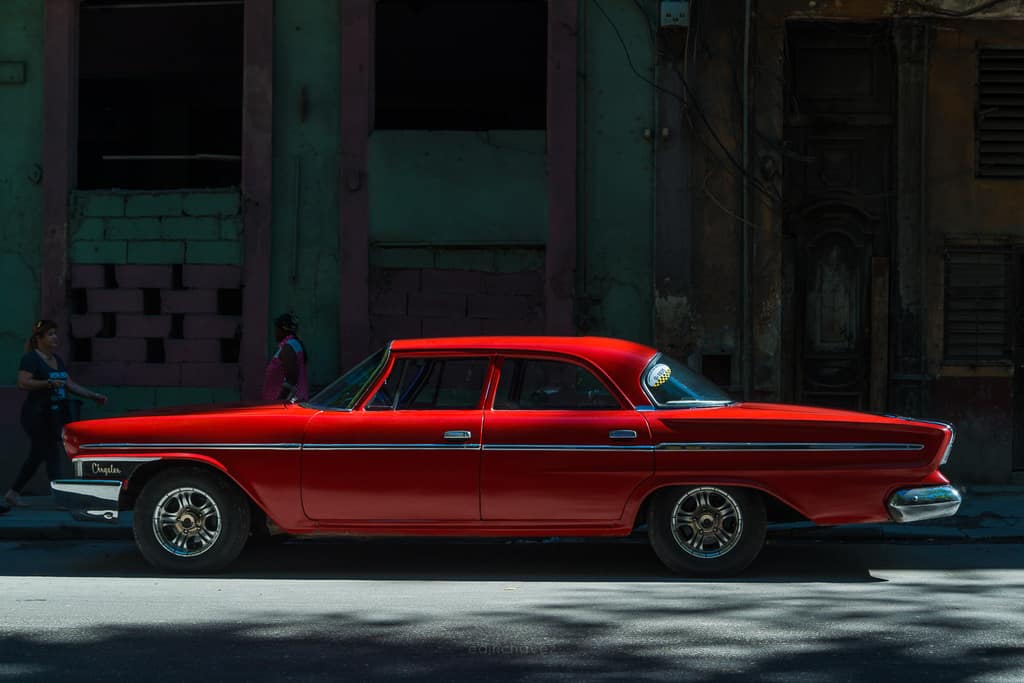
Look at the red vintage car in the Havana street below. The strongest part of that kind of scene is not only the car. It is the way light, shadow and surface work together. Reflections give you the same ingredient on any block, any day, any rain.
Tip 4: Lock exposure and pull it down
Phones love to brighten everything. That is how you end up with gray skies and washed-out faces. Tap on the brightest part of the scene, then drag the little sun icon down until the highlights look rich. Hold your finger on the screen until you see an AE/AF lock message so the camera stops changing its mind.
Shadows will go dark. Good. Dark shadows make the picture feel deeper. If you want detail back, you can lift it in editing, and you will have far more to work with than if you had blown out the highlights.
For sunsets and backlit scenes this one habit matters more than any app. Expose for the sky, let the foreground fall to silhouette, and your phone will give you color most people think needs a tripod and a real camera.
Tip 5: Get low, get high, get weird
Almost every phone picture is taken from standing eye height. That is why almost every phone picture looks the same. Change your height and you change your photo.
Put the phone on the ground and shoot up at a tree, a building or a friend. Hold it overhead and shoot down on a table, a crowd or a stairwell. Lean against a wall and shoot a long diagonal. You are not working harder. You are just moving your body five or ten inches in a direction you normally do not.
Ultra-wide lenses on current phones make this even better. Get close to a foreground object, an inch or two away, and let the wide lens pull the background into a huge sweep. Edges stretch, lines lean, and ordinary places start to look like movie sets.
Tip 6: Build a tripod from nothing
Night shots and long exposures fail because of shake. You do not need a tripod to fix it. Wedge the phone in a bike rack, on a trash can lid, a fence post, a stack of books, or the ground with a small bag of beans or sand under it. Use the self-timer so your finger is not touching the screen when the shutter fires.
Once the phone is still, turn on night mode and let it gather light for a few seconds. City lights, car trails and moonlit landscapes turn clean and sharp. This is also the easiest way to shoot a long exposure of water in daylight if your phone offers a Live Photo or long-exposure effect.
If you shoot like this a lot, a small phone tripod is worth buying. A few starting points are in the gear box at the bottom of this post.
Tip 7: Pay attention to light before you pay attention to the phone
Light does 80 percent of the work in every photograph. Soft window light on a face looks great. Hard overhead sun looks harsh. Open shade is the easiest trick in the book: step a few feet out of direct sun and your subject gets even, gentle light with no squinting.
Golden hour, the first and last hour of sunlight, adds warmth for free. Blue hour, the twenty minutes after sunset, turns cities into glowing models of themselves. The best frames come when you stop chasing the subject and start chasing the light.
Here is a drill I give new photographers. Take one subject, a coffee cup, a plant, a friend, and photograph it at five different times of day. Compare the five shots side by side. You will learn more about light in that one hour than you will from a month of reading.
Tip 8: Edit like you mean it, but lightly
A great edit is mostly small moves. Straighten the horizon. Crop to cut out distractions. Lower the highlights a touch. Raise the shadows a touch. Add a little contrast and a little warmth. Stop.
Your phone’s built-in editor can do all of that. If you want more control, apps like Lightroom Mobile and Snapseed give you curves, selective edits and healing tools. Shoot in the highest quality your phone allows, and if it offers a RAW or ProRAW option, try it on scenes with tricky light. RAW files are bigger, but they keep far more detail in the highlights and shadows.
Build a simple routine and use it on every shot: crop, straighten, exposure, color, sharpen. Five steps, two minutes. When every picture goes through the same routine, your feed starts to look like one photographer made it. That is what style is.
Common mistakes with phone photography
Most weak phone pictures fail for the same few reasons. Dirty lenses are number one. Wipe the lens on your shirt before every session. Fingerprints turn highlights into smears and make sunsets look foggy.
Number two is digital zoom. Pinch-zooming past the optical zoom range just crops the picture and adds noise. Walk closer instead, or use the real telephoto lens if your phone has one. Number three is shooting everything on auto filters or beauty modes that smooth detail. Turn them off and let the picture be honest.
Last, do not shoot a hundred frames of one thing and call it work. Shoot ten, look at the screen, change something, shoot ten more. That loop is how you get better.
A simple weekend project: the one-street series
Pick one street or one block close to home. Walk it three times in a weekend: morning, late afternoon and after dark. On each walk, try three of the tips above. Shoot through a window. Find a reflection. Get low. Use a tripod stand-in for the night walk.
At the end you will have maybe 150 frames. Pick your best twelve. Edit them with the same routine. Put them in a folder, a post or a small print set. You now have a body of work, built from nothing but a phone and a place you already know.
Projects like this teach you to see. They also build a habit, and the habit matters more than any lens, any app or any camera body.
Where to go next
If you want to go deeper, join the Shut Your Aperture Academy. Every course is taught by me, Edin Chavez, and you get lifetime access, so you can learn light, composition and editing at your own pace and keep coming back. Good phone pictures and good camera pictures run on the same skills, so what you practice here carries straight over. For ideas on pocket cameras and street work, read our guide to the best camera for street photography. If you are weighing a real camera purchase after all this phone shooting, start with our camera buyer guide.
Frequently asked questions
Do I need a new phone to take good photos?
No. A phone from the last four or five years can take excellent pictures. Light, framing and timing matter far more than the model. Upgrade only when you can name a specific limit, such as poor low-light results or no ultra-wide lens.
What is the best smartphone camera setting for beginners?
Turn on the grid lines, tap to set focus, drag exposure down slightly to protect the highlights, and use the highest photo quality your phone offers. Those four habits fix most beginner problems.
How do I take sharper phone photos at night?
Brace the phone against something solid, use night mode, set the self-timer so you are not touching the screen, and keep the lens clean. Moving subjects will still blur, so ask people to hold still for a few seconds.
Is it worth buying clip-on lenses?
Sometimes. Cheap clip-ons often add softness and color fringing. If your phone already has wide and telephoto lenses, you probably do not need them. If you want a macro or a creative effect, a decent one can be a fun add-on.
Should I shoot in RAW on my phone?
If you plan to edit and your phone supports it, yes for tricky light such as sunsets and night scenes. For everyday snaps, standard photos are fine and use less storage.
Can I sell or print photos shot on a phone?
Yes. Modern phone files print well at medium sizes and are used in editorial and commercial work. Shoot at full resolution, keep the lens clean and edit carefully.
Gear box: phone photography starting points
These are research starting points, not rankings. I have not tested every item, so check current specs and reviews before you buy. Prices change, so confirm them on the store page.
- A small phone tripod: a flexible-leg or compact tabletop model keeps the phone steady for night and self-timer shots. Look for a phone clamp that fits your case. See smartphone tripods at B&H or on Amazon.
- A Bluetooth shutter remote: a cheap way to fire the shutter without touching the phone. Browse remotes on Amazon.
- A microfiber cleaning cloth: the most useful phone camera accessory there is. See lens cloths at B&H.
- A pocket mirrorless or compact camera: if you outgrow your phone, see our camera buyer guide for starting points.
Affiliate disclosure: some links above are affiliate links. If you buy through them, Shut Your Aperture may earn a small commission at no extra cost to you.