The moon can turn into a white blob surprisingly quickly. It is bright, the surrounding sky is dark, and the camera may try to lift all that darkness instead of protecting the detail you came to photograph. The solution starts with deciding what the photograph is about: a close view of the lunar surface, or a landscape with the moon in it.
Those are different jobs. A detailed moon needs enough image scale, checked focus, and an exposure that keeps the bright surface from clipping. A moonlit landscape needs a readable foreground and a plan for the difference in brightness. This guide explains both without pretending one setting works every night.
Updated October 2026. The real images illustrate lunar detail and landscape composition. Only the original annotated example supplies its own exposure settings; the other photographs are not controlled comparisons.
Photographing the moon: choose your subject first
For surface detail, make the moon large enough in the frame that the file records something useful. A telephoto lens, a suitable long-zoom camera, or carefully configured telescope equipment can help. You can still begin with a shorter lens, but expect a smaller moon and a different final photograph.
For a landscape, the moon can be small and still matter. Its relationship to a mountain, skyline, or reflection can be more interesting than filling the frame with a circle. Choose the composition you want before deciding that you need the longest lens available.
The moon is not visible in the same position at the same time every evening. Phase, rise and set times, season, and your location affect the opportunity. Use a planning tool with the correct date, location, and time zone, then confirm the conditions locally.
A full moon is familiar and bright, but other phases can offer different surface shadows and a different balance with the landscape. Do not wait for a headline about a supermoon to practice. An ordinary clear evening can teach you plenty about focus and exposure.
Plan access, weather, and a safe camera position
Check cloud cover, haze, wind, and the direction you need to face. Thin cloud can soften detail but may also create atmosphere in a wider scene. Clear conditions are useful when crisp surface detail is the goal. Be willing to change the photograph rather than force the original plan.
A darker location is not automatically required for a detailed photograph of the bright moon. Artificial light matters more when faint stars are part of the scene. Heat shimmer, haze, and the atmosphere along the viewing path can affect detail even when the sky looks clear.
Going uphill does not meaningfully bring your camera closer to the moon. Choose elevation for a useful view, permitted access, or a better foreground, not because a short climb promises a larger lunar image. Long focal length and composition change its recorded size far more than that walk does.
Scout a safe position before dark where practical. Check opening hours and parking rules. Do not stand in a road, climb a closed structure, or enter a restricted area for an alignment. A photograph is not worth losing a safe way home.
Understand focal length and cropping
A longer focal length makes the moon larger on the sensor from the same position. It also narrows the view, so small changes in camera direction matter more. Tracking the moon through a very tight frame can take patience.
A crop uses a smaller part of an existing image. It can improve the composition, but it does not create surface detail that was never recorded. An in-camera crop mode likewise should not be described as a free optical magnifier. Check the resulting resolution and whether it is enough for the output you want.
A teleconverter may change lens compatibility, maximum aperture, autofocus behavior, and image quality. Verify the exact camera, lens, and converter combination before buying or attaching one. Digital zoom and phone processing have their own limits; a larger display preview is not proof of more genuine detail.
Start with the equipment you own. If a sharp, well-exposed file still leaves the moon too small for your intended print, you have identified a real limitation. That is a better reason to consider another lens than a blanket claim that every moon photograph needs the same focal length.
Keep the camera steady
Stable support helps with precise framing and repeated tests. Lock the tripod legs and head, secure the camera plate, and keep the strap from catching wind. A long lens can amplify small movements, so pay attention to the setup before blaming the camera’s resolution.
A compatible remote release or a self-timer can reduce the disturbance from pressing the shutter. Neither makes wind or loose equipment disappear. If you work handheld with a suitable shutter speed, brace yourself safely and check the result rather than assuming every frame is sharp.
Read your camera and lens instructions for stabilization on a tripod. Some systems handle it automatically; others recommend a particular setting. Shutter mode and release options are also model-specific. Test unfamiliar controls before you are trying to follow a moving moon in darkness.
If you use heavy equipment, stay within the support’s load limits and use the appropriate mounting point. Avoid a setup that can tip when you loosen the head. Keep legs and bags out of paths where another person could trip.
Focus on the moon and verify it
The bright moon can be an autofocus target on suitable equipment. Use a focus area that actually covers it and review the result. Manual exposure does not require manual focus; these are separate controls.
If autofocus struggles, magnify the live view where available and adjust manually until surface detail looks distinct. Take a test frame and enlarge it. A lens set to its infinity mark is a starting idea, not proof that it is focused exactly where you need it.
Recheck after changing focal length, moving the camera, or touching the focus ring. At long focal lengths, atmospheric movement may make the live view fluctuate. Compare several carefully made frames before concluding that every soft result is a focus mistake.
A nearby foreground and a distant moon may not both be sharp with the same focus choice. Choose a more distant foreground, adjust the composition, or learn a separately focused workflow. If you combine frames, be clear about the composite rather than describing it as one exposure.
Expose for lunar detail, not the dark sky
The moon is lit by the sun. A normal bright lunar photograph does not need the same long exposure as a faint star field. A camera averaging the dark surroundings can overexpose the moon, so inspect the bright surface rather than trusting the overall appearance of the screen.
Manual exposure is useful for repeatable tests. Start with a low ISO your camera supports, a moderate aperture, and a shutter time short enough to protect detail and avoid unwanted movement. For a full moon, Canon describes the Looney f/11 rule as a starting estimate: f/11, ISO 100, and about 1/100 second. It is a test, not a guarantee.
Your lens, conditions, phase, and desired result may need different settings. A very long lens may need a faster shutter for a sharp result. Do not insist on f/11 if another aperture gives a better balance for your equipment. Make a frame, inspect it, and change one control at a time.
Use highlight warnings and an enlarged review to check whether bright areas have lost detail. A tiny moon may barely affect the histogram, so the overall graph is not enough on its own. If the moon is clipped, reduce exposure and test again.
Use metering and exposure compensation deliberately
Spot metering can help when the metering area covers the moon, but its behavior and location vary by camera. A small target that falls outside the spot can still give a misleading reading. Check the actual file.
In an automatic exposure mode, exposure compensation may help you reduce the brightness the camera chooses. In manual mode, its effect depends on settings such as auto ISO and the camera’s implementation. Do not treat one compensation value as a universal switch that fixes every moon photograph.
If your goal is a repeatable manual test, check that auto ISO is not quietly changing the result. Keep notes or review the stored settings when comparing frames. Bracketing can give you choices, but it is not a substitute for focus and stable support.
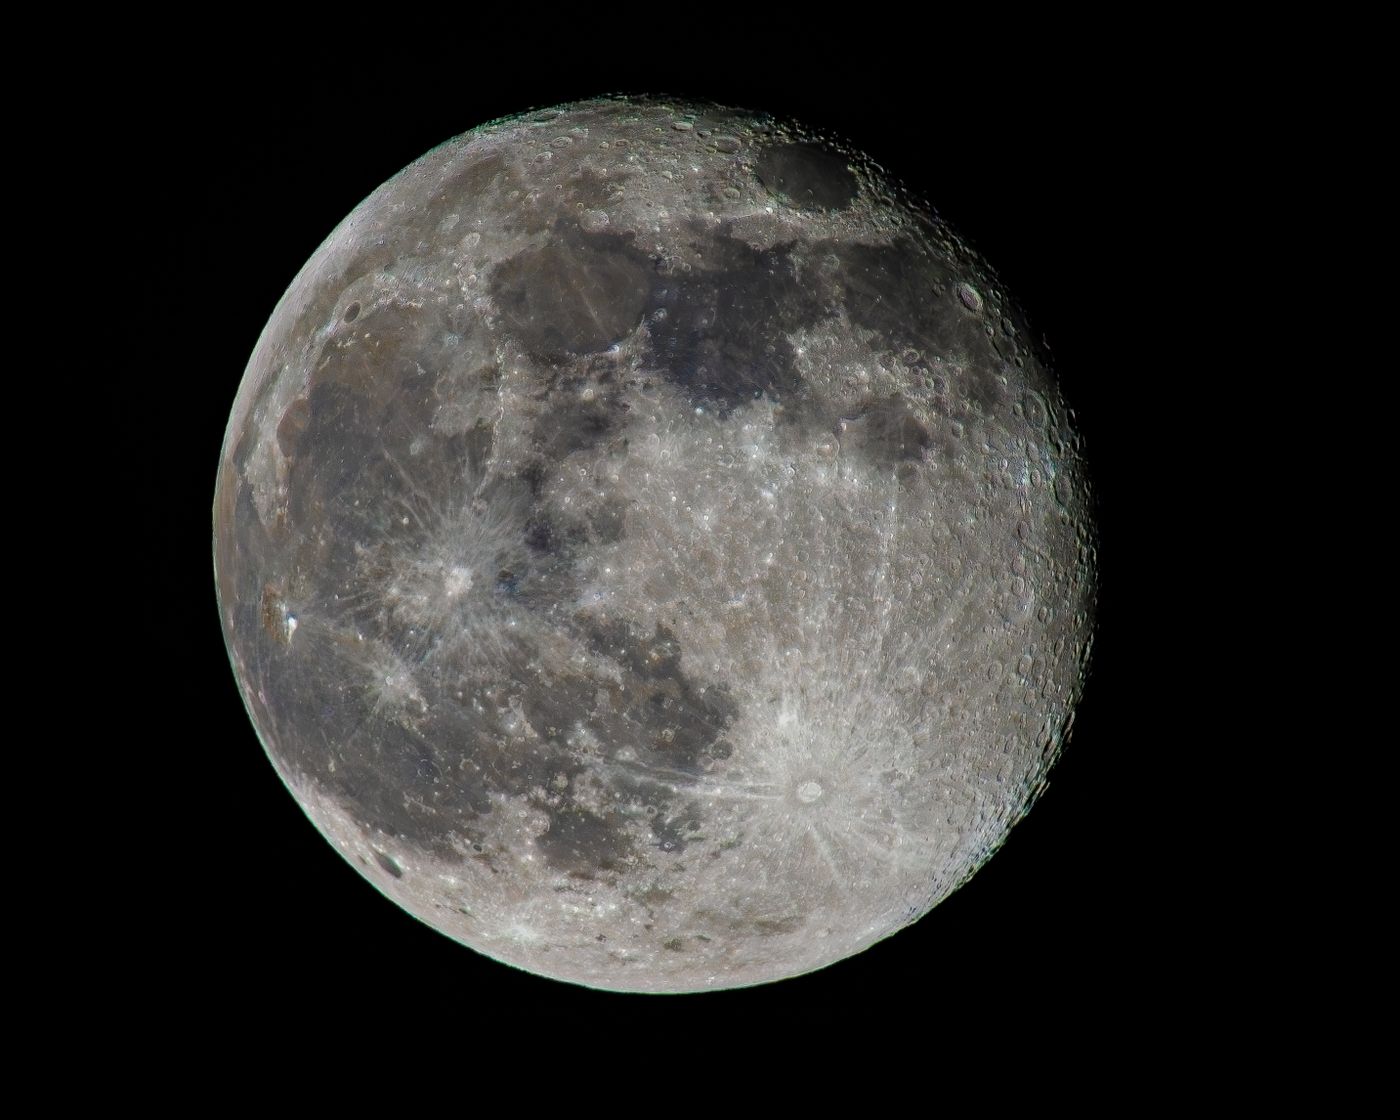
The original annotated photograph below shows its own recorded example: 200mm, f/5.6, ISO 100, and 1/160 second. That tells you what was used for that image, not what every moon, lens, or night requires.

Balance the moon with a landscape
A bright moon above a dark landscape can exceed what one exposure records cleanly. Expose for the ground and the moon may turn white; expose for the moon and the ground may become a silhouette. Decide which information matters before trying to brighten everything.
Twilight can make the brightness difference more manageable because the landscape still has light. The useful window changes with phase, latitude, season, and weather. Do not treat a fixed number of minutes around sunset as a promise for every location.
A silhouette is a valid choice. You do not have to recover every shadow when the outline tells the story. Alternatively, you can make separate exposures and blend them carefully. Keep the moon’s scale and placement honest if you present the result as a faithful scene.
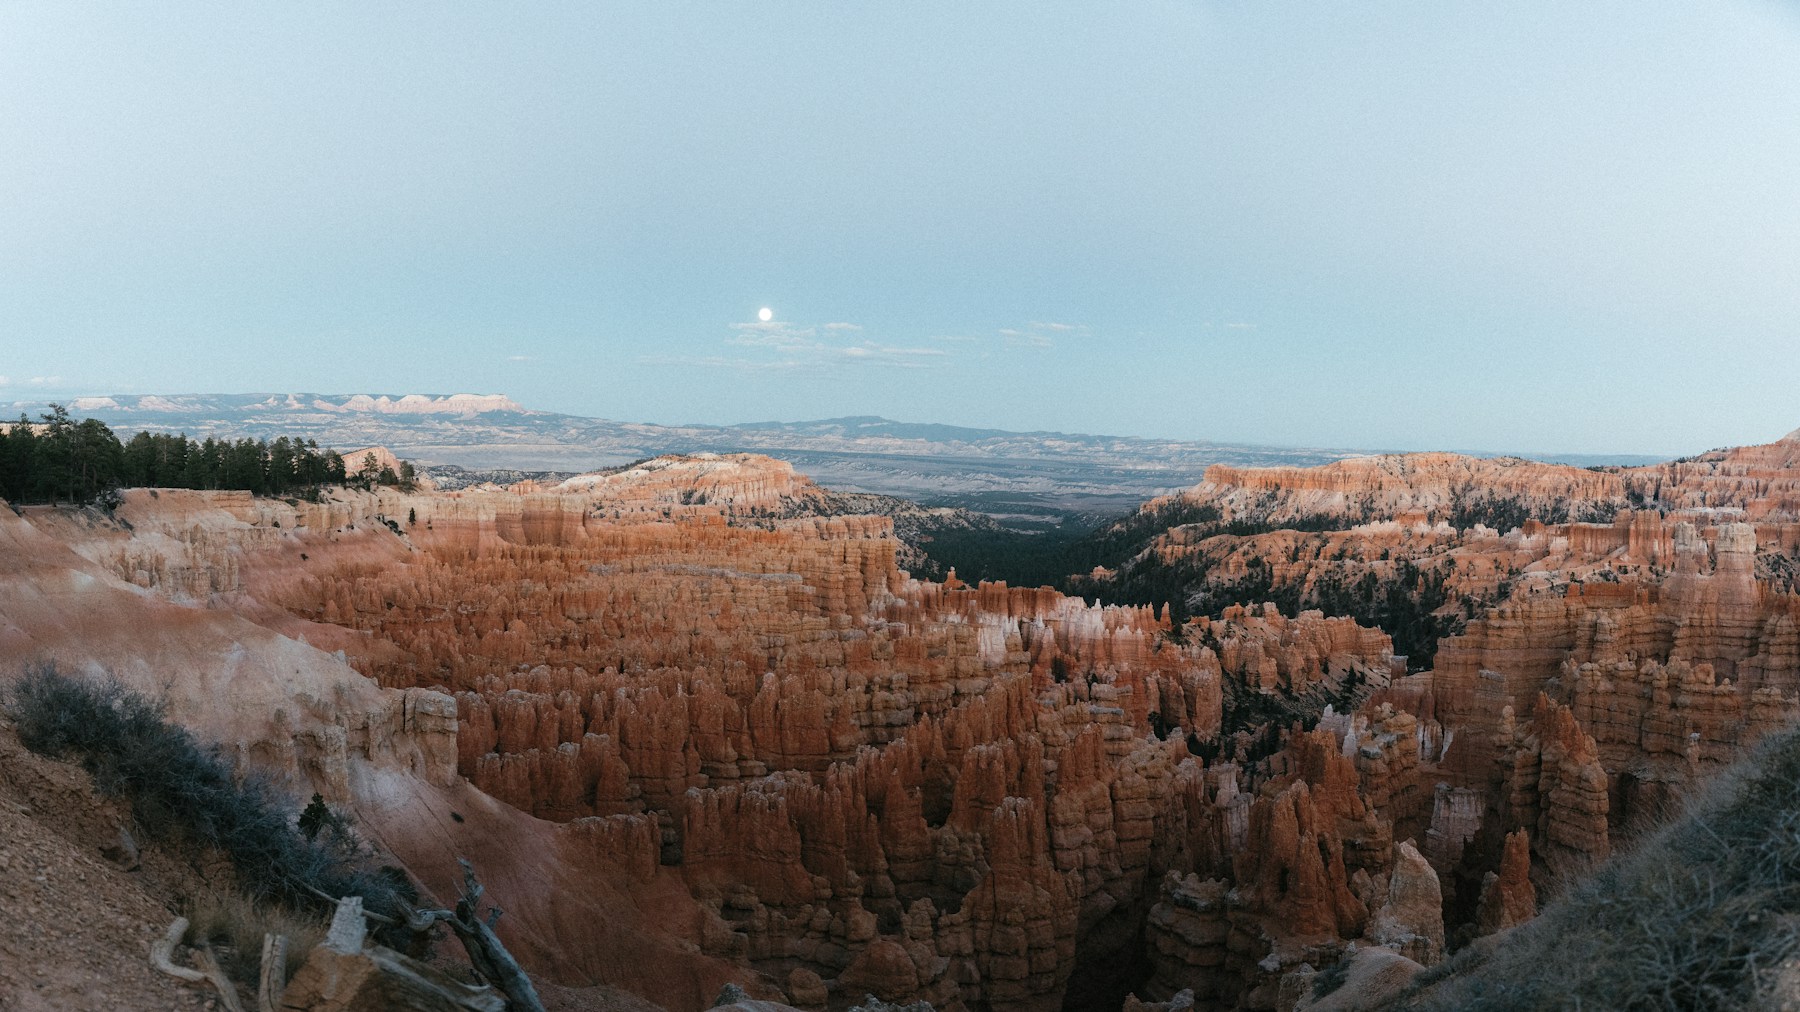
The real twilight landscape below illustrates a readable foreground and horizon. It is not a comparison of lunar exposure settings, and its lack of a visible moon does not make it evidence for a moon alignment. Use it to think about the structure you want before adding the sky subject.
Eclipses and phone photographs need their own expectations
A lunar eclipse can be much dimmer than an ordinary bright full moon. The normal full-moon test exposure may no longer fit. Follow current event information, make fresh exposure tests, and allow for movement if you lengthen the shutter.
A lunar eclipse and a solar eclipse are not the same safety situation. Never point an unprotected camera or look through an optical viewfinder at the sun because you have read a moon tutorial. Solar photography needs suitable safety equipment and guidance for the exact use.
A phone can make a good wider moon-and-landscape photograph. A close-up depends on its lens, exposure control, stabilization, and processing. Avoid assuming a large digitally enlarged moon contains genuine surface detail. Inspect the saved file, not only the preview.
Edit the file without inventing detail
Choose the sharpest frame before adjusting contrast. Crop for the intended composition, refine white balance, and bring out existing detail with restrained sharpening. Excess sharpening can create bright edges and a brittle-looking surface without adding real information.
Keep noise reduction moderate and inspect both a large view and the final display size. RAW can offer more editing flexibility where available, but it cannot restore a badly blurred or fully clipped surface. Keep the original files so you can revisit your choices.
If you replace the moon, change its scale dramatically, or blend exposures from different times, disclose the creative treatment. For more camera fundamentals, read our exposure guide and continue through Shut Your Aperture Academy.
Moon photography FAQ
Why does the moon look like a white blob?
It is often overexposed because the camera is responding to the dark surroundings. Reduce exposure and inspect lunar detail with highlight warnings and an enlarged review.
Do I need a very long lens?
Not for every photograph. A longer focal length helps record a larger moon, while a wider lens can make a strong landscape with a smaller moon. Choose for the intended image.
Does climbing higher make the moon much bigger?
No. A small change in elevation does not meaningfully change its recorded size. Choose elevation for the view and access, not as a substitute for focal length.
Should I always focus at the infinity stop?
No. Check autofocus or magnified manual focus and inspect the actual image. Lens markings and stops are not a guarantee of exact focus.
Can one exposure show the moon and a dark foreground?
Sometimes, especially when the foreground still has twilight light. At other times you may need a silhouette or a carefully disclosed blend because of the brightness difference.
Technical reading: Nikon’s moon guide and Canon’s moon and landscape guide.