Unlocking the marvels of the universe and capturing the serene beauty of nature’s landscapes requires more than just the press of a button on a camera. It is an art that demands an interplay of skill, passion, and the right equipment. Whether you are gazing up at the twinkling canvas of the night sky or out across rolling hills bathed in the golden light of dusk, the journey into astrophotography and landscape photography starts with a mastery of tools and techniques. In the crucible of creativity and technological aptitude, we will delve into the essential gear and knowledge needed to turn ordinary scenes into extraordinary memories and explore the critical facets of exposure, composition, and timing that transform snapshots into sweeping epics of light and color.
Equipment Essentials for Night Sky & Landscape Photography
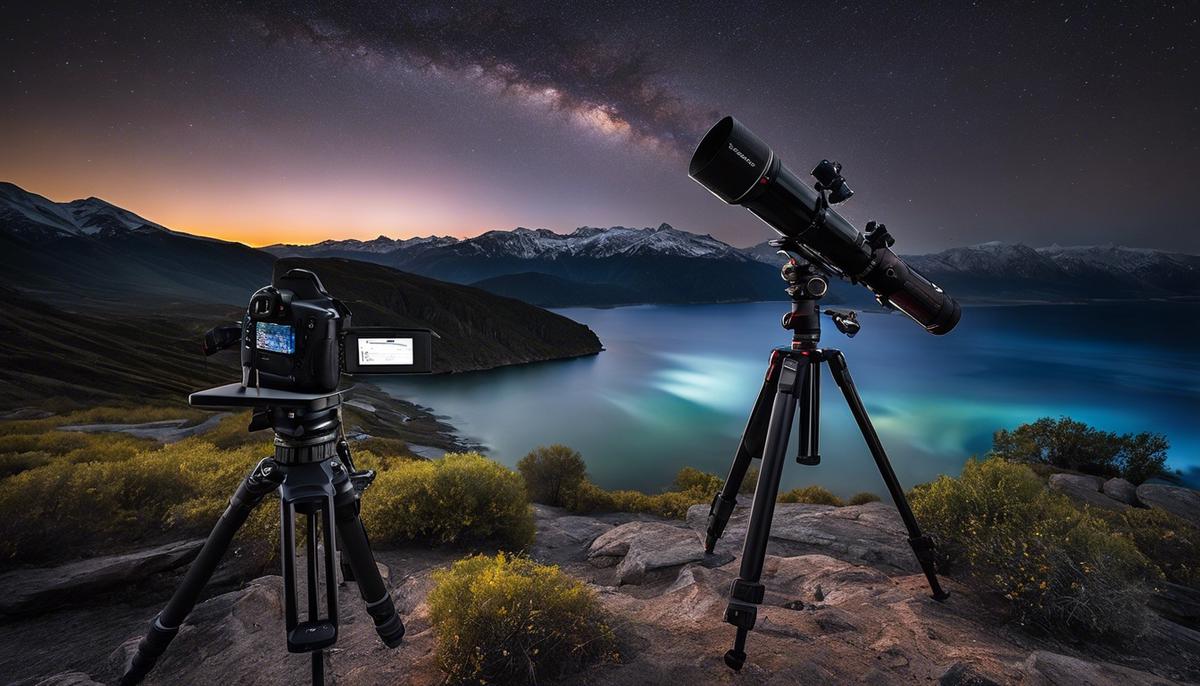
Gearing Up for the Stars and Scenery: Your Starter Pack for Astrophotography and Landscape Photography
Are you marveling at the night sky and dreaming of snapping those vibrant sunsets? Well, friend, you’re not alone! Astrophotography and landscape photography are hobbies that have folks starstruck and nature smitten. Want to dive in? You don’t need a spaceship or a magic carpet; just some essential gear will do the trick. Let’s talk about what you really need to get those stellar shots!
First up, the heart of your setup: the camera. For beginners, a DSLR or a mirrorless camera is your best bet. These cameras let you control settings like exposure time and ISO, which are super handy for capturing the dim light of stars or changing outdoor landscapes. Don’t stress over the fanciest model—start with something you can play with comfortably.
Next, the lens is key. A wide-angle lens is a real gem for both night skies full of stars and landscapes that seem to stretch forever. They let you capture a vast scene, so look for something with a wide aperture, around f/2.8 is great—you want to let in as much light as possible, especially at night!
Say hello to the tripod, your new best buddy. For sharp photos, especially in low light, your camera needs to be as still as a tree. A sturdy tripod makes sure those long exposures don’t turn into a blurry mess because let’s face it, no one has hands that steady.
“But what about when it’s too dark to see?” you ask. Enter the remote shutter release. This tiny device is a huge game-changer. It lets you snap photos without even touching the camera—so no jiggles or shakes when you’re taking a shot.
“And the backpack?”, remember, all this stuff has to travel! A good camera backpack that’s comfy to carry and has padded compartments for protection is a serious must-have. It’s like the cool utility belt that keeps all your photography powers ready to go.
Finally, let’s not forget about those little extras that make life easier. Spare batteries and memory cards are like having extra water and snacks; you never want to run out! And a headlamp with a red-light option? That’s gold for fumbling around in the dark without ruining your night vision.
To wrap it all up, your starry-eyed dreams and lush landscape wishes don’t have to stay in your head. With a solid camera, a wide-angle lens, a trusty tripod, a remote shutter, a backpack for your gear, and those small but mighty extras, you’re set to capture the wonders of the world. So grab that gear and get ready to make some magic with light!
 Save
SaveUnderstanding the Basics of Exposure and Composition
Mastering Exposure and Composition in Astrophotography and Landscape Images
Astrophotography and landscape photography are two realms where patience, practice, and persistence pay off. Once the gear is sorted, it’s all about nailing the art of exposure and composition to capture breath-taking images that tell a story of the night sky or grand vistas.
Understanding Exposure
Exposure is the game of balancing light. It’s controlled by three main factors: aperture, shutter speed, and ISO. For stars and the night sky, start by setting the aperture as wide as possible to let in a maximum amount of light – think f/2.8 or wider.
Shutter speed is crucial. With stars, the goal is to avoid star trails which show up when you expose for too long due to Earth’s rotation. A handy rule is the “500 Rule”, which is 500 divided by the focal length of the lens to determine the longest shutter speed before the stars start to blur. If you’re using a 20mm lens, you can go for a 25-second exposure without worry.
ISO refers to your camera sensor’s sensitivity to light. Start at ISO 1600 for starlit skies and adjust from there. Remember, a higher ISO means more light captured, but also more potential noise – the grainy bits you see in darker images.
Composition Matters
Great composition turns a snapshot into a story. For landscapes, follow the rule of thirds: imagine your image is divided into a grid of nine equal sections. Place key elements along these lines or at their intersections. This creates more tension, energy, and interest in the composition than simply centering the subject.
In astrophotography, composition is about balance. Find interesting foreground elements like trees, mountains, or buildings to pair with the majesty of the Milky Way. This juxtaposes the earth with the cosmos and gives viewers a sense of scale.
Leading lines guide the viewer’s eye through the image – pathways, rivers, or even a trail of stars can serve as these lines. For landscapes, it’s about using natural formations, while for the night sky, arranging your shot where the galactic core leads into or out of the frame can be stunning.
Photographing during the blue hour offers soft light that can help define shapes and contours in landscapes. This is the time before sunrise or after sunset when the sky is richly colored yet the stars are not yet visible. Transitioning from blue hour to the pitch dark offers a range of exposures to play with, telling a dynamic story of time passing.
Bracketing exposures can also be invaluable, especially in landscape photography. This involves taking several shots at different exposures to capture the full dynamic range of a scene. These can be blended in post-processing for a final image that’s rich in detail and balanced in light.
Practice and Patience
Did you nail the shot the first time? Maybe not, but that’s the thrill. Every moment spent under the stars or amidst stunning landscapes is a chance to learn. Experiment with different settings, compositions, and techniques. And when that perfect shot finally clicks, the feeling is unforgettable.
Capturing the profound beauty of the night sky or an expansive landscape isn’t just about the gear. It’s about the dance of light and dark, and crafting a frame that sings. Embrace the journey, learn from each outing, and the mastery of exposure and composition in astrophotography and landscape shots will be within reach.
 Save
SavePlanning and Timing Your Photography Sessions
Moving past the essential gear and techniques in photography, let’s dive into the core of what makes astrophotography and landscape photography not only a passion but an art form. Whether you’re capturing the Milky Way’s arch or that breathtaking mountain vista at dawn, timing and planning are everything.
First, let’s talk about the sky’s celestial timetable. Star alignments, moon phases, and celestial events don’t wait for anyone. To get that perfect shot of the night sky, you need to know when and where to set up. Stellar shows like meteor showers have peak times, and guess what? These are best enjoyed on nights when the moon’s glow isn’t stealing the spotlight. So before heading out, check a moon phase calendar and an astronomical events timetable to maximize your chances of a star-studded background.
For landscape photographers, the sun is your diva, and it demands respect. The golden hours—that magical time just after sunrise or just before sunset—offer the softest, most golden light that can transform an ordinary scene into a masterpiece. But this light doesn’t stick around for long. You’ve got to plan and know exactly when these times occur. Trusty apps and websites can tell you when the sun will rise and set no matter where you’re shooting.
On the topic of timing and Mother Nature, let’s not forget about weather patterns. Overcast skies can dull the stars’ twinkle and landscape textures. Planning around favorable weather increases those chances of crisp, clear shots. Your secret weapon? Weather apps and cloud cover charts. These tools can help predict the perfect window to capture the beauty of the heavens and earth.
Moving your tripod a notch, let’s focus on seasonal changes, too. Seasons paint landscapes in different colors and moods. Planning for the right season means you’ll get that snow-capped mountain or a field of blooming wildflowers at its peak beauty. Sometimes, it’s not just about the day or the hour, but the right month that can make or break your landscape shot.
The last piece of the planning puzzle is scouting locations. You can’t overstate the importance of knowing your shooting spot like the back of your hand. Taking test shots, understanding how the light moves through the terrain, and identifying potential foreground subjects – all this homework pays off when you’re racing against time to capture the light at its peak.
In conclusion, whether it’s the universe’s grand schedule, the day’s weather, or the sun’s limited encore, timing and planning are as essential in astrophotography and landscape photography as a lens to a camera. Great shots don’t happen by chance—they’re the result of meticulous preparation and an almost reverent dedication to the clockworks of nature. With the right timing and a well-thought-out plan, those moments of celestial and earthbound glory are yours to capture.
 Save
SavePost-Processing Techniques for Breathtaking Images
When the sun sets and the stars twinkle to life, a whole new realm of photography awakens. Night sky and landscape photography need not really just a good eye and solid gear; they require a magician’s touch in the darkroom of the digital era—post-processing. Here’s how one can transform decent shots into stellar masterpieces with some savvy editing techniques.
First up, let’s talk about noise reduction. Night photos are often shot at high ISOs, which can introduce noise. Programs like Adobe Lightroom have built-in noise reduction sliders that can clean the graininess without smudging the stars into oblivion. The trick is to find the sweet spot between reducing noise and preserving detail. Be gentle with these controls; too much can make the image look unnatural.
Next, ever noticed how the night sky can sometimes look washed out? Boost those inky blues and rich blacks with contrast adjustments. Ramping up the contrast can make the stars pop, but be careful with landscapes as too much can lead to loss of detail in the shadows and highlights. Use the ‘Curves’ tool to fine-tune the contrast in specific tonal areas without affecting the whole image.
Then there’s color correction. The night sky isn’t just black; it’s brimming with subtle hues. Use the ‘White Balance’ slider to add touches of blues or purples to render a more natural or dramatic night sky. For landscapes, make sure you adjust the colors to capture the essence of the scene, whether it’s the warm glow of a setting sun or the cool cast of moonlight.
Let’s not forget about the magic of ‘Sharpening’ – the fairy dust to sprinkle over your imagery. While sharpening, zoom into the image to ensure you’re making the stars clearer without introducing unwanted artifacts. A universal rule is to sharpen your images last, after all other editing has been completed.
Harnessing the power of ‘Layer Masks’ in editing software like Photoshop can lead to jaw-dropping results. This technique allows you to combine different exposures of the same scene—perhaps a well-exposed landscape with a perfectly-exposed sky. By using masks, you can blend the best parts of each exposure for a dynamic and compelling final image.
Dodging and burning are age-old darkroom techniques, now made simple with digital tools. These methods help to direct the viewer’s eye and add depth and dimension to night landscapes. Lighten certain spots with ‘Dodging’ or darken them with ‘Burning’ to increase the drama in the images.
Star enhancement adds that extra twinkle to your shots. After reducing noise and increasing contrast, use a small brush to individually brighten the most prominent stars or define the edges of constellations. This should be done sparingly, as overdoing it can lead to an unnatural look.
For those who like a painterly feel, ‘Orton Effect’ could be the ace up your sleeve. It’s when you combine a sharp image with a blurred version of the same, adding an ethereal glow and dreaminess to your landscapes. This effect mimics the soft focus technique used by photographers to create a sense of depth and mood.
The final touch? ‘Vignetting’ can anchor the viewers’ attention to the center and edges of your night landscapes. Adding a subtle vignette focuses the eye on the brightest parts of your image—the stars or the landscape’s contours.
Remember, less is often more in the editing process. Over-processed images lose their natural appeal. It’s the subtle enhancements that elevate your night sky and landscape photography from pretty good to absolutely out of this world. Good luck tweaking those sliders and happy star chasing!
 Save
SaveProtecting Your Gear and Staying Safe during Shoots
Keeping Your Gear Secure and Yourself Safe in the Wilderness
Hey there, fellow outdoor photography enthusiasts! When aiming to capture the beauty of remote locations, protecting your equipment and personal safety can be as crucial as snagging that perfect shot. Let’s delve into some savvy tips to ensure your gear remains in top condition and you stay safe while out in the wild.
Start with the basics: Weather Protection
Mother Nature doesn’t always play nice, right? Packing weatherproof covers for your camera and lens is essential. Whether it’s just morning dew or an unexpected downpour, keeping moisture at bay is crucial in preserving the life of your electronics. Protective camera skins or simple plastic bags can work miracles in a pinch.
Secure Storage Solutions
Imagine you finally get to that remote waterfall and…oops, your lens takes a tumble. Avoid heartbreak by investing in sturdy, padded cases. Dedicated compartments for each piece of equipment can prevent scratches and impacts that often occur during transit. Plus, they’re usually equipped with locks or secured zippers, deterring any unwanted access when you’re focused on your shot.
Physical Safety Tips
Now, let’s talk safety. Trekking to those off-the-beaten-path spots alone? Make sure to let someone know your itinerary and expected return time. And how about wildlife? Research the area beforehand to be aware of which critters call it home and how to respond if you encounter them. A can of bear spray doesn’t hurt if you’re venturing into bear country.
Stay Grounded
We love our tripods, don’t we? Ensure stability on uneven terrain by using a tripod with spiked feet or simply pressing it firmly into the ground. Some tripods even have hooks where you can hang your backpack for added weight and stability.
Watch Your Step
Literally. It’s easy to get caught up framing that breathtaking scene, but watch where you’re going! Always be mindful of your surroundings and footing. Stepping into a hole or tripping over roots isn’t the kind of adventure you want.
Power and Light
Here’s a cool trick—pack a small solar charger. It’s a lifeline when you’re miles away from a power outlet, ensuring those spare batteries stay charged. At night, use your red-light headlamp to maintain night vision while keeping your hands free for setup. It’s much safer than fumbling around in the dark.
Secure Against Theft
Lastlly, when shooting in remote areas, theft can still be a concern. Always have your gear within sight or secured to an immovable object with a lock and cable. You might be surprised how quickly things can disappear, even off the beaten path.
Remember, capturing those stunning, untouched landscapes is all about being prepared. By securing your equipment against the elements and taking the right safety precautions, you’ll be ready to focus on creating that prized shot, with peace of mind in your pocket. Now, get out there, and let’s see what you can capture!
 Save
SaveEmbracing the elements and transcending the challenges of outdoor photography leads to more than just stunning images—it cultivates patience, endurance, and an intimate connection with the world around us. Perfecting the craft of astrophotography and landscape photography is an enduring quest, punctuated by fleeting moments of brilliance that illuminate our understanding of the intricate beauty of the skies and the earth. With your gear safeguarded and your safety ensured, venture forth and etch your vision into the annals of light and shadow, capturing the fleeting dance of the cosmos and the timeless splendor of nature’s vistas through the lens of your camera.
Luminar Neo’s Sky AI, atmosphere AI and SuperSharp are designed for landscape work — replace flat skies, add depth, and recover detail in seconds. Tagged as affiliate per FTC.


