Updated October 2026.
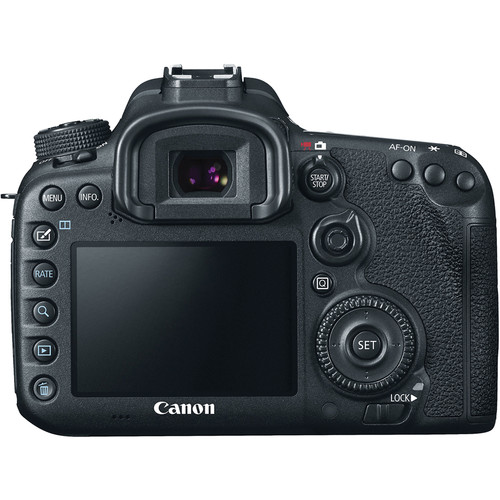
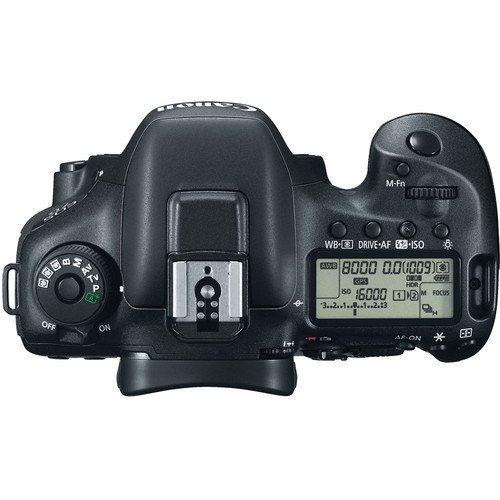
The Canon EOS 7D Mark II is a camera for someone who still wants an optical viewfinder, Canon EF or EF-S lenses and a body built around tracking moving subjects. It is not the original 7D, and it is not a modern mirrorless camera hiding inside an old DSLR shell. Start with that distinction. A used body can make useful photographs, but the model name alone does not tell you whether the individual camera is ready for work.
I would put the subject before the specification sheet. Decide how close you can get, how quickly the subject moves and what the light allows. Then choose the lens, focus area and shutter speed. Ten frames per second gives you choices around a moment; it does not rescue a poor viewpoint, an obstructed subject or focus placed on the wrong thing.
Know the exact camera before choosing a kit
Canon lists a 20.2-megapixel APS-C sensor, Dual DIGIC 6 processors and continuous shooting up to approximately 10 frames per second. The optical viewfinder has approximately 100 percent coverage. The normal still-photo ISO range is 100-16000, with higher expansion settings available. Those numbers describe the camera, not the quality of every file made at the highest setting.
The sensor’s smaller field of view gives a roughly 1.6x full-frame framing relationship with the same focal length. A 100mm lens remains a 100mm lens; the framing is roughly comparable to 160mm on full frame. That can help with distant subjects, but it can make a lens feel too tight indoors. Think about your nearest subject as well as the farthest one.
The body accepts EF and EF-S lenses. Canon RF and EF-M lenses are not direct-fit alternatives. Check the actual mount and full lens name in a used listing, including any third-party compatibility requirements. The 18-135mm shown in the original product photograph is an illustration, not a promise that every retailer bundle is a standard 7D Mark II kit. A current seller must identify what is included.

Set the CF and SD cards deliberately
The 7D Mark II has one CompactFlash slot and one SD-family slot. Canon specifies Type I CF with UDMA 7 compatibility and SD, SDHC or SDXC cards, with UHS-I writing supported. CFexpress, CFast and Type II CompactFlash are not substitutes. Inspect the CF slot carefully and never force the wrong card into it.
Open Record func+card/folder sel. and decide how the cards should behave. Standard records to the selected card. Auto switch card moves to the other card when the first becomes full. That is extra capacity, not a duplicate of the photographs already recorded. Rec. separately lets you set different image quality for each card. Rec. to multiple writes the same image size to both cards, including a RAW+JPEG choice.
For duplicate still files, Rec. to multiple is the setting to understand. Test it by making photographs and checking both cards, rather than trusting that inserting two cards automatically creates a backup. In the dual-recording modes, a full card can stop shooting until you change the card or recording setup. Build that response into your preparation.
Movies are a separate case. The manual says they cannot be recorded to both cards simultaneously, even when Rec. to multiple is selected. Verify the movie destination and make an independent copy after recording. A dual-slot body is not a promise of duplicate video files.
Start autofocus with the subject, not all 65 points
Canon describes a 65-point viewfinder autofocus system with up to 65 cross-type points. The available points and their characteristics depend on the lens combination. The center point has additional capabilities under specified aperture conditions, including supported f/8 combinations. Do not turn that into a claim that every lens and extender activates every point equally.
Use One-Shot AF for a subject that stays still while you focus. For a subject whose distance changes, AI Servo AF is the mode to learn. Start with an area you can understand: a single point, expansion around a point or a zone suited to the size and movement of the subject. A larger area can help keep an active subject covered, but it also gives the camera more candidates when the background is busy.
Place the starting area on the part of the subject that needs to be sharp and begin tracking before the moment. Leave space for movement in the frame. If the camera keeps choosing the foreground or background, narrow the selection, improve your starting position or change the viewpoint. Do not assume automatic selection can infer your intention from a cluttered scene.
The rear controls let you separate focusing from shutter release through customization, but back-button focus is a workflow choice, not a sharpness upgrade by itself. Set it only if you can operate it without confusion. Practice on ordinary subjects before making it your setup for something you cannot repeat.
Choose an AI Servo case for a real problem
The six autofocus cases combine tracking sensitivity, acceleration/deceleration tracking and AF point auto switching. They are not six grades of autofocus strength. Case 1 is the versatile starting point. Keep it while learning unless the photographs reveal a specific behavior that needs changing.
Case 2 is designed to continue tracking despite possible obstacles. It may fit a subject briefly passing behind another object. Case 3 favors subjects suddenly entering the autofocus points, so it can be the wrong response when you want to ignore an intruder. Case 4 addresses subjects that accelerate or decelerate quickly. Cases 5 and 6 address erratic movement, with the appropriate area-selection conditions described in the manual.
Change one thing and inspect a sequence. Did focus leave the subject, or was the subject blurred because the shutter was too slow? Did the area move onto the background because your framing slipped? These are different problems. A tracking-sensitivity change cannot repair motion blur or make an unsuitable lens focus instantly.
Keep notes on the area, case and exposure you tried. You do not need a complicated spreadsheet, just enough to connect a result to a choice. If you change the case, area, button setup and exposure at once, the next sequence may look better without telling you why.
Ten frames per second has conditions
The advertised speed is a maximum under specified conditions. Canon’s manual lists requirements including a sufficiently fast shutter speed and particular settings; iTR AF and anti-flicker behavior can affect the rate. Light, lens, aperture, temperature, battery condition and other factors also matter. Do not promise ten frames per second in every configuration.
Buffer depth depends on file type, settings and media. Canon’s specification gives 31 RAW images under its stated UDMA 7 card conditions. That is not a guaranteed count for your card, dual-recording setup or RAW+JPEG choice. Different quality settings in Rec. separately can reduce maximum burst. Make a representative test with the cards and recording mode you will actually use.
Short bursts around the action are often more useful than holding the shutter while nothing changes. Watch for the gesture, direction change or separation from the background. Give the camera time to clear its buffer and review whether you caught the moment. More files make the editing job larger; they do not select the strongest frame for you.
Exposure and anti-flicker deserve separate checks
Choose shutter speed from the movement you want to show. A fast-moving subject may need a faster exposure than a stationary subject held at the same focal length. Raise sensitivity or adjust aperture when the light demands it, then judge noise and detail at the intended output size. Lens stabilization can reduce camera shake where supported, but the body has no in-body stabilization and stabilization does not freeze independent subject movement.
The normal maximum shutter speed is 1/8000 second, and Canon lists ordinary flash synchronization at 1/250 second. Compatible high-speed flash synchronization is a separate system with its own output consequences. Know which mode is active before assuming a fast shutter and flash will behave like an ordinary synchronized exposure.
Anti-flicker shooting addresses certain cycling light sources. The manual identifies detection at 100Hz or 120Hz, not every modern LED or every lighting frequency. It can improve exposure and color consistency, but it may slightly delay release, slow continuous shooting or make the intervals irregular. The function does not work for Live View or movie shooting.
Make test frames in the actual lighting. Look at the sequence for brightness or color changes, then decide whether enabling anti-flicker helps. A perfectly timed frame can matter more than a small difference in burst rate, but that choice depends on the subject. Do not disable a useful correction solely to chase the headline speed.
Use Live View and movies within their limits
Dual Pixel CMOS AF gives Live View and supported movie modes a different focusing system from the viewfinder array. It is useful to understand both, rather than treating one set of focus settings as a universal camera behavior. The rear screen is fixed and is not a touchscreen. Plan low-angle framing and focus changes around the controls you actually have.
The 7D Mark II records Full HD, not 4K. Its 1080 options include approximately 59.94fps or 50fps, but the manual says Movie Servo AF is unavailable at those high Full HD frame rates. Choose frame rate and focusing method together. If you need continuous movie focus, verify the supported lower-rate configuration instead of discovering the limit after the action begins.
The body has microphone and headphone connections. Listen to a short recording for wind, clipping, focus noise and handling sounds. Use manual focus when it gives a more predictable result for a planned scene. The approximately 29-minute-59-second clip limit and other file, card or operating limits also deserve a check before long recording. This is not an unlimited event-recording camera.
Make a slower photograph as carefully as a fast one
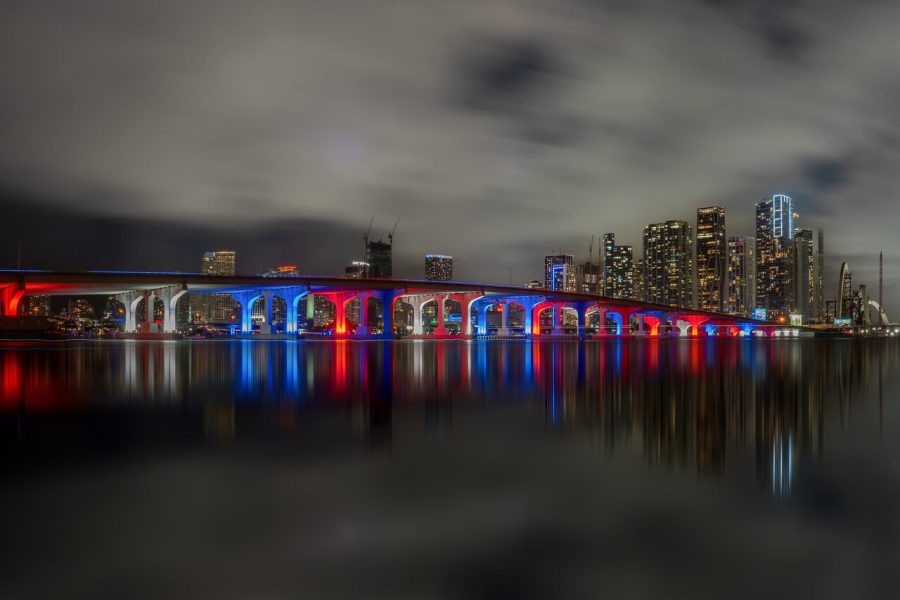
An action-focused body can still make a considered landscape or architectural photograph. Use the scene to choose the position, keep the edges clean and decide which near and distant details matter. The Mono Lake photograph illustrates light and framing, not a claim that this specific camera made the image or a controlled test of its sensor.
For a stationary scene, support the camera safely, check focus in a representative file and choose aperture for the detail you need. Do not default to the smallest aperture simply because everything looks distant. Use the timer or a compatible release if pressing the shutter introduces movement. Review highlights and shadows before packing up; a good composition still needs an exposure that preserves the important parts.

Inspect firmware, power and the used body
Canon’s support notice lists firmware 1.1.3, including corrections for PTP communication and firmware-update vulnerabilities. Read the installed version and follow the exact official procedure if updating is needed. Downloading firmware is not a physical repair, and a seller’s current-version claim does not prove the camera is otherwise healthy.
The manual identifies LP-E6N and LP-E6 batteries with the specified charger. Check condition, authenticity and the current compatibility guidance for any replacement. Do not expect in-camera USB charging. Inspect the compartment, card pins, doors, mount, ports, hot shoe and controls. Test both slots and transfer actual files to your editing system.
Built-in GPS is not built-in Wi-Fi. GPS settings can affect power use and can embed location information in files, so decide whether you need them before sharing photographs. The optional W-E1 Wi-Fi adapter occupies the SD slot and cannot store images. Check current device support before buying an old connectivity accessory; a card reader is a simpler file-transfer plan when wireless support is uncertain.
Ask for service history, a clear accessory inventory and the seller’s current return terms. Test autofocus with the intended lens, repeated exposures at different shutter speeds, movie recording and playback. Weather-resistant design is not waterproofing or proof that old seals are sound. The useful used-camera decision comes from the actual copy, representative files and a workable return path, not from reviving the original launch announcement.
Frequently asked questions
Is the 7D Mark II the original 7D?
No. The Mark II has a different sensor, autofocus system, burst specification and dual CF/SD slots. Check the exact body label.
Does it record 4K?
No. It records Full HD, including approximately 59.94fps or 50fps at 1080 resolution.
Does Movie Servo AF work at 1080/60p?
No. The manual says Movie Servo AF does not work at the high Full HD rates of 59.94fps or 50fps.
Do two cards automatically create backups?
No. Understand Rec. to multiple for duplicate still files. Auto switch card adds capacity, and movies are not recorded to both cards simultaneously.
Does anti-flicker work for every light?
No. The manual describes 100Hz and 120Hz detection, with limitations. It does not work in Live View or movie shooting.
Does built-in GPS mean built-in Wi-Fi?
No. GPS and Wi-Fi are separate. The optional W-E1 adapter uses the SD slot and cannot store images.
A practical 7D Mark II kit
Check exact model, mount, condition and return terms. These links are shopping starting points, not stock or price promises.
- Canon EOS 7D Mark II listings: check condition, operation, included accessories and return terms.
- Remote shutter releases: match the camera connector or supported wireless system.
- UDMA 7 CF cards at B&H: check Type I format and test the actual slot.
- Tripods at B&H: support the whole kit safely.
Affiliate disclosure: Some links are affiliate links. If you buy through them, Shut Your Aperture may earn a commission at no extra cost to you. As an Amazon Associate, we earn from qualifying purchases.
Find practical photography tips at Shut Your Aperture Academy. Build your understanding of light and framing alongside your camera technique.
References: Canon specifications, official instruction manual and firmware notice.