
Updated October 2026
An epic photograph starts with light, timing and a reason to press the shutter. Editing is where you finish that idea. Luminar Neo, now presented by Skylum as Luminar on desktop, puts a lot of that finishing work into one place: RAW development, selective adjustments, portrait tools, sky tools and creative effects. The trick is knowing which controls improve the photograph and which ones just make it louder.
This guide is for photographers who want stronger landscapes, cleaner travel images and portraits that still look like people. It is not a promise that software can rescue every bad frame. You still need a good subject, clean composition and enough detail in the original file. Give the editor something worth working with, then use it with intent.
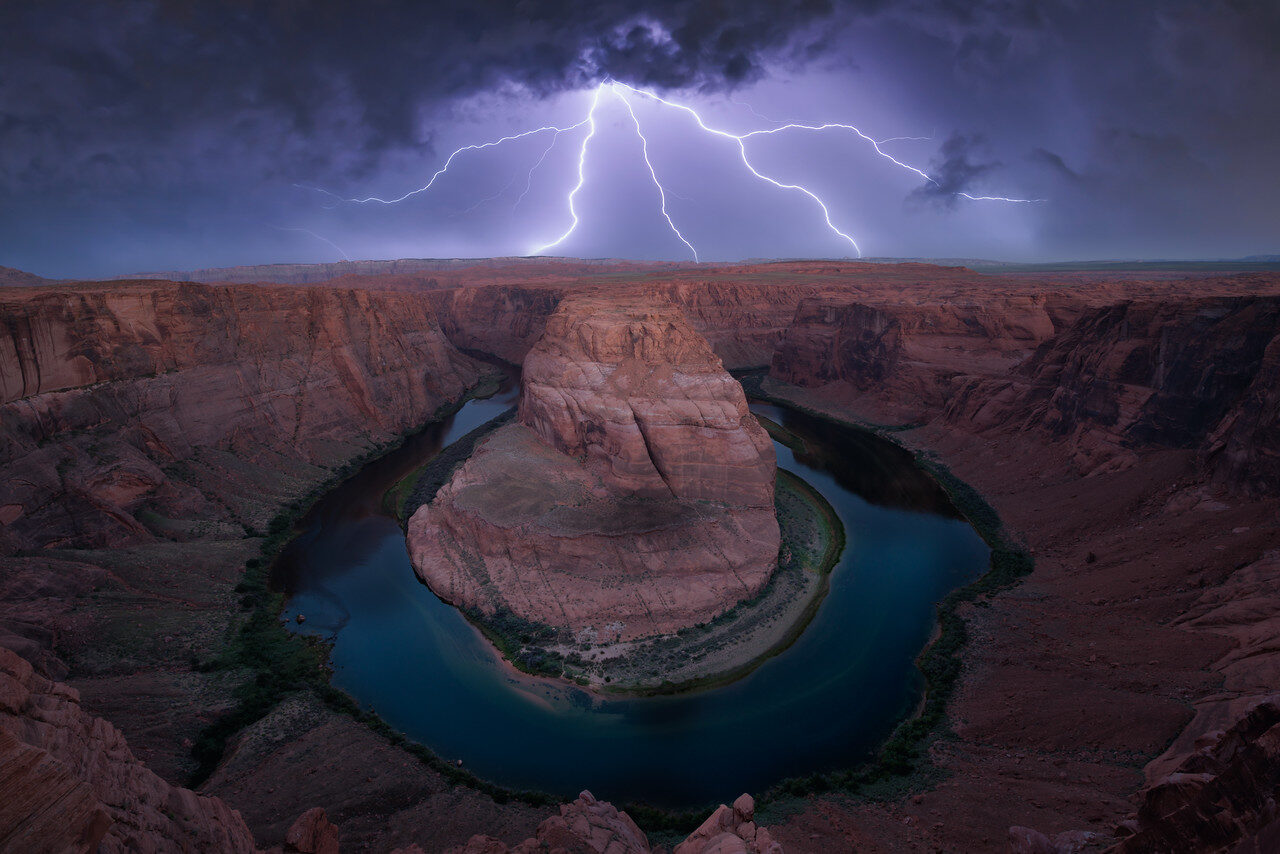
The photographs here are mine, used to illustrate light, color and composition. They are not before-and-after tests, and I am not claiming they were edited in Luminar. Product details come from Skylum’s current pages and documentation rather than invented performance tests. If the workflow below fits how you shoot, check the current Luminar desktop packages at Skylum before choosing a license.
Luminar Neo in 2026: understand the name before buying
Old tutorials, old purchase receipts and current sales pages do not always use the same name. Skylum’s desktop changelog calls the August 5, 2026 release Luminar 1.28.0, while earlier releases use Luminar Neo. Its current product page uses Luminar on Desktop. That is why you may search for Luminar Neo and land on a page branded simply Luminar.
Do not confuse that change with Luminar 4, Luminar AI or Aurora HDR. Those are different generations or products. Before following a tutorial, check the application name and version you actually have. A slider location from an old video is not proof that your installation is broken. The 1.28 redesign puts Presets, Tools and Edit together in the right panel and changes navigation, so older screenshots can look different.
The useful question is not whether the newest logo looks better. It is whether the current desktop application does the work you need on your computer. Check camera support, operating-system requirements, the included tools and the exact package at checkout. See the current Luminar offer, not an expired launch discount someone left in a years-old article.
 Save
SaveWho should consider Luminar, and who should pause?
Luminar deserves a look if you edit selected landscapes, travel photographs or portraits and want a visual workflow with both ordinary tonal controls and creative tools. A photographer finishing ten portfolio images has a different job from someone delivering thousands of wedding frames. Start with your actual workload, not the longest feature list.
For a landscape, you may want to balance a bright sky and dark foreground, refine color, control texture and guide the eye. For a portrait, you may want cleaner skin without removing every pore. For travel, you may want consistent color across a small set without spending the evening repeating the same adjustments. Those are reasonable editing goals.
Pause if your current workflow depends on a large archive, complex catalog organization, specific plugins or fast volume delivery. Do not move everything because a demo looked good. Test a small working set, compare exports, and keep your existing catalog and originals backed up. An editor earns a place in your workflow by helping you finish real jobs, not by winning a screenshot contest.
A better Luminar editing workflow starts before the sliders
Make a copy or backup of the originals before experimenting. Keep a simple folder structure you understand outside the editor. A catalog is useful, but it is not a substitute for knowing where the files live. Separate originals, working exports and final deliverables so you do not accidentally send a low-resolution preview to a client or print lab.
Pick one strong frame first. Look at it without touching anything and decide what matters: the warm light on a building, a face, a line through the landscape or a reflection. Write that intention in your head. If you cannot identify the subject, a heavy preset probably will not solve the problem.
Check focus and motion blur at a useful zoom. Look for clipped highlights, distracting edges and an awkward horizon. Some problems are editing choices; others belong to the capture. Do not spend an hour polishing a weaker frame when another photograph in the set already has the right gesture, light or composition.
Develop RAW: build a clean base
Skylum’s Develop RAW/Develop documentation describes exposure, color, curves, noise reduction and optical controls. Start there. A solid base makes later adjustments easier to judge. Set white balance deliberately, adjust overall exposure, then balance highlights and shadows without flattening the whole scene.
For a sunset, protect the bright sky and leave some shape in the shadows. You do not need detail in every dark corner. Darkness can give the photograph depth. For a backlit portrait, bring the face into balance while watching noise and color shifts. Pulling a shadow slider all the way up is not the same thing as improving the light.
Correct obvious lens problems and straighten the frame before adding drama. Then compare with the starting point. The image should feel cleaner and more intentional, not like every tone has been forced into the same middle range. If the RAW file looks different from the camera preview, remember that different RAW engines render a starting image differently; judge the final edit, not just the first preview.
Enhance AI: a starting point, not your signature
Enhance AI offers a quick way to adjust several parts of an image. It can help you find a direction, but a global improvement is not automatically the right improvement for every subject. Move the control gradually and watch the important parts of the frame, not only the whole-image thumbnail.
Skylum distinguishes Sky Enhancer AI from sky replacement. Sky Enhancer adjusts the existing sky’s texture, tone and color. Its documentation says it is not designed for night skies and may not recognize a small, blurred or poorly defined sky. That is a real limitation, not a reason to keep pushing a disabled control.
Use the result as a base, then refine it. If the scene suddenly looks crunchy, the skin turns strange or the clouds lose their soft edges, back off. An epic edit should hold up when somebody looks closely. It should not depend on being viewed as a tiny phone thumbnail.
 Save
SaveLandscape color: bold does not mean radioactive
Color is where a good edit can turn bad quickly. A warm sunset already has energy. Add contrast and color with a light hand, then inspect neutral objects, water and distant haze. When every surface becomes orange, you have lost the difference between the light and the things it touches.
Think in relationships. A warm foreground may work because the distant mountains stay cooler. A bright sky may feel bigger because the lower part of the frame stays quieter. If you make everything equally vivid, the eye has nowhere to settle. Use selective adjustments to strengthen the subject rather than dragging the whole image in the same direction.
Take a break before the final export. Your eyes adapt to an exaggerated version after a few minutes. Return to the image, compare it with the starting point and ask whether the edit supports the moment. That simple pause can do more for your color than another expensive preset pack.
Sky AI: keep enhancement and compositing honest
Skylum’s Sky AI documentation describes replacing a sky, adjusting its position, refining the mask, relighting the scene and controlling reflections. Those tools can be useful for creative work. They also change what the photograph represents. Replacing a sky makes a composite; it does not recover a sky that your camera recorded.
If you use it, match direction of light, perspective, horizon and color. Inspect branches, rooftops and fine edges at full size. Check water separately, because a reflection that does not agree with the new sky can break the whole image. Do not assume an automatic selection is perfect just because it took seconds.
Use your own sky photographs or properly licensed assets, and describe a composite honestly when that distinction matters. For documentary, news, competition or client work, follow the relevant rules and brief. This article uses real photographs, not generated skies or made-up before-and-after pairs. You can get a powerful result without pretending the scene was something it was not.
Portrait tools: keep the person in the photograph
The April 2026 release notes describe changes to Bokeh AI, Skin AI and Face AI, including controls for blemishes, shine and dark circles. Those are tools, not instructions to erase a person’s character. Start with exposure and color before retouching, then make small changes that fit the purpose of the portrait.
Look at skin texture, hair edges and eyes. A soft face against razor-sharp clothing can look wrong. Background blur also needs careful inspection around flyaway hair, glasses and gaps between arms. If the effect does not survive a close look, reduce it or leave the original background alone.
For client portraits, agree on the retouching expectation. A commercial beauty brief and a natural family portrait are not the same thing. Keep an untouched original and compare often. The goal is a strong portrait of that person, not a generic smooth face produced by a slider.
 Save
SaveNoise, sharpening and extra tools: judge the output
The current Luminar offer lists tools for denoising, sharpening, upscaling, HDR merging, focus stacking and panorama stitching. Verify what your package includes rather than assuming every old license unlocks every current tool. The existence of a tool does not guarantee that it fixes every file.
Noise reduction can trade fine texture for smoothness. Sharpening can create halos. Upscaling creates a larger output, but it cannot promise the same recorded detail as a better original capture. Compare results at the size you will actually deliver, then inspect critical areas closely. Leaves, hair, fabric and distant architecture are useful places to check.
For bracketed exposures, panoramas and focus stacks, capture clean source frames. Moving subjects, changing light and gaps between images can create problems no merge button solves cleanly. Keep the source files and check seams or ghosting before treating a merged result as finished.
Lightroom Classic users: add a tool without burning your archive
Skylum documents a Lightroom Classic plugin workflow. That is worth considering if you want Luminar for selected edits while keeping your existing organization. Verify supported host versions and what file is passed into the plugin before committing to a workflow.
The June 2026 changelog also describes Lightroom Migration as a beta feature. It says migration transfers photographs, folders, albums, ratings and basic edits while leaving the original Lightroom catalog untouched. That is narrower than promising every adjustment and workflow transfers perfectly. Test a small catalog and inspect the results before trusting a large archive to a new process.
Back up the catalog and originals regardless of the vendor’s promise. Check edits, metadata, ratings and exports that matter to you. If you only need an occasional creative finishing tool, a plugin route may be a smaller change than moving your entire photographic life.
Batch work: consistency first, then individual judgment
Skylum’s Syncing Adjustments documentation explains applying settings from one image to others. Work within a group shot in similar light. Choose a representative frame, build the base edit and sync carefully, then inspect the rest rather than assuming the group is finished.
A photograph facing the sun and another facing away can need different exposure and color. A close portrait and a wide landscape do not need identical texture settings. Separate groups by lighting and subject, and avoid copying scene-specific changes blindly.
Presets can make a useful starting point, especially when you want a consistent feel. They should save repetitive work, not remove your judgment. If you spend more time undoing the preset than building a clean edit, change the preset or start from scratch.
 Save
SaveLuminar pricing and licenses: read the whole package
Do not buy from an old price quoted in a launch article. The current affiliate destination offers Desktop Only, All Platforms and Max packages. It separates perpetual application access from time-limited AI services and other benefits. A one-time application purchase does not mean every cloud service, future feature and asset library is yours forever.
Check the total, currency, device allowance, included tools and renewal options on the live checkout. The Luminar Prime offer describes auto-renewal for AI tools and Library of Assets after 365 days. That condition should not be generalized to every license. Understand what continues, what ends and what can renew before paying. Do not let a large lifetime label hide a smaller recurring component.
Skylum advertises a 30-day money-back guarantee on the current offer. Read the applicable terms before relying on it. Compatibility and workflow fit still matter even when a return option exists. Compare the current Luminar packages here and pick the smallest package that actually covers your work, not the biggest bundle just because it is marked popular.
What is available now, and what is still coming?
The current sales page labels some Fall 2026 features as coming, including Crop 2.0, Atmosphere 2.0, AI Assistant 2.0 and Enhance AI 2.0. Do not plan a paid job around an announced feature until your actual installed version has it and you have tested it. A roadmap is not a finished workflow.
Use the changelog and your account to check your version. Keep a working installation stable when deadlines matter, and back up before a major update. Performance claims in vendor release notes are vendor claims, not benchmarks from my computer. The useful test is your own files, your own machine and a finished export you can trust.
A practical final-edit checklist
- The subject is clear and the crop helps it.
- Exposure and color support the light rather than flatten it.
- Faces, foliage and fine edges survive a close look.
- Any replacement sky or generative change is treated honestly.
- The export size, format and color settings fit the destination.
- Originals and working files are backed up separately.
Start with one photograph that matters to you. Build a clean base, make a few selective adjustments and stop before the image loses its character. That is how you get an epic result instead of another overcooked file. If you want these tools in your workflow, check Luminar’s current desktop offer and read the package details before buying.
Luminar Neo questions photographers ask
Is Luminar Neo still the current product name?
Skylum now markets the desktop application as Luminar on Desktop. Its changelog calls the August 2026 release Luminar 1.28.0, while older releases and tutorials use Luminar Neo. Check the version and package rather than relying only on the name.
Is Luminar a one-time purchase or a subscription?
The current offer has perpetual application packages, but certain AI services and benefits are time-limited and may renew separately. Read the selected package and renewal options before paying.
Does Luminar replace Lightroom Classic?
It can be used as a separate editor or through a documented Lightroom Classic plugin workflow. Test your own files and organization needs before moving an archive. Lightroom Migration is described as beta in the June 2026 release notes.
Does Sky Enhancer AI replace the sky?
No. Sky Enhancer AI adjusts an existing detected sky. Sky AI is a separate replacement tool that creates a composite. Inspect edges and reflections and describe composites honestly when relevant.
Can I use Luminar on Mac and Windows?
Skylum offers the desktop application for macOS and Windows. Check the current system requirements, camera support and device allowance for the exact package you choose.
Are the photographs here Luminar before-and-after examples?
No. They are Edin Chavez photographs illustrating light, color and composition. They are not software benchmarks or evidence that a particular Luminar tool produced the result.
Software helps you finish a photograph. Learning light and composition helps you make a better one in the first place. Join the ShutYourAperture Academy Landscape Photography course for instruction you can take into the field, then bring stronger files into your editing workflow.
Editing toolkit: Luminar on desktop
The current desktop product descended from Luminar Neo. Start with the license that fits your computer and workflow. Check included tools, one-year AI access and any renewal options at checkout.
RAW development, selective editing and creative tools
Affiliate disclosure: We may earn a commission if you buy through the Skylum links in this article, at no extra cost to you. Product details are based on Skylum’s published information, not a controlled hands-on benchmark. Photographs are by Edin Chavez and illustrate photographic choices, not Luminar processing results. Packages, prices and availability can change.