Best Photography Spots in Seattle: 12 Locations With GPS
Updated
~14 min read
Seattle is one of the most photogenic destinations for serious travel photographers. This field guide covers 12 GPS-tagged vantage points, camera settings optimized for each location, gear recommendations, and the logistics photographers actually need — transit, timing, permits, and seasonal light conditions. Whether you have a long weekend or a one-day layover, use this guide to come home with portfolio-quality frames.
 Save
SaveWhy Seattle rewards photographers
Seattle concentrates an exceptional range of photographic subjects within a compact, walkable geography. The combination of urban architecture, natural light patterns, and cultural street life creates a city that rewards photographers who move slowly and look carefully. The 12 vantage points in this guide represent the highest-yield locations — places where composition, light, and accessibility converge into frames worth keeping.
The photographers who produce the best work here arrive with a specific shot list (use the table below), plan around the golden and blue hours, and then walk far enough to find the second-best angle — the one without the tour bus in the frame. Bring fewer lenses than you think and walk farther than you planned.
For Seattle, the editing approach that works is one that respects the city’s natural color palette. Push contrast and lift shadows — don’t crush the blacks into oblivion. Shoot RAW so you have the dynamic range to handle the bright skies and dark shadows that characterize this latitude at golden hour.
12 photography spots with GPS coordinates
The table below lists all 12 vantage points with GPS coordinates, recommended focal length, and a brief composition note. Pin these on Google Maps or import them into Gaia GPS before you leave home — cell coverage is spotty in many of the best spots.
| Vantage Point | GPS | Why Shoot Here | Focal Length |
|---|---|---|---|
| 1. Kerry Park | 47.629380, -122.360023 |
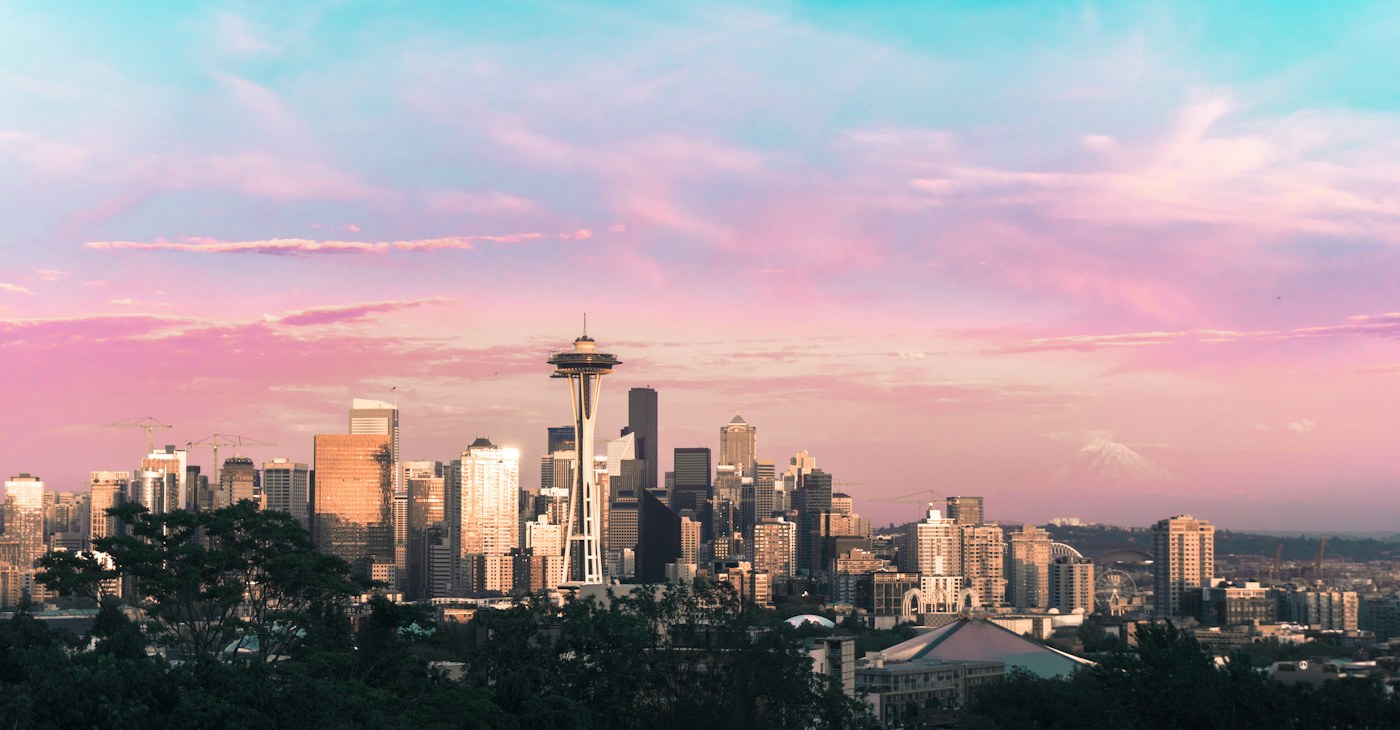
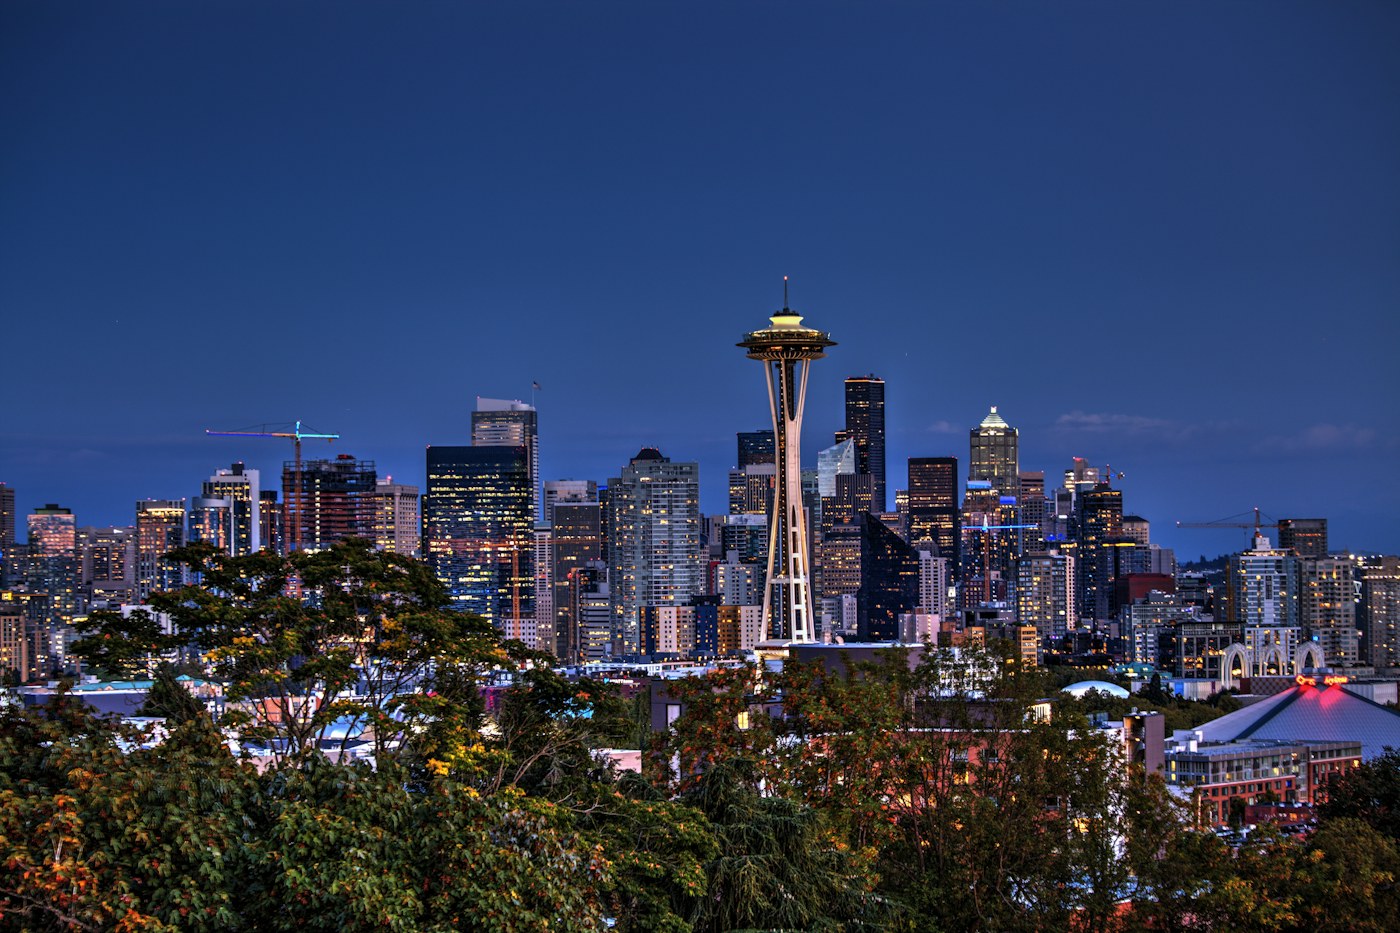
Iconic view of Space Needle and downtown skyline; best at golden hour and blue hour. | 24–70mm |
| 2. Pike Place Market | 47.609726, -122.342148 |
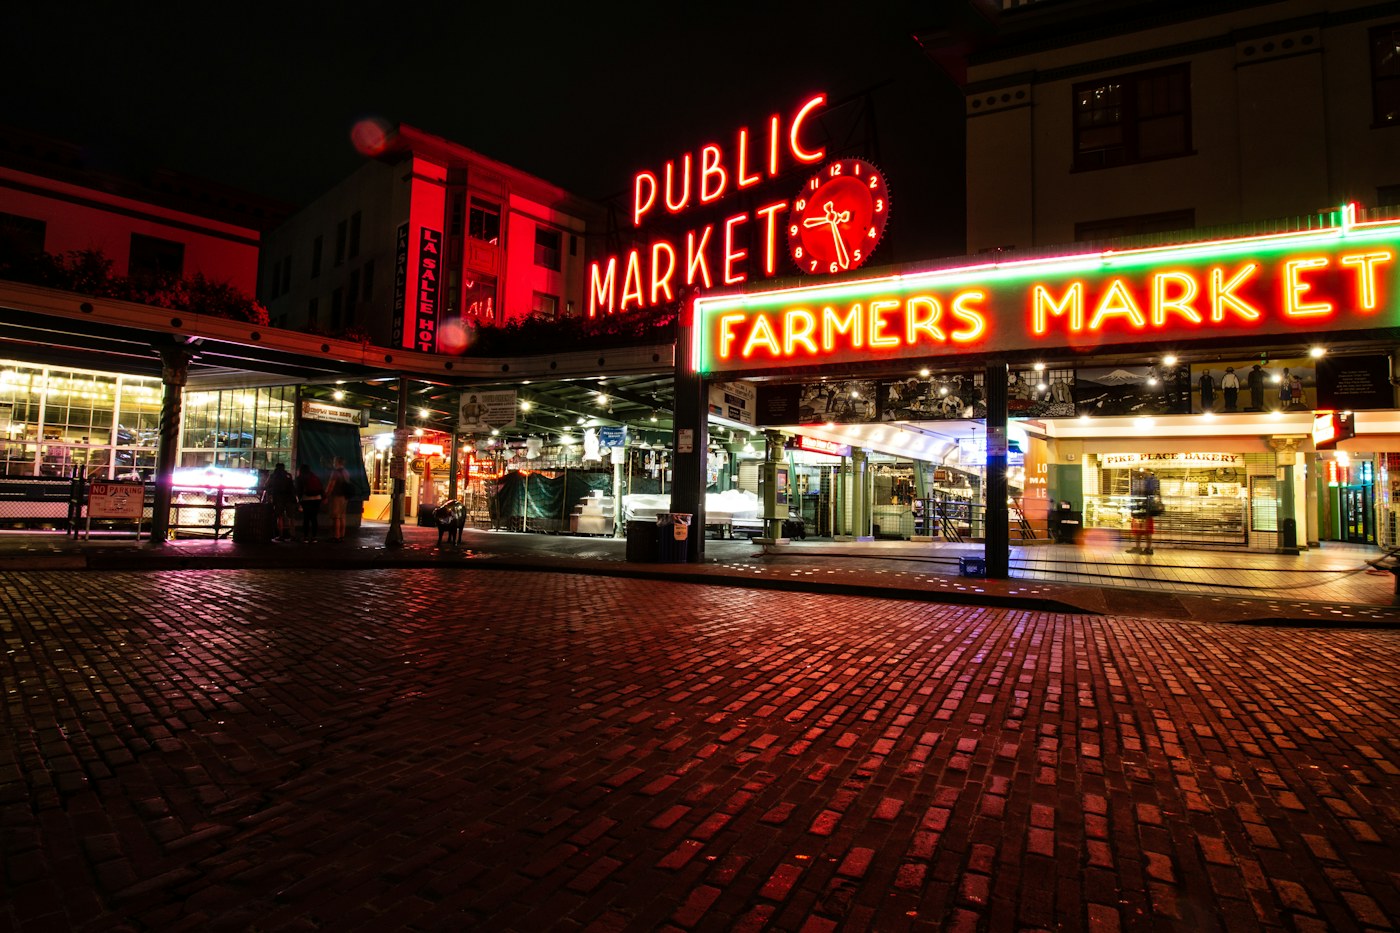
Fishmongers, flower stalls, neon signs; great for street and food photography. | 35mm |
| 3. Gas Works Park | 47.645706, -122.334015 |
Former industrial park with city skyline backdrop; reflections in the lake at dawn. | 16–35mm |
| 4. Chihuly Garden and Glass | 47.620731, -122.350823 |
Dale Chihuly glass art with Space Needle framing; morning light before crowds. | 24–70mm |
| 5. Mount Rainier from Reflection Lakes | 46.857290, -121.731490 |
3-hour drive but worth it; sunrise reflections of the mountain. | 70–200mm |
| 6. Myrtle Edwards Park | 47.618440, -122.358440 |
Waterfront walk with Olympic Mountains backdrop; evening golden light. | 24–70mm |
| 7. Columbia Center Sky View Observatory | 47.604810, -122.330810 |
Highest public viewpoint in Seattle; 360-degree urban photography. | 24–70mm |
| 8. Ballard Locks | 47.664070, -122.396910 |
Salmon run photography in season; boats and industrial architecture. | 70–200mm |
| 9. Discovery Park Lighthouse | 47.657260, -122.419730 |
Historic lighthouse with Puget Sound views; dramatic sunset light. | 24–70mm |
| 10. Fremont Troll | 47.650910, -122.347130 |
Quirky public art under Aurora Bridge; wide-angle comedy shots. | 16–35mm |
| 11. Alki Beach | 47.575980, -122.417140 |
West Seattle beach with skyline panorama; sunset silhouettes. | 24–70mm |
| 12. Seattle Waterfront Pier 62 | 47.607930, -122.341970 |
Renovated pier with ferry traffic, Olympic Mountains, Puget Sound. | 16–35mm |
Detailed vantage point guide for Seattle
Each vantage point below includes a detailed composition guide, the best time of day and year, transit notes, and the specific technical challenges you will encounter at each location. Read this section before you arrive so you can solve problems before you are standing in fading light with the wrong lens mounted.
1. Kerry Park
GPS: 47.629380, -122.360023, Focal Length: 24–70mm
Iconic view of Space Needle and downtown skyline; best at golden hour and blue hour. For best results, arrive 20–30 minutes before sunrise to claim your position before light moves. Blue hour — roughly 30 minutes after sunset — delivers different but equally compelling tones for this location.
2. Pike Place Market
GPS: 47.609726, -122.342148, Focal Length: 35mm
Fishmongers, flower stalls, neon signs; great for street and food photography. For best results, arrive 20–30 minutes before sunrise to claim your position before light moves. Blue hour — roughly 30 minutes after sunset — delivers different but equally compelling tones for this location.
3. Gas Works Park
GPS: 47.645706, -122.334015, Focal Length: 16–35mm
Former industrial park with city skyline backdrop; reflections in the lake at dawn. For best results, arrive 20–30 minutes before sunrise to claim your position before light moves. Blue hour — roughly 30 minutes after sunset — delivers different but equally compelling tones for this location.
4. Chihuly Garden and Glass
GPS: 47.620731, -122.350823, Focal Length: 24–70mm
Dale Chihuly glass art with Space Needle framing; morning light before crowds. For best results, arrive 20–30 minutes before sunrise to claim your position before light moves. Blue hour — roughly 30 minutes after sunset — delivers different but equally compelling tones for this location.
5. Mount Rainier from Reflection Lakes
GPS: 46.857290, -121.731490, Focal Length: 70–200mm
3-hour drive but worth it; sunrise reflections of the mountain. For best results, arrive 20–30 minutes before sunrise to claim your position before light moves. Blue hour — roughly 30 minutes after sunset — delivers different but equally compelling tones for this location.
6. Myrtle Edwards Park
GPS: 47.618440, -122.358440, Focal Length: 24–70mm
Waterfront walk with Olympic Mountains backdrop; evening golden light. For best results, arrive 20–30 minutes before sunrise to claim your position before light moves. Blue hour — roughly 30 minutes after sunset — delivers different but equally compelling tones for this location.
7. Columbia Center Sky View Observatory
GPS: 47.604810, -122.330810, Focal Length: 24–70mm
Highest public viewpoint in Seattle; 360-degree urban photography. For best results, arrive 20–30 minutes before sunrise to claim your position before light moves. Blue hour — roughly 30 minutes after sunset — delivers different but equally compelling tones for this location.
8. Ballard Locks
GPS: 47.664070, -122.396910, Focal Length: 70–200mm
Salmon run photography in season; boats and industrial architecture. For best results, arrive 20–30 minutes before sunrise to claim your position before light moves. Blue hour — roughly 30 minutes after sunset — delivers different but equally compelling tones for this location.
9. Discovery Park Lighthouse
GPS: 47.657260, -122.419730, Focal Length: 24–70mm
Historic lighthouse with Puget Sound views; dramatic sunset light. For best results, arrive 20–30 minutes before sunrise to claim your position before light moves. Blue hour — roughly 30 minutes after sunset — delivers different but equally compelling tones for this location.
10. Fremont Troll
GPS: 47.650910, -122.347130, Focal Length: 16–35mm
Quirky public art under Aurora Bridge; wide-angle comedy shots. For best results, arrive 20–30 minutes before sunrise to claim your position before light moves. Blue hour — roughly 30 minutes after sunset — delivers different but equally compelling tones for this location.
11. Alki Beach
GPS: 47.575980, -122.417140, Focal Length: 24–70mm
West Seattle beach with skyline panorama; sunset silhouettes. For best results, arrive 20–30 minutes before sunrise to claim your position before light moves. Blue hour — roughly 30 minutes after sunset — delivers different but equally compelling tones for this location.
12. Seattle Waterfront Pier 62
GPS: 47.607930, -122.341970, Focal Length: 16–35mm
Renovated pier with ferry traffic, Olympic Mountains, Puget Sound. For best results, arrive 20–30 minutes before sunrise to claim your position before light moves. Blue hour — roughly 30 minutes after sunset — delivers different but equally compelling tones for this location.
 Save
SaveCamera settings cheat sheet for Seattle
Settings vary by scenario. Use this as a starting point and bracket exposures in challenging light:
| Scenario | ISO | Aperture | Shutter | Notes |
|---|---|---|---|---|
| Golden hour landscape | 100–400 | f/8–f/11 | 1/125–1/500s | Expose to protect highlights; lift shadows in RAW |
| Blue hour cityscape | 400–1600 | f/8 | 2–15s (tripod) | Balance ambient and artificial light |
| Night cityscape | 800–3200 | f/5.6–f/8 | 5–30s (tripod) | Use self-timer or cable release to eliminate vibration |
| Street photography | 400–3200 | f/2.8–f/5.6 | 1/125–1/500s | Continuous AF; burst mode for candid moments |
| Interior architecture | 400–3200 | f/5.6–f/8 | 1/30–1/125s (tripod) | Check permissions; keystone correction in post |
| Waterfront long exposure | 100 | f/11 | 30–120s (ND filter) | 10-stop ND filter; remote release; mirror lock-up |
| Sunrise landscape | 100–200 | f/8–f/16 | 1/30–1/250s | Arrive 30 min before sunrise; bracket 3 frames |
Lens and gear recommendations for Seattle
The essential kit for Seattle photography covers three focal ranges: wide (16–35mm or equivalent) for architecture and sweeping landscapes, standard zoom (24–70mm f/2.8) as the workhorse for 80% of shots, and telephoto (70–200mm) for compressed skylines, wildlife, and isolating architectural details from distance.
For mirrorless shooters: a single body with a 24–70mm f/2.8 plus a 35mm or 50mm f/1.8 prime is a viable travel kit. Add a 16–35mm for the wide-angle moments and a 70–200mm for compression. Most photographers bring two bodies to avoid lens changes in challenging conditions.
Essential accessories: a sturdy travel tripod (carbon fiber under 1.5kg), a circular polarizing filter for sky contrast and water management, a 6-stop and 10-stop ND filter for long exposures, extra batteries (cold weather or long shooting days drain fast), and enough memory cards to shoot RAW all day without worrying about space.
US Cities Guide Series
This guide is part of the Shut Your Aperture US cities series: GPS-tagged vantage guides, camera settings cheat sheets, and seasonal light notes for the most-visited cities in the country.
Best months and light conditions for Seattle
Spring (March–May) and fall (September–November) offer the best combination of moderate temperatures, photogenic skies, and lower crowd density at the main vantage points. Summer delivers the longest golden hours but also peak tourist traffic and, in many cities, haze that degrades long telephoto shots. Winter can produce dramatic low-angle light and clear air — particularly valuable for skyline photography — but requires planning around shorter days and colder conditions.
Day-to-day, plan your shooting schedule around golden hour (first and last hour of daylight) and blue hour (30 minutes after sunset). Midday sun in most urban environments creates harsh, unflattering light for architecture and street photography. Use the midday hours for scouting evening compositions, eating, and transit between vantage points. The four-hour midday block is planning time, not capture time.
Check weather forecasts for partial cloud cover — a single layer of clouds at sunset can transform the sky into a canvas and multiply the quality of any exterior shot. Completely overcast days are excellent for waterfall, forest, and interior photography where diffuse light eliminates harsh contrast.
Getting around Seattle for photographers
Seattle’s vantage points split into two zones: the downtown waterfront and Pike Place cluster is walkable, while Kerry Park, Gas Works, Discovery Park, and Alki sit across the city’s hill-and-water geography and want a car or rideshare. The Link light rail runs from the airport through downtown to Capitol Hill and the University District, and buses fill the gaps. For a Kerry Park sunset, rideshare beats hunting the tiny residential parking strip on Queen Anne.
Traffic on I-5 is among the worst in the country at rush hour – a cross-town move that takes 15 minutes at midday can triple after 3:30 PM. Ferries are both transport and vantage point: the Bainbridge Island ferry from Pier 52 gives the classic downtown skyline crossing for the price of a walk-on ticket. Rain changes planning more than season does: carry a rain cover year-round, and treat the October-to-April gray stretch as a blue-hour and moody-street season rather than a write-off.
 Save
SaveRelated guides nearby
Other photography destinations to explore:
- Grand Teton
998 km away, national park, USA - San Francisco
1086 km away, city, USA - Las Vegas
1400 km away, city, USA
Frequently asked questions
What is the best time of day to photograph in Seattle?
The golden hour (first hour after sunrise, last hour before sunset) and blue hour (30 minutes after sunset) deliver the best light in Seattle. Midday sun is harsh and produces flat, overexposed results. Plan your shooting schedule around the light, not the convenience of sleeping in.
Do I need a permit to photograph in Seattle?
Personal and editorial photography on public property in Seattle generally requires no permit. Commercial photography — where a tripod is used for commercial purposes in a public park, or photography takes place on private property — may require a permit. Check with local parks departments and venues before commercial shoots. Drone photography requires FAA Part 107 certification and may be restricted in certain zones near airports.
What gear should I bring to Seattle?
A versatile zoom lens (24–70mm f/2.8 or equivalent) covers 80% of Seattle photography. Add a wide-angle (16–35mm) for architectural and landscape work and a telephoto (70–200mm) for compressed city skylines and wildlife. A sturdy travel tripod is essential for blue-hour and night photography. Pack a polarizing filter to manage reflections and deepen sky contrast, and an ND filter (6-stop or 10-stop) for long-exposure water and crowd shots.
What camera settings work best for city photography in Seattle?
During golden hour: ISO 100–400, f/8–f/11 for sharpness, 1/125–1/500s shutter speed. At blue hour and night: ISO 800–3200, f/5.6–f/8, use a tripod and shoot 2–30 second exposures for light trails and long exposures. Shoot RAW files in all conditions — the extra dynamic range rescues highlights and shadows that JPEG cannot recover.
When is the best season to visit Seattle for photography?
Spring and fall offer the best combination of comfortable temperatures, lower tourist density, dramatic skies, and ideal light angles. Summer delivers long days with extended golden hours but peak crowds. Winter can offer dramatic weather and clear air, with lower humidity removing haze from long telephoto shots. Research any unique seasonal events – the summer dry stretch from July into early September when Mount Rainier is reliably visible, the late-March cherry blossoms on the University of Washington quad, and the holiday lights around Pike Place and the waterfront – that create once-a-year photographic opportunities in Seattle.
Plan a Seattle outing with Klook
Check the departure point, timing and route before booking. This is a sightseeing outing, not photography instruction.
What to Pack
A landscape kit built around wide views, steady support, and changing light is a useful starting point. Compare the gear and choose what fits your camera, budget, and conditions. These links lead to B&H Photo Video and Amazon.
| What & Why | B&H | Amazon |
|---|---|---|
Sony 16-35mm f/2.8 GM Check the camera mount before buying. Choose a focal length that fits the photos you plan to make. | Shop B&H → | Shop Amazon → |
Peak Design Travel Tripod Check the load rating, packed size and local tripod rules before buying. | Shop B&H → | Shop Amazon → |
Breakthrough X4 CPL Check the filter type and lens thread size before buying. Use a filter only when the effect fits your photo. | Shop B&H → | Shop Amazon → |
Breakthrough X4 10-stop ND Check the filter type and lens thread size before buying. Use a filter only when the effect fits your photo. | Shop B&H → | Shop Amazon → |
Sony NP-FZ100 battery Use the battery type specified for your camera. Bring a spare if your shooting plan calls for one. | Shop B&H → | Shop Amazon → |
SanDisk Extreme Pro 128GB Check the card format and speed requirements specified for your camera. | Shop B&H → | Shop Amazon → |
Koh microfiber cloths Compare this option with your current kit. Check compatibility and the product details before buying. | Shop B&H → | Shop Amazon → |
B&H and Amazon links are affiliate links. We earn a small commission on purchases at no extra cost to you.