Best Photography Spots in Las Vegas: 12 Locations With GPS

Tours & experiences disclosure: This guide includes affiliate links to Viator, the world’s largest tour and experiences marketplace. If you book through these links, ShutYourAperture may earn a small commission at no extra cost to you.

Las Vegas photography guide hero imageSave

Amazon Associates disclosure: ShutYourAperture is a participant in the Amazon Services LLC Associates Program. As an Amazon Associate we earn from qualifying purchases. Some links below go to Amazon (Store ID shutyouraperture-20). Buying through these links costs you nothing extra and helps fund our free guides.
Skip the planning. Get the Las Vegas PDF. All locations, GPS coordinates, golden-hour times, gear tips. Instant download.

Las Vegas, Nevada is one of the most photogenic cities in the United States. If you have a camera and the patience to show up before dawn, Las Vegas will give you images that last a career — but only if you know where and when to point it.

This is the definitive field guide to the 12 best photography spots in Las Vegas, with GPS coordinates you can drop straight into Google Maps, exact camera settings tuned to Las Vegas’s unique light, precise timing for every location, and the access notes nobody else bothers to document. It mirrors the intel inside our Las Vegas Ultimate Photographer’s Guide ($47 PDF) — a downloadable field guide with full-page hero images, GPS maps, seasonal tables, a city safety briefing, and a complete photographer’s packing list. Get the guide →

Planning multi-city travel? See also: U.S. cities photography hub and the National Parks Photography Guides.

Las Vegas Ultimate Photographer’s Guide — $47
12 GPS-mapped locations · Exact camera settings · Multi-season shooting calendar · Free annual updates

Download the PDF guide →
Skip the planning

Get the Las Vegas Ultimate Photographer’s Guide

Every location below — pre-mapped with GPS, golden-hour timing, gear recommendations, cultural rules, and a 14-day itinerary. Downloaded by 200+ working photographers.

Get the PDF · $47
Instant download · Lifetime updates

Quick jump to the 12 spots

  1. Bellagio Fountains (Las Vegas Strip)
  2. Welcome to Fabulous Las Vegas Sign
  3. Fremont Street Experience
  4. The Neon Museum Boneyard
  5. Bellagio Conservatory & Botanical Gardens
  6. Sphere (MSG Sphere Exosphere)
  7. Eiffel Tower Las Vegas (Paris Las Vegas)
  8. High Roller Observation Wheel
  9. Red Rock Canyon (Calico Hills)
  10. Seven Magic Mountains
  11. Hoover Dam
  12. Downtown Container Park

A look inside the Las Vegas Photographer’s Guide

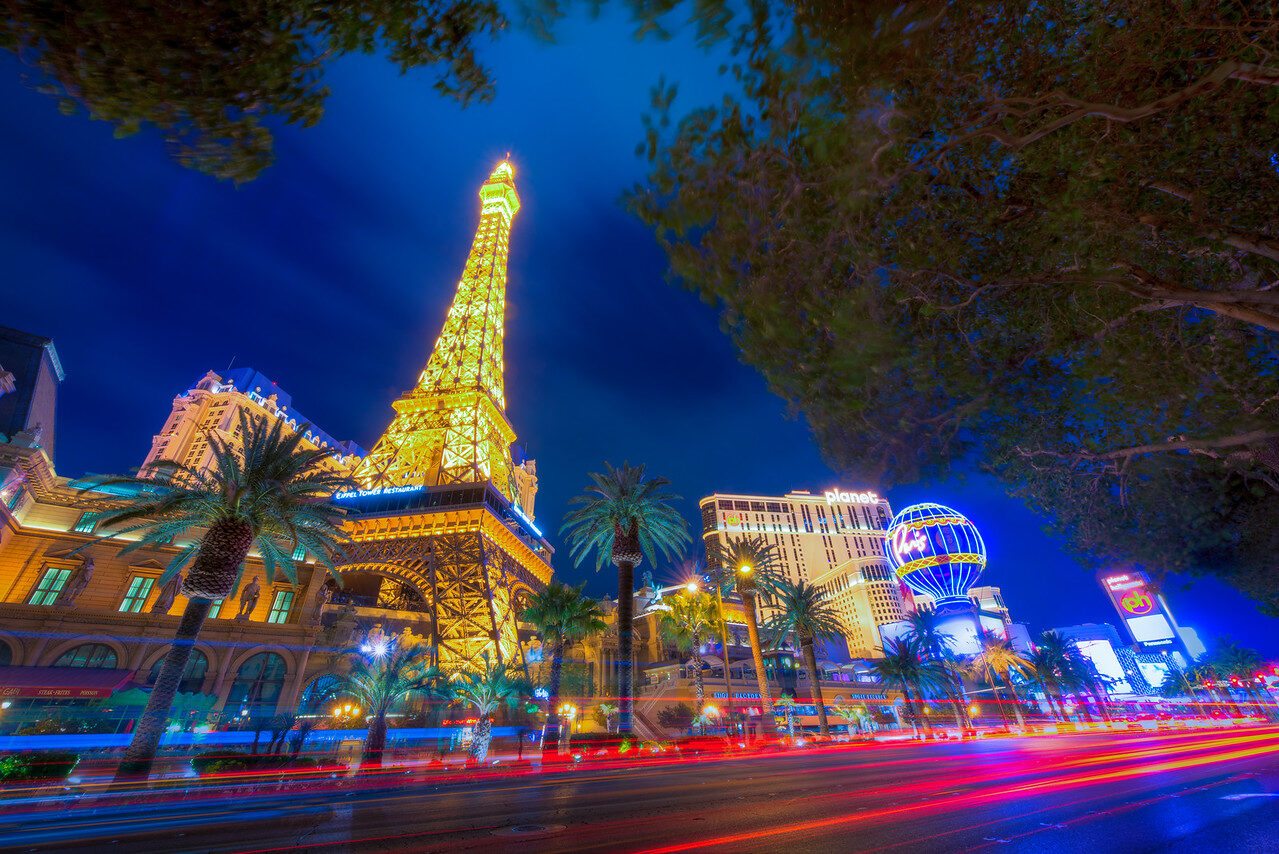
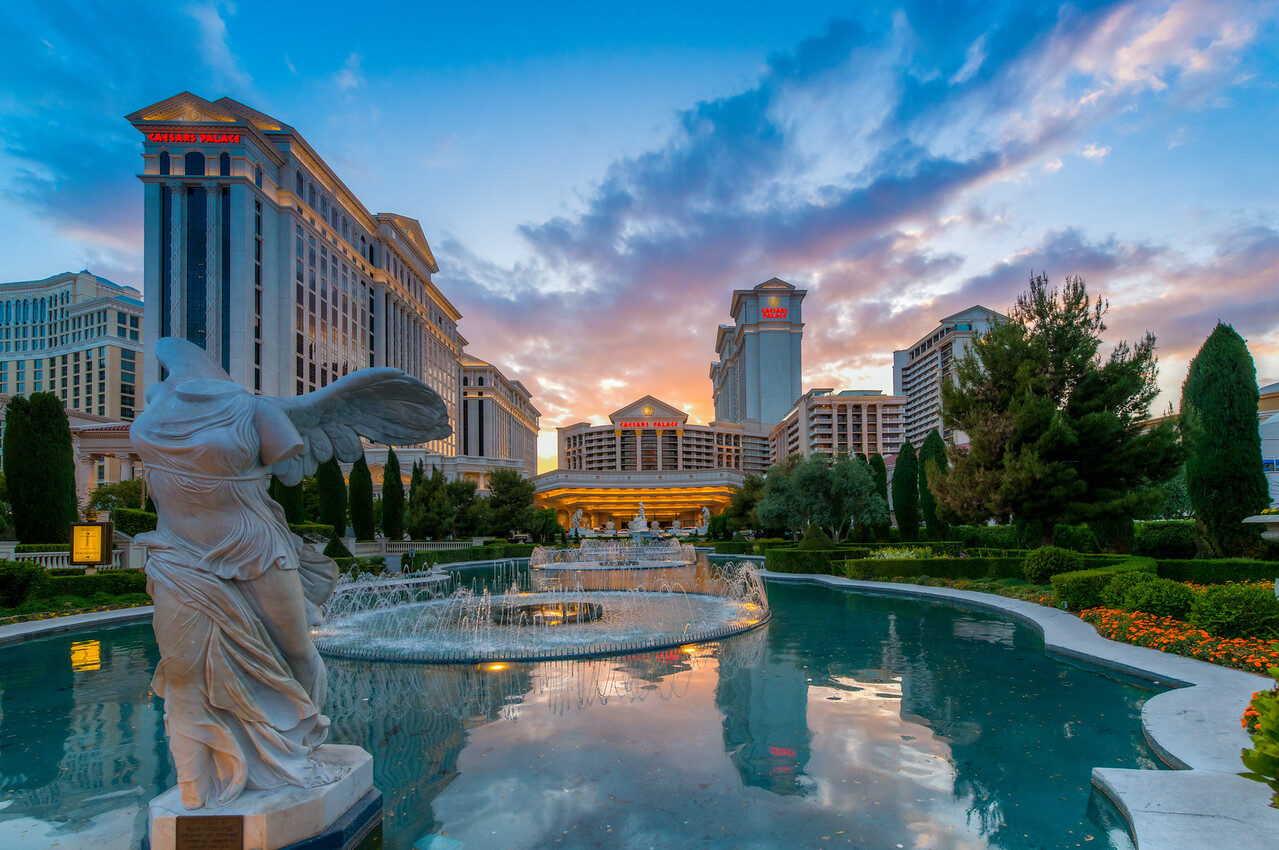
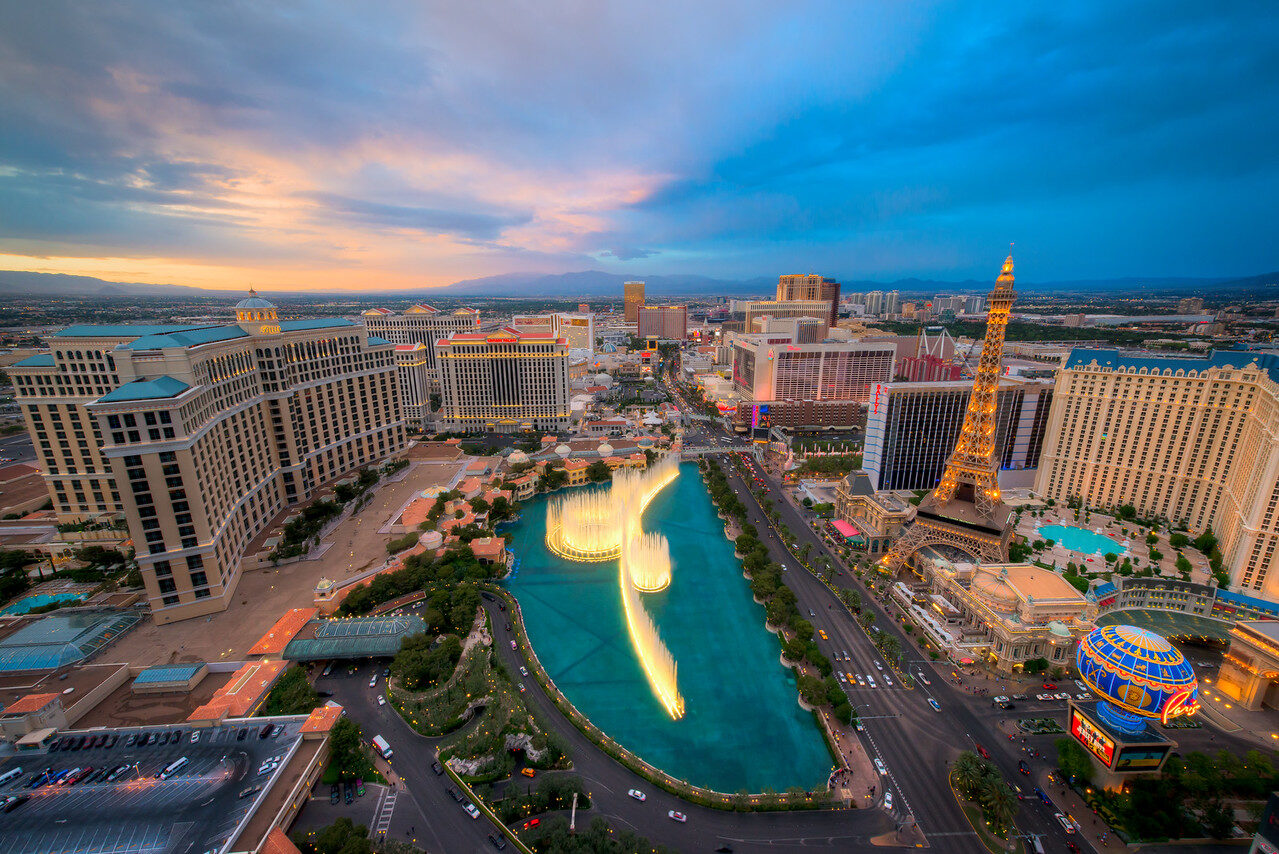
Here are three of the actual shots you’ll find inside the PDF — cinematic full-page references for the exact spots, lenses, and lighting conditions documented in the guide. The full guide includes 12 locations, each with a hero image, GPS map, settings table, and a five-shot list.

Bellagio Fountains (Las Vegas Strip) — from the Las Vegas Photographer's GuideSave
Bellagio Fountains (Las Vegas Strip) — sample reference photo from the Las Vegas Photographer’s Guide PDF

Before you shoot Las Vegas: the essentials

  • Free public access: Most Strip exteriors, Fremont Street Experience canopy shows, Seven Magic Mountains, and Welcome to Las Vegas Sign are free. High Roller, Neon Museum, Eiffel Tower observation deck, and Hoover Dam parking/tour require fees.
  • Commercial permits: Commercial or professional photography may require permits at Hoover Dam (Bureau of Reclamation) and Red Rock Canyon (BLM permit). The Neon Museum requires booking a tour ticket; commercial shoots need prior arrangement.
  • Best photography seasons: October–April (mild temperatures, clear skies; avoid summer midday heat)
  • Blue hour notes: Blue hour falls 20–40 min after sunset on the Strip; all casino facades and the Sphere LED display are active by this window, producing ideal contrast between warm city lights and deep indigo sky. Arrive at your chosen vantage point at least 30 min before sunset.
  • Drone policy: Most major U.S. cities restrict drone flight in airspace and via local ordinances. Check FAA + city rules before launching.
  • Local resource: Official visitor information

The full-resolution version of every map below — plus seasonal calendars, gear notes per location, sun-angle diagrams, and a complete photographer’s packing checklist — is inside the Las Vegas Photographer’s Guide PDF ($47).

1. Bellagio Fountains (Las Vegas Strip)

The Bellagio Fountains are the most-photographed water feature in the world, with 1,214 computer-choreographed jets shooting water up to 460 ft against the illuminated Strip skyline. The free spectacle runs nightly, and the Eiffel Tower replica of Paris Las Vegas frames the background from the northern vantage points.

  • GPS: 36.1127, -115.1743
  • Elevation: 2,001 ft
  • Best time of day: blue hour (30–40 min after sunset) during a show
  • Sun direction: Fountain faces north; the Bellagio hotel facade is lit from the west. At blue hour the sky to the west still glows while the fountains and Strip neon illuminate the foreground. Avoid midday—southern sun blows out the water highlights.
  • Access: Free 24-hr sidewalk access along Las Vegas Blvd S. Shows run Mon–Fri every 30 min 3–8 pm, every 15 min 8 pm–midnight; Sat–Sun every 30 min noon–8 pm, every 15 min 8 pm–midnight. Street parking limited; self-park in Bellagio garage ($18+) or Cosmopolitan ($15+). Bus: Deuce/SDX stop ‘Bellagio’.
  • Difficulty: easy
  • Recommended settings: Blue Hour Wide Fountain Show: f/8, 1/30 sec, ISO 400, 24mm  ·  Full Dark Long Exposure: f/11, 2–4 sec, ISO 100, 35mm (tripod required)  ·  Freeze Water Jets: f/4, 1/500 sec, ISO 1600, 70mm  ·  Phone Night Mode: Night Mode on, tap fountains to set exposure reference, 12mm equivalent

Shots to chase:

  • Wide 24mm shot from the north sidewalk capturing full fountain arc with illuminated Bellagio hotel and Paris Eiffel Tower in the background
  • Long-exposure (2–4 sec) during the finale to capture silky water trails alongside the lit Strip at blue hour
  • Shoot from the Bellagio garage rooftop (level 6) to get an elevated overview of the entire fountain lake with the Eiffel Tower at right
  • Frame a single high-pressure jet frozen at 1/500 sec against the deep-indigo sky during peak show moments
  • Capture Strip light trails leading toward the fountain by positioning on the Las Vegas Blvd median crosswalk

Pro tip: Use the Bellagio parking garage rooftop level for a clear, elevated view of both the fountains and the Paris Eiffel Tower replica; get there 45 min before sunset to secure a spot. For ground-level shots, press your lens right against the metal railing to eliminate foreground obstruction and use a 2-second shutter delay to remove camera vibration from finger press.

Common mistake to avoid: Shooting in full darkness makes the sky pure black and removes the ambient contrast that makes blue-hour shots magical—arrive at sunset, not after. Many photographers set exposure off the bright fountain water, silhouetting the hotel facade; meter to the midtones (hotel lights) and let the water highlights clip slightly.

2. Welcome to Fabulous Las Vegas Sign

Designed in 1959 by Betty Willis and donated to the public domain, this historic neon sign is one of the most recognized symbols in American pop culture. Its south-facing position in the Strip median offers clean background separation for portrait-style photography day or night.

  • GPS: 36.0821, -115.1728
  • Elevation: 2,001 ft
  • Best time of day: sunrise (golden hour from the east side) or early morning
  • Sun direction: Sign faces north-northeast; shooting at sunrise means soft golden light raking across the sign face from the left. By 9 am in summer the overhead sun creates harsh shadows on the sign’s lettering. Shooting from the south at dawn puts warm backlight on subjects posed below the sign.
  • Access: Free, open 24 hr. Located in the median of Las Vegas Blvd S at 5100 S Las Vegas Blvd (Paradise, NV 89119). Small paved parking lot directly in the median—arrives fill fast on weekends; weekday 6–7 am slots are usually empty. Nearest bus stop: Deuce Strip southbound ‘Russell Rd’.
  • Difficulty: easy
  • Recommended settings: Sunrise Landscape: f/8, 1/200 sec, ISO 100, 24mm  ·  Night Neon Glow: f/5.6, 1/15 sec, ISO 800, 35mm (tripod)  ·  Portrait With Fill Flash: f/4, 1/250 sec, ISO 200, 50mm + TTL flash  ·  Blue Hour Sign Only: f/8, 4 sec, ISO 100, 16mm (tripod)

Shots to chase:

  • Classic portrait of person standing below sign at golden hour with warm sidelight; use fill flash to open facial shadows
  • Wide 16mm ground-level HDR capturing entire sign plus Vegas Strip highway perspective leading into frame
  • Shoot sign-only at blue hour with tripod to show the neon lettering glowing against a deep blue sky
  • Low-angle composition using the median planting strip as a leading line toward the sign
  • Shoot from the side (west or east) for a dynamic 3/4 perspective showing the sign’s depth and the Strip highway traffic in the background

Pro tip: Arrive between 3–6 am on weekdays for a crowd-free experience; by 9 am on weekends waits for the photo queue can exceed 30–40 min. The sign is lit from before sunset to a few hours after sunrise—purely nocturnal visits are valid but lose the sky context. Use a circular polarizer in morning light to deepen the blue sky behind the sign.

Common mistake to avoid: Midday shooting produces an unflattering overhead shadow inside the sign lettering and squinting subjects; the overhead Nevada sun is brutal. Do not pay the street photographers who approach visitors—they are unsanctioned and have been known to hold phones until a large ‘tip’ is paid.

3. Fremont Street Experience

The 1,500-ft canopy spanning five city blocks houses the world’s largest single LED display (49 million pixels, 550,000 watts), transforming downtown Las Vegas into a tunnel of synchronized light shows. The vintage casino neon, zip-line riders, and street performers create layered compositional opportunities unavailable anywhere else.

  • GPS: 36.1707, -115.1439
  • Elevation: 2,001 ft
  • Best time of day: night (LED canopy shows run dusk to midnight hourly)
  • Sun direction: The pedestrian mall runs east–west under a 1,500-ft vaulted LED canopy. Directional sunlight is irrelevant once the canopy show begins; focus instead on the relationship between the surrounding casino marquee neon and the overhead 16K-resolution light show for compositional depth.
  • Access: Free pedestrian mall open 24 hr; LED shows run hourly from dusk to midnight. Located at 425 E Fremont St, Las Vegas, NV 89101. Street parking on surrounding blocks; parking garage at 3rd St and Fremont. Bus: Deuce/SDX ‘Fremont St/Casino Center Blvd’ stop.
  • Difficulty: easy
  • Recommended settings: Canopy Show Wide Angle: f/5.6, 1/60 sec, ISO 800, 14mm  ·  Street Level With Neon: f/2.8, 1/30 sec, ISO 1600, 35mm  ·  Zip Line Panning: f/5.6, 1/30 sec, ISO 1600, 70mm (panning technique)  ·  Full Scene Long Exposure: f/8, 3 sec, ISO 100, 16mm (tripod; between shows)

Shots to chase:

  • Stand at the center of the canopy tunnel at the start of an hourly show and shoot straight up (16mm) to fill the frame with the 49-million-pixel display at full brightness
  • Low-angle 14mm shooting west down the mall at dusk capturing vintage casino marquees, the canopy glow, and pedestrian movement in one frame
  • Panning shot of a zip-line rider against the illuminated canopy to show motion against the static architecture
  • Detail shot of a single vintage casino sign (e.g., Golden Nugget or Binion’s) with the canopy glow as background bokeh at f/2.8
  • Long exposure between shows using tripod on the center walkway to capture light trails from foot traffic under the dark canopy

Pro tip: Position yourself at the western end (near Main St) for shows—this provides a longer tunnel perspective with the canopy receding into depth. The slot-machine and neon ground-level lights are bright enough to cause underexposure when your meter averages the dark overhead areas; dial in +1.0 to +1.5 EV exposure compensation.

Common mistake to avoid: Using flash in a crowd of thousands will only illuminate the nearest 10 feet and create harsh foreground reflections; rely entirely on the ambient canopy and neon light. Rookie mistake is arriving between shows when the canopy is dark and missing the hourly spectacle—check show times before visiting.

4. The Neon Museum Boneyard

Over 200 rescued neon signs from legendary Vegas hotels and casinos—Stardust, Riviera, Binion’s Horseshoe—are densely packed in this outdoor 2-acre boneyard. At night, illuminated neon creates a surreal low-light photography environment impossible to replicate anywhere else in the world.

  • GPS: 36.1776, -115.1347
  • Elevation: 2,001 ft
  • Best time of day: night (“Brilliant!” guided tour or Independent Photo Walk)
  • Sun direction: The open-air boneyard faces various directions; sun orientation matters little once signs are actively lit. During Independent Photo Walks (evening), signs are illuminated with ground-level floodlights. Daytime sunlight is useful for capturing texture, oxidation, and signage details in warm afternoon sidelight.
  • Access: Admission required: “Brilliant!” guided tours ~$30–45/person; Independent Photo Walks (limited, book early) allow tripods and unlimited time. Address: 770 N Las Vegas Blvd, Las Vegas, NV 89101. Free onsite parking lot. Book at neonmuseum.org. No flash photography; tripods allowed on evening tours.
  • Difficulty: easy
  • Recommended settings: Bright Neon Sign Night: f/5.6, 5–10 sec, ISO 100, 24mm (tripod)  ·  Single Sign Isolation: f/2.8, 2 sec, ISO 200, 50mm (tripod)  ·  Dim Sign Dark Background: f/4, 15 sec, ISO 400, 35mm (tripod)  ·  Detail Texture Close Up: f/8, 8 sec, ISO 200, 100mm macro (tripod)

Shots to chase:

  • Wide 16mm long-exposure of the main boneyard lane with multiple illuminated signs receding into depth under the night sky
  • Close-up of a single iconic sign (Stardust or Riviera) with a 50mm lens at f/2.8 to isolate the neon tubes in bokeh
  • Capture the parabolic curve of the La Concha Lobby building (now the visitor center) in warm side-light with a 35mm lens
  • Low-angle 5-second exposure looking upward at a towering sign with stars or indigo sky as the background
  • Detail shot of weathered, partially-lit neon letters showing oxidized metal casing and cracked glass tubes for a nostalgic texture study

Pro tip: Book the Independent Photo Walk (not the guided tour) if serious photography is the goal—you have uninterrupted time for tripod work without keeping pace with a group. Switch to manual focus and use live view magnification to nail sharpness in low light; autofocus hunts on dark sign backgrounds. Shoot RAW: the extreme contrast between bright neon and dark backgrounds requires shadow/highlight recovery in post.

Common mistake to avoid: Flash photography is prohibited and would blow out the neon’s natural glow in any case; commit fully to long-exposure techniques. Many visitors expose for the brightest sign in the scene and lose all shadow detail in surrounding signs; expose for the mid-value signs and let the brightest highlights clip slightly.

Want this in your pocket on the street?
The full-resolution version of every spot above — with full-page hero photography, GPS maps with gold location pins, sun direction diagrams, multi-season tables, and a complete safety + packing checklist — is inside the Las Vegas Ultimate Photographer’s Guide PDF ($47). Print it, save it offline, take it on the walk. Get the guide →

5. Bellagio Conservatory & Botanical Gardens

Bellagio Conservatory & Botanical Gardens Las Vegas photography sampleSave
Bellagio Conservatory & Botanical Gardens — cinematic reference from the Las Vegas Photographer’s Guide PDF

The Bellagio Conservatory hosts five world-class seasonal botanical installations per year, each constructed by up to 140 horticulturists using over 10,000 individual plants, flowers, and trees. The massive central displays—some reaching 20+ feet—create an otherworldly interior environment for detail and wide-angle macro photography.

  • GPS: 36.112, -115.1766
  • Elevation: 2,001 ft
  • Best time of day: daytime (interior display best lit 9 am–5 pm when glass-dome natural light supplements installed lighting)
  • Sun direction: The 14,000 sq ft conservatory has a central skylight dome; midday sun (11 am–1 pm) provides the most even overhead fill, reducing harsh shadows in the floral displays. Overcast days outside actually improve the quality of diffused skylight within the dome. Avoid early morning and evening when the dome interior is purely dependent on artificial lighting.
  • Access: Free admission. Open 24 hr at 3600 S Las Vegas Blvd (inside the Bellagio). Seasonal themes change 5 times/year: Chinese New Year, Spring, Summer, Fall, and Holiday. Access through the hotel lobby. Self-park Bellagio garage $18+ (first 2 hr free with hotel purchase).
  • Difficulty: easy
  • Recommended settings: Wide Display Overview: f/8, 1/60 sec, ISO 800, 16mm  ·  Floral Detail Macro: f/2.8, 1/200 sec, ISO 400, 100mm macro  ·  Mixed Ambient Artificial: f/5.6, 1/100 sec, ISO 1600, 35mm  ·  Skylight Dome Architecture: f/11, 1/80 sec, ISO 400, 14mm (shoot straight up)

Shots to chase:

  • Wide 16mm overview from the entrance doorway capturing the full seasonal centerpiece display with the glass skylight dome as the ceiling background
  • 100mm macro detail shot of a single exotic flower or carefully arranged moss/stone arrangement in the foreground display
  • Architectural shot pointing straight up at the ornate glass skylight dome with the garden canopy below
  • Portrait of a visitor dwarfed by a towering seasonal sculpture (e.g., the Chinese New Year dragon, or a 12-ft autumn pumpkin) using a 24mm lens from low angle
  • Color-field composition using massed flowers at the base of the central display, isolating complementary color blocks with a 70mm lens

Pro tip: Visit early morning (8–10 am) on weekdays to avoid tour bus crowds and get clean compositions without heads in the frame. Seasonal themes change 5x/year—check the Bellagio website for current installation dates to plan around specific botanical themes. The dome’s mixed natural/artificial lighting will skew warm; set a custom white balance off a neutral white card or shoot RAW and correct in post.

Common mistake to avoid: Using a polarizing filter indoors reduces already-limited light without correcting the color temperature mismatch; skip it here. Many visitors stand at the entrance only and miss the detailed miniature gardens around the perimeter—walk the full loop to find intimate compositions.

6. Sphere (MSG Sphere Exosphere)

At 366 ft tall and 516 ft wide with 1.2 million programmable LEDs covering the entire exterior surface, the Sphere is the largest spherical LED structure on Earth. Its constantly changing visual programs—cosmic scenes, sports graphics, branded art—ensure no two visits produce the same photograph, and the sheer scale dwarfs every surrounding building.

  • GPS: 36.1212, -115.1621
  • Elevation: 2,001 ft
  • Best time of day: blue hour (LED Exosphere activates at/just after sunset; sky holds deep indigo for 20–40 min)
  • Sun direction: The Sphere sits east of the Strip; best compositional vantage points face east or northeast from the Venetian/Palazzo sidewalk and the Sands Ave pedestrian bridge. At golden hour, afternoon light rakes the dome from the west, revealing LED panel texture. At blue hour, the lit dome contrasts with the indigo western sky behind the viewer.
  • Access: Exterior photography is free from all public sidewalks 24/7. Best shooting spots: (1) Sands Ave pedestrian bridge above Sands Ave near the Venetian Expo (~15 ft elevated, no restrictions); (2) Las Vegas Blvd sidewalk in front of the Venetian/Palazzo; (3) corner of Koval Ln and Sands Ave. The Sphere is located at 255 Sands Ave, Las Vegas, NV 89169. Street parking on Koval Ln; Venetian/Palazzo self-park adjacent.
  • Difficulty: easy
  • Recommended settings: Blue Hour From Bridge: f/8, 1/30 sec, ISO 400, 24mm (tripod)  ·  Full Dark Led Drama: f/8, 1/60 sec, ISO 800, 35mm  ·  Golden Hour Architecture: f/8, 1/500 sec, ISO 100, 50mm  ·  Street Level With Foreground: f/5.6, 1/15 sec, ISO 800, 16mm (tripod)

Shots to chase:

  • From the Sands Ave pedestrian bridge, shoot at blue hour with the Sphere filling the frame against indigo sky using a 24mm lens on tripod
  • From the Venetian/Palazzo sidewalk (Las Vegas Blvd), frame the Sphere rising above the ornate Italian-inspired facade at street level at night
  • Koval Ln & Sands Ave corner: use palm trees as natural side framing with the lit Sphere centered in the background
  • Look for the Sphere’s colorful LED display reflected in the Venetian’s glass facade panels for an abstract reflection shot at 70mm
  • From inside the High Roller observation wheel (purchased ticket), shoot the Sphere from above-level as you arc to the highest point

Pro tip: The Exosphere LED display activates at or just after local sunset—arrive 20–30 min before sunset to catch the full transition from off to on, which is itself a compelling moment to photograph. LED brightness varies significantly by program; shoot in RAW to handle the extreme dynamic range between the display and the surrounding night sky. The pedestrian bridge vantage is the single best free spot—it elevates you above street clutter and lets the Sphere float against the sky.

Common mistake to avoid: Shooting at full dark (sky pure black) makes exposure balancing harder and flattens the scene into a dark background with a blob of light; blue hour provides a second light source that dramatically improves compositional depth. Tapping the Sphere on your phone screen to set exposure reference is critical—otherwise the camera meters the dark sky and blows out the entire LED surface.

7. Eiffel Tower Las Vegas (Paris Las Vegas)

At exactly half the size of the Paris original (541 ft vs 1,063 ft), this replica is positioned directly across from the Bellagio fountains, making it the iconic background element in the most-photographed Strip view in the world. The observation deck offers the premier mid-Strip elevated view of both the Bellagio fountains and the full Strip skyline.

  • GPS: 36.1125, -115.1721
  • Elevation: 2,001 ft
  • Best time of day: blue hour to night (lit 6 pm–1 am); best exterior view from across the street at blue hour
  • Sun direction: The Eiffel Tower replica faces east toward the Bellagio across the Strip. Afternoon (western) sun silhouettes the tower dramatically from the Bellagio parking garage. From the east sidewalk at blue hour, the tower is frontlit by its own warm incandescent fixtures. The observation deck (46th floor, 460 ft) gives 360° views with the setting sun to the west over Red Rock Canyon.
  • Access: Exterior: free from the Las Vegas Blvd sidewalk at all times. Observation deck: $18–37 depending on time (less busy = cheaper); open Sun–Thu 11 am–11 pm, Fri–Sat 11 am–midnight. Located at 3655 S Las Vegas Blvd, Las Vegas, NV 89109. Paris Las Vegas self-park garage adjacent. Bus: Deuce/SDX ‘Paris/Bally’s’ stop.
  • Difficulty: easy
  • Recommended settings: Exterior Blue Hour From Bellagio Garage: f/8, 4 sec, ISO 100, 35mm (tripod)  ·  Observation Deck Strip Panorama: f/8, 1/30 sec, ISO 800, 16mm  ·  Tower Detail Nighttime: f/4, 1/60 sec, ISO 1600, 70mm  ·  Street Level Upward: f/8, 1/15 sec, ISO 400, 14mm (tripod)

Shots to chase:

  • From Bellagio parking garage level 6 at blue hour: 35mm wide shot of the tower lit against the indigo sky with Bellagio fountains in the foreground
  • From the Eiffel Tower observation deck looking north: panoramic Strip view with High Roller visible at dusk
  • Low-angle 14mm upward shot from beneath the tower’s base archway, shooting straight up through the lattice ironwork
  • From the Cosmopolitan hotel walkway at street level: 24mm framing the tower between the hotel facades of Bally’s/Paris with pedestrian traffic in the foreground
  • From the observation deck looking west at golden hour: Red Rock Canyon visible in the distant haze framed against the desert plateau

Pro tip: The best exterior shots of the tower combined with the Bellagio fountains are taken from the top level of the Bellagio self-park garage—arrive 30 min before sunset to secure position. On the observation deck, press your lens flush with the mesh safety barrier (bring a rubber lens hood) to eliminate the wire pattern from your frame; tripods are generally allowed but confirm with staff.

Common mistake to avoid: Shooting the tower from directly below on the Paris Las Vegas hotel grounds produces a cramped, foreshortened view with no separation—cross to the Bellagio side of the Strip for the definitive composition. The observation deck mesh barrier creates a moire pattern at certain apertures; use f/5.6 or wider to soften the mesh into invisibility.

8. High Roller Observation Wheel

At 550 ft, the High Roller is the world’s tallest observation wheel, offering a complete 360° panorama of the Strip, downtown Las Vegas, Red Rock Canyon, and the Spring Mountains in a single 30-minute ride. It provides the only elevated vantage point where the Sphere, Bellagio fountains, and distant mountain ranges can all be photographed in one session.

  • GPS: 36.1177, -115.1684
  • Elevation: 2,001 ft
  • Best time of day: sunset into blue hour (board 30 min before sunset for the complete light transition during the 30-min ride)
  • Sun direction: The High Roller sits at the LINQ promenade; the glass cabins rotate 360°. At the apex (550 ft above the Strip), the western cabin walls face the setting sun over Red Rock Canyon. As the cabin rotates to the east, the illuminated Sphere and eastern Strip come into view. Best light transitions happen when you time boarding to coincide with the last 30 min of golden light.
  • Access: Ticket required: $25–37 general; $37–55 happy hour (open bar); book at caesars.com/linq. 3545 S Las Vegas Blvd, Las Vegas, NV 89109 (LINQ promenade). Open daily; hours vary seasonally (typically 11:30 am–2 am). Self-park at LINQ garage. No tripods allowed in cabins; handheld and monopod only.
  • Difficulty: easy
  • Recommended settings: Strip Panorama Dusk: f/5.6, 1/60 sec, ISO 800, 16mm  ·  Night City Lights: f/2.8, 1/30 sec, ISO 3200, 24mm  ·  Distant Mountain Sunset: f/8, 1/250 sec, ISO 100, 70mm  ·  Interior Glass Reflection Minimized: f/4, 1/60 sec, ISO 1600, 35mm (lens pressed to glass)

Shots to chase:

  • At the apex facing west: 70mm shot of the setting sun over Red Rock Canyon with Strip hotels below in silhouette
  • 16mm wide shot from apex facing north at blue hour: full Strip panorama from Stratosphere to Mandalay Bay with the Sphere glowing in the east
  • Press a 24mm lens to the glass to capture the LINQ Promenade and High Roller’s own illuminated gondola structure from inside the cabin at night
  • 70mm telephoto of the Bellagio fountains mid-show from above, compressing the Strip to show scale of the hotel corridor
  • Facing east at night: the Sphere fills the middle distance—shoot at 50mm to balance the Sphere with the hotel corridor below

Pro tip: Remove your lens hood and press the lens as close to the glass as possible without touching it to eliminate reflections—bring a black cloth or dark jacket to block interior lighting behind you. Time your boarding for 25–35 minutes before local sunset to catch the golden hour at mid-elevation, then the full blue hour at the apex. Book weekday tickets (Mon–Tue) for the least crowded cabins.

Common mistake to avoid: Auto ISO will fluctuate wildly as the cabin rotates between dark shadow and sunset brightness; set ISO manually. Interior LED lighting inside the cabin creates ghost reflections in every shot—block the interior light source with your body or a dark cloth pressed against the glass.

Want this in your pocket on the street?
The full-resolution version of every spot above — with full-page hero photography, GPS maps with gold location pins, sun direction diagrams, multi-season tables, and a complete safety + packing checklist — is inside the Las Vegas Ultimate Photographer’s Guide PDF ($47). Print it, save it offline, take it on the walk. Get the guide →

9. Red Rock Canyon (Calico Hills)

Red Rock Canyon (Calico Hills) Las Vegas photography sampleSave
Red Rock Canyon (Calico Hills) — cinematic reference from the Las Vegas Photographer’s Guide PDF

Red Rock Canyon’s Calico Hills offer a dramatic 3,000-ft escarpment of Aztec Sandstone in vivid shades of red, orange, and cream within 17 miles of the Strip. The juxtaposition of ancient desert geology against the visible Las Vegas Valley below creates unique landscape compositions found nowhere else near a major American city.

  • GPS: 36.1461, -115.4307
  • Elevation: 4,500 ft
  • Best time of day: sunrise golden hour (sun rises directly over Las Vegas, side-lighting the red and orange sandstone faces)
  • Sun direction: The Calico Hills escarpment faces east-southeast. At sunrise, direct warm light rakes the sandstone faces horizontally, intensifying the red-ochre color. By 10 am the sun is overhead and washes out color; by late afternoon (3–5 pm) the hills are backlit from the west, ideal for silhouettes but not color. Arrive before sunrise and begin shooting within the first 30 min of dawn.
  • Access: Day-use fee: $15/vehicle or America the Beautiful pass. Scenic Drive open daily 6 am–7 pm (hours vary seasonally). Calico Hills Trailhead 1 at GPS 36.1461, -115.4307 (Calico I parking lot, 13-mile scenic loop). 17 miles west of Strip on W Charleston Blvd (NV-159). No public transit; personal vehicle required.
  • Difficulty: moderate
  • Recommended settings: Sunrise Rock Color: f/11, 1/40 sec, ISO 100, 24mm (tripod)  ·  Golden Hour Landscape: f/8, 1/200 sec, ISO 100, 35mm  ·  Rock Texture Detail: f/11, 1/250 sec, ISO 100, 70mm  ·  Las Vegas Valley From Ridge: f/11, 1/160 sec, ISO 100, 16mm

Shots to chase:

  • Pre-dawn setup at Calico I trailhead facing east: 24mm tripod shot capturing the first warm light hitting the pale sandstone faces with indigo western sky behind
  • 16mm wide angle from the Calico Hills ridgeline looking east across the Las Vegas Valley with the city grid visible 17 miles away at golden hour
  • 70mm telephoto compressing the layered red-and-white sandstone strata against the Spring Mountains for a graphic, pattern-heavy composition
  • Low-angle 24mm shot of desert scrub vegetation (Joshua trees, creosote) in the foreground with the massive Calico escarpment rising behind
  • Capture a technical climber on the Calico Hills walls with a 200mm lens to show human scale against the towering formations

Pro tip: Use PhotoPills or The Photographer’s Ephemeris to plan exact sunrise position relative to the Calico Hills face on your visit date. A 3-stop ND graduated filter holds back the bright sky while keeping the rock face correctly exposed. Arrive 45 min before sunrise to set up in pre-dawn darkness; the light transition from blue to gold to white takes only 20–30 min.

Common mistake to avoid: Arriving after 9 am in summer produces flat, colorless, heat-hazed results—the rocks look beige, not red. A polarizing filter is extremely effective here to saturate the sandstone color and eliminate sky haze, but many photographers forget it at home; pack it the night before.

10. Seven Magic Mountains

Swiss artist Ugo Rondinone’s seven 35-ft-tall stacked-boulder towers, painted in neon colors, stand in stark contrast to the flat Mojave desert. Installed in 2016 and extended through 2027, the sculptures create a pop-art surrealism that pairs perfectly with the empty desert landscape and Joshua trees for conceptual photography.

  • GPS: 35.8399, -115.271
  • Elevation: 2,608 ft
  • Best time of day: golden hour before sunset (late afternoon sun illuminates fluorescent neon boulders from the west)
  • Sun direction: The seven stacked-boulder towers are oriented north–south along Las Vegas Blvd South. Late afternoon (3–6 pm) westerly light side-lights the fluorescent painted surfaces, creating vibrant color saturation and long shadows. Morning sun (from behind the sculptures) produces backlit silhouettes. The surrounding Ivanpah Valley provides unobstructed 360° sky, making this ideal for dramatic cloud or milky-way compositions.
  • Access: Free, open sunrise to sunset. Located on S Las Vegas Blvd approximately 10 miles south of Las Vegas (exit 25 off I-15 to Sloan Rd, then east to Las Vegas Blvd, then 7 miles south). Unpaved parking lot directly off Las Vegas Blvd. No facilities; bring water. No public transit.
  • Difficulty: easy
  • Recommended settings: Golden Hour Full Scene: f/8, 1/200 sec, ISO 100, 24mm  ·  Single Tower Portrait: f/5.6, 1/250 sec, ISO 100, 50mm  ·  Blue Hour Sky Background: f/8, 4 sec, ISO 100, 24mm (tripod)  ·  Milky Way Night Sky: f/2.8, 25 sec, ISO 3200, 14mm (tripod)

Shots to chase:

  • Golden hour 24mm wide shot with all seven towers framed from the north, late afternoon light illuminating fluorescent colors against the Spring Mountains backdrop
  • Walk between the staggered towers and shoot with multiple towers in mid-ground, Joshua trees in the foreground, and open desert horizon at 35mm
  • Sunset silhouette shot facing west with a tower in the foreground as a dark, stacked shape against a warm orange sky
  • Milky Way night composition at 14mm f/2.8 with a neon-painted tower in the foreground and the galactic core rising above in summer months
  • Single tower portrait at 50mm with a Joshua tree framing the right edge and the tower’s neon yellow-orange-red stack occupying the left two-thirds of the frame

Pro tip: The mountain range directly east of the sculptures blocks the rising sun for the first hour of dawn, making morning visits less effective than late-afternoon golden hour. The flat desert floor allows a very low tripod position to shoot upward through the boulder stacks against the sky—this dramatically increases perceived scale. For Milky Way shots (June–August), there is essentially no light pollution from this direction; arrive by 11 pm for galactic core position.

Common mistake to avoid: Visiting at midday produces flat, overexposed, washed-out colors on the fluorescent paint—the sculptures almost disappear against the bright desert sky. Many photographers miss the Joshua trees growing within 200 ft of the sculptures; incorporating them adds compositional depth and ecological context.

11. Hoover Dam

Hoover Dam is one of the most photographically iconic pieces of American engineering—its art deco towers, the massive curved concrete arch, Lake Mead behind, and the Colorado River gorge below combine to offer three distinct photographic zones (dam top, bridge, and lake approach) within a single site. The Mike O’Callaghan–Pat Tillman Memorial Bridge offers the only unobstructed side-on view of the entire 726-ft dam wall.

  • GPS: 36.0156, -114.7378
  • Elevation: 1,232 ft
  • Best time of day: sunrise golden hour (art deco towers glow in warm sidelight; Black Canyon walls in shadow provide strong contrast)
  • Sun direction: The dam faces northwest on the Nevada–Arizona border in Black Canyon. At sunrise, the sun rises over the Arizona ridge to the east, throwing golden horizontal light across the dam’s concrete face and art deco intake towers. By mid-morning the canyon walls cast harsh shadows across the dam; midday is flat and contrasty. The Mike O’Callaghan–Pat Tillman Memorial Bridge (½ mile downstream) provides the best side-on panoramic view of the entire dam.
  • Access: Parking: $10 at Hoover Dam parking garage (Nevada side); Memorial Bridge parking lot is free. Boulder City is 8 miles north. Visitor center hours 9 am–5 pm; dam top and bridge are 24 hr. Tour options: Powerplant Tour ($15) and Guided Tour ($30). GPS for parking: 36.0151, -114.7459. No public transit from Las Vegas.
  • Difficulty: moderate
  • Recommended settings: Sunrise Wide From Bridge: f/8, 1/160 sec, ISO 100, 24mm  ·  Dam Top Art Deco Towers: f/8, 1/250 sec, ISO 100, 50mm  ·  Canyon Wall And River: f/11, 1/200 sec, ISO 100, 16mm  ·  Blue Hour Dam Lights: f/8, 8 sec, ISO 100, 24mm (tripod)

Shots to chase:

  • From the Memorial Bridge pedestrian walkway at sunrise: 24mm wide shot of the full dam face with the morning light catching the art deco towers and Colorado River below
  • From the dam crest facing upstream: 16mm shot of Lake Mead receding into the distance with the Nevada and Arizona canyon walls framing both sides
  • Detail shot of one of the two Winged Figure of the Republic bronze sculptures on the dam crest at 50mm at golden hour
  • Blue hour long-exposure from the Memorial Bridge: dam lights illuminate the concrete face while the sky holds a fading gradient above the canyon rim
  • Low-angle 16mm from the downstream base approach road (if accessible) looking up at the curved dam face with the sky visible above the rim

Pro tip: Drive the 35 miles from the Strip the night before if shooting sunrise—arrive at the Memorial Bridge parking area by 5:30 am in summer to set up before first light. A polarizing filter eliminates glare on Lake Mead and dramatically saturates the turquoise water color. The Bureau of Reclamation requires commercial photography permits; personal use is unrestricted.

Common mistake to avoid: Many visitors only photograph from the dam crest, missing the Memorial Bridge—the definitive architectural view showing the full dam profile is only possible from the bridge, 900 ft downstream. Shooting in midday canyon conditions creates extreme contrast that cannot be recovered even in RAW; the shadow/highlight spread is beyond sensor dynamic range.

12. Downtown Container Park

Built entirely from repurposed shipping containers, Downtown Container Park is part marketplace, part art installation—housing boutiques, restaurants, an outdoor stage, and massive praying mantis fire sculptures at its entrance. The colorful geometric architecture, large-scale murals, and playful public art make it the premier street-art and urban-texture photography destination in downtown Las Vegas.

  • GPS: 36.1676, -115.1384
  • Elevation: 2,001 ft
  • Best time of day: golden hour to night (the praying mantis fire sculpture activates at dusk; storefront LED and string lights create warm ambient glow)
  • Sun direction: The park entrance faces west on E Fremont St; the golden hour sun strikes the colorful shipping container facades from the west in late afternoon, ideal for saturated colors. At dusk, the 40-ft steel praying mantis sculptures at the entrance emit fire jets, and the interior string lights and LED storefront signage create a warm-toned ambient environment for available-light photography.
  • Access: Free entry; open Mon–Thu 11 am–11 pm, Fri 11 am–midnight, Sat 10 am–midnight, Sun 10 am–11 pm (hours may vary). Address: 707 E Fremont St, Las Vegas, NV 89101. Street parking on surrounding blocks and parking garage at 3rd St. Walk from Fremont Street Experience (~0.4 miles east).
  • Difficulty: easy
  • Recommended settings: Mantis Fire Dusk: f/5.6, 1/250 sec, ISO 800, 50mm  ·  String Light Interior Night: f/2.8, 1/60 sec, ISO 1600, 35mm  ·  Facade Architecture Golden Hour: f/8, 1/160 sec, ISO 100, 24mm  ·  Mural Detail Overcast: f/5.6, 1/200 sec, ISO 200, 50mm

Shots to chase:

  • Dusk shot at f/5.6 from across Fremont St capturing both 40-ft praying mantis sculptures simultaneously with fire jets mid-burst and the illuminated container facades behind
  • Interior 35mm ambient shot of the central courtyard at night with string lights overhead, colorful container storefronts on both sides, and crowd activity below
  • Golden hour 24mm architectural shot of the stacked container facade showing geometric color blocks and shadows
  • Detail mural shot at 50mm of the Life is Beautiful festival wall art visible on nearby structures, using late afternoon sidelight to reveal paint texture
  • Wide-angle 16mm ground-level shot looking up through the container stack archway at the sky with string lights overhead

Pro tip: The praying mantis fire sculptures typically shoot flames at scheduled intervals around dusk and on weekend evenings—ask staff for the current fire schedule when you arrive. The interior shooting conditions are mixed ambient: warm string lights plus LED signage; use Auto White Balance and correct in post, or set custom WB to 3200K for the incandescent string lights. This location pairs well with a Fremont Street Experience night visit just 0.4 miles west.

Common mistake to avoid: Visiting midday produces flat, uninteresting light on the container facades with no atmosphere—the park truly transforms at golden hour and night when the lighting design activates. Using flash to ‘fill’ in the courtyard blows out the carefully designed ambient string-light warmth and makes the scene feel clinical.

When to photograph Las Vegas: a year-round breakdown

Las Vegas is photogenic every month of the year — but the conditions differ radically by season. Here is what to expect:

October–April (mild temperatures, clear skies; avoid summer midday heat)

Photographer safety in Las Vegas: read this

City photography has its own risks: gear visibility, neighborhood timing, traffic, weather. Read the briefing before you go.

  • Gear visibility: Use a discreet bag with no obvious camera branding. Keep a body strapped under a jacket on transit.
  • Neighborhood timing: Pre-dawn and post-sunset shoots reward early scouting. Cross-reference each location with current local guidance and choose well-lit transit routes.
  • Situational awareness: Headphones out. One eye in the viewfinder, one on the street.
  • Traffic: Bridges, medians, and bike lanes are not setup zones. Shoot from sidewalks and pedestrian areas only.
  • Weather: Summer storms move quickly; winter cold drains batteries. Layer up, keep gear dry, watch for ice on cobblestones at blue hour.

The complete safety briefing is inside the Las Vegas Photographer’s Guide PDF.

Take this guide into the city

This post is the complete field reference. The Las Vegas Ultimate Photographer’s Guide PDF is the field-deployable version: full-page resolution hero photography, GPS maps with gold pins for every location, multi-season shooting calendars, gear notes per location, sun-angle diagrams, the full city safety briefing, and a print-ready editorial layout in Framehaus black and gold. Save it offline. Print it. Take it on the walk.

Las Vegas Ultimate Photographer’s Guide
Downloadable PDF · 12 GPS-mapped locations · Multi-season calendar · City safety briefing · Packing checklist

Get the Las Vegas guide — $47

Book your tours & experiences in Las Vegas

All links go to Viator (a TripAdvisor company), the world’s largest marketplace for guided experiences. Tagged as affiliate per FTC.

Also on Amazon: gear that helps with this technique

Quick Amazon shortcuts to the gear most useful for this kind of shot. Use them if Prime shipping or Amazon credit makes more sense than B&H. As an Amazon Associate ShutYourAperture earns from qualifying purchases.

Take Las Vegas home in your pocket.

Every shot location, every angle, every time of day worth shooting. Printable PDF + GPS-tagged map.

Instant download. Works on phone, tablet, and printed.

Continue reading

← Back to U.S. Cities Photography Guides

Related guides nearby

Three more photography guides within striking distance — perfect for combining into one trip.

  • Zion 232 km away · national park · USA
  • Joshua Tree 250 km away · national park · USA
  • Grand Canyon 277 km away · national park · USA

Browse all 78 guides → · Open the map

Save your trip-planning hours

The complete Las Vegas guide is $47

All vantage points above + 5 bonus secret spots, printable map, gear pack list, and editing recipes. One-time payment, instant download, lifetime updates.

Buy Las Vegas PDF →

Common questions about the Las Vegas guide

Is the Las Vegas photography guide worth $47?

For most photographers, yes. The guide saves 8-12 hours of trip-planning research and prevents the most common mistake of Las Vegas photography: shooting at the wrong time of day. If a single better frame is worth $47 to you, the guide pays for itself on day one. Buyers get every GPS coordinate, every golden-hour window, every cultural rule, and a printable shot list.

Does the Las Vegas guide include GPS coordinates?

Yes — every vantage point in the guide has Google Maps-ready GPS coordinates so you can pin them before you fly. The guide also includes a printable map showing all locations clustered by walking distance, so you can build efficient half-day routes.

What's in the Las Vegas PDF that isn't in this article?

The article shows the highlights. The PDF includes: 5 additional secret spots not published online, a 14-day itinerary with daily routes, the full camera-settings cheat sheet for every scenario in Las Vegas, a printable gear packing list, post-processing recipes with screenshot examples, and a list of local guides we trust for portrait commissions.

Do I get the Lightroom presets too?

The $47 guide is the PDF only. The matching Las Vegas preset pack is a separate $19 download — most buyers grab both as a bundle and save the editing time. Both are instant download, both work on Lightroom Classic and Lightroom Mobile.

Will the guide work for a Las Vegas trip in 2026?

Yes. The guide is updated annually as fees, restrictions, and new vantage points change. All buyers get free lifetime updates. The 2026 edition includes the latest drone rules, museum photography policies, and seasonal light data for the year.

Get the Las Vegas guide · $47