Best Photography Spots in Los Angeles: 12 Locations With GPS

Tours & experiences disclosure: This guide includes affiliate links to Viator, the world’s largest tour and experiences marketplace. If you book through these links, ShutYourAperture may earn a small commission at no extra cost to you.

Los Angeles photography guide hero imageSave

Amazon Associates disclosure: ShutYourAperture is a participant in the Amazon Services LLC Associates Program. As an Amazon Associate we earn from qualifying purchases. Some links below go to Amazon (Store ID edinchavez01-20). Buying through these links costs you nothing extra and helps fund our free guides.
Skip the planning. Get the Los Angeles PDF. All locations, GPS coordinates, golden-hour times, gear tips. Instant download.

Los Angeles, California is one of the most photogenic cities in the United States. If you have a camera and the patience to show up before dawn, Los Angeles will give you images that last a career — but only if you know where and when to point it.

This is the definitive field guide to the 12 best photography spots in Los Angeles, with GPS coordinates you can drop straight into Google Maps, exact camera settings tuned to Los Angeles’s unique light, precise timing for every location, and the access notes nobody else bothers to document. It mirrors the intel inside our Los Angeles Ultimate Photographer’s Guide ($47 PDF) — a downloadable field guide with full-page hero images, GPS maps, seasonal tables, a city safety briefing, and a complete photographer’s packing list. Get the guide →

Planning multi-city travel? See also: U.S. cities photography hub and the National Parks Photography Guides.

Los Angeles Ultimate Photographer’s Guide — $47
12 GPS-mapped locations · Exact camera settings · Multi-season shooting calendar · Free annual updates

Download the PDF guide →
Skip the planning

Get the Los Angeles Ultimate Photographer’s Guide

Every location below — pre-mapped with GPS, golden-hour timing, gear recommendations, cultural rules, and a 14-day itinerary. Downloaded by 200+ working photographers.

Get the PDF · $47
Instant download · Lifetime updates

Quick jump to the 12 spots

  1. Griffith Observatory
  2. Walt Disney Concert Hall Exterior
  3. Venice Beach Boardwalk
  4. Santa Monica Pier
  5. LACMA Urban Light
  6. The Broad Museum Exterior
  7. Beverly Gardens Park – Beverly Hills Sign
  8. Watts Towers
  9. Vista Hermosa Natural Park
  10. Echo Park Lake
  11. Olvera Street
  12. Bradbury Building Atrium

A look inside the Los Angeles Photographer’s Guide

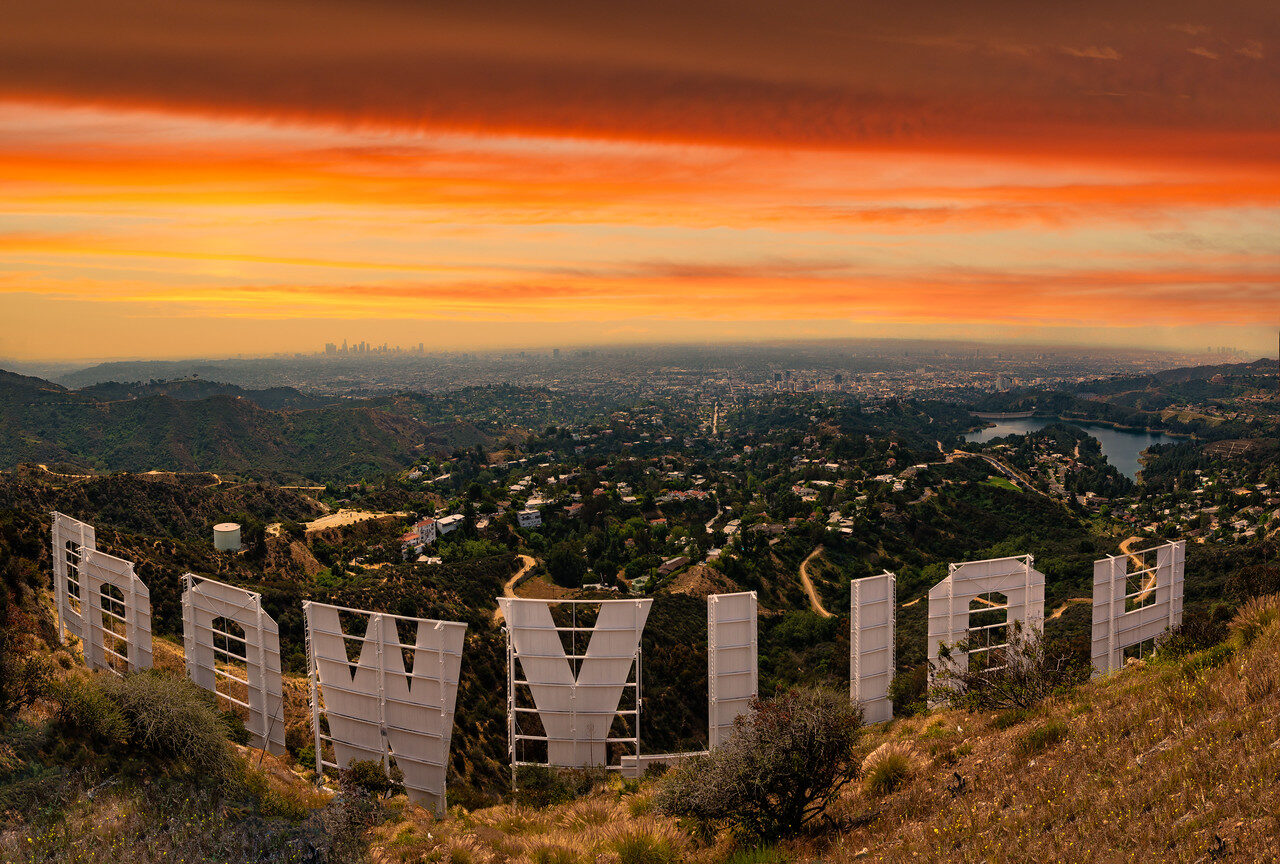
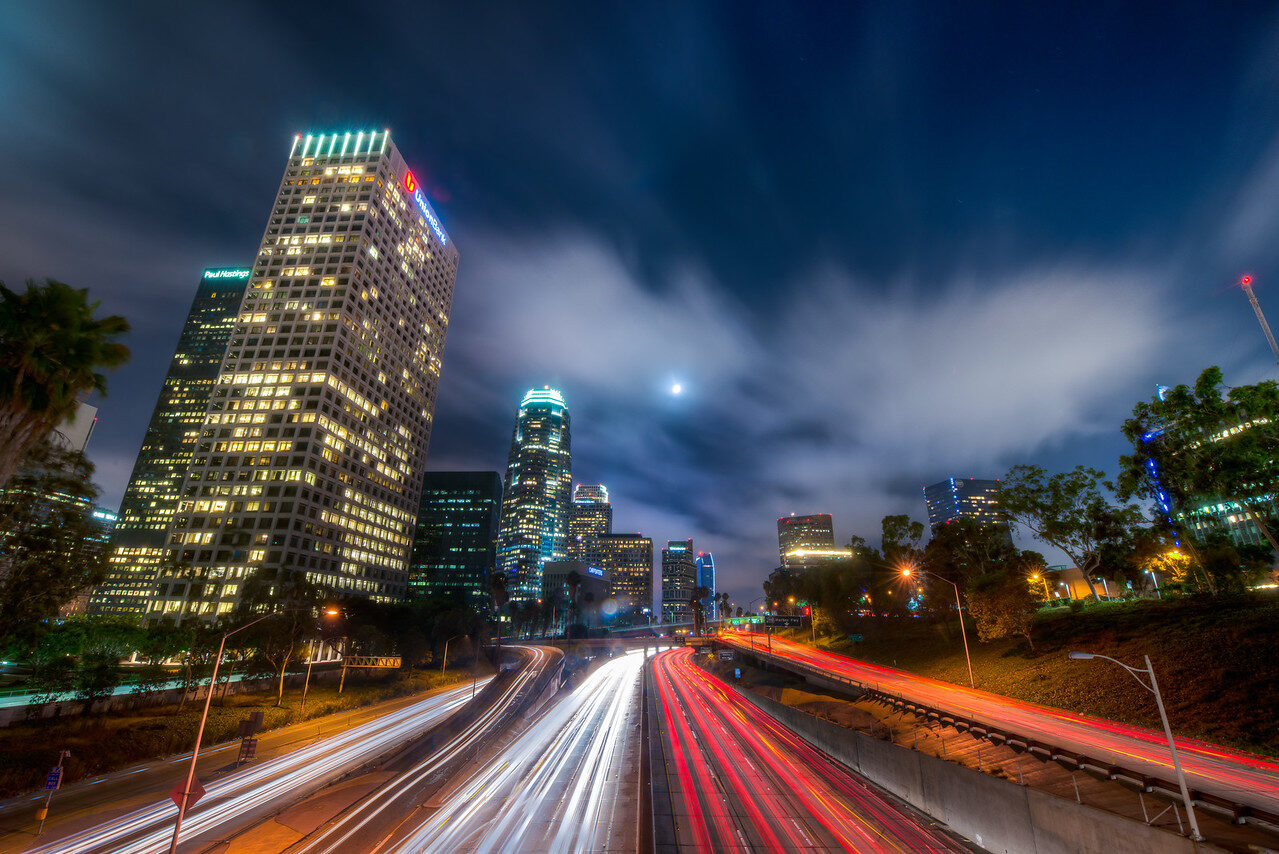
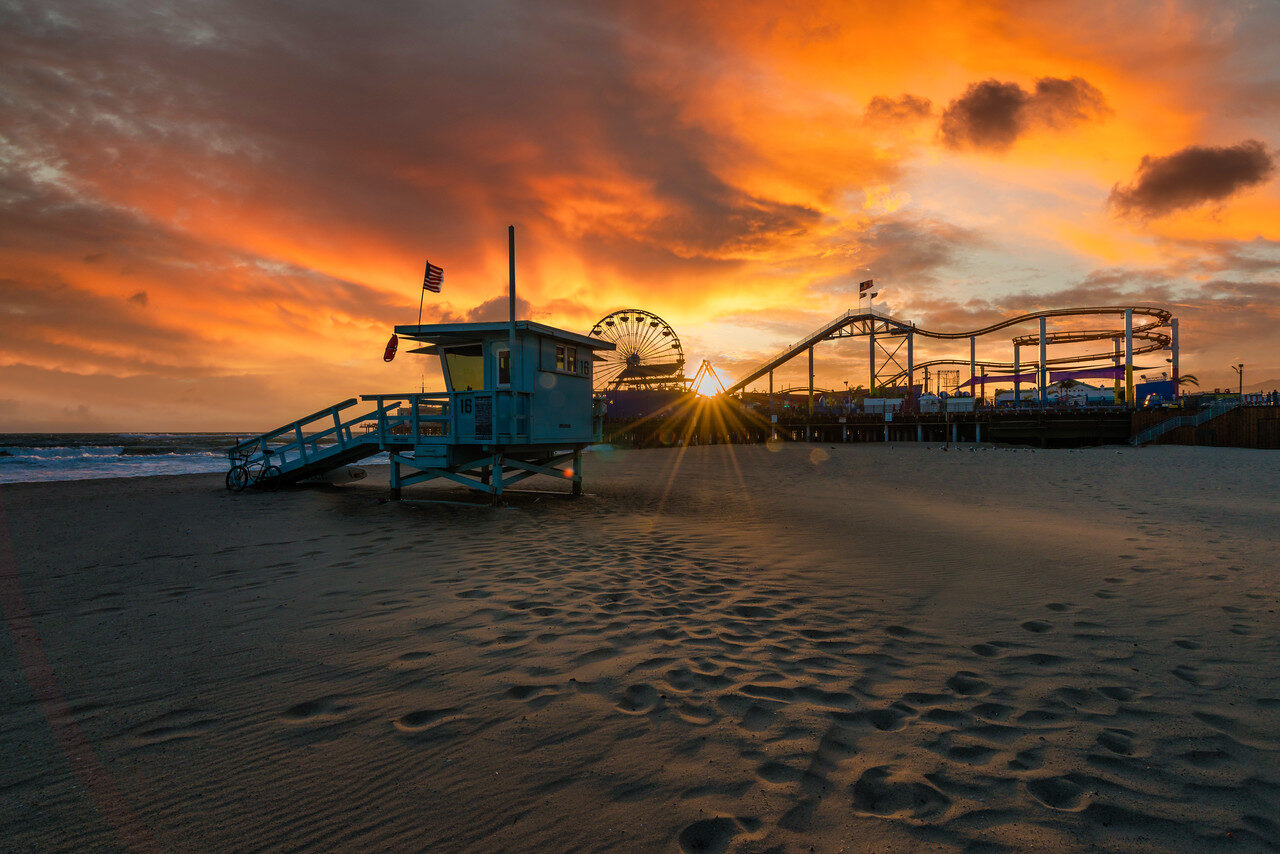
Here are three of the actual shots you’ll find inside the PDF — cinematic full-page references for the exact spots, lenses, and lighting conditions documented in the guide. The full guide includes 12 locations, each with a hero image, GPS map, settings table, and a five-shot list.

Griffith Observatory — from the Los Angeles Photographer's GuideSave
Griffith Observatory — sample reference photo from the Los Angeles Photographer’s Guide PDF

Before you shoot Los Angeles: the essentials

  • Free public access: Griffith Observatory, LACMA Urban Light, Vista Hermosa Park, Venice Beach Boardwalk, Santa Monica Pier boardwalk, Olvera Street, and Beverly Gardens Park are all free. The Broad museum interior is free with advance timed reservation. Watts Towers guided tour is $7 adults.
  • Commercial permits: Personal/editorial still photography requires no permit on most public sidewalks and parks. Commercial shoots in City of LA require a FilmLA still-photo permit ($104). Beverly Hills (Rodeo Drive, Beverly Gardens Park) and Watts neighborhood fall under separate jurisdiction—contact Beverly Hills City Hall or FilmLA for commercial shoots. Bradbury Building interior photography is allowed in the public lobby but tripods and commercial shoots need prior permission from building management at (213) 626-1893.
  • Best photography seasons: Spring (March–May) and fall (September–November) offer mild temperatures, cleaner air, and lower crowds; summer mornings deliver reliable marine-layer softbox light on the coast before it burns off.
  • Blue hour notes: LA’s flat basin and west-facing coast produce exceptional blue-hour windows. West-facing spots (Santa Monica Pier, Venice Beach) catch deep indigo sky with warm Pacific horizon glow. East-facing hilltop spots (Griffith Observatory, Vista Hermosa) show Downtown towers lit against the fading sky. Blue hour typically runs 20–35 minutes after sunset year-round.
  • Drone policy: Most major U.S. cities restrict drone flight in airspace and via local ordinances. Check FAA + city rules before launching.
  • Local resource: Official visitor information

The full-resolution version of every map below — plus seasonal calendars, gear notes per location, sun-angle diagrams, and a complete photographer’s packing checklist — is inside the Los Angeles Photographer’s Guide PDF ($47).

1. Griffith Observatory

The Observatory perches at 1,134 ft on the south slope of Mount Hollywood, providing one of the most iconic 270° panoramas in the world—DTLA skyline, Hollywood Sign, Pacific Ocean, and Santa Monica Mountains all visible from a single terrace. The Art Deco copper-dome building itself is a photogenic foreground element that has appeared in Rebel Without a Cause and countless films.

  • GPS: 34.118401, -118.300414
  • Elevation: 1,134 ft
  • Best time of day: Sunset and blue hour (Tuesday–Sunday, arrive 45 min before sunset for parking); also excellent for night cityscape after 9 pm
  • Sun direction: Sun sets due west in summer (over Pacific/Santa Monica range), swinging southwest in winter. The Hollywood Sign to the northwest catches direct golden-hour sidelight from the Observatory’s west terrace. DTLA skyline faces southeast, receiving warm backlit glow at sunset.
  • Access: Address: 2800 E Observatory Rd, Los Angeles, CA 90027. Open Tue–Fri 12–10 pm, Sat–Sun 10 am–10 pm; closed Monday. Paid parking lot on-site ($10/hr, pay-and-display, credit card only, Mon–Fri noon–10 pm, Sat–Sun 10 am–10 pm). Free parking near Greek Theatre (walk ~1 mi uphill or take DASH Observatory bus, $0.50 each way, runs daily 10 am–10 pm). Ride-shares drop at Greek Theatre only. Admission to grounds and building: free.
  • Difficulty: easy
  • Recommended settings: Golden Hour Cityscape: f/8, 1/125 sec, ISO 200, 24–50mm  ·  Blue Hour Long Exposure: f/11, 8–15 sec, ISO 100, 16–24mm, tripod  ·  Night City Lights: f/5.6, 20–30 sec, ISO 400, 24mm, tripod  ·  Hollywood Sign Telephoto: f/6.3, 1/250 sec, ISO 400, 200–400mm

Shots to chase:

  • Wide 16mm shot of the copper Art Deco dome against a deep-blue twilight sky with DTLA glow below
  • Telephoto (200–400mm) compression of the Hollywood Sign with Observatory roofline as foreground anchor
  • Long-exposure city light trails from the east terrace railing at 20+ seconds
  • Silhouette portraits of visitors on the upper terrace with the lit cityscape behind at blue hour
  • Coin-operated binoculars as leading-line foreground pointing toward Downtown towers

Pro tip: Arrive 45–60 minutes before sunset to claim a terrace spot and scout compositions; the west terrace fills fast. Walk the Mt. Hollywood Trail (15 min north of the building) for a higher vantage with fewer people and a direct Hollywood Sign alignment. Park early or take the DASH bus—road closures trigger frequently on peak evenings.

Common mistake to avoid: Using a wide lens for the Hollywood Sign from the Observatory results in a barely-visible sign lost in the hillside; bring at least a 200mm equivalent. Many photographers shoot only at full dark and miss the 15-minute blue-hour window when sky and city lights are in perfect balance.

2. Walt Disney Concert Hall Exterior

Frank Gehry’s 2003 deconstructivist masterpiece wraps 2,265 curved stainless-steel panels around a concert hall, creating a sculptural exterior that transforms dramatically with the quality and angle of light. It is widely regarded as one of the most photogenic buildings in America, appearing different in every frame and at every hour.

  • GPS: 34.05528, -118.25001
  • Elevation: 394 ft
  • Best time of day: Sunrise or golden hour (late afternoon facing west) when stainless-steel petals ignite with warm reflected light; also stunning during blue hour for long-exposure leading lines
  • Sun direction: The building’s undulating stainless-steel facades face multiple directions; the south and west faces receive best warm light at golden hour (sun setting over the Pacific to the west-southwest). Morning light from the east catches the Grand Ave frontage. Overcast days with diffuse light reduce hotspots on the highly reflective metal.
  • Access: Address: 111 S Grand Ave, Los Angeles, CA 90012. Exterior is accessible 24/7 from the public sidewalk; no admission required for exterior photography. Underground parking garage entrance on 2nd St or Lower Grand Ave, $10 from 4:30 pm for evening concerts, flat rate on weekends. Metro: Red/Purple Line to Civic Center/Grand Park Station (2-block walk). The exterior garden and public plaza are open during the day.
  • Difficulty: easy
  • Recommended settings: Golden Hour Reflections: f/8, 1/250 sec, ISO 200, 24–70mm  ·  Blue Hour Long Exposure: f/11, 10–20 sec, ISO 100, 16mm, tripod  ·  Abstract Detail: f/5.6, 1/500 sec, ISO 400, 70–200mm for curved panel compression  ·  Overcast Architecture: f/11, 1/100 sec, ISO 400, 24mm with polarizing filter to cut reflections

Shots to chase:

  • Low-angle wide shot (16mm) looking up at the cascading stainless-steel curves against a vivid blue sky
  • Abstract telephoto compression of repeating curved panel seams with light and shadow interplay
  • Blue-hour long exposure with light trails from Grand Ave traffic as foreground leading lines
  • Reflection study: the curved steel panels mirror distorted images of adjacent Bunker Hill buildings
  • Human-scale contrast: lone pedestrian dwarfed beneath the massive soaring facade on the Grand Ave side

Pro tip: The corner of 2nd Street and Grand Avenue gives the most comprehensive view of multiple facade planes simultaneously. Visit in the hour before sunset on clear days for maximum ‘golden fire’ effect on the southwest-facing panels—the metal can appear to glow orange-red. A circular polarizer reduces glare on overcast days when shooting straight reflective surfaces.

Common mistake to avoid: Midday shooting creates extreme blown-out hotspots on the metal surfaces; avoid 10 am–3 pm on clear days. Forgetting that the building is contextual—shooting only tight abstracts loses the sense of scale that makes the architecture so impressive.

3. Venice Beach Boardwalk

Venice Beach Boardwalk is the quintessential LA street-life panorama—a 2-mile oceanfront promenade where bodybuilders, skaters, fortune-tellers, muralists, and buskers coexist against a Pacific backdrop. The stretch between Windward Ave and the skate park contains the highest concentration of large-scale murals in LA, including the famous ‘Enchanted Venice’ and panels at the handball courts.

  • GPS: 33.98502, -118.47305
  • Elevation: 10 ft
  • Best time of day: Golden hour (late afternoon facing west toward ocean); street art and performer scenes work well in soft morning light before crowds arrive (8–10 am)
  • Sun direction: Boardwalk runs north–south; the beach faces directly west so sunset light falls perpendicular to the boardwalk, creating dramatic side-lighting on performers, murals, and palm trees. Morning light comes from the east (inland) and hits the colorful murals and food stands with warm directional light. Marine layer common before noon April–June.
  • Access: Address: 1800 Ocean Front Walk, Venice, CA 90291. Open 24/7; vendors and performers typically 10 am–sunset. Paid beach parking lots nearby ($5–$20 flat rate depending on season); street parking along adjacent streets. Free boardwalk access. Metro: Rapid Bus Line 733 stops near Venice Blvd and Pacific Ave.
  • Difficulty: easy
  • Recommended settings: Street Portrait Golden Hour: f/2.8, 1/1000 sec, ISO 200, 85mm  ·  Mural Documentation: f/8, 1/200 sec, ISO 400, 24–35mm  ·  Sunset Beach Long Exposure: f/16, 2–4 sec, ISO 100, 24mm, ND filter  ·  Skate Park Action: f/4, 1/1000 sec, ISO 800, 70–200mm

Shots to chase:

  • Wide environmental portrait of a Venice skater mid-air at the skate park with Pacific horizon behind
  • Mural close-up at Windward Ave handball courts—rich colors best in morning shade before noon sun creates harsh contrast
  • Sunset silhouette of palm tree row with warm orange sky over the Pacific
  • Muscle Beach Gym: candid of a bodybuilder mid-rep with the ocean blurred in background
  • Long exposure of incoming wave with boardwalk lights after sunset using 2-stop ND filter

Pro tip: Arrive at 8–9 am on weekdays for near-empty boardwalk access to murals and unobstructed wide shots. The handball courts wall murals between 17th Ave and Dudley Ave are best photographed in the morning when the wall faces east. Always ask performers before photographing up close; many appreciate a small tip.

Common mistake to avoid: Coming on a busy summer weekend afternoon means mural shots will be crowded with tourists. Shooting murals at midday creates harsh vertical shadows from the parapet above. A wide lens at the skate park struggles to freeze action—a 70–200mm from the railing captures clean peaks above the lip.

4. Santa Monica Pier

The Santa Monica Pier is the western terminus of historic Route 66 and home to the iconic Pacific Wheel—one of the world’s only solar-powered Ferris wheels. The 100-year-old wooden pier frames classic LA coastal images: carnival lights reflected in wet sand, Pacific sunsets through the pier pilings, and the Meeting of Land and Sea at the end of the continent.

  • GPS: 34.01009, -118.49695
  • Elevation: 20 ft
  • Best time of day: Sunset and blue hour when Pacific Wheel neon lights ignite; also first light (sunrise) from the north beach for dramatic golden sidelight along the pier deck
  • Sun direction: Pier extends due west into the Pacific; sun sets directly behind the pier head in mid-spring and late summer (near-true west alignment), creating perfect silhouette opportunities. In winter, sun sets south of the pier producing warm side-glow on the Ferris wheel. Blue hour 20–30 minutes after sunset lights the Pacific Wheel neon against a deepening indigo sky.
  • Access: Address: 200 Santa Monica Pier, Santa Monica, CA 90401. Pier open 24/7; Pacific Park (amusement rides) open daily 11 am–11 pm (later on weekends). Free pedestrian access to pier. Parking: Pier Deck lot $10/hr, Beach lots 1–3 (surface) $3–$12 depending on day/season. Metro: Expo Line to Downtown Santa Monica station, 0.5-mile walk.
  • Difficulty: easy
  • Recommended settings: Blue Hour Ferris Wheel: f/8, 15–25 sec, ISO 100, 24mm, tripod  ·  Sunset Silhouette: f/11, 1/500 sec, ISO 200, 50–100mm  ·  Pier Pilings Below: f/5.6, 1/60 sec, ISO 800, 16–24mm  ·  Carnival Lights Night: f/2.8, 1/30 sec, ISO 3200, 35mm

Shots to chase:

  • Long-exposure blue-hour shot from the beach below the pier: pier pilings as leading lines, Pacific Wheel aglow with neon
  • Looking west down the pier deck at golden hour with the Ferris wheel centered in the vanishing point
  • Silhouette of the Ferris wheel skeleton against a fiery sunset sky, telephoto compression from the beach
  • Wet sand reflections at low tide just after sunset, pier lights mirrored below
  • Historic Route 66 ‘End of the Trail’ sign close-up with pier and ocean in background

Pro tip: For the classic beach-level shot, walk north of the pier ~200 ft and shoot south at a low angle so pier pilings frame the Pacific Wheel. Check tide charts: low tide 1–2 hours before sunset leaves wet sand for reflections. Weekday visits are dramatically less crowded.

Common mistake to avoid: Standing on the pier and shooting down at the wheel results in a foreshortened, less dramatic image; get to the beach below for full impact. Forgetting to check when the Pacific Wheel switches on—it typically illuminates at dusk, not at sunset, so arriving just for sunset may miss the neon display.

Want this in your pocket on the street?
The full-resolution version of every spot above — with full-page hero photography, GPS maps with gold location pins, sun direction diagrams, multi-season tables, and a complete safety + packing checklist — is inside the Los Angeles Ultimate Photographer’s Guide PDF ($47). Print it, save it offline, take it on the walk. Get the guide →

5. LACMA Urban Light

LACMA Urban Light Los Angeles photography sampleSave
LACMA Urban Light — cinematic reference from the Los Angeles Photographer’s Guide PDF

Chris Burden’s 2008 installation comprises 202 restored cast-iron antique street lamps salvaged from across LA, arranged in a symmetric grid on the LACMA plaza. It is simultaneously a public sculpture, a functional light source, and one of the most photographed artworks in California—a forest of warm lamplight at night that feels both industrial and romantic.

  • GPS: 34.06305, -118.35921
  • Elevation: 302 ft
  • Best time of day: Blue hour and night (lights activate at dusk via astronomical timer); also just after LACMA closes (~8 pm on Fri, 7 pm on Sat–Sun) for fewer people in the lamp rows
  • Sun direction: The Wilshire Blvd installation faces south; during golden hour the lamp tops catch warm sidelight from the west, casting long shadows down the rows. The lamps face all directions from the central arrangement, so north–south rows photograph best from the Wilshire sidewalk looking north toward the Resnick Pavilion.
  • Access: Address: 5905 Wilshire Blvd, Los Angeles, CA 90036. Urban Light is on the public sidewalk outside LACMA—accessible 24 hours a day, 7 days a week at no cost. Lamps illuminate every evening from dusk to dawn. Street parking on Wilshire and side streets; LACMA parking garage closes at 10 pm ($17 flat on weekends). Metro: Bus Lines 20, 720 stop directly in front.
  • Difficulty: easy
  • Recommended settings: Blue Hour Wide: f/8, 8–15 sec, ISO 100, 16–24mm, tripod  ·  Looking Up Lamppost: f/5.6, 1/60 sec, ISO 800, 14mm fisheye or 16mm ultrawide  ·  Dusk Ambient: f/5.6, 1/30 sec, ISO 1600, 24–35mm handheld  ·  Mist Or Rain Night: f/4, 2 sec, ISO 400, 24mm, tripod for glow halos

Shots to chase:

  • Symmetrical wide shot from the center of the lamp grid looking toward the Resnick Pavilion at blue hour
  • Low 14mm angle looking straight up through a row of lamps against the deep-blue twilight sky
  • Human-scale portrait: subject standing between lamp rows at dusk, warm amber top-light, soft blue background
  • Abstract telephoto: a line of lamp globes receding into bokeh, evening glow
  • Rain-wet pavement reflections of lamp light on Wilshire Blvd creating a doubling effect

Pro tip: Arrive 15–20 minutes after sunset for the optimal balance of deep-blue sky and warm lamplight. The installation is least crowded on weekday evenings after 8 pm. Shoot from ground level (camera 12–18 inches high) through the forest of poles for maximum leading-line depth. On foggy nights, the lamps produce spectacular light halos.

Common mistake to avoid: Coming during the day misses the entire point—the lamps are off and the installation reads as a collection of plain iron poles. Shooting only from Wilshire Blvd level loses the depth of the grid; step inside the installation and look along the rows.

6. The Broad Museum Exterior

Diller Scofidio + Renfro’s 2015 building wraps a perforated concrete-and-fiberglass ‘veil’ over a concrete ‘vault,’ making it one of the most distinct contemporary museum facades in the US. Its position across from Walt Disney Concert Hall in LA’s civic arts campus creates a dynamic architectural dialog perfect for wide street shots.

  • GPS: 34.05451, -118.25031
  • Elevation: 390 ft
  • Best time of day: Morning golden hour (east-facing Grand Ave facade lit 7–9 am) or blue hour after closing for traffic-free composition with DTLA towers behind
  • Sun direction: The Broad’s ‘veil-and-vault’ facade faces west on Grand Ave; morning light from the east back-lights the honeycomb panel pattern, creating a glowing translucent effect. Afternoon light silhouettes the veil structure against the western sky. The building is surrounded by neighboring DTLA towers that add context in any wide composition.
  • Access: Address: 221 S Grand Ave, Los Angeles, CA 90012. Exterior sidewalk accessible 24/7. Museum hours: Tue–Wed, Fri 11 am–5 pm; Thu 11 am–8 pm; Sat 10 am–6 pm; Sun 10 am–6 pm; closed Monday. Free general admission (timed ticket reservation recommended; walk-ups available daily). Underground parking garage enter via 2nd St from Grand Ave: $19/3 hrs with museum validation; $29 daily max; $19 flat after 5 pm weeknights and all day weekends.
  • Difficulty: easy
  • Recommended settings: Morning Facade: f/8, 1/200 sec, ISO 200, 24–35mm  ·  Honeycomb Detail: f/11, 1/125 sec, ISO 200, 100–200mm telephoto for pattern compression  ·  Blue Hour Exterior: f/8, 10–20 sec, ISO 100, 16–24mm, tripod  ·  Street Level Wide: f/11, 1/100 sec, ISO 400, 16mm with rising composition

Shots to chase:

  • Wide-angle (16mm) shot from the south side of 2nd St capturing The Broad’s veil texture alongside the curving Disney Hall steel
  • Morning backlit honeycomb panels glowing translucent against blue sky—telephoto flattening for graphic texture study
  • Blue-hour long exposure from Grand Ave with light-streaked car trails and DTLA tower lights behind the Broad’s facade
  • Low-angle street shot looking up the Broad’s curved corner toward the sky, converging lines of the veil facade
  • Symmetrical composition of the museum entrance archway with visitors as human scale

Pro tip: The most compelling shot pairs the Broad and Disney Concert Hall in a single frame—stand at the southwest corner of 2nd St and Grand Ave with a 24–35mm lens. The Broad’s perforated veil panels photograph best in overcast or backlit conditions; direct midday sun bleaches the texture flat. Tripod use on the public sidewalk is permitted without a permit for personal/editorial work.

Common mistake to avoid: Photographing only a straight-on facade portrait misses the dynamic corner geometry; walk around the building to find the curving south and east elevations. Shooting at the same ‘eye level’ as other tourists—getting low or finding a second-floor parking structure opposite for elevated angles yields far more original frames.

7. Beverly Gardens Park – Beverly Hills Sign

The iconic Beverly Hills shield sign sits above the lily pond in a 16-acre linear park that stretches nearly two miles along Santa Monica Blvd. The sign is the single most photographed object in Beverly Hills and serves as a shorthand symbol for LA affluence and celebrity culture. One block south of Rodeo Drive, it anchors a self-guided architectural and shopping district walk.

  • GPS: 34.07222, -118.40333
  • Elevation: 259 ft
  • Best time of day: Golden hour (late afternoon, sign faces south—receives warm front-lighting in the 2 hours before sunset); sign is also illuminated at night for after-dark portraits
  • Sun direction: Beverly Gardens Park runs east–west along Santa Monica Blvd. The Beverly Hills sign faces south, receiving direct front-lighting from the south in the afternoon. In summer, golden-hour light hits the sign from the west-southwest (~5–7 pm PDT), wrapping it in warm tones. Early mornings may produce backlit situations—best approached from the north with sun behind you in the afternoon.
  • Access: Address: Beverly Gardens Park, 9439 Santa Monica Blvd at N Beverly Dr, Beverly Hills, CA 90210. Park open daily dawn to dusk; free entry. Sign is in the public park and accessible 24/7 (sign illuminated at night). Street parking on Beverly Dr and cross streets; 2-hour free parking on many Beverly Hills side streets. No Metro directly; Bus 4/704 along Santa Monica Blvd.
  • Difficulty: easy
  • Recommended settings: Golden Hour Portrait: f/2.8, 1/1000 sec, ISO 200, 50–85mm  ·  Wide Environmental: f/8, 1/200 sec, ISO 200, 24–35mm for sign + lily pond + park  ·  Night Illuminated Sign: f/4, 4–8 sec, ISO 400, 35mm, tripod  ·  Telephoto Compression: f/5.6, 1/500 sec, ISO 400, 135–200mm

Shots to chase:

  • Low-angle wide shot with lily pond reflection of the Beverly Hills sign and surrounding palm trees
  • Framed portrait with subject in foreground and illuminated sign at night with street bokeh behind
  • Sunrise shot: first light hitting the sign face with empty park and long shadow across the path
  • Telephoto compression down North Beverly Dr showing Rodeo Drive luxury storefronts receding into the distance
  • Golden-hour wide shot along the linear park with the sign, water feature, and the Santa Monica Mountains on the horizon

Pro tip: The lily pond directly in front of the sign creates a natural foreground and reflection element—get low (6–12 inches above the pond wall) with a wide lens for the classic composition. Early weekday mornings (7–8 am) minimize tourist crowds. The Beverly Hills Visitor Center shield sign one block south at 9400 S Santa Monica Blvd (at N Canon Dr) is slightly smaller but quicker to photograph with no wait.

Common mistake to avoid: Shooting the sign from the middle of Santa Monica Blvd for a wider angle is dangerous and illegal. Many visitors photograph from too far away or too high, missing the lily pond as the natural foreground. Night shots without a tripod produce blurry illuminated-sign frames—even a low ISO at f/4 needs 4+ seconds exposure.

8. Watts Towers

Watts Towers is a National Historic Landmark and one of the world’s great works of vernacular/outsider architecture—17 interlaced sculptural towers up to 99.5 ft tall, hand-built over 33 years by Italian immigrant Simon Rodia using rebar, mortar, and embedded found objects (seashells, pottery, tile, glass, cobalt bottles). The mosaic texture and organic form are unlike any other structure in the US.

  • GPS: 33.93874, -118.24105
  • Elevation: 98 ft
  • Best time of day: Late morning to midday on tour days (Thu–Sat) when guided access is possible; golden afternoon light illuminates the mosaic tile and glass best 3–5 pm
  • Sun direction: The towers orient generally northwest–southeast on the lot at 1765 E 107th St. The tallest tower (99.5 ft) faces northwest; afternoon light from the west illuminates the west-facing mosaic tiles most brilliantly. The open-air structure allows light to pass through the interlinked rods and spirals, creating complex shadow lattice patterns on the ground.
  • Access: Address: 1727 E 107th St, Los Angeles, CA 90002. Exterior view: towers are visible from outside the fence at all times at no charge. Interior guided tours: Thu–Sat, tours depart 11 am–3 pm (first-come first-served; $7 adults, $3 seniors/children; 20-person max per tour). Gallery: Wed–Sat 10 am–4 pm. Parking: free street parking on 107th St. Metro: A Line (Blue) to 103rd St/Watts Towers station (~0.4-mile walk south).
  • Difficulty: easy
  • Recommended settings: Mosaic Detail: f/5.6, 1/250 sec, ISO 200, 100–200mm macro-zoom  ·  Full Tower Wide: f/11, 1/200 sec, ISO 400, 16–24mm from exterior street  ·  Lattice Backlit: f/8, 1/500 sec, ISO 200, 50mm—backlight from the west highlighting open steelwork  ·  Interior Tour: f/4, 1/125 sec, ISO 800, 24mm handheld

Shots to chase:

  • Wide 16mm shot from street corner capturing all three major towers against a clear blue sky
  • Telephoto macro detail of hand-pressed Malibu tile, Wedgwood fragments, and cobalt glass in the spiral mortar
  • Looking straight up through interlaced tower rods and spirals with sky as a background (interior tour access required)
  • Backlit late-afternoon shot through the lattice structure with Watts neighborhood rooftops beyond
  • Ground-level perspective of the shadow pattern cast by the rebar lattice across the mosaic floor panels

Pro tip: Book your tour spot by arriving at the Arts Center office right at 11 am on Thursday or Saturday for the first tour of the day and most favorable morning light. The exterior (street view) photographs beautifully without a ticket, but interior access reveals the mosaic detail that makes the structure truly extraordinary. A 100mm macro lens reveals stunning glasswork and tile details invisible to the naked eye.

Common mistake to avoid: Visiting on a Monday or Tuesday when the galleries are closed and guided access unavailable—you can still see the towers from the street, but can’t enter. Shooting only wide views misses the hypnotic tile and glass mosaic detail that is the structure’s most visually compelling feature.

Want this in your pocket on the street?
The full-resolution version of every spot above — with full-page hero photography, GPS maps with gold location pins, sun direction diagrams, multi-season tables, and a complete safety + packing checklist — is inside the Los Angeles Ultimate Photographer’s Guide PDF ($47). Print it, save it offline, take it on the walk. Get the guide →

9. Vista Hermosa Natural Park

Vista Hermosa Natural Park Los Angeles photography sampleSave
Vista Hermosa Natural Park — cinematic reference from the Los Angeles Photographer’s Guide PDF

Vista Hermosa is the first public park built in downtown Los Angeles in over 100 years—a 10.5-acre urban natural park of native California grassland, oak savannah, and wildflower meadows perched on a ridgeline immediately west of the 110 Freeway. An iconic wooden bench at the hilltop overlook delivers one of LA’s most intimate and Instagram-famous DTLA skyline compositions, framing the towers within wild native grasses.

  • GPS: 34.05782, -118.26302
  • Elevation: 320 ft
  • Best time of day: Sunrise and early morning golden hour for dramatic low-angle DTLA skyline with warm sidelight; also blue hour after sunset facing northeast toward the lit towers
  • Sun direction: The park’s main skyline viewpoint faces east-northeast toward Downtown LA. Sunrise light (coming from the east-southeast) back-lights the towers in silhouette—wait 20 minutes after sunrise for golden front-light to wash the facades. At blue hour, the DTLA towers glow against a deep indigo sky to the east while the western sky retains color overhead.
  • Access: Address: 100 N Toluca St, Los Angeles, CA 90026. Open daily dawn to dusk (approximately 8 am–8 pm seasonally). Free entry. Small free parking lot at the park entrance (limited, ~15 spaces). Street parking on Toluca St and nearby Echo Park Ave. No direct Metro stop; 0.5-mile walk from DASH Route Pico-Union stop.
  • Difficulty: moderate
  • Recommended settings: Blue Hour Skyline: f/8, 15–25 sec, ISO 200, 24–50mm, tripod  ·  Golden Hour Portrait: f/2.8, 1/500 sec, ISO 200, 50–85mm with DTLA background  ·  Sunrise Silhouette: f/11, 1/500 sec, ISO 200, 24mm  ·  Native Grass Foreground: f/5.6, 1/250 sec, ISO 400, 35mm—rack focus foreground grass to towers

Shots to chase:

  • The iconic bench composition: wooden bench in left-foreground with DTLA towers filling the right background in golden hour
  • Native California grass and wildflowers (spring) in soft-focus foreground, sharp DTLA skyline beyond
  • Blue-hour long exposure: city tower lights sparkle against deep-indigo sky, grassy hillside in lower frame
  • Silhouette shot at sunrise: hiker’s profile on the hill ridge against a bright DTLA skyline glow
  • Telephoto compression (200mm) isolating US Bank Tower and adjacent skyscrapers above the meadow treeline

Pro tip: The most famous viewpoint is the wooden bench visible from the main trail—walk straight uphill from the parking lot stairs, approximately 3–4 minutes. Arrive at sunrise for the most dramatic light and zero crowds; the park is nearly empty before 8 am. Spring (March–April) adds wildflower foreground color. The hilltop is exposed and windy—brace or use a sandbag weight on your tripod.

Common mistake to avoid: Coming mid-morning misses the short golden window and the park fills with joggers. The park closes at dusk, so blue-hour shooters must be prepared to pack up quickly—rangers do make closing rounds. Forgetting that the DTLA view faces east means afternoon/sunset light produces back-lit towers (silhouettes only); golden-hour front-light only exists at sunrise.

10. Echo Park Lake

Echo Park Lake is LA’s oldest public park and home to the largest natural lotus bed in California—thousands of pink and white lotuses bloom July through September, creating an otherworldly floral carpet with the DTLA skyline as a backdrop. The lake’s calm water reflects the Downtown tower cluster and fountain, making it one of the best urban reflection spots in the western United States.

  • GPS: 34.075493, -118.260597
  • Elevation: 280 ft
  • Best time of day: Sunrise for glassy still-water reflections of DTLA skyline and lotus blossoms; late July–September for peak lotus bloom season; blue hour for tower reflections at dusk
  • Sun direction: Lake faces east toward Downtown LA; sunrise light front-lights the DTLA skyline reflected in the water. The lotus beds on the north and west shores receive morning side-light from the east—ideal for petal translucency. Afternoon sun from the west back-lights the lotus and creates golden shimmer on the water. Palm trees along the southern edge catch warm sunset light.
  • Access: Address: 751 Echo Park Ave, Los Angeles, CA 90026. Open daily approximately sunrise–10 pm (city park). Free entry. Free street parking on Echo Park Ave and surrounding streets. Pedal swan boats available for rent approximately 9 am–10 pm, 7 days per week. Metro: Bus Lines 2, 4 stop adjacent on Glendale Blvd.
  • Difficulty: easy
  • Recommended settings: Lotus Bloom Morning: f/5.6, 1/250 sec, ISO 400, 70–200mm telephoto  ·  Sunrise City Reflection: f/11, 1/30 sec, ISO 200, 24–35mm, tripod (still water)  ·  Blue Hour Towers: f/8, 15 sec, ISO 200, 24mm, tripod—city lights double in still water  ·  Lotus Backlit: f/4, 1/500 sec, ISO 400, 100–200mm—afternoon backlight through petals

Shots to chase:

  • Sunrise wide shot: DTLA towers mirrored in glassy lake with lotus pads in the foreground
  • Telephoto isolation of a single pink lotus bloom against a soft-focus cityscape backdrop
  • Swan boat pedaling through the lotus field at golden hour—human scale in a floral cityscape
  • Blue-hour reflection: illuminated US Bank Tower and Citigroup Center reflected in still water
  • Fountain jet with backlit water droplets against a dark DTLA silhouette at sunset

Pro tip: Peak lotus bloom is mid-July through September; arrive at 6:30–7 am before wind disturbs the water surface. The north shore path closest to the lotus field provides the best telephoto angles. Rent a swan boat to access angles within the lotus field not reachable from the shore path—allows shooting down into fully open blooms at water level.

Common mistake to avoid: Coming outside lotus season (October–June) and finding only empty pads. Arriving past 9 am on weekends when wind picks up and water surface ripples destroy reflections. Underestimating the telephoto reach needed—a 70–200mm minimum is required for frame-filling lotus shots; a 24mm from the shore path produces tiny flowers lost in the expanse.

11. Olvera Street

Olvera Street is the oldest extant street in Los Angeles (paved 1929 as a Mexican marketplace) and the living heart of El Pueblo de Los Ángeles Historic Monument. Lined with brightly painted kiosks selling handcrafted goods, Mexican candy, and traditional clothing, it offers the most concentrated collection of colorful Mexican folk art and colonial-era architecture in LA—including the 1818 Avila Adobe, LA’s oldest surviving structure.

  • GPS: 34.057495, -118.237996
  • Elevation: 236 ft
  • Best time of day: Mid-morning to early afternoon on weekdays (10 am–1 pm) for directional light in the narrow pedestrian lane; also Día de los Muertos (Nov 1–2) and Cinco de Mayo festivals for vibrant atmosphere
  • Sun direction: Olvera Street runs north–south. The narrow lane is shaded by awnings and buildings for much of the day; diffuse light from overhead works well for vendor and architecture shots. Southern end near the Plaza opens into direct sun. Morning (8–10 am) light enters from the east before shops fully open, illuminating the colorful façades on the west wall.
  • Access: Address: 125 Paseo de la Plaza, Los Angeles, CA 90012 (enter from Cesar Chavez Ave side or via El Pueblo Plaza). Open daily 10 am–7 pm (vendor hours; outdoor street accessible earlier). Free public access. Parking: Union Station parking across Alameda St; various paid lots from $8–$15. Metro: Red/Purple Line to Union Station (5-minute walk), or Gold Line to Union Station.
  • Difficulty: easy
  • Recommended settings: Vendor Portrait: f/2.8, 1/500 sec, ISO 400, 50–85mm  ·  Architectural Lane: f/8, 1/100 sec, ISO 400, 24–35mm  ·  Festival Color: f/5.6, 1/500 sec, ISO 200, 24–70mm zoom  ·  Low Light Evening: f/2.8, 1/60 sec, ISO 1600, 35mm

Shots to chase:

  • Wide-angle shot looking north down the narrow street corridor with colorful awnings framing the lane
  • Vendor stall close-up: vibrant papel picado banners against a tiled wall with handcrafted goods in the foreground
  • Portrait of a street vendor in traditional embroidered dress with blurred kiosk merchandise behind
  • Avila Adobe exterior: ochre-washed adobe wall with original wooden balcony against blue Southern California sky
  • Day of the Dead altar (November): marigold flowers, candles, and sugar skulls in rich warm light

Pro tip: Weekday mornings (10–11 am) offer the best balance of open shops, directional light, and manageable crowds. Visit around November 1–2 for the Día de los Muertos celebration—Olvera Street becomes one of the most photographically rich scenes in all of California. Ask vendors before photographing their faces; most are happy to engage and the interaction itself can become the shot.

Common mistake to avoid: Weekend afternoons are extremely crowded, making clean architectural shots difficult without extensive post-processing. Shooting only from the middle of the street loses the colorful awnings as a framing device—step back and use a 24–35mm to incorporate the full lane overhead.

12. Bradbury Building Atrium

Built in 1893 by George Wyman, the Bradbury Building’s five-story interior atrium is considered one of the finest examples of Victorian commercial architecture in the United States. The ornate cast-iron railings, open-cage elevators, glazed yellow brick, and skylighted atrium have appeared in Blade Runner (1982), Chinatown, and dozens of other films, making it one of Hollywood’s most filmed interiors. Its light-drenched geometry is a benchmark for architectural photography.

  • GPS: 34.05054, -118.24786
  • Elevation: 295 ft
  • Best time of day: Midday (11 am–1 pm) when overhead skylight floods the atrium with even, diffuse light; also open in morning golden hour on clear days when direct shaft of light enters the skylight from the east
  • Sun direction: The central skylit atrium roof is approximately north–south; direct sunlight enters through the glass roof most dramatically in late morning (10–11:30 am) on south-facing panes in winter. Cloudy or overcast days provide the most even and shadow-free light on the ornate ironwork. In summer, high sun position means relatively even top-down light from roughly 10 am–2 pm.
  • Access: Address: 304 S Broadway, Los Angeles, CA 90013. Open Mon–Sat 9 am–5 pm, Sun 9 am–5 pm (lobby ground floor and first landing only; upper floors are private offices). Free entry to public lobby. Visitors allowed up to the first landing. Casual photography permitted; tripods and commercial shoots require prior permission from building management: (213) 626-1893. Metro: Red/Purple Line to Civic Center/Grand Park Station (3-block walk south and east on Broadway).
  • Difficulty: easy
  • Recommended settings: Atrium Wide: f/8, 1/60 sec, ISO 800, 16–24mm (handheld or very small tabletop tripod)  ·  Ironwork Detail: f/5.6, 1/125 sec, ISO 1600, 50–100mm  ·  Elevator Cage: f/4, 1/60 sec, ISO 3200, 35mm—for ornate latticework in low corridor light  ·  Skylight Sunbeam: f/11, 1/250 sec, ISO 200, 50mm—expose for the bright shaft, let ironwork silhouette

Shots to chase:

  • Classic atrium wide shot: stand at the ground-floor center, 16mm looking straight up through all five balcony tiers to the skylighted ceiling
  • Ornate iron railing detail: staircase balustrade in isolation against soft skylight backdrop
  • Open-cage elevator door: iron lattice with glowing atrium light behind, Victorian ironwork in foreground
  • Looking along first-floor balcony: receding railings as leading lines, atrium light flooding in from above
  • Silhouette of a figure on the first-floor landing against the bright skylight, iron railings framing both sides

Pro tip: The Bradbury only allows public access to the ground floor and first landing, but that is all you need for the iconic atrium shot. Come on a cloudy day for even, flattering light on the ironwork without blown-out skylight patches. Arrive right at 9 am on a weekday for the quietest experience—by 11 am tour groups begin cycling through. Shooting straight up from center requires a camera that can tilt (live view/mirrorless) to avoid craning awkwardly.

Common mistake to avoid: Using flash, which creates harsh uneven shadows in the layered ironwork and may be restricted—rely on available light and higher ISO. Visiting on a Sunday afternoon when weekend crowds make clean shots nearly impossible without long waits. Standing too close to the railing with a wide lens creates dramatic distortion; step back toward the center of the lobby for a more balanced perspective.

When to photograph Los Angeles: a year-round breakdown

Los Angeles is photogenic every month of the year — but the conditions differ radically by season. Here is what to expect:

Spring (March–May) and fall (September–November) offer mild temperatures, cleaner air, and lower crowds; summer mornings deliver reliable marine-layer softbox light on the coast before it burns off.

Photographer safety in Los Angeles: read this

City photography has its own risks: gear visibility, neighborhood timing, traffic, weather. Read the briefing before you go.

  • Gear visibility: Use a discreet bag with no obvious camera branding. Keep a body strapped under a jacket on transit.
  • Neighborhood timing: Pre-dawn and post-sunset shoots reward early scouting. Cross-reference each location with current local guidance and choose well-lit transit routes.
  • Situational awareness: Headphones out. One eye in the viewfinder, one on the street.
  • Traffic: Bridges, medians, and bike lanes are not setup zones. Shoot from sidewalks and pedestrian areas only.
  • Weather: Summer storms move quickly; winter cold drains batteries. Layer up, keep gear dry, watch for ice on cobblestones at blue hour.

The complete safety briefing is inside the Los Angeles Photographer’s Guide PDF.

Take this guide into the city

This post is the complete field reference. The Los Angeles Ultimate Photographer’s Guide PDF is the field-deployable version: full-page resolution hero photography, GPS maps with gold pins for every location, multi-season shooting calendars, gear notes per location, sun-angle diagrams, the full city safety briefing, and a print-ready editorial layout in Framehaus black and gold. Save it offline. Print it. Take it on the walk.

Los Angeles Ultimate Photographer’s Guide
Downloadable PDF · 12 GPS-mapped locations · Multi-season calendar · City safety briefing · Packing checklist

Get the Los Angeles guide — $47

Combo Deal

Get the Los Angeles Guide + Preset Pack

Photograph it. Edit it. Done.

$66
$54
Save $12
PDF Guide Every spot, GPS, golden hour
Preset Pack 20 Lightroom presets
Book your tours & experiences in Los Angeles

All links go to Viator (a TripAdvisor company), the world’s largest marketplace for guided experiences. Tagged as affiliate per FTC.

Also on Amazon: gear that helps with this technique

Quick Amazon shortcuts to the gear most useful for this kind of shot. Use them if Prime shipping or Amazon credit makes more sense than B&H. As an Amazon Associate ShutYourAperture earns from qualifying purchases.

Take Los Angeles home in your pocket.

Every shot location, every angle, every time of day worth shooting. Printable PDF + GPS-tagged map.

Instant download. Works on phone, tablet, and printed.

Continue reading

← Back to U.S. Cities Photography Guides

Related guides nearby

Three more photography guides within striking distance — perfect for combining into one trip.

Browse all 78 guides → · Open the map

Save your trip-planning hours

The complete Los Angeles guide is $47

All vantage points above + 5 bonus secret spots, printable map, gear pack list, and editing recipes. One-time payment, instant download, lifetime updates.

Buy Los Angeles PDF →

Common questions about the Los Angeles guide

Is the Los Angeles photography guide worth $47?

For most photographers, yes. The guide saves 8-12 hours of trip-planning research and prevents the most common mistake of Los Angeles photography: shooting at the wrong time of day. If a single better frame is worth $47 to you, the guide pays for itself on day one. Buyers get every GPS coordinate, every golden-hour window, every cultural rule, and a printable shot list.

Does the Los Angeles guide include GPS coordinates?

Yes — every vantage point in the guide has Google Maps-ready GPS coordinates so you can pin them before you fly. The guide also includes a printable map showing all locations clustered by walking distance, so you can build efficient half-day routes.

What's in the Los Angeles PDF that isn't in this article?

The article shows the highlights. The PDF includes: 5 additional secret spots not published online, a 14-day itinerary with daily routes, the full camera-settings cheat sheet for every scenario in Los Angeles, a printable gear packing list, post-processing recipes with screenshot examples, and a list of local guides we trust for portrait commissions.

Do I get the Lightroom presets too?

The $47 guide is the PDF only. The matching Los Angeles preset pack is a separate $19 download — most buyers grab both as a bundle and save the editing time. Both are instant download, both work on Lightroom Classic and Lightroom Mobile.

Will the guide work for a Los Angeles trip in 2026?

Yes. The guide is updated annually as fees, restrictions, and new vantage points change. All buyers get free lifetime updates. The 2026 edition includes the latest drone rules, museum photography policies, and seasonal light data for the year.

Get the Los Angeles guide · $47