Best Photography Spots in San Francisco: 12 Locations With GPS

Tours & experiences disclosure: This guide includes affiliate links to Viator, the world’s largest tour and experiences marketplace. If you book through these links, ShutYourAperture may earn a small commission at no extra cost to you.

San Francisco photography guide hero imageSave

Amazon Associates disclosure: ShutYourAperture is a participant in the Amazon Services LLC Associates Program. As an Amazon Associate we earn from qualifying purchases. Some links below go to Amazon (Store ID shutyouraperture-20). Buying through these links costs you nothing extra and helps fund our free guides.
Skip the planning. Get the San Francisco PDF. All locations, GPS coordinates, golden-hour times, gear tips. Instant download.

San Francisco, California is one of the most photogenic cities in the United States. If you have a camera and the patience to show up before dawn, San Francisco will give you images that last a career — but only if you know where and when to point it.

This is the definitive field guide to the 12 best photography spots in San Francisco, with GPS coordinates you can drop straight into Google Maps, exact camera settings tuned to San Francisco’s unique light, precise timing for every location, and the access notes nobody else bothers to document. It mirrors the intel inside our San Francisco Ultimate Photographer’s Guide ($47 PDF) — a downloadable field guide with full-page hero images, GPS maps, seasonal tables, a city safety briefing, and a complete photographer’s packing list. Get the guide →

Planning multi-city travel? See also: U.S. cities photography hub and the National Parks Photography Guides.

San Francisco Ultimate Photographer’s Guide — $47
12 GPS-mapped locations · Exact camera settings · Multi-season shooting calendar · Free annual updates

Download the PDF guide →
Skip the planning

Get the San Francisco Ultimate Photographer’s Guide

Every location below — pre-mapped with GPS, golden-hour timing, gear recommendations, cultural rules, and a 14-day itinerary. Downloaded by 200+ working photographers.

Get the PDF · $47
Instant download · Lifetime updates

Quick jump to the 12 spots

  1. Battery Spencer Golden Gate Overlook
  2. Lands End Coastal Trail — Eagle Point Overlook
  3. Painted Ladies at Alamo Square
  4. Twin Peaks — Christmas Tree Point
  5. Lombard Street Crooked Block
  6. Palace of Fine Arts
  7. Coit Tower — Telegraph Hill
  8. Pier 39 Sea Lions
  9. Cable Car on California Street — Nob Hill
  10. Mission District Murals — Clarion Alley
  11. Baker Beach — Golden Gate Bridge View
  12. Chinatown Dragon Gate

A look inside the San Francisco Photographer’s Guide

Here are three of the actual shots you’ll find inside the PDF — cinematic full-page references for the exact spots, lenses, and lighting conditions documented in the guide. The full guide includes 12 locations, each with a hero image, GPS map, settings table, and a five-shot list.

Battery Spencer Golden Gate Overlook — from the San Francisco Photographer's GuideSave
Battery Spencer Golden Gate Overlook — sample reference photo from the San Francisco Photographer’s Guide PDF

Before you shoot San Francisco: the essentials

  • Free public access: Most outdoor locations are free. Coit Tower charges $10–$12 for elevator access to top. Cable car rides are $8 per boarding. Pier 39 grounds are free.
  • Commercial permits: Commercial film/photo permits required for professional shoots in GGNRA parklands (Battery Spencer, Baker Beach, Lands End). Free visitor photography is unrestricted. No drones in GGNRA.
  • Best photography seasons: September–November (clearest skies, golden-light fog burns off early) and February–April (lush green hills, mild rain possible)
  • Blue hour notes: Blue hour is especially dramatic from Twin Peaks, Coit Tower summit, and the Chinatown Dragon Gate; city lights glow amber against deep cobalt sky 20–40 minutes after sunset.
  • Drone policy: Most major U.S. cities restrict drone flight in airspace and via local ordinances. Check FAA + city rules before launching.
  • Local resource: Official visitor information

The full-resolution version of every map below — plus seasonal calendars, gear notes per location, sun-angle diagrams, and a complete photographer’s packing checklist — is inside the San Francisco Photographer’s Guide PDF ($47).

1. Battery Spencer Golden Gate Overlook

At ~495 feet above the bay, Battery Spencer is the highest vantage in the immediate vicinity of the Golden Gate Bridge, placing the viewer at near eye-level with the north tower and framing the complete span against the San Francisco skyline and Alcatraz. The ruined WWII-era concrete gun emplacements add dramatic foreground texture unavailable from any other vantage.

  • GPS: 37.8296, -122.4834
  • Elevation: 495 ft
  • Best time of day: golden hour at sunrise or sunset; foggy blue hour mornings for ethereal mist shots
  • Sun direction: At sunrise, light hits the eastern bridge tower and SF skyline from behind the shooter’s right shoulder — ideal for illuminating the full span. At sunset, the sun drops behind the Marin Hills to the northwest, casting orange-pink backlight through the bridge cables. In summer, low morning sun skims the north tower at a flattering 20° angle.
  • Access: Drive north over Golden Gate Bridge; take Alexander Ave exit, turn left on Conzelman Rd, follow to Battery Spencer parking pullout. Limited roadside parking (~15 spaces); arrive before 7 am on weekends. No fees. Open 24 hours (NPS GGNRA). No drones permitted.
  • Difficulty: easy
  • Recommended settings: Sunrise Golden Hour: f/8, 1/250 sec, ISO 100, 50mm  ·  Blue Hour Tripod: f/11, 8 sec, ISO 200, 24mm  ·  Foggy Morning: f/5.6, 1/500 sec, ISO 400, 200mm  ·  Night Long Exposure: f/8, 30 sec, ISO 200, 24mm

Shots to chase:

  • Wide-angle composition with concrete battery walls as leading foreground framing the full bridge span
  • Telephoto compression stacking the bridge towers with Alcatraz and the Bay Bridge beyond
  • Long exposure at blue hour capturing the glow of headlights on the bridge deck and city light reflections on the bay
  • Misty fog-shrouded shot where only the tops of the towers emerge — patience required, light breaks unpredictably
  • Vertical portrait with wildflower clusters (spring) or dry grass (fall) in the lower third and sky dominating the upper frame

Pro tip: Check the San Francisco Bay Area fog forecast on the National Weather Service site the night before — summer fog often sits below 300 feet, blocking the bridge entirely by 9 am. Fall (September–November) offers the most consistent clear mornings. For fog-tower drama specifically, arrive 30 minutes before sunrise when the marine layer is partially lifted.

Common mistake to avoid: Shooting at midday produces harsh, flat light with blown-out sky and deep bridge shadows. Parking along Conzelman Rd and blocking turnouts can result in a citation — park only in designated pullouts. Over-rotating the tripod toward the city loses the bay foreground that gives depth to the composition.

2. Lands End Coastal Trail — Eagle Point Overlook

Eagle Point delivers a sweeping coastal panorama of the Golden Gate Bridge framed by dramatically eroded rocky cliffs, cypress groves, and the Pacific surf — a composition that no road-accessible viewpoint can match. The trail itself offers multiple secondary compositions including the sunken remains of shipwrecks visible at low tide and the stone Lands End Labyrinth.

  • GPS: 37.7809, -122.5056
  • Elevation: 185 ft
  • Best time of day: golden hour at sunset; late afternoon for western light on the bridge and Marin Headlands
  • Sun direction: The trail faces northwest, so the setting sun backlights the Golden Gate Bridge in late afternoon and at sunset, creating silhouette and warm-rim lighting. Morning light comes from the east behind the shooter — good for shadow-free detail shots on the trail itself. Overcast days eliminate glare and saturate the blue-green sea color.
  • Access: Park at Lands End Lookout lot at 680 Point Lobos Ave, San Francisco, CA 94121 (free, limited spots). Walk the Lands End Trail ~0.9 miles east to Eagle Point Overlook. NPS GGNRA; no entrance fee. Visitor Center open daily 9 am–5 pm. Trail open sunrise to sunset.
  • Difficulty: moderate
  • Recommended settings: Sunset Wide: f/11, 1/125 sec, ISO 100, 24mm  ·  Telephoto Bridge: f/8, 1/500 sec, ISO 200, 200mm  ·  Overcast Trail: f/5.6, 1/250 sec, ISO 400, 35mm  ·  Blue Hour Tripod: f/11, 15 sec, ISO 200, 24mm

Shots to chase:

  • Classic bridge-and-headlands panorama from Eagle Point with cypress silhouettes in the foreground
  • Low-angle shot with rocky tide pools reflecting amber sunset light and the bridge in the background
  • The Lands End Labyrinth stone spiral with Marin Headlands softly visible through morning marine layer
  • Shipwreck ribs at low tide (consult tide tables) emerging from the surf with the coast curving behind
  • Trail-perspective shot looking west with eroded cliffs framing the Golden Gate strait at golden hour

Pro tip: Combine the walk with the Sutro Baths ruins at the western trailhead for two iconic subjects in one visit. Bring a polarizing filter to cut through ocean surface glare and reveal aqua water tones. The Eagle Point path is unsigned — look for a slight spur off the main trail about 0.9 miles from the Merrie Way parking lot.

Common mistake to avoid: Visiting at midday produces harsh light and washed-out ocean color. The trail surface is uneven with exposed roots and slippery gravel — wrong footwear leads to falls and missed shots. Do not attempt to descend to the shipwrecks along the cliff face; the terrain is unstable.

3. Painted Ladies at Alamo Square

The juxtaposition of ornate 1890s Victorian ‘Painted Ladies’ against the modern glass skyscrapers of the Financial District encapsulates San Francisco’s layered architectural history in a single frame. This is one of the most recognized cityscapes in North America, recognizable from the Full House TV title sequence.

  • GPS: 37.7763, -122.4347
  • Elevation: 220 ft
  • Best time of day: late afternoon golden hour (sun from the southwest illuminates Victorian facades and skyline together)
  • Sun direction: The Painted Ladies face east-southeast, so morning sun lights the facades directly while the skyline is in shadow. Afternoon sun from the west-southwest (approximately 2–5 pm) catches both the houses and the Financial District skyline backdrop simultaneously — the preferred lighting window. Overcast days work well for even color saturation on the pastel paint.
  • Access: Street parking on Steiner St or Hayes St (often difficult on weekends). Nearest Muni: 21-Hayes bus to Steiner & Hayes. The classic vantage is from the grassy upper knoll of Alamo Square Park (free, open 5 am–midnight). No permits required for personal photography.
  • Difficulty: easy
  • Recommended settings: Afternoon Sunshine: f/8, 1/250 sec, ISO 100, 50mm  ·  Overcast Flat Light: f/5.6, 1/160 sec, ISO 200, 35mm  ·  Blue Hour Skyline: f/8, 4 sec, ISO 400, 35mm  ·  Telephoto Detail: f/5.6, 1/500 sec, ISO 200, 135mm

Shots to chase:

  • Classic wide shot from upper park knoll: all six Victorian row houses aligned with the downtown skyline rising behind them
  • Low-angle from Steiner St sidewalk looking up at the ornate gingerbread facades with blue sky above
  • Blue-hour long exposure with city skyscraper lights aglow and foreground streetlights illuminating the row
  • Tight telephoto compression stacking the Victorian rooflines against the distant Salesforce Tower
  • Human-scale candid street scene: visitors on Steiner sidewalk with the houses as backdrop and park greenery in frame

Pro tip: The best in-park shooting position is on the grass approximately 100 feet from the corner of Hayes and Steiner — this aligns all six houses without perspective distortion. Use a telephoto (85–135mm) from further up the hill to compress the Victorian facades against the skyline for maximum drama. Weekday mornings have significantly fewer crowds than weekend afternoons.

Common mistake to avoid: Shooting from ground level on Steiner Street loses the skyline backdrop — you must be elevated in the park. Visiting in summer morning fog can obscure the skyline entirely. Including too many houses beyond the classic six-house row diminishes the composition by adding less-photogenic structures at the ends.

4. Twin Peaks — Christmas Tree Point

At 922 feet, Twin Peaks offers the highest freely accessible panoramic viewpoint within San Francisco city limits, with an unobstructed 360° view spanning the Bay Bridge, Alcatraz, the Marin Headlands, downtown, and Silicon Valley on clear days. The two prominent hillocks create a natural geographic centerpiece recognizable in aerial views of the city.

  • GPS: 37.7516, -122.4477
  • Elevation: 922 ft
  • Best time of day: blue hour after sunset for full city light panorama; sunrise for mist-draped valleys
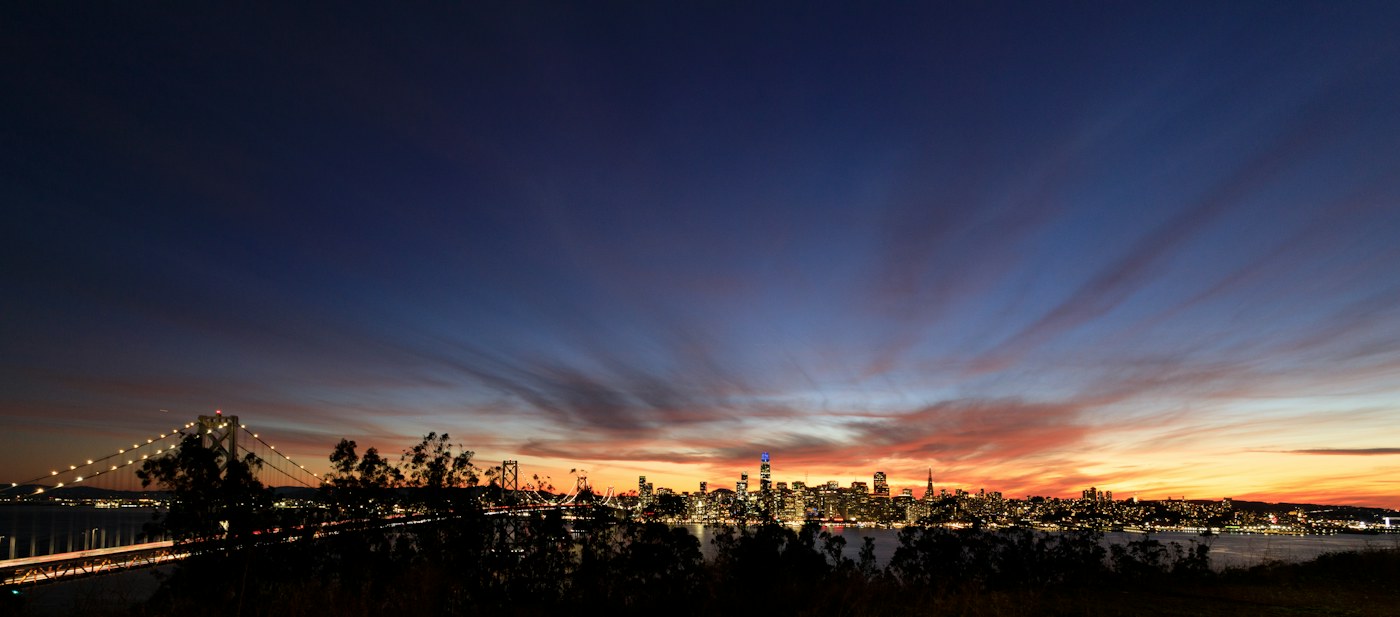
  • Sun direction: Twin Peaks faces north over the city grid, so the sun rises to the northeast (behind/right) and sets to the northwest (behind/left). This means the city itself is lit from the side at golden hour — ideal for revealing three-dimensional texture in the cityscape. At blue hour after sunset, the entire city glows with street-lamp amber against a deep blue sky, making this the premier night-photography vantage.
  • Access: Drive via Market St → Portola Dr → Twin Peaks Blvd to the summit parking lot (free, ~40 spaces). Public transit: Muni 37-Corbett to Burnett Ave & Crestline Dr. Summit road is open 5 am–midnight. No entrance fee. Restrooms available. The area is exposed and can be extremely windy and cold.
  • Difficulty: easy
  • Recommended settings: Blue Hour Tripod: f/11, 20 sec, ISO 400, 24mm  ·  Sunset Golden Hour: f/8, 1/60 sec, ISO 200, 35mm  ·  Daytime Wide: f/11, 1/500 sec, ISO 100, 16mm  ·  Night Cityscape: f/8, 30 sec, ISO 800, 24mm

Shots to chase:

  • 360° panoramic stitch from Christmas Tree Point capturing the full city grid, bay, and both bridges in one frame
  • Blue-hour cityscape with trails of headlights on Market Street converging to a vanishing point in the downtown core
  • Sunrise shot with marine fog filling the valleys below while Twin Peaks rises above the white sea of clouds
  • Silhouette of fellow visitors on the hillock ridge against the blazing western horizon at last light
  • Night telephoto of the illuminated Bay Bridge and Transamerica Pyramid from the north-facing patio

Pro tip: Arrive at least 30 minutes before sunset to scout your tripod position before crowds at Christmas Tree Point peak. Wind gusts regularly exceed 25 mph — use a camera strap and lens hood, and brace tripod legs against wind direction. Check weather forecasts: summer fog can roll in quickly and erase the entire view within minutes.

Common mistake to avoid: Visiting on a summer afternoon when fog is thick eliminates any view. Bringing a wide-angle lens alone misses the telephoto compression shots of the Bay Bridge that appear in most professional SF cityscapes. Arriving after dark with insufficient ambient light understanding leads to underexposed results — shoot during blue hour, not full night.

Want this in your pocket on the street?
The full-resolution version of every spot above — with full-page hero photography, GPS maps with gold location pins, sun direction diagrams, multi-season tables, and a complete safety + packing checklist — is inside the San Francisco Ultimate Photographer’s Guide PDF ($47). Print it, save it offline, take it on the walk. Get the guide →

5. Lombard Street Crooked Block

Lombard Street Crooked Block San Francisco photography sampleSave
Lombard Street Crooked Block — cinematic reference from the San Francisco Photographer’s Guide PDF

The eight tight hairpin bends on a single block of Russian Hill make Lombard Street the most famous residential street in the world, flanked by immaculately maintained hydrangea and flower beds that change color seasonally. The block’s steep descent within a dense urban neighborhood creates a naturally layered foreground-to-background depth impossible to replicate anywhere else in the city.

  • GPS: 37.8019, -122.4189
  • Elevation: 290 ft
  • Best time of day: early morning golden hour (light from the east illuminates east-facing gardens and brick paving)
  • Sun direction: Lombard Street’s crooked block runs east–west on a south-facing hillside. Morning sun (6–9 am) rakes across the switchbacks from the east, creating texture-enhancing side light on the red-brick pavers. By midday the sun is overhead and washes out color. From the bottom (Leavenworth), you face west-uphill, so the sky behind the cars at top can be exposed to the sun during morning golden hour for dramatic backlit compositions.
  • Access: Reach the top via Powell-Hyde cable car to Hyde & Lombard (most photogenic approach). Street parking nearby is extremely scarce. Pedestrian stairways run alongside the switchbacks; open 24 hours, no fee to walk or photograph. Cars may drive down (one-way eastbound, 9 am–10 pm); Rec & Park enforces seasonal reservations for driving, but pedestrian access is unrestricted.
  • Difficulty: easy
  • Recommended settings: Morning Golden Hour: f/8, 1/250 sec, ISO 100, 50mm  ·  Top View Wide: f/11, 1/320 sec, ISO 100, 24mm  ·  Bottom Up Telephoto: f/8, 1/500 sec, ISO 200, 135mm  ·  Blue Hour Light Trails: f/11, 20 sec, ISO 200, 24mm

Shots to chase:

  • Bottom of Leavenworth looking up the cascading switchbacks with a car navigating the bends — telephoto compression
  • Top of Hyde looking down the full crooked block with Coit Tower and the bay visible in the background beyond the rooflines
  • Aerial-perspective image from the mid-stairway landing capturing the tight S-curves and flower beds in overhead view
  • Blue-hour long exposure with car light trails tracing luminous curves down the brick switchbacks
  • Spring/summer close-up of hydrangea blossoms with the brick road and switchback geometry in soft focus behind

Pro tip: Arrive before 8 am on weekdays to photograph the crooked block without cars or crowds. The classic bottom-up shot requires a 100–200mm telephoto to compress the switchbacks into a visually stacked cascade — wide angles from below make the hill look modest. For a fresh perspective, the city-facing balconies of the Fairmont Hotel on Nob Hill provide a rare aerial overview of the block.

Common mistake to avoid: Photographing from the roadway itself is hazardous and blocked by traffic-control measures during peak hours. Shooting midday bleaches out the red brick and flower color. Using a wide lens from the bottom makes the famous curves look shallow and underwhelming rather than stacked and dramatic.

6. Palace of Fine Arts

The Palace of Fine Arts is the sole surviving structure from the 1915 Panama-Pacific International Exposition — a Roman/Greek Revival rotunda and colonnade set on a reflective lagoon, with eucalyptus and weeping willows providing lush framing. The combination of classical architecture, still water reflections, and mature landscaping creates a timeless, European-feeling composition unique in North America.

  • GPS: 37.8029, -122.4486
  • Elevation: 10 ft
  • Best time of day: golden hour at sunset (west-facing rotunda glows; lagoon reflections are mirror-flat in calm evenings) or blue hour for artificial lighting
  • Sun direction: The rotunda faces roughly south-southeast. Morning sun from the east side-lights the colonnade textures beautifully. Afternoon sun approaches from the southwest and directly illuminates the rotunda dome; the warm ochre-painted surfaces appear almost incandescent at golden hour. The lagoon faces east, producing best water reflections in morning calm before wind picks up.
  • Access: 3601 Lyon St, San Francisco, CA 94123. Free street parking on Baker St and Palace Dr. Free entry to grounds (24 hours). No fee. Nearest Muni: 30X or 43 to Marina Blvd & Divisadero. The grounds are maintained by the SF Recreation & Parks Dept.
  • Difficulty: easy
  • Recommended settings: Golden Hour Lagoon: f/8, 1/60 sec, ISO 200, 35mm  ·  Blue Hour Reflection: f/8, 10 sec, ISO 400, 24mm  ·  Rotunda Detail: f/5.6, 1/500 sec, ISO 100, 85mm  ·  Overcast Even Light: f/5.6, 1/160 sec, ISO 400, 35mm

Shots to chase:

  • Classic lagoon reflection: rotunda dome and colonnade perfectly mirrored in the still water at golden hour
  • Low-angle long exposure from the eastern bank capturing the colonnade framed by weeping willow branches
  • Blue-hour composition with warm interior lighting of the rotunda contrasting against the cooler sky
  • Architectural detail shot of the urns, friezes, and weeping women statues atop the colonnade columns
  • People-in-scale candid: couple walking along the lagoon path with the towering rotunda as backdrop

Pro tip: The east side of the lagoon (closest to Baker St) provides the best full-rotunda reflection angle. Arrive 15 minutes before sunrise for mirror-flat lagoon water before morning breezes ripple the surface. Visiting on a windless weekday morning often means the place to yourself — this is one of the most visited tourist spots in the city. A neutral-density filter allows silky-smooth reflections even in partial sunlight.

Common mistake to avoid: Shooting from the western colonnade side puts the rotunda between you and the light — the façade reads in shadow. Visiting on a windy afternoon (common in SF) eliminates reflections entirely. Overexposing the white/ochre stonework in bright midday sun destroys the subtle painted detail on the friezes.

7. Coit Tower — Telegraph Hill

The 210-foot Art Deco fluted concrete tower, built in 1933, occupies a dramatic 299-foot hilltop with views spanning Alcatraz, the Bay Bridge, downtown, and Fisherman’s Wharf. The interior holds 27 WPA-commissioned fresco murals (1934) depicting California Depression-era life — a rare chance to photograph New Deal public art in a landmark setting. Wild parrots (red-masked parakeets) nest on the hill.

  • GPS: 37.8024, -122.406
  • Elevation: 299 ft
  • Best time of day: sunrise for east bay and Bay Bridge views with warm light; night for illuminated tower and city lights
  • Sun direction: The tower sits on the crest of Telegraph Hill facing west. Sunrise light comes from the east across the bay — at this hour the tower is side-lit, and the East Bay hills glow amber behind it. At sunset the western sky behind the downtown skyline creates strong silhouette opportunities from across the bay or from lower North Beach. The tower is floodlit after dark, making it a distinctive nighttime landmark from Fisherman’s Wharf.
  • Access: 1 Telegraph Hill Blvd, San Francisco, CA 94133. Limited 30-minute parking on Telegraph Hill Blvd (arrives via Filbert St or Greenwich St stairs from North Beach). Muni 39-Coit bus directly to summit (weekends/limited weekdays). Grounds free, open daily 10 am–6 pm (hours vary seasonally). Elevator to top: $10 adult (cash/card). Interior murals are free with grounds access.
  • Difficulty: moderate
  • Recommended settings: Sunrise Bay View: f/8, 1/250 sec, ISO 100, 35mm  ·  Night Floodlit Tower: f/5.6, 8 sec, ISO 400, 24mm  ·  Interior Murals: f/2.8, 1/60 sec, ISO 1600, 24mm  ·  Telephoto Alcatraz: f/8, 1/500 sec, ISO 200, 200mm

Shots to chase:

  • Tower with Bay Bridge and Alcatraz in the background photographed from the upper viewing terrace at sunrise
  • Upward-looking shot from directly beneath the tower emphasizing the fluted Art Deco column against the sky
  • Night long exposure with the floodlit tower as foreground anchor and North Beach street lights below
  • WPA interior murals: wide-angle shot capturing the full 360° panorama of Depression-era Californian scenes
  • Wild parrots perched on the hillside eucalyptus with the tower rising behind — telephoto wildlife shot

Pro tip: Walk up the Filbert Street wooden stairway from Sansome Street for a scenic approach through terrace gardens — the stairway itself provides beautiful overhead angles of the tower appearing above overgrown cottage gardens. The wild parrots are most active at dawn and dusk near the summit; use a 200mm+ lens. Interior mural photography is allowed (no flash, no tripod).

Common mistake to avoid: Attempting to drive to the top on weekends leads to finding no parking and wasted time — take the 39 bus or walk the stairs. The tower exterior is unimpressive at midday flat light; exterior shots only work at golden hour or night. Shooting the Bay Bridge from the tower requires 200mm+ to bring it close enough to look dramatic.

8. Pier 39 Sea Lions

Since 1989, over 1,000 California sea lions have colonized the K-Dock wooden platforms at Pier 39 — one of the largest urban pinniped colonies in the world. The animals are mere feet from the viewing deck, allowing intimate wildlife photography with city and bay backgrounds unavailable in any other metropolitan setting in the US.

  • GPS: 37.8093, -122.41
  • Elevation: 5 ft
  • Best time of day: morning golden hour (low-angle sun from the east side-lights the sea lions, Marin Headlands visible in background)
  • Sun direction: The K-Dock sea lion platform faces northeast toward the bay. At sunrise, warm low light rakes across the dock from the east and illuminates the bronze sea lion bodies against the bay backdrop. By mid-morning the light becomes flat and overhead. Overcast days work well for sea lion detail shots without harsh shadows. At sunset the western sky is behind the viewer looking northeast — less dramatic for background color.
  • Access: Beach Street & The Embarcadero, San Francisco, CA 94133. Pier 39 grounds free, open daily from 10 am (sea lions visible at K-Dock, western end). Parking in the Pier 39 garage ($8–$15). Muni F-Market streetcar or the Embarcadero BART/Muni station (10-minute walk). Sea lions present year-round; peak population January–July.
  • Difficulty: easy
  • Recommended settings: Wildlife Action: f/5.6, 1/1000 sec, ISO 400, 200mm  ·  Environmental Portrait: f/8, 1/500 sec, ISO 200, 85mm  ·  Morning Golden Hour: f/5.6, 1/250 sec, ISO 200, 135mm  ·  Overcast Closeup: f/4, 1/400 sec, ISO 400, 200mm

Shots to chase:

  • Close-up portrait of sea lions piled on each other, whiskers and wet fur lit by low morning sun
  • Wide shot including multiple dock platforms with Alcatraz and Marin Headlands in the out-of-focus background
  • Action shot: sea lion launching off the dock edge or a large bull establishing dominance with a wide-open mouth bark
  • Eye-level shot (crouch down at the viewing rail) looking across the dock surface — the sea lions fill the foreground and the bay recedes
  • Silhouette of a sea lion barking upward against a pastel sunrise sky over the bay

Pro tip: Visit at 7–9 am before the crowds arrive (pier shops don’t open until 10 am) and the sea lions are most active after overnight rest. A 200–400mm telephoto fills the frame with individual animals. Bring earplugs — the barking is intense and disorienting for prolonged shoots. The December–January months see the largest aggregations (1,000+ animals).

Common mistake to avoid: Shooting from the upper viewing deck at the back of the crowd results in dock railings obscuring the animals — position yourself at the front rail for an unobstructed sight line. Midday harsh overhead light creates dark eye-socket shadows and specular highlights on wet skin. Do not use a flash, which disturbs the animals and produces flat, reflective results.

Want this in your pocket on the street?
The full-resolution version of every spot above — with full-page hero photography, GPS maps with gold location pins, sun direction diagrams, multi-season tables, and a complete safety + packing checklist — is inside the San Francisco Ultimate Photographer’s Guide PDF ($47). Print it, save it offline, take it on the walk. Get the guide →

9. Cable Car on California Street — Nob Hill

Cable Car on California Street — Nob Hill San Francisco photography sampleSave
Cable Car on California Street — Nob Hill — cinematic reference from the San Francisco Photographer’s Guide PDF

The California Street line climbs the steepest cable car grade in the city through the historic Nob Hill neighborhood, producing the quintessential San Francisco image: a red cable car cresting the hill against the bay and Bay Bridge. Unlike the crowded Powell lines, the California Street line retains authentic daily commuter use and offers a more architectural, less touristy backdrop.

  • GPS: 37.7921, -122.4084
  • Elevation: 376 ft
  • Best time of day: golden hour sunrise (cars run from ~6 am, side-lit by low eastern sun with Bay Bridge visible to the east)
  • Sun direction: California Street runs east–west on a significant gradient. Shooting eastward (from Stockton or Powell toward the Embarcadero) places the rising sun directly behind the receding streetscape — creating rim-lit cable cars, Bay Bridge, and East Bay hills all aligned in a single telephoto compression composition. Shooting westward captures sunset backlight but loses the bay backdrop. Overcast days even out contrast between cable car red and surrounding buildings.
  • Access: California Street cable car (Line 61) runs between California & Market St east terminus and California & Van Ness St west terminus. Best photo spot: California St at Stockton St (or one block east at Powell St). No car required — ride the cable car for $8 one-way. Street parking scarce. Muni Powell St BART/Muni station is 1 block south. Cars run 6 am–midnight daily.
  • Difficulty: easy
  • Recommended settings: Telephoto Compression: f/8, 1/500 sec, ISO 200, 200mm  ·  Environmental Street: f/8, 1/250 sec, ISO 100, 50mm  ·  Low Light Dawn: f/5.6, 1/125 sec, ISO 800, 85mm  ·  Panning Action: f/11, 1/30 sec, ISO 100, 85mm

Shots to chase:

  • Classic telephoto compression from California & Stockton: cable car ascending the hill with Bay Bridge and East Bay perfectly framed at street level
  • Wide street scene from the traffic island at Powell & California showing two cable cars passing each other on parallel tracks
  • Panning shot: tracking the moving cable car at 1/30 sec to show motion blur in the background while the car stays sharp
  • Interior shot from aboard the cable car: gripman at work with Nob Hill buildings flashing past the open side of the car
  • Low-angle from sidewalk at dawn: cable car silhouetted against a soft-lit sky as it crests the Nob Hill summit

Pro tip: Stand on the traffic median island in the center of California Street between Powell and Stockton for the safest and most level telephoto angle — the compression effect is maximized at 150–200mm from this position. Early morning (6–8 am) offers the fewest cars blocking the street scene. Riding the cable car in both directions while shooting from the open side costs only $16 and produces insider angles unavailable from street level.

Common mistake to avoid: Shooting from the sidewalk at wide angles eliminates the hill compression that makes the image iconic — distance and telephoto compression are essential. Arriving midday finds cable cars obscured by tour buses, delivery vehicles, and crowds. Confusing the California line with the Powell-Hyde line (different look and neighborhood) leads to shooting at less architecturally interesting locations.

10. Mission District Murals — Clarion Alley

Clarion Alley hosts over 100 rotating murals maintained by the Clarion Alley Mural Project (CAMP) since 1992 — one of the most concentrated and politically charged mural collections in the United States. The murals directly address race, immigration, gender, and housing justice in vivid, large-format imagery, making this a living gallery that changes multiple times per year and documents SF’s activist culture.

  • GPS: 37.7631, -122.4208
  • Elevation: 55 ft
  • Best time of day: midday on an overcast day (even diffuse light eliminates harsh shadows between buildings in the narrow alley)
  • Sun direction: Clarion Alley runs east–west between Mission and Valencia Streets. The alley is narrow (~15 feet wide), so direct sunlight creates extreme contrast between lit and shadowed mural sections — overcast light is significantly better. If shooting on a sunny day, morning light enters from the east end (Mission St side) and afternoon from the west end (Valencia St). North-facing walls are best lit by ambient sky light.
  • Access: Clarion Alley, between 17th and 18th Streets and Mission and Valencia Streets, Mission District, San Francisco, CA 94110. Free, open 24 hours. Street parking on 17th, 18th, or Valencia. Nearest Muni: 22-Fillmore or BART 16th Street Mission Station (2-block walk).
  • Difficulty: easy
  • Recommended settings: Overcast Full Wall: f/8, 1/160 sec, ISO 400, 24mm  ·  Detail Section: f/5.6, 1/250 sec, ISO 200, 50mm  ·  Environment Wide: f/8, 1/125 sec, ISO 400, 16mm  ·  Portrait With Mural: f/2.8, 1/400 sec, ISO 200, 85mm

Shots to chase:

  • Full-length alley perspective looking east from Valencia Street with murals lining both walls converging to a vanishing point
  • Detail shot of a single large-format mural panel filling the frame with bold colors and political imagery
  • Environmental portrait: local resident or artist in front of a mural with the alley depth visible behind
  • Ground-level looking up at an overhead mural element with the narrow strip of sky above creating a graphic compositional frame
  • Documentary sequence: side-by-side 50mm shots of four contrasting murals showing the range of styles and subjects

Pro tip: Check the Clarion Alley Mural Project website (clarionalleymuralproject.org) for information on new murals or painting events — attending a live painting session produces extraordinary behind-the-scenes images. Also visit Balmy Alley (24th and 25th between Harrison and Treat) 5 minutes away, which has older Chicano-tradition murals in a very different visual style. Bring a wide-angle lens (16–24mm) for the narrow alley width.

Common mistake to avoid: Visiting on a bright sunny day produces unmangeable contrast — half the murals will be in shadow, half in blown-out direct light. Shooting only the most famous/colorful murals at the Mission Street end misses powerful political work deeper in the alley. Not checking for recent changes means your research-based shot list may be irrelevant — murals are frequently repainted.

11. Baker Beach — Golden Gate Bridge View

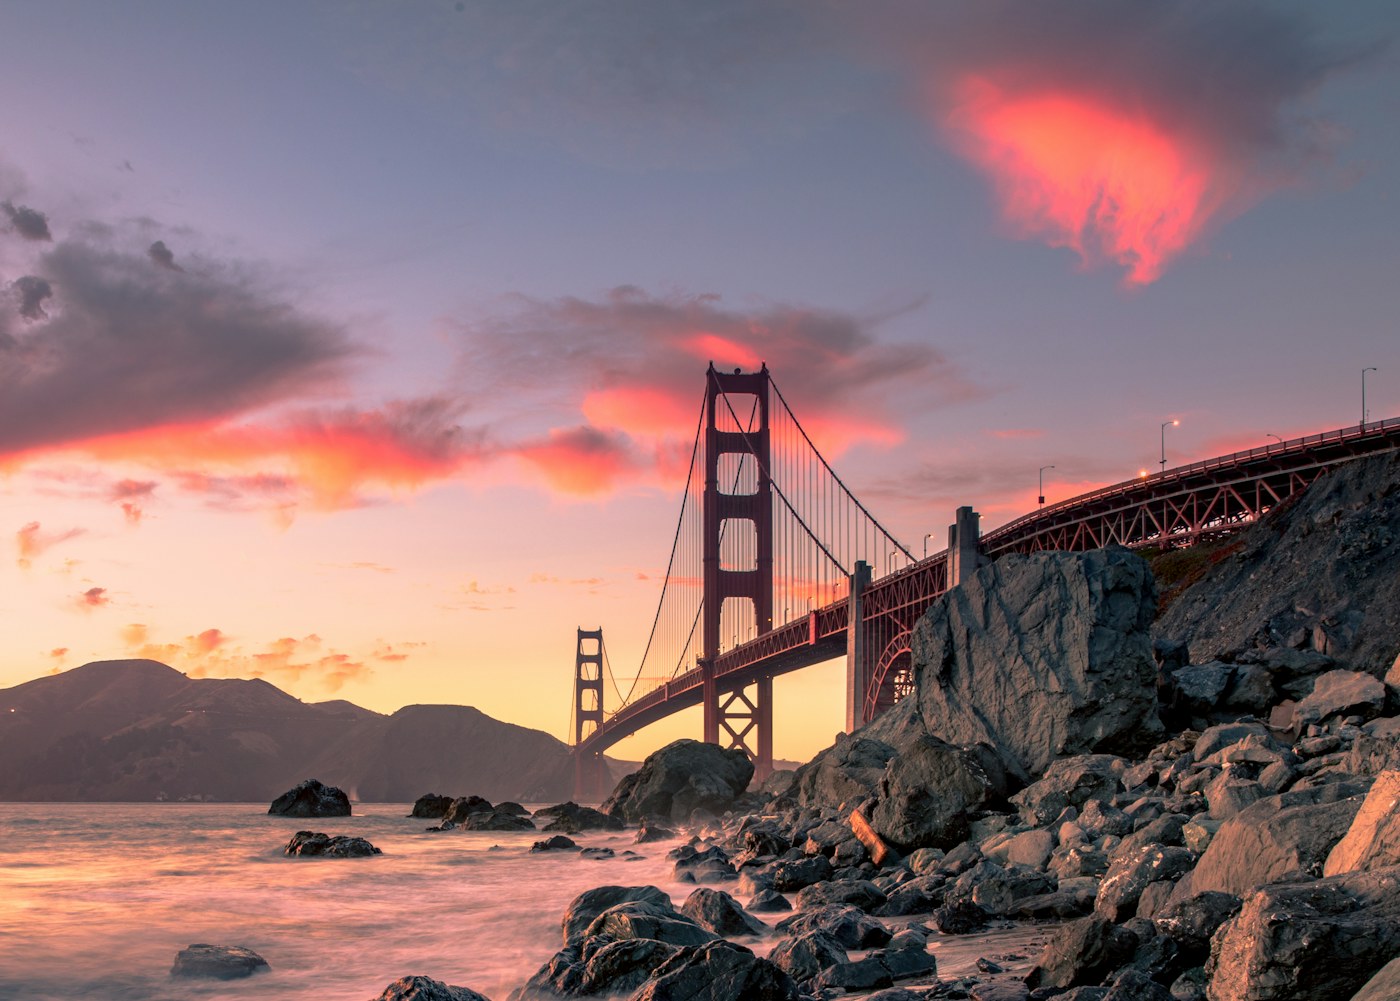
Baker Beach provides the most intimate ground-level view of the Golden Gate Bridge’s southern anchorage tower, with just 700 yards of open water between the beach and the bridge base. The combination of Pacific surf, sea-stack rock formations, dramatic serpentine sea cliffs, and the massive bridge makes for compositions that are simultaneously intimate and epic.

  • GPS: 37.7944, -122.4833
  • Elevation: 10 ft
  • Best time of day: sunset golden hour (sun drops toward the Pacific northwest, side-lighting the bridge from the west and illuminating the beach surf)
  • Sun direction: Baker Beach faces northeast across the mouth of the bay toward the Golden Gate Bridge. At sunset, the sun tracks northwest and drops behind the Marin Headlands, casting warm sidelight and then backlight on the bridge’s south tower — the south tower is dramatically close and dominates the frame. Sunrise over the East Bay hills illuminates the bridge’s eastern face and the SF skyline behind the shooter. Low tide exposes smooth sand for reflections.
  • Access: Baker Beach, Presidio of San Francisco, CA (NPS). Free public beach, open 24 hours. Parking lot on Gibson Rd off Lincoln Blvd (free, ~40 spaces). Muni 29-Sunset to Bowley St, then 10-minute walk. The north end of the beach (clothing-optional section) provides the closest bridge views. Large waves and undertow — no swimming.
  • Difficulty: easy
  • Recommended settings: Sunset Bridge: f/11, 1/60 sec, ISO 200, 35mm  ·  Surf Long Exposure: f/16, 2 sec, ISO 100, 24mm  ·  Telephoto Tower: f/8, 1/500 sec, ISO 200, 200mm  ·  Blue Hour Tripod: f/11, 15 sec, ISO 400, 24mm

Shots to chase:

  • Wide angle with foreground rocks and surf leading into the frame toward the bridge’s south tower at golden hour
  • Long exposure at dusk: silky smooth waves sweeping across the sandy beach with the bridge lit by fading sunset color
  • Telephoto compression from the north end of the beach: the massive south bridge tower filling the frame with city visible behind
  • Low-tide reflection shot: mirror-smooth wet sand reflecting the orange bridge tower and pink sky
  • Vertical portrait composition: towering serpentine cliff face on the right, bridge base on the left, surfer watching in the middle

Pro tip: The north end of Baker Beach offers the closest and most dramatic views of the south tower — walk the full length of the beach (0.8 miles) rather than shooting from the parking lot area. A 2-stop graduated ND filter helps balance the bright sky against the darker beach foreground. Checking tide charts (low tide ±2 hours) reveals wet-sand reflection opportunities that transform the composition.

Common mistake to avoid: Shooting from the parking-lot end of the beach produces a more distant, less dramatic view of the bridge — walk to the north end. Visiting on weekday mornings when the Presidio fog is still heavy (7–10 am in summer) results in a completely obscured bridge. Summer afternoons consistently see fog rolling in from the west and blocking bridge views by 4 pm.

12. Chinatown Dragon Gate

The Dragon Gate (built 1970, donated by Republic of China) is a three-bay ceremonial paifang-style gateway with green ceramic glazed tile roofs, dragon carvings, and a plaque reading ‘All under heaven is for the good of the people’ — the symbolic entry to the oldest and most densely populated Chinatown in North America. It stands at the crossroads of Chinatown’s Grant Avenue commercial district and the adjacent Union Square, making it a cultural threshold unlike any other in the US.

  • GPS: 37.7908, -122.4056
  • Elevation: 55 ft
  • Best time of day: blue hour after sunset (neon signs and gate lanterns illuminate; traffic light trails on Bush Street add motion)
  • Sun direction: The Dragon Gate faces south on Grant Avenue at Bush Street. Morning sun from the east side-lights the gate’s green tile roofline. By midday, direct overhead sun creates harsh shadows in the intricate carved details. Overcast days produce even light that allows the vivid green, gold, and red tile colors to pop without glare. At blue hour, the gate’s interior lanterns come on and create a warm golden glow against the cooling blue sky — the ideal balance.
  • Access: Grant Ave & Bush St, San Francisco, CA 94108. Foot traffic only — no cars on Grant Ave north of Bush. Free to photograph 24/7. On-street parking on Bush St or in Union Square garage (2-block walk). BART/Muni Montgomery Station (5-minute walk). The Chinatown neighborhood is densely active daily 9 am–9 pm.
  • Difficulty: easy
  • Recommended settings: Blue Hour Gate: f/8, 4 sec, ISO 400, 35mm  ·  Overcast Detail: f/8, 1/160 sec, ISO 400, 50mm  ·  Night Neon: f/5.6, 6 sec, ISO 800, 24mm  ·  Street Scene: f/5.6, 1/160 sec, ISO 800, 35mm

Shots to chase:

  • Classic frontal shot from the southeast corner of Bush & Grant: full gate with roofline, dragons, and Grant Avenue receding behind
  • Blue-hour long exposure with the gate’s lanterns glowing amber and car light trails on Bush Street streaking below
  • Vertical shot looking up through the central arch at the intricate tile and carved detail with the sky visible above
  • Street-level wide angle from inside Chinatown looking south through the gate toward Union Square with pedestrian traffic in motion
  • Telephoto compression from further down Grant Avenue: the gate appears smaller but is framed by the crowded storefronts of the street

Pro tip: Position yourself at the southeast corner of the Bush/Grant intersection to capture the gate’s full decorative facade with the three tiers of green roofing and flanking columns. Include a human figure in the central archway for scale — the gate is only 20 feet tall and scale context makes it more imposing. At Chinese New Year (late January/February) the gate is draped in red lanterns and surrounded by firecracker smoke and lion dances — the single best time of year to photograph this location.

Common mistake to avoid: Shooting from directly in front (standing in the street on Bush) is dangerous and illegal — use the crosswalk and sidewalks. Midday overhead sun creates deep shadows under the roofline that hide the intricate tile and carved decoration. Arriving on a Sunday when Grant Ave is pedestrianized but extremely crowded makes clean architecture shots nearly impossible.

When to photograph San Francisco: a year-round breakdown

San Francisco is photogenic every month of the year — but the conditions differ radically by season. Here is what to expect:

September–November (clearest skies, golden-light fog burns off early) and February–April (lush green hills, mild rain possible)

Photographer safety in San Francisco: read this

City photography has its own risks: gear visibility, neighborhood timing, traffic, weather. Read the briefing before you go.

  • Gear visibility: Use a discreet bag with no obvious camera branding. Keep a body strapped under a jacket on transit.
  • Neighborhood timing: Pre-dawn and post-sunset shoots reward early scouting. Cross-reference each location with current local guidance and choose well-lit transit routes.
  • Situational awareness: Headphones out. One eye in the viewfinder, one on the street.
  • Traffic: Bridges, medians, and bike lanes are not setup zones. Shoot from sidewalks and pedestrian areas only.
  • Weather: Summer storms move quickly; winter cold drains batteries. Layer up, keep gear dry, watch for ice on cobblestones at blue hour.

The complete safety briefing is inside the San Francisco Photographer’s Guide PDF.

Take this guide into the city

This post is the complete field reference. The San Francisco Ultimate Photographer’s Guide PDF is the field-deployable version: full-page resolution hero photography, GPS maps with gold pins for every location, multi-season shooting calendars, gear notes per location, sun-angle diagrams, the full city safety briefing, and a print-ready editorial layout in Framehaus black and gold. Save it offline. Print it. Take it on the walk.

San Francisco Ultimate Photographer’s Guide
Downloadable PDF · 12 GPS-mapped locations · Multi-season calendar · City safety briefing · Packing checklist

Get the San Francisco guide — $47

Book your tours & experiences in San Francisco

All links go to Viator (a TripAdvisor company), the world’s largest marketplace for guided experiences. Tagged as affiliate per FTC.

Also on Amazon: gear that helps with this technique

Quick Amazon shortcuts to the gear most useful for this kind of shot. Use them if Prime shipping or Amazon credit makes more sense than B&H. As an Amazon Associate ShutYourAperture earns from qualifying purchases.

Take San Francisco home in your pocket.

Every shot location, every angle, every time of day worth shooting. Printable PDF + GPS-tagged map.

Instant download. Works on phone, tablet, and printed.

Continue reading

← Back to U.S. Cities Photography Guides

Related guides nearby

Three more photography guides within striking distance — perfect for combining into one trip.

Browse all 78 guides → · Open the map

Save your trip-planning hours

The complete San Francisco guide is $47

All vantage points above + 5 bonus secret spots, printable map, gear pack list, and editing recipes. One-time payment, instant download, lifetime updates.

Buy San Francisco PDF →

Common questions about the San Francisco guide

Is the San Francisco photography guide worth $47?

For most photographers, yes. The guide saves 8-12 hours of trip-planning research and prevents the most common mistake of San Francisco photography: shooting at the wrong time of day. If a single better frame is worth $47 to you, the guide pays for itself on day one. Buyers get every GPS coordinate, every golden-hour window, every cultural rule, and a printable shot list.

Does the San Francisco guide include GPS coordinates?

Yes — every vantage point in the guide has Google Maps-ready GPS coordinates so you can pin them before you fly. The guide also includes a printable map showing all locations clustered by walking distance, so you can build efficient half-day routes.

What's in the San Francisco PDF that isn't in this article?

The article shows the highlights. The PDF includes: 5 additional secret spots not published online, a 14-day itinerary with daily routes, the full camera-settings cheat sheet for every scenario in San Francisco, a printable gear packing list, post-processing recipes with screenshot examples, and a list of local guides we trust for portrait commissions.

Do I get the Lightroom presets too?

The $47 guide is the PDF only. The matching San Francisco preset pack is a separate $19 download — most buyers grab both as a bundle and save the editing time. Both are instant download, both work on Lightroom Classic and Lightroom Mobile.

Will the guide work for a San Francisco trip in 2026?

Yes. The guide is updated annually as fees, restrictions, and new vantage points change. All buyers get free lifetime updates. The 2026 edition includes the latest drone rules, museum photography policies, and seasonal light data for the year.

Get the San Francisco guide · $47