Best Photography Spots in Grand Teton National Park: 12 Locations With GPS
edinchavez01-20). Buying through these links costs you nothing extra and helps fund our free guides.
Grand Teton National Park is one of the most photogenic landscapes in the United States. If you have a camera and the patience to show up before dawn, Grand Teton will give you images that last a career — but only if you know where and when to point it.
This is the definitive field guide to the 12 best photography spots in Grand Teton National Park, with GPS coordinates you can drop straight into Google Maps, exact camera settings tuned to Grand Teton’s unique light, precise timing for every location, and the access notes nobody else bothers to document. It mirrors the intel inside our Grand Teton Ultimate Photographer’s Guide ($47 PDF) — a downloadable field guide with full-page hero images, GPS maps, seasonal tables, a safety briefing, and a complete photographer’s packing list. Get the guide →
Planning multiple parks? See also: best photography spots in Zion, Grand Canyon, and the full National Parks Photography Guides hub.
12 GPS-mapped locations · Exact camera settings · Multi-season shooting calendar · Free annual updates
Download the PDF guide →
Get the Grand Teton Ultimate Photographer’s Guide
Every location below — pre-mapped with GPS, golden-hour timing, gear recommendations, cultural rules, and a 14-day itinerary. Downloaded by 200+ working photographers.
Quick jump to the 12 spots
- Schwabacher Landing
- Oxbow Bend
- Snake River Overlook
- Mormon Row — T.A. Moulton Barn
- Jenny Lake
- String Lake
- Cunningham Cabin
- Signal Mountain Summit
- Teton Glacier Viewpoint
- Black Tail Ponds Overlook
- Cascade Canyon
- Inspiration Point
Before you shoot Grand Teton: the essentials
- Park entrance fee (2026): $35 per vehicle (7-day pass); $30 motorcycle; $20 individual/pedestrian/cyclist on foot or bike (age 16+). Pass is valid at both Grand Teton AND Yellowstone National Parks (joint corridor). $70 Grand Teton annual park pass; $80 America the Beautiful annual pass covers all 400+ federal sites. Children under 16 free. Non-US residents pay additional $100 per person surcharge. Free entrance days 2026: Feb 16, May 25, Jun 14, Jul 3–5, Aug 25, Sep 17, Oct 27, Nov 11. Current rates at nps.gov.
- Best photography seasons: Fall (late Sep–early Oct) for golden aspens and elk rut; Summer (Jun–Aug) for wildflowers and long days; Spring (May–Jun) for calving moose and snow-dusted peaks; Winter (Nov–Mar) for dramatic snow scenes at accessible locations.
- Drone policy: Drones are completely prohibited on all NPS land under 36 CFR § 1.5. Fines up to $5,000.
The full-resolution version of every map below — plus seasonal calendars, gear matrices per location, sun-angle diagrams, and a complete photographer’s packing checklist — is inside the Grand Teton Photographer’s Guide PDF ($47).
1. Schwabacher Landing
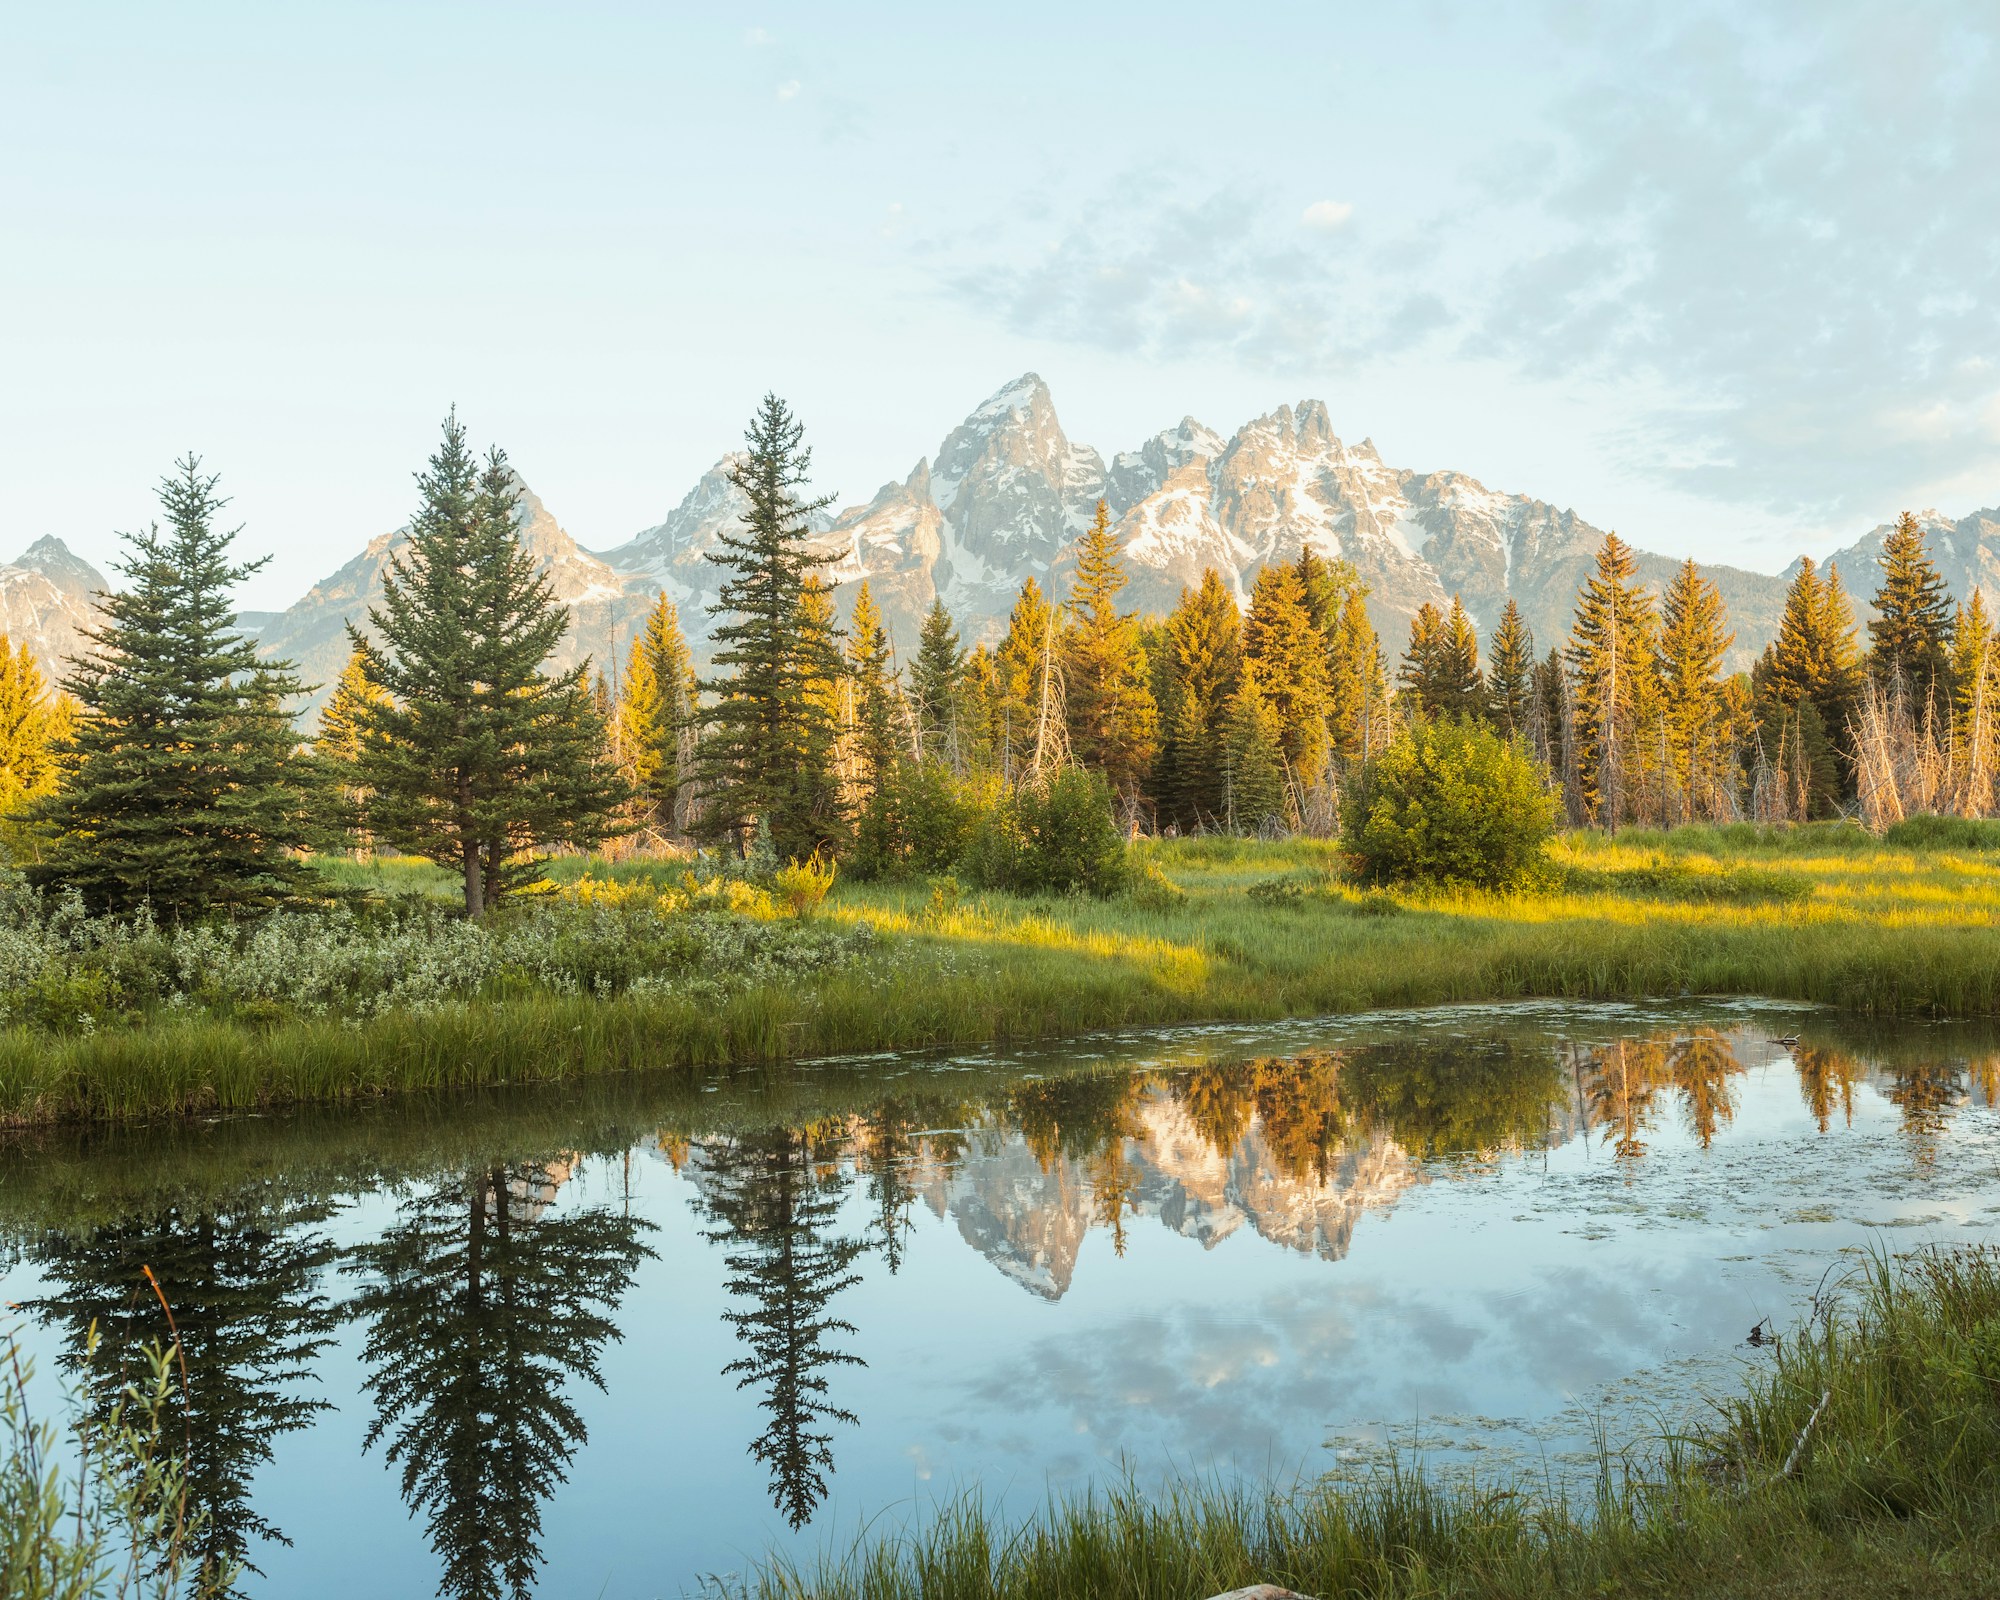
Beaver-dammed side channels of the Snake River create mirror-still reflection pools — the most iconic reflection photography in all of Grand Teton National Park. Unlike Oxbow Bend (which faces Mount Moran), Schwabacher Landing reflects Grand Teton and the Cathedral Group (Grand, Teewinot, Owen) perfectly in the foreground water. Moose, beavers, and river otters frequently present in the willows. The scene is accessible with a flat 5-minute walk from the car, making it achievable for all fitness levels.
- GPS: 43.6847, -110.6789
- Elevation: 6,800 ft
- Best time of day: Sunrise (primary — the defining money shot); mid-morning acceptable on calm days
- Sun direction: The Teton Range faces east, meaning the peaks catch the first alpenglow of sunrise while the photographer standing on the eastern bank is still in pre-dawn shadow. This creates a stunning contrast: mountains blazing in pink-orange light while the still beaver-dammed Snake River channel reflects the entire Teton skyline. Peak alpenglow arrives 10–15 minutes before official sunrise. By 30–45 minutes after sunrise, direct sunlight falls across both mountains and foreground simultaneously — a broader, warmer window. Avoid afternoon/sunset: the Tetons face away from the setting sun, leaving the peaks in shadow or hazy backlight.
- Access: Turn west off US Highway 191/89 onto an unmarked gravel road approximately 4.5 miles north of the Moose Entrance Station (look for small brown ‘Schwabacher Landing’ sign). Drive 1 mile to parking area. Short 5-minute walk north along the river bank reaches the main reflection channel.
- Difficulty: Easy — flat walk on dirt path, 0.1 miles to primary viewpoint; 0.5-mile walk north along river bed reveals additional reflection angles
- Recommended settings: f/8–f/11, ISO 100–400, shutter 1/4–4 sec on tripod for reflection; bracket 2–3 stops for highlight/shadow dynamic range. Use graduated ND filter (3-stop) to balance bright sky against dark water. For alpenglow only: ISO 400–800, f/5.6, shutter 1/15–1/2 sec.
Shots to chase:
- Classic wide-angle reflection: Cathedral Group reflected in the still beaver channel at alpenglow, f/10, 16–24mm
- Vertical panoramic: mountain reflection stretching top to bottom of frame using 24mm portrait orientation
- Wildlife integration: moose in the willows with Teton reflection in foreground channel (400mm+)
- Pre-dawn blue hour: deep blue sky, stars fading, mountains just beginning to glow above dark mirror reflection
- Telephoto compression: 200–400mm to stack mountain peaks tightly above the winding river channel
Pro tip: [‘Arrive 30–40 minutes before sunrise to secure position and let the water settle — any disturbance creates ripples that ruin reflections’, ‘Walk 0.25–0.5 miles north from the main parking area for less-photographed angles with unique foreground willows and cottonwoods’, ‘Bring river sandals or waterproof boots — wading a few feet into the shallow channels gives compositions inaccessible to shore-only photographers’, ‘Wind is the enemy of reflections: check forecast the night before. Calm, still mornings (common in summer) yield the best mirror surfaces’, ‘In fall (late September), cottonwoods along the bank turn bright gold — a completely different and spectacular subject’, ‘Light painting is NOT permitted in Grand Teton; plan exposures to use natural light only’]
Common mistake to avoid: [‘Arriving too late — arriving at sunrise rather than 30 min before sunrise misses the alpenglow window’, ‘Shooting only from the main parking area viewpoint — the best reflections are 200–400 yards north along the bank’, ‘Forgetting a tripod — handheld at low light produces blurred reflections’, ‘Disturbing the water surface by walking too close to the channel edge before shooting’, ‘Not checking for wind — overcast calm days often yield better reflections than clear but windy mornings’]
2. Oxbow Bend
The north-facing oxbow curve of the Snake River creates a large, naturally protected reflection pool that shows Mount Moran — the widest, most photogenic face in the Teton Range — perfectly mirrored. Unlike the Cathedral Group peaks visible from southern locations, Moran’s distinctive dark vertical intrusions and ice-filled summit bowl make it unique. Wildlife is prolific: great blue herons, trumpeter swans, moose, river otters, osprey, and bald eagles work the river bend year-round. Fall is extraordinary when the aspen and cottonwood surrounding the bend turn gold.
- GPS: 43.8635, -110.5443
- Elevation: 6,820 ft
- Best time of day: Sunrise (primary reflection window); first week of October for peak fall color + reflection
- Sun direction: Located in the northern section of the park, Oxbow Bend faces west toward Mount Moran (12,605 ft), the park’s most massively-faced peak. At sunrise, the east-facing Moran catches direct first light while the Snake River’s oxbow curve creates a large, calm reflection pool that mirrors the entire massif in warm alpenglow. Photographers standing on the east bank shoot west — the rising sun is behind them, lighting the mountains from the optimal angle. This is one of the rare Grand Teton locations that also works at certain sunset windows (mid-October to mid-February, when the sun sets slightly south of Moran’s face).
- Access: Located on US Highway 89/191/287, approximately 1 mile east of Jackson Lake Junction and 2 miles west of Moran Junction. Large pull-out parking area directly on the highway’s north side. No hiking required — the viewpoint is roadside. Walk east or west along the bank to vary composition.
- Difficulty: Easy — roadside access with no hiking required; some photographers walk 0.2–0.5 miles along the riverbank
- Recommended settings: f/8–f/14, ISO 100–400, shutter 1/2–4 sec for reflections. Graduated ND filter (2–3 stops) essential to balance bright mountain faces against dark river surface. Telephoto (200–400mm) for wildlife in the river corridor. Polarizer useful mid-morning to cut water glare.
Shots to chase:
- Classic Mount Moran reflection: the mountain mirrored perfectly in the calm oxbow at alpenglow, 16–35mm wide
- Autumn color explosion: first week of October gold aspen canopy surrounding the bend with Moran reflection (one of the most famous fall shots in the American West)
- Wildlife portrait: trumpeter swans swimming in the reflection pool with Moran above, 400–600mm
- Panoramic: full Teton Range sweep from this northern perspective where the range appears more condensed, 24mm stitched panorama
- Pre-dawn Milky Way over Moran: face west with wide-angle, include river in foreground (May–August)
Pro tip: [‘Arrive at least 30–45 minutes before sunrise; the reflection pool fills extremely quickly with other photographers in peak season’, ‘Walk east along the bank 100–300 yards from the main pull-out for cleaner compositions without guardrails in frame’, ‘The first week of October is widely considered the single best week for Oxbow Bend photography — cottonwoods and aspens at peak gold’, ‘Wind kills reflections — check weather the night before; fog patches over the river in spring and fall add dramatic atmosphere’, “Mount Moran’s northwest face catches alpenglow differently than the Cathedral Group; at Oxbow, Moran’s glowing face reflects across the largest water surface in the park”]
Common mistake to avoid: [‘Shooting in the middle of the day — the Tetons face east and Moran is in full shadow or harsh light by mid-morning’, ‘Using only the main parking pull-out — walking east reveals foreground cottonwood trees and river bends unavailable from roadside’, ‘Skipping the location in summer — although fall is best, summer mornings with clean reflections are spectacular’, ‘Including the highway guardrail in frame — position carefully to hide infrastructure’]
3. Snake River Overlook
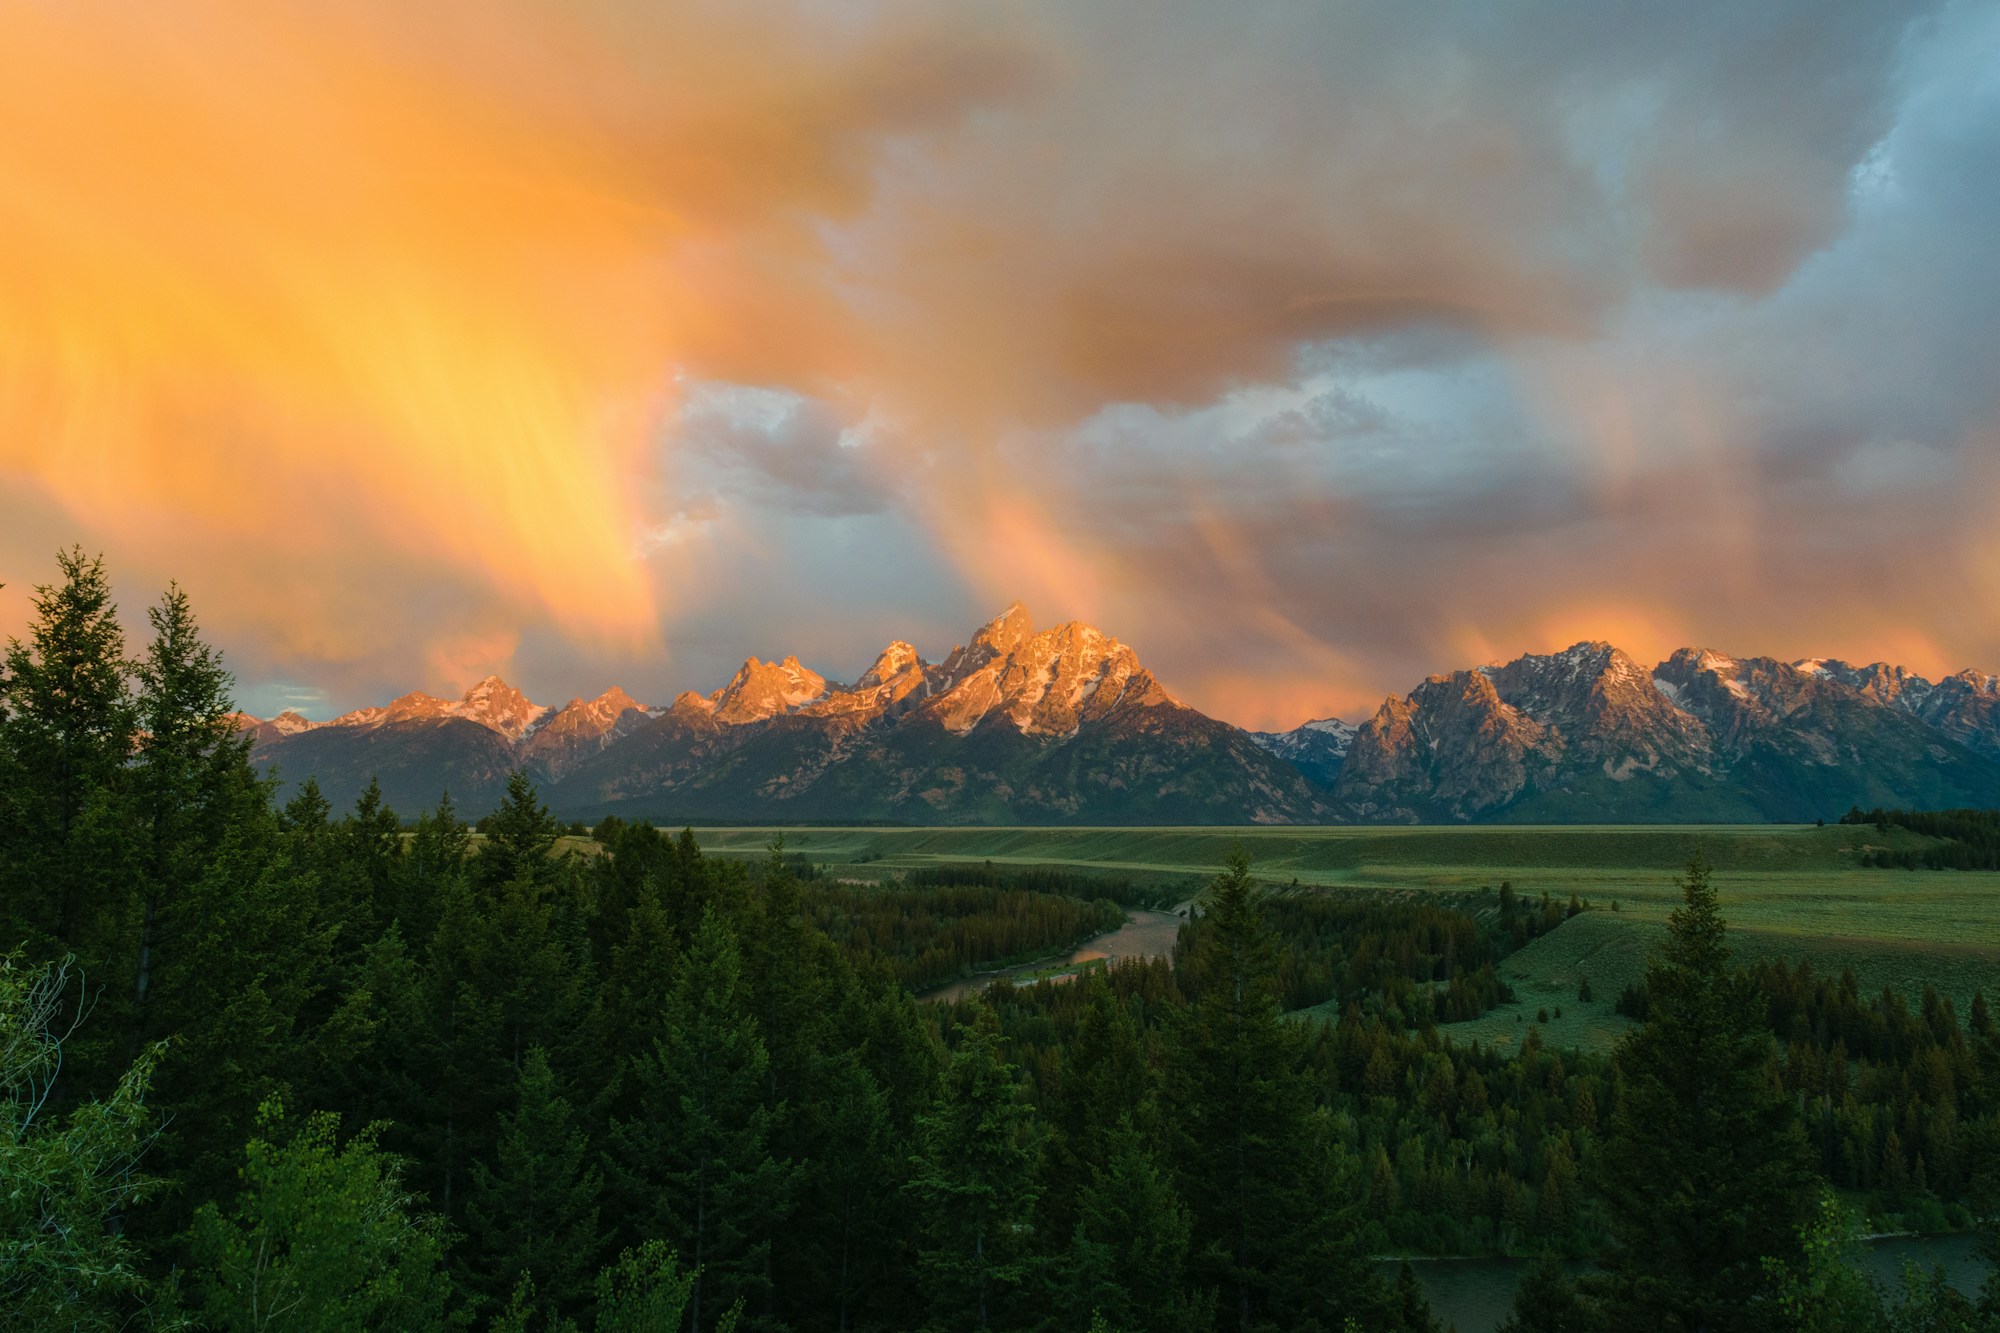
Ansel Adams’ 1942 image ‘The Tetons and the Snake River’ is one of the most reproduced landscape photographs in American history — and this is exactly where he made it. The naturally sinuous S-curve of the Snake River provides a powerful compositional leading line drawing the eye from foreground up to the full Teton Range backdrop. The elevated vantage point gives a bird’s-eye perspective unavailable at river-level locations. In fall, the cottonwoods along the river turn vivid gold; in winter (when accessible), snow blankets the river banks creating a striking black-and-white scene.
- GPS: 43.7878, -110.5278
- Elevation: 6,942 ft
- Best time of day: Sunrise (primary) — Ansel Adams made this photograph in 1942; early morning light from the east illuminates both river and peaks simultaneously
- Sun direction: The overlook sits elevated above the Snake River on its east bank, facing west-northwest toward the Teton Range. At sunrise, the rising sun behind the photographer lights up the entire scene: the snaking river curves visible below, and the Teton peaks (Grand Teton, Teewinot, Mount Owen, Middle Teton) catch direct east-facing alpenglow. The photographer is above the shadow line from the elevated position, giving earlier, richer light than valley-floor locations. Afternoon and sunset can be difficult — the sun moves behind the Tetons, causing backlight that washes out mountain detail unless dramatic clouds are present.
- Access: Located directly on US Highway 89/191/26 approximately 6 miles north of Moose Junction and 12 miles south of Moran Junction. Large paved parking lot on the west side of the highway with handicapped-accessible overlook platform. No hiking required.
- Difficulty: Easy — fully accessible paved overlook platform above the river bend
- Recommended settings: f/8–f/16, ISO 100–400, shutter 1/125–1/500 sec at sunrise (faster than reflection shots due to elevated dry viewpoint). Wide-angle 16–35mm to capture full river curve and mountain range. Sunrise: bracket 2 stops. For starburst on rising sun: f/16–f/22.
Shots to chase:
- The Ansel Adams classic: full S-curve of Snake River with complete Teton Range backdrop, 24mm, f/11
- Telephoto compression: 200mm to stack river bends and compress mountains into a tighter, more graphic composition
- Fall color: golden cottonwoods lining the river bank with Tetons above, early October peak
- Winter snow: when accessible (road plowed), snow-covered river bank creates the closest approximation to Adams’ original composition
- Moon setting: early morning with moon descending behind the Tetons — dramatic when timed with alpenglow
Pro tip: [“Tree growth since 1942 partially blocks the original Adams foreground view — position at the overlook’s far left (north) end for the clearest river bend view”, ‘In past decades, photographers climbed the guardrail for a higher vantage; this is now extremely dangerous due to the steep cliff edge — do not attempt’, “This is one of only two ‘Famous Four’ GTNP locations accessible in winter (Oxbow Bend is the other) — snow scenes here are spectacular”, ‘Arrive 45 min before sunrise during summer peak season (Jul–Aug); the small overlook fills with photographers’, ‘Mid-morning (1 hour after sunrise) is when both mountains and river are equally lit — good for those who cannot do pre-dawn visits’]
Common mistake to avoid: [‘Shooting afternoon or sunset without dramatic clouds — the backlit Tetons appear washed out and hazy’, “Standing at the center of the overlook — the northernmost position has the clearest view of the river’s S-curves”, “Using too long a focal length — the river’s sweeping S-curve is the primary compositional element and needs a wide angle to capture fully”, ‘Not accounting for shadow on the foreground — at exact sunrise, the overlook ledge briefly casts shadow on the river below; wait a few minutes for the shadow to fall below the trees’]
4. Mormon Row — T.A. Moulton Barn
One of the most photographed barns in the United States — the T.A. Moulton Barn (built circa 1916) is a historic homesteading-era structure that sits in the open Antelope Flats sagebrush meadow with an unobstructed, direct view of the entire Cathedral Group rising behind it. The rustic wooden construction, the flat meadow foreground, and the massive Teton backdrop create a classic Wyoming scene that has appeared on countless magazine covers and postcards. In early June, wildflowers bloom in the meadow; in late September, the surrounding aspens turn gold; in winter, snow-covered scenes are extraordinary.
- GPS: 43.6633, -110.6635
- Elevation: 6,840 ft
- Best time of day: Sunrise (definitive primary) — barn front and Teton Range both face east and are simultaneously illuminated by first light; the photographer shoots west with the rising sun behind them
- Sun direction: The T.A. Moulton Barn and the Teton Range both face east — this is a pure sunrise composition. At sunrise, the eastern light hits the front of the barn and the east-facing mountain range in exactly the same warm light simultaneously. At sunset, the front of the barn falls into shadow and the mountains are backlit — a far less satisfying composition. The barn is one of the few Grand Teton subjects where the sun-on-subject and sun-on-mountains alignment is perfect at a single time of day.
- Access: From US Highway 89/191, turn west onto Antelope Flats Road (gravel, well-maintained) approximately 1.5 miles north of the Moose Entrance Station. Drive 1.8 miles on Antelope Flats Road to Mormon Row Historic District. T.A. Moulton Barn is on the south side of the road with a small parking area. Vault toilet at this location. John Moulton Homestead (second barn) is 0.4 miles further east. Road closed in winter — use Gros Ventre Road from further south on US-89 during winter months.
- Difficulty: Easy — flat walk in open sagebrush meadow. Drive-up access with walking distances under 0.25 miles.
- Recommended settings: f/8–f/11, ISO 100–400, shutter 1/125–1/500 sec at sunrise. Wide 16–35mm to capture barn + full mountain range. Telephoto 200mm to compress mountains closer to barn. Bracket 2 stops for sky-foreground balance.
Shots to chase:
- Classic wide: barn and fence in sagebrush foreground with full Teton Range backdrop at alpenglow, 24mm f/10
- Irrigation ditch reflection: kneel at the small footbridge near the barn to capture the barn reflected in the old irrigation channel (historic and rarely photographed)
- Telephoto compression: 200–400mm to appear to stack Grand Teton directly behind the barn roof
- Wildflower foreground: early June, yellow balsamroot wildflowers covering the meadow with barn and mountains behind
- Winter: snow-covered roof and sagebrush flats with the Tetons behind (access via Gros Ventre Road)
- Vertical portrait with leading fence line: the old split-rail fence leading toward the barn creates a dynamic diagonal
Pro tip: [‘Shoot from slightly left-of-center (south of the road) to get the most iconic T.A. Moulton Barn composition’, ‘The footbridge south of the parking area is the location for the irrigation ditch reflection shot — rarely done, extremely rewarding’, ‘Visit both barns: T.A. Moulton (more photogenic structure) and John Moulton Homestead (multiple buildings, slightly different mountain angle)’, ‘Be mindful of your own long shadow at sunrise — a shadow stretching hundreds of feet west into the frame is a common error’, ‘Light painting is NOT permitted — plan for natural ambient exposures only’, ‘In summer, grass grows very tall by August and can obscure low-angle foreground compositions — May–July and September–October have the best meadow conditions’]
Common mistake to avoid: [‘Shooting at sunset — the barn front and mountains are both in shadow; the backlit composition is significantly weaker’, ‘Arriving exactly at sunrise rather than 20–30 minutes before for civil twilight setup time’, ‘Casting your own shadow into the wide-angle foreground at dawn’, ‘Ignoring the John Moulton Homestead 0.4 miles east — it offers a different mountain angle and a cluster of historic buildings’, ‘Not exploring the meadow south of the road for alternative low-to-the-ground foreground perspectives’]
Want this in your pocket on the trail?
The full-resolution version of every spot above — with full-page hero photography, GPS maps with gold location pins, sun direction diagrams, multi-season tables, and a complete safety + packing checklist — is inside the Grand Teton Ultimate Photographer’s Guide PDF ($47). Print it, save it offline, take it into the park. Get the guide →
5. Jenny Lake
Jenny Lake is the park’s most visited natural feature — a glacially-carved lake 2.5 miles long and 1.2 miles wide, sitting directly below the Teton Cathedral Group. The Jenny Lake Overlook on the scenic loop drive provides one of the best close-up views of Cascade Canyon mouth and Mount Teewinot. The lake itself is renowned for its extraordinary clarity and alpine blue color. Boat and kayak activity adds human-interest elements. Wildlife: bald eagles fish the lake, moose wade the shoreline willows.
- GPS: 43.7543, -110.7284
- Elevation: 6,783 ft
- Best time of day: Sunrise (primary) for reflections; morning for boat and kayak activity; late afternoon for western light on canyon walls above
- Sun direction: Jenny Lake sits immediately east of the Cathedral Group — Grand Teton (13,770 ft), Teewinot (12,325 ft), and Mount Owen (12,928 ft) rise dramatically directly west of the lake. At sunrise, the peaks catch the first alpenglow while the lake surface reflects them. The Jenny Lake Overlook on the one-way scenic drive faces west toward the mouth of Cascade Canyon, making it a strong morning shot year-round. Light quality is best in the first 2 hours after sunrise before harsh mid-day light.
- Access: From Teton Park Road, turn west at South Jenny Lake Junction (approximately 8 miles north of Moose). Jenny Lake Visitor Center, boat launch, and main parking are here. The Jenny Lake Scenic Loop Drive (one-way, northbound) provides the best photography pull-offs. Boat shuttle operates May through September ($18 round trip) from East Dock to West Dock at Cascade Canyon Trailhead.
- Difficulty: Easy for lakeside and overlook photography; Moderate (2.2 miles round trip via boat shuttle) to reach Inspiration Point and Cascade Canyon trail junction
- Recommended settings: f/8–f/11, ISO 100–400 for landscape; f/5.6–f/8 for wildlife. Wide-angle 16–35mm for lake + mountain panoramas. Telephoto 400mm for bird-of-prey fishing activity. Polarizer effective for cutting water surface glare mid-morning.
Shots to chase:
- Jenny Lake Overlook: Teewinot and Cascade Canyon mouth perfectly framed above the lake, 24–35mm
- Low waterline perspective: get to the rocky northeast shore for reflections of Cathedral Group at sunrise
- Boat shuttle kayak: rent a kayak and paddle to the lake’s western shoreline for the closest mountain views from water level
- Wildflower meadow: lupine and Indian paintbrush bloom in the meadows around the south shore parking area in July
- Bald eagle fishing: 400–600mm from the east shore, eagles hunt the lake morning and evening
Pro tip: [‘The Jenny Lake Overlook pull-off on the one-way scenic loop road (not the main visitor center) is the best stationary photography vantage point — faces directly into Cascade Canyon’, ‘Arriving by 6 AM in summer secures parking before the lots fill; overflow parking is significant distance away’, ‘Take the boat shuttle to the west shore for dramatically different perspectives — the mountains appear nearly twice as close from the western bank’, ‘Walk the Jenny Lake Loop Trail (7 miles) for a full set of compositions that cannot be achieved from road-accessible points’]
Common mistake to avoid: [‘Shooting only from the main visitor center dock — the one-way scenic loop overlook is a far superior photography location’, ‘Mid-day photography — harsh overhead light flattens the mountain texture that makes the Tetons so dramatic’, ‘Not taking the boat shuttle — the western shore provides completely different, more dramatic close-up mountain perspectives’]
6. String Lake
String Lake is shallow (never deeper than a few feet), calm, and exceptionally clear — a naturally perfect reflection pool. Unlike the larger lakes, wind has less effect on surface conditions. Mount Moran is the primary subject from the northern end of String Lake. The trail around the lake passes through old-growth forest with multiple intimate forest-to-lake compositions. It is also the launching point for canoe and kayak portage into Leigh Lake (bear canister required for camping). Wildlife: moose, beaver, deer, osprey frequenting the lake margins.
- GPS: 43.78, -110.733
- Elevation: 6,860 ft
- Best time of day: Sunrise for reflections of Mount Moran over the northern section; moonrise over the Tetons for night photography (faces west-southwest)
- Sun direction: String Lake is a narrow, shallow connector lake between Jenny Lake (south) and Leigh Lake (north). Its long axis runs north-south, with the Teton Range rising directly to the west. Early morning light illuminates Mount Moran and the northern peaks reflected in String Lake’s exceptionally calm, shallow water (wind resistance is lower than the larger lakes). This is an outstanding Milky Way photography location — facing west toward the Tetons, the galactic core rises and sweeps above the mountain crest on dark summer nights.
- Access: From Teton Park Road, turn west at North Jenny Lake Junction. Follow signs north to String Lake Trailhead parking area (first large lot). The canoe launch lot is the second area; Leigh Lake Trailhead and picnic area are at the road’s end. Access from Jenny Lake Scenic Loop Drive (one-way northbound).
- Difficulty: Easy — flat trail around the lake; 3.8-mile loop trail around String Lake for extended access to multiple viewpoints
- Recommended settings: Milky Way: f/2.8, ISO 3200–6400, shutter 15–25 sec (apply 500 Rule or NPF Rule for sharp stars). Landscape reflections: f/8–f/11, ISO 100–400, graduated ND 2-stop. Polarizer effective mid-morning for aqua water color.
Shots to chase:
- Mount Moran reflection: the northern end of String Lake reflects Moran in extraordinarily calm water at sunrise
- Milky Way over the Tetons: face west, ultra-wide 14–20mm, mountain silhouette with galactic core rising above (June–August, no moon)
- Kayak/canoe on calm water: human-interest element with Teton backdrop
- Forest-frame compositions: use the old-growth spruce and fir on the eastern trail as natural frames around water + mountain
- Moonrise timing: east-facing at moonrise, Tetons glowing under full moon reflection
Pro tip: [‘The north end of String Lake (nearest the Leigh Lake outlet) provides the cleanest Mount Moran reflection — walk 0.5 miles north from the first parking lot’, ‘For Milky Way, arrive at nautical twilight and allow 30 min for eyes to dark-adapt before shooting’, “String Lake is the best park location for flat-water kayak photography — rent from Dornan’s in Moose or Signal Mountain Lodge”, ‘The loop trail is mostly flat — excellent for photographers carrying heavy gear’]
Common mistake to avoid: [‘Shooting only from the parking area — the best reflections and Milky Way positions are 0.3–0.7 miles north along the trail’, ‘Arriving in midday expecting reflections — wind picks up by 9–10 AM most days and ends reflection opportunities’, ‘Forgetting bear spray for the Milky Way session — grizzly activity is high at dawn/dusk along this lake corridor’]
7. Cunningham Cabin
The J.P. Cunningham Cabin (built circa 1888–1890) is one of the Jackson Hole valley’s last surviving homesteading-era structures. The weathered log cabin with full Teton Range backdrop is an iconic combination of human history and wilderness landscape. For astrophotography, the wide-open sagebrush flat with zero light pollution to the west creates one of the best Milky Way foreground subjects in the park — the rustic cabin silhouetted under the galaxy is a classic Grand Teton night shot. Bison frequently graze the surrounding flats, making wildlife photography possible at dawn.
- GPS: 43.8156, -110.5618
- Elevation: 6,800 ft
- Best time of day: Sunrise for alpenglow on the Tetons behind the cabin; deep dark moonless nights for Milky Way over the historic structure
- Sun direction: The Cunningham Cabin homestead sits in the open sagebrush flats of the northern Jackson Hole valley, east of the Snake River. Like all eastern valley locations, the Tetons face east and are lit at sunrise while the photographer shoots westward. The broad, open flat sagebrush landscape creates vast foreground space that can lead the eye toward the mountains. For Milky Way: face southwest to west, where the galactic core rises above the southern Teton peaks in summer months. The open sky with no tree obstruction is a major advantage for astrophotography.
- Access: Located on US Highway 191/89 approximately 6 miles south of Moran Junction, near the park’s eastern boundary. Large parking area directly off the highway. 0.25-mile interpretive trail leads to the historic 1890s homestead structure. Open year-round (highway access).
- Difficulty: Easy — flat, 0.25-mile interpretive trail across sagebrush flats
- Recommended settings: Milky Way: f/2.8, ISO 3200–6400, 15–25 sec, 14–24mm ultra-wide. Sunrise landscape: f/8–f/11, ISO 100–400. Bison at dawn: ISO 1600–3200, f/5.6, fast shutter 1/500 sec, 400mm+.
Shots to chase:
- Milky Way cabin: ultra-wide 14–20mm, cabin silhouetted under the galactic core with Teton peaks visible on the horizon
- Sunrise alpenglow behind mountains, cabin in dark shadow foreground — classic Wyoming homestead scene
- Bison herd at dawn: 400mm, bison grazing sagebrush flats with Teton Range behind in morning light
- Fall: sagebrush goes brown-gold in October, cabin + Tetons in the crisp clear post-summer air
- Star trail circles: multi-hour star trail with North Star above the cabin using an intervalometer
Pro tip: [‘For Milky Way: target June–August for both the galactic core above the horizon AND before the ground freezes; check moon phase calendars’, ‘The interpretive wayside signs at the cabin are visible in compositions — plan your angle to minimize or incorporate them intentionally’, ‘Bison are active in this area; maintain 75-foot minimum distance (NPS requirement) and never approach between a cow and calf’, ‘In winter, this highway section remains plowed — accessible year-round unlike most park interior roads’]
Common mistake to avoid: [‘Treating as a daytime destination only — the night photography and dawn wildlife opportunities are the primary draws’, ‘Forgetting bear spray for night/dawn sessions — grizzly activity is documented in this area’, ‘Standing between bison and their calves — bison charges are a genuine danger in this open flat terrain’]
8. Signal Mountain Summit
Signal Mountain is the only drive-up summit in Grand Teton National Park offering a true bird’s-eye panorama of the entire ecosystem. Jackson Lake — the largest lake in the park — fills the middle ground, and the complete 40-mile Teton Range forms the western horizon. Named in memory of William Henry Jackson, who made the first photographs of the Tetons from the west side during the 1871 Hayden Survey. The Jackson Point Overlook is the primary photography platform. Wildlife spotted from above includes bison, elk, and moose in the valley below.
- GPS: 43.847, -110.607
- Elevation: 7,727 ft
- Best time of day: Sunrise for alpenglow on the Teton Range; also excellent at sunset in spring/fall when the sun sets in a position that paints the sky above the peaks
- Sun direction: Signal Mountain rises 800 ft above the valley floor and offers a 360-degree panoramic perspective unmatched anywhere in the park. From the summit, photographers can see the entire 40-mile Teton Range to the west, Jackson Lake to the north, and the full Jackson Hole valley below. At sunrise, the Teton Range catches direct east-facing alpenglow while the valley floor is still in shadow — an extraordinary bird’s-eye view of the mountains lit above a dark sea of forest. The elevated position means photographers are above the tree line fog that sometimes obscures valley viewpoints.
- Access: Turn east off Teton Park Road at the Signal Mountain Summit Road sign, approximately 5 miles south of Jackson Lake Junction. Paved 5-mile winding road (800 ft elevation gain) with multiple switchbacks — NO RVs or trailers permitted. Two parking areas at the summit: Jackson Point Overlook (western face, Teton view) and Summit Overlook (eastern face, valley view). Road closed November through spring (snow-dependent; typically opens mid-May). Alternatively, hike 3.5 miles from Signal Mountain Lodge via Signal Mountain Trail.
- Difficulty: Easy (drive-up) — 5-mile paved road to summit. Moderate (3.5-mile hike) if approaching on foot. No RVs or trailers.
- Recommended settings: Sunrise panorama: f/8–f/11, ISO 100–400, 16–35mm. For Jackson Lake detail: 70–200mm. For wildlife in the valley: 400–600mm with tripod. Graduated ND filter for horizon balance when Tetons are lighter than the dark valley floor.
Shots to chase:
- Full Teton Range panorama: 24mm stitched 3–5 frame pano showing entire 40-mile range from summit
- Jackson Lake + Tetons: classic composition with the lake’s blue surface and mountain skyline above
- Valley floor bird’s-eye: bison or elk herds visible as dark specks moving across the sagebrush flat below
- Sunrise alpenglow from above: unique perspective of the peaks catching light while the valley floor is in pre-dawn blue shadow
- Fall foliage aerial: October aspens turning gold on the valley floor as seen from summit height
Pro tip: [‘The Jackson Point Overlook (west side of the summit) is the primary photography platform — faces directly at the Teton Range and Jackson Lake’, ‘Arrive 45 min before sunrise to climb the summit road in darkness; allow 25–30 min to drive from Jackson Lake Lodge area’, ‘Fog often fills Jackson Hole valley in early morning — from Signal Mountain summit you may be above the fog with clear mountain views and a sea of clouds below’, “The summit road opens mid-May and closes November/first major snowfall — check nps.gov for current year’s status”, ‘Wildflowers cover the hillsides below in early June — mid-slope stopping points on the drive add wildflower foreground options’]
Common mistake to avoid: [‘Attempting the road with an RV or trailer — the road is strictly prohibited and cannot accommodate large vehicles’, ‘Arriving only for sunrise and leaving immediately — the signal mountain summit road passes multiple excellent mid-slope viewpoints worth exploring’, ‘Underestimating wind at the summit — exposed position means wind protection gear needed for camera stability’]
Want this in your pocket on the trail?
The full-resolution version of every spot above — with full-page hero photography, GPS maps with gold location pins, sun direction diagrams, multi-season tables, and a complete safety + packing checklist — is inside the Grand Teton Ultimate Photographer’s Guide PDF ($47). Print it, save it offline, take it into the park. Get the guide →
9. Teton Glacier Viewpoint
Teton Glacier is the largest glacier in Wyoming and one of the largest in the Rockies south of the Canadian border. From this turnout, the glacier’s ice field is visible tucked into the northeast face of Grand Teton — a rare sight in the contiguous US. The combination of vertical granite walls, permanent snow and ice, and the glacier’s blue-white surface creates a geological drama unavailable at any other park viewpoint. A powerful telephoto lens (300–600mm) reveals glacier crevasses, bergschrund, and the scale of the cliff faces in extraordinary detail.
- GPS: 43.7417, -110.7922
- Elevation: 7,200 ft
- Best time of day: Morning (best light on glacier faces) and early afternoon (angled light reveals glacier surface texture and crevasses)
- Sun direction: The Teton Glacier sits in the northeast face of Grand Teton at approximately 11,000–12,000 ft elevation. From the valley-floor viewpoint on the inner Teton Park Road, photographers shoot directly west-northwest at the glacier. Morning light (first 3 hours after sunrise) provides the best illumination on the glacier’s icy surface and the steep couloirs that frame it. This is one of the few primary park photography locations that works in mid-morning rather than exclusively at sunrise, since the glacier is a geological feature rather than a reflection or sunrise-dependent composition.
- Access: The primary roadside Teton Glacier Viewpoint (also marked as Teton Glacier Turnout) is located on the inner loop Teton Park Road, approximately 2 miles north of South Jenny Lake Junction. Small pull-out turnout directly off the road. No hiking required. For a different and broader glacier view, the Glacier View Turnout on the outer road (US-89/191) shows Middle, Teepee, and Teton glaciers simultaneously.
- Difficulty: Easy — roadside turnout; no hiking required for the standard viewpoint
- Recommended settings: Telephoto essential: 300–600mm for glacier detail. f/8–f/11, ISO 200–400 in morning light. Polarizer to reduce ice glare and deepen blue sky. Wide-angle 24mm for contextual mountain + glacier scene. Tripod or monopod required for 600mm stability.
Shots to chase:
- Glacier detail: 400–600mm isolating the blue-white glacier face, crevasses, and surrounding granite walls
- Contextual mountain: 50–100mm showing Grand Teton’s full profile with the glacier visible as a white wedge in the northeast couloir
- Climbers: with 600mm, mountaineers on the Teton Glacier route can be visible as tiny silhouettes against the ice in summer
- Ice and granite abstract: extreme telephoto on the glacier edge where ice meets dark granite wall
Pro tip: [‘Bring your longest telephoto lens — the glacier is 6+ miles away and requires 300mm minimum for any meaningful detail’, ‘Visit in August when summer snowmelt reveals the deepest blue glacier ice; early season snow covers the ice and reduces visual contrast’, ‘Combine this stop with the Jenny Lake area (2 miles south) and Cascade Canyon turnout (nearby) for a morning photography circuit’, ‘The Glacier View Turnout on US-89/191 (outer road) shows three glaciers simultaneously — a more expansive geological composition than the inner road turnout’]
Common mistake to avoid: [‘Expecting to be close to the glacier — it is visible from the valley floor but requires significant telephoto reach’, ‘Shooting at noon — harsh overhead light flattens glacier texture; morning sidelight reveals ice surface detail’, ‘Not bringing a polarizer — reduces ice glare and dramatically deepens the blue sky above the peaks’]
10. Black Tail Ponds Overlook
The Black Tail Ponds area is one of the most wildlife-dense locations in the entire park. The marshy wetlands, willow thickets, and ponds attract moose (extremely reliable sighting), deer, elk, great blue herons, sandhill cranes, and various waterfowl year-round. Photographically, the wetland vegetation and pond surfaces provide rich green foreground textures against the Teton Range backdrop — a very different look from the open sagebrush flats at Cunningham Cabin or Mormon Row. The low angle of the lower bench gives a ground-level perspective rarely available at road-accessible locations.
- GPS: 43.7025, -110.653
- Elevation: 6,850 ft
- Best time of day: Sunrise (primary) for alpenglow on Cathedral Group peaks; also excellent for wildlife (moose, deer, elk) at dawn and dusk throughout the year
- Sun direction: The Black Tail Ponds Overlook sits above a series of small marshy ponds and wetland vegetation, facing west toward the Teton Range Cathedral Group. At sunrise, the peaks catch the first alpenglow while the photographer shooting westward has warm light behind them. The overlook provides two distinct levels: upper deck (higher elevation, broader mountain panorama) and lower bench (closer to the ponds, potential for partial pond reflections and wildlife in the wetland vegetation).
- Access: Located on US Highway 89/191/26, approximately 3 miles north of the Moose Entrance Station. Small pull-off parking area directly on the highway. Overlook platform with split-rail fence is elevated above the pond complex. Short path leads down to the lower bench for closer pond-level access.
- Difficulty: Easy — short walk from roadside pull-off to overlook; optional short descent to lower bench (0.1 miles)
- Recommended settings: Wildlife: f/5.6–f/8, ISO 1600–3200 at dawn, 400mm+ telephoto. Landscape: f/8–f/11, ISO 100–400, 24–70mm. Graduated ND 2-stop for mountain vs. foreground balance. Polarizer effective mid-morning to cut wetland glare.
Shots to chase:
- Moose in willows: 400–600mm, moose wading or feeding in the ponds with mountain backdrop
- Wide wetland panorama: 16–24mm capturing the full green wetland complex with Cathedral Group behind
- Pond reflection: descend to the lower bench for partial Teton reflections in the small ponds at still-water sunrise
- Heron hunting: 400mm, great blue heron stalking the shallows with mountain backdrop at dawn
- Sandhill cranes: if present in fall migration, 400mm pairs of cranes in the marshy foreground
Pro tip: [‘The lower bench (reached by a short path below the overlook platform) gives a dramatically different low-angle perspective — do not skip it’, ‘Moose are extremely reliable at this location year-round; blue hour and dawn are peak activity times’, ‘The overlook faces northwest toward the Teton summits — panoramic shots from here include both the Cathedral Group and Signal Mountain’, ‘In summer, there can be significant vegetation in the pond — fall (September–October) reduces foliage and opens cleaner sight lines through the willows’]
Common mistake to avoid: [‘Shooting only from the upper fence overlook — the lower bench access is the most rewarding photography position’, ‘Approaching moose too closely — moose can be aggressive, especially cows with calves; stay minimum 100 yards’, “Skipping this location in favor of only the ‘Famous Four’ spots — Black Tail Ponds offers wildlife diversity unavailable at the famous locations”]
11. Cascade Canyon
Cascade Canyon is the interior of the Teton Range — surrounded by walls rising 6,000 feet above the canyon floor, with the Cathedral Group peaks visible at the canyon head. Wildlife inside the canyon is extraordinary: black bears, moose, pika, marmot, and deer frequent the interior. Hidden Falls (the first major landmark, 0.5 miles from the west dock) is a beautiful 200-foot multi-strand waterfall that is one of the park’s most photographed water features. The canyon provides the only accessible interior alpine landscape photography in the park without a multi-day backpack.
- GPS: 43.7516, -110.7893
- Elevation: 7,200 ft
- Best time of day: Morning (canyon walls in direct light within 1–2 hours of sunrise); late August–September for late-summer wildflowers and dramatic canyon walls
- Sun direction: Cascade Canyon runs east-west through the heart of the Cathedral Group. The canyon walls (Mt. Teewinot to the north, Grand Teton to the south) catch direct sunlight by mid-morning as the sun rises above the eastern Teton ridgeline. The inner canyon photography is not a sunrise-or-nothing proposition — once inside, the canyon provides dramatic shots throughout the morning as light angle changes and illuminates different walls. The east-facing canyon entrance photograph (looking back east toward Jenny Lake) captures the most dramatic light in the first 90 minutes after sunrise.
- Access: Reach the Cascade Canyon Trailhead via the Jenny Lake Boat Shuttle (recommended — saves 4 miles round trip; approximately $18 round trip, seasonal May–September) from the East Dock at Jenny Lake Visitor Center. Alternative: walk the south shore of Jenny Lake (2 miles each way) to the West Dock trailhead. From the West Dock, Hidden Falls is 0.5 miles, Inspiration Point is 1.1 miles, and the main Cascade Canyon is entered beyond Inspiration Point (2+ miles from West Dock).
- Difficulty: Moderate — 1.5-mile uphill push from West Dock to Cascade Canyon via Inspiration Point; mostly flat inside canyon. Total round trip (boat shuttle) approximately 4.5–6 miles. Without shuttle: 8.5–10 miles round trip.
- Recommended settings: Canyon interior: f/8–f/11, ISO 400–1600 (shaded walls need higher ISO). Hidden Falls: f/11, 0.5–2 sec for silky water, tripod essential. Wildlife: ISO 1600–6400, f/5.6, 300–400mm. Wide-angle 16–24mm for full canyon wall panoramas.
Shots to chase:
- Hidden Falls: tripod-mounted long exposure for silky water flowing over the 200-ft falls, canyon walls framing the scene
- Canyon walls: ultra-wide 14–20mm tilted up to capture the vertical granite walls converging overhead
- Moose in the creek: the Cascade Creek running through the canyon floor attracts moose throughout the season — 300mm+ for safe distance
- Looking east toward Jenny Lake: from the canyon mouth, shoot back east with mountain profile silhouettes framing the lake in golden morning light
- Canyon mouth from Inspiration Point: the canyon entrance framed by granite walls with Jenny Lake visible below
Pro tip: [‘Take the boat shuttle — the 4-mile walk saved allows far more time for photography inside the canyon before afternoon storms’, ‘Afternoon thunderstorms build over the Tetons by 2–4 PM in summer; plan to be below Inspiration Point by 1 PM’, ‘Black bears are common inside the canyon — carry bear spray and make noise on the trail’, ‘The first 0.5 miles inside the canyon (Hidden Falls area) has the best light-to-difficulty ratio; even on casual outings, this section rewards deeply’]
Common mistake to avoid: [‘Hiking without bear spray inside the canyon — bear activity is high and the terrain offers no escape’, ‘Starting too late — entering the canyon after 9 AM in summer means competing with large crowds and worsening afternoon storm risk’, ‘Not considering the boat shuttle — the extra 4-mile walk tires photographers before reaching the best canyon locations’]
12. Inspiration Point
Inspiration Point sits at the mouth of Cascade Canyon, 400 feet above Jenny Lake, providing one of the most dramatic overlooks in the park. The view east encompasses the full length of Jenny Lake, the Jackson Hole valley, and (on clear days) the Gros Ventre Range and Wind River foothills in the distance. The viewpoint is east-facing — one of the park’s rare sunrise-from-above compositions. The point is also the gateway to the deeper canyon — photographers can extend their visit far into Cascade Canyon for interior mountain photography.
- GPS: 43.7579, -110.7938
- Elevation: 7,200 ft
- Best time of day: Sunrise hike (arrive at viewpoint at or before sunrise) for the park’s best east-facing elevated overlook; afternoon for western light on canyon walls above
- Sun direction: Inspiration Point is one of the very few east-facing elevated overlooks in Grand Teton National Park that rises above the forest canopy. At sunrise, the viewpoint looks east over Jenny Lake and across all of Jackson Hole — the rising sun is in view, and warm alpenglow floods the valley below while the canyon walls above begin to catch morning light. This opposite perspective from the typical ‘face-west-toward-Tetons’ shots provides a unique documentation of the park as seen from within the mountains looking out. Afternoon light from the west illuminates the Cascade Canyon walls above the point.
- Access: Reach via West Jenny Lake Dock (accessed by boat shuttle, $18 round trip seasonal, or 2-mile walk around south shore of Jenny Lake from East Dock). From West Dock: 0.5 miles to Hidden Falls, then 0.6 miles up switchbacks (400 ft gain) to Inspiration Point. Total from East Dock via boat: approximately 1.6 miles one-way. No road access to this location.
- Difficulty: Moderate — 400 ft elevation gain over 0.6 miles of switchbacks from Hidden Falls to Inspiration Point. Trail is well-maintained. For sunrise, must navigate trail in low light — headlamp required.
- Recommended settings: Sunrise: f/8–f/11, ISO 200–800, wide-angle 16–24mm for the full valley panorama. Telephoto 70–200mm to isolate Jenny Lake and surrounding forest below. Star trails pre-dawn: ISO 400, f/4, 30-min exposure on intervalometer.
Shots to chase:
- East-facing sunrise: dramatic valley below in pre-dawn shadow with sun rising over the eastern ridge — Jenny Lake visible as a mirror in the distance
- Canyon mouth perspective: looking west from Inspiration Point into the canyon corridor with Teton peaks visible at the canyon head
- Jenny Lake aerial-style: 70–200mm, the lake reduced to a jewel-blue oval in the forested valley 400 feet below
- Pre-dawn Milky Way: face east for stars and galaxy above, Jenny Lake below in darkness (summer, no moon)
- Long-distance panoramic: stitched 5-frame pano sweeping from south (Gros Ventre) to north (Jackson Lake area) across all of Jackson Hole
Pro tip: [“For sunrise: take the boat shuttle’s first departure (check seasonal schedule) or leave the east dock by foot at least 2.5 hours before sunrise to arrive at Inspiration Point before first light”, ‘The trail switchbacks in darkness require a good headlamp (200+ lumens) — the trail footing is rocky’, ‘Bears are active at dawn in this area — carry bear spray and make noise on the switchbacks’, ‘Views are dramatically better in the afternoon compared to morning (different light angles); plan a morning-sunrise + stay-for-midday visit for the full range of compositions’]
Common mistake to avoid: [‘Not accounting for the 1.5+ hour approach time when planning for sunrise — arrival too late means missing the alpenglow window’, ‘Treating Inspiration Point as the destination rather than the launching point — the deeper canyon beyond is equally stunning’, ‘Forgetting bear spray — bear activity is high at canyon entry zones at dawn’]
When to photograph Grand Teton: a year-round breakdown
Grand Teton is photogenic every month of the year — but the conditions differ radically by season. Here is what to expect:
Spring (March–May)
Variable — valley floors open in April but snow lingers on Teton peaks through June. Most park roads open by early May. Moose calving season (May–June) makes this the best time to photograph cow-calf pairs in willow thickets at Oxbow Bend, Black Tail Ponds, and Schwabacher Landing. Spring snowmelt fills the Snake River dramatically, increasing the danger of the river but also filling reflection pools. Wildflowers begin in late May (balsamroot, phlox) and peak in June (lupine, Indian paintbrush). Snow-dusted peaks against wildflower meadows create extraordinary, brief-window compositions.
Challenges: Unpredictable weather — winter storms can occur through May. Many lodges and restaurants are closed until Memorial Day. Signal Mountain Summit Road typically opens mid-May. Inner park roads may be soft or closed briefly after heavy rain. High river current dangerous for wading photography.
Summer (June–August)
Peak visitation season (July and August highest crowds). All roads open, all services operating. Daylight runs from ~5:30 AM to ~9 PM. Afternoon thunderstorms build over the Tetons most days by noon, with lightning risk peaking 2–4 PM. Mornings are the photography gold window — crystal clear air, still water, rich light — before afternoon cloud buildup. Wildflowers transition from valley (July) to higher alpine meadows (August). Temperature: valley 70–85°F, cooler in canyon.
Challenges: Crowds at primary locations (Schwabacher, Oxbow, Mormon Row) can mean 30–50 photographers at sunrise on peak summer weekends. Book accommodations 6–12 months in advance. Afternoon thunderstorm risk is significant above timberline — plan all hikes to be complete by 1 PM. Smoke from regional wildfires can reduce visibility in August. Heat haze in afternoon reduces mountain definition for telephoto shots.
Fall (September–November)
Widely considered the best season for Grand Teton photography. Crowds thin dramatically after Labor Day. Air quality is exceptional — no haze, no smoke. Aspens and cottonwoods turn gold beginning in mid-September at higher elevations and sweeping to the valley floor by late September. Peak color is historically the last week of September through the first week of October. Elk rut peaks in September–October: bulls bugle, spar, and herd cows throughout the valley — particularly at Willow Flats, Elk Ranch Flats, and along the river corridors. Oxbow Bend traditionally peaks in the first week of October for color + reflection. Temperatures cool significantly (40–60°F days, near-freezing nights).
Challenges: Services begin closing — many lodges close after Labor Day. Signal Mountain Lodge and some campgrounds close by mid-October. Most services fully closed by November 1. Antelope Flats Road to Mormon Row closes with first significant snowfall. Weather can turn abruptly — early October snowstorms possible. Shorter days (sunrise nearing 7 AM by mid-October).
Winter (December–February)
Most park interior roads closed November through April (Teton Park Road, Signal Mountain Road, Antelope Flats Road to Mormon Row). The outer highway (US 89/191/26) and US-287 remain plowed year-round, keeping Snake River Overlook, Oxbow Bend, and Cunningham Cabin accessible. The valley receives significant snowfall; the Tetons in deep snow are strikingly beautiful — the black granite and white snowfields create high-contrast winter compositions unmatched any other season. Groomed ski trails on the closed Teton Park Road allow winter access on skis or snowshoes. Jackson Hole Mountain Resort (outside park) provides gondola access to high-elevation snow scenes.
Challenges: Most primary locations inaccessible without skis/snowshoes (Jenny Lake, String Lake, Mormon Row, Schwabacher Landing). Temperatures: -20°F to 30°F; camera batteries drain rapidly and must be kept warm. Sunrise very late (after 7:30 AM) with short photography days. Wildlife spread out and harder to locate without summer congregation patterns.
How to get to Grand Teton National Park
Nearest airports
- JAC — Jackson Hole Airport (Jackson Hole, WY): 10–15 minutes to Moose Entrance Station (park entrance ~5 miles from terminal). The ONLY commercial airport located entirely within a National Park boundary. Direct service from Atlanta (Delta), Chicago (United), Dallas (American), Denver (United), Los Angeles (United), New York JFK (Delta), Salt Lake City (Delta). Summer service adds seasonal routes. Book early — JAC seats sell out months in advance. The airport is 5 miles from the park entrance and 10 miles from Jackson city center. This is the only airport in the contiguous US where you can land within a national park.
- SLC — Salt Lake City International Airport (Salt Lake City, UT): 4.5–5 hours to Moose Entrance Station via US-89 north. Major hub with extensive service. Best fallback airport if JAC is unavailable or overpriced. Full service economy car rentals available. Drive north through Logan, Brigham City, Pocatello (ID), Idaho Falls (ID), then Jackson via US-26 over Teton Pass or via US-89 through Hoback Junction.
- BZN — Bozeman Yellowstone International Airport (Bozeman, MT): 3–3.5 hours via US-191 south through Yellowstone. Good option for photographers combining Yellowstone and Grand Teton. Road through Yellowstone is spectacular but adds significant drive time. Note: Yellowstone’s south entrance road to Grand Teton requires a separate stop at the park entrance.
Photographer safety at Grand Teton: read this
Every national park has its own hazards. Read the briefing before you go.
- Wildlife Bears: Grand Teton has an active population of both Grizzly Bears (Ursus arctos horribilis) and Black Bears (Ursus americanus). Grizzlies are most active at dawn, dusk, and night throughout the valley — the same windows prized for photography. Bear spray is strongly recommended by the NPS for all hikers and strongly recommended for dawn/dusk photographers at all valley locations. Maintain 100 yards (length of a football field) from all bears; never position yourself between a bear and food, cubs, or an escape route. All bear sprays must be EPA-registered. Do not run from a bear. For grizzly contact: stand your ground, deploy bear spray at 30–60 ft. Store food in bear boxes at trailheads and campsites.
- Wildlife Moose: Moose are the most commonly encountered large mammal in the park and are responsible for more injuries annually than bears. Moose are unpredictable and will charge without warning, especially cows with calves (May–July) and bulls in rut (September–October). Maintain 75–100 feet minimum. If a moose charges, run behind a large tree or solid structure — moose will not follow. Do not attempt to photograph from close range; telephoto lenses (400mm+) allow safe working distances.
- Wildlife Bison: Bison roam throughout the valley, especially at Cunningham Cabin and the Elk Ranch Flats. Do not approach within 75 feet. Bison can sprint at 35 mph and can weigh 2,000 lbs — they have killed and seriously injured visitors. For photography, 400–600mm telephoto is the appropriate tool.
- River Current: The Snake River runs through Grand Teton and carries dangerously strong current, especially during spring runoff (May–June) when snow melt raises water levels. The river looks calm but has powerful undertow. Do not wade into the river for photography — it has claimed lives. Wade only in the shallow beaver-dammed side channels at Schwabacher Landing, where current is minimal.
- Drone Policy: BANNED — Launching, landing, or operating any unmanned aircraft (drone) on any NPS land or water is prohibited under 36 CFR § 1.5. This applies to recreational and commercial operators equally. Violation carries fines up to $5,000 and possible criminal prosecution. No exceptions for photography.
- Lightning: Afternoon thunderstorms develop over the Teton Range with extraordinary speed, typically building by noon and striking by 2–4 PM from June through August. Lightning above timberline is lethal. If you are hiking above the tree line (Inspiration Point switchbacks, Cascade Canyon higher reaches) and hear thunder, descend immediately. The open sagebrush flats at Cunningham Cabin, Mormon Row, and Snake River Overlook offer no shelter — retreat to your vehicle if lightning approaches. Check the Jackson weather forecast each morning at weather.gov.
- Altitude: The Jackson Hole valley sits at 6,800 ft — altitude sickness can affect visitors arriving from sea level. Symptoms include headache, dizziness, and nausea. Allow 24–48 hours of acclimatization before strenuous hiking. Drink extra water. Summit photography at Signal Mountain (7,727 ft) adds another 900 ft — note any physical signs of hypoxia.
- Permits: No photography permits required for personal/non-commercial photography at any location in Grand Teton. Commercial photography (including commercial video) requires a permit from the park’s Division of Resource Stewardship. Backcountry overnight permits required for any overnight camping. Light painting is NOT allowed anywhere in the park.
The complete safety briefing is inside the Grand Teton Photographer’s Guide PDF.
Luminar Neo’s Sky AI, atmosphere AI and SuperSharp are designed for landscape work — replace flat skies, add depth, and recover detail in seconds. Tagged as affiliate per FTC.
Related guides nearby
Three more photography guides within striking distance — perfect for combining into one trip.
- Yellowstone 105 km away · national park · USA
- Rocky Mountain 562 km away · national park · USA
- Arches 567 km away · national park · USA
Quick Amazon shortcuts to the gear most useful for this kind of shot. Use them if Prime shipping or Amazon credit makes more sense than B&H. As an Amazon Associate ShutYourAperture earns from qualifying purchases.
Frequently asked questions
What is the single best photography location in Grand Teton National Park?
Schwabacher Landing is the consensus choice among professional photographers for the definitive Grand Teton reflection shot. The beaver-dammed side channels of the Snake River create mirror-still surfaces that reflect the Cathedral Group (Grand Teton, Teewinot, Owen) in pre-dawn alpenglow. Arrive 30–40 minutes before sunrise, walk 200–400 yards north from the main parking area, and set up on the bank. For a different subject — Mount Moran instead of the Cathedral Group — Oxbow Bend provides equally spectacular reflections and is especially extraordinary in early October when the surrounding cottonwoods peak in gold.
Is Grand Teton better than Yellowstone for photography?
They offer very different experiences and most photographers do both in the same trip (the joint $35 pass covers both). Grand Teton excels at dramatic alpine landscape, reflection, and wildlife photography — it offers arguably the most photogenic mountain range in the lower 48. Yellowstone excels at geothermal features (geysers, hot springs, Grand Prismatic), bison herds, and wolf photography. For pure landscape work, Grand Teton is considered superior by most professional landscape photographers. For wildlife diversity (wolves, bears in open terrain, geysers), Yellowstone wins. Both parks are within 60 miles of each other; the typical trip combines 3–4 days in Grand Teton with 3–4 days in Yellowstone.
Can I fly a drone in Grand Teton National Park?
No — drones are completely banned from all National Park Service lands under 36 CFR § 1.5, which prohibits launching, landing, or operating any unmanned aircraft on NPS land and waters. This applies to recreational and commercial operators equally. Violations carry fines up to $5,000 and possible criminal charges. No exceptions are granted for photography. The surrounding Bridger-Teton National Forest (outside the park boundary) has different rules — check with the Bridger-Teton NF office in Jackson for current drone regulations on forest lands adjacent to the park.
What are the best photography months for Grand Teton?
September (late) through early October is the consensus best window — fall color peaks during the last week of September and first week of October, elk rut is active, crowds drop dramatically after Labor Day, and the air is exceptionally clear and crisp with no summer haze. June is the second-best choice for wildflowers and calving moose in lush green meadows. July and August offer the longest daylight windows and all facilities open, but crowds are at maximum and afternoon haze can reduce mountain clarity. Winter (January–February) is spectacular for snow scenes but most interior roads are closed.
Do I need a permit for photography in Grand Teton?
No permit is required for personal or non-commercial photography anywhere in the park. You can shoot commercially accessible areas (roadside, overlooks, trails) without any permit. Commercial photography — defined as photography intended for commercial sale or production, including commercial video production — requires a Commercial Use Authorization (CUA) from the park’s Division of Resource Stewardship. Contact the park at 307-739-3300 for commercial permit applications. Light painting (illuminating subjects with flashlights or strobes) is not permitted anywhere in the park regardless of permit status. Backcountry camping for multi-day photo trips requires a backcountry permit from the Backcountry Office at the Craig Thomas Visitor Center.
Take this guide into the park
This post is the complete field reference. The Grand Teton Ultimate Photographer’s Guide PDF is the field-deployable version: full-page resolution hero photography, GPS maps with gold pins for every location, multi-season shooting calendars, gear matrices per location, sun-angle diagrams, the full safety briefing, and a print-ready editorial layout in Framehaus black and gold. Save it offline. Print it. Take it into the park.
Grand Teton Ultimate Photographer’s Guide
Downloadable PDF · 12 GPS-mapped locations · Multi-season calendar · Safety briefing · Packing checklist
Get the Grand Teton guide — $47
Or get the National Parks Bundle — $197
Get the Grand Teton National Park Guide + Preset Pack
Photograph it. Edit it. Done.
All links go to Viator (a TripAdvisor company), the world’s largest marketplace for guided experiences. Tagged as affiliate per FTC.
Take Grand Teton National Park home in your pocket.
Every shot location, every angle, every time of day worth shooting. Printable PDF + GPS-tagged map.
Instant download. Works on phone, tablet, and printed.
Continue reading
- National Parks Photography Guides — every park, mapped
- Best photography spots in Zion National Park
- Best photography spots in Grand Canyon National Park
- Travel photography destinations
- How to shoot golden hour like a pro
- Milky Way photography settings and locations
← Back to National Parks Photography Guides
The complete Grand Teton guide is $47
All vantage points above + 5 bonus secret spots, printable map, gear pack list, and editing recipes. One-time payment, instant download, lifetime updates.
Common questions about the Grand Teton guide
Is the Grand Teton photography guide worth $47?
For most photographers, yes. The guide saves 8-12 hours of trip-planning research and prevents the most common mistake of Grand Teton photography: shooting at the wrong time of day. If a single better frame is worth $47 to you, the guide pays for itself on day one. Buyers get every GPS coordinate, every golden-hour window, every cultural rule, and a printable shot list.
Does the Grand Teton guide include GPS coordinates?
Yes — every vantage point in the guide has Google Maps-ready GPS coordinates so you can pin them before you fly. The guide also includes a printable map showing all locations clustered by walking distance, so you can build efficient half-day routes.
What's in the Grand Teton PDF that isn't in this article?
The article shows the highlights. The PDF includes: 5 additional secret spots not published online, a 14-day itinerary with daily routes, the full camera-settings cheat sheet for every scenario in Grand Teton, a printable gear packing list, post-processing recipes with screenshot examples, and a list of local guides we trust for portrait commissions.
Do I get the Lightroom presets too?
The $47 guide is the PDF only. The matching Grand Teton preset pack is a separate $19 download — most buyers grab both as a bundle and save the editing time. Both are instant download, both work on Lightroom Classic and Lightroom Mobile.
Will the guide work for a Grand Teton trip in 2026?
Yes. The guide is updated annually as fees, restrictions, and new vantage points change. All buyers get free lifetime updates. The 2026 edition includes the latest drone rules, museum photography policies, and seasonal light data for the year.
Visiting more than Grand Teton?
Bundle multiple destination guides and save planning time across the trip:
- Acadia Photographer’s Guide ($47)
- Joshua Tree Photographer’s Guide ($47)
- Arches Photographer’s Guide ($47)
- Rocky Mountain Photographer’s Guide ($47)
- Glacier Photographer’s Guide ($47)
Or get all 60+ destinations in one bundle: Photo Atlas — every guide, every map, $97.