Best Photography Spots in Denver: 12 Locations With GPS
edinchavez01-20). Buying through these links costs you nothing extra and helps fund our free guides.
Denver, Colorado is one of the most photogenic cities in the United States. If you have a camera and the patience to show up before dawn, Denver will give you images that last a career — but only if you know where and when to point it.
This is the definitive field guide to the 12 best photography spots in Denver, with GPS coordinates you can drop straight into Google Maps, exact camera settings tuned to Denver’s unique light, precise timing for every location, and the access notes nobody else bothers to document. It mirrors the intel inside our Denver Ultimate Photographer’s Guide ($47 PDF) — a downloadable field guide with full-page hero images, GPS maps, seasonal tables, a city safety briefing, and a complete photographer’s packing list. Get the guide →
Planning multi-city travel? See also: U.S. cities photography hub and the National Parks Photography Guides.
12 GPS-mapped locations · Exact camera settings · Multi-season shooting calendar · Free annual updates
Download the PDF guide →
Get the Denver Ultimate Photographer’s Guide
Every location below — pre-mapped with GPS, golden-hour timing, gear recommendations, cultural rules, and a 14-day itinerary. Downloaded by 200+ working photographers.
Quick jump to the 12 spots
- Sloan’s Lake — Southeast Shore Skyline Viewpoint
- Colorado State Capitol — Gold Dome & Mile-High Steps
- Denver Union Station — Great Hall Interior & Wynkoop Plaza
- Frederic C. Hamilton Building — Denver Art Museum Exterior
- Larimer Square — Historic Denver at Night
- RiNo Art District — Mural Corridor (Brighton Blvd & Walnut St)
- Red Rocks Park & Amphitheatre — Sunrise Geological Wonder
- Confluence Park & Riverfront — Cherry Creek Meets South Platte
- Denver Botanic Gardens — York Street
- 16th Street Mall — Urban Canyon & Daniels-Fisher Tower
- City Park — Museum Steps Skyline with Rocky Mountain Backdrop
- Highland Neighborhood Overlook & Cable Bridge — Northwest Denver Skyline
A look inside the Denver Photographer’s Guide
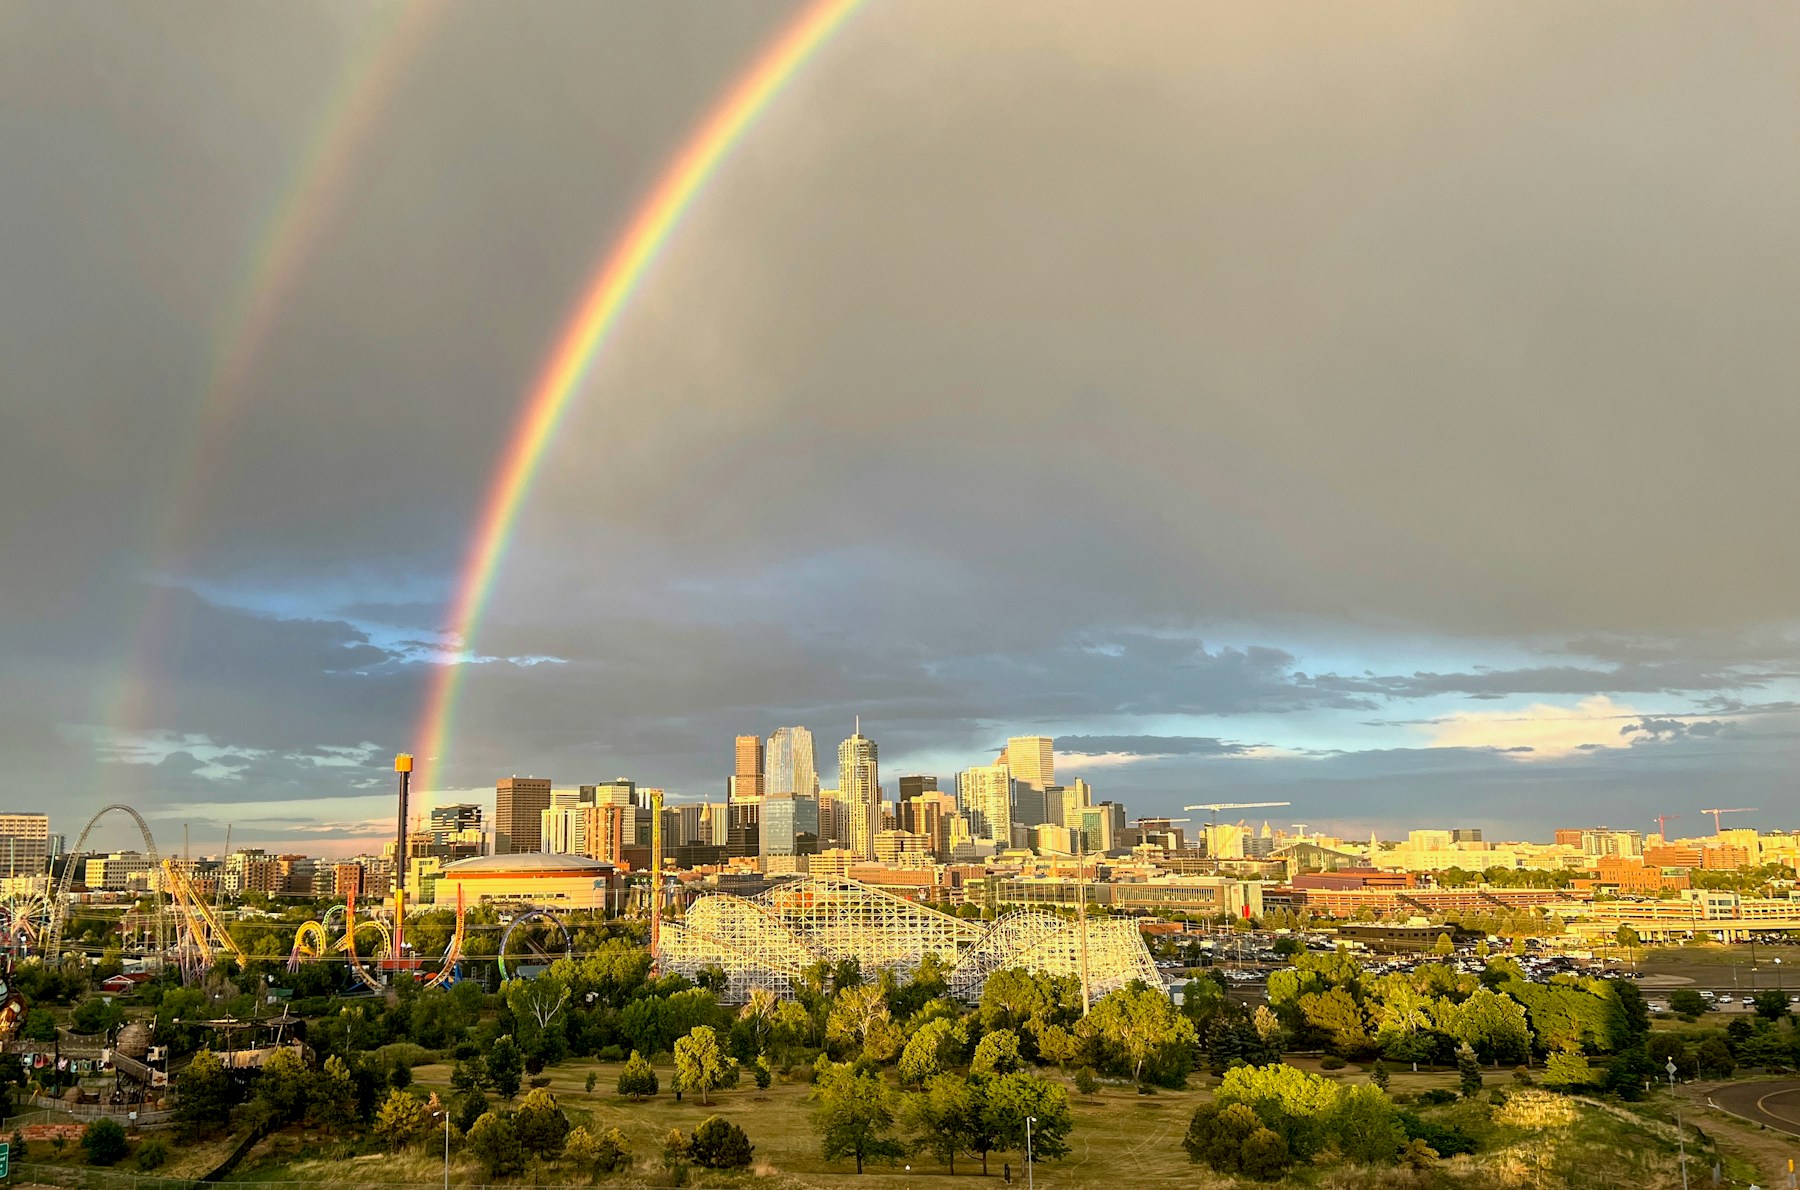
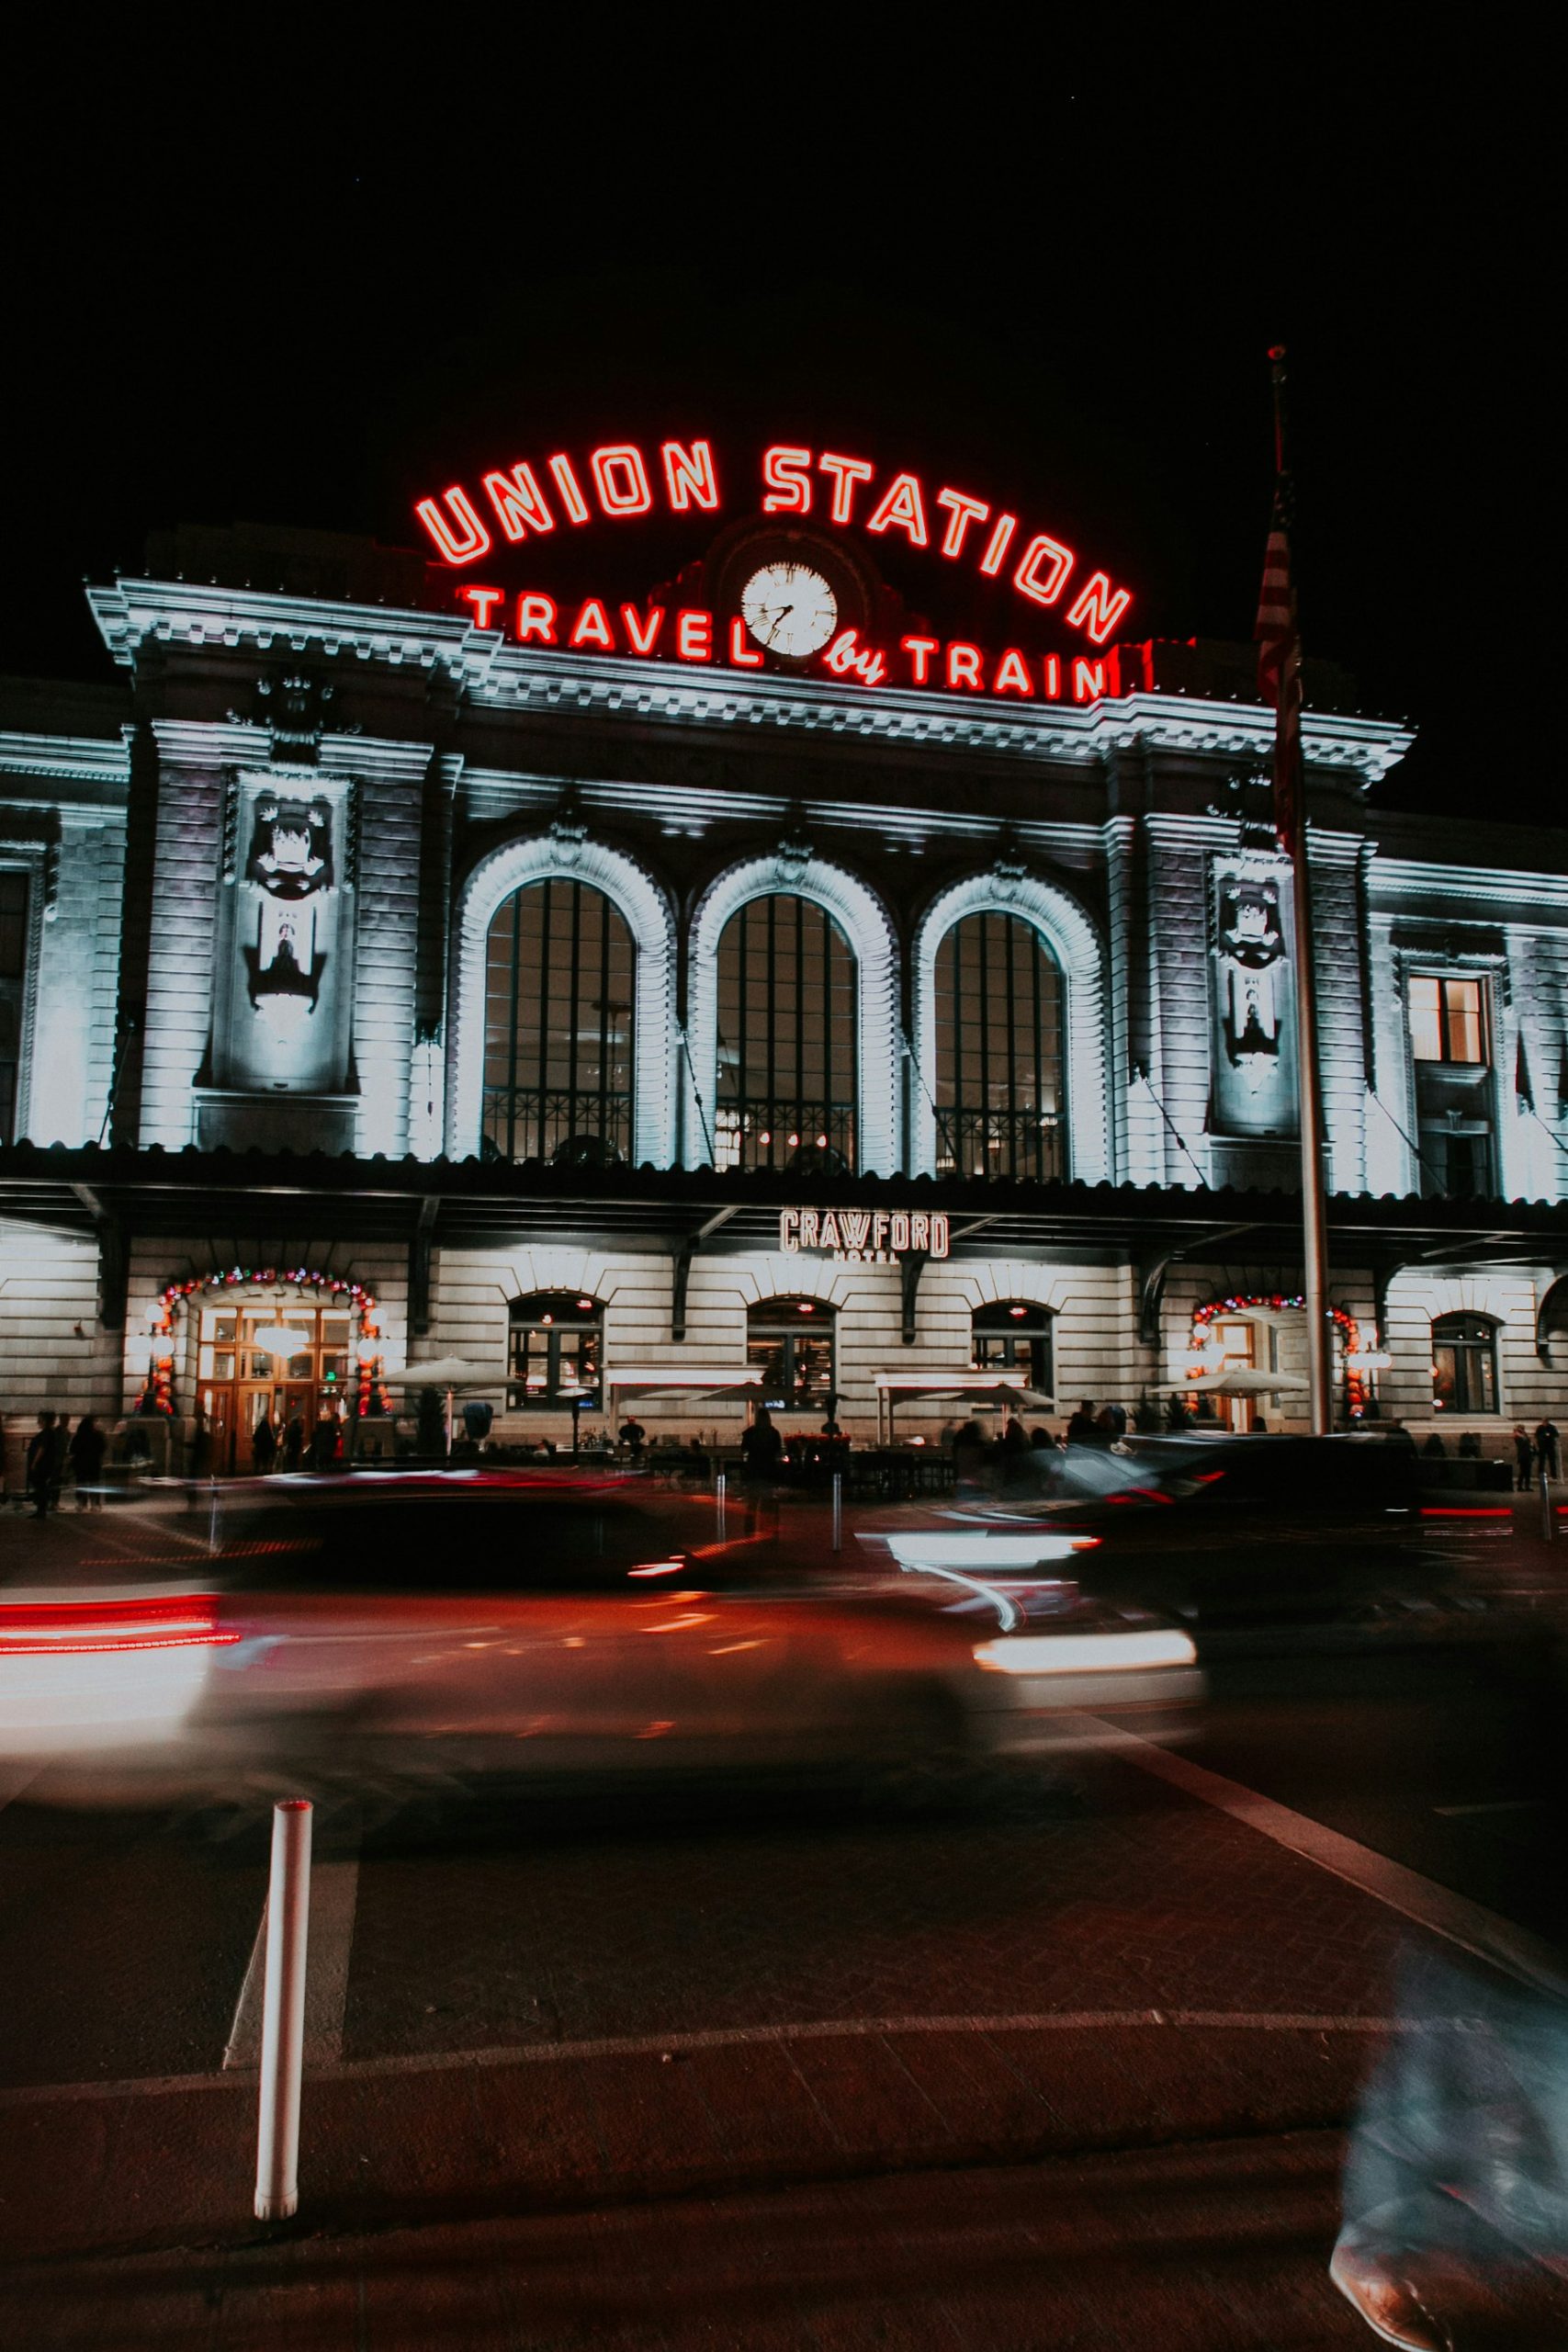
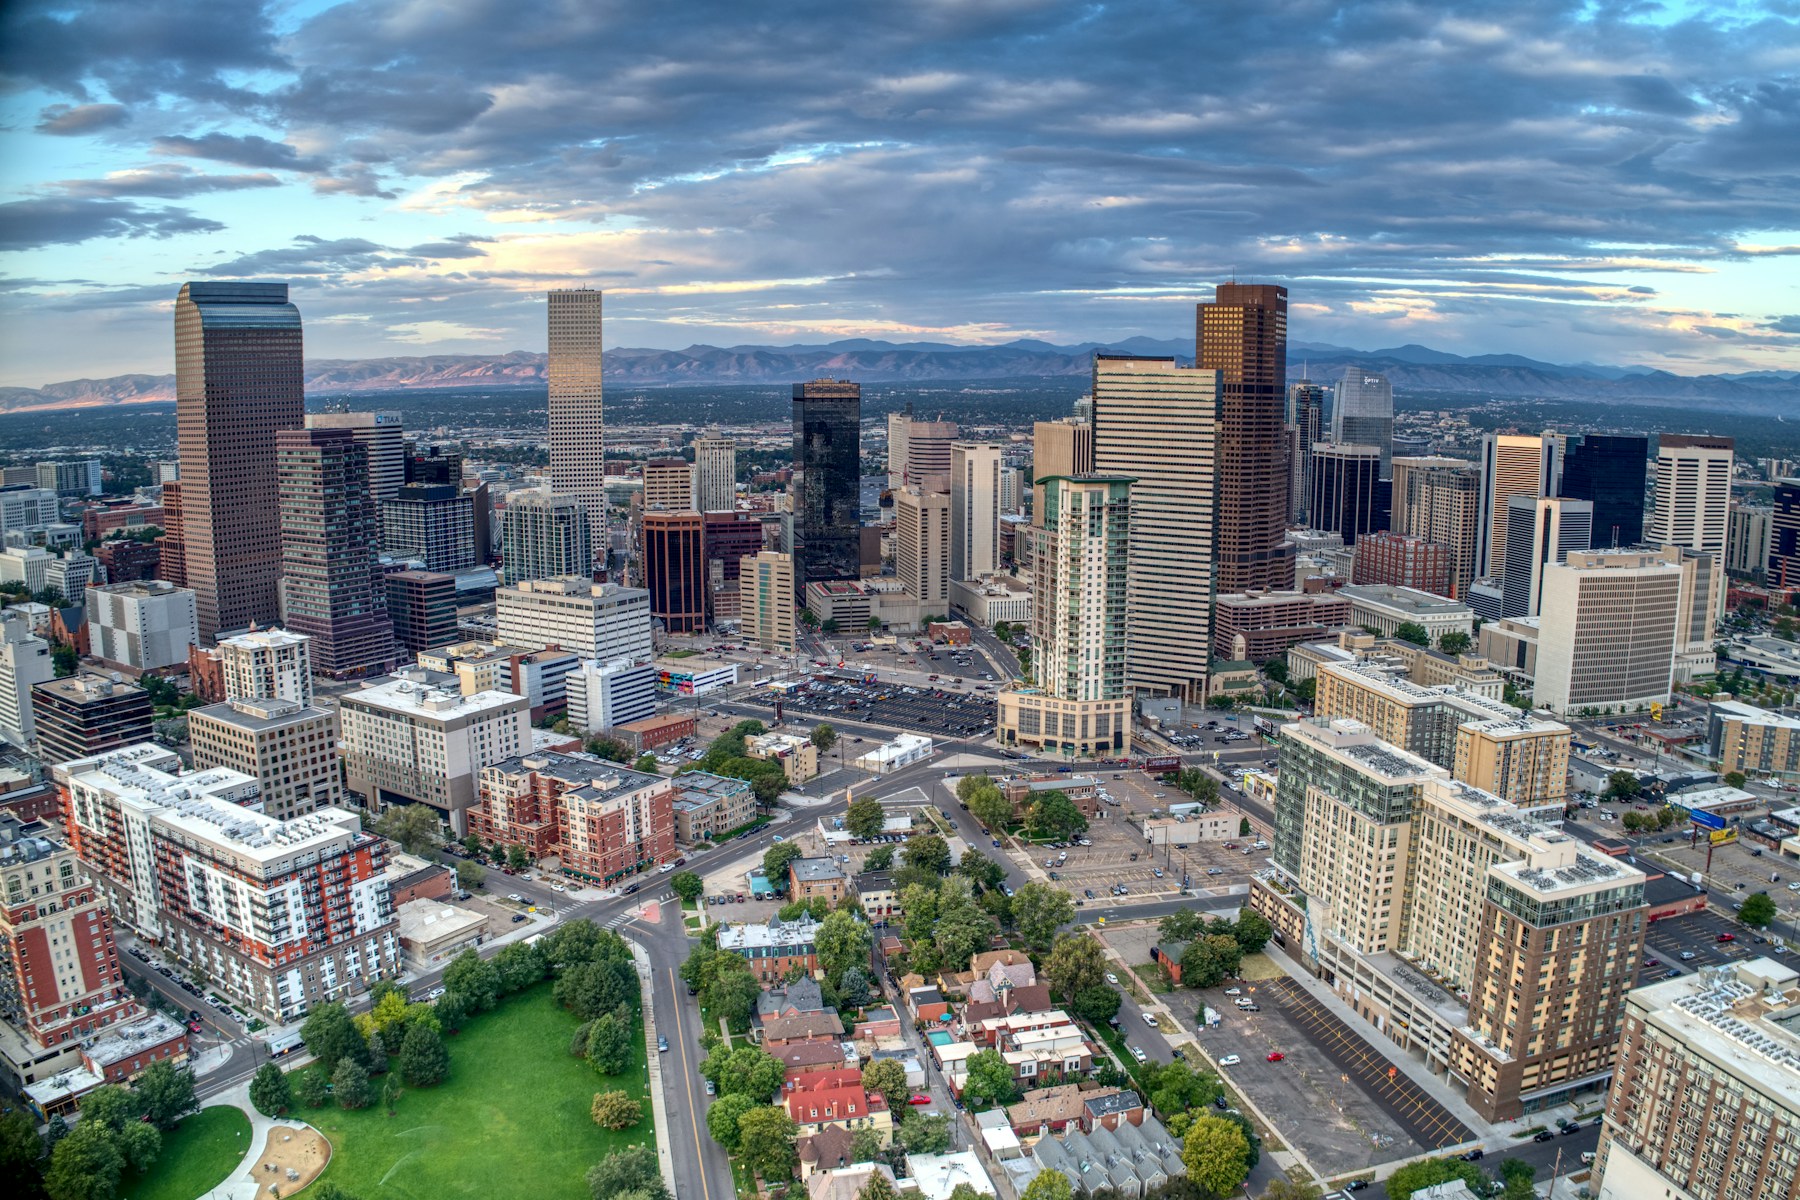
Here are three of the actual shots you’ll find inside the PDF — cinematic full-page references for the exact spots, lenses, and lighting conditions documented in the guide. The full guide includes 12 locations, each with a hero image, GPS map, settings table, and a five-shot list.
Save
Before you shoot Denver: the essentials
- Free public access: Sloan’s Lake Park, Civic Center Park, Confluence/Riverfront Park, the exterior of Colorado State Capitol (including the mile-high 13th step), the exterior and plaza of Denver Union Station, the 16th Street Mall, Larimer Square public sidewalks, the Highland Bridge pedestrian walkway, all RiNo Art District exterior murals on public streets, and Red Rocks Park trail system (separate from the Amphitheatre grounds) are all free and publicly accessible around the clock. The interior of Colorado State Capitol is open free for self-guided or guided tours Monday–Friday; the observation deck requires a 99-step climb but is free. The Denver Art Museum exterior plazas and sculptures are freely accessible 24/7.
- Commercial permits: Denver’s Office of Special Events (OSE) administers film and photography permits for all city-owned public property under 2025 Film & Photography Rules. No permit is required for solo photographers or small groups using handheld equipment or a single tripod: on city sidewalks, fewer than 10 people; in city parks, fewer than 25 people. A permit is required when: (1) crew/cast is 25+ in a city park or 10+ on a sidewalk; (2) more than one tripod or non-handheld equipment is used; (3) public access is blocked; (4) drones are used in city parks (drones are additionally prohibited in all Denver Mountain Parks, including Red Rocks Park, and in City Park). Mountain park trails (including Red Rocks Park trails) are limited to a maximum of 5 individuals without a permit, and only handheld equipment is allowed there. Standard permit applications require at least 5 business days’ notice; complex projects (exclusive park use, street closures, drone use) require 10 business days. No OSE fee for permit applications, though other city agencies may charge location fees. Apply at specialeventapplication.denvergov.org. Red Rocks Amphitheatre grounds (stage, seating, walkways): a separate free permit is required for professional photo sessions — apply via the Red Rocks Contact page at redrocksonline.com, selecting ‘Photography/Video Permits.’ DSLR/SLR cameras with detachable lenses are prohibited inside the venue during concerts. Denver Art Museum requires a permit for all portrait/personal sessions ($40/hr interior; free exterior). Denver Botanic Gardens (York Street) requires a permit for all portrait and fine art photography ($100 for 1–6 people per session; $500 annual permit); commercial photography is not permitted. Union Station exterior: free permit, apply 5 business days in advance through Downtown Denver Partnership at downtowndenver.com/permits. For general inquiries: Denver OSE at denvergov.org.
- Best photography seasons: Fall (mid-September through October) for crisp, smoke-free air, high-contrast blue skies, and golden aspen color visible in the Foothills framing skyline shots from Sloan’s Lake and City Park; Spring (late April through May) for wildflower blooms at the Denver Botanic Gardens, green Civic Center Park, and low-angle morning light raking across the Capitol dome; Summer (June through early July, before wildfire smoke season) for long golden hours, open-air events at Red Rocks, and active Confluence Park; Winter (December through February) for rare dustings of snow transforming Larimer Square cobblestones and Union Station’s forecourt, ultra-clear post-storm air producing the sharpest mountain vistas, and magenta pre-dawn alpenglow on downtown towers
- Blue hour notes: At 5,280 ft, Denver’s blue hour is one of the most intense in the continental United States. The lower atmospheric column means twilight transitions are sharper and shorter — the blue hour window runs approximately 15–25 minutes after sunset (compared to 25–35 minutes at sea level), compressing the optimal shooting window. The Rocky Mountains create a distinctive secondary horizon to the west: once the sun dips behind the 14ers, alpenglow — a vivid pink-to-magenta band — lingers on the mountain crests for 10–20 minutes and simultaneously reflects off downtown glass towers from Sloan’s Lake. Denver’s city lights are densely concentrated east of the mountains, so westward-facing shots (from Capitol Hill, Civic Center Park) catch the last sky warmth above the peaks, while eastward-facing shots (from the Highland neighborhood, Union Station forecourt) frame the illuminated skyline against a deepening cobalt dome. The blue hour is most dramatic after a rain or snowstorm when the air is scrubbed clean and building lights reflect on wet pavement.
- Drone policy: Most major U.S. cities restrict drone flight in airspace and via local ordinances. Check FAA + city rules before launching.
- Local resource: Official visitor information
The full-resolution version of every map below — plus seasonal calendars, gear notes per location, sun-angle diagrams, and a complete photographer’s packing checklist — is inside the Denver Photographer’s Guide PDF ($47).
1. Sloan’s Lake — Southeast Shore Skyline Viewpoint
Sloan’s Lake is the only viewpoint in the continental United States where a major downtown skyline (Republic Plaza, at 714 ft the tallest building between Chicago and Los Angeles) can be photographed reflected in open water with a Rocky Mountain backdrop in the same composition. The 177-acre lake is large enough — and sufficiently still on calm mornings — to produce mirror-perfect reflections that double the visual impact of the skyline. Denver’s compact, underspread downtown cluster photographs more impressively here than from any closer vantage point, with the telephoto compression of a 100–200mm lens pulling mountains and towers together into a single dramatic frame. No other American city offers this trifecta of water reflection, dense skyline, and immediate mountain backdrop at walking distance.
- GPS: 39.7285, -105.0392
- Elevation: 5,321 ft
- Best time of day: Sunrise (primary) for east-sky backdrop and lake reflection; sunset (secondary) for Rocky Mountain backdrop behind skyline; blue hour for alpenglow on mountain crests
- Sun direction: The southeast viewpoint faces roughly 80° east toward downtown. At sunrise (azimuth ~80–95° in spring/fall), the sun rises almost directly behind the skyline cluster, creating a warm backlit glow on the towers and igniting the lake surface in orange and gold — the classic composition. At 5,321 ft, the thin atmosphere at Sloan’s Lake means golden-hour light transitions quickly; the window from first warm color to full daylight is roughly 20–25 minutes versus 35+ minutes at sea level. In the minutes before official sunrise, alpenglow illuminates the Rocky Mountain peaks rising directly behind the skyline to the west, creating a rare front-and-back lighting scenario when shot from the east shore looking west at that precise moment. At sunset, the sun descends toward the Rockies due west, backlighting the skyline from the west; the mountains turn orange-gold behind the steel-and-glass towers. The Rocky Mountains block direct western light on west-facing building facades approximately 30–45 minutes before official sunset, creating a ‘pre-dusk’ softening of downtown lighting from this angle.
- Access: Sloan’s Lake Park, Denver, CO 80214. The southeast shore viewpoint is accessed from W. 17th Ave at Sheridan Blvd (south boundary of the park). Free parking in the large lots along Sheridan Blvd on the west side and along W. 26th Ave on the north side. RTD buses along W. Colfax Ave (#16 line) stop about 0.4 miles south; no direct light rail. The park is free and open 5 AM–11 PM. One tripod is permitted without a permit for groups under 25 people (Denver Parks & Recreation rules). Drone photography is prohibited in Denver Mountain Parks but Sloan’s Lake is an urban park — drone permits through OSE, not recommended due to residential density. The Edgewater neighborhood retail district along W. 25th Ave is 0.3 miles north for pre-sunrise coffee.
- Difficulty: Easy — fully paved lakeside trail, flat grade, ADA accessible throughout
- Recommended settings: Sunrise Reflection: aperture: f/11, shutter: 1/15s, iso: 200, lens: 70-200mm at 100-135mm, notes: Set up tripod at water’s edge 20 minutes before sunrise. Use telephoto compression to pull the Rockies and downtown together. At 5,321 ft, the sky brightens faster than at sea level — bracket ±1.5 EV starting 15 minutes before sunrise. A 0.6 GND filter holds the sky while the dark lake surface catches warm light. Mirror lock-up or electronic shutter prevents vibration at these slow speeds on a potentially breezy lakeside. · Blue Hour Alpenglow: aperture: f/8, shutter: 6s, iso: 400, lens: 70-200mm at 120mm, notes: Target the 10-minute window just after sunset when alpenglow turns the mountain crests pink-magenta and downtown lights begin activating. The compressed blue hour at altitude means this window closes faster than expected — start shooting 5 minutes before official sunset. Check wind: even 4 mph will ripple Sloan’s Lake and eliminate reflections entirely. · Mountain Backdrop Sunset: aperture: f/11, shutter: 1/250s, iso: 100, lens: 70-200mm, notes: Shoot from the east shore looking west 20 minutes before sunset. The sun is still above the mountains, backlighting the skyline. Use a polarizer rotated to 70% polarization to cut glare on tower glass and deepen the sky without over-darkening. The high altitude UV means polarizer effect is more pronounced than at lower elevations.
Shots to chase:
- Sunrise mirror reflection: from the southeast footbridge, capture the full downtown skyline — Republic Plaza as tallest element — perfectly doubled in a glass-smooth lake surface with pink pre-dawn sky
- Trifecta composition: telephoto at 150mm from east shore compresses the water foreground, the compact city cluster, and the snow-capped Rockies into a single vertically stacked frame — Denver’s most iconic single photograph
- Post-storm clarity: within 2 hours of a winter snowstorm clearing, shoot at blue hour when scrubbed air produces zero atmospheric haze and snowy peaks glow against a saturated cobalt sky
- Seasonal swap: in autumn (late September), the Foothills turn golden-amber behind the city — shoot at sunset when mountain foliage and warm light on towers creates a three-tone warm palette
- Footbridge leading line: use the southwest footbridge at W. 17th Ave as a leading line curving toward the skyline — a shallow depth-of-field 50mm shot at f/5.6 keeps the bridge in sharp foreground while the reflection stretches behind
Pro tip: The absolute optimal conditions are a weekday in mid-October following a 24-hour high-pressure system after a September rain, when air quality is excellent and the Foothills have early aspen color. Check AirNow.gov before every shoot — Denver’s mountain-valley geography traps ozone on calm, warm days, and wildfire smoke from July through September routinely reduces visibility to 5–10 miles. The southwest corner of the lake (near W. 17th Ave and Sheridan) has a small pedestrian bridge that adds foreground interest for wide-angle compositions. Arrive 30 minutes before official sunrise; the first light at altitude is dramatic and brief.
Common mistake to avoid: Using a wide-angle lens (under 50mm) from the lake shore — the downtown cluster is 2.5 miles east and requires at least 85–100mm to give buildings meaningful scale in the frame. Shooting in summer without checking air quality, when wildfire smoke and ozone reduce visibility and desaturate the mountain backdrop. Forgetting that the lake needs still conditions: even light breezes destroy reflections — check wind forecasts the night before.
2. Colorado State Capitol — Gold Dome & Mile-High Steps
The Colorado State Capitol is one of America’s great civic photography subjects — a Neoclassical building covered in white Colorado Yule marble and topped with a 24-karat gold-leaf dome that honors the state’s gold rush origins. Denver’s famous 13th step, marked ‘One Mile Above Sea Level,’ is one of the most visited and photographed single steps in America, a tangible anchor to the city’s defining identity. Unlike the more famous gold dome in Boston, the Colorado dome is smaller in scale but dramatically more vivid in color because it is solid gold leaf (200 ounces applied) rather than painted, and at 5,280 ft the UV intensity and thin atmosphere cause gold to appear richer than at sea level. From the west (Civic Center Park), the dome anchors a grand civic axis with the Greek Theater in the foreground — one of Denver’s finest symmetrical architectural compositions.
- GPS: 39.7391, -104.9844
- Elevation: 5,280 ft
- Best time of day: Morning (8–10 AM) for front-facade light; late afternoon for gold dome illumination; blue hour for dome against cobalt sky; midday overcast for interior dome photography
- Sun direction: The Capitol faces west on East Colfax Avenue, with the main facade and dome-topped rotunda oriented to face west-southwest. The 24-karat gold dome is most spectacularly lit when the afternoon sun (from the southwest in autumn, due west in summer) catches it directly — roughly 2–5 PM creates full golden illumination of the dome skin. At 5,280 ft, the high altitude UV causes the gold to appear almost incandescent on clear afternoons, a more saturated gold than comparable domes at lower elevations. Morning light from the east backlights the dome (best for silhouette shots from Civic Center Park to the west) and front-lights the Colfax/east-approach staircase and columns. Blue hour from the west — standing in Civic Center Park looking east — produces the most complete composition: dome glowing warm gold against deep cobalt, flanked by the columns’ white marble. The Rocky Mountains lie due west of the Capitol; at sunset from the east steps, the mountains are directly behind you and occasionally cast a long shadow across the eastern plains, creating dramatic raking light on the dome’s southeast face.
- Access: 200 E Colfax Ave, Denver, CO 80203. Exterior grounds and the famous 13th step (marked ‘One Mile Above Sea Level’) are publicly accessible 24/7 at no charge. Interior self-guided tours are free, Monday–Friday 7:30 AM–5 PM. Free guided tours are available Monday–Friday — the 99-step climb to the observation gallery at the dome base offers panoramic views. RTD light rail: Capitol station (E/W lines) at 16th Ave and Lincoln St, 2 blocks north. Street parking along E Colfax Ave or in the Civic Center Station garage. One tripod is permitted on exterior grounds without a permit for groups under 25. No permit required for personal photography inside public areas; commercial shoots require city permit.
- Difficulty: Easy for exterior; 99 steps to dome observation level (no elevator) — moderate fitness required for interior dome access
- Recommended settings: Afternoon Dome Gold: aperture: f/11, shutter: 1/500s, iso: 100, lens: 70-200mm at 135mm, notes: From the south lawn at 3–4 PM in autumn, telephoto compression isolates the gold dome and its drum colonnade against a deep blue Colorado sky. At 5,280 ft the sky is noticeably darker blue than at sea level — a polarizer can deepen it further but be careful not to over-darken to black. The extreme UV at altitude makes the gold leaf appear almost blown-out without minus exposure compensation; use -0.7 EV to preserve dome detail. · Blue Hour Dome Glow: aperture: f/8, shutter: 15s, iso: 400, lens: 24-70mm at 35mm, notes: From Civic Center Park’s central axis (looking east up the plaza toward the Capitol), 15–20 minutes after sunset: the dome is floodlit warm gold, the sky is cobalt, and the park’s period lampposts activate. Include the Greek Theater archways as a framing foreground. The blue hour window is shorter at altitude — arrive pre-sunset to set up, and be ready to shoot immediately after the sun drops. · Wide Staircase Architecture: aperture: f/11, shutter: 1/125s, iso: 100, lens: 16-35mm, notes: From the base of the west steps looking up at the colonnade and dome, early morning when few tourists are present. Include the 13th step marker as a foreground element. At 5,280 ft, bright morning sky and white marble create a 4-stop contrast — bracket ±1.5 EV or use HDR blending.
Shots to chase:
- Mile-high step portrait: photograph the engraved ‘5280 FEET ABOVE SEA LEVEL’ 13th step from ground level with the dome looming above — a vertically oriented 35mm shot at f/8 keeps both in focus and provides instant narrative context
- Blue hour civic axis: from Civic Center Park’s central walkway, capture the gold dome floating at the end of the formal axis with Greek Theater colonnade framing the edges and lampposts activating along the path
- Dome vs. mountains: from the east steps facing west, the Rocky Mountains fill the sky behind the dome at sunset — a compressed 200mm composition makes the 14ers appear monumental behind the gold dome
- Interior rotunda starburst: inside the rotunda looking up at the dome interior from directly below, use a 16mm at f/16 to create a starburst from the central oculus light — the stained-glass rings add color layers
- Snow-dusted marble: after rare Denver snowstorms (most common November–March), the white marble staircase with a dusting of snow and warm gold dome is one of the city’s most evocative winter images
Pro tip: The dome is most dramatically lit between 2:30–4:30 PM in autumn when the sun is low enough from the southwest to directly illuminate the gold leaf without harsh shadows. Check the Visit Denver mile-high markers page — there are actually three separate marks on the Capitol steps (from three different surveys since 1909) and they create an interesting triple-marker photograph. The observation gallery at the base of the dome (99 steps up) is open free during weekday tours and provides a 360° view of Denver that is one of the best vantage points for mountain panoramas — arrive on the first tour of the day (typically 10 AM) for minimum crowd interference.
Common mistake to avoid: Shooting the dome from the west (Civic Center side) in morning light — it will be backlit and underexposed. The most common technical error is overexposing the gold leaf, which appears to glow in strong sun; set exposure for the dome’s highlights (-0.7 to -1 EV) and let shadows fall. Ignoring the east approach staircase and the distinctive Yule marble columns, which photograph beautifully as leading lines toward the dome on clear mornings.
3. Denver Union Station — Great Hall Interior & Wynkoop Plaza
Denver Union Station is the spiritual and physical heart of LoDo (Lower Downtown) — a restored 1914 Beaux-Arts landmark that anchors the city’s transit system, food and beverage scene, and civic life. The Great Hall’s 65-foot barrel-vaulted ceiling, arched windows, and original terrazzo floors create one of the finest interior architectural photography spaces in the American West. The vintage neon ‘TRAVEL BY TRAIN’ sign, visible from blocks away on Wynkoop Street at night, has become the most reproduced single image of Denver in the Instagram era. Unlike most transit terminals, Union Station operates as a hotel (the Crawford), bar, restaurant, and community gathering space around the clock — meaning photographers can capture authentic candid life at any hour. At 5,228 ft the air clarity means the building’s exterior limestone detail is razor-sharp in morning light.
- GPS: 39.75301, -104.99971
- Elevation: 5,228 ft
- Best time of day: Interior: late afternoon (2–5 PM) when south-facing clerestory windows pour warm light; exterior: blue hour for the iconic ‘TRAVEL BY TRAIN’ sign illumination; evening for Terminal Bar warmth
- Sun direction: Union Station’s main facade faces southeast on Wynkoop Street. The Beaux-Arts exterior is illuminated from the east in the morning, with the large arched windows and the ‘TRAVEL BY TRAIN’ neon sign most visible on approach from the 16th Street pedestrian mall. At blue hour (15–25 minutes after sunset), the building’s warm interior light pours through the grand arched windows onto the Wynkoop Plaza, creating a glowing amber contrast against the cobalt sky — one of Denver’s most recognizable nighttime compositions. The interior Great Hall receives its best natural light through south-facing clerestory windows from roughly 10 AM to 3 PM; the warm-toned vaulted ceiling and arched windows are most evenly lit in mid-afternoon. At 5,228 ft, the blue hour transitions faster than at sea level, so blue-hour exterior shots require pre-positioning on the plaza 10 minutes before official sunset.
- Access: 1701 Wynkoop St, Denver, CO 80202. The building is open 24 hours daily (hotel, bars, and restaurants operate across different hours). The Great Hall interior is publicly accessible from approximately 5 AM–midnight. RTD light rail and commuter rail: Union Station stop on multiple lines including the A Line (airport), W Line, and C/D Lines. Free Ride on the 16th Street Mall Free MallRide bus connects Union Station to Civic Center Station. Street parking on Wewatta St or the Union Station garage. Exterior photography permit: free permit required for sessions involving more than 5 people; apply 5 business days in advance through Downtown Denver Partnership (downtowndenver.com/permits). Interior Great Hall: no permit required for casual photography; portrait/professional shoots are allowed in the Great Hall only (not upper levels/Crawford Hotel); limited to 45 minutes; no tripods, lighting, reflectors, or flash inside; permit is free. No photography on the Crawford Hotel upper levels or Cooper Lounge.
- Difficulty: Easy — flat plaza and interior, fully ADA accessible, no admission
- Recommended settings: Interior Great Hall: aperture: f/5.6, shutter: 1/60s, iso: 1600, lens: 16-35mm at 16mm, notes: From the center of the Great Hall looking toward either arched end, a 16mm captures the full barrel vault. At 5,228 ft altitude, indoor light behaves the same as at sea level — use ISO 1600 or 3200 to avoid tripod requirement (tripods prohibited inside). Activate in-camera stabilization. The warm pendant lights and natural window light create a 2500–4000K mixed scene; shoot in RAW and correct white balance in post. Midday (11 AM–2 PM) delivers the most even natural light from the south windows. · Blue Hour Exterior: aperture: f/8, shutter: 20s, iso: 400, lens: 24-70mm at 28mm, notes: From Wynkoop Plaza directly in front of the main entrance, 15 minutes after sunset. The ‘TRAVEL BY TRAIN’ neon sign illuminates amber-orange against the cobalt sky. A 20-second exposure at ISO 400 captures the sign glow and any pedestrian light trails. The shorter blue hour window at altitude means shoot immediately when sky turns cobalt — do not wait for full darkness. A slight tilt down captures the plaza’s reflective tiles. · Neon Sign Closeup: aperture: f/8, shutter: 1/250s, iso: 400, lens: 70-200mm at 135mm, notes: From across the plaza, telephoto compression isolates the illuminated ‘TRAVEL BY TRAIN’ lettering against the night sky. The vintage incandescent-glow neon renders beautifully at -0.7 EV exposure compensation — preserve the letter detail without blowing highlights. Shoot multiple focal lengths from 85mm to 200mm to vary how much sky and building are included.
Shots to chase:
- Classic blue-hour facade: from Wynkoop Plaza center, wide-angle captures the full Beaux-Arts facade with neon sign glowing against cobalt sky and plaza tiles reflecting warm window light — Denver’s single most ‘gramworthy’ architectural shot
- Interior symmetry: from the exact center of the Great Hall floor, a 16mm straight up captures the barrel-vault ceiling’s arched ribs converging symmetrically with the pendant chandeliers and terminal signs
- Terminal Bar warmth: tight 35mm shot through the Bar’s brass-and-glass partition, capturing the amber-lit cocktails and vintage timber interior against the grand hall’s warm light — available after 11 AM daily
- Train arrival motion blur: from the mezzanine level (if accessible), a 2-second exposure captures commuter trains arriving on the platform tracks with motion blur while the station structure remains static
- Pre-dawn solitude: at 5 AM before coffee shops open, the Great Hall is empty and naturally lit by overnight pendant lights — a 16mm wide shot captures the space in its most intimate, museum-quality state
Pro tip: The absolute best exterior blue-hour shot requires arriving on the plaza 20 minutes before sunset to pre-compose and focus — the blue hour at 5,228 ft lasts only 15 minutes and begins the moment the sun drops below the mountains to the west (often 30–40 minutes before official sunset due to the Rocky Mountain horizon elevation). The plaza’s brick and granite tiles produce better reflections after light rain. Weekday evenings (Tuesday–Thursday, 7–9 PM) have the perfect balance of foot traffic for candid street life and manageable crowd density for architectural shots. The Wynkoop Brewing Company patio (adjacent to the station) provides an elevated viewpoint for telephoto compression of the facade.
Common mistake to avoid: Shooting the exterior from Wynkoop Street (too close, distorted perspective) rather than backing up to the full plaza for a properly proportioned facade shot. Attempting tripod use inside the Great Hall — it is explicitly prohibited and security will intervene. Arriving at blue hour unprepared: the mountain horizon means sunset-to-dark at Denver is 10–20 minutes faster than expected from sea-level experience.
4. Frederic C. Hamilton Building — Denver Art Museum Exterior
The Frederic C. Hamilton Building is Daniel Libeskind’s first completed building in the United States and one of the most architecturally significant structures in the American West. Its explosive deconstructivist geometry — 20 angular planes covered in titanium and glass, a 167-foot steel cantilever extending above 13th Avenue, all assembled from 3,100 pieces of steel weighing 2,740 tons — is a permanent photographic provocation. Unlike most modern museums that present clean rectilinear surfaces, the Hamilton Building offers no two identical angles; every viewpoint reveals a different configuration of triangular facets, shadow lines, and reflections. The building’s design was explicitly inspired by the angular crystals found at the base of the Rocky Mountains, and at 5,250 ft altitude, the quality of Colorado light — particularly in low-angle autumn sun — amplifies the geometric drama. The adjacent Gio Ponti-designed Martin Building (1971) with its mosaic tile facade provides a complementary mid-century contrast in the same frame.
- GPS: 39.7372, -104.9893
- Elevation: 5,250 ft
- Best time of day: Late afternoon (2–4 PM) for angular titanium surface shadows; overcast mornings for shadowless metallic surface detail; blue hour for surrounding plaza ambient light
- Sun direction: The Hamilton Building sits at 100 W 14th Ave Pkwy, oriented with its primary deconstructivist angular surfaces facing northwest and southwest. None of the building’s 20 planes is parallel or perpendicular to another, meaning shadow patterns shift dramatically throughout the day as the sun traverses the sky. At 5,250 ft, the intense Colorado UV and thinner atmosphere cause the titanium-clad panels to appear more brilliantly silver in direct sun and more dramatically shadowed at oblique angles than at lower elevations — the high-altitude light accentuates the angular drama the architect Daniel Libeskind intended. The most striking window is 1–3 PM on clear autumn days when raking light from the southwest creates sharp shadow edges along the building’s angular facets. Overcast days produce even diffuse light that is actually superior for revealing the titanium surface texture. The building’s most dramatic architectural element — a 167-foot steel beam extending over the street — is best photographed with a telephoto from across 13th Ave looking north, where sunlight rakes across the underside of the cantilever from the southeast in morning hours.
- Access: 100 W 14th Ave Pkwy, Denver, CO 80204. The exterior plazas and adjacent Civic Center Cultural Complex are publicly accessible 24/7 at no charge. Museum interior: open Tuesday–Sunday 10 AM–5 PM (Friday until 9 PM); admission ~$20 adults, free for Colorado residents on the first Saturday of each month. RTD light rail: 16th/California Station (0.5 mi) or Colfax at Auburn Station (W Line). Paid street parking on 13th Ave or Acoma St. Exterior photography permit required only for groups 25+ (Denver Parks) or professional portrait sessions ($40/hr interior, free exterior; apply via DAM); commercial photography not permitted. Tripods permitted on exterior plaza without permit for groups under 25.
- Difficulty: Easy — fully paved public plazas, ADA accessible, no admission required for exterior
- Recommended settings: Angular Facets Afternoon: aperture: f/11, shutter: 1/500s, iso: 100, lens: 24-70mm or 16-35mm, notes: From the 13th Ave public sidewalk, experiment with extreme wide-angle (16mm) at close distance — the deconstructivist angles become even more disorienting when the building seems to lean over you. No perspective correction: embrace the converging verticals as part of the architectural language. At 5,250 ft the titanium panels reflect UV intensely — a lens hood is essential to prevent flare at steep angles. · Overcast Titanium Texture: aperture: f/8, shutter: 1/125s, iso: 200, lens: 70-200mm, notes: Overcast, cloudy days are ideal for the titanium facade — diffuse sky light reveals the micro-texture of the panels and the sharp edge transitions between planes without the confusing mix of lit and shadowed surfaces in direct sun. Use a telephoto from 50–80m back to compress multiple angled planes into a flat abstract composition. · Cantilever Underside: aperture: f/11, shutter: 1/250s, iso: 200, lens: 16-35mm or 24mm tilt-shift, notes: From the Acoma St sidewalk looking northeast at the 167-ft cantilever: morning southeast sun (9–11 AM) illuminates the underside of the extended beam. A 16mm at f/11 captures the cantilever, the angular facets, and the deep blue Colorado sky in one extreme-contrast composition. Use a tilt-shift if available to correct extreme vertical perspective shift.
Shots to chase:
- Abstract angular study: with a 24mm from 5 meters away, fill the entire frame with a single triangular titanium facet at a 45° angle — the plane’s edge becomes a diagonal across the frame and the reflection of the sky creates an abstract color gradient
- Libeskind vs. Ponti: from the plaza between the Hamilton Building and the Martin Building (Gio Ponti, 1971), a wide 20mm at ground level captures the angular titanium geometry of 2006 in dialogue with the mosaic tile castle-form of 1971
- Blue hour titanium glow: 15 minutes after sunset, the titanium panels take on a faint violet-blue cast from the cobalt sky above — the building’s own geometry creates a subtle chiaroscuro as the last warm light leaves the upper facets
- Cantilever compression: 200mm telephoto from across 13th Ave isolates the dramatic horizontal cantilever extension against the sky — a purely architectural abstract with no ground reference
- Shadow geometry study: on a clear afternoon, the cast shadows of the angular planes on neighboring surfaces create their own second-order geometric pattern — seek out where the building’s triangular shadows fall on the adjacent plaza at 2 PM in October
Pro tip: The Hamilton Building’s most dramatic photographs are taken from unconventional angles: from directly below the cantilever (Acoma St, looking straight up), from extreme close range (5–10 ft) with a wide angle, or from the pedestrian bridge connecting the two museum buildings. The ‘Big Sweep’ sculpture by Claes Oldenburg (a giant orange broom) in the plaza provides a playful foreground element that humanizes the architectural scale. The first Saturday of each month, Colorado residents get free museum admission — use the interior visit to study the angular gallery spaces for interior photography (tripods not permitted inside).
Common mistake to avoid: Shooting only from the standard street-level approach on 14th Ave — this view reveals the building’s primary entrance but is actually one of its least dynamic angles. Photographing in summer midday sun, when harsh overhead light flattens the angular facets and eliminates the shadow drama Libeskind designed for. Forgetting that overcast light is optimal for this subject — clear blue-sky days are counterintuitively not the best choice.
Want this in your pocket on the street?
The full-resolution version of every spot above — with full-page hero photography, GPS maps with gold location pins, sun direction diagrams, multi-season tables, and a complete safety + packing checklist — is inside the Denver Ultimate Photographer’s Guide PDF ($47). Print it, save it offline, take it on the walk. Get the guide →
5. Larimer Square — Historic Denver at Night
Save
Larimer Square is Denver’s oldest and most intact block of Victorian commercial architecture, a single surviving example of the Gold Rush-era streetscape that once defined the city. The block was saved from demolition in 1965 by preservationist Dana Crawford and is now on the National Register of Historic Places. Its characteristic brick facades, bay windows, and decorative ironwork date primarily from the 1870s–1880s, and the entire block is draped in a permanent canopy of string lights that creates a warm, intimate European-café atmosphere unique in the Mountain West. At night, the combination of warm Victorian brick, twinkling overhead lights, and the energy of Denver’s premier restaurant/bar block creates a scene that photographs unlike any other street in the city. In the altitude of 5,210 ft, the string lights appear marginally brighter against the sky because the thinner atmosphere reduces atmospheric scatter.
- GPS: 39.7478, -104.9994
- Elevation: 5,210 ft
- Best time of day: Blue hour and evening (30 minutes after sunset through 10 PM) for string-light canopy illumination; golden hour in autumn for warm storefronts; pre-sunrise on weekdays for empty cobblestone scenes
- Sun direction: Larimer Square occupies a single block of Larimer Street between 14th and 15th Streets, oriented NE-SW. The street canyon runs roughly northeast-southwest, meaning the building facades receive direct warm sunlight from the southeast in the morning (east-facing facades lit until about 11 AM) and from the southwest at golden hour (west-facing facades from 3–5 PM). At 5,210 ft, the warm light in the 45 minutes before sunset is more intense and saturated than at sea level — the Victorian red-brick facades glow a deeper amber in low-angle autumn sun. The overhead string-light canopy (suspended above the entire block) creates a competing light source after sunset; mixed-light compositions work best when sky color (blue hour) and string lights are in balanced exposure. The Rocky Mountains lie due west and cast no shadow on Larimer Square directly, but in winter create dramatic low-angle sidelighting from the southwest on the south-facing (north-side) facades.
- Access: 1400 Larimer St, Denver, CO 80202. Larimer Square is a public street (24/7 access) within a Historic District. Street parking on Larimer, Lawrence, and 14th/15th Streets; parking garages on Market St and Wewatta St (2 blocks). RTD Free MallRide bus stops at 15th and Curtis (2 blocks). Photography on the public street does not require a permit. For larger crew productions (10+ on sidewalk), a Denver OSE film permit is required. Note: Larimer Square is privately managed as a historic district and the property owner (Larimer Square LLC) may restrict commercial photography on private courtyards/entries — exterior street photography is publicly permitted.
- Difficulty: Easy — flat cobblestone street, fully walkable, ADA ramps at street crossings
- Recommended settings: Blue Hour String Lights: aperture: f/8, shutter: 4s, iso: 400, lens: 24-70mm at 35mm, notes: From the center of the street looking north or south along the block, 15–25 minutes after sunset. A 4-second exposure at f/8 balances the string-light glow with the remaining cobalt sky above. At 5,210 ft, blue hour is brief — be ready immediately after sunset. Include pedestrians in frame using 4-second motion blur for ghost-like street life effect. Tripod essential; OSE permit required if more than one tripod is deployed. · Wide Street Perspective: aperture: f/11, shutter: 1/125s, iso: 400, lens: 16-35mm at 20mm, notes: From the Larimer/14th intersection looking northeast, a 20mm captures the full string-light canopy perspective with both rows of facades leading to a vanishing point. Early evening (7–9 PM) on weekends when foot traffic fills the street creates authentic energy. Shoot from a slight crouch to include both the cobblestone foreground and the string-light canopy overhead. · Golden Hour Brick Detail: aperture: f/8, shutter: 1/250s, iso: 100, lens: 70-200mm at 85mm, notes: 30 minutes before sunset from the north sidewalk looking south, the late afternoon sun from the southwest illuminates the red-brick Victorian facades with warm orange light. At altitude, this light is more intense and saturated — a polarizer at 45° enhances the brick’s terracotta color without removing the specular window reflections.
Shots to chase:
- String-light corridor: from low and center on the Larimer Street cobblestones, a 20mm captures the entire string-light canopy perspective receding 350 feet to the block’s end — the quintessential Larimer Square image, best at blue hour
- Victorian detail + altitude: telephoto at 135mm picks out an individual bay window with cast-iron fire escape, Victorian cornice detail, and window boxes against a deep Colorado blue sky — the architecture photography equivalent of the Capitol dome
- After-hours emptiness: on a Tuesday at 6 AM, the string lights are still active (24/7) but the street is empty — a 10-second exposure captures the amber-lit cobblestones and glowing facades with zero human presence
- Winter holiday illumination: December brings additional seasonal lighting; a 4-second exposure captures layered string lights, holiday decorations, and the occasional snow dusting on brick — Denver’s most festive photography opportunity
- Portrait with architectural depth: human subject in cobblestone foreground at f/2.8 (50mm), string lights and facades becoming warm bokeh — the leading-line perspective and bokeh lights create editorial-quality depth
Pro tip: The string-light canopy is active 24/7 and most photogenic on Tuesday–Thursday when the block is less crowded than weekends. The block is narrow (~30 feet wide) and buildings tall (~4 stories) — this means the best light for architecture is actually in the morning when high-angle eastern sun clears the buildings, or in the 30 minutes before sunset when low southwestern light rakes along the facades. The cobblestone surface produces excellent reflections after rain — check 5-day forecasts for rain then clear conditions. Foot traffic peaks Friday–Saturday evenings after 8 PM; weekday evenings are optimal for architectural shots with ambient human activity.
Common mistake to avoid: Shooting only from the obvious corner positions without walking the full block — the alley entrances and mid-block archways offer unexpected framing options. Arriving in full daylight and missing the string-light effect, which only becomes photogenic 15–20 minutes after sunset. Using too short a shutter for evening handheld shots — even with IS/IBIS, the f/8 or smaller aperture needed for string-light bokeh requires either a tripod or ISO 3200+.
6. RiNo Art District — Mural Corridor (Brighton Blvd & Walnut St)
RiNo (River North Art District) is the most vibrant public mural destination in the Mountain West — a 1-square-mile district that has transformed from a warehouse industrial zone into one of America’s premier creative neighborhoods, home to over 200 murals ranging from 15-foot alley pieces to 8-story building-scale works by internationally recognized artists. Unlike curated mural programs in other cities, RiNo murals are commissioned through the district’s artist community and change seasonally as building owners refresh their walls. The combination of Denver’s altitude (5,180 ft), intense UV, and dry air means mural pigments remain vivid longer than in coastal cities — colors are more saturated and contrast is higher under Colorado skies. The 38th Street underpass (38th and Blake) is one of the district’s most photographed nodes, where bridge murals and tunnel art create a gallery-in-infrastructure.
- GPS: 39.76201, -104.98001
- Elevation: 5,180 ft
- Best time of day: Morning (8–11 AM) for south-facing murals; afternoon (2–5 PM) for north-facing murals; overcast light for shadowless, even mural colors; golden hour for warm-toned walls
- Sun direction: RiNo’s mural-dense streets — Brighton Blvd, Walnut St, Larimer St, and Blake St — run primarily northeast-southwest, producing mural walls that face either northwest or southeast. South-facing walls (north side of streets running east-west) receive direct light in morning and afternoon, while north-facing walls (south side) remain in open shade all day — ideal for even mural photography without harsh shadows. At 5,180 ft, the Colorado UV is 25% more intense than at sea level, which means murals on south-facing walls photograph with exceptional color saturation in the morning hours. Overcast ‘Colorado white sky’ days are optimal for mural photography because diffuse light renders the full dynamic range of pigments. The Rocky Mountains are not visible from street level within RiNo itself, but the eastern foothills are sometimes visible at the end of east-west streets on exceptionally clear post-storm days.
- Access: RiNo Art District is bounded roughly by I-25 (west), I-70 (north), Park Ave West (south), and Arapahoe St (east). Primary mural areas: Brighton Blvd (38th to 29th), Walnut St (between 30th and 40th), Blake St. RTD A Line commuter rail: 38th and Blake Street station is the primary access point. Street parking throughout the district; free parking along Brighton Blvd on weekdays. No permit required for casual photography of public murals on public streets. Production shoots with 10+ people or multiple tripods require a Denver OSE film permit. Important: RiNo mural artists require credit and tagging in any shared photographs showing their work (social media, blogs, publications) — check rinoartdistrict.org for individual artist credits. Drones require OSE permit; the dense building density makes flying difficult and permit-constrained.
- Difficulty: Easy to moderate — flat urban streets, extensive walking required to see all major murals (1–2 miles total)
- Recommended settings: Wide Mural Facade: aperture: f/8, shutter: 1/250s, iso: 100, lens: 16-35mm or 24mm tilt-shift, notes: For full building-scale murals (4–8 stories), position yourself across the street with a 16–24mm lens and shoot straight-on to avoid keystone distortion. Overcast light is ideal — bright sun creates uneven illumination and hot-spot glare on paint. At altitude, even thin cloud cover provides excellent diffuse light because the higher solar intensity still delivers adequate exposure. A tilt-shift corrects any vertical keystoning on tall murals. · Human Scale Interaction: aperture: f/4, shutter: 1/500s, iso: 200, lens: 35mm or 50mm, notes: Use pedestrians or cyclists as scale references against large-format murals. f/4 keeps the human sharp while slightly softening mural background edges, creating editorial depth. The 38th Street underpass provides natural framing: subjects walking through the tunnel are flanked by tunnel murals on both sides in a 35mm frame. · Detail Abstraction: aperture: f/5.6, shutter: 1/500s, iso: 100, lens: 70-200mm at 100-200mm, notes: Telephoto compression from 50–100m away isolates a specific mural section against an adjacent architectural element — a weathered brick corner, rusty fire escape, or glass window reflection. The abstract composition of mural color pattern with industrial texture is a distinctly RiNo genre. Under Colorado’s intense UV, the mural pigments appear hyper-saturated at telephoto magnification.
Shots to chase:
- 38th Street underpass gallery: from inside the underpass looking east or west, the tunnel murals frame a circle of daylight at each end with pedestrians silhouetted — a strong graphic composition found nowhere else in Denver
- Brighton Blvd aerial perspective: from the 38th-Blake RTD station platform elevated walkway, a 35mm captures a street-level mural with the full industrial-to-creative streetscape of Brighton Blvd receding behind it
- Artist at work: large-format commission murals are actively painted throughout the year; a 200mm from across the street captures the artist and their scaffold with the partially completed work in a documentary-style image
- Scale juxtaposition: a 20mm captures a 5-story mural with a single human in the frame — the scale contrast between micro and macro is one of RiNo’s most powerful visual themes
- Faded vs. fresh comparison: seek out adjacent walls where a new mural was painted over an older work, and the ghost of the previous piece bleeds through at the edges — a uniquely urban-archaeology photograph
Pro tip: The RiNo Art District’s main mural map is available at rinoartdistrict.org/go — download it before visiting as many of the best murals are on secondary alley walls not visible from primary streets. The district publishes walking tour PDFs with turn-by-turn mural locations. New murals are typically unveiled in spring (April–May) and fall (September–October) during art walks. Weekday mornings (8–11 AM) have the lowest foot traffic for clean mural shots without people in frame. Remember to credit the artist when sharing images — the RiNo community is protective of their artists’ intellectual property.
Common mistake to avoid: Sticking to only Brighton Blvd (the main arterial) and missing the denser mural concentrations on Walnut, Larimer, and the alley networks between 35th and 38th Streets. Shooting south-facing murals in midday summer sun when harsh overhead light creates ugly shadows and blown highlights. Forgetting to include a human figure for scale — without context, a 5-story mural looks the same as a 15-foot alley piece in photographs.
7. Red Rocks Park & Amphitheatre — Sunrise Geological Wonder
Red Rocks is one of the most photographically spectacular natural-meets-built environments in North America — a naturally formed geological amphitheatre created by 300-million-year-old Precambrian sandstone monoliths that soar 300 feet above the stage. The red ferric-oxide coloration of the Fountain Formation sandstone intensifies dramatically at sunrise and sunset, shifting from deep maroon to fluorescent scarlet to golden-orange across a 30-minute window. As an outdoor music venue, it is consistently ranked the world’s best — artists from the Beatles to U2 to Radiohead have performed here — adding a layer of cultural mythology to the geological spectacle. Photographically, no other location within 15 miles of a major American city offers this combination of ancient geological grandeur, concert-venue human scale, and the ability to frame Denver’s skyline and the entire Front Range through naturally sculpted sandstone arches. At 6,450 ft — 1,170 ft above Denver’s famed 5,280 ft baseline — altitude effects on light are pronounced: colors are purer, shadows harder, and the sky is measurably darker blue.
- GPS: 39.6655, -105.2053
- Elevation: 6,450 ft
- Best time of day: Sunrise (primary) for east-lit red sandstone; late afternoon for south-facing amphitheatre seating golden light; shoulder months (April–May, September–October) for manageable crowds; avoid major concert dates
- Sun direction: Red Rocks Amphitheatre is set between two massive 300-foot red sandstone monoliths — Ship Rock (south) and Creation Rock (north) — with the stage facing northeast and the seating curving southeast. At 6,450 ft, golden hour is dramatically different from Denver’s 5,280 ft baseline: the atmosphere is even thinner, causing more intense light color saturation and an even shorter golden hour window (typically 15–20 minutes from first warm color to full daylight). At sunrise, the sun rises to the east and progressively illuminates the south faces of the Precambrian sandstone monoliths from left to right — the lower orange-red layers (Fountain Formation, 300 million years old) glow an almost fluorescent scarlet in the first 10 minutes of direct sunlight. By 9 AM, the sun has risen enough to flood the stage area with relatively flat light. The most dramatic sunrise shots are from the upper south lot (or the top rows of seating) looking west, where the silhouetted monoliths frame the Denver skyline and Great Plains beyond in a single composition — one of the most unique urban backdrops in world photography. The Rocky Mountains block any direct western light on the stage area until approximately 2 hours before sunset.
- Access: 18300 W Alameda Pkwy, Morrison, CO 80465. Approximately 15 miles west of downtown Denver. Red Rocks Park (the geological area surrounding the amphitheatre) is managed by Denver Parks & Recreation and is free and open to the public year-round. The Park (hiking trails, geological formations) is open 5 AM–11 PM; parking lots are open 5 AM–11 PM. The Amphitheatre grounds (stage, seating, walkways, parking lots) are managed separately: free access on non-show days during park hours. Photography permit for the Amphitheatre: free personal photo permits required — apply via redrocksonline.com, select ‘Photography/Video Permits’ from the Contact page Department dropdown; provide details about your session. On concert/show days, access to the seated area is restricted to ticket holders; cameras with detachable lenses are prohibited inside the venue during concerts. Tripods are allowed in the Park trail areas with no permit for groups under 5 people (Denver Mountain Parks rules — strictly 5 or fewer, handheld only on trails). No drones permitted anywhere in Denver Mountain Parks. Drive or rideshare recommended; no RTD service directly to Red Rocks. Paid parking in Amphitheatre lots ($10 on non-show days). Trailhead parking also available.
- Difficulty: Moderate — the Amphitheatre seating is a significant staircase climb (~200 steps); hiking trails in the Park add additional elevation gain. Not recommended for those with mobility limitations. At 6,450 ft, altitude effects (breathlessness, headache) are real for visitors coming from sea level — hydrate and pace yourself.
- Recommended settings: Sunrise Monolith Glow: aperture: f/11, shutter: 1/30s, iso: 200, lens: 16-35mm, notes: From the upper south lot or top amphitheatre rows, set up before sunrise facing west-southwest where the monoliths frame the stage and Denver beyond. At 6,450 ft, the sky brightens significantly 20 minutes before sunrise — target the 5-minute window when the monolith faces glow scarlet before the shadows lift. Bracket ±2 EV: the bright sky and deep red rock create a 5-stop dynamic range. A graduated ND filter prevents sky blowout. At altitude, temperature drops fast at dawn in spring/fall — protect camera batteries. · Silhouette Framing: aperture: f/16, shutter: 1/1000s, iso: 100, lens: 24-70mm at 24mm, notes: Expose for the bright sky between the monolith silhouettes — at f/16, a starburst forms at the edges where the rock meets the sky. The 300-foot monoliths are black at -2 EV exposure, creating a graphic negative-space silhouette that frames the dawn colors perfectly. Morning in March–April or September–October produces the warmest light at the most photogenic angle. · Telephoto Denver Skyline: aperture: f/11, shutter: 1/500s, iso: 200, lens: 70-200mm at 200mm, notes: From the upper south amphitheatre seating, face northeast: the Denver skyline (12 miles distant) is compressed between the monolith silhouettes by a 200mm lens, appearing almost as large as the rocks themselves. This shot requires exceptionally clear air (post-storm, autumn) — summer haze or wildfire smoke at 6,450 ft can reduce this visibility to under 10 miles. Shoot at f/11 for maximum front-to-back sharpness.
Shots to chase:
- Monolith sunrise glow: from the upper south lot at first light, the scarlet-glowing Ship Rock and Creation Rock frame the stage and the Denver skyline beyond — one of the most iconic and least-duplicable landscapes in American photography
- Stage from the top rows: telephoto from row 70 (the highest seating) looking down at the 37-by-96-foot stage with the Great Plains and Denver visible through the natural rock arch — the photograph that communicates why Red Rocks is the world’s greatest outdoor venue
- Rock formation macro: 100mm macro on the Fountain Formation sandstone surface reveals ancient folded strata, lichen patches, and mineral veins — a geological abstraction that complements the grandeur shots
- Concert light and rock: if attending a show, a 2-second handheld exposure (high ISO) captures the stage lighting with the rock formations silhouetted above — the only photograph type allowed with a non-detachable lens camera during shows
- Yoga on the Rocks session: the venue hosts Yoga on the Rocks events in summer — a 70mm telephoto from the upper rows captures practitioners on the stage with the sandstone formations and sunrise behind them
Pro tip: Navigate to ‘Red Rocks Amphitheatre Upper South Lot’ in your mapping app — this takes you to the optimal sunrise viewpoint directly. Arrive 45 minutes before sunrise; the lot fills quickly on weekends April–October. Check redrocksonline.com’s event calendar 48 hours before visiting — on concert days, parking and access are restricted from mid-afternoon. The Trading Post Trail (1.4 miles, starting from the south end of the amphitheatre) passes through the geological formations at eye-level and provides intimate sandstone photography opportunities unavailable from the Amphitheatre’s upper viewpoints. Carry extra memory cards and batteries — at 6,450 ft in cold mornings (temperature drops 3°F per 1,000 ft), battery drain accelerates significantly.
Common mistake to avoid: Arriving at sunrise and shooting only the standard ‘monolith from the upper lot’ shot without exploring the geological park trails for different perspectives. Visiting in July–August when afternoon thunderstorms (which build over the Rockies and arrive at Red Rocks by 2–4 PM) present both a safety risk and a photography opportunity — if shooting in summer, be off exposed areas by 1 PM. Failing to check the concert schedule and arriving to a parking-lot-full, ticketed venue.
8. Confluence Park & Riverfront — Cherry Creek Meets South Platte
Confluence Park marks the exact geographic birthplace of Denver — it was here in 1858 that gold prospectors established the first permanent settlement at the confluence of Cherry Creek and the South Platte River. Today it remains a rare urban space where natural river dynamics (constructed whitewater rapids, riprap banks, cottonwood groves) coexist with the industrial-heritage REI flagship building (a 1901 tramway power station), the modern Highland Bridge cable span visible upstream, and the downtown skyline a half-mile northeast. The proximity of river, rapids, historic industrial architecture, pedestrian infrastructure, and city views within a single frame makes it one of Denver’s richest compositional environments. In summer, the constructed whitewater attracts kayakers and tubers whose colorful gear adds kinetic foreground interest to skyline compositions.
- GPS: 39.7547, -105.0078
- Elevation: 5,174 ft
- Best time of day: Golden hour (sunrise or sunset) for warm reflections on the rivers; late afternoon for kayakers on the South Platte rapids; summer evenings for water activity and urban skyline context
- Sun direction: Confluence Park sits at the Y-shaped junction of Cherry Creek (from the southeast) and the South Platte River (from the north), with the park’s main viewpoint facing roughly northwest toward the REI flagship store building and the Highland neighborhood bluffs beyond. At 5,174 ft, the golden hour light here is intense and brief — roughly 20–25 minutes from first warm color to full daylight. The morning sun from the southeast illuminates the west-facing facade of the REI flagship building (a converted 1901 tramway power station) and reflects off the rippled whitewater on the South Platte, creating animated light patterns on the rock faces. At sunset, the sun dips toward the northwest and backlights the Highland bluffs, while warm light rakes across the wide South Platte riverbed from the west. The Rocky Mountains are visible to the west at the end of the South Platte valley corridor — on clear mornings, telephoto shots up the river channel reveal the foothills as a distant backdrop.
- Access: 2250 15th St, Denver, CO 80202 (REI flagship store address; Confluence Park is adjacent). The park is publicly accessible 24/7 at no charge. Street parking on 15th St and Little Raven St; the REI store has a large parking garage. RTD: several bus lines along Speer Blvd (0.2 miles); no direct light rail but the Millennium Bridge pedestrian walkway connects to Union Station 0.3 miles northeast. The South Platte River Trail is a continuous multi-use path running north-south along the river, open to cyclists and pedestrians. No photography permit required for solo photographers; groups of 25+ in city parks need an OSE film permit. Whitewater kayaking on the constructed rapids attracts paddlers from April through September — an active photo subject.
- Difficulty: Easy — flat riverfront path, paved and unpaved sections, ADA accessible in main park area
- Recommended settings: Whitewater Freeze: aperture: f/8, shutter: 1/2000s, iso: 400, lens: 70-200mm at 135mm, notes: A 1/2000s or faster shutter freezes the white water spray mid-air, crystallizing individual droplets against the dark river rock and creating an energetic foreground for urban-nature compositions. Position from the east bank looking west at the REI building for a white-water-plus-architecture two-element frame. At altitude, the intense UV makes white water overexpose easily — use -0.7 EV compensation. · River Silky Long Exposure: aperture: f/16, shutter: 3s, iso: 100, lens: 16-35mm, notes: From the pedestrian bridge or riverbank at golden hour, a 3-second exposure silks the moving water into smooth ribbons while the rocky banks and cottonwood trees remain sharp. Include the REI building or Highland Bridge as the mid-ground anchor. A 6-stop ND filter extends exposures to 30+ seconds for an even more abstract silky water effect even in daylight. · Golden Hour Bridge Reflection: aperture: f/11, shutter: 1/15s, iso: 200, lens: 24-70mm, notes: At golden hour, the calm stretches upstream from the rapids reflect the Highland Bridge cables and the bluffs in amber light. Position tripod at the water’s edge, include the reflection. The South Platte is generally shallowest and calmest in late summer (August–September) when snowmelt flows are minimal.
Shots to chase:
- Kayaker and skyline: 135mm telephoto captures a kayaker in the constructed South Platte rapids with the downtown skyline and the REI power station building visible between the river cottonwoods
- REI tramway building at golden hour: from directly across the South Platte on the west bank, the warm afternoon sun illuminates the 1901 red-brick tramway power station with the river in the foreground — Denver’s best industrial-heritage architectural shot
- Confluence Y-junction abstract: from the pedestrian bridge above the Y-junction, looking straight down, Cherry Creek’s pale green water meets the South Platte’s darker flow in a two-tone abstract river composition unique to this exact spot
- Highland Bridge and rapids: from the south bank looking northwest, the Highland Bridge cable span frames the whitewater rapids in the foreground — the bridge’s triple steel arch makes an elegant geometric backdrop for water photography
- Cottonwood autumn: in mid-October, the cottonwood trees lining the riverbanks turn brilliant yellow-gold — a 50mm portrait of the river corridor under a canopy of gold, with the city visible between tree trunks
Pro tip: The constructed whitewater at Confluence Park is most active from April through July during spring snowmelt, when river flows support kayaking and tubing — this is the best season for action water photography. By August, flows drop and the rapids become less dramatic but easier to wade in for creative low-angle water perspectives. The REI flagship store building is open 9 AM–9 PM and its interior (a restored industrial space with rock climbing wall) offers legitimate indoor architectural photography; no commercial photography permit required for personal use inside.
Common mistake to avoid: Shooting only from the park’s paved main path and missing the elevated viewpoint from the pedestrian bridge 100 meters upstream — from there, the Y-shaped confluence is visible as a graphic composition looking straight down. Ignoring the REI building as an architectural subject and focusing only on the river. Coming in winter when the South Platte runs low and the cottonwoods are bare — the park is most photogenic from April through October.
Want this in your pocket on the street?
The full-resolution version of every spot above — with full-page hero photography, GPS maps with gold location pins, sun direction diagrams, multi-season tables, and a complete safety + packing checklist — is inside the Denver Ultimate Photographer’s Guide PDF ($47). Print it, save it offline, take it on the walk. Get the guide →
9. Denver Botanic Gardens — York Street
Save
Denver Botanic Gardens is one of the finest botanical photography destinations in the Mountain West — a 23-acre curated collection of over 33,000 plants in a designed landscape at exactly 5,280 ft elevation. The combination of Colorado’s intense UV light, low humidity (average 40–50% relative humidity), and high altitude means Denver’s horticultural subjects photograph with a crispness and color saturation that rivals botanical gardens in any climate. The Boettcher Memorial Conservatory (the cloud forest dome) brings tropics to altitude — shooting tropical plants through condensation-filmed glass at altitude produces a surreal, dreamlike quality unique to this location. The York Street location is surrounded by residential Cheesman Park neighborhood and is simultaneously a world-class scientific institution and a neighborhood park where Denverites picnic on lunch breaks.
- GPS: 39.7326, -104.9608
- Elevation: 5,280 ft
- Best time of day: Spring (late April–May) for tulip and iris peak; summer (June–August) for tropical conservatory and water lily blooms; autumn (September–October) for ornamental grasses and chrysanthemum; morning light (8–11 AM) for east-facing gardens
- Sun direction: Denver Botanic Gardens is a 23-acre formal garden at 5,280 ft — exactly the mile-high elevation. The gardens face east toward the rising sun on York Street, meaning the primary entrance corridor and the main Boettcher Memorial Conservatory receive direct morning light from 8 AM onward. The formal garden rooms are oriented in multiple directions, but the most photogenic — the Japanese Garden and the Water-Lily Pond — receive the best light in morning (eastern exposure). At the mile-high elevation, plant colors photograph with exceptional saturation under Colorado’s intense UV, particularly reds, oranges, and yellows which appear more vivid than at sea level. The tropical Conservatory interior presents interior-photography challenges: glass structure admits variable natural light (best in midday from above) and the humid atmosphere can create lens fogging when entering from cold exterior conditions in winter. The Romantic Gardens on the south section receive warm afternoon light from the west in late summer and autumn.
- Access: 1007 York St, Denver, CO 80206. Open daily; hours vary by season (generally 9 AM–5 PM, extended to 8 PM May–September). Admission: ~$15 adults, $10 Colorado residents. RTD bus: #12 Colfax and #6 6th Ave stop nearby. Street parking on York St; metered parking garage across the street. Photography permit required for all portrait and fine-art photography (casual visitor photography is encouraged): one-time permit $100 for 1–6 people per session (2-hour maximum); apply at least one week in advance via botanicgardens.org/york-street-photography-reservation-request. Annual permit: $500 for one named photographer. Tripods must stay on paths at all times. Drones strictly prohibited. No commercial photography. Groups of 21+ require Private Events reservation. Best to book permits well in advance — availability is limited to a few concurrent sessions per day.
- Difficulty: Easy — paved and gravel paths throughout, ADA accessible on main paths; some garden rooms have step access only
- Recommended settings: Macro Flower Altitude: aperture: f/4, shutter: 1/500s, iso: 200, lens: 100mm macro, notes: At 5,280 ft, the UV intensity creates exceptional detail sharpness in macro photography — flower veins, pollen grain structures, and water droplets render with clinical precision. Shoot in morning when dew is still on petals. The shallow depth-of-field at f/4 with a 100mm macro creates a creamy background bokeh from the garden’s continuous planting tapestry. Note: tripods must stay on paths, limiting macro angle options — a monopod gives flexibility. · Conservatory Interior: aperture: f/5.6, shutter: 1/125s, iso: 1600, lens: 24-70mm, notes: Inside the Boettcher Conservatory, available light from the glass dome above is the primary source. At ISO 1600 and f/5.6, hand-held shots are feasible (tripods allowed in the Conservatory if not blocking access). The tropical humidity can fog front lens elements when moving from cold exterior (winter) — allow 5 minutes for the glass to equilibrate before shooting. · Wide Garden Room: aperture: f/11, shutter: 1/250s, iso: 100, lens: 16-35mm, notes: From the entrance to each garden room, a 16–20mm captures the designed landscape with architectural elements (pergolas, fountains, walls) as framing devices. Under Colorado blue sky at 5,280 ft, a polarizer removes glare from leaf surfaces and deepens the sky, making garden colors appear hyper-saturated. Shoot on clear mornings between 9–11 AM when sun angle is optimal for east-facing rooms.
Shots to chase:
- Water lily reflection: the Water-Lily Pond in summer (June–August) produces classic Monet-style compositions — Victoria amazonica water lilies up to 6 feet in diameter photograph against their own reflections in still morning water
- Conservatory glass dome abstraction: shooting straight up through the cloud forest dome glass structure creates a tropical-foliage-framed geometric pattern — the 5,280 ft elevation and dry air means the glass is typically clean and glare-minimal
- Japanese garden roji path: the Japanese Garden’s stepping-stone path framed by clipped Hinoki cypress and moss creates a meditative depth-of-field composition — best in rain or just after, when stone surfaces darken
- Tulip mountain backdrop: in late April when the main tulip fields are at peak, a telephoto shot from the south garden edge captures massed tulip color with the Rocky Mountain foothills as a distant backdrop — unique to this altitude garden
- Golden autumn sedge grasses: September–October, the ornamental grass meadow in the western section turns golden-copper in afternoon light — long grass blades catch the low-angle sun and create a warm abstract texture
Pro tip: Photography session times at the Botanic Gardens are strictly enforced at 2 hours — plan your route in advance. The gardens publish a ‘what’s blooming now’ calendar at botanicgardens.org that is updated weekly; use it to plan your permit date around peak blooms rather than booking arbitrarily. The Romantic Gardens section (southwest corner) is the least-visited and most intimate garden room — book permits for Tuesday–Thursday mornings for the lowest foot traffic. Blossoms of Light (the winter light installation, November–January) prohibits professional photography sessions entirely — the only exception is press credentialed photographers.
Common mistake to avoid: Booking a portrait permit without confirming what is currently in bloom — the Gardens’ peak changes dramatically week to week at altitude. The common mistake of using flash photography (prohibited) or attempting to enter plant beds for low-angle shots (strictly prohibited). Arriving in late November when most outdoor planting has been cut back; the most photogenic outdoor seasons are April–May and September–October.
10. 16th Street Mall — Urban Canyon & Daniels-Fisher Tower
The 16th Street Mall is the civic and commercial spine of downtown Denver — a European-style pedestrian promenade designed by I.M. Pei (who also designed the East Building of the National Gallery of Art), running the entire length of downtown with free transit access. Anchoring the mall is the Daniels & Fisher Tower (1910–1912), Denver’s most beloved historic skyscraper — a 330-foot, 22-story Italian Renaissance campanile that stood as the tallest building between Chicago and the West Coast when completed. Its terracotta cream-and-white shaft, clock faces, and belvedere observation gallery are among the most photographed architectural details in Denver. At 5,213 ft, the tower’s white terracotta appears almost incandescent against the deep Colorado sky in afternoon light — the effect is more dramatic than in east-coast cities due to altitude UV enhancement.
- GPS: 39.74801, -104.99801
- Elevation: 5,213 ft
- Best time of day: Early morning (6–9 AM) for crowd-free architectural shots; golden hour (late afternoon) for canyon light on east-facing facades; blue hour for transit and street lights; any time for street photography
- Sun direction: The 16th Street Mall runs northwest-southeast for 1.25 miles, from Wewatta St at Union Station (northwest end) to Broadway at Civic Center Station (southeast end). The street canyon is oriented roughly 135°/315° (SE-NW), meaning the northern-facing facades receive direct light in the morning from the northeast (east-facing sides of north-facing buildings are lit 7–10 AM) and the southern-facing facades catch late afternoon light from the southwest. The Daniels & Fisher Tower — the mall’s 330-foot Italian Renaissance bell tower, one of only two pre-World War I high-rises remaining in downtown Denver — faces south toward the sun for most of the day, making it the best-lit architectural subject on the mall from 8 AM to 4 PM. At 5,213 ft, the Colorado UV creates dramatic contrast on the tower’s white terracotta facade against the deep blue sky. The mall’s tree-lined central promenade creates intermittent light dappling on the granite pavers throughout the day — these patterns photograph well in early morning.
- Access: 16th Street between Union Station (northwest) and Civic Center Station (southeast), Denver, CO. Fully pedestrian/transit-only street (no private vehicles). RTD Free MallRide bus operates 24/7 along the full 1.25-mile length at no charge. Stops at every block. Parking in garages along adjacent 15th and 17th Streets. Photography on the 16th Street Mall public right-of-way is publicly permitted for personal photography; commercial productions require Downtown Denver Partnership permit coordination in addition to Denver OSE permit (downtowndenver.com/permits). The Daniels & Fisher Tower at 1101 16th St is on the National Register of Historic Places; exterior photography is freely accessible from the public sidewalk.
- Difficulty: Easy — fully flat, paved, ADA accessible along entire 1.25-mile length
- Recommended settings: Tower Telephoto Isolation: aperture: f/11, shutter: 1/500s, iso: 100, lens: 70-200mm at 200mm, notes: From 300m south at the Stout St intersection, a 200mm isolates the Daniels & Fisher tower shaft against the sky, with the clock faces and ornate belvedere in sharp detail. The deep Colorado blue sky at 5,213 ft is noticeably more saturated than at sea level — a polarizer deepens it further without over-darkening. At this focal length, even slight camera shake is visible: use 1/500s minimum or tripod (permit required for second tripod). · Wide Mall Perspective: aperture: f/11, shutter: 1/125s, iso: 200, lens: 16-35mm at 20mm, notes: From the center of the mall looking northwest toward Union Station (or southeast toward Civic Center), a 20mm captures the boulevard perspective with the tree-lined promenade, Free MallRide bus, and flanking building facades. Include the tree canopy and the Daniels-Fisher tower as mid-ground landmark. Early morning (7–8 AM) on weekdays gives the best light-to-crowd ratio. · Blue Hour Transit: aperture: f/8, shutter: 8s, iso: 400, lens: 24-70mm, notes: From the center of the mall at blue hour, an 8-second exposure captures the Free MallRide bus light trails streaking along the transit lanes while building lights illuminate. The mall’s granite paving reflects street light at moderate humidity. The Daniels-Fisher tower clock face glows warm amber from its interior backlight — expose for the sky to balance the tower.
Shots to chase:
- Daniels-Fisher tower contrast: from directly south on the mall, a 135mm shot isolates the Italian Renaissance campanile against a deep Colorado blue sky — the architectural incongruity of a 1910 tower amid glass office buildings is quintessentially Denver
- Free MallRide light trails: a 10-second blue-hour exposure from the center median captures both directions of Free MallRide bus light trails converging toward Union Station, with building facades glowing on both sides
- Morning pedestrian blur: a 1/4-second handheld panning shot during the 8 AM commuter rush captures the energy of downtown Denver’s pedestrian spine with the Daniels-Fisher tower sharp in background
- Tower clock face detail: 200mm telephoto from the street floor captures the cast-metal clock face, Roman numerals, and ornate ironwork with the sky visible through the open belvedere — a detail photograph most visitors never notice
- Holiday lights perspective: December brings seasonal lighting to the mall’s trees — a 20-second exposure creates light-streak abstractions from the LED tree illumination along the full mile perspective
Pro tip: The 16th Street Mall’s most interesting photography window for architecture is Tuesday–Thursday 7–9 AM when the commuter energy is present but crowd density doesn’t block architectural sight lines. The Daniels & Fisher Tower clock chimes on the hour — photograph during the chime cycle for documentary authenticity. The mall’s I.M. Pei pavement design (a pattern of two types of stone) is a design detail appreciated when photographed from the upper floors of adjacent buildings (some hotels offer lobby-level elevated views down the mall).
Common mistake to avoid: Walking the full length without stopping at the Daniels-Fisher Tower to document it specifically — it is the architectural crown of the mall and photographs best in isolation, not as a background element. Arriving during midday Saturday when tourist and pedestrian density makes architectural photography nearly impossible. Ignoring the western end of the mall near Union Station, where the Millennium Bridge and the vista toward the Platte River create a different spatial character than the commercial core.
11. City Park — Museum Steps Skyline with Rocky Mountain Backdrop
The steps behind the Denver Museum of Nature & Science (on the west-facing side, overlooking Ferril Lake and the downtown skyline) are arguably the finest accessible skyline photography viewpoint inside the Denver city limits. Unlike Sloan’s Lake (which shows the skyline reflected in water but with no mountain context at ground level), this elevated position compresses the downtown skyline’s towers against the snow-capped Rocky Mountain backdrop using telephoto optics, creating Denver’s most powerful mountain-city photographic composition. Ferril Lake, with its summer fountain activation and resident waterfowl, adds a dynamic foreground element. At 5,338 ft, the slightly elevated position relative to downtown increases the apparent mountain height in the frame.
- GPS: 39.7475, -104.9436
- Elevation: 5,338 ft
- Best time of day: Sunset (primary) for Rocky Mountains behind the skyline and Ferril Lake reflections; sunrise for east-lit museum facade and lake mirror reflection; summer for Ferril Lake fountain
- Sun direction: The Denver Museum of Nature & Science sits at the eastern edge of City Park on a gentle ridge, with its main steps and east-facing entrance looking across Ferril Lake toward the downtown skyline to the west. This is one of the most distinctive viewpoints in Denver because the skyline faces east from the museum steps — meaning at sunrise, the buildings are perfectly front-lit from the east-southeast while the observer faces west, and at sunset, the sun sets directly behind the skyline from the west, creating a warm backlit silhouette of downtown towers with the Rocky Mountains visible behind. At 5,338 ft — 58 feet above Denver’s baseline mile-high elevation — the altitude effect on light is modest but consistent with the rest of the city. The mountain backdrop visible behind the skyline from this vantage is a continuous chain including Mount Blue Sky (formerly Mt. Evans, 14,265 ft) and the Arapaho Peaks, 40+ miles away and compressed by telephoto into dramatic scale proximity with the downtown towers.
- Access: 2001 Colorado Blvd, Denver, CO 80205 (Denver Museum of Nature & Science). City Park is publicly accessible 24/7 at no charge. Free parking along Colorado Blvd and East 23rd Ave (park interior roads). RTD bus: #40 Colorado Blvd stops at the museum. Museum exterior steps and grounds are free; museum admission ~$22 adults. The Anschutz Family Sky Terrace (at exactly 5,280 ft) inside the museum offers panoramic views — requires museum admission. Photography on the public park grounds and exterior museum steps requires no permit for groups under 25. Ferril Lake rowboat rentals available in summer.
- Difficulty: Easy — flat park paths; the museum’s exterior front steps require moderate stair climbing for the elevated view (approximately 40 steps to the main entrance landing)
- Recommended settings: Telephoto Skyline Mountains: aperture: f/11, shutter: 1/500s, iso: 200, lens: 70-200mm at 150-200mm, notes: From the museum’s west-facing steps or the upper path, a 150–200mm telephoto pulls the Rocky Mountains and the downtown skyline into an equal-scale composition. At 5,338 ft, the atmosphere is thin enough that mountains 40 miles away appear razor-sharp on clear autumn days — if you can see individual ridgelines in the distance with the naked eye, the telephoto shot will be exceptional. Use a tripod or high shutter speed (1/500s minimum) for telephoto sharpness. · Sunset Silhouette Skyline: aperture: f/8, shutter: 1/500s, iso: 100, lens: 70-200mm, notes: At sunset facing west, expose for the colorful sky above the mountains — the downtown skyline becomes a silhouette against the golden-pink gradient. The mountain peaks catch the last direct light as the sky turns orange-gold behind the towers. The compressed blue hour at altitude means the best color lasts only 15–20 minutes — start shooting 15 minutes before official sunset. · Ferril Lake Reflection: aperture: f/11, shutter: 1/15s, iso: 200, lens: 24-70mm at 35mm, notes: From lake level at the western shore, compose with the summer fountain jet as foreground anchor and the skyline visible between tree edges at mid-ground. At sunrise, the lake surface is typically calmer — include the skyline reflection doubled in the water. A GND filter balances the bright sky and darker lake surface.
Shots to chase:
- Mountain-skyline compression: 200mm telephoto from the museum’s west-facing steps captures Republic Plaza and surrounding towers floating in front of (apparently) adjacent Rocky Mountain peaks — Denver’s signature ‘city at the foot of the mountains’ image
- Ferril Lake sunset panorama: from the west museum steps, a multi-frame panorama (70mm, 3–5 vertical frames stitched) captures the full 180° sweep from the south mountains through the downtown skyline to the north foothills
- Waterfowl foreground: the lake’s resident Canada geese and mallards create moving foreground interest — a 70mm shot with a goose in the immediate foreground and the skyline/mountains behind blurs the city into a graphic backdrop
- Post-storm mountain clarity: within 6 hours of a major Front Range snowstorm clearing, the mountain snow line drops visibly and air quality is perfect — this is the optimal window for the mountain-skyline compressed telephoto composition
- Dawn bird activity: at sunrise from April–October, herons and egrets fish the lake shallows with the backlit downtown skyline visible behind — documentary wildlife-plus-cityscape in a single composition
Pro tip: The optimal window for the mountain-skyline compressed telephoto shot is a clear weekday morning in late September or October, when wildfire smoke season has ended, fall air is crisp, and mountain snowcaps are just appearing on the higher peaks. Check the AQI (airnow.gov) the night before — on poor air quality days (AQI above 50), the mountains appear washed out through haze from this 40-mile distance. The museum’s Anschutz Family Sky Terrace (Level 4, requires museum admission) provides an even higher elevation with patio views that include the Ferril Lake, downtown, and mountains in one unobstructed panorama.
Common mistake to avoid: Using a wide-angle lens from this viewpoint — the skyline and mountains are 5–40 miles away respectively, and a wide lens makes them appear as tiny features at the horizon. Only telephoto (100mm+) creates the compressed, dramatic scale relationship that defines this view. Visiting on a hazy summer day when mountains disappear behind ozone and smoke — this shot only works on clear autumn or post-storm days.
12. Highland Neighborhood Overlook & Cable Bridge — Northwest Denver Skyline
The Highland Bridge and LoHi neighborhood provide the most dramatically urban approach to the Denver skyline available to pedestrians — the cable-stay bridge literally suspends you above Interstate 25 at the edge of the bluff, with the downtown skyline spread before you to the southeast and the highway traffic streaming below. Unlike the flat lake-level perspective of Sloan’s Lake, this elevated position puts the observer’s eye at building-base level, creating a more dynamic, street-level perspective on the towers. The LoHi neighborhood itself — with its Victorian rowhouses, upscale restaurants, and the 32-flavor Little Man Ice Cream landmark cone — is one of Denver’s most photogenic residential streets, providing excellent morning golden-hour architectural shooting on the surrounding streets before and after bridge photography.
- GPS: 39.75801, -105.00881
- Elevation: 5,290 ft
- Best time of day: Sunrise (primary) for east-lit downtown facades; blue hour for activated city lights from an elevated northwest approach; late afternoon for long shadows on Highland streetscapes
- Sun direction: The Highland neighborhood rises on a bluff approximately 40–60 feet above the South Platte River corridor, providing an elevated northwest-facing view of the downtown Denver skyline across I-25. The Highland Bridge (a 320-foot steel cable-stay span) crosses I-25 at an elevation of 13 feet above the highway, offering an eye-level perspective of the downtown skyline from a northwest approach angle — different from Sloan’s Lake’s western angle. At 5,290 ft, the thin atmosphere and the relatively unobstructed air over the industrial South Platte Valley between Highland and downtown means this view has exceptional clarity on clear days. The Highland viewpoint faces approximately 110° southeast toward downtown; at sunrise (azimuth ~85–100° in spring/fall), the sun rises close to the downtown axis and front-lights the towers. At golden hour before sunset, the towers catch warm western light from behind the observer’s position and glow orange-gold.
- Access: Access the Highland Bridge via Central St and 16th Ave in the LoHi (Lower Highlands) neighborhood. Approach from the west: drive or walk to Central St at W 16th Ave, then cross the Highland Bridge east over I-25 to reach Platte Street and Confluence Park. Free street parking on Central St and side streets in LoHi. RTD: no direct light rail; bus lines on Speer Blvd (0.3 mi south). The bridge itself is a public pedestrian/bicycle facility open 24/7. Photography from the bridge deck and surrounding Highland streets is publicly permitted (no permit needed for solo photographer). The National Velvet sculpture at the base of the spiral ramp is a secondary photographic subject. LoHi neighborhood has restaurants and coffee shops within 1 block for pre-dawn logistics.
- Difficulty: Easy — flat bridge deck, paved access; the spiral ramp at the west end is ADA accessible
- Recommended settings: Bridge Deck Skyline: aperture: f/11, shutter: 1/250s, iso: 200, lens: 24-70mm at 28mm, notes: From the bridge deck midpoint looking southeast at the downtown skyline, a 28mm captures the cable stay elements in the immediate foreground with the towers behind. Shoot at f/11 for front-to-back sharpness including cable details. At 5,290 ft, slight wind on the bridge causes vibration — use a 1/250s minimum shutter to eliminate cable blur. Morning (7–9 AM) provides soft frontal light on the downtown facades. · Blue Hour Highway Trails: aperture: f/11, shutter: 15s, iso: 400, lens: 24-70mm at 24mm, notes: From the bridge deck looking straight down at I-25 below, a 15-second exposure creates converging light trails from the highway traffic. Combine with the downtown skyline in the background — a layered urban abstraction of modern infrastructure, traffic energy, and city lights. The blue hour window at altitude is brief; be ready to shoot immediately after sunset. · Highland Street Golden Hour: aperture: f/8, shutter: 1/250s, iso: 100, lens: 35mm, notes: On the Highland neighborhood streets (32nd Ave, Highlands Square), the late afternoon sun rakes low-angle across Victorian rowhouse facades from the west, creating long cast shadows. A 35mm at f/8 captures the streetscape character — brick rowhouses, sidewalk café tables, vintage storefronts — with the downtown skyline peeking at the end of the east-west streets.
Shots to chase:
- Cable-stay architecture portrait: from directly below the bridge’s apex (accessible from the east end), looking straight up at the triple-rib steel arch — a 16mm creates a vertiginous upward composition unique to this engineered structure
- Bridge silhouette skyline: in the pre-dawn minutes before sunrise, the bridge cables form dark silhouette lines across the glowing eastern sky with downtown towers as background — a graphic composition of infrastructure and city
- I-25 light trail abstraction: from the bridge deck at 15-second exposure, converging red tail-lights and white headlights on I-25 below become liquid-light abstract lines framed by the bridge cables
- Highland rowhouse to downtown: a 50mm street photograph from 32nd Ave looking east, with Victorian rowhouses on both sides creating a domestic leading line toward the glass towers visible at the end of the street — Denver’s past-to-present narrative in one frame
- National Velvet sculpture: the odd fluorescent-orange elongated figure sculpture at the bridge’s western spiral ramp is a quirky foreground element for a 24mm shot with the bridge structure and sky behind
Pro tip: The LoHi neighborhood’s most photogenic streets are the residential blocks north of 32nd Ave between Lowell Blvd and Zuni St, where Victorian brick rowhouses from the 1890s–1910s are largely intact and the morning light from the east illuminates their facades beautifully from 7–10 AM. Little Man Ice Cream (2620 16th St) with its 28-foot cream-can replica structure is a worthwhile secondary subject before or after the bridge — it is most photogenic in evening light or blue hour. The Highland Bridge was opened in 2006 as part of the South Platte River bridge trilogy (with the Millennium Bridge and Platte River Bridge), and all three bridges within 400 meters of each other offer complementary geometric compositions.
Common mistake to avoid: Shooting from the bridge only at midday when harsh overhead light flattens the cable geometry and the downtown skyline lacks texture from the flat top-lighting. Forgetting that the bridge deck is an open public space — pedestrians and cyclists frequently cross at all hours, which is either a hazard for long exposures or an opportunity for motion-blur compositional elements. Missing the LoHi neighborhood streets as a photography destination in their own right — the bridge is the access, but the neighborhood is the equal subject.
When to photograph Denver: a year-round breakdown
Denver is photogenic every month of the year — but the conditions differ radically by season. Here is what to expect:
Fall (mid-September through October) for crisp, smoke-free air, high-contrast blue skies, and golden aspen color visible in the Foothills framing skyline shots from Sloan’s Lake and City Park; Spring (late April through May) for wildflower blooms at the Denver Botanic Gardens, green Civic Center Park, and low-angle morning light raking across the Capitol dome; Summer (June through early July, before wildfire smoke season) for long golden hours, open-air events at Red Rocks, and active Confluence Park; Winter (December through February) for rare dustings of snow transforming Larimer Square cobblestones and Union Station’s forecourt, ultra-clear post-storm air producing the sharpest mountain vistas, and magenta pre-dawn alpenglow on downtown towers
Photographer safety in Denver: read this
City photography has its own risks: gear visibility, neighborhood timing, traffic, weather. Read the briefing before you go.
- Gear visibility: Use a discreet bag with no obvious camera branding. Keep a body strapped under a jacket on transit.
- Neighborhood timing: Pre-dawn and post-sunset shoots reward early scouting. Cross-reference each location with current local guidance and choose well-lit transit routes.
- Situational awareness: Headphones out. One eye in the viewfinder, one on the street.
- Traffic: Bridges, medians, and bike lanes are not setup zones. Shoot from sidewalks and pedestrian areas only.
- Weather: Summer storms move quickly; winter cold drains batteries. Layer up, keep gear dry, watch for ice on cobblestones at blue hour.
The complete safety briefing is inside the Denver Photographer’s Guide PDF.
Take this guide into the city
This post is the complete field reference. The Denver Ultimate Photographer’s Guide PDF is the field-deployable version: full-page resolution hero photography, GPS maps with gold pins for every location, multi-season shooting calendars, gear notes per location, sun-angle diagrams, the full city safety briefing, and a print-ready editorial layout in Framehaus black and gold. Save it offline. Print it. Take it on the walk.
Denver Ultimate Photographer’s Guide
Downloadable PDF · 12 GPS-mapped locations · Multi-season calendar · City safety briefing · Packing checklist
Get the Denver guide — $47
Get the Denver Guide + Preset Pack
Photograph it. Edit it. Done.
All links go to Viator (a TripAdvisor company), the world’s largest marketplace for guided experiences. Tagged as affiliate per FTC.
Quick Amazon shortcuts to the gear most useful for this kind of shot. Use them if Prime shipping or Amazon credit makes more sense than B&H. As an Amazon Associate ShutYourAperture earns from qualifying purchases.
Take Denver home in your pocket.
Every shot location, every angle, every time of day worth shooting. Printable PDF + GPS-tagged map.
Instant download. Works on phone, tablet, and printed.
Continue reading
- U.S. Cities Photography Guides — every city, mapped
- National Parks Photography Guides
- Travel photography destinations
- Travel photography pillar
- How to shoot golden hour like a pro
- Blue hour photography settings and locations
← Back to U.S. Cities Photography Guides
Related guides nearby
Three more photography guides within striking distance — perfect for combining into one trip.
- Rocky Mountain 86 km away · national park · USA
- Great Sand Dunes 228 km away · national park · USA
- Arches 408 km away · national park · USA
The complete Denver guide is $47
All vantage points above + 5 bonus secret spots, printable map, gear pack list, and editing recipes. One-time payment, instant download, lifetime updates.
Common questions about the Denver guide
Is the Denver photography guide worth $47?
For most photographers, yes. The guide saves 8-12 hours of trip-planning research and prevents the most common mistake of Denver photography: shooting at the wrong time of day. If a single better frame is worth $47 to you, the guide pays for itself on day one. Buyers get every GPS coordinate, every golden-hour window, every cultural rule, and a printable shot list.
Does the Denver guide include GPS coordinates?
Yes — every vantage point in the guide has Google Maps-ready GPS coordinates so you can pin them before you fly. The guide also includes a printable map showing all locations clustered by walking distance, so you can build efficient half-day routes.
What's in the Denver PDF that isn't in this article?
The article shows the highlights. The PDF includes: 5 additional secret spots not published online, a 14-day itinerary with daily routes, the full camera-settings cheat sheet for every scenario in Denver, a printable gear packing list, post-processing recipes with screenshot examples, and a list of local guides we trust for portrait commissions.
Do I get the Lightroom presets too?
The $47 guide is the PDF only. The matching Denver preset pack is a separate $19 download — most buyers grab both as a bundle and save the editing time. Both are instant download, both work on Lightroom Classic and Lightroom Mobile.
Will the guide work for a Denver trip in 2026?
Yes. The guide is updated annually as fees, restrictions, and new vantage points change. All buyers get free lifetime updates. The 2026 edition includes the latest drone rules, museum photography policies, and seasonal light data for the year.
Visiting more than Denver?
Bundle multiple destination guides and save planning time across the trip:
- New York City Photographer’s Guide ($47)
- Los Angeles Photographer’s Guide ($47)
- Chicago Photographer’s Guide ($47)
- San Francisco Photographer’s Guide ($47)
- Miami Photographer’s Guide ($47)
Or get all 60+ destinations in one bundle: Photo Atlas — every guide, every map, $97.