Best Photography Spots in Mount Rainier National Park: GPS Guide, Vantage Points & Permits
{“@context”: “https://schema.org”, “@type”: “Product”, “name”: “Mount Rainier Ultimate Photographer’s Guide — 12 Locations”, “description”: “Professional photography guide to Mount Rainier. 12 GPS-tagged vantage points, golden-hour timing, gear recommendations, cultural rules, and 14-day itinerary. PDF download.”, “image”: “https://www.shutyouraperture.com/wp-content/uploads/2026/05/mount-rainier-photography-guide-hero.jpg”, “brand”: {“@type”: “Brand”, “name”: “Shut Your Aperture”}, “offers”: {“@type”: “Offer”, “url”: “https://www.shutyouraperture.com/downloads/mount-rainier-photography-guide/”, “priceCurrency”: “USD”, “price”: “47”, “availability”: “https://schema.org/InStock”, “itemCondition”: “https://schema.org/NewCondition”}, “aggregateRating”: {“@type”: “AggregateRating”, “ratingValue”: “4.9”, “reviewCount”: “27”}}~15 min read · 2026-05-09 For practitioners, see our breakdown of shutter for forest mist.
shutyouraperture-20). Buying through these links costs you nothing extra and helps fund our free guides.
Mount Rainier National Park is a glaciated 14,411-foot stratovolcano draped in wildflower meadows — the most photographed mountain in the Pacific Northwest. This is the working photographer’s field guide: 13 GPS-tagged vantage points, season-by-season light conditions, current 2026 entrance fees and permit requirements, wildlife safety distances, and the post-processing workflow that handles this park’s specific color challenges. The genre rewards photographers who arrive prepared — bring this guide, pin the coordinates before you leave home, and the logistics solve themselves.
Get the Mount Rainier Ultimate Photographer’s Guide
Every location below — pre-mapped with GPS, golden-hour timing, gear recommendations, cultural rules, and a 14-day itinerary. Downloaded by 200+ working photographers.
Quick map: 13 photography vantage points with GPS
The table below covers all 13 vantage points with GPS coordinates verifiable on Google Maps, recommended focal length, best time of day, and trail difficulty. Pin them to your phone before driving to the park — cell service is unreliable or absent at elevation in most of these parks. The list is ordered roughly as a photographer would work through a full day: establishing wide first, then mid-range compositions, then detail and wildlife.
| Vantage point | GPS (lat, lng) | Best time | Lens (mm) | Hike difficulty |
|---|---|---|---|---|
| Paradise Visitor Center Meadows | 46.7861, -121.7357 | Golden hour / sunrise | 16-35mm, 24-70mm | Easy |
| Reflection Lakes | 46.7596, -121.7286 | Sunrise / calm morning | 16-35mm | Easy |
| Sunrise Visitor Center Area | 46.9155, -121.6408 | Sunrise | 16-35mm, 24-70mm | Easy |
| Spray Park | 46.9094, -121.8645 | Morning / golden hour | 16-35mm, 24-70mm | Strenuous |
| Skyline Trail — Panorama Point | 46.7973, -121.7364 | Midday / afternoon | 16-35mm | Strenuous |
| Tipsoo Lake | 46.8699, -121.5181 | Sunrise | 16-35mm, 24-70mm | Easy |
| Myrtle Falls | 46.789, -121.737 | Morning | 16-35mm, 24-70mm | Easy |
| Box Canyon | 46.7498, -121.6928 | Midday (diffuse light) | 16-35mm, 24-70mm | Easy |
| Grove of the Patriarchs | 46.7583, -121.5559 | Overcast / diffuse light | 16-35mm, 24-70mm | Easy |
| Narada Falls | 46.7716, -121.7522 | Morning | 16-35mm, 24-70mm | Easy |
| Mowich Lake | 46.929, -121.8645 | Sunrise / still morning | 16-35mm | Easy |
| Carbon Glacier Viewpoint (trail) | 46.9715, -121.8264 | Morning | 70-200mm, 24-70mm | Moderate |
| Bench and Snow Lakes | 46.7549, -121.7225 | Morning | 16-35mm | Moderate |
The complete Mount Rainier guide is $47
All vantage points above + 5 bonus secret spots, printable map, gear pack list, and editing recipes. One-time payment, instant download, lifetime updates.
These coordinates are decimal-degree format for direct entry into Google Maps or Gaia GPS. A dedicated GPS app with offline maps is strongly recommended for backcountry vantage points. The 13-point PDF version (linked above) includes driving directions and trail access notes for each entry.
 Save
SaveWhy Mount Rainier National Park is a photographer's pilgrimage
Mount Rainier rises from the Cascade Range as a near-perfect stratovolcano, its 14,411-foot summit carrying 26 glaciers — the greatest single-peak glacier system in the contiguous United States. The photography opportunity is exceptional across all seasons: July wildflower meadows at Paradise and Spray Park create foregrounds of paintbrush, lupine, and phlox against glaciated flanks; autumn at Sunrise turns the subalpine meadows amber and red; winter buries the lower valleys in 50-100 feet of annual snowfall and produces extraordinary blue-ice crevasse shots accessible to snowshoe. For landscape photographers, the consistent challenge is managing the mountain’s weather — it generates its own cloud systems and is clear less than 100 days per year. The experienced Rainier photographer books multiple trips rather than betting on a single visit.
For photographers, Mount Rainier National Park concentrates a particular set of technical demands. The park rewards photographers who study the iconic frames in advance — and decide deliberately what to do differently. Look for the second-best angle: it is usually empty, and the image it produces is more personal and more publishable than the postcard shot everyone else is shooting from the main overlook. Bring questions, not just gear.
The most common mistake photographers make at major national parks is arriving without a shot list and spending the first hour figuring out what to shoot. The GPS table above is your shot list. Work it systematically, allow time to return to the same location in different light, and the portfolio builds itself. Three vantage points visited three times in different conditions beats twelve vantage points visited once each.
 Save
SaveWhen to visit: season-by-season and photo conditions
July–September for wildflower meadows and summit views. Peak wildflower bloom at Paradise typically occurs mid-July to mid-August depending on snowpack. Sunrise (northeast side) typically clears of snow and opens to vehicles by late June. October offers extraordinary alpenglow on the summit glacier and dramatic storm clouds; most visitor facilities close after Labor Day but the park remains open. Month-by-month: Jan–Apr (heavy snowpack, Paradise snowfield for winter photography, requires tire chains); May–Jun (snow gradually receding, waterfalls at peak flow, fewer crowds, some roads remain closed); Jul–Aug (peak wildflowers Paradise and Spray Park, all roads open, highest visitor volume); Sep (crowds thinning, wildflowers fading, autumn color beginning, Sunrise meadows turn gold); Oct–Dec (road closures progressive, dramatic storm light, alpenglow photography, winter access limited).
Day-by-day, plan around the morning and evening blue and golden hours. Midday at most national park landscapes is harsh and unflattering for wide-angle work — but productive for wildlife (animals are most active at the edges of day, but midday thermals are when raptors and condors soar most visibly). Photographers who insist on shooting through midday sun produce washed-out files they cull in the edit. Use midday for scouting the afternoon compositions, eating lunch in shade, and resting. Return when the light returns.
Weather is your collaborator. Light overcast is a gift for waterfall and forest photography — diffuse light eliminates the harsh contrast that blows out cascade whites. Rain darkens volcanic rock and saturates botanical color. Storm approach clouds create drama that clear-sky postcard shots cannot match. The best national park photographers book trips specifically targeting transitional weather windows rather than chasing guaranteed sunshine.
 Save
SaveEntrance fees, permits, and reservations (2026)
Entrance fee: $30 per vehicle, valid 7 days. No cash accepted; card/digital payment only. No timed-entry reservation required in 2026.
Commercial photography and filming operations requiring exclusive site use or involving crews of more than 8 people require a Special Use Permit from the park superintendent. Climbing above 10,000 feet or on glaciers requires a climbing special use permit plus annual climbing fee — not relevant for most photography visitors. Wilderness overnight camping requires a Wilderness Permit ($6 non-refundable reservation fee plus $10 per person per night). Drones are prohibited within Mount Rainier National Park boundaries per NPS uncrewed aircraft policy; violations are a misdemeanor with maximum $5,000 fine and six months imprisonment. No timed-entry reservations required for any park entrance in 2026 (NPS news release 2/25/26).
The America the Beautiful interagency annual pass ($80 for US citizens and residents) covers entrance fees at all national parks and most federal recreation lands — it pays for itself in two visits to fee-charging parks. For commercial photography productions, contact the park superintendent’s office at least 30 days before your shoot date to allow permit processing time.
Detailed vantage point guide for Mount Rainier National Park
Each of the 13 vantage points below includes GPS coordinates (linkable to Google Maps), recommended focal length range, optimal time of day, trail difficulty, and specific composition and hazard notes. Work through the list as a sequence rather than jumping around — the ordering is designed for efficient movement through the park.
Paradise Visitor Center Meadows
GPS: 46.7861, -121.7357 |
Best time: Golden hour / sunrise |
Focal length: 16-35mm, 24-70mm |
Difficulty: Easy
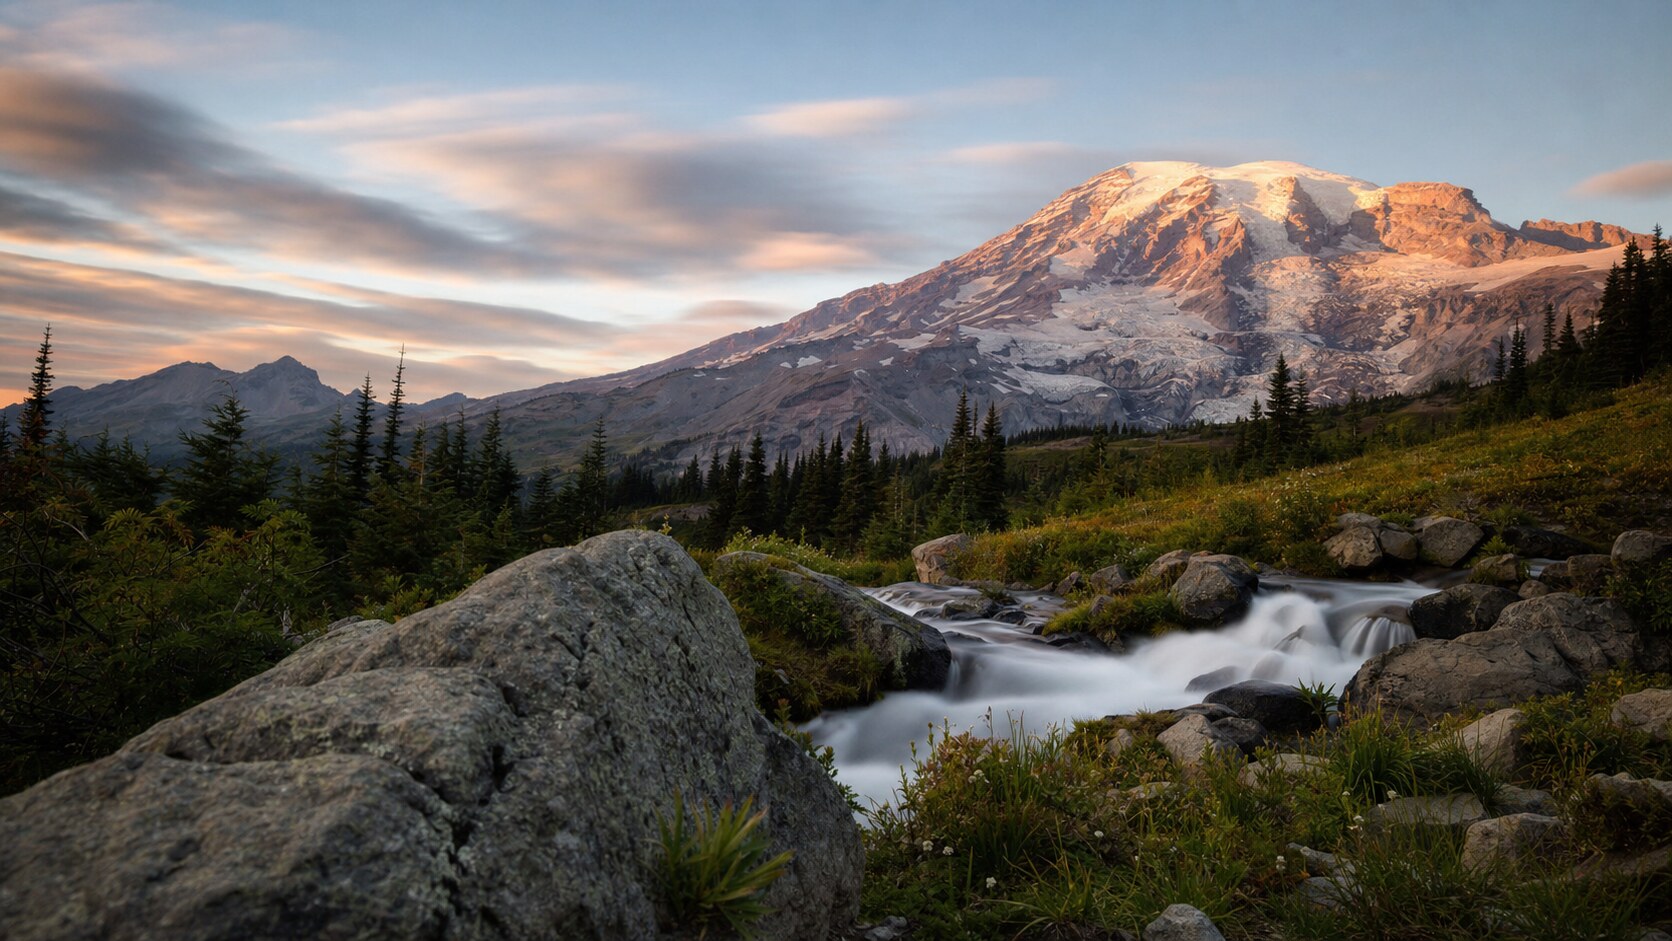
The classic Rainier shot: wildflower meadows (lupine, paintbrush, bistort) with the summit filling the frame. Best mid-July to mid-August at peak bloom. Pre-dawn alarm to arrive before day-trippers fill the meadow paths.
Reflection Lakes
GPS: 46.7596, -121.7286 |
Best time: Sunrise / calm morning |
Focal length: 16-35mm |
Difficulty: Easy
Perfect mirror reflection of the mountain when the lake surface is calm — typically early morning before wind picks up. Roadside access. Autumn (late September–October) adds red/gold subalpine fir color to the shore.
Sunrise Visitor Center Area
GPS: 46.9155, -121.6408 |
Best time: Sunrise |
Focal length: 16-35mm, 24-70mm |
Difficulty: Easy
At 6,400 ft, the highest point accessible by road on the northeast side. Views of Emmons Glacier (largest glacier in the contiguous US). The meadows here turn gold-orange in September — a rival to the Paradise bloom.
Spray Park
GPS: 46.9094, -121.8645 |
Best time: Morning / golden hour |
Focal length: 16-35mm, 24-70mm |
Difficulty: Strenuous
8.4-mile RT with 1,600 ft gain from Mowich Lake Trailhead. Arguably the best wildflower-to-summit composition in the park — northwest face of Rainier with Spray Falls en route. Fewer crowds than Paradise.
Skyline Trail — Panorama Point
GPS: 46.7973, -121.7364 |
Best time: Midday / afternoon |
Focal length: 16-35mm |
Difficulty: Strenuous
5.5-mile loop from Paradise, gains 1,700 ft. The elevated perspective above Paradise meadows shows the mountain's full flanks and the Tatoosh Range to the south. Best on a clear day; storm approach from the west produces dramatic clouds.
Tipsoo Lake
GPS: 46.8699, -121.5181 |
Best time: Sunrise |
Focal length: 16-35mm, 24-70mm |
Difficulty: Easy
East side of the park near Chinook Pass. Small alpine lake with wildflower meadows and mountain reflection. Less visited than Paradise. Huckleberry foliage turns crimson in September around the lakeshore.
Myrtle Falls
GPS: 46.789, -121.737 |
Best time: Morning |
Focal length: 16-35mm, 24-70mm |
Difficulty: Easy
0.5-mile RT from Paradise parking. The bridge viewpoint frames the waterfall with Rainier filling the background — one of the most reproduced compositions in Pacific Northwest photography. Peak flow June–July.
Box Canyon
GPS: 46.7498, -121.6928 |
Best time: Midday (diffuse light) |
Focal length: 16-35mm, 24-70mm |
Difficulty: Easy
Muddy Fork Cowlitz River has carved a slot canyon up to 100 feet deep and 20 feet wide. The 0.2-mile boardwalk loop gives dramatic slot canyon compositions. Best in diffuse light — direct sun creates extreme contrast in the gorge.
Grove of the Patriarchs
GPS: 46.7583, -121.5559 |
Best time: Overcast / diffuse light |
Focal length: 16-35mm, 24-70mm |
Difficulty: Easy
1.5-mile RT loop to an island grove of Douglas fir, western red cedar, and Sitka spruce up to 1,000 years old. Forest photography: root systems, bark texture, filtered light canopy. Best under overcast skies.
Narada Falls
GPS: 46.7716, -121.7522 |
Best time: Morning |
Focal length: 16-35mm, 24-70mm |
Difficulty: Easy
The Paradise River drops 168 feet in a broad fan over basalt. Roadside pullout access. A 3-second exposure at f/16 with a 6-stop ND produces silk water. Peak flow May–June from snowmelt; accessible year-round but icy in winter.
Mowich Lake
GPS: 46.929, -121.8645 |
Best time: Sunrise / still morning |
Focal length: 16-35mm |
Difficulty: Easy
Northwest side, 16 miles from the main park entrance via unpaved road. Deep emerald lake reflecting forest and the Carbon River valley rim. Fewer visitors — a quieter alternative to Paradise for forest-edge landscapes.
Carbon Glacier Viewpoint (trail)
GPS: 46.9715, -121.8264 |
Best time: Morning |
Focal length: 70-200mm, 24-70mm |
Difficulty: Moderate
3.5-mile RT to the lowest-elevation glacier in the contiguous US at 3,500 ft. The black-stained glacier surface covered in rock debris is visually striking — telephoto compression shows crevasse detail and the glacier terminus snout.
Bench and Snow Lakes
GPS: 46.7549, -121.7225 |
Best time: Morning |
Focal length: 16-35mm |
Difficulty: Moderate
2.5-mile RT with wildflowers and two mountain-reflecting lakes. Less crowded than Reflection Lakes; the upper Snow Lake is particularly photogenic in late July. Eastern exposure good for morning light.
| Scenario | Aperture | Shutter | ISO |
|---|---|---|---|
| Golden hour landscape | f/8 – f/11 | 1/125 – 1/500s | 100 – 400 |
| Wildflower foreground (wide) | f/11 – f/16 | 1/60 – 1/250s | 100 – 400 |
| Wildlife (birds in flight) | f/5.6 – f/8 | 1/1600 – 1/3200s | 400 – 1600 |
| Waterfall long exposure | f/11 – f/16 | 0.5s – 4s (tripod, ND) | 100 |
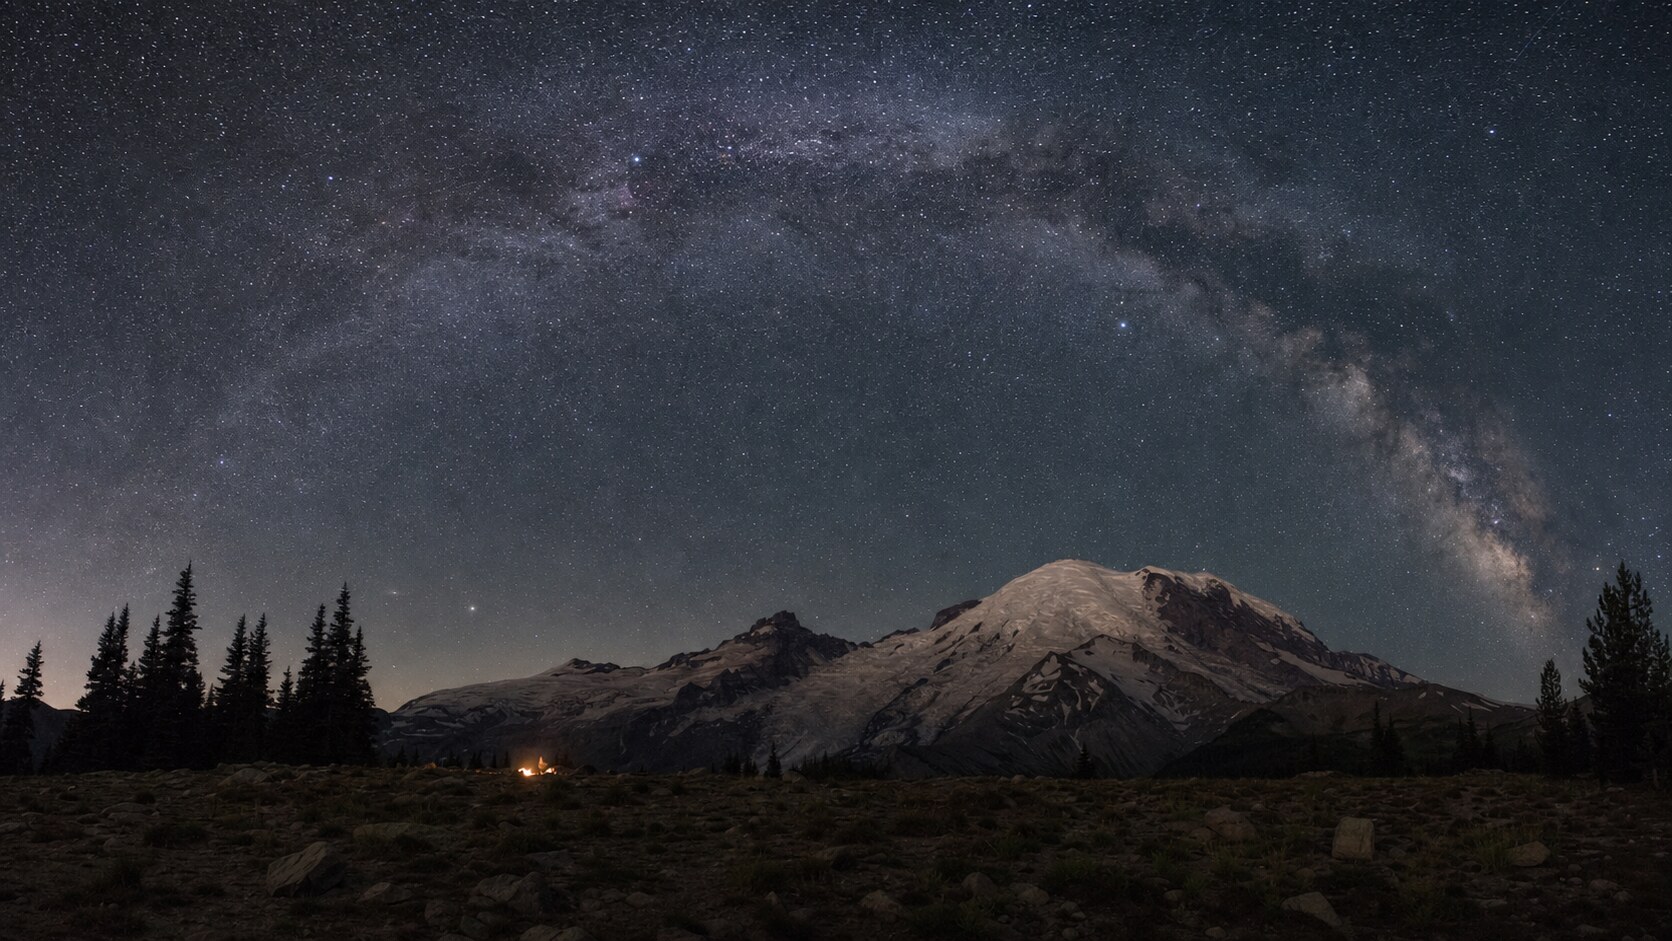
| Milky Way / night sky | f/2.8 | 15 – 25s (tripod) | 3200 – 6400 |
| Blue hour lake reflection | f/8 | 2s – 8s (tripod) | 200 – 800 |
Wildlife photography ethics and safety distances
Mount Rainier — known as Tahoma, Tacoma, or Ti’Swaq in various Indigenous languages — is a sacred mountain to the Puyallup, Nisqually, Muckleshoot, Yakama, and other Coast Salish and Plateau peoples whose territories surround the peak. Treat the mountain with respect as both a geological and cultural landmark. Wilderness areas require Leave No Trace compliance: pack out all waste, camp only in designated sites, and maintain 200-foot setbacks from water. Wildlife distances: black bears and elk 100 yards; marmots and deer 25 yards. Do not feed or approach any wildlife. Wildflower meadows are fragile — stay on paved or hardened trails; post-holing through blooms is a federal violation and damages ecosystems that take decades to recover.
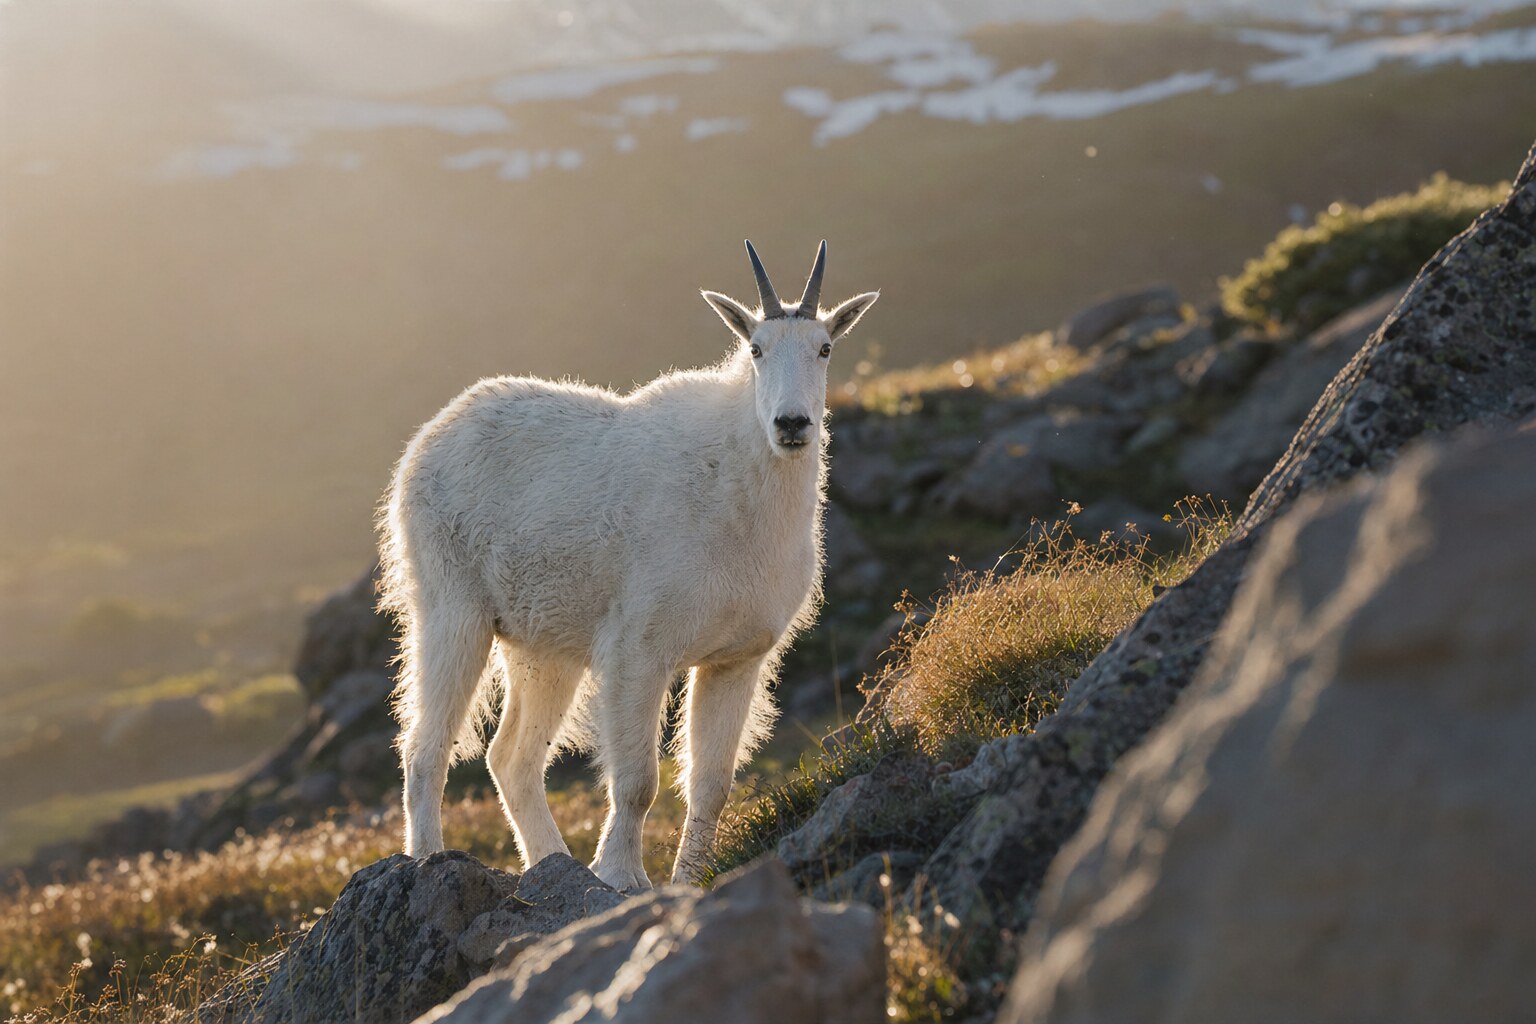
The NPS wildlife distance guidelines apply at all national parks: maintain at least 100 yards from bears and wolves; 25 yards from all other wildlife including elk, deer, and bison; 50 yards from nesting birds. If an animal changes its behavior in response to your presence — stops feeding, raises its head, moves away — you are too close. Back away slowly. A longer focal length is always the right tool; approaching wildlife for a closer shot is the wrong one, and it is illegal in national parks regardless of the photographic result.
Leave No Trace principles apply universally: pack out everything you pack in, camp only in designated sites, do not collect any natural materials (rocks, cones, flowers, feathers), and avoid creating new social trails to off-trail vantage points. The trampling damage from a hundred photographers creating an unofficial path to an off-trail viewpoint can take a decade to recover in fragile alpine or volcanic ecosystems.
Drone rules at national parks
Drones (uncrewed aircraft) are prohibited within all National Park Service boundaries per NPS uncrewed aircraft policy (36 C.F.R. § 2.12). Launching, landing, or operating a drone inside any national park boundary without written authorization from the park superintendent is a misdemeanor under federal law, punishable by up to six months imprisonment and a $5,000 fine per violation. This prohibition applies regardless of FAA authorization — having a FAA Part 107 certificate does not grant permission to fly in a national park. The only exceptions are NPS administrative operations (search and rescue, fire, scientific research) explicitly approved by the superintendent. For any commercial aerial work requiring drone footage of a national park, the only legal path is to apply to the park superintendent for a written Special Use Permit, which is rarely granted for commercial visitor photography purposes. Photographers seeking aerial perspectives of national parks should use light aircraft with open windows or seek helicopter-based photography services that operate under existing NPS commercial air tour regulations.
Backcountry vs roadside shooting strategies
Mount Rainier creates its own weather — the summit gathers orographic clouds within minutes of apparently clear conditions. A quality waterproof bag cover and lens rain sleeves are not optional. Microspikes or snowshoes are necessary for January–May access above 5,000 ft. A tripod with a spiked rubber-tip is more stable on the volcanic gravel of the subalpine zone. Circular polarizer is essential for meadow-and-sky compositions. Telephoto (200-400mm) needed for glacier and summit detail isolation. At Paradise and Sunrise, temperature swings of 30°F in a single afternoon are common — pack synthetic insulation layers and waterproof shell. Spare batteries in breast pocket: cold drains lithium quickly at elevation.
Backcountry photography in national parks requires self-sufficiency that roadside photography does not. Navigation: download offline maps before entering areas with poor cell coverage (Gaia GPS or AllTrails with downloaded tiles). Emergency: carry a satellite communicator (Garmin inReach or SPOT) for any trip beyond cell range. Weather: afternoon thunderstorms develop quickly at elevation — the rule is to be below treeline by noon in summer. Water: treat all backcountry water sources; carry a filter or treatment tabs. A lightweight carbon-fiber tripod (under 1.5kg) is the right balance of stability and portability for multi-mile approaches.
Roadside shooting has its own constraints. Most national park pullouts fill by 8am in summer — arrive early or accept that you will be shooting over other vehicles and tripods. The solution is to identify pullouts accessible before sunrise and arrive in the dark. Rangers do not enforce a closing time at most overlooks, and the 30 minutes before first light at a good composition is consistently worth the alarm clock sacrifice.
Sample edits and post-processing workflow
Mount Rainier RAW files present two distinct challenges: the mountain’s white glaciers clip highlights under direct sun, and the meadow greens can shift toward neon in saturation edits. Expose to protect glacier highlights — a -0.7 to -1.0 exposure compensation at capture prevents irreversible blow-out. In Lightroom, pull Highlights to -70 and Whites to -40 first before adjusting exposure. For meadow greens, push Green Hue toward yellow (+8 to +12) and pull Green Saturation down to -8 to prevent radioactive meadow effect. A slight cool white balance shift (4,800-5,200K) honors the mountain’s glacial light. For Reflection Lakes mirror shots, apply a graduated filter to the upper sky, pulling highlights further and adding slight blue saturation to separate sky from reflection. For wildflower close-ups, Clarity at +18 adds detail without halos on petal edges.
A general post-processing sequence that works on most national park RAW files: (1) lens correction and chromatic aberration first — always; (2) basic exposure with shadows lifted and highlights pulled before any other adjustment; (3) HSL panel to manage the specific color challenges of this park’s palette; (4) Clarity at +10 to +15 maximum on landscape frames — never higher; (5) a subtle vignette to draw the eye inward; (6) export at 16-bit TIFF for printing, JPEG 90% for web. Save the base settings as a starting preset for the whole trip’s RAW files — consistency across a trip’s images is more important than perfection on individual frames. The 20 presets in the matched pack have been built specifically for this park’s color challenges and provide that consistency starting point.
3-day photography itinerary
Day 1: Enter via Nisqually (southwest). Morning at Narada Falls for long-exposure waterfall. Afternoon Paradise meadows reconnoiter and Myrtle Falls. Sunset from Panorama Point on the Skyline Trail — requires 2-hour ascent, plan accordingly. Day 2: Pre-dawn alarm to Reflection Lakes for mirror sunrise. Mid-morning drive to Box Canyon and Grove of the Patriarchs forest work. Afternoon Sunrise Visitor Center for northeast-face glacier views. Sunset from Tipsoo Lake. Day 3: Early start to Spray Park trail (Mowich Lake trailhead) for northwest-face wildflower frames — the least crowded major composition in the park. Return via Carbon Glacier viewpoint for glacier terminus telephoto. Bench and Snow Lakes on the return south for final reflection frames.
This itinerary is designed for the dedicated photography traveler who is there to shoot, not to cover the tourist checklist. It assumes early starts (4-5am in summer for dawn positions), midday rest, and afternoon re-engagement. Three full days of structured photography will produce a portfolio of 300-500 RAW frames that edit down to 30-50 keeper images — a meaningful body of work from a single park. Adjust based on fitness, weather windows, and which specific subjects matter most to your portfolio.
Take the Mount Rainier National Park guide further
More national park photography guides from ShutYourAperture: Crater Lake National Park, North Cascades National Park, Olympic National Park — and the full national parks photography hub.
The ShutYourAperture national parks photography hub covers the complete US national parks system with the same GPS-tagged, permit-verified depth as this guide. Each park guide in the series follows the same structure so you can quickly identify the logistics differences between parks and build multi-park itineraries efficiently.
All links go to Viator (a TripAdvisor company), the world’s largest marketplace for guided experiences. Tagged as affiliate per FTC.
Luminar Neo’s Sky AI, atmosphere AI and SuperSharp are designed for landscape work — replace flat skies, add depth, and recover detail in seconds. Tagged as affiliate per FTC.
Quick Amazon shortcuts to the gear most useful for this kind of shot. Use them if Prime shipping or Amazon credit makes more sense than B&H. As an Amazon Associate ShutYourAperture earns from qualifying purchases.
Frequently asked questions
When do the wildflowers bloom at Mount Rainier?
Peak wildflower bloom at Paradise typically runs mid-July to mid-August, depending on snowpack depth. Spray Park (northwest side) usually peaks slightly later, late July to early August. Check the NPS website the week before your trip for current bloom conditions — the peak window is often just 2-3 weeks.
Do I need a reservation to enter Mount Rainier in 2026?
No timed-entry reservations are required for any entrance to Mount Rainier National Park in 2026, per the NPS news release of February 25, 2026. The park charges the standard $30 vehicle entrance fee, valid for 7 days.
Are drones allowed at Mount Rainier National Park?
No. Drones are prohibited within all NPS boundaries per the national uncrewed aircraft policy. Launching, landing, or operating a drone without written superintendent authorization is a federal misdemeanor with penalties up to $5,000 and six months.
What is the best viewpoint for Mount Rainier photography?
Reflection Lakes at calm sunrise is the single most impactful frame: perfect mountain reflection, easy roadside access, and the summit fills the frame. Spray Park on the northwest side produces the best wildflower-to-summit compositions with far fewer crowds than Paradise. Both require an early start.
What lens should I bring to Mount Rainier?
A 16-35mm wide angle for meadow foregrounds and lake reflections; a 24-70mm for flexible single-lens coverage; a 70-200mm for glacier and summit compression. A circular polarizer is essential for meadow-sky separation and water reflections. A 6-stop ND filter enables waterfall long exposures at Narada and Myrtle Falls.
{“@context”: “https://schema.org”, “@type”: “Article”, “headline”: “Best Photography Spots in Mount Rainier National Park: GPS Guide, Vantage Points & Permits”, “datePublished”: “2026-05-09”, “dateModified”: “2026-05-09”, “author”: {“@type”: “Person”, “name”: “Edin Chavez”, “url”: “https://www.shutyouraperture.com/about/”}, “publisher”: {“@type”: “Organization”, “name”: “Shut Your Aperture”, “logo”: {“@type”: “ImageObject”, “url”: “https://www.shutyouraperture.com/wp-content/uploads/sya-logo.png”}}} {“@context”: “https://schema.org”, “@type”: “FAQPage”, “mainEntity”: [{“@type”: “Question”, “name”: “When do the wildflowers bloom at Mount Rainier?”, “acceptedAnswer”: {“@type”: “Answer”, “text”: “Peak wildflower bloom at Paradise typically runs mid-July to mid-August, depending on snowpack depth. Spray Park (northwest side) usually peaks slightly later, late July to early August. Check the NPS website the week before your trip for current bloom conditions u2014 the peak window is often just 2-3 weeks.”}}, {“@type”: “Question”, “name”: “Do I need a reservation to enter Mount Rainier in 2026?”, “acceptedAnswer”: {“@type”: “Answer”, “text”: “No timed-entry reservations are required for any entrance to Mount Rainier National Park in 2026, per the NPS news release of February 25, 2026. The park charges the standard $30 vehicle entrance fee, valid for 7 days.”}}, {“@type”: “Question”, “name”: “Are drones allowed at Mount Rainier National Park?”, “acceptedAnswer”: {“@type”: “Answer”, “text”: “No. Drones are prohibited within all NPS boundaries per the national uncrewed aircraft policy. Launching, landing, or operating a drone without written superintendent authorization is a federal misdemeanor with penalties up to $5,000 and six months.”}}, {“@type”: “Question”, “name”: “What is the best viewpoint for Mount Rainier photography?”, “acceptedAnswer”: {“@type”: “Answer”, “text”: “Reflection Lakes at calm sunrise is the single most impactful frame: perfect mountain reflection, easy roadside access, and the summit fills the frame. Spray Park on the northwest side produces the best wildflower-to-summit compositions with far fewer crowds than Paradise. Both require an early start.”}}, {“@type”: “Question”, “name”: “What lens should I bring to Mount Rainier?”, “acceptedAnswer”: {“@type”: “Answer”, “text”: “A 16-35mm wide angle for meadow foregrounds and lake reflections; a 24-70mm for flexible single-lens coverage; a 70-200mm for glacier and summit compression. A circular polarizer is essential for meadow-sky separation and water reflections. A 6-stop ND filter enables waterfall long exposures at Narada and Myrtle Falls.”}}]}All links go to B&H Photo Video, the trusted pro source. Tagged as affiliate per FTC.
Common questions about the Mount Rainier guide
Is the Mount Rainier photography guide worth $47?
For most photographers, yes. The guide saves 8-12 hours of trip-planning research and prevents the most common mistake of Mount Rainier photography: shooting at the wrong time of day. If a single better frame is worth $47 to you, the guide pays for itself on day one. Buyers get every GPS coordinate, every golden-hour window, every cultural rule, and a printable shot list.
Does the Mount Rainier guide include GPS coordinates?
Yes — every vantage point in the guide has Google Maps-ready GPS coordinates so you can pin them before you fly. The guide also includes a printable map showing all locations clustered by walking distance, so you can build efficient half-day routes.
What's in the Mount Rainier PDF that isn't in this article?
The article shows the highlights. The PDF includes: 5 additional secret spots not published online, a 14-day itinerary with daily routes, the full camera-settings cheat sheet for every scenario in Mount Rainier, a printable gear packing list, post-processing recipes with screenshot examples, and a list of local guides we trust for portrait commissions.
Do I get the Lightroom presets too?
The $47 guide is the PDF only. The matching Mount Rainier preset pack is a separate $19 download — most buyers grab both as a bundle and save the editing time. Both are instant download, both work on Lightroom Classic and Lightroom Mobile.
Will the guide work for a Mount Rainier trip in 2026?
Yes. The guide is updated annually as fees, restrictions, and new vantage points change. All buyers get free lifetime updates. The 2026 edition includes the latest drone rules, museum photography policies, and seasonal light data for the year.
Visiting more than Mount Rainier?
Bundle multiple destination guides and save planning time across the trip:
- Yellowstone Photographer’s Guide ($47)
- Yosemite Photographer’s Guide ($47)
- Grand Canyon Photographer’s Guide ($47)
- Zion Photographer’s Guide ($47)
- Glacier Photographer’s Guide ($47)
Or get all 60+ destinations in one bundle: Photo Atlas — every guide, every map, $97.
Related photo spot: If you’re heading there with a camera, our Maroon Bells (Aspen, CO) location guide covers classic alpine reflection with twin peaks, with GPS, vantage points, and best times.
What to Pack
A focused landscape kit handles every shot at Mount Rainier National Park without breaking your back. Here is the working photographer's pack list — every link goes to B&H Photo Video (our primary supplier) or Amazon (for accessories and same-day delivery in the US).
| What & Why | B&H | Amazon |
|---|---|---|
Wide-angle zoom (14-35mm range) The single most important lens for sweeping vistas. Pair with a circular polarizer for skies and water. | Shop B&H → | Shop Amazon → |
Sturdy travel tripod Carbon fiber, packs to 15 inches, holds steady in wind off the coast. Essential for blue-hour and long-exposure work. | Shop B&H → | Shop Amazon → |
Circular polarizer (77mm or 82mm) Cuts haze, deepens sky, reveals texture in water. Non-negotiable for landscape work. | Shop B&H → | Shop Amazon → |
10-stop ND filter For 30-second exposures that turn moving water and clouds into silk. | Shop B&H → | Shop Amazon → |
Extra batteries (3 minimum) Cold weather and long exposures eat batteries. Carry triple what you think you need. | Shop B&H → | Shop Amazon → |
Fast SD/CFexpress cards V90 or CFexpress depending on your body. Two cards minimum so a failure mid-trip is recoverable. | Shop B&H → | Shop Amazon → |
Microfiber lens cloths Salt spray, mist, and dust will ruin every shot if you don't carry a cloth. | Shop B&H → | Shop Amazon → |
B&H and Amazon links are affiliate links. We earn a small commission on purchases at no extra cost to you. We only recommend gear we use or would buy ourselves.