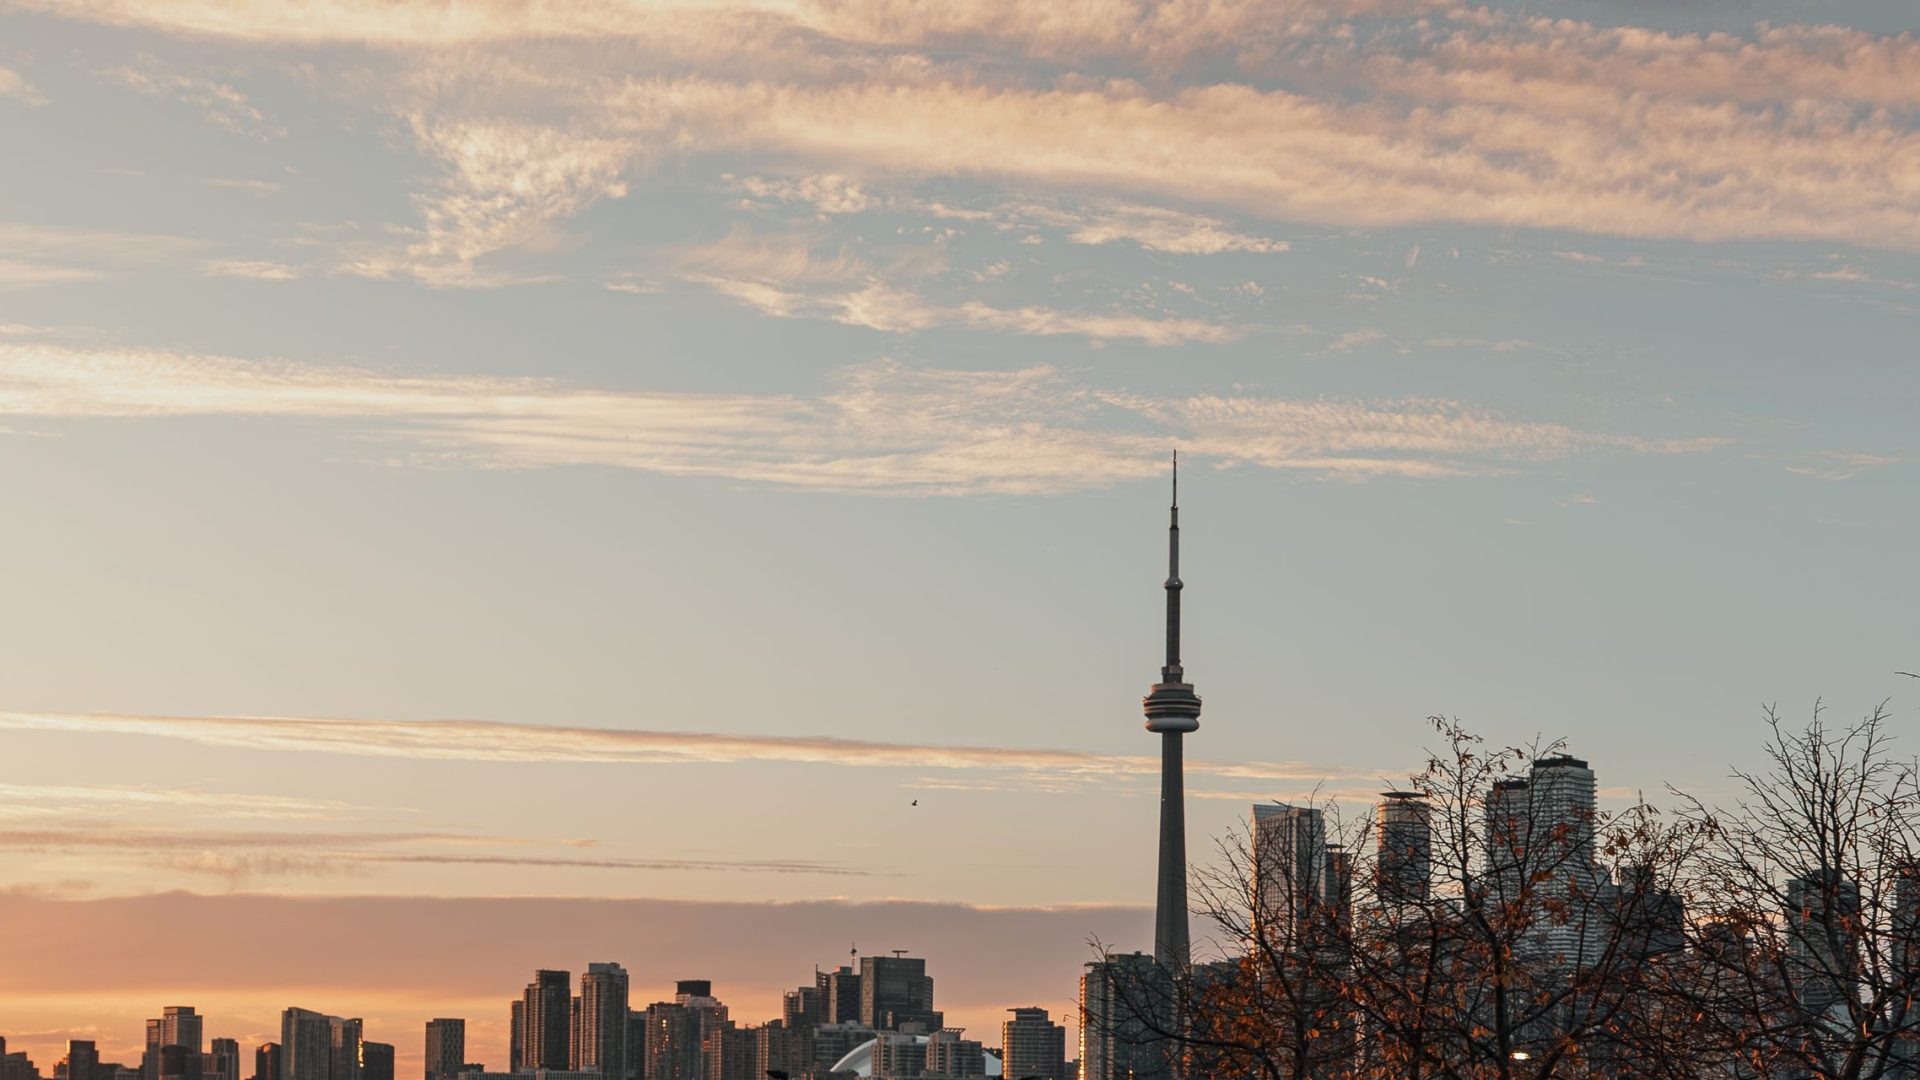
Cover: cropped illustrative stock photo by Kate Trysh / Pexels, Pexels License. Toronto skyline overview, not a marked shooting position.
Updated October 2026. Looking for the best photography spots in Toronto? Start with these four researched locations: modern civic architecture, a red-brick flatiron building, the CN Tower from street level, and a waterfront arch bridge. Each has an address, GPS coordinates and a map link so you can plan your own shoot.
These are exterior subjects, so you can build a day around architecture without planning an interior shoot. Coordinates mark the landmarks; choose a safe pedestrian position when you arrive. Access notes and current official sources are below each spot.
Four Toronto photography spots at a glance
- Nathan Phillips Square and Toronto City Hall: curves, repeating windows and architectural details.
- Gooderham Building: red brick, a pointed corner and the surrounding street grid.
- CN Tower exterior: a strong vertical subject and changing sky.
- Humber Bay Arch Bridge: repeating arches and leading lines on the waterfront trail.
1. Nathan Phillips Square and Toronto City Hall
Address: 100 Queen Street West, Toronto, Ontario.
GPS: 43.6527069, -79.3834137.
Open Nathan Phillips Square in Google Maps.
 Save
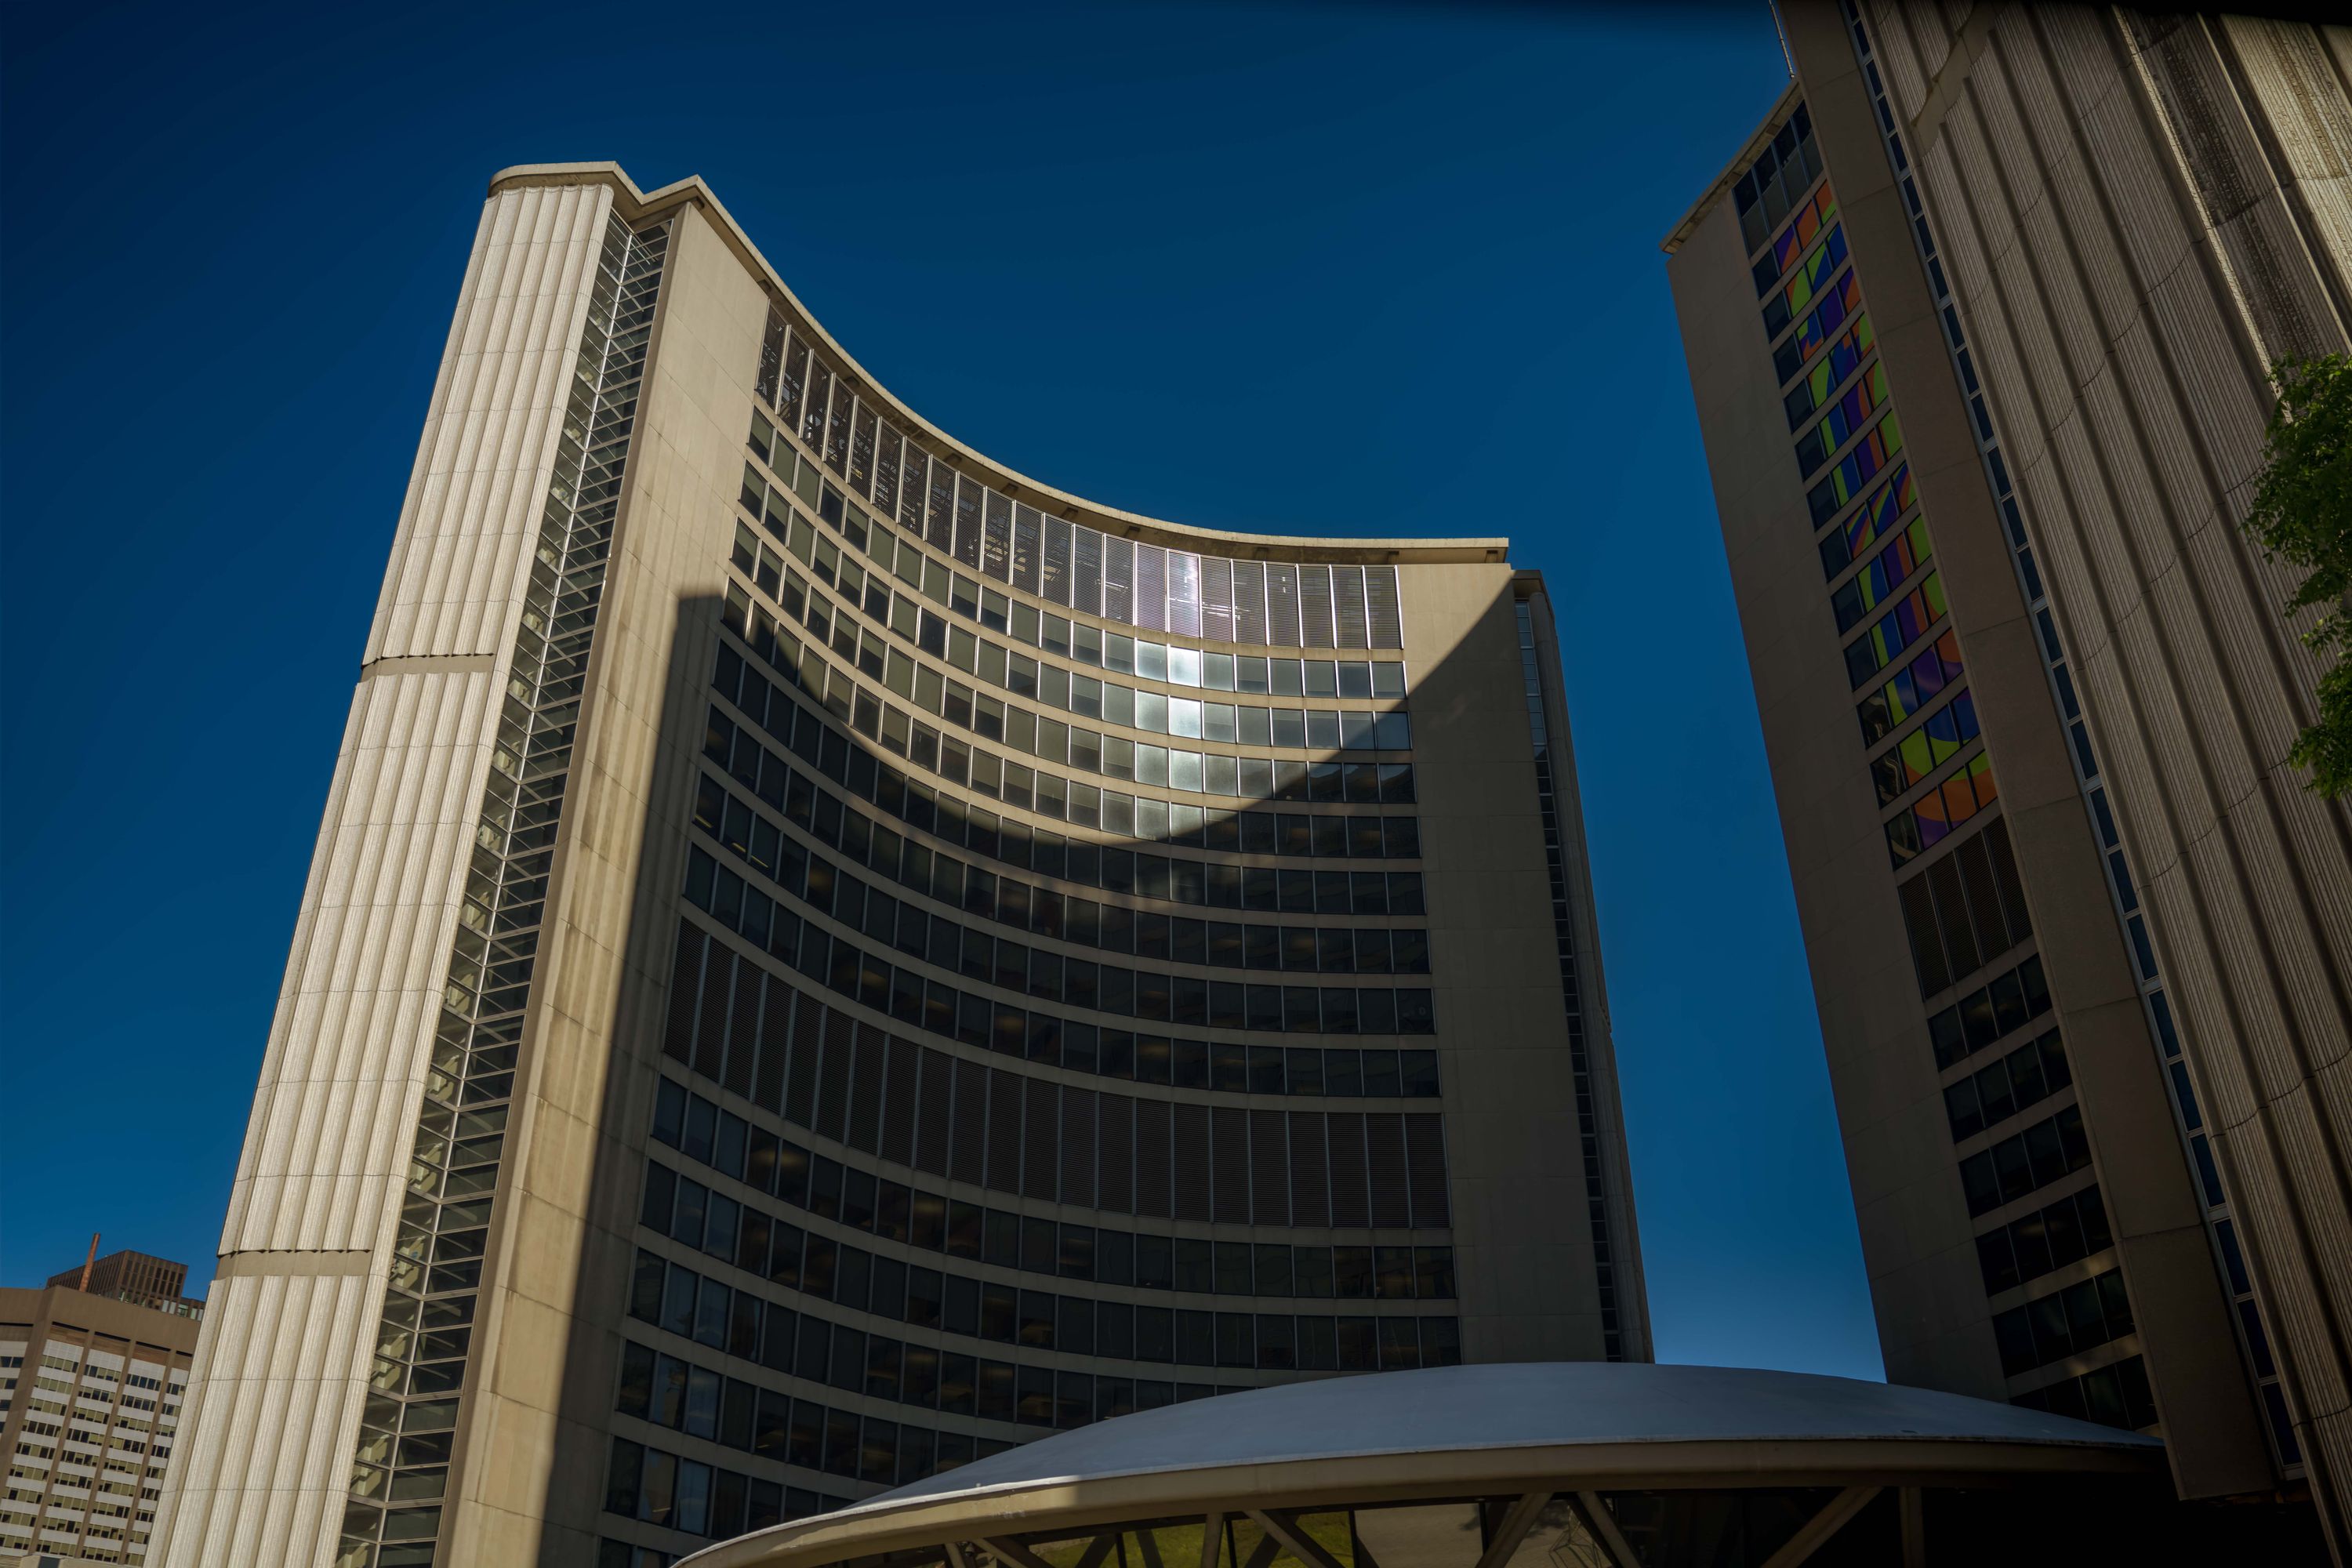
Toronto City Hall’s curved towers make this a useful stop for architectural photography. Instead of treating the whole square as one wide scene, look for a small number of shapes: a tower against clear sky, a row of windows, or the contrast between the two curved faces. A longer lens helps isolate those details when the square is busy.
Composition to try: move until one tower becomes a clean edge against the sky. Keep enough space around its top to avoid a cramped crop. If you want straight verticals, keep the camera level and leave room to correct perspective later. A deliberate upward view is another valid approach, but commit to the converging lines rather than leaving the tilt halfway corrected.
Light and equipment: side light can separate the building’s curves; softer cloud can make its repeating windows easier to study. A wide-to-standard zoom is a practical starting point, with a longer lens for details. Check the histogram to avoid clipping bright sky.
Access: this guide covers the outdoor square and exterior views, not interior access. Events can change where you can stand. The City says commercial photography and film shoots at Nathan Phillips Square require a film permit through its Film Office. Do not assume a public square means every production is permit-free.
2. Gooderham Building
Address: 49 Wellington Street East, Toronto, Ontario.
GPS: 43.6483816, -79.3743010.
Open Gooderham Building in Google Maps.
 Save
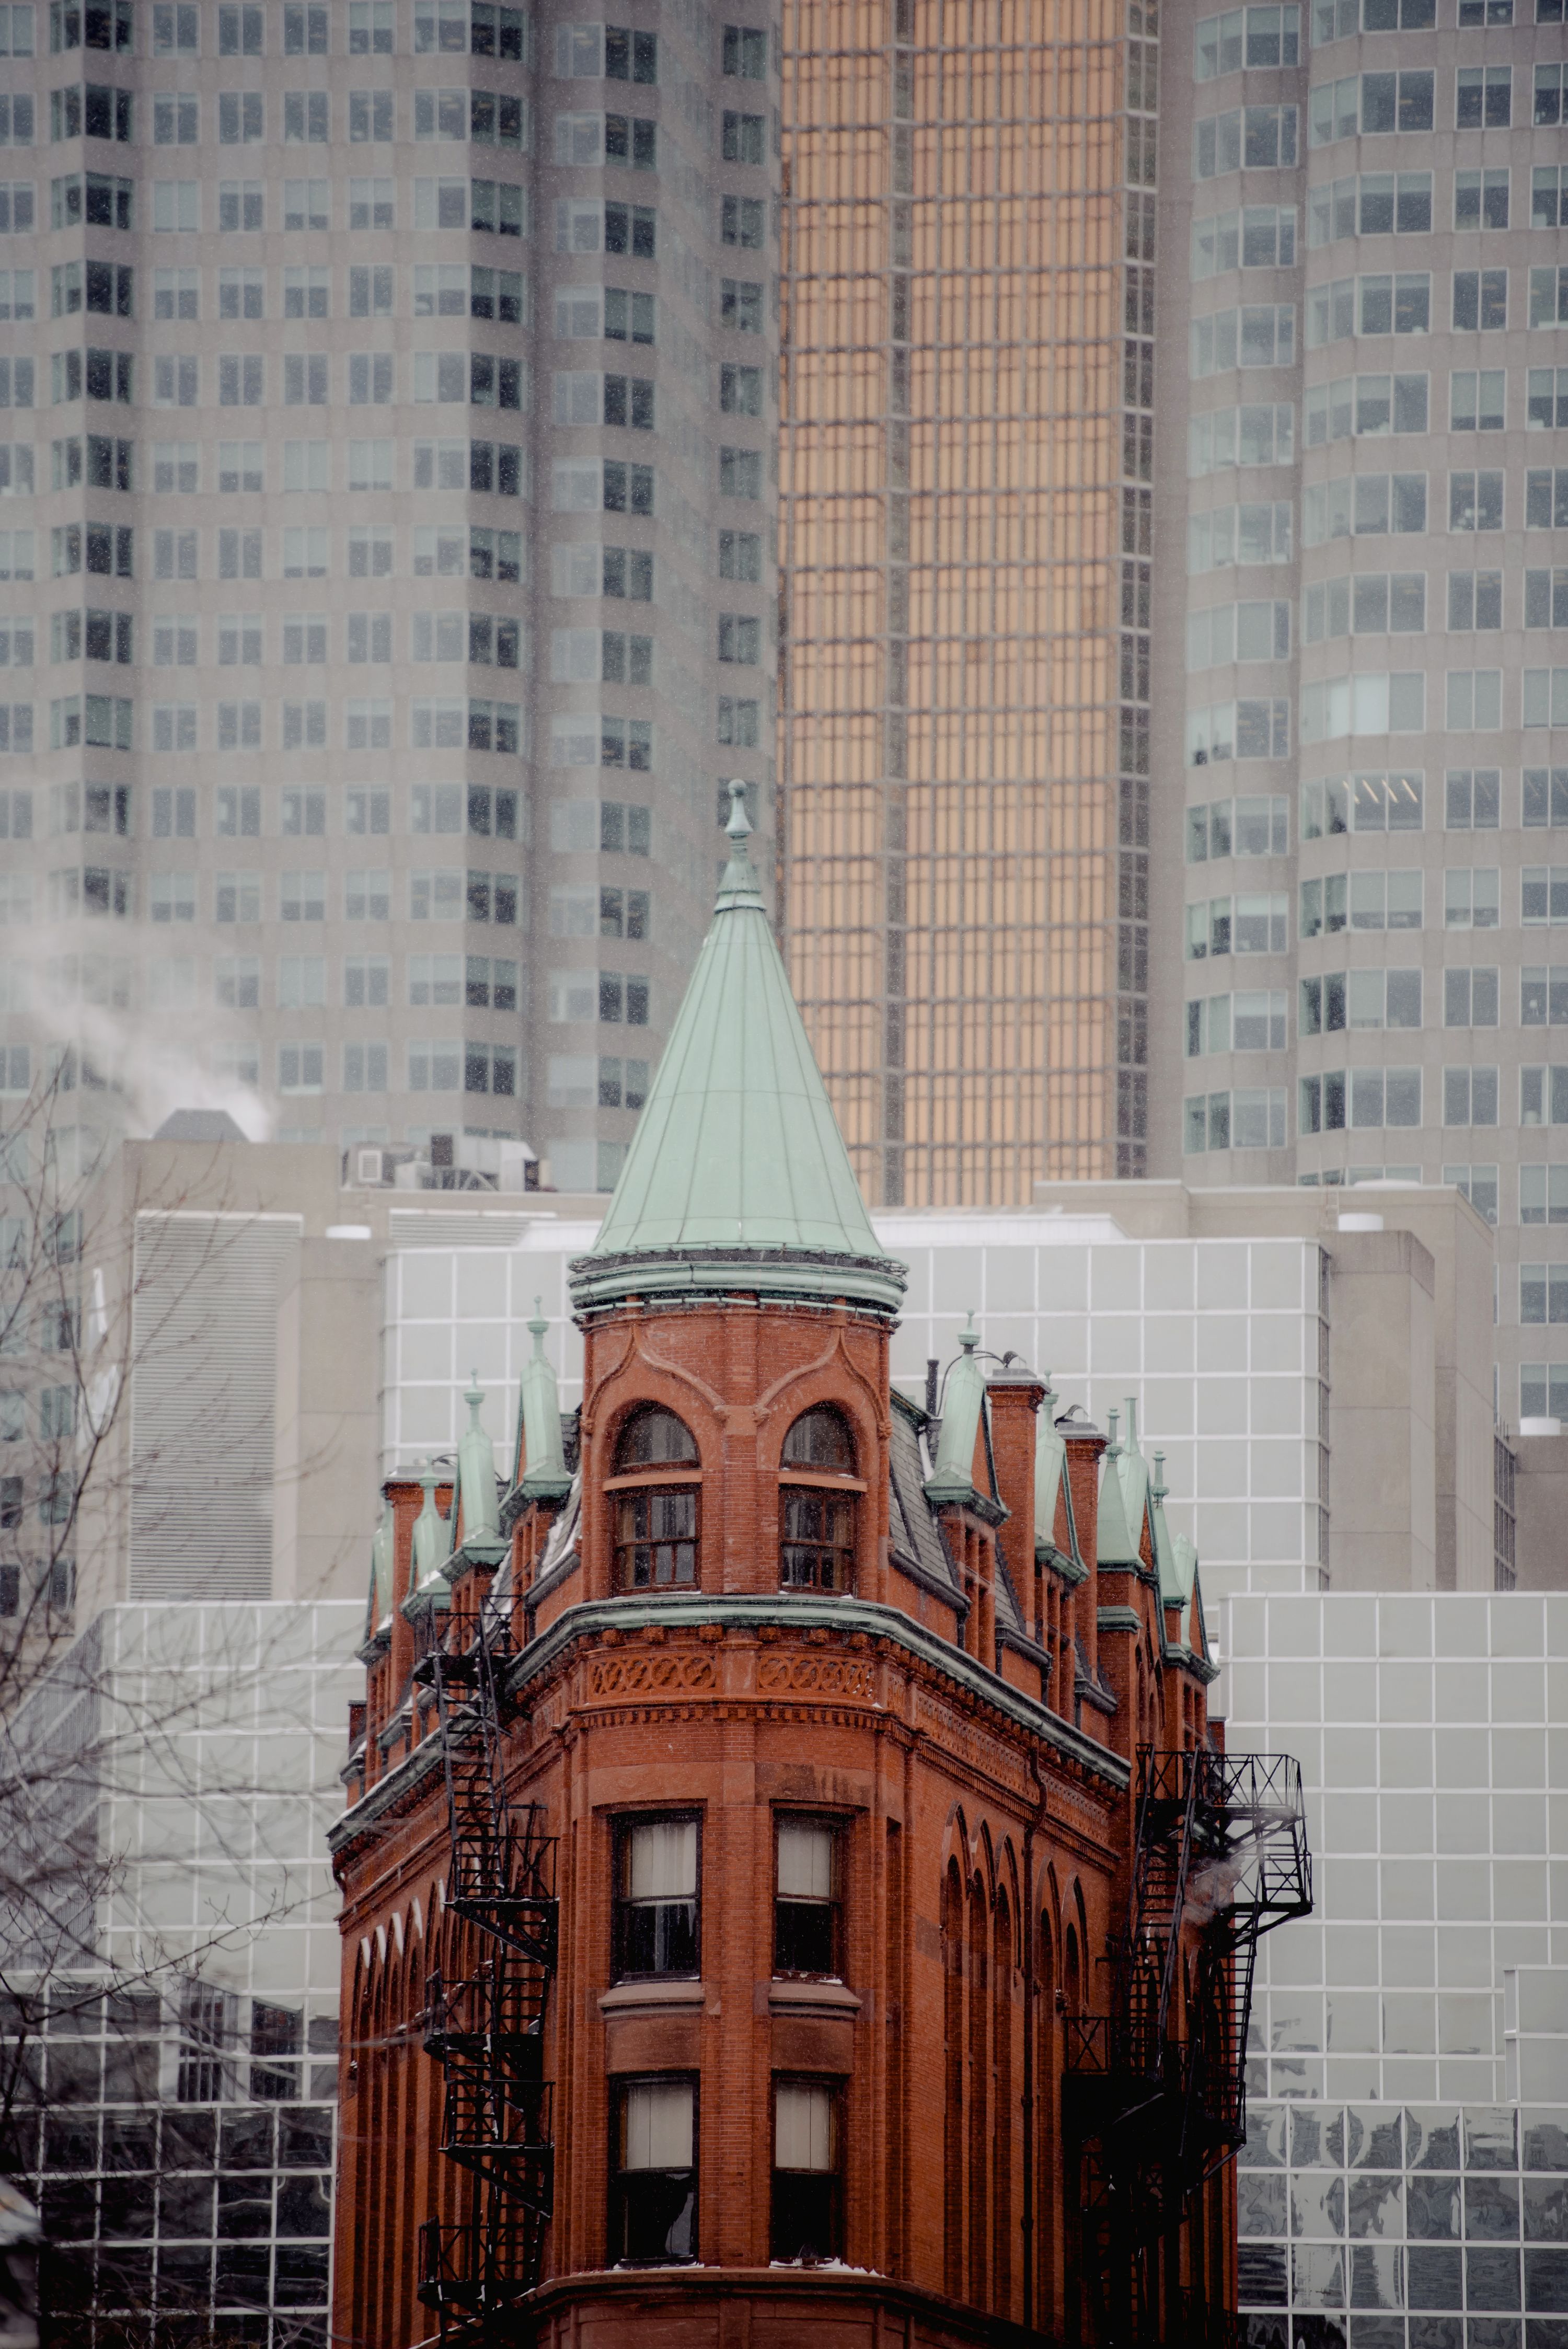
The Gooderham Building gives you a different kind of architecture: red brick, a copper-clad roof and a narrow, rounded corner where two streets meet. The Ontario Heritage Trust explains that its triangular shape follows the meeting of Wellington Street’s grid and the diagonal line of Front Street. That geometry is the reason to photograph it, not merely a background for a street scene.
Composition to try: find a legal public sidewalk position that separates the pointed corner from the buildings behind it. Try a tighter vertical frame of the roof and upper floors if traffic or pedestrians make the wider view cluttered. A standard or short telephoto lens can give you that cleaner frame without stepping into the street.
Light and equipment: compare how the brick looks in direct and diffused light rather than assuming a fixed hour will work in every season. If you want moving traffic sharp, raise the shutter speed before increasing exposure with a wider aperture. For the building itself, a moderate aperture and careful focus give you more room for fine brick detail.
Access: photograph the exterior from public pedestrian areas. This is not an invitation to enter the building or use its roof. Never stand in a traffic lane, bike lane or intersection for a centered shot. A narrower composition from a safe position is better than a dangerous wide one.
3. CN Tower from street level
Landmark address: 290 Bremner Boulevard, Toronto, Ontario.
GPS: 43.6425662, -79.3870568.
Open CN Tower in Google Maps.
 Save
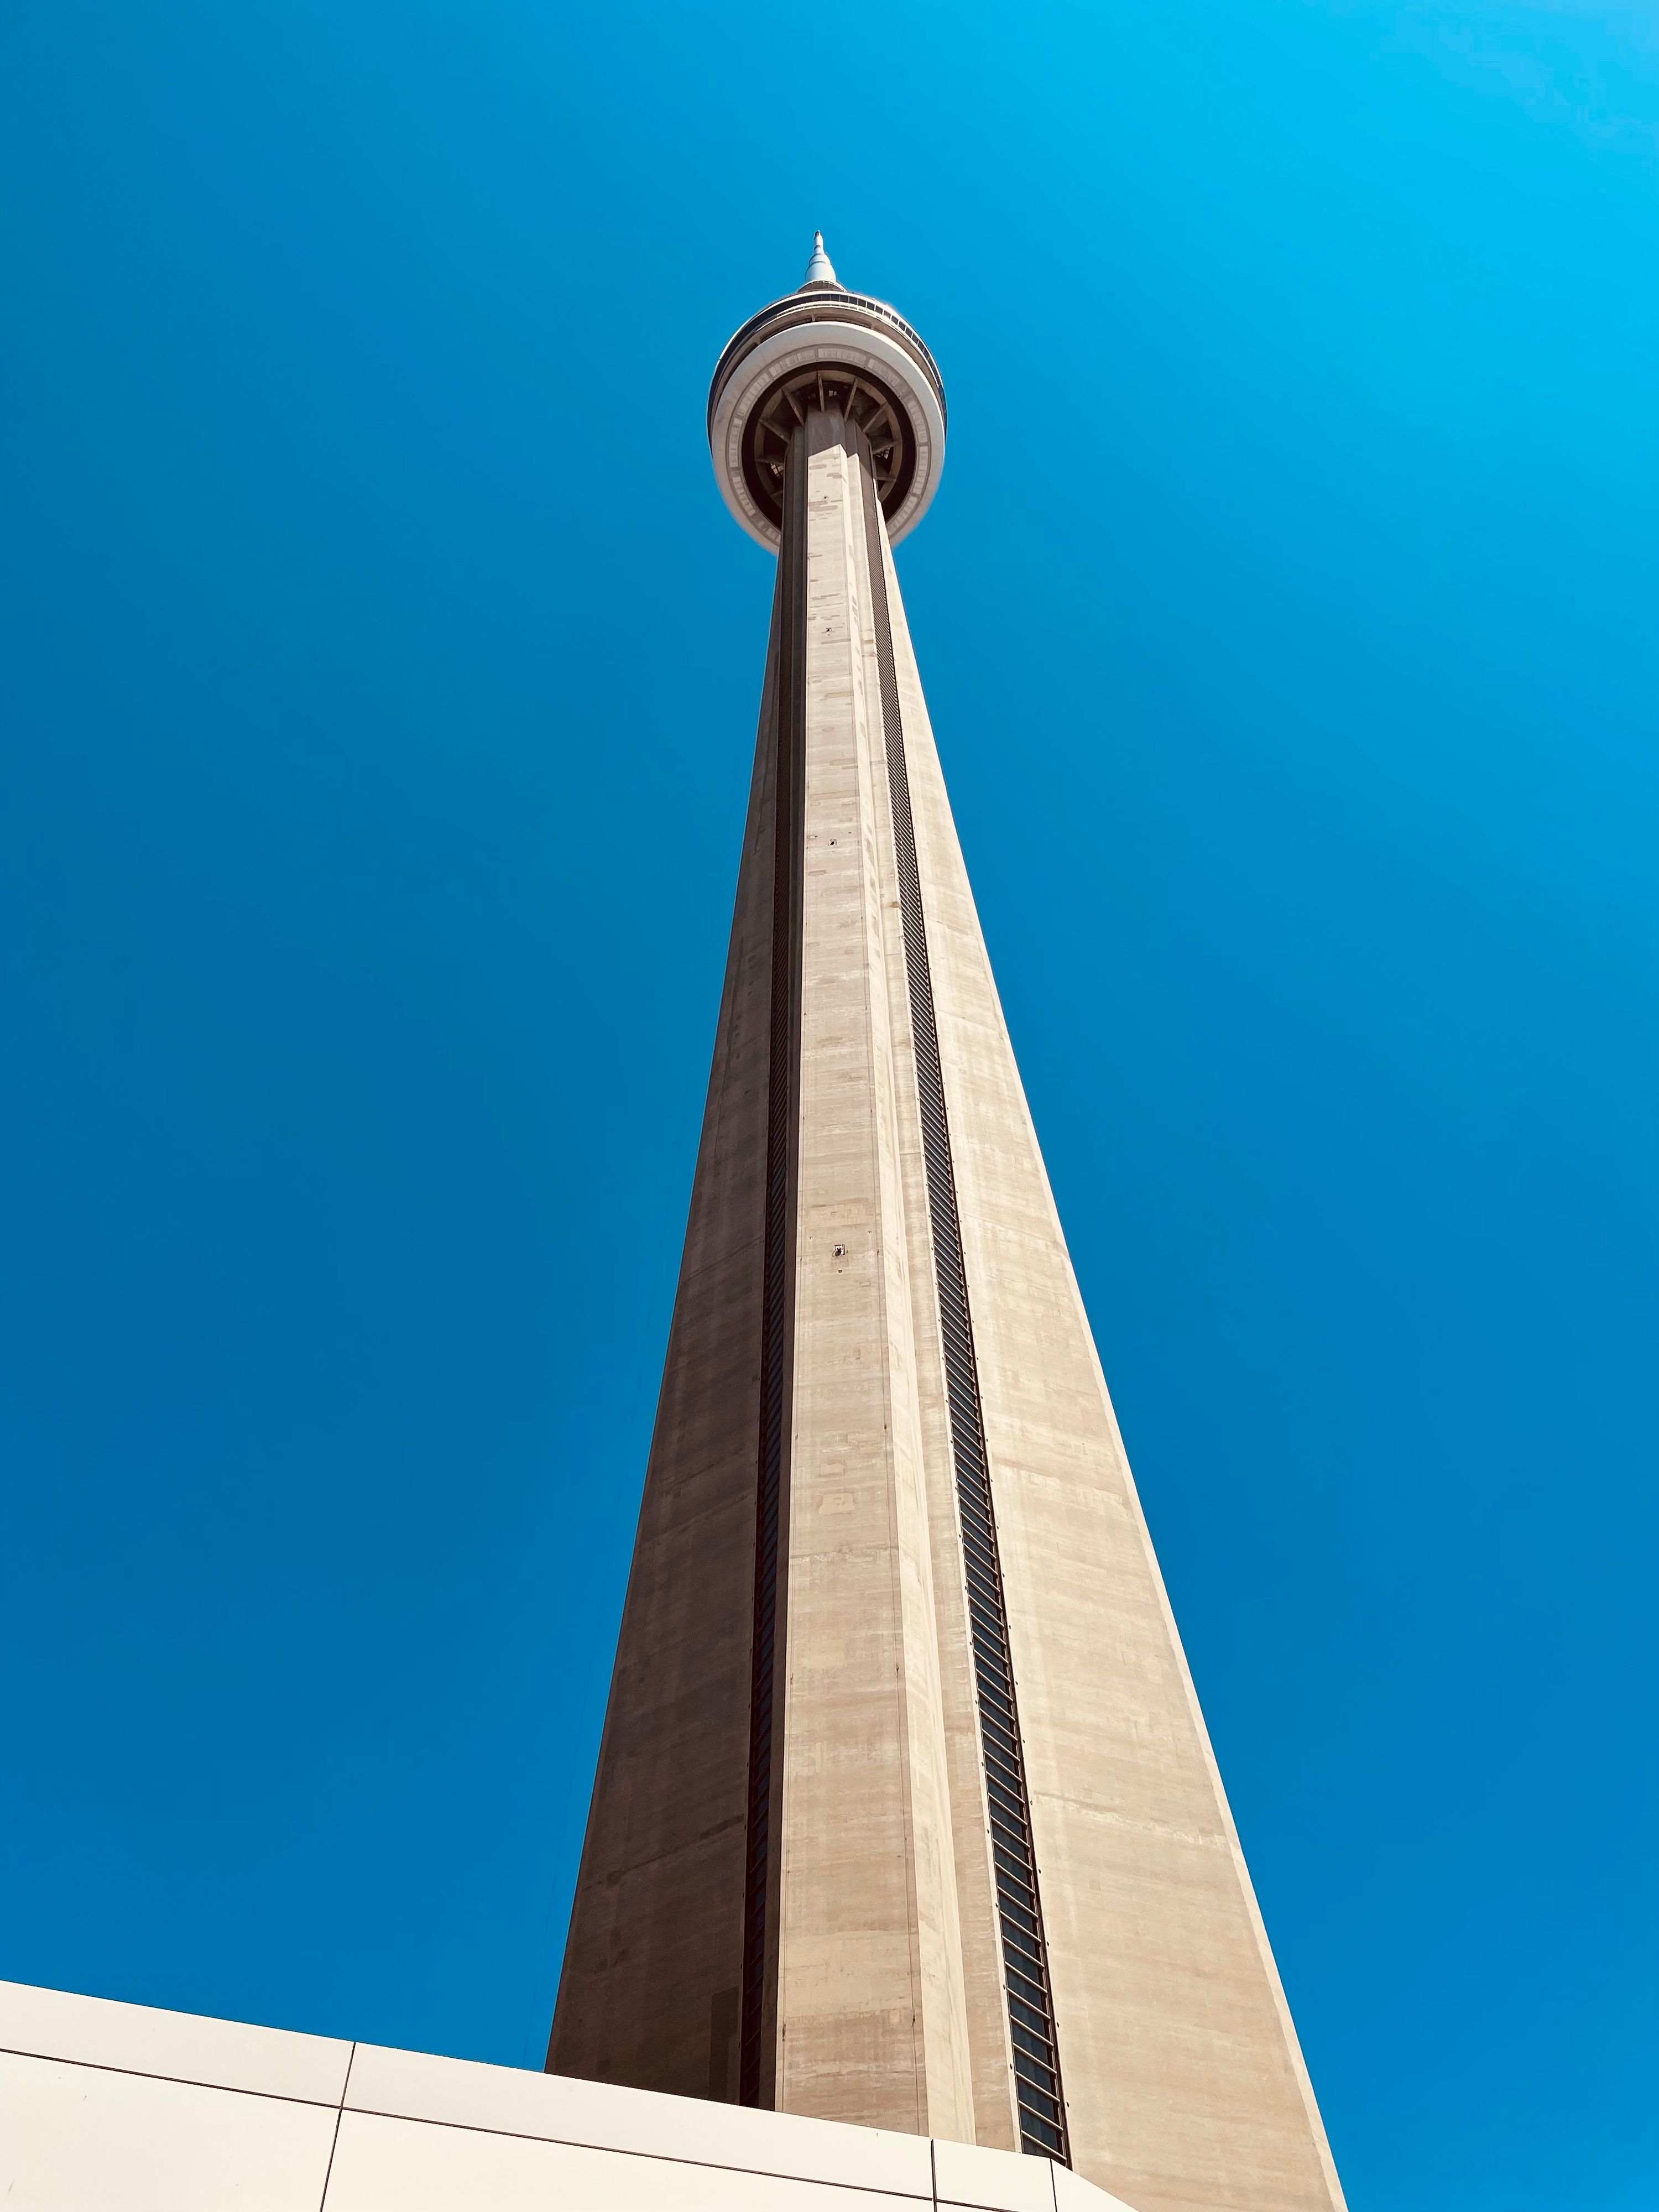
The CN Tower is a straightforward subject with plenty of room for variation. From street level, its long shaft creates a strong line through the frame. You do not need to promise a skyline panorama or buy an observation ticket to make an exterior photograph.
Composition to try: look up from a safe pedestrian position and keep the tower’s upper structure clear of nearby rooflines. A vertical frame emphasizes its height. A small change in position can remove a distracting street fixture or move it into the frame intentionally. Check all four edges before releasing the shutter.
Light and equipment: use the sky as part of the photograph. Clear sky gives the tower a simple backdrop; cloud can add texture, while fog may hide its top. A wide-angle lens works well close to the base. Do not assume that the widest possible frame is the strongest one: compare a tighter view of the structure before moving on.
Access: the map marks the tower, not a guaranteed shooting position. Stay on permitted pedestrian areas and follow posted directions. Paid admission, observation levels, opening times and equipment rules are separate matters; check the tower’s own visitor information if you decide to enter. None is included or required by this exterior guide.
4. Humber Bay Arch Bridge
Location: Martin Goodman Trail at the mouth of the Humber River, Toronto, Ontario.
GPS: 43.6319018, -79.4712345.
Open Humber Bay Arch Bridge in Google Maps.
 Save
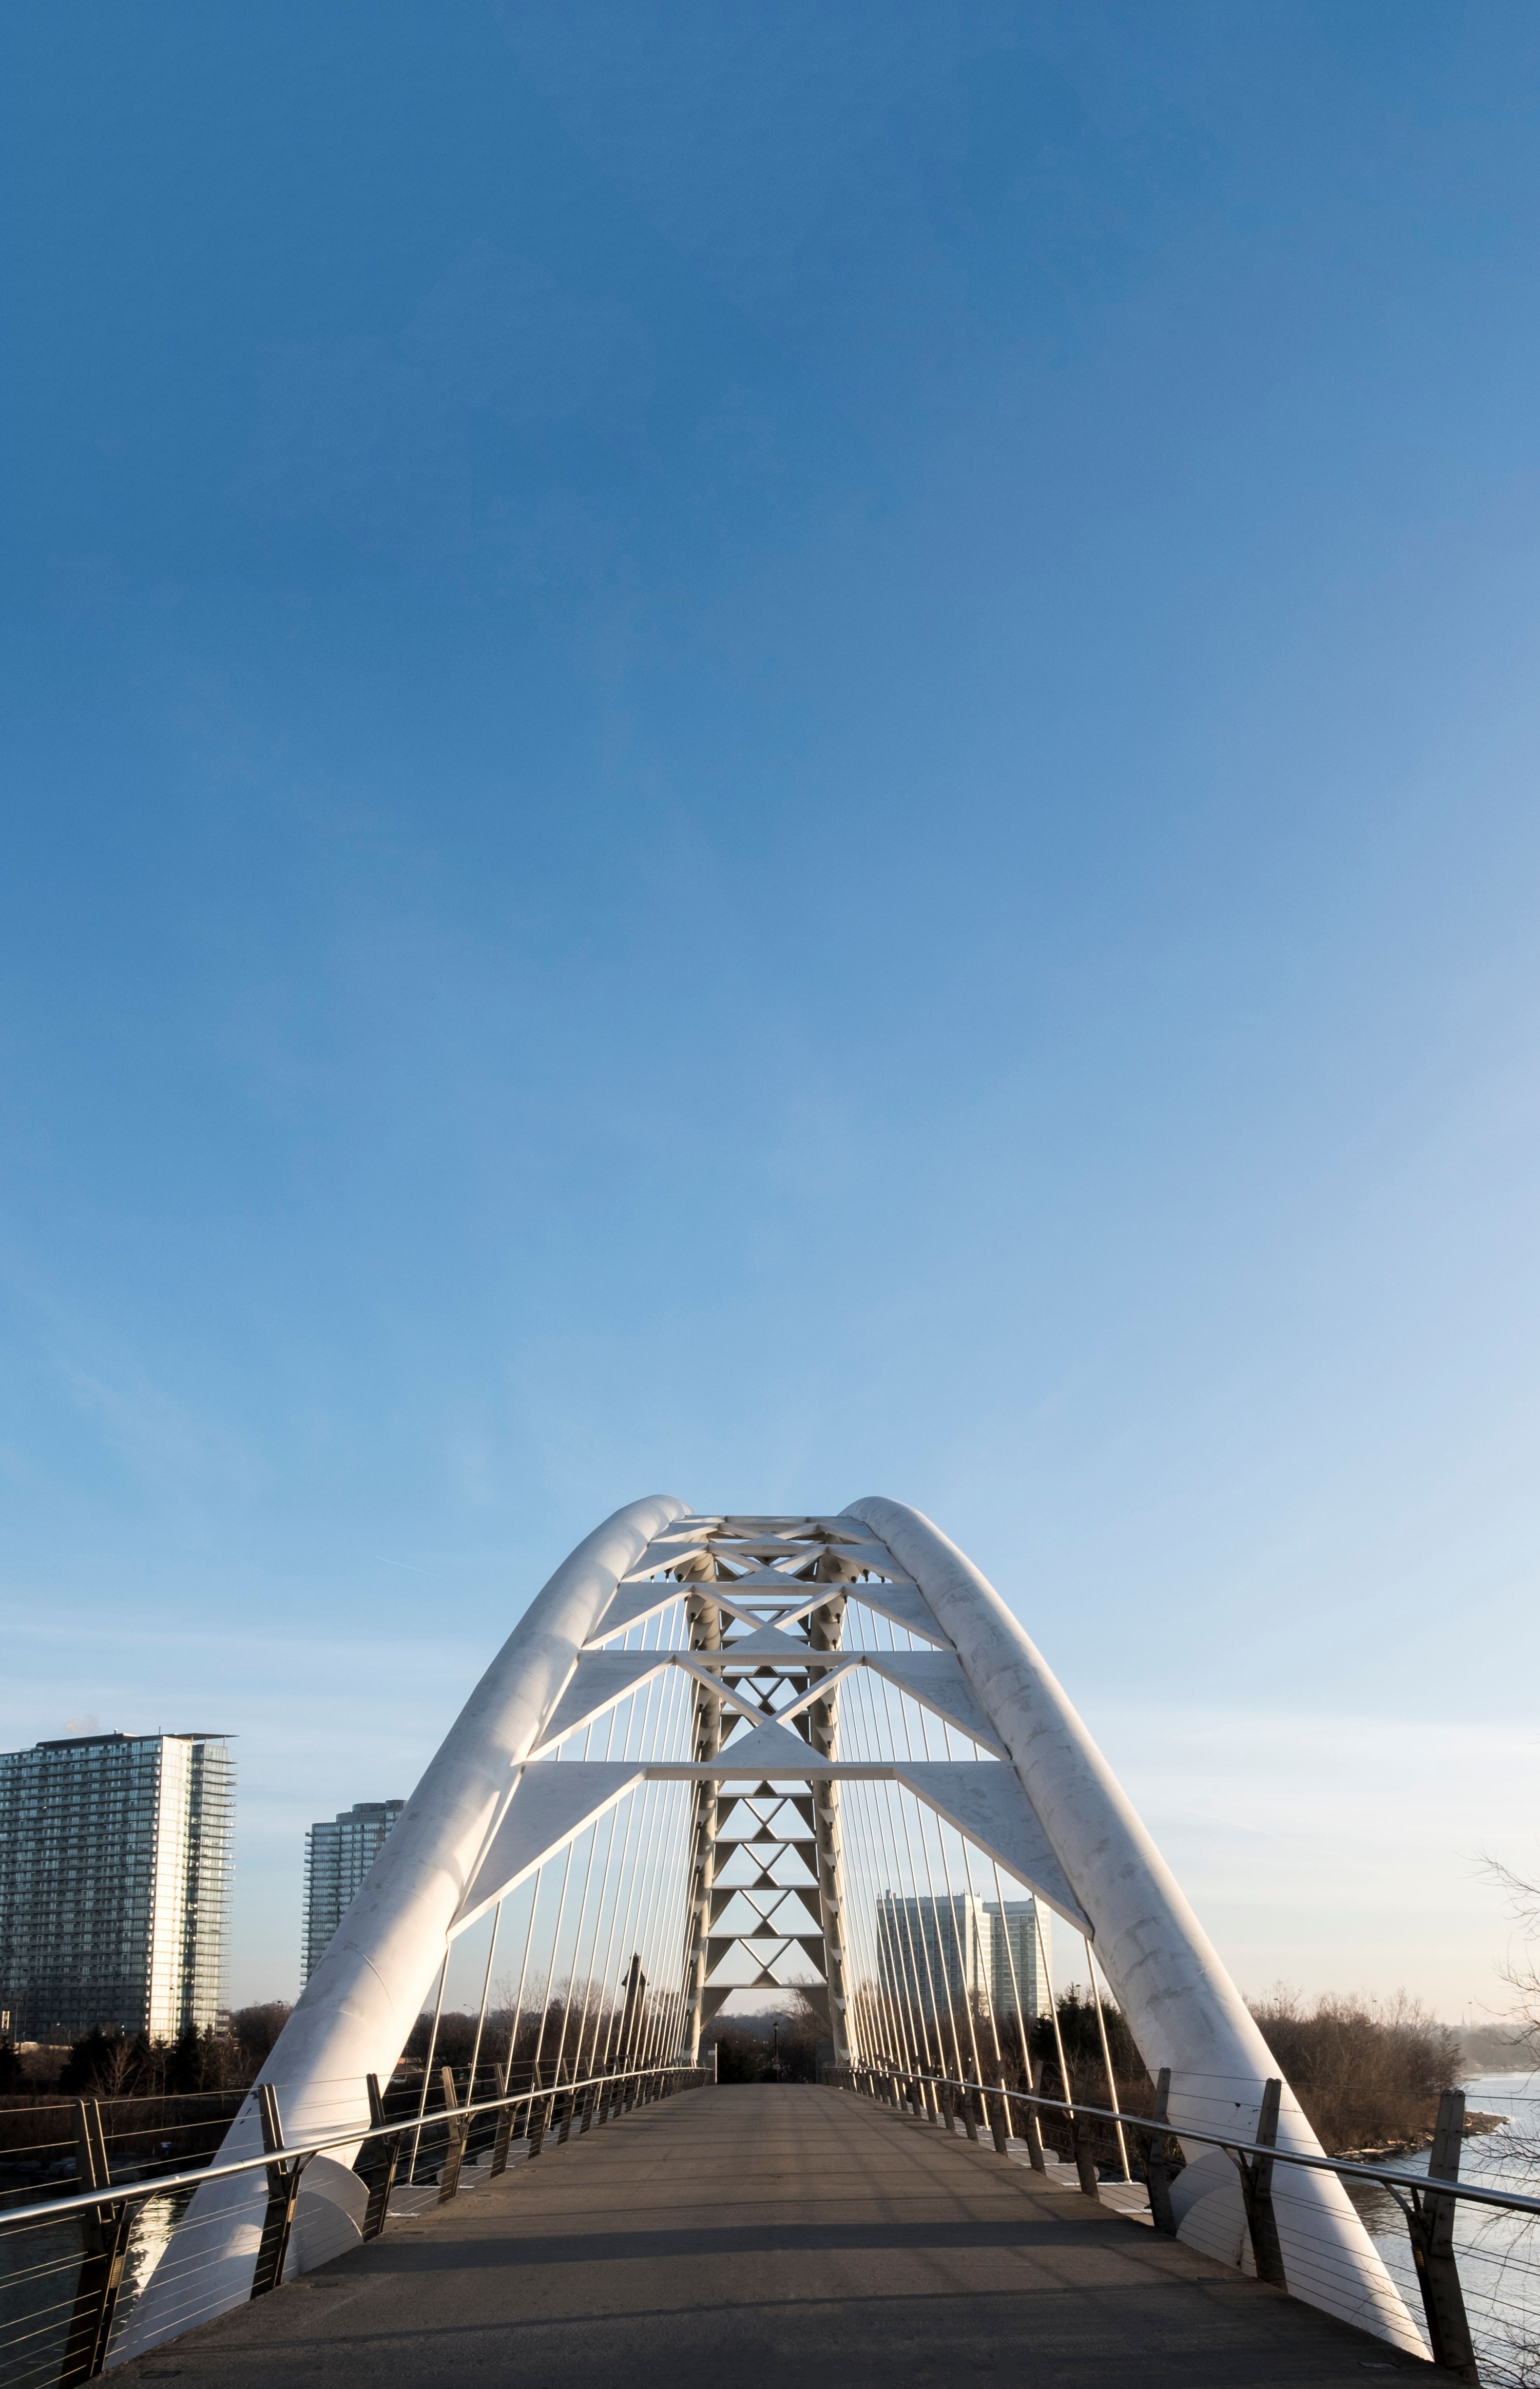
The bridge carries the Martin Goodman Trail over the Humber River. Its white arches and cross-bracing create repeating shapes that work well as leading lines. This is a shared pedestrian and cycling route, so the photograph has to fit around people using it, not the other way around.
Composition to try: from a position that leaves the path clear, align the arches so their repetition draws the eye through the frame. Compare a lower view with a standing-height view; the relationship between the deck and the arches changes quickly. Check that railings do not cut awkwardly through the strongest part of the structure.
Light and equipment: low side light can separate the arches from the background, but it is a creative option rather than a guaranteed condition. A wide-to-standard zoom is enough to explore the geometry. Wind off the waterfront can move the camera, so use a shutter speed that suits the conditions. If using a tripod is permitted and practical, keep its legs out of the travel path.
Access: do not stop cyclists, block the bridge or climb its structure for a photograph. Check local notices for maintenance or closures. The coordinate identifies the bridge; it does not establish parking availability, step-free conditions along every approach or permission for a commercial setup.
Planning a Toronto photography outing
The three downtown stops suit an architectural outing; Humber Bay Arch Bridge is a separate waterfront stop west of that group. Check a current route rather than assuming they form a short walking loop. Choose fewer locations if that lets you spend more time studying the light.
For a small personal outing, a camera, a wide-to-standard zoom, spare battery and weather protection are a useful starting kit. Keep bags and tripods clear of pedestrian routes. For a commercial shoot, wedding session, lighting setup or organized group, confirm the applicable city or property rules in advance. This guide is not a permit.
Photography tips for these four locations
Build the frame before choosing the settings
At each stop, spend a minute looking without taking a photograph. Choose your subject, then look behind it. A tower can look strong in isolation but disappear into a busy line of buildings. Move sideways before reaching for a different lens. Once the background is clean, choose how much context to include. For Gooderham, that might mean the upper brickwork instead of the intersection; at the bridge, it might mean a few repeating arches rather than the full span.
Keep bright sky and pale structures under control
Check the histogram and highlight warning after a test frame. Bright sky behind a shaded building can exceed what a single exposure holds comfortably. Reduce exposure if important highlights are clipping, then check whether the darker subject still has enough detail. Exposure bracketing can help with a static architectural scene when you know how you will combine the files. It is less useful when pedestrians, leaves or traffic move between frames. Do not make a habit of heavy HDR halos around every roofline.
Choose a shutter speed for what is moving
A building does not move, but the scene around it does. If you want sharp pedestrians or passing vehicles, choose the shutter speed for their movement rather than for the building alone. If the frame is deliberately architectural, wait for a clear gap instead of assuming people can be removed later. Along the waterfront, wind can affect both your balance and a small tripod. Review a magnified frame for sharpness before leaving, especially after a long exposure.
Leave room for perspective correction
Tilting the camera upward makes vertical lines converge. That can suit the CN Tower, where height is the point, but may feel accidental in a carefully balanced view of City Hall. If you intend to straighten the building later, include extra space at the edges because correction crops the image. Do not stretch a file until the top looks unnaturally wide. Compare the corrected version with the original and keep the one that feels believable.
Edit the city without inventing it
Use white balance to make the light readable, not to force every scene into orange and blue. Check red brick and blue sky for oversaturation. Local contrast can bring out windows or cross-bracing, but aggressive sharpening makes branches and rooflines brittle. Keep a separate original file before cropping. If a crop changes the story, such as removing a crowded foreground, do not present it as proof that the location was deserted.
Toronto photography questions
Which of these stops works best for architecture?
Start with City Hall for curves and repeating windows, or Gooderham for brick detail and its narrow corner. The CN Tower gives you a simpler vertical subject. Humber Bay Arch Bridge is a better choice when you want a structure set within a waterfront trail rather than a dense downtown street scene.
Can I photograph these places without entering a building?
Yes, this selection is built around exterior subjects and pedestrian viewpoints. That does not override posted restrictions or guarantee that every preferred camera position is available. Interiors, observation decks and private property have separate rules. If your plan depends on going inside, check the operator directly rather than treating this article as an admission guide.
Do I need a permit or a tripod?
A tripod is not essential for daylight architectural photography. If you bring one, leave enough room for other people and follow local restrictions. Permit needs depend on the location and the activity: a commercial production, wedding session, organized group or lighting setup is different from a small personal outing. Nathan Phillips Square explicitly requires a film permit for commercial photography and film shoots. Check the city’s current rules before arranging a session.
What is the best time to photograph Toronto?
Choose the light for your frame instead of relying on one universal hour. Side light can reveal shape, overcast light can soften contrast, and blue hour can suit illuminated architecture. Those are creative choices, not a forecast. Cloud, fog, events and construction may change the result. Check current conditions and allow enough time to try a different composition without rushing across traffic.
Are these photographs by Edin Chavez?
The photographs accompanying this researched guide are credited illustrative stock images from their named photographers. They show the subjects discussed but do not imply that Edin visited each location, that conditions are unchanged today, or that your own viewpoint will be identical. The source and license are linked in each caption.
Recommended gear for this outing
Start with the camera you already know and a wide-to-standard zoom. Add a short telephoto only if you want to isolate roofs, windows and brickwork from a safe distance. A spare battery, a clean lens cloth and a rain cover are more useful than carrying every lens you own. Avoid setting a bag where it blocks a sidewalk or trail. Before buying anything, read our street photography guide for a lighter way to work in a busy city.
Sources and access checks
Location and access information was researched in October 2026. Photography suggestions are editorial recommendations, not a claim that Edin personally photographed every location. Conditions can change after publication.
- City of Toronto: City Hall.
- City of Toronto: Nathan Phillips Square, including commercial photography rules.
- Ontario Heritage Trust: Gooderham Building.
- CN Tower: visitor information.
- City of Toronto: cultural heritage report describing Humber Bay Arch Bridge and the Martin Goodman Trail.
- City of Toronto: wedding and commercial photography in parks.
What to Pack
A landscape kit built around wide views, steady support, and changing light is a useful starting point. Compare the gear and choose what fits your camera, budget, and conditions. These links lead to B&H Photo Video and Amazon.
| What & Why | B&H | Amazon |
|---|---|---|
Sony 16-35mm f/2.8 GM Check the camera mount before buying. Choose a focal length that fits the photos you plan to make. | Shop B&H → | Shop Amazon → |
Peak Design Travel Tripod Check the load rating, packed size and local tripod rules before buying. | Shop B&H → | Shop Amazon → |
Breakthrough X4 CPL Check the filter type and lens thread size before buying. Use a filter only when the effect fits your photo. | Shop B&H → | Shop Amazon → |
Breakthrough X4 10-stop ND Check the filter type and lens thread size before buying. Use a filter only when the effect fits your photo. | Shop B&H → | Shop Amazon → |
Sony NP-FZ100 battery Use the battery type specified for your camera. Bring a spare if your shooting plan calls for one. | Shop B&H → | Shop Amazon → |
SanDisk Extreme Pro 128GB Check the card format and speed requirements specified for your camera. | Shop B&H → | Shop Amazon → |
Koh microfiber cloths Compare this option with your current kit. Check compatibility and the product details before buying. | Shop B&H → | Shop Amazon → |
B&H and Amazon links are affiliate links. We earn a small commission on purchases at no extra cost to you.