Zion is a canyon you photograph from the inside. Most parks give you a rim and a long lens; Zion puts you on the canyon floor with walls on both sides, and the question becomes which wall, which hour, and how much of the Virgin River you want in the frame. The subjects are close, vertical and completely dependent on reflected light.
The useful question is not simply where to stand. It is what you want the photograph to say. A knife-edge ridge with a hiker for scale. A slot canyon with light sliding down dark varnish. A cottonwood-lined river under a monsoon sky. Pick the statement first, then pick the hour.
These are researched photography spots, illustrated with public-domain National Park Service photographs by the credited NPS photographers. Suggested settings are starting points, not recorded settings from the photographs shown. This post does not claim the author photographed each position.
This article covers five of the guide’s eleven spots: Angels Landing, Canyon Overlook, the Watchman at sunset, Temples and Towers at sunrise and the Narrows. The PDF adds Observation Point, Upper Emerald Pool in autumn, a storm over the Streaked Wall and Sentinel, the Virgin River in snow, Echo Canyon’s storm waterfall and the Temple of Sinawava falls, with shuttle times, fees and closure intel.
1. Angels Landing: earn the knife-edge
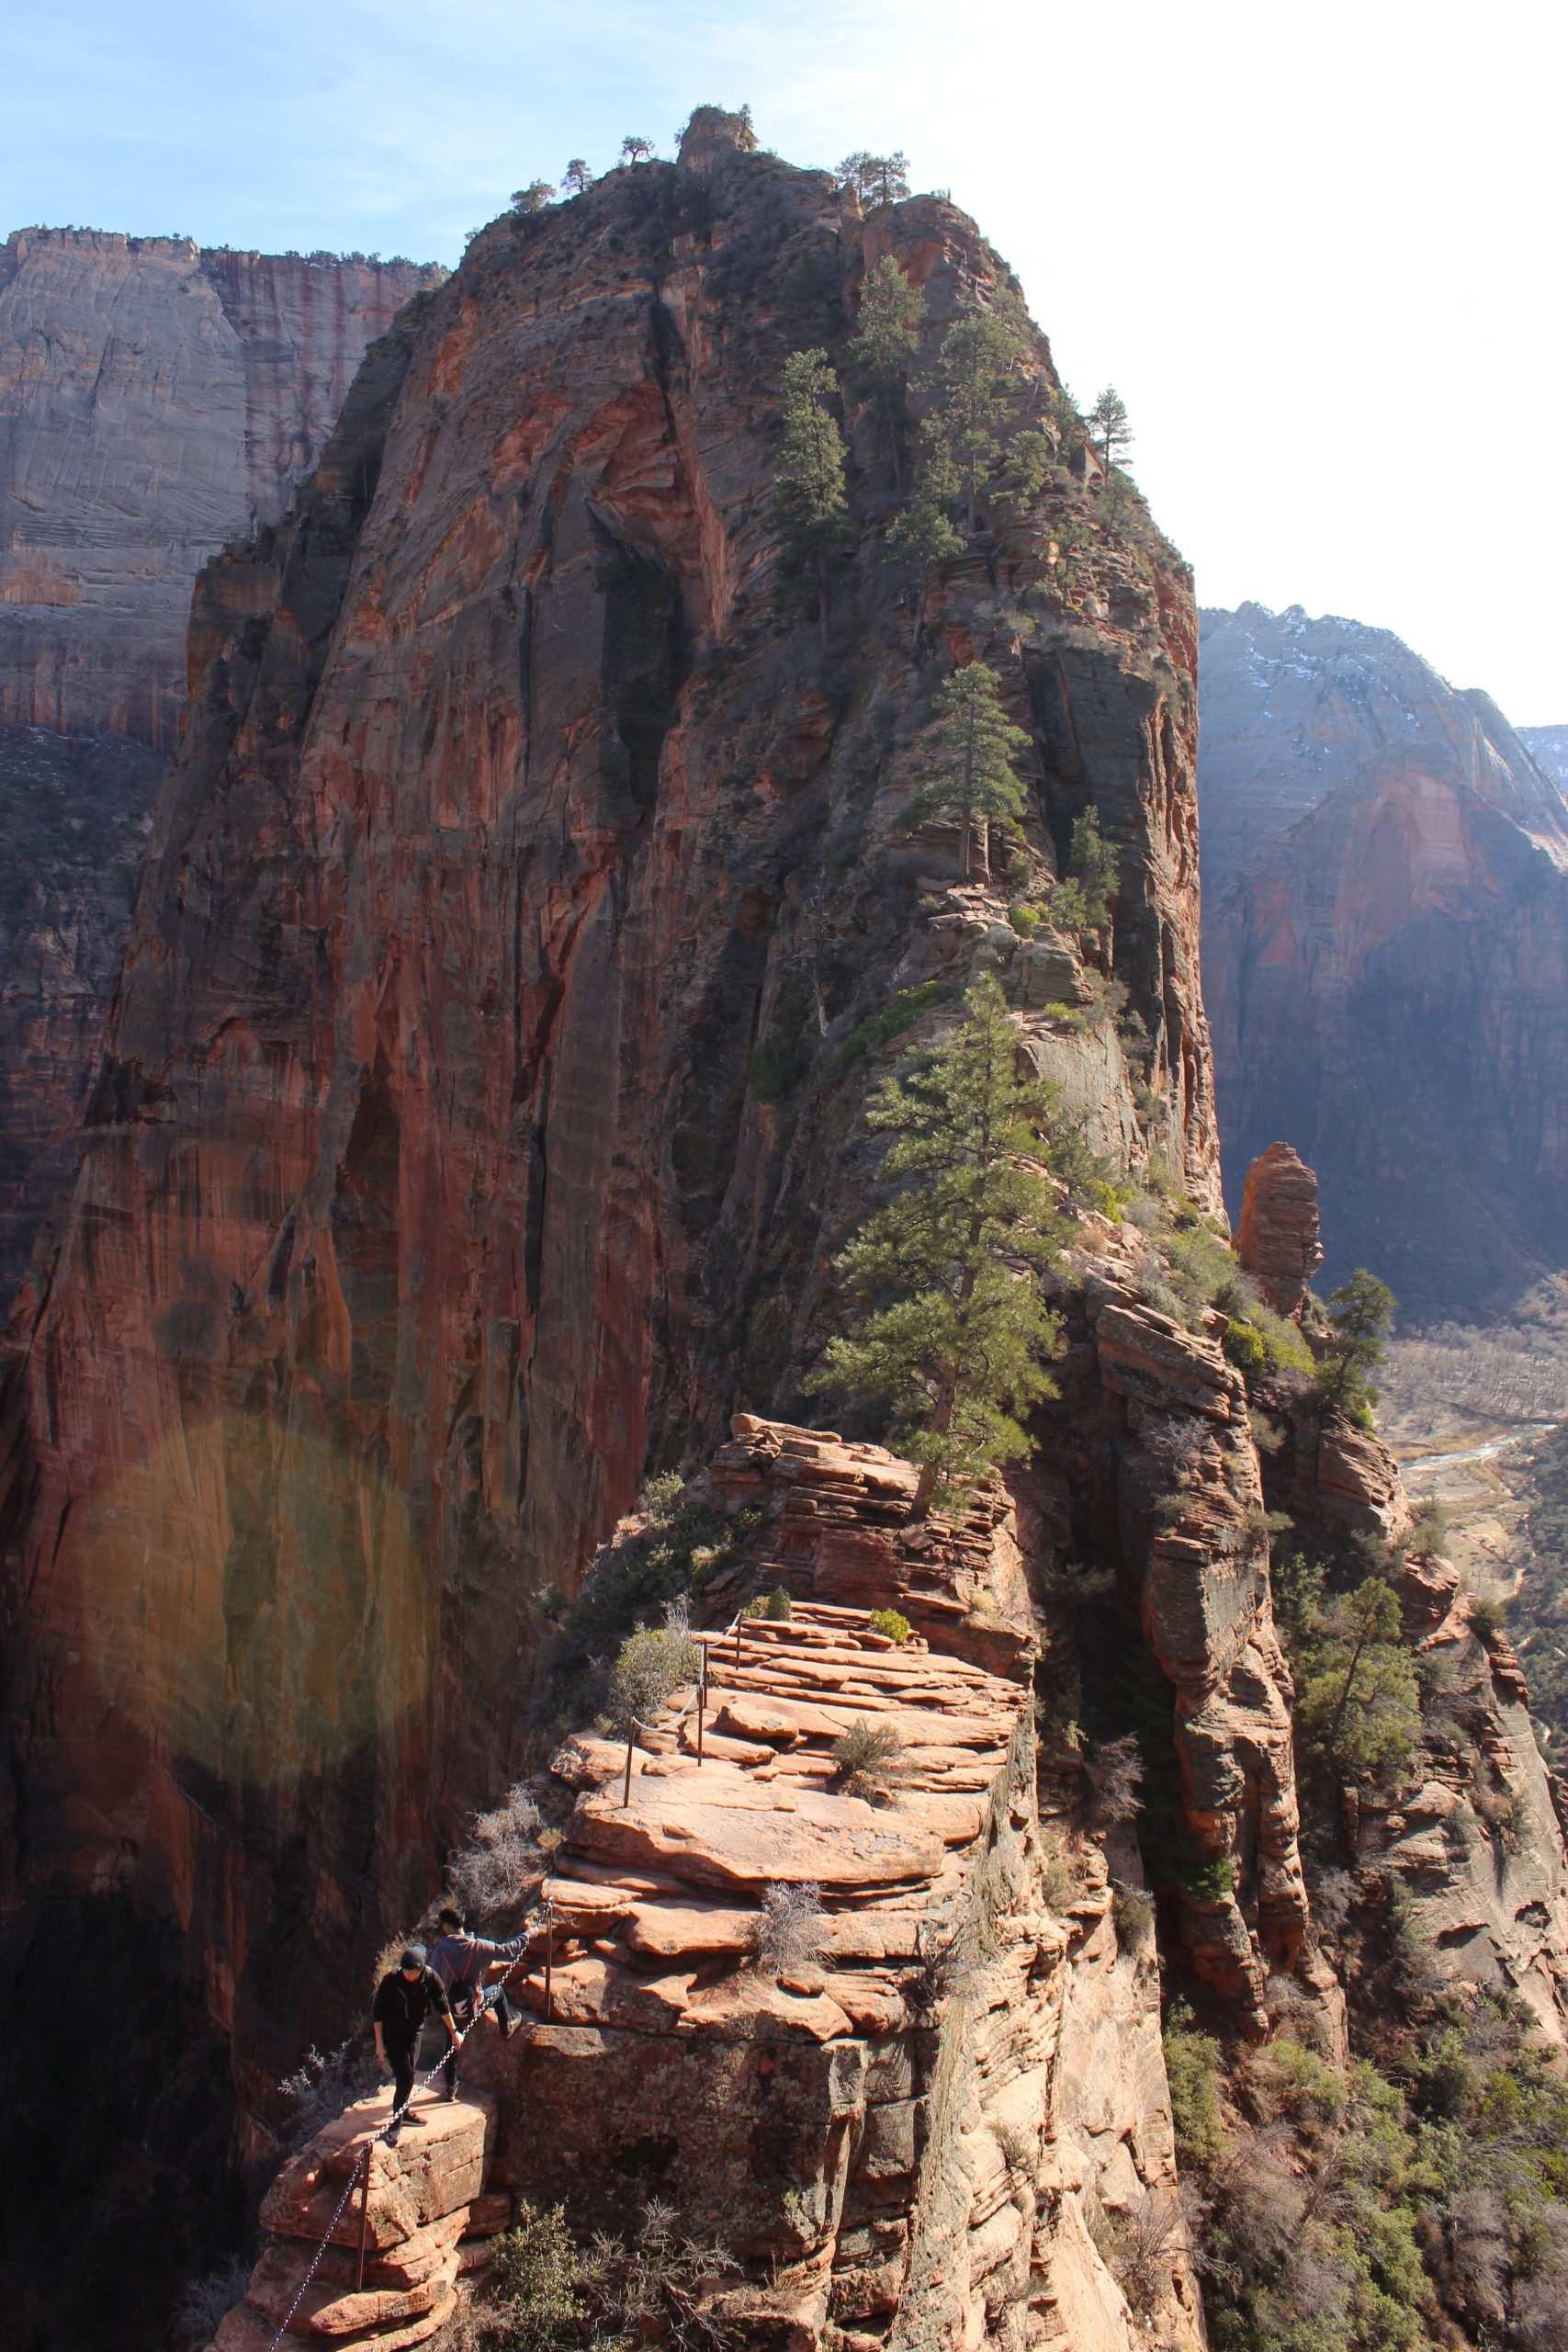
Photo: NPS Photo / Brian Whitehead, public domain
Angels Landing is the famous fin of rock above Zion Canyon, and the last half mile follows a narrow ridge with chains bolted into the stone. From The Grotto (shuttle stop #6), the trail climbs through Refrigerator Canyon and up Walter’s Wiggles to Scout Lookout, where the permit section begins. The classic photograph is the ridge itself: a hiker small against the drop on both sides, the canyon opening 1,500 feet below.
Start with scale. The ridge without a person on it reads as a generic red-rock skyline. Wait for a hiker on the chains and let them give the fin its size. Scout Lookout is the easiest working position and needs no permit; from there you shoot along the ridge with a short telephoto and compress the hiker against the canyon behind.
Light matters more than elevation here. The canyon is deep, and by mid-morning half of it is in hard shadow while the rim burns. Early light is softer and the crowds are thinner. In autumn, the cottonwoods along the river give you a gold line at the base of the frame.
Permits are the honest reality: the chain section past Scout Lookout requires a permit from the day-before lottery ($6 application, $3 per person if awarded). Scout Lookout itself is free to anyone with strong legs. Do not carry a tripod onto the chains if you are not comfortable with exposure; the best Angels Landing frames are made from stable positions, not from the middle of the route.
For a static ridge scene on a tripod at Scout Lookout, start at ISO 100 and f/8, and let the shutter land where the histogram wants it. With a hiker moving on the chains, keep the shutter at 1/250 or faster and accept a higher ISO. Those numbers are a starting scenario, not a recipe — adjust to the actual light.
2. Canyon Overlook: the best effort-to-view ratio in the park
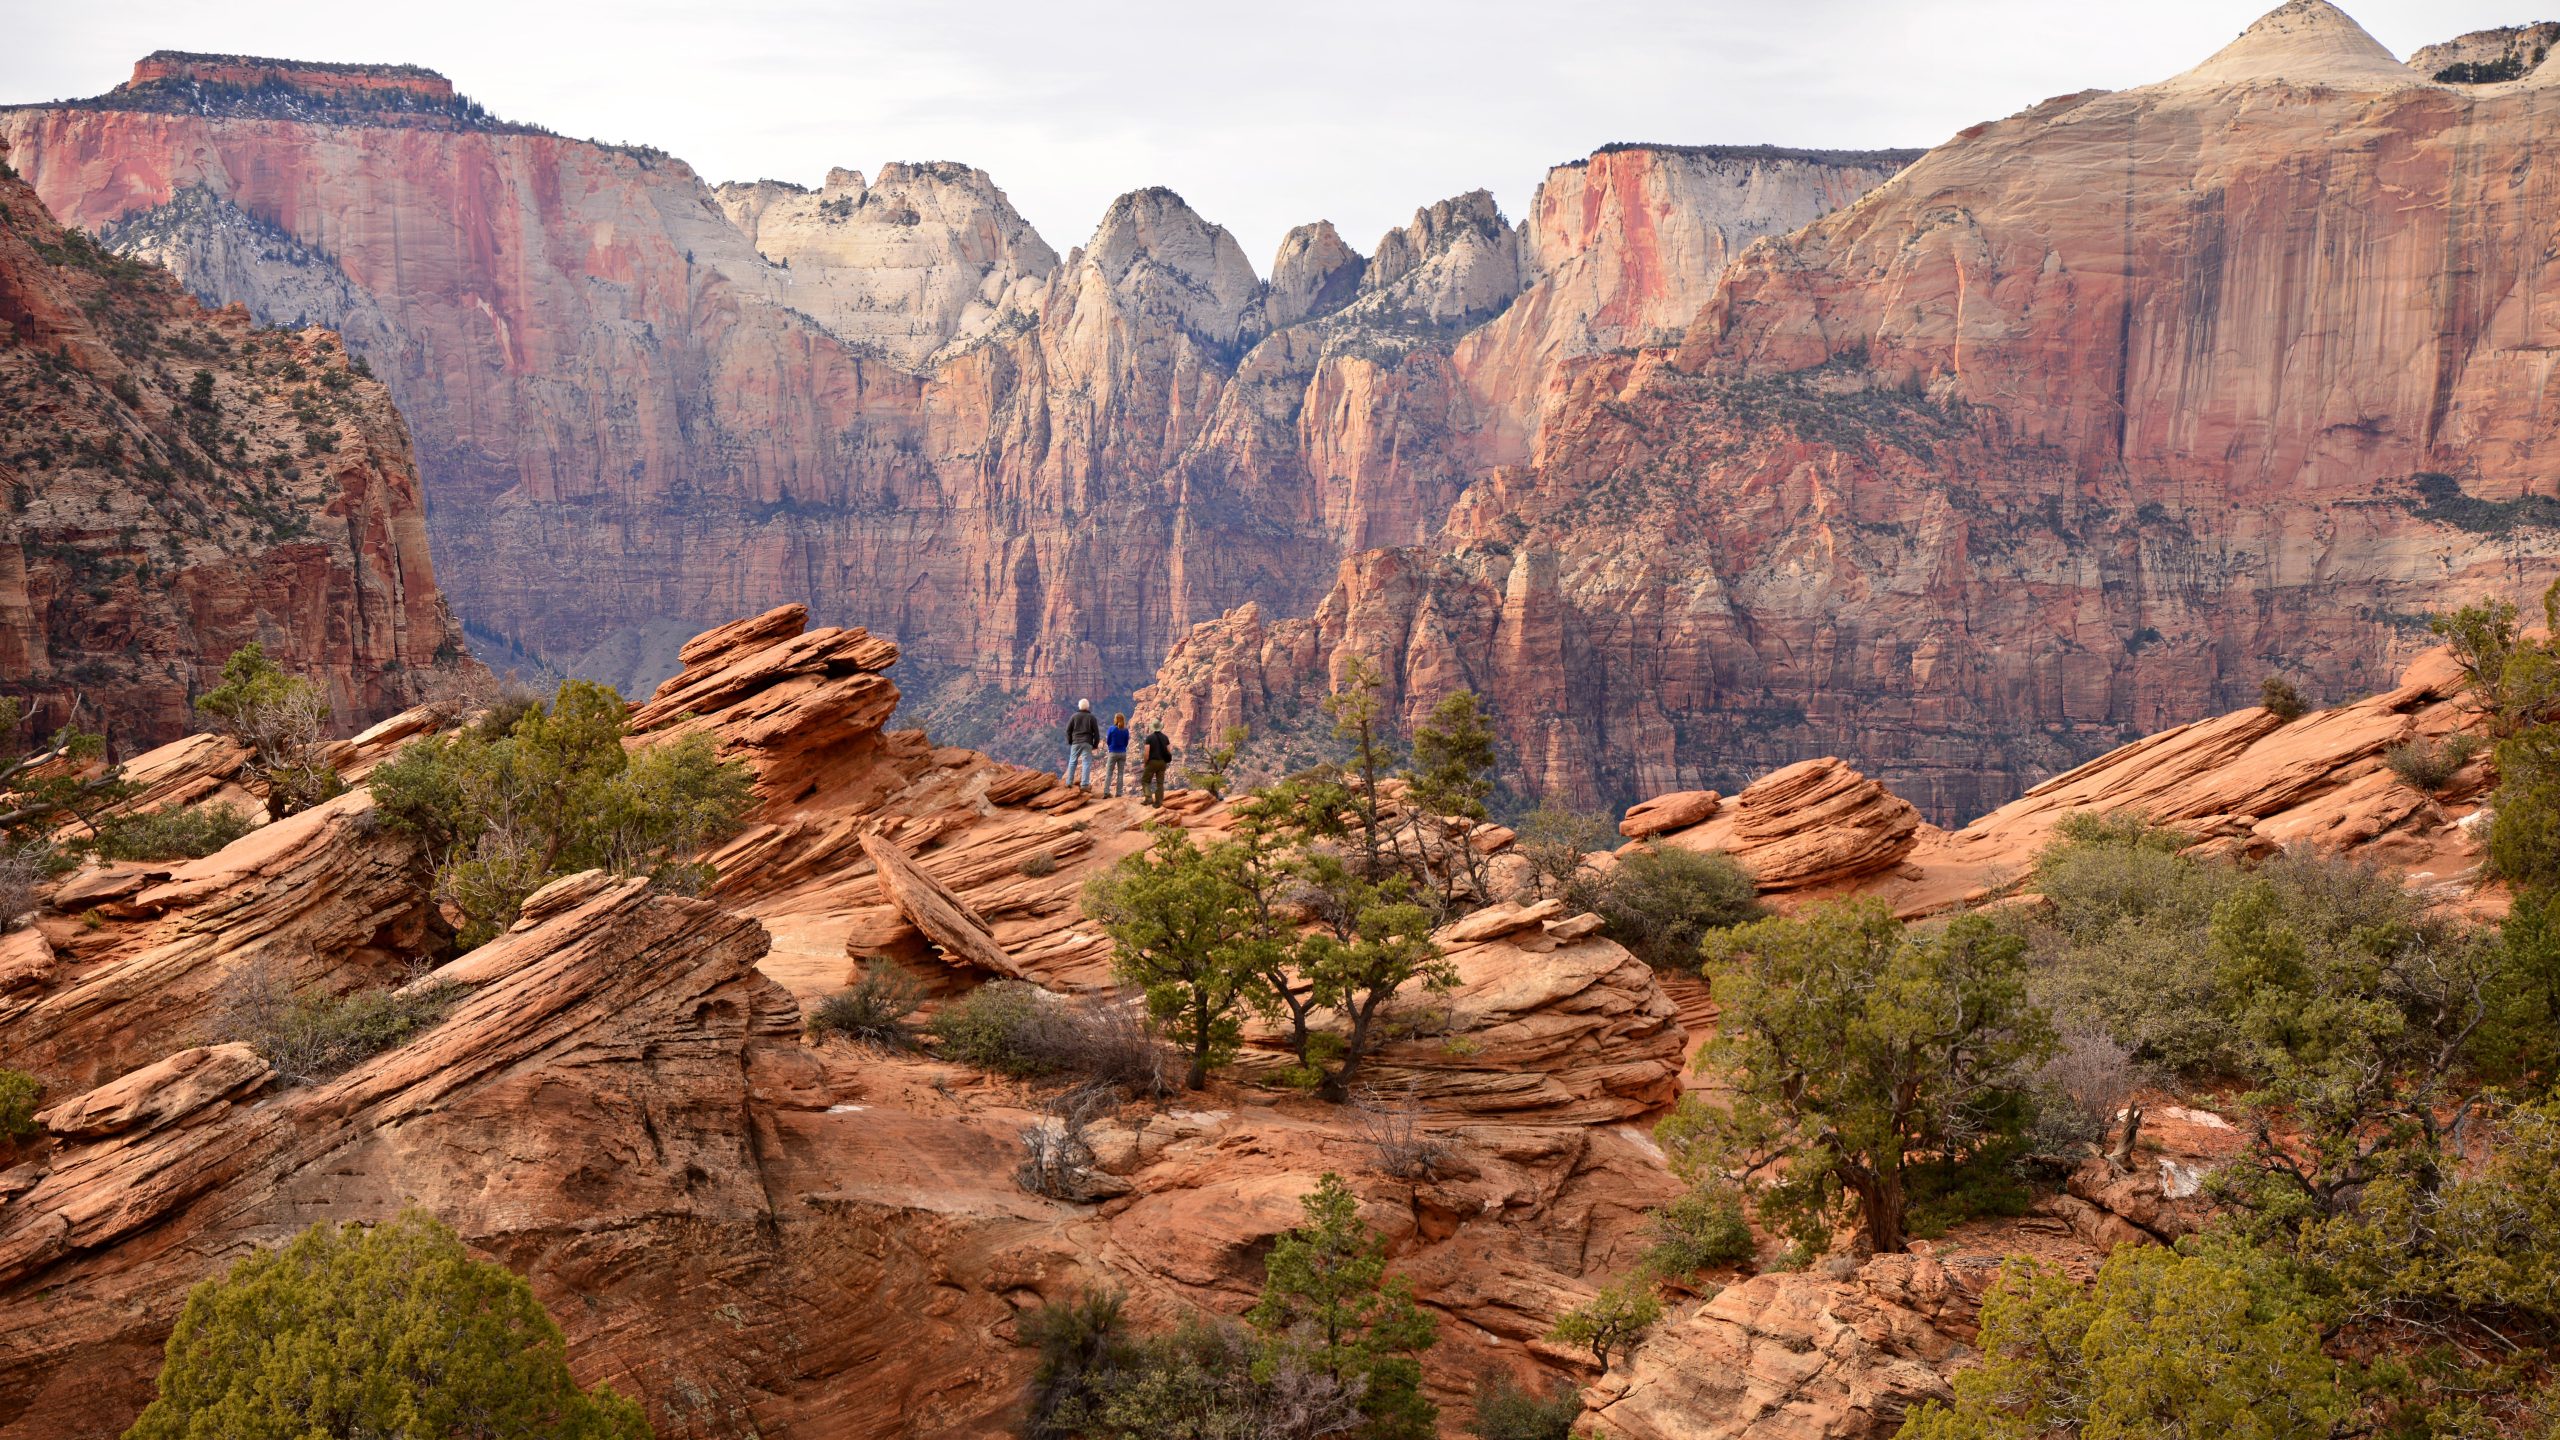
Photo: NPS / Daren Reehl, public domain
One mile of moderate trail on the East Side ends at a fenced cliff edge with the whole main canyon opening below you, the Towers and Temples of the Virgin facing you across the void. It is the single best effort-to-view ratio in Zion, and the NPS lists it as a sunrise location for a reason: the east-facing wall catches first light while the canyon floor is still cool and blue.
The trailhead sits on SR-9 immediately east of the Zion-Mount Carmel Tunnel. No shuttle serves it, and parking is a handful of roadside spaces that fill before dawn in season. Arrive early or be prepared to come back. Do not invent a parking space on the switchbacks; the rangers have seen it before.
Compositionally, resist the urge to shoot only the wide view. The overlook’s rail and the foreground slabs give you leading lines into the canyon; a foreground boulder with the Towers behind makes a stronger frame than the panorama alone. A 16-35mm at the wide end works here, but check the corners — the cliffs converge fast if you tilt.
Arrive before sunrise and watch the light move down the cliffs. Start at ISO 100, f/11 on a tripod, expose for the lit faces and let the shadows fall where they want. Bracket if the contrast exceeds your sensor; the canyon at sunrise is a blend job more often than not.
3. The Watchman at sunset: the postcard, done honestly
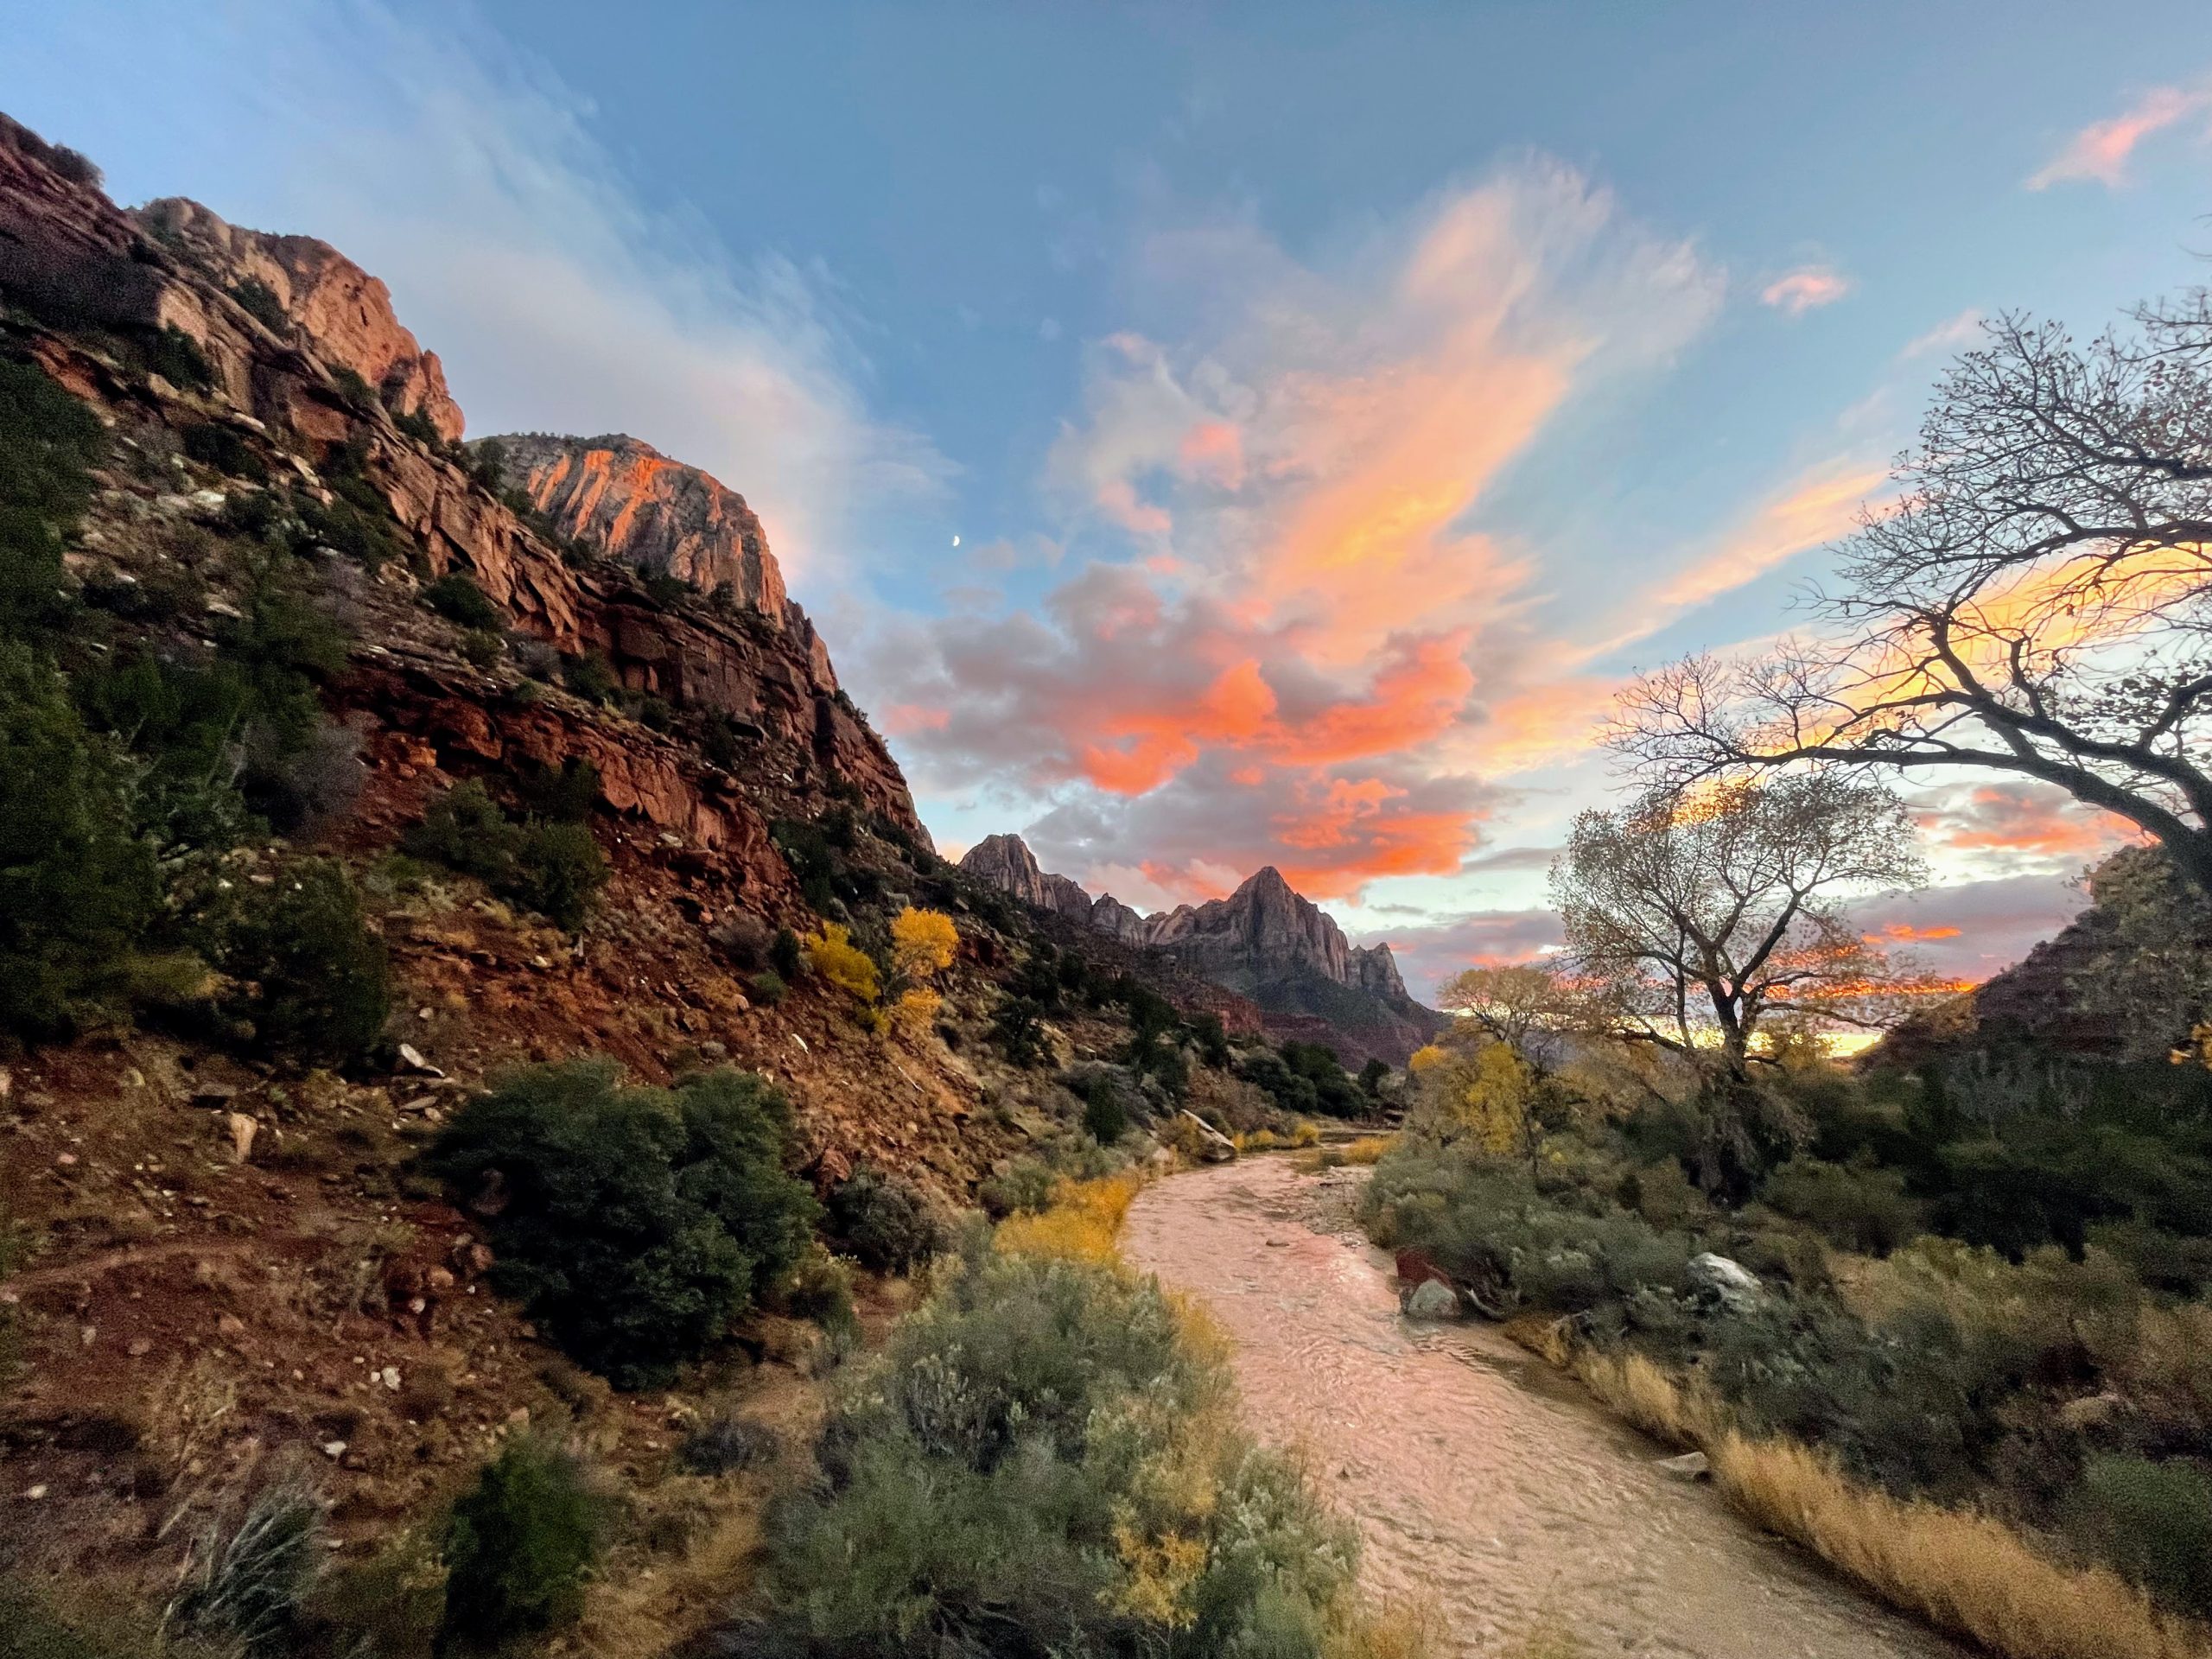
Photo: NPS / Serena Wurmser, public domain
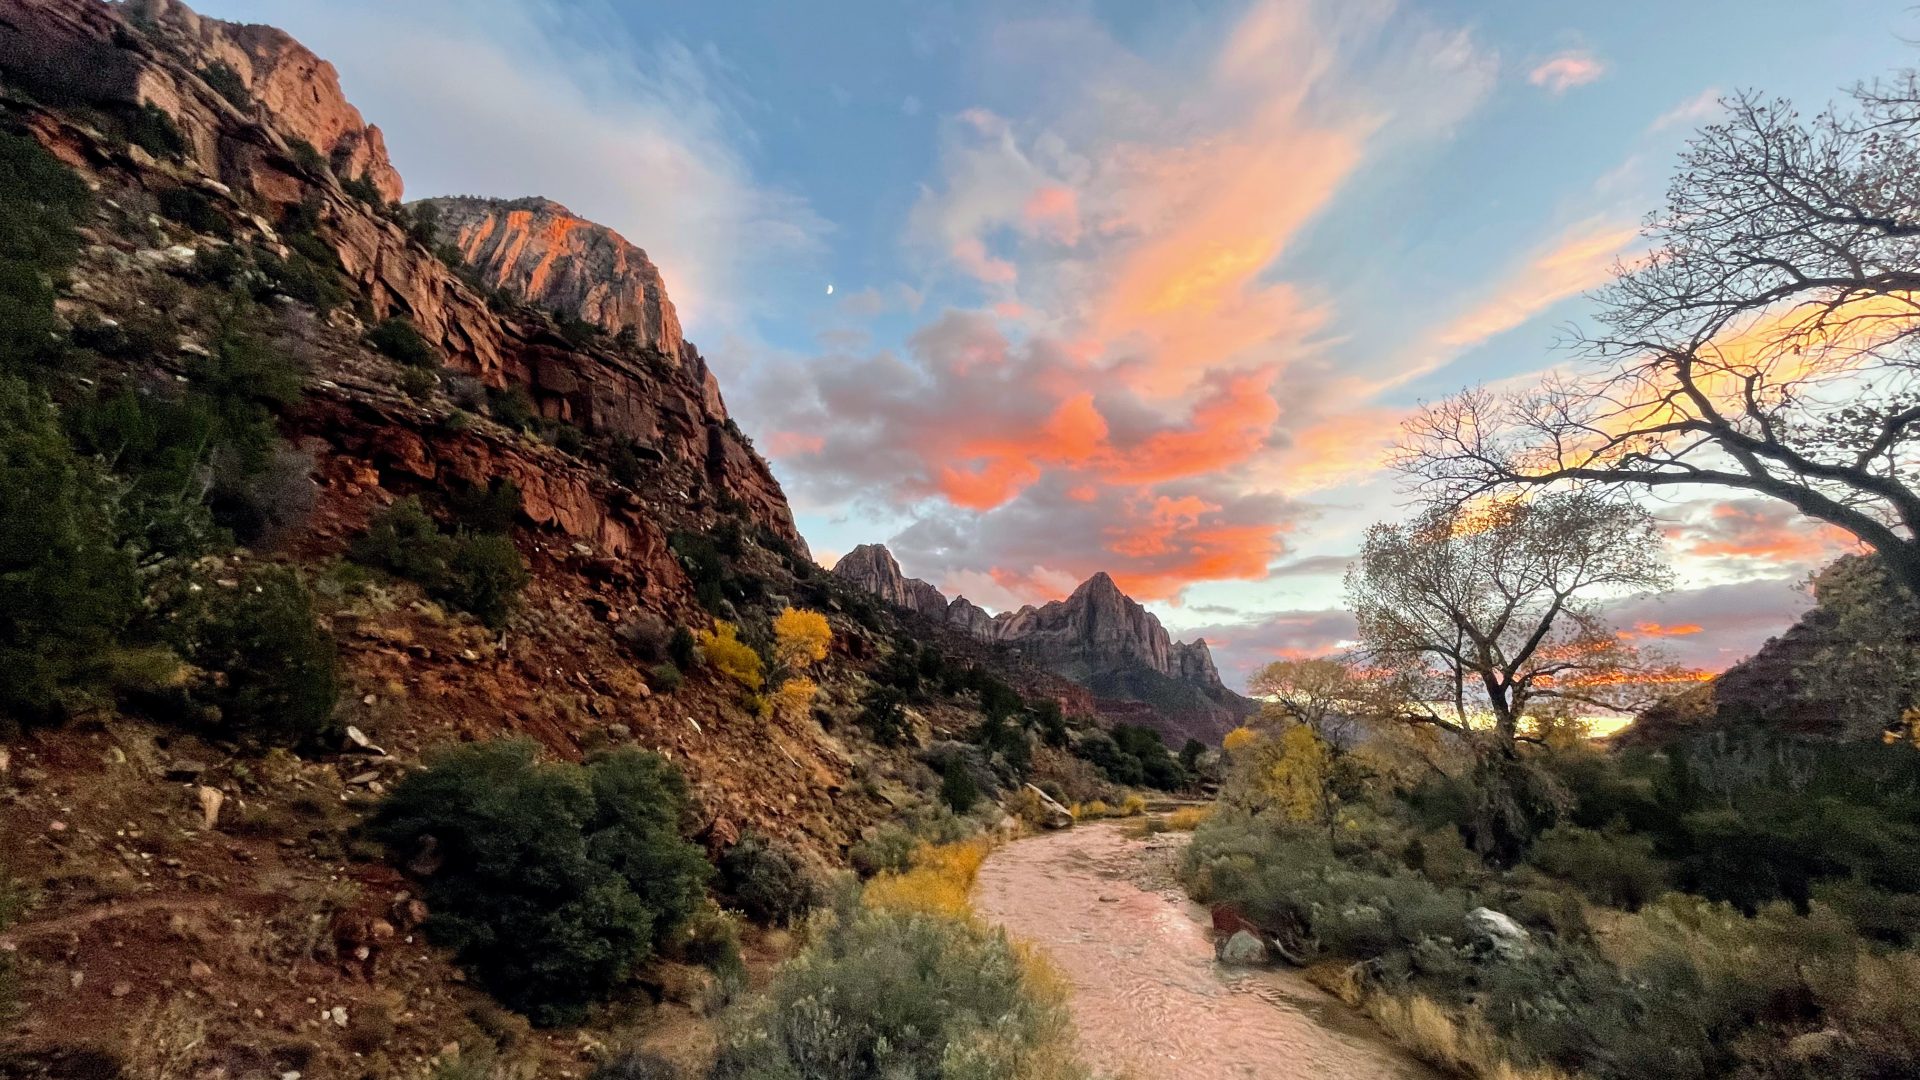
This is the classic Zion postcard: the Watchman catching the last warm light while the Virgin River runs pink and gold in the foreground. Pink clouds drift over the summit as the river catches the light. NPS tells you exactly where to stand: the pedestrian bridge on the Pa’rus Trail, a short walk from the Visitor Center (shuttle stop #1).
Shoot from the pedestrian bridge. Never stop on the Canyon Junction Bridge — it carries shuttle and vehicle traffic, it is illegal to stop there, and rangers move photographers along. The Pa’rus footbridge gives the same composition with none of the risk or the ticket.
The light you want is after the sun drops below the horizon behind you, when the clouds over the Watchman take color. Arrive 45 minutes before sunset, frame up, and wait. Most of the crowd leaves when the sun touches the ridge; the best five minutes come after. A polarizer manages the river glare and deepens the cottonwood color in autumn.
Start at ISO 100, f/8 to f/11, on a tripod, with a shutter slow enough to soften the river without smearing the clouds — 1/4 to 2 seconds is the usual band. Watch your highlights on the lit face; it holds detail better than you think, but not by much.
4. Temples and Towers at sunrise: the museum patio, not a trail
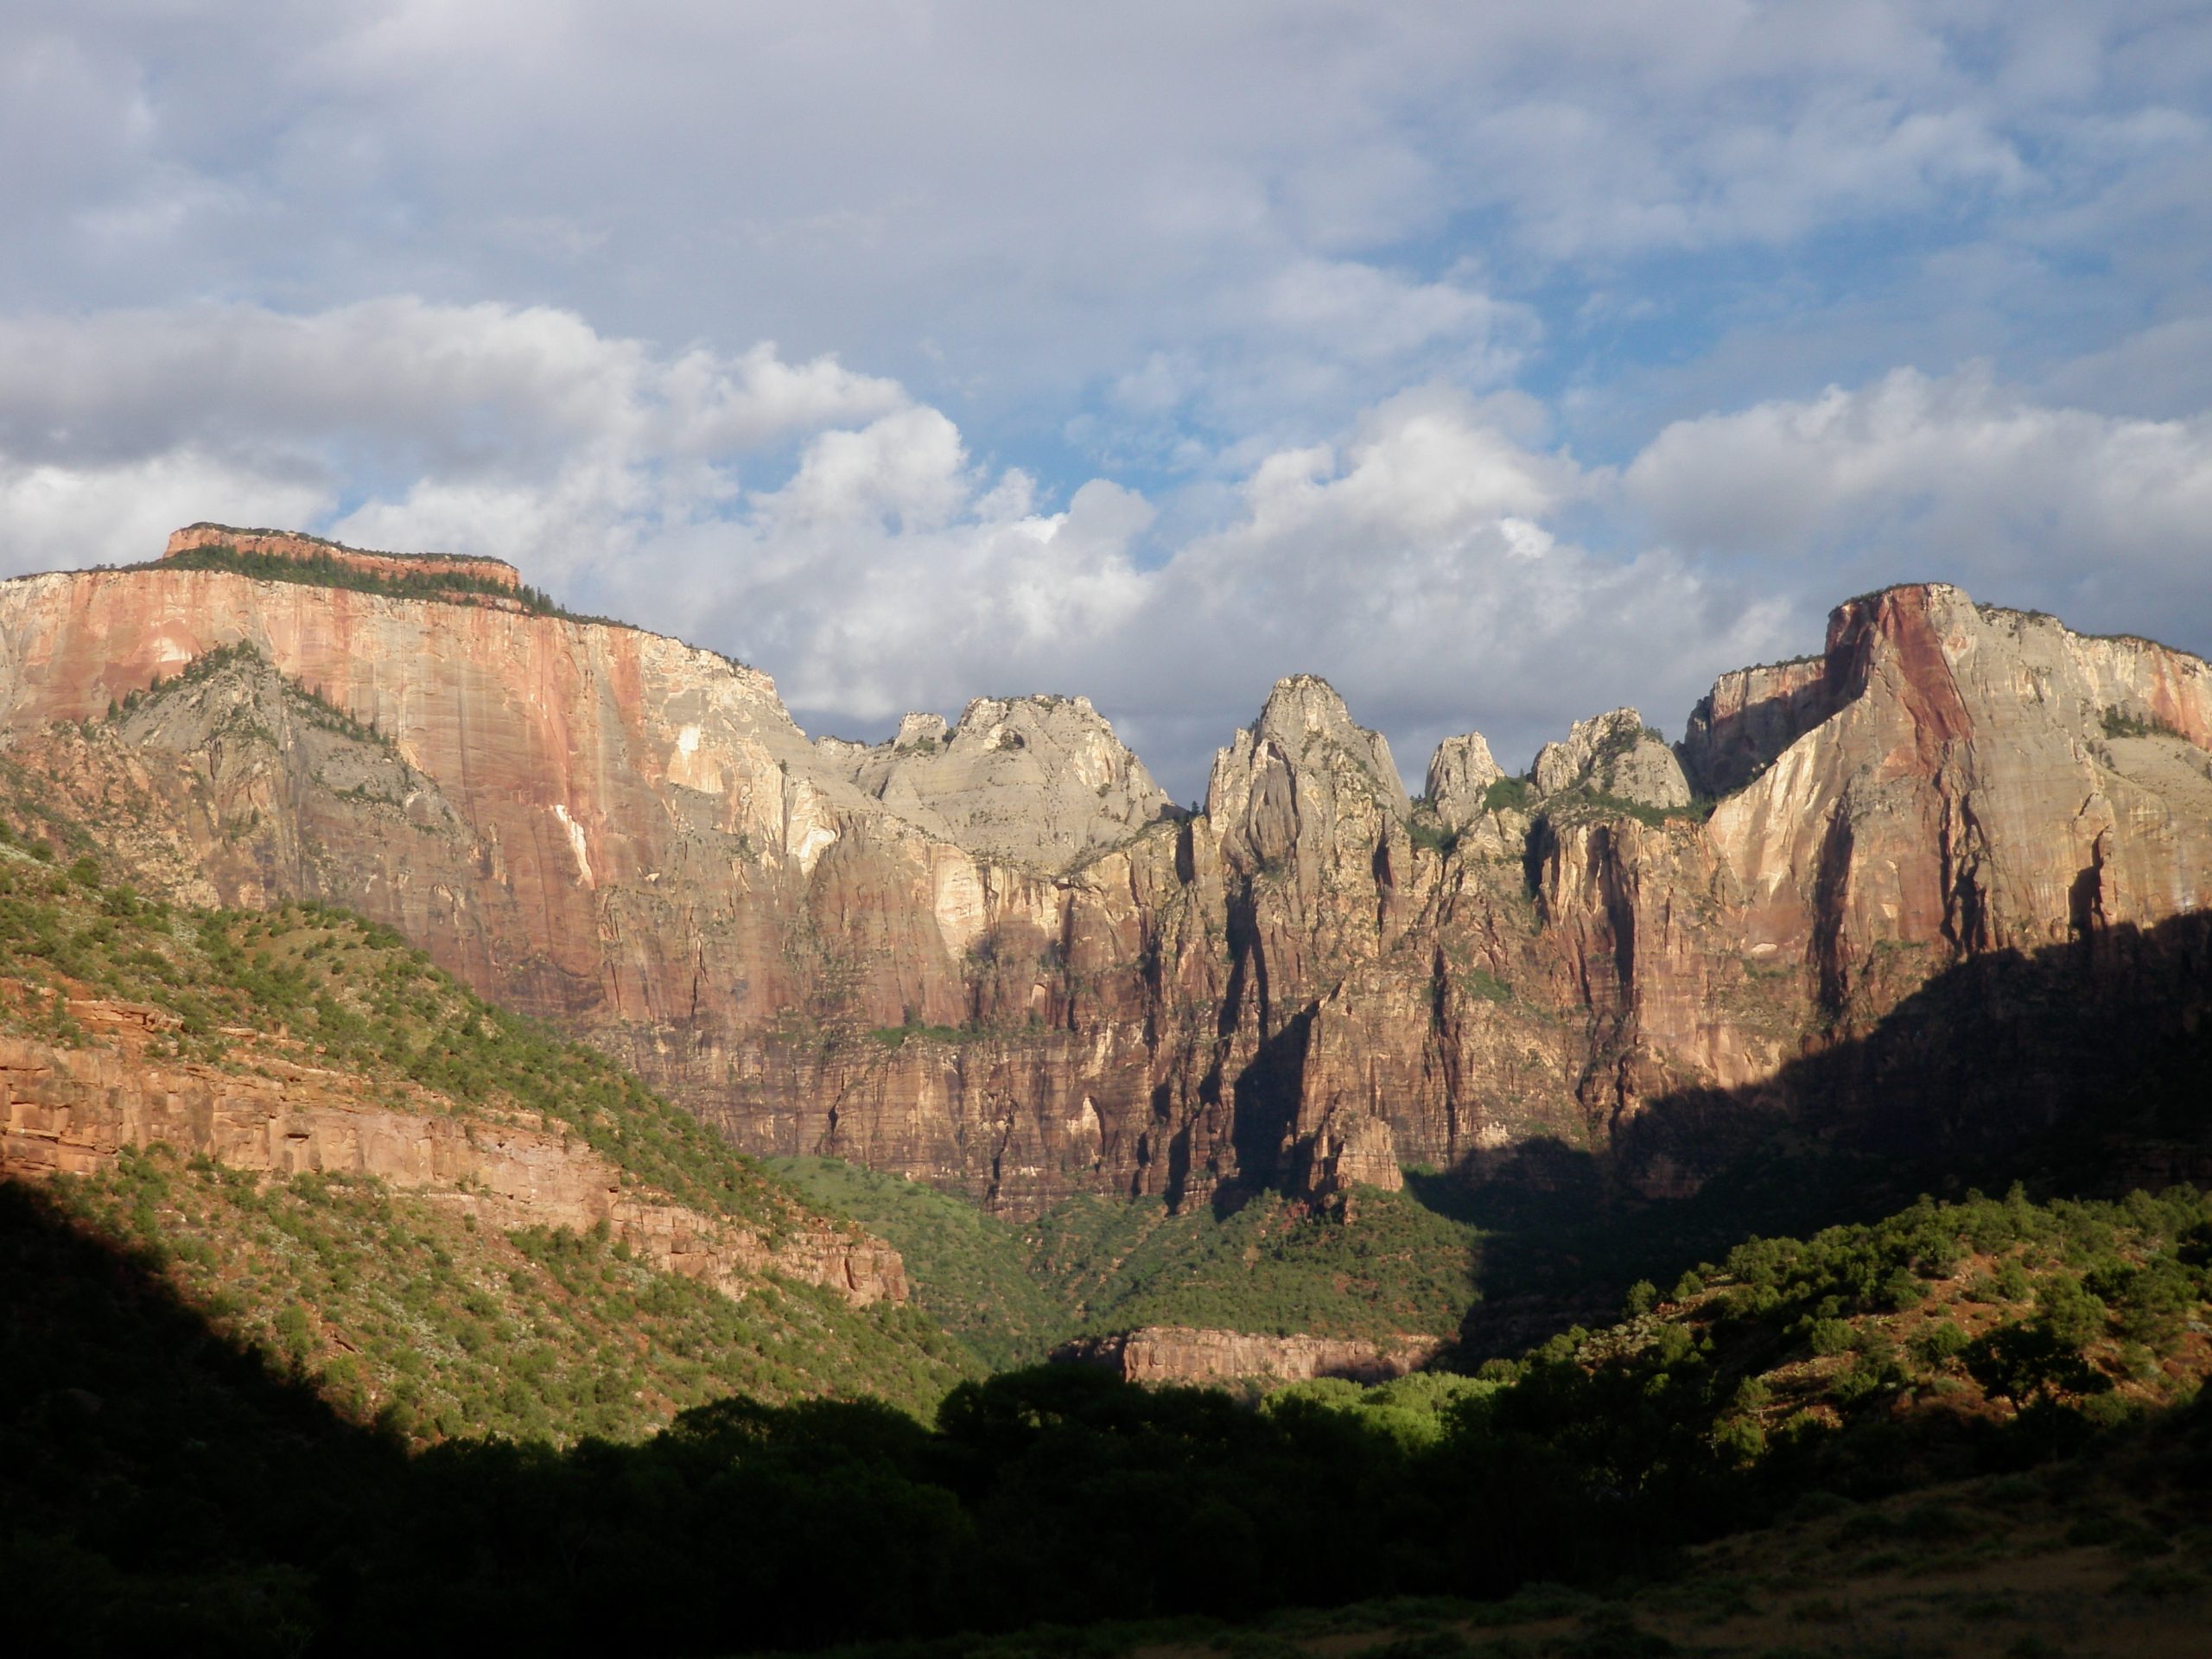
Photo: NPS Photo / Rebecca Alfafara, public domain
The tall pale faces of the Temples and Towers of the Virgin take the first direct sun in the park while the canyon floor stays in cool shadow, and the easiest working position is not a trail at all: it is the back patio of the Zion Human History Museum (shuttle stop #2). Warm light strikes the faces and climbs down them as you watch.
The mistake here is arriving at sunrise. The show starts before the sun clears the east rim, and the best balance of warm face against cool canyon lasts only a few minutes. Be on the patio, tripod set, before official sunrise. The shuttle does not run that early in most seasons — drive to the museum lot or check the current first-shuttle time before you promise yourself this frame.
A 24-70mm covers the patio compositions. Go wide for the full amphitheater with the museum’s interpretive panels cropped out, or zoom to isolate a single lit face against the shadowed wall. A polarizer will deepen the blue hour sky but costs you two stops of light you may want.
Start at f/11, ISO 100, and expose for the lit faces — the shadowed foreground is allowed to go dark. If you try to hold both, you will hold neither. Bracket a three-frame spread if the histogram says no.
5. The Narrows: the canyon you stand inside
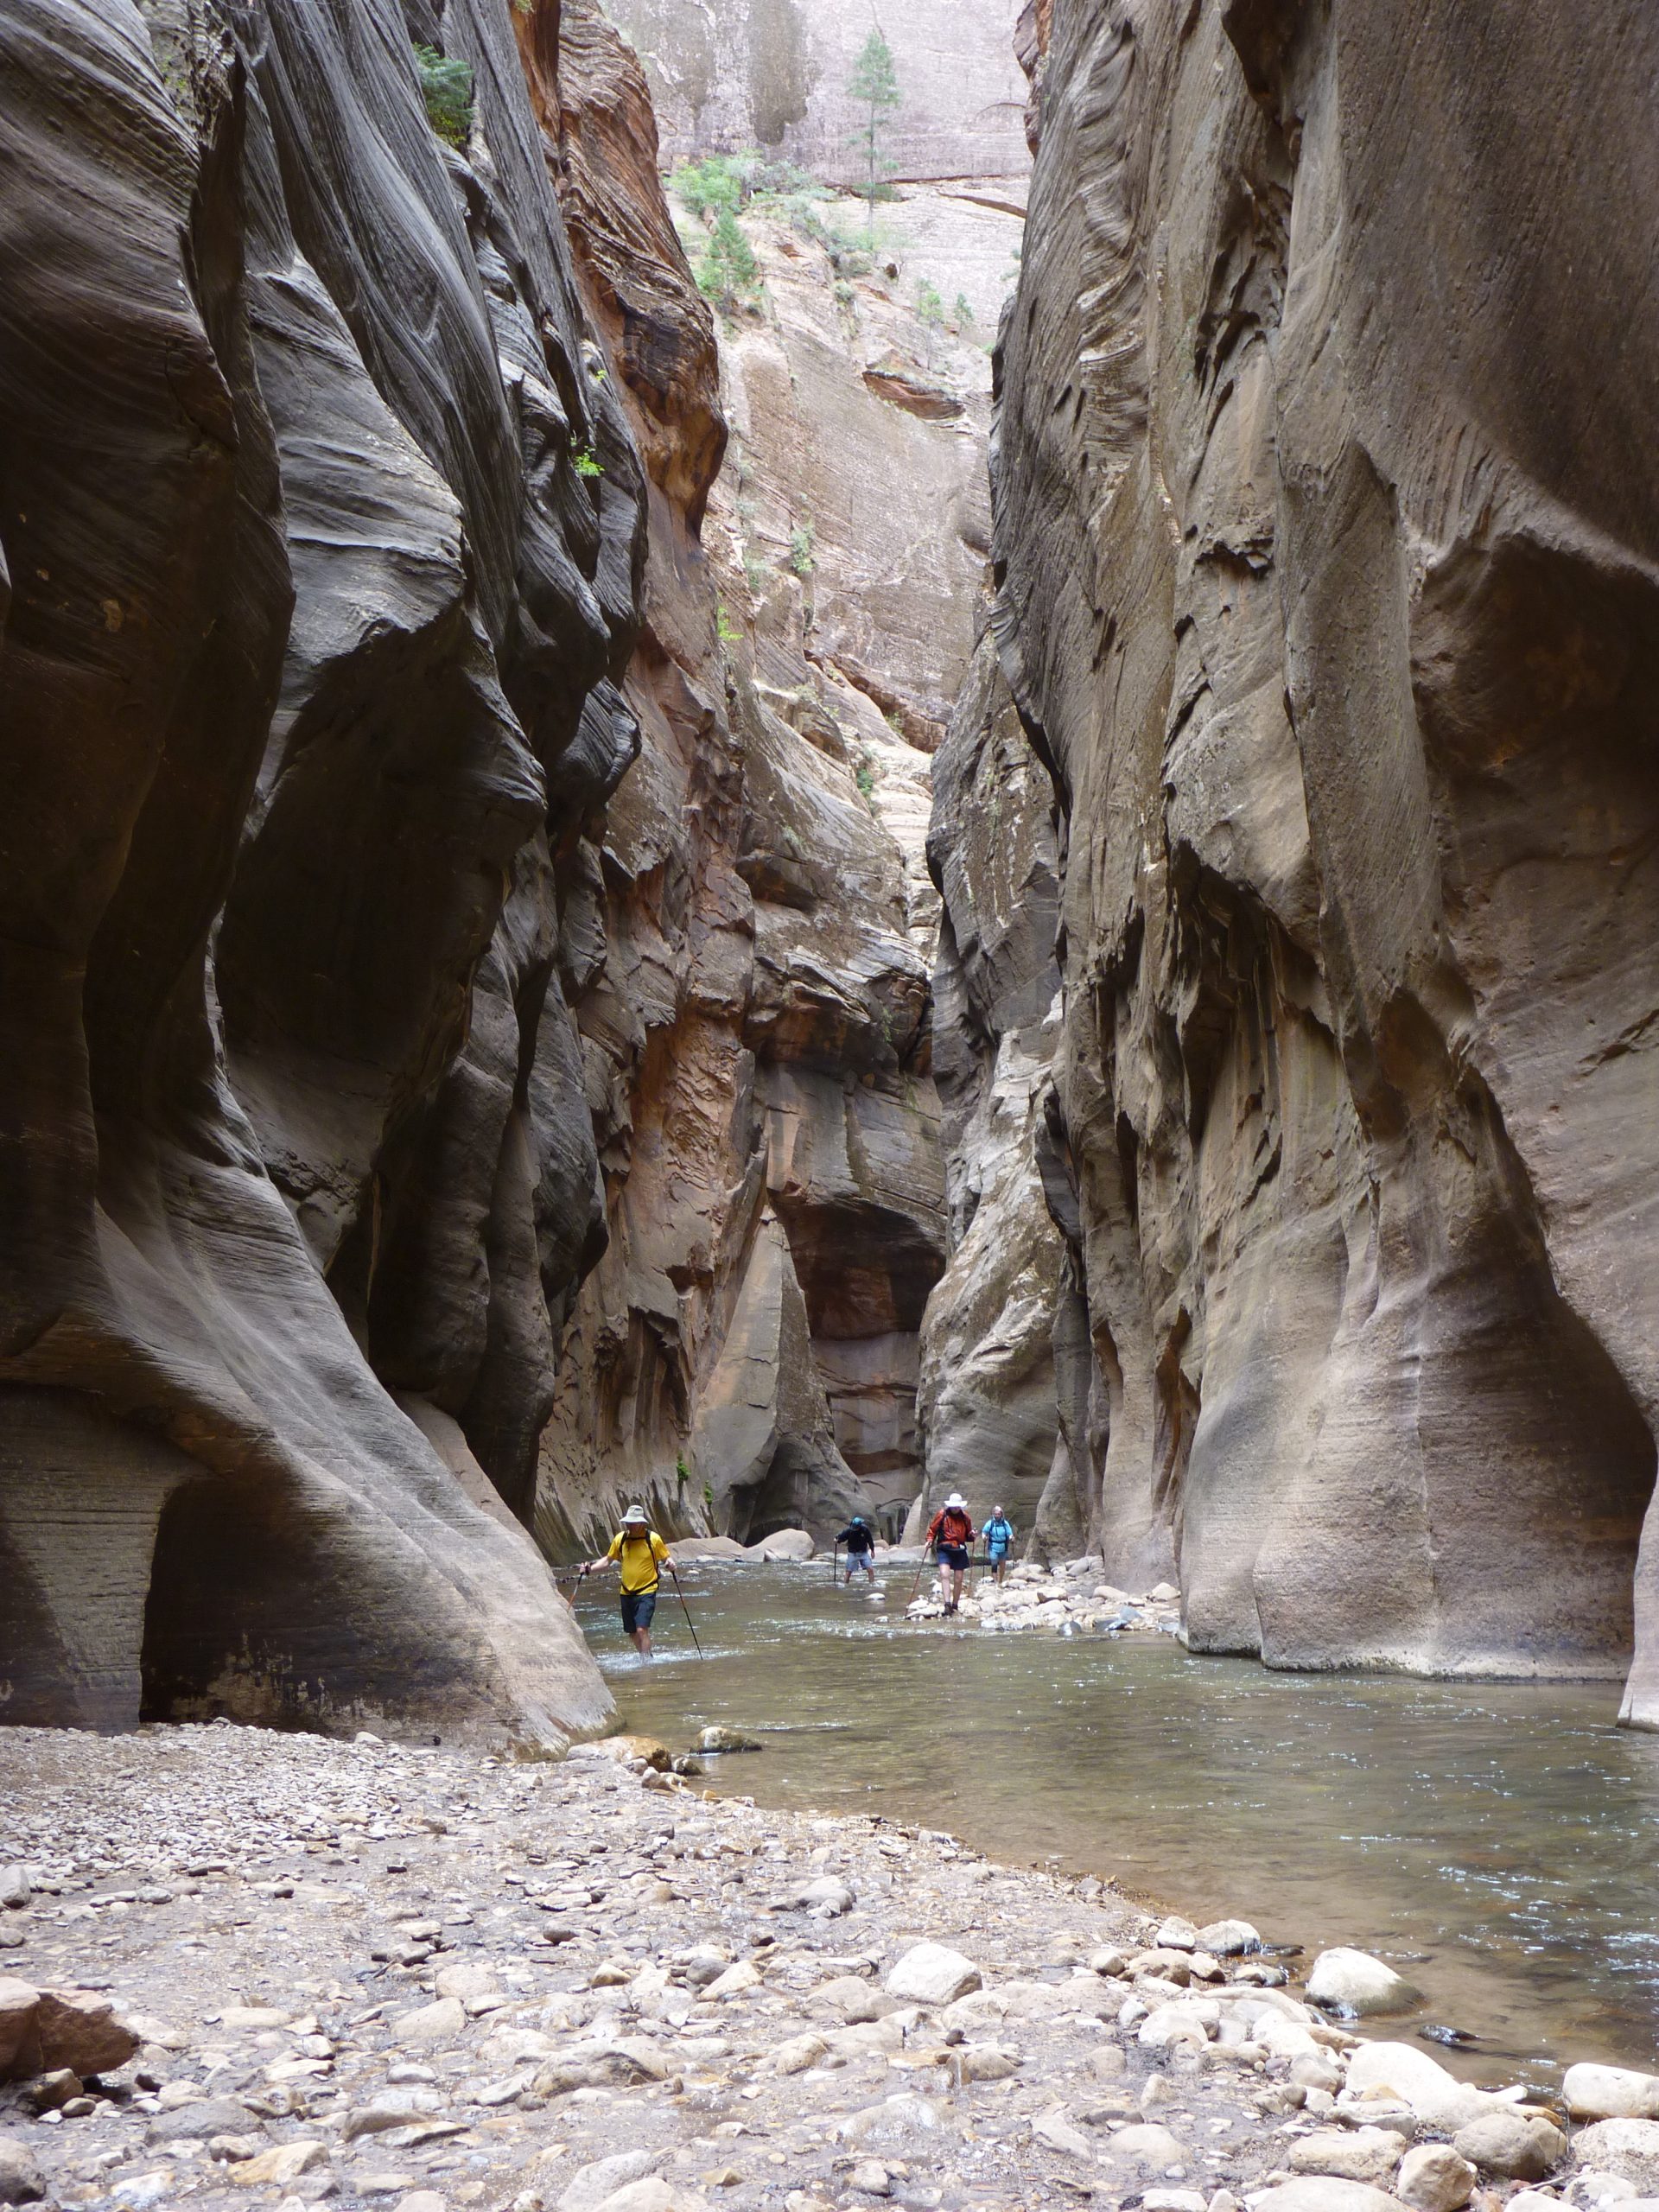
Photo: NPS Photo / Marc Neidig, public domain
The Narrows is the slot-canyon walk up the Virgin River, reached by the Riverside Walk from the Temple of Sinawava (shuttle stop #9). Hikers wade where the canyon closes to a slot, walls towering overhead and light sliding down the dark varnish in sheets. It is the one Zion subject where your tripod stands in the river and the water is part of the composition.
Light in the Narrows is reflected, not direct. The walls glow when the sun strikes the rim above and bounces down — late morning through early afternoon is often the best band, the reverse of the usual landscape rule. Overcast days kill the glow but even out the contrast for detail work.
The honest constraint: the Narrows closes when the flow exceeds 150 cfs or a Flash Flood Warning is issued, and conditions change overnight. Check the NPS current conditions page the morning you go, not the week before. Neoprene socks and a dry bag are not optional if you are carrying a camera into the river; the packing list below covers the kit.
For the classic look, a wide lens low over the water with a slow shutter turns the river into silk against the static walls. Start at ISO 100, f/8, 1/2 to 2 seconds on a tripod planted in the flow. Keep your gear in the dry bag until the tripod is set, and accept that you will be wet below the knees. Everyone is.
A smaller kit makes a better canyon day
Zion’s shuttle system decides your kit for you. From spring through late fall, the main canyon is shuttle-only, and everything you carry rides on your back through crowds and onto trails. A camera that records RAW files and a 24-70mm-style zoom cover most of these scenes. Add a 16-35mm for the Narrows and Canyon Overlook if you have it, and leave the rest in the car.
Carry water, a spare battery and a microfiber cloth. For the Narrows specifically, a small dry bag and neoprene socks matter more than a second lens. Sun protection is part of the kit — you will stand in open sun waiting for light more than once.
Weather, timing and an honest backup
Zion is a year-round park with four distinct shooting personalities. Spring brings runoff, wildflowers and the highest closure risk in the Narrows. Summer is monsoon season: brutal midday heat, but afternoon storms that clear into the best light of the year over the Streaked Wall. Autumn is the cottonwood show under Angels Landing and along the Pa’rus. Winter is quiet, cold and occasionally magical — the Virgin River under snow with Mount Moroni behind it.
Keep one main subject per session. If clouds flatten the canyon, move to the river where soft light works, or wait for the storm light. If the Narrows is closed, the Emerald Pools waterfalls are running — that is not a consolation prize, it is the better day.
If you want someone else to handle the logistics
Zion’s shuttle rules, permits and trail closures take planning. A guided day handles the driving and the timing while you watch the light. These are third-party tours I have not taken, linked as options, not recommendations from experience:
- Full-Day Small Group Tour of Zion National Park on Viator: a full-day small-group circuit of the main canyon stops with a guide handling the shuttle and timing.
- Day Trip to Zion National Park on Viator: a day trip that covers the canyon highlights without you managing park logistics.
Neither is a photography tour and neither is timed around your light. Ask the operator about sunrise or sunset timing if that matters to you.
Frequently asked questions
Do I need a permit to photograph Angels Landing?
Only for the chain section past Scout Lookout, which requires a permit from the day-before lottery ($6 application, $3 per person if awarded). Scout Lookout itself needs no permit and gives you the classic ridge photograph with hikers for scale.
Are the suggested settings exact settings from the photographs?
No. They are starting scenarios for the conditions described. Adjust exposure, focus and shutter speed to the actual light and subject movement.
Can I photograph from the Canyon Junction Bridge?
No. Stopping on the bridge is illegal and unsafe – it carries shuttle and vehicle traffic. The Pa’rus Trail pedestrian bridge gives the same Watchman composition from a position built for it.
When is the Narrows closed?
When the Virgin River flow exceeds 150 cfs or a Flash Flood Warning is issued. Check the NPS current conditions page the morning you go; spring runoff and summer monsoons both shut it down regularly.
What does the paid PDF add?
The $47 guide has eleven spots rather than this article’s five, plus landmark GPS, tappable Google Maps links, composition tips, starting camera settings, practical access notes and a field checklist.
Disclosure: Some links on Shut Your Aperture may be affiliate links. If you buy through an affiliate link, the site may earn a commission at no extra cost to you. The internal learning links in this article are not affiliate links. Photographs in this article are public-domain National Park Service photographs by the credited NPS photographers; this post does not claim the author photographed each position.
Photography spot GPS references
The five spots in this article each have their own GPS reference. These arrival references do not claim an exact historical camera position.
- Angels Landing (from The Grotto, shuttle stop #6): 37.26903, -112.94690. Open Google Maps. Trailhead reference.
- Canyon Overlook Trail (SR-9, east of the tunnel): 37.21364, -112.94333. Open Google Maps. Trailhead reference.
- The Watchman from the Pa’rus Trail pedestrian bridge: 37.20182, -112.98678. Open Google Maps. Viewpoint reference.
- Temples and Towers from the Zion Human History Museum patio: 37.20954, -112.98033. Open Google Maps. Viewpoint reference.
- The Narrows (Riverside Walk from Temple of Sinawava, stop #9): 37.30501, -112.94912. Open Google Maps. Trailhead reference.
What to Pack
For canyon days, a flexible focal range and a light kit can help you move between shuttle stops, trails and the river. See the B&H Photo Video and Amazon options below, then choose what fits your setup.
| What & Why | B&H | Amazon |
|---|---|---|
|
Sony 24-70mm f/2.8 GM II
Check the camera mount before buying. Choose a focal length that fits the photos you plan to make.
|
Shop B&H → | Shop Amazon → |
|
Sony 16-35mm f/2.8 GM II
Check the camera mount before buying. A wide zoom earns its place in the Narrows and at Canyon Overlook.
|
Shop B&H → | Shop Amazon → |
|
Peak Design Travel Tripod
Check the load rating, packed size and local tripod rules before buying.
|
Shop B&H → | Shop Amazon → |
|
Tiffen 77mm Circular Polarizer
Manages river glare at the Watchman bridge and deepens autumn cottonwood color. Check the filter thread size before buying.
|
Shop B&H → | Shop Amazon → |
|
Sony NP-FZ100 battery
Use the battery type specified for your camera. Bring a spare if your shooting plan calls for one.
|
Shop B&H → | Shop Amazon → |
|
LensPen NLTP-1
Follow the cleaning instructions for your lens and this kit. Remove loose dust before cleaning the optical surface.
|
Shop B&H → | Shop Amazon → |
|
Sea to Summit 8L Dry Bag
The Narrows kit essential: the camera stays dry until the tripod is planted. Check the size against your camera and lens before buying.
|
Shop B&H → | Shop Amazon → |
B&H and Amazon links are affiliate links. We earn a small commission on purchases at no extra cost to you.