
Updated October 2026
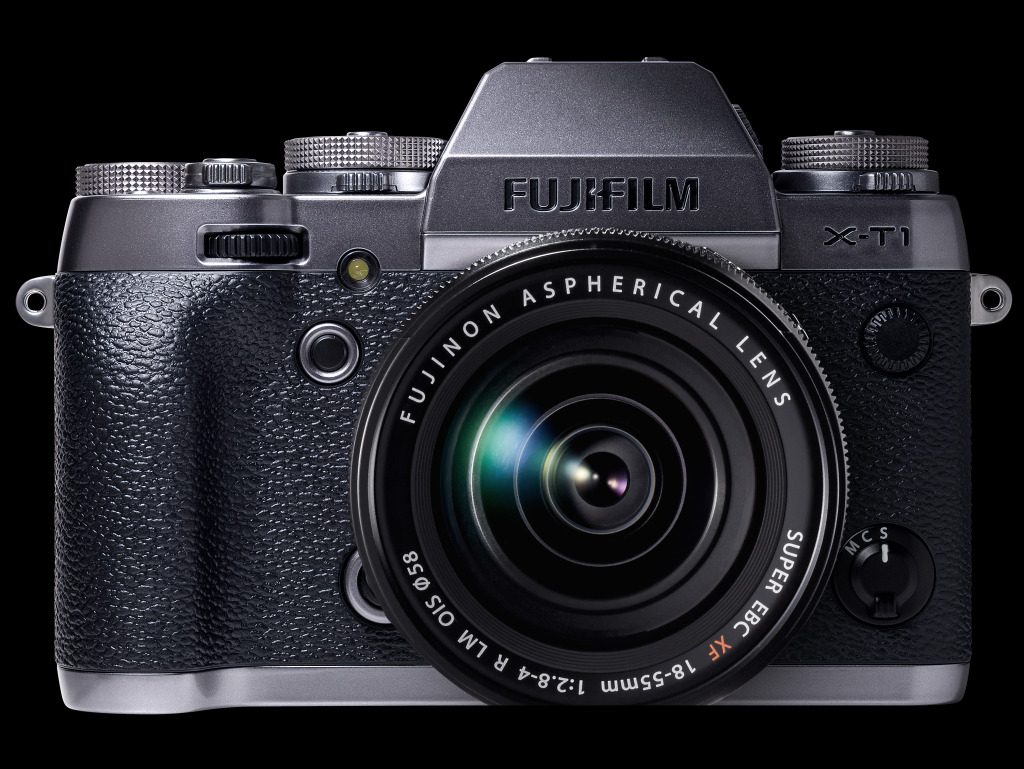
The Fujifilm X-T1 Graphite Silver is a camera for photographers who want their exposure controls out in the open. Shutter speed, ISO and exposure compensation sit on the top plate. Aperture usually lives on the lens. That arrangement is the reason to consider this camera today, not the old launch hype or a claim that its silver finish makes better files.
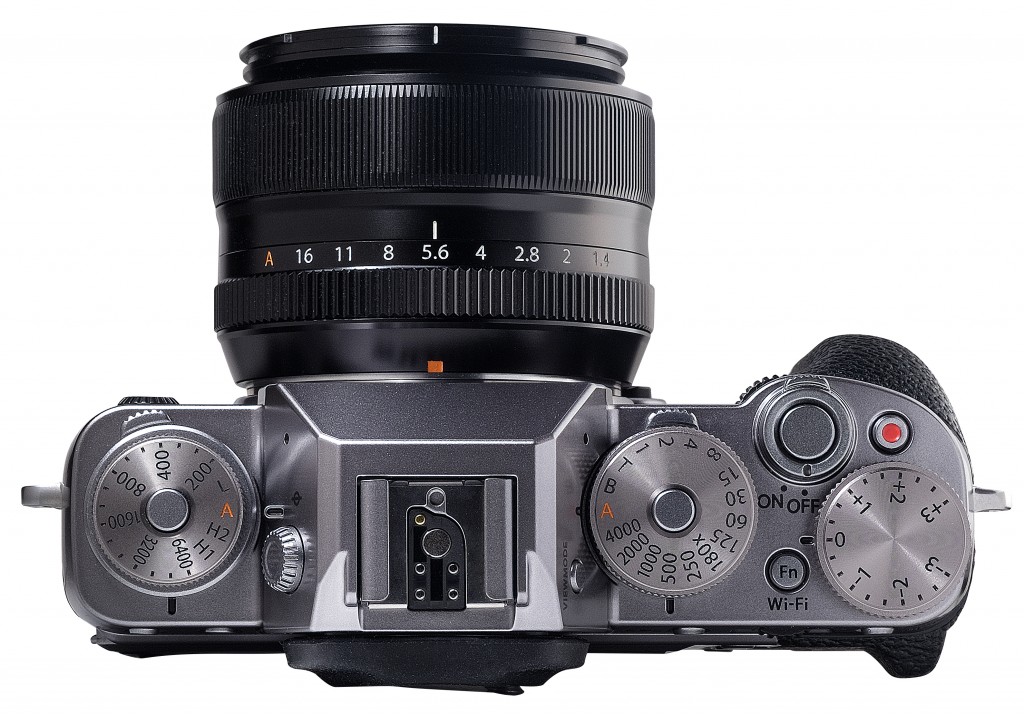
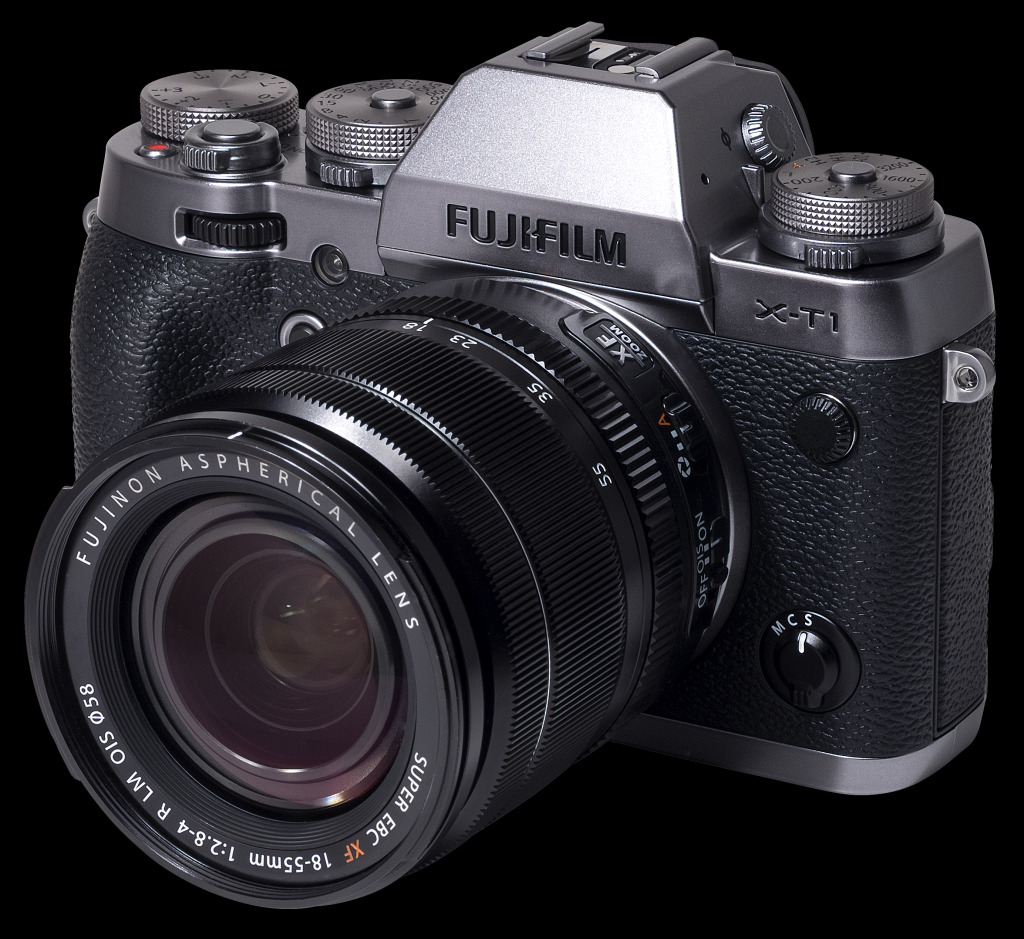
This is a setup and used-camera guide to the exact 2014 model. It is not a new hands-on test. The original product photographs below show the controls and body design; the landscape hero is an illustration of the kind of scene you can practice, not an X-T1 sample file. Old stock listings, original bundles and historical reviews do not establish what a seller includes now.
What the Graphite Silver edition actually changes
The core is a 16.3-megapixel APS-C X-Trans CMOS II sensor in a Fujifilm X-mount body. The silver edition added a layered finish and arrived with features including Classic Chrome, Natural Live View and an electronic shutter. Later firmware brought those features to the black X-T1 too. Do not pay for this edition because you think it has a different sensor or exclusive modern image processing.
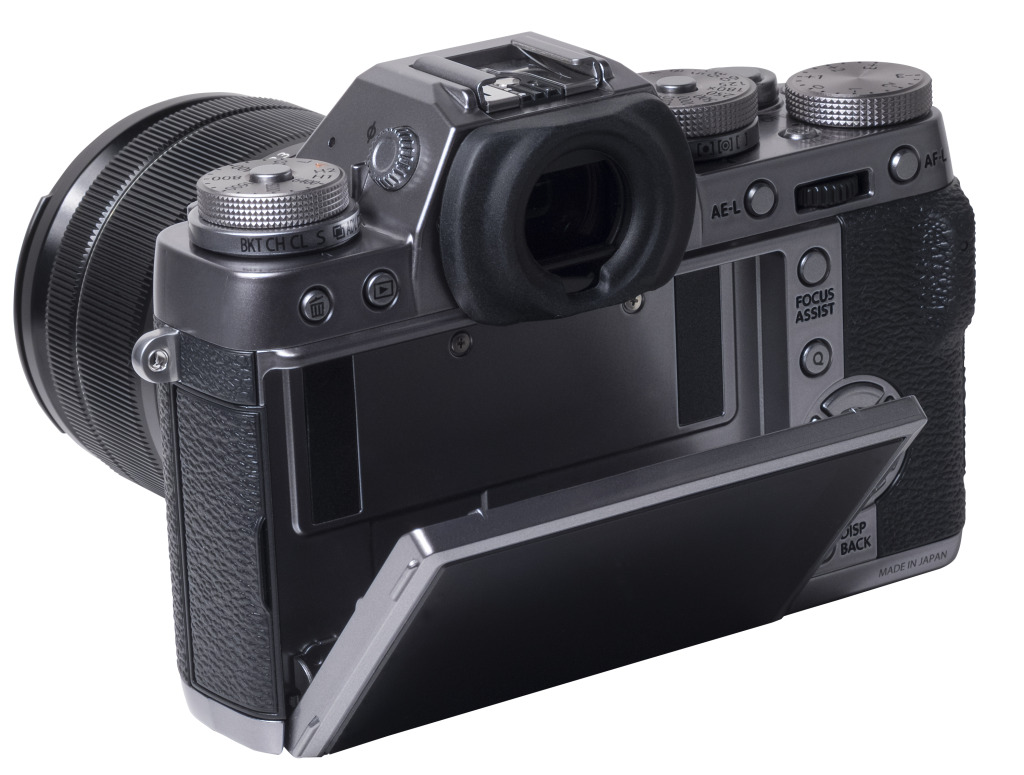
The useful distinction is how the camera feels and how well a particular used copy works. The electronic viewfinder and tilting rear screen make low-angle compositions practical. The screen is not a fully rotating selfie screen, and it is not a touchscreen. There is no in-body image stabilization. If a lens offers optical stabilization, that is a lens feature, not proof that the body can stabilize every lens you attach.
Sixteen megapixels can cover a lot of real photography when focus, light and composition are right. It also gives you less freedom to crop heavily than a higher-resolution body. Frame carefully instead of assuming a loose photograph can always become a tight wildlife portrait later. This is a stills-first legacy camera, not a substitute for a recent video body or modern subject-recognition autofocus.
Check the firmware before following old advice
Fujifilm’s official X-T1 download page lists version 5.52, dated September 17, 2020, when checked for this update. That is well beyond the original launch firmware. Read the current official page again before installing anything. A version number on a third-party blog is not the file you should trust with your camera.
Firmware matters here because the autofocus modes, shutter choices and flash menus changed over the camera’s life. Version 4.00 added Zone and Wide/Tracking autofocus and eye detection. Version 5.00 changed flash functions and menus for EF-X500 compatibility. Later updates addressed lens compatibility and other issues. A menu screenshot from an early review can be accurate for its time and wrong for the body in your hand.
Check both camera and lens versions using Fujifilm’s instructions. Start with a charged battery, the correct model’s download and a reliable card. Follow the update sequence on the official page, including any camera-before-lens requirement. Do not switch off the camera during the update. An update is not a repair for a damaged shutter, loose mount or intermittent card slot.
The base owner’s manual explains the controls. The supplementary new-features guide explains changes. Keep both available rather than forcing a later menu to match the original manual. The final version on a support page is also not a promise of future updates, parts stock or repair acceptance in your region.
Set up the physical controls without fighting them
Think of the A positions as handing a decision to the camera. Shutter dial on A and lens aperture on A gives you program exposure. Choose an aperture and leave shutter speed on A for aperture priority. Choose a shutter speed and leave aperture on A for shutter priority. Choose both for manual exposure. The ISO dial is a separate decision: a fixed value or automatic sensitivity.
Start in single-frame drive mode. The drive selector is below the ISO dial, and it is easy to bump into a burst or bracketing setting while adjusting the controls. If the camera produces unexpected sequences or stops writing RAW files, inspect that selector before resetting everything. Also check the metering selector under the shutter dial.
For a simple outdoor start, use aperture priority, a suitable aperture for your subject, Auto ISO and mechanical shutter. Set a minimum shutter speed that makes sense for the lens and subject, then watch the actual shutter speed in the display. Auto ISO is a starting tool, not a guarantee that every moving subject will be sharp. Raise the minimum or take direct control when motion demands it.
Exposure compensation is most useful when the camera is making an automatic exposure decision. Check its position before each outing. An accidental negative setting can leave a whole series darker than you intended. Use the histogram and highlight warning to review the result, not just the brightness of a screen that may be adjusted for comfortable viewing.
Spend a few minutes assigning the function buttons and quick menu to settings you actually change. White balance, film simulation, autofocus mode and shutter type are good candidates. Make one change at a time and test it. A borrowed custom setup can be harder to troubleshoot than a plain setup you understand.
Mechanical versus electronic shutter
The mechanical shutter reaches 1/4,000 second. The electronic shutter reaches 1/32,000 second and can make a wide aperture usable in bright light without the mechanical shutter firing. That sounds like a free upgrade until you photograph movement or artificial lighting.
Electronic readout can distort moving subjects and create bands under flickering light. Use mechanical shutter for moving subjects, panning and uncertain indoor lighting. Take a test frame under LED or fluorescent lighting and inspect it at a useful size. A silent camera with striped files has not solved the assignment.
The documented electronic-shutter range is one second to 1/32,000 second at ISO 200 through 6400. Long-exposure noise reduction does not operate in that electronic range. Fujifilm’s notes also describe focus and exposure being fixed at the first frame for electronic-shutter bursts. Do not treat an electronic burst as equivalent to mechanical-shutter continuous tracking.
With the dial at 4000, the command dial accesses faster electronic speeds when the shutter-type setting allows them. Confirm the displayed speed. For flash, choose mechanical shutter as the uncomplicated baseline. Normal synchronization is 1/180 second or slower. Later firmware and compatible flash equipment add functions, but a generic flash does not acquire high-speed sync just because the camera received a firmware update.
Focus modes that match the subject
The front switch selects S, C or M. S is single autofocus for subjects that stay put. C is continuous autofocus for subjects that move. M is manual focus. That switch and the autofocus-area setting solve different problems: one determines whether focus keeps changing, the other determines where the camera looks.
For architecture, objects and quiet landscapes, begin with single autofocus and a point over a clear edge at the distance you need. Do not put the point over empty sky and blame the lens when focus hunts. Review a magnified image, especially when working at a wide aperture or near the lens’s minimum distance.
On updated firmware, Zone and Wide/Tracking modes provide options for movement beyond the original single-point system. Practice with a predictable subject before a job. Start with mechanical shutter, adequate shutter speed and a sensible focus area. Check the sequence afterward to see whether focus followed the subject or settled on a busy background.
Manual focus offers focus peaking and Digital Split Image aids. They help you place focus; they do not replace magnified checking. Strong peaking on high-contrast details can look convincing while the exact plane you wanted remains soft. With an adapted manual lens, check the adapter’s mechanical fit and use the camera’s appropriate no-lens shooting setting when required.
Do not expect this generation to identify birds, vehicles or every face the way a recent camera might. Work with clean backgrounds, contrast and anticipation. That is a useful discipline, but it is not a reason to hide the camera’s age from someone buying it for fast action.
RAW, Classic Chrome and dynamic range
Use Fine plus RAW if you want a ready JPEG and a file to develop later. The native ISO range is 200 through 6400. The expanded L and H settings are JPEG-only on this model. If RAW suddenly disappears after an ISO change, inspect the dial before assuming your card or software is broken.
Classic Chrome is a film simulation for the rendered look. It is not an exposure technique and does not rescue clipped highlights. Make a sensible exposure first, then decide whether that muted palette suits the subject. Keep a RAW file when you want the freedom to build a different result later.
Dynamic range settings have ISO conditions. DR200 requires at least ISO 400; DR400 requires at least ISO 800. These settings affect how the camera handles exposure and JPEG tones. They are not a reason to ignore the histogram. For a consistent starting point, use DR100 and compare controlled examples before adding another automatic decision.
Natural Live View, described in the menus through preview-picture-effect behavior, can make the finder easier to judge without displaying the full chosen picture look. Know which preview behavior you selected. A pleasing viewfinder image and the recorded JPEG can differ when preview effects are disabled.
For a calm landscape, put the camera on a stable support, frame with the tilting screen and check the foreground and distant detail separately. Choose an aperture for the depth you need rather than always stopping down as far as possible. The silver finish will not improve a weak composition. Light, camera position and a clean edge arrangement matter more.
Batteries, cards and getting files off the camera
The original battery is NP-W126 and the manual specifies the BC-W126 charger. Check an offered replacement against the exact camera and charger, rather than buying a similar-looking battery. Reject a swollen battery, damaged contacts or a charger with questionable wiring. Charge a spare before leaving, and test endurance on your own copy instead of treating the historical battery rating as a guarantee.
This body uses SD, SDHC and SDXC cards. Buy from a reliable source, back up existing files and format the card in the camera. Test a burst and playback before an important outing. A card that is readable on a laptop can still cause trouble when the camera writes a long sequence.
The X-T1’s USB connection is part of its legacy data workflow. Do not assume modern USB-C charging or a power-bank shooting setup. A card reader and the proper external battery charger are a straightforward plan. Back up files in two places before formatting the card again.
Original wireless features and app names in the manual are historical. Check present phone, operating-system and camera support before buying for wireless transfer or remote control. Do not assume that a current Fujifilm app supports every older X-series body. If wireless convenience is essential, test the exact combination during the return window.
Inspect a used X-T1 before committing
Check the mount, viewfinder, screen hinge, card door, battery door, rubber covering and port covers. Press every button and rotate every dial through its positions. Peeling rubber or a loose door can be more than a cosmetic annoyance when it interferes with handling. Ask about repairs and inspect the result rather than assuming a seller’s description is complete.
Bring a known working lens and card if possible. Photograph a detailed subject with autofocus, compare it with magnified manual focus, and test several shutter speeds. Make a plain bright frame to look for sensor dust, then inspect ordinary files for repeatable lines or artifacts. These are screening checks, not a technician’s diagnosis.
Test the mechanical shutter, electronic shutter, burst write, playback and both viewing displays. Verify that the camera recognizes the card consistently. If flash is important, bring a compatible unit and test the mode you intend to use. Ask what is actually included: battery, charger, flash, caps and grip accessories are not guaranteed by the original retail bundle.
The original body was weather-resistant, but an old used camera’s seal condition is unknown. A matching sealed lens and intact doors matter, and weather resistance is not waterproofing. Keep rain protection in the bag. Get the seller’s return terms and ask regional support about a specific repair before relying on service availability.
Frequently asked questions
Is Graphite Silver better than the black X-T1?
The core sensor and camera platform are the same. The silver edition launched with extra features, but later firmware brought those features to the black model. Condition, installed firmware and your preference for the finish matter more.
Does the X-T1 have in-body stabilization?
No. Optical stabilization depends on the attached lens. A tripod, adequate shutter speed and careful technique still matter with an unstabilized lens.
Why did my X-T1 stop recording RAW?
Check the expanded L or H ISO positions and the drive/bracketing setting. The expanded ISO settings are JPEG-only, and some bracketing functions can override RAW recording.
Should I leave electronic shutter on all the time?
No. It can distort movement and produce bands under flickering light. Mechanical shutter is the safer starting point for motion, flash and uncertain artificial lighting.
What firmware does Fujifilm list for the X-T1?
The official page listed version 5.52, dated September 17, 2020, when checked for this October 2026 update. Recheck the official page and exact model before downloading.
Is a used X-T1 a good first camera?
It can be if you value direct controls and mostly photograph still subjects. Inspect the exact copy and accessories, test your workflow and accept the older autofocus and video limits before buying.
Build a simple X-T1 support kit
Start with power, storage and a stable shooting setup. These are retailer search links, not claims of current stock, price or universal compatibility. Check the exact listing and return terms.
Affiliate disclosure: Some links are affiliate links. If you buy through them, Shut Your Aperture may earn a commission at no extra cost to you. As an Amazon Associate, we earn from qualifying purchases.
Find practical photography tips at Shut Your Aperture Academy. Build your understanding of light, timing and framing alongside your equipment choices.
References: X-T1 owner’s manual, new-features guide, official firmware history, and historical independent review.