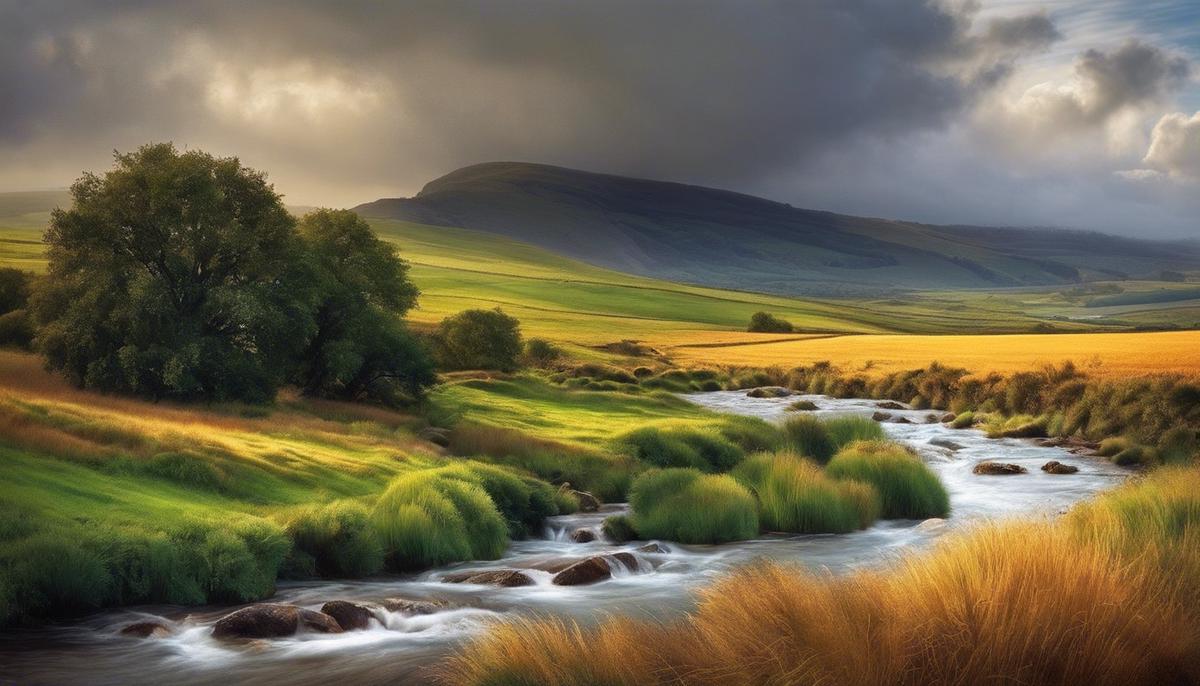
Landscape photography is an art that celebrates the natural world, capturing the interplay of earth and sky with a painterly touch. Yet, often when the skies turn gray and the winds pick up, many photographers pack away their gear, mistakenly seeing the ‘bad’ weather as an impediment to great photography. But it is within these tumultuous conditions that the true magic of the landscape can be revealed. This essay illuminates the misunderstood potential of inclement weather in landscape photography, from the nuanced qualities of light during a storm to the unexpected vistas unveiled by a veil of rain. We’ll journey through the techniques and precautions necessary to not only protect your equipment in the face of nature’s wrath but also to harness the dramatic power of these moments to create stunning, evocative images that resonate with the raw beauty of our world.
Understanding Light and Weather
Mastering Photography in Any Weather
Ever watched a storm rolling in and thought, “Now that’s the perfect time to snap a photo”? If it sounds crazy, you might just be not as weather-obsessed as us photography buffs! Inclement weather, while often a pain, can actually be a blessing in disguise for capturing unique and powerful images – if you know how to use it to your advantage.
First off, let’s chat about clouds. Those fluffy or ominous sky-dwellers can turn the sun’s harsh, midday light into a softbox of diffused light that’s perfect for photography. Cloudy skies can eliminate harsh shadows and reduce the contrast in your scene, making for some stunning and balanced exposures. Plus, the tones you get on an overcast day are just chef’s kiss – gentle and even, giving your photos a moody, contemporary feel.
Now, what about rain? Ever noticed how colors pop when the world is wet? Rain can amp up saturation, giving your photos a vibrant lift. Just after a downpour, the air is often clearer too, which means crisper, fresher-looking images. And let’s not forget those magical raindrops! Use a fast shutter speed to freeze them in mid-air, or a slow one to capture streaks as they fall. Either way, you’re in for some droplet drama!
Let’s not overlook the wind, either. Yeah, it can make holding your camera steady a challenge, but it can also breathe life into a static scene. Imagine leaves dancing on a breeze or waves crashing against a rocky shore – that’s action that keeps viewers hooked on your image.
Lastly, there’s the drama-queen of weather: thunderstorms. Lightning bolts provide a one-of-a-kind light show. But capturing these requires patience, timing, and a tripod to keep your camera steady during long exposures. Lightning can light up a scene in otherworldly ways that are hard to replicate any other time.
However, you’ve got to remember – safety first! Always have your camera gear protected with weather-sealed cases or covers. And never, ever put yourself in harm’s way just for a shot, no matter how Insta-worthy it might be.
So, if the weather app shows storm clouds on the horizon, don’t sigh and put your camera away. Instead, think of the incredible atmosphere and mood those stormy skies can bring to your pictures. Just bundle up, protect your gear, and get ready for Mother Nature’s version of a photo studio!
 Save
SaveProtecting Your Gear in Harsh Conditions
Braving the Elements: Shield Your Camera Gear for Those Perfect Bad Weather Shots
Hey there, camera enthusiasts! Bad weather doesn’t mean bad news for photographers; on the contrary, it’s an opportunity to capture some truly spectacular shots. That being said, it’s also essential to keep your prized gear safe and sound while you’re chasing those stormy scenes. Let’s dive into some top-notch strategies to protect your camera equipment when the weather decides to throw a curveball.
First things first, a robust camera bag is like a knight’s armor for your equipment. Opt for bags that are weather-sealed or have a built-in rain cover. These darlings are designed to withstand the elements, keeping your camera and lenses snug and dry.
When you’re in the heat of the moment (or should we say, the downpour of the moment?), a trusty rain sleeve can be a lifesaver. These simple, plastic shields are like raincoats for cameras. They are super affordable and come in various sizes to fit different camera types. You just slip one on, and voila! You’re ready to shoot, regardless of the drizzle or downpour.
Don’t forget the humble umbrella! It’s a quick and easy solution, especially handy if you’re shooting without much movement. For those who have an extra hand, clamping an umbrella to your tripod gives you that hands-free protection. Just make sure it’s secure so a gust of wind doesn’t turn your setup into a tumbleweed!
Tripod wise, think stability in windy conditions. Weight hooks at the bottom of tripod legs are fantastic for attaching a bag or weights. This trick holds the tripod steady, giving you a firm stand against the breezy resistance.
Lens fogging up? Humidity and temperature changes are notorious for causing this. Keep a bunch of silica gel packets in your camera bag to help combat moisture. Additionally, using anti-fog wipes or a microfiber cloth helps keep your lens clear for those crystal-clear shots.
Finally, let’s not forget about ourselves. Dress in layers and wear water-resistant clothing. When you’re comfortable, you’re more focused on the shot, not how soaked your socks are.
Armed with the right protection for your gear (and yourself!), bad weather shoots can go from daunting to exhilarating. So get out there, keep your gear safe, and capture the drama of nature with confidence. Happy (and dry) shooting!
 Save
SaveCreative Techniques and Composition
Capturing the Raw Energy of Storms: Perfecting Landscape Photography
When stormy skies loom overhead, it’s natural to think it’s time to pack up the camera gear and wait for clearer skies. However, bad weather can provide some of the most dramatic and captivating landscape shots. This article dives deep into compositional techniques that elevate photography in less-than-ideal weather conditions.
First, let’s talk about leading lines. Storms often bring with them crazy patterns – think about those unevenly laid pebbles on a beach or long stretches of road that seem to absorb the mood of the sky. Use these lines to direct the viewer’s eye through the shot, channeling the wild personality of the weather directly into the composition.
Next, consider foreground interest. Throwing in something like rain-soaked leaves or a frost-covered fence can make a photo pop. It gives the scene depth and a sense of scale, enlivening the overall image. Don’t shy away from getting close to capture the textures that bad weather accentuates.
Don’t forget about the rule of thirds either. Rather than placing the horizon line smack dab in the middle, shift it up or down to give either the brooding sky or the dramatic land more space. That bit of imbalance can make the viewer feel the weight of the storm.
Experiments with exposure can yield surprising results. Try a longer exposure to smooth out churning waters or streaky clouds. It creates a contrast between the dynamic elements and the eeriness of an otherwise static scene.
Reflections can be particularly gripping during foul weather. Capture the flip side of the scenery in puddles, lakes, or any reflective surface for a unique perspective. The trick is to find spots where the water is still enough to create a clear mirror image under the somber lighting.
Finally, embrace the moodiness. Moody shots have character. Dark, foreboding clouds and churning seas can be awe-inspiring if shot with a lens that encapsulates that heavy atmosphere. Instead of striving for the ‘perfect’ shot, aim for one that earns its place in a body of work of nature’s raw power and beauty.
There you have it, storm chasers and photo enthusiasts! Bad weather shouldn’t be a deterrent but an invitation to explore the often underappreciated faces of nature. Remember, it’s about making the most out of the available elements to convey the full experience of the landscape, come rain or high winds.
 Save
SaveCamera Settings for Optimal Exposure
Adjusting Camera Settings in Bad Weather: Tips for the Perfect Shot
Bad weather shouldn’t be a spoiler for photography enthusiasts. On the contrary, it can provide a playground of light and mood that, with a few adjustments on your camera, can produce some truly epic shots. Let’s delve into the settings adjustments that can make bad weather your best friend.
ISO Adaptation
First things first, let’s talk about ISO. Rainy or stormy conditions generally mean less light. A higher ISO can compensate for this. But beware, cranking it up too high might introduce grain or ‘noise’. Start around 800 ISO and inch up as needed. Noise reduction software can help in post-editing if things get a tad too grainy.
Shutter Speed Selection
Fast shutter speeds freeze action—great for capturing individual raindrops in sharp detail. However, a slightly slower shutter speed can convey the movement of rain or the swirling drama of clouds, giving your photo a sense of the weather’s energy.
Aperture Adjustment
An aperture, or f-stop, controls depth of field; that’s the amount of your shot that will be in focus. A wide aperture (a smaller f-number) allows more light in, which is useful in dimmer conditions. But if you want everything in focus, like those moody clouds and the landscape beneath, you might need a narrower aperture (larger f-number). Remember, this means less light, so balance with ISO and shutter speed.
White Balance Tuning
The automatic white balance might get confused with all the grays and the odd lighting. Play with your camera’s white balance settings until you find a setting that gives you a true-to-life representation. Some cameras have ‘Cloudy’ or ‘Shade’ presets that could instantly warm up the scene.
Metering Mode Mastery
Metering affects how your camera judges the light. In bad weather, try spot metering to measure light at a specific point, which can be crucial if you’re focusing on a subject that’s differently lit than its surroundings.
Exploiting Manual Mode
Sometimes automatic modes can be thrown off by unusual lighting. Don’t be afraid to go manual. It allows full control to balance ISO, shutter speed, and aperture to suit the exact scenario you’re shooting in.
Using RAW Power
If your camera has the option, shoot in RAW. This file format captures all the data from the sensor, allowing you to tinker with the exposure, white balance, contrast, and more during editing without degrading the quality of your photo.
Stabilization Techniques
Bad weather can often equal camera shake due to shivering hands or powerful winds. Use your camera’s built-in image stabilization if available. A tripod can be your best ally, especially for those slower shutter speed or time-exposure shots.
Bonus Tip: Patience Pays Off
Ultimately, patience is key. Waiting for just the right moment when a break in the clouds casts interesting shadows or immediately after a downpour when the world seems freshly washed can capture a once-in-a-lifetime photo.
That’s a wrap! With your camera settings tweaked for bad weather, it’s time to venture out and capture those impressively moody shots that fair-weather days can’t offer. Happy shooting!
 Save
SavePost-Processing Edits for Dramatic Effects
Alright, you’ve got some fantastic shots of moody skies and gusty landscapes. The captures are great, but something’s not quite clicking. Maybe the colors look a little flat, or the details aren’t popping how you’d hoped. Fear not, enthusiasts of stormy scenes! It’s time to dive into the transformative world of post-processing where so-so snaps become next-level landscape art.
First up, let’s chat about contrast.
Bad weather shots often lack the punch they deserve. Upping the contrast can bring back that dimension you thought was washed away with the rain. It’ll make those dark clouds look even more ominous and give your image more depth.
Next stop on the enhancement train is tweaking the highlights and shadows.
Pull down the highlights to recover some of the detail in the clouds. And, don’t be shy to lift the shadows a tad. This reveals the hidden details without overexposing parts of the photo. It’s all about balance!
Saturation and vibrancy are your best pals for rain-amplified colors. Boosting these settings can turn a drab photo into a fab photo, but watch it – too much and your shot will feel more cartoon than captivating.
Now, onto sharpening. Those raindrops and wind-swept trees can benefit from some detailing. Sharpen up those edges just enough to give some crispness to your image, but remember, a light touch is key. Over-sharpening can make photos look unnatural.
Here’s a cool trick – local adjustments. Tools like the graduated filter or adjustment brush in editing software are a game-changer. Want to darken the sky but keep the land bright? Easy. Paint or drag the effect where you want it. This level of control is particularly awesome for landscapes with uneven lighting or dramatic weather.
Don’t overlook color balance either. Sometimes bad weather can throw off colors. A little tweak can warm up a cold, rainy picture or cool down a scene if that’s the mood you’re going for.
And to really bring out that stormy drama, play with the clarity or dehaze sliders. Pushing these can add a touch of grit and intensity to those clouds, making the scene more impactful.
Lastly, let’s not forget cropping. Sometimes, all you need is to trim the edges to focus more on the heart of the scene. Maybe your composition can be stronger with a little off the top or side. Experiment, and find that sweet spot.
These are just starters to get you rolling. Every photo has its own flavor, so it’s up to you to taste-test and see what works. Abra-ca-dabra that weather-worn landscape into a photographic pilot you’re proud to showcase. Keep experimenting, keep learning, and most of all, keep enjoying the process. Magic happens in the editing room as much as it does out in the wild, windy, wonderfully wet world – own it, landscape wizards!
 Save
SaveThe ethereal beauty of a landscape doesn’t fade away with the arrival of bad weather; rather, it transforms into a canvas ripe with potential. By embracing the challenges and spontaneity of adverse conditions, photographers can unlock a spectrum of visual narratives that fair-weather shots may never tell. The gray veil of rain, the dance of wind-tossed branches, and the moody hues of a stormy sky are but whispers of the symphony that awaits the patient and prepared photographer. With the insights and techniques outlined here, from precise camera settings to creative post-processing, your next foray into the wild under darkening skies could yield your most compelling work yet—an homage to the beauty and power of nature in all its guises.
Luminar Neo’s Sky AI, atmosphere AI and SuperSharp are designed for landscape work — replace flat skies, add depth, and recover detail in seconds. Tagged as affiliate per FTC.


