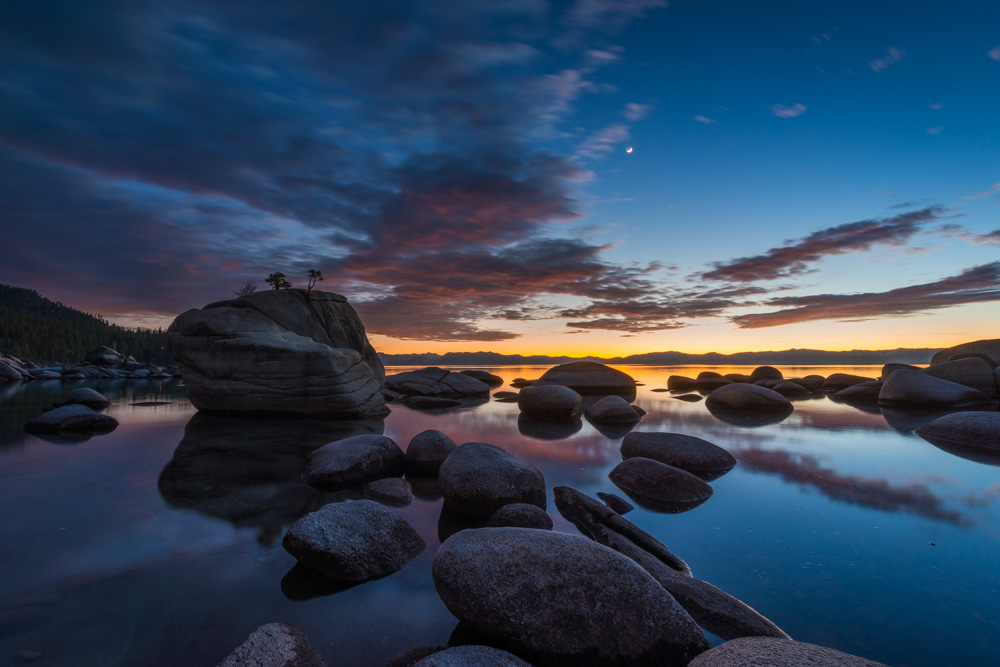
Here is a sunset photograph I shot at Bonsai Rock in Lake Tahoe, Nevada, a bit after the sun went down. In this edit I used a mix of global and local adjustments to make the image pop while keeping the mood of that blue-hour sky. Here is the workflow.
1. Global adjustments in the basic panel
Start global. Recover the highlights to keep the last color on the horizon, then lift the shadows so the foreground rocks keep their texture without going gray. A small contrast bump sets the structure before any local work.
2. White balance for blue hour
Shooting after sunset means the frame leans blue, and that is a feature, not a problem. Keep the overall balance cool, then add a touch of warmth only where the horizon still glows. Fighting the blue everywhere kills the mood.
3. Local adjustments on the sky and water
Use a graduated mask on the sky to deepen the clouds and bring back the pink and orange bands near the horizon. A second, gentler mask on the water brightens the reflections so they mirror the sky. Local adjustments are where this image comes together: sky darker on top, warm at the horizon, reflections glowing below.
4. HSL for the sunset palette
In HSL, give the oranges and reds a modest saturation lift for the horizon, and deepen blue luminance slightly for the upper sky. Keep the rocks neutral; if they pick up color casts, desaturate the offending channel until the stone reads natural.
5. Finishing
Add texture to the foreground rocks, keep dehaze minimal, and sharpen for output. The final image should still feel like that quiet, cold evening on the lake.
For the full editing toolkit, see our complete Lightroom guide.