Updated October 2026
White balance is one of the easiest settings to get wrong and one of the easiest to fix. It controls whether your photo leans warm and orange or cool and blue, and whether whites look white. This guide explains what white balance is, how to set it in camera, and how to correct it in editing. It also covers a point of view Edin has shared on this site for years: white balance is a creative choice as much as a technical one.
What white balance actually does
Different light sources have different colors. Candlelight is orange, midday sun is neutral, shade is bluish and fluorescent tubes can look green. Your eyes adjust to all of this without you noticing. A camera does not, so it needs a white balance setting to decide what counts as neutral. Get it right and a white shirt looks white. Get it wrong and the whole picture has a color cast.
White balance is measured in Kelvin. Low numbers, around 2,500 to 3,500 K, describe warm light like candles and tungsten bulbs. Around 5,500 K is typical daylight. Higher numbers, 7,000 K and up, describe cool, bluish light such as open shade. When you set your camera to a number, you are telling it what color the light is, and it shifts the image in the opposite direction to neutralize it. A low setting makes the photo cooler, and a high setting makes it warmer.
The white balance presets
- Auto (AWB): The camera guesses. It does a good job in many scenes, but it can neutralize the warm light of a sunset or the blue of twilight, which weakens the mood.
- Daylight: Around 5,200 to 5,500 K. Good for direct sun, and it keeps sunset colors warm.
- Cloudy: Warmer than Daylight, around 6,000 to 6,500 K. It adds warmth to overcast scenes.
- Shade: Warmer still, around 7,000 K. Use it in open shade where the light is cool.
- Tungsten: Around 3,000 K. It cools down orange indoor bulbs.
- Fluorescent: Corrects the green cast of many tube lights.
- Flash: Matches the color of a typical flash.
- Custom or Kelvin: You set a number yourself, or measure it from a gray card.
Shoot RAW so white balance is not final
When you shoot JPEG, the camera bakes the white balance into the file, and fixing it later can cause color damage. RAW stores the data without committing to a white balance, so you can change it in editing without losing quality. The setting in camera is only a preview. This is one of the best reasons to shoot RAW, and our post on why you should shoot RAW explains the rest.
Edin’s approach: shoot auto, then correct by feel
There are many ways to handle white balance, and this one has been the approach on this site for years. Shoot in auto white balance most of the time, then correct it by hand in Lightroom. You can do the same in Photoshop or other editors. The idea is that a camera can only measure the light, not the feeling of the scene. If a scene feels hot, push the photo warm. If it feels cold, make it cool. White balance, like the photograph itself, should be felt and not forced.
This is a style choice. Someone who shoots products or real estate needs accurate neutral color, and a gray card helps. A landscape or travel photographer has more freedom to let the color serve the mood.
 Save
SaveHow to fix white balance in Lightroom
- Open the Basic panel in the Develop module.
- Try the White Balance Selector (eyedropper). Click something in the picture that should be neutral gray or white, like a white wall or a gray rock. The image will shift to match.
- Use the Temp slider. Move it left for cooler (bluer) and right for warmer (yellower). In RAW files it displays real Kelvin values.
- Use the Tint slider. This fixes green or magenta casts, which are common under artificial light.
- Judge by feel. Step away from the numbers. Does the picture look like how the scene felt?
- Check skin and neutrals. If there are people, make sure skin tones look natural. If there is a white or gray object, make sure it is not tinted.
- Use local adjustments. With a brush or gradient, shift the temperature in just the sky or just the foreground when the light is mixed.
The Lightroom editing course in the Academy, taught by Edin Chavez, walks through color correction in 10 modules and 42+ parts, with lifetime access. For a worked example, see how to edit a sunrise photo using Lightroom.
Light source cheat sheet
- Candle flame: roughly 1,800 to 2,000 K, very orange.
- Household tungsten bulb: roughly 2,700 to 3,200 K, orange to yellow.
- Sunrise and sunset: roughly 3,000 to 4,000 K, warm and golden.
- Midday sun: roughly 5,000 to 5,500 K, close to neutral.
- Overcast sky: roughly 6,000 to 7,000 K, slightly cool.
- Open shade: roughly 7,000 to 8,000 K, noticeably blue.
- Blue hour: roughly 9,000 K and up, deep blue.
These are rough numbers and change with weather, location and time of year. Use them as a guide for where to start, then adjust by eye.
Warm and cool: choose the mood
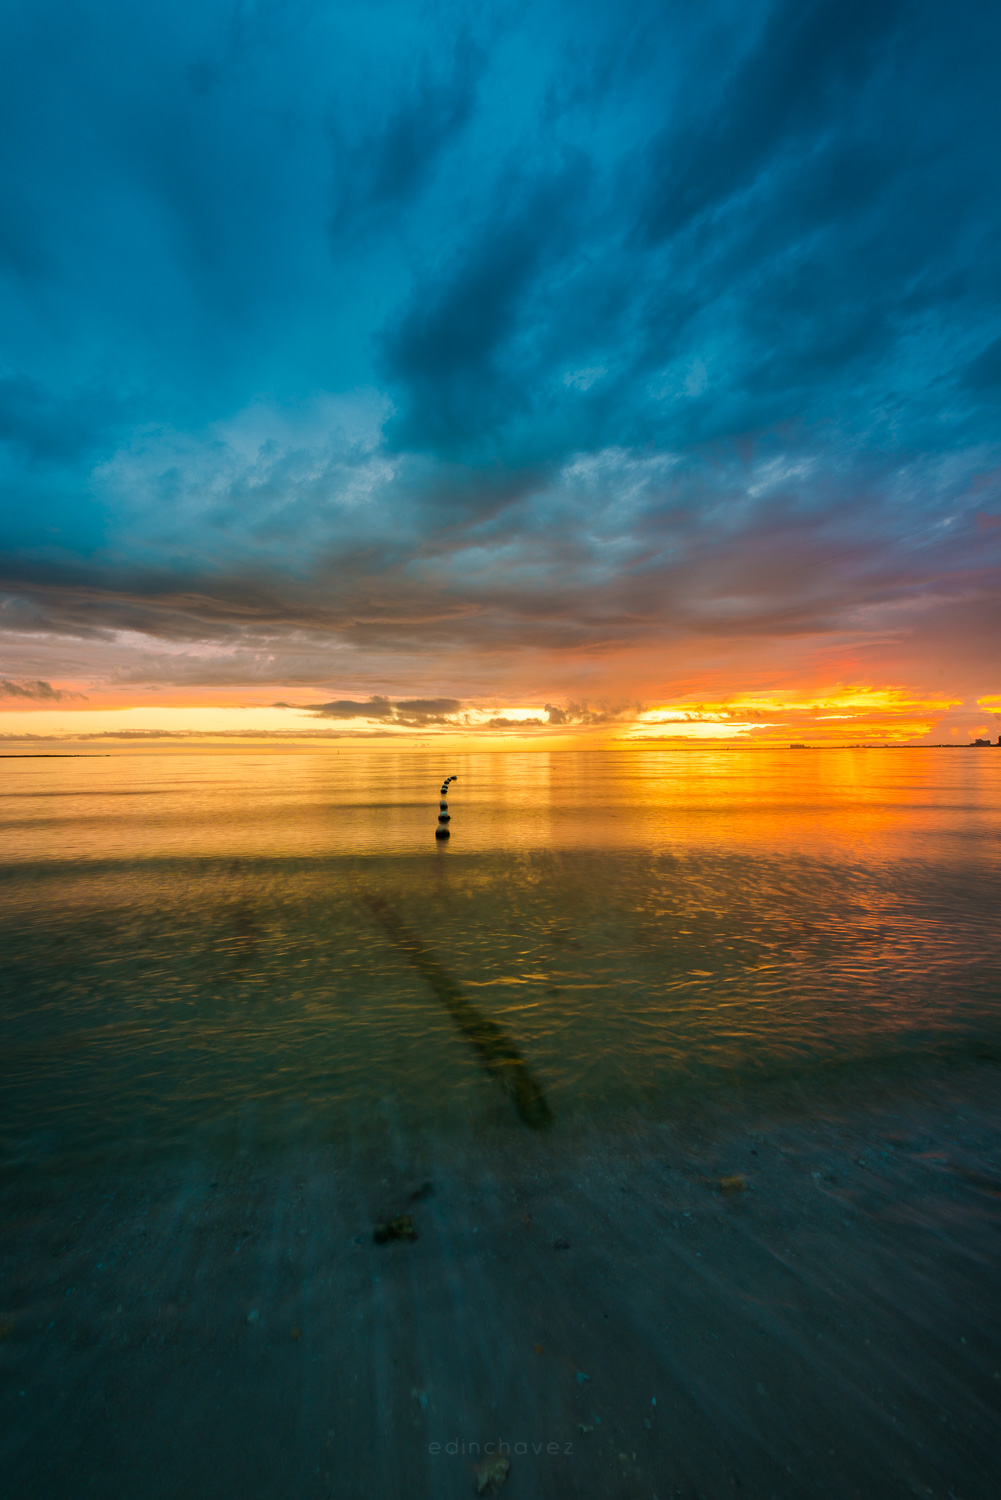
Warm tones, such as orange and yellow, feel cozy, energetic and welcoming. Cool tones, such as blue and teal, feel calm, distant or cold. A beach at sunset works best warm. A frozen lake at dawn works best cool. You can also mix them: a warm subject against a cool background, as in the sunset photos above, creates contrast that draws the eye. Before you move the slider, decide what the scene felt like, and move toward that feeling.
Set white balance in camera, step by step
- Find the white balance setting on your camera. It is often a button, a quick menu or a dial.
- Choose a preset that fits the light, or choose Kelvin and enter a number.
- Take a test shot and check the screen. Do the whites look white, and does the mood feel right?
- Adjust, and reshoot if needed.
- If the light changes, for example from sunrise to full daylight, change the setting or switch to auto and fix it later.
Keep a batch consistent
When you shoot a series in the same light, such as a sunset sequence or an event, fix the white balance on one good frame, and then sync those settings to the others. In Lightroom, select the edited photo and the others, and use Sync Settings with only White Balance checked. It saves time, and it keeps the set consistent. If the light changes during the shoot, make a new group and correct it again.
White balance for video
The same principles apply to video, but you cannot fix it as easily afterward. Set a manual Kelvin value, or use a custom white balance from a gray card, and keep it the same across clips in the same scene. Auto white balance can shift during a shot as the camera moves, and the color change is distracting. If you shoot in a flat log profile, you will have more room to adjust in editing. The Intro to Videography course in the Academy covers camera setup for video.
Editing in other apps
You do not need Lightroom to fix white balance. Photoshop’s Camera Raw filter has the same Temp and Tint controls. Most phone editors have a warmth or temperature slider, and many free desktop editors offer an eyedropper. The idea is the same everywhere: find something neutral, correct the cast, then adjust by feel.
Using a gray card for accuracy
If you need exact color, photograph a gray card or a white balance target at the start of a shoot in the same light. In editing, click the card with the eyedropper, and copy those settings to the other images from that setup. This is the fastest way to get consistent color across a batch, and it removes guesswork for product, portrait and event work.
 Save
SaveWhite balance in common situations
Sunrise and sunset
Auto white balance often tones down the warm colors. Use Daylight or Cloudy, or correct it in editing, so the orange and red stay rich. Our guides on sunsets and sunrises cover this in more detail.
Blue hour and twilight
The cool blue is the mood. Do not neutralize it completely. A setting around 4,000 to 5,000 K keeps the blues rich without turning the scene gray.
Indoors
Mixed light is the hardest case. A window gives cool daylight, and lamps give warm light. Pick the main source, set white balance for it, and accept that the other sources will have a color cast. You can also turn off the lamps to keep things consistent.
Night and city lights
Streetlights vary from orange sodium to white LED. Auto often works, but RAW gives you the freedom to choose the look afterward. For more on night work, see the Night Photography course.
Snow
Snow often looks blue in shade and gray in dull light. Warm it up slightly and check that whites still look white.
Portraits
Skin tone is the priority. A slight warmth usually looks healthy and natural. Check that the highlights on the skin are not yellow or green.
Color theory helps
White balance is really color control. Warm and cool tones create different emotions, and complementary colors like orange and blue make images pop. The Color Theory course in the Academy explains how to use color on purpose, so your edits stop being guesses.
Common white balance mistakes
- Trusting auto in every scene. It is a good start, not a final answer.
- Editing on a bad screen. A screen with strong color shift will mislead you.
- Making every photo neutral. Not every photo should be neutral. Mood matters.
- Changing white balance between frames in a series. It makes sets look inconsistent.
- Ignoring tint. A green or magenta cast can remain even when temperature looks right.
- Overcorrecting skin. Keep portraits natural.
Grow your skills with the Academy
Color is one of the biggest things that separates a good edit from a great one. The Shut Your Aperture Academy has the Lightroom Editing and Color Theory courses, taught by Edin Chavez, with lifetime access. Browse them all at the Academy home.
Frequently asked questions
What is white balance in photography?
White balance tells the camera what color the light is, so it can make whites look white and remove color casts. It is measured in Kelvin.
Should I use auto white balance?
Auto is a fine starting point, especially if you shoot RAW and plan to adjust in editing. For sunsets and mood-driven scenes, Daylight or Cloudy can keep warm tones.
How do I fix white balance in Lightroom?
Use the eyedropper on something neutral, then fine-tune with the Temp and Tint sliders. Judge by how the scene felt, and check skin tones and whites.
Does white balance matter if I shoot RAW?
The camera setting does not change RAW data, so you can adjust white balance later without losing quality. It still affects your preview, so get close in camera.
What Kelvin setting is best for daylight?
About 5,200 to 5,500 K is typical for direct daylight. Cloudy and shade conditions usually need a higher, warmer setting.
Why do my photos look too blue or too orange?
The white balance does not match the light. Adjust Temp toward warmer to reduce blue, or toward cooler to reduce orange.
Gear box: color accuracy starting points
These are research starting points, not rankings. Check current specs, reviews and prices before you buy.
- A gray card or white balance target: Browse gray cards at B&H or on Amazon.
- A monitor calibrator: See calibrators at B&H.
- A color checker chart: See color checkers on Amazon.
Affiliate disclosure: some links above are affiliate links. If you buy through them, Shut Your Aperture may earn a small commission at no extra cost to you.