By Edin Chavez
Updated October 2026
Bangkok gives you gold, pink skies, crowded streets and neon that practically begs for a photograph. The trick is knowing when to stop chasing everything. Pick a subject. Find a clean frame. Wait for the light or the person that makes it work. A great photograph usually needs fewer ingredients than the scene in front of you.
This city is a good place to build a small, varied set instead of coming home with a hundred versions of the same skyline. Give the river one evening. Give the temple details their own time. Then put the tripod away and work the streets with a shutter fast enough to keep people sharp. Those changes in pace make a stronger travel story.
These six Bangkok photography spots are a starting point, not the full map. The Bangkok Photography Guide covers 11 subjects across 43 pages, with real photographs, access notes, shot ideas, camera starting points and linked landmark references. Use this post to choose the kind of photographs you want. Use the guide to go deeper without turning your day into a race between pins.
Make a plan for Bangkok: 11 subjects across 43 pages.
1. Wat Arun: build the photograph around the river
 Save
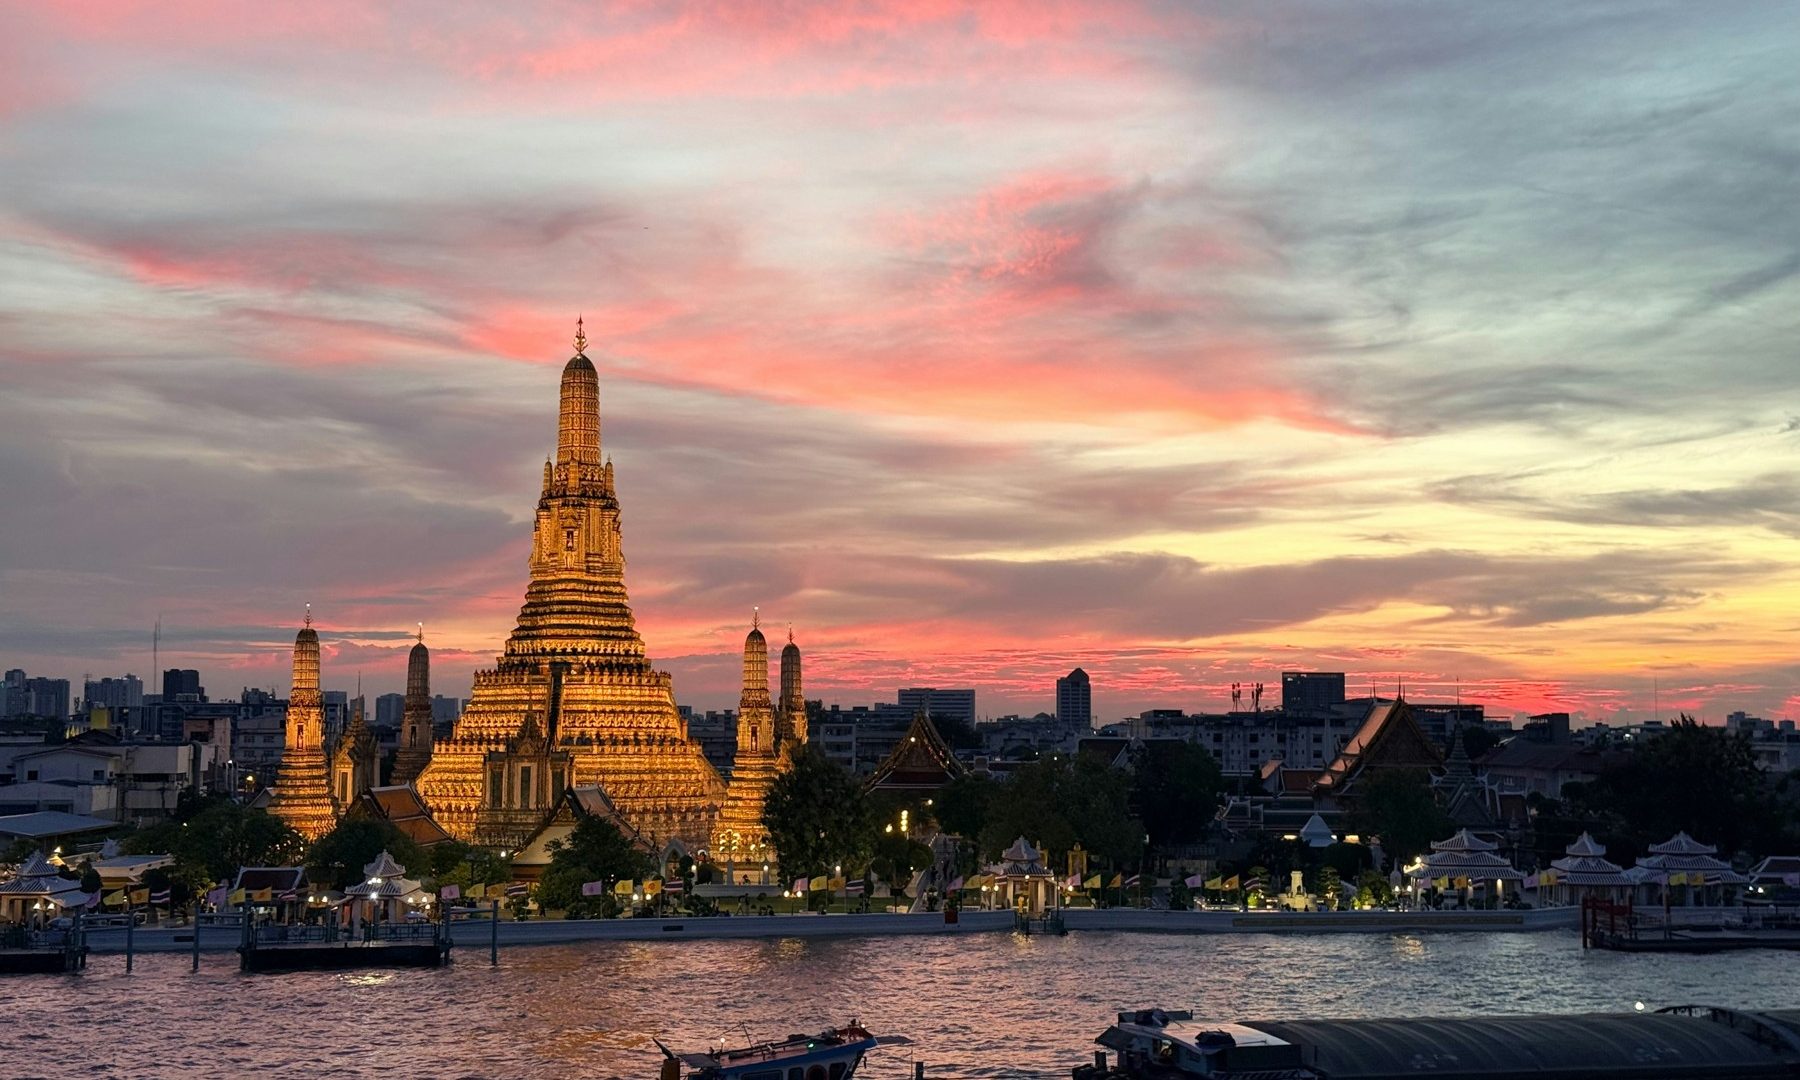
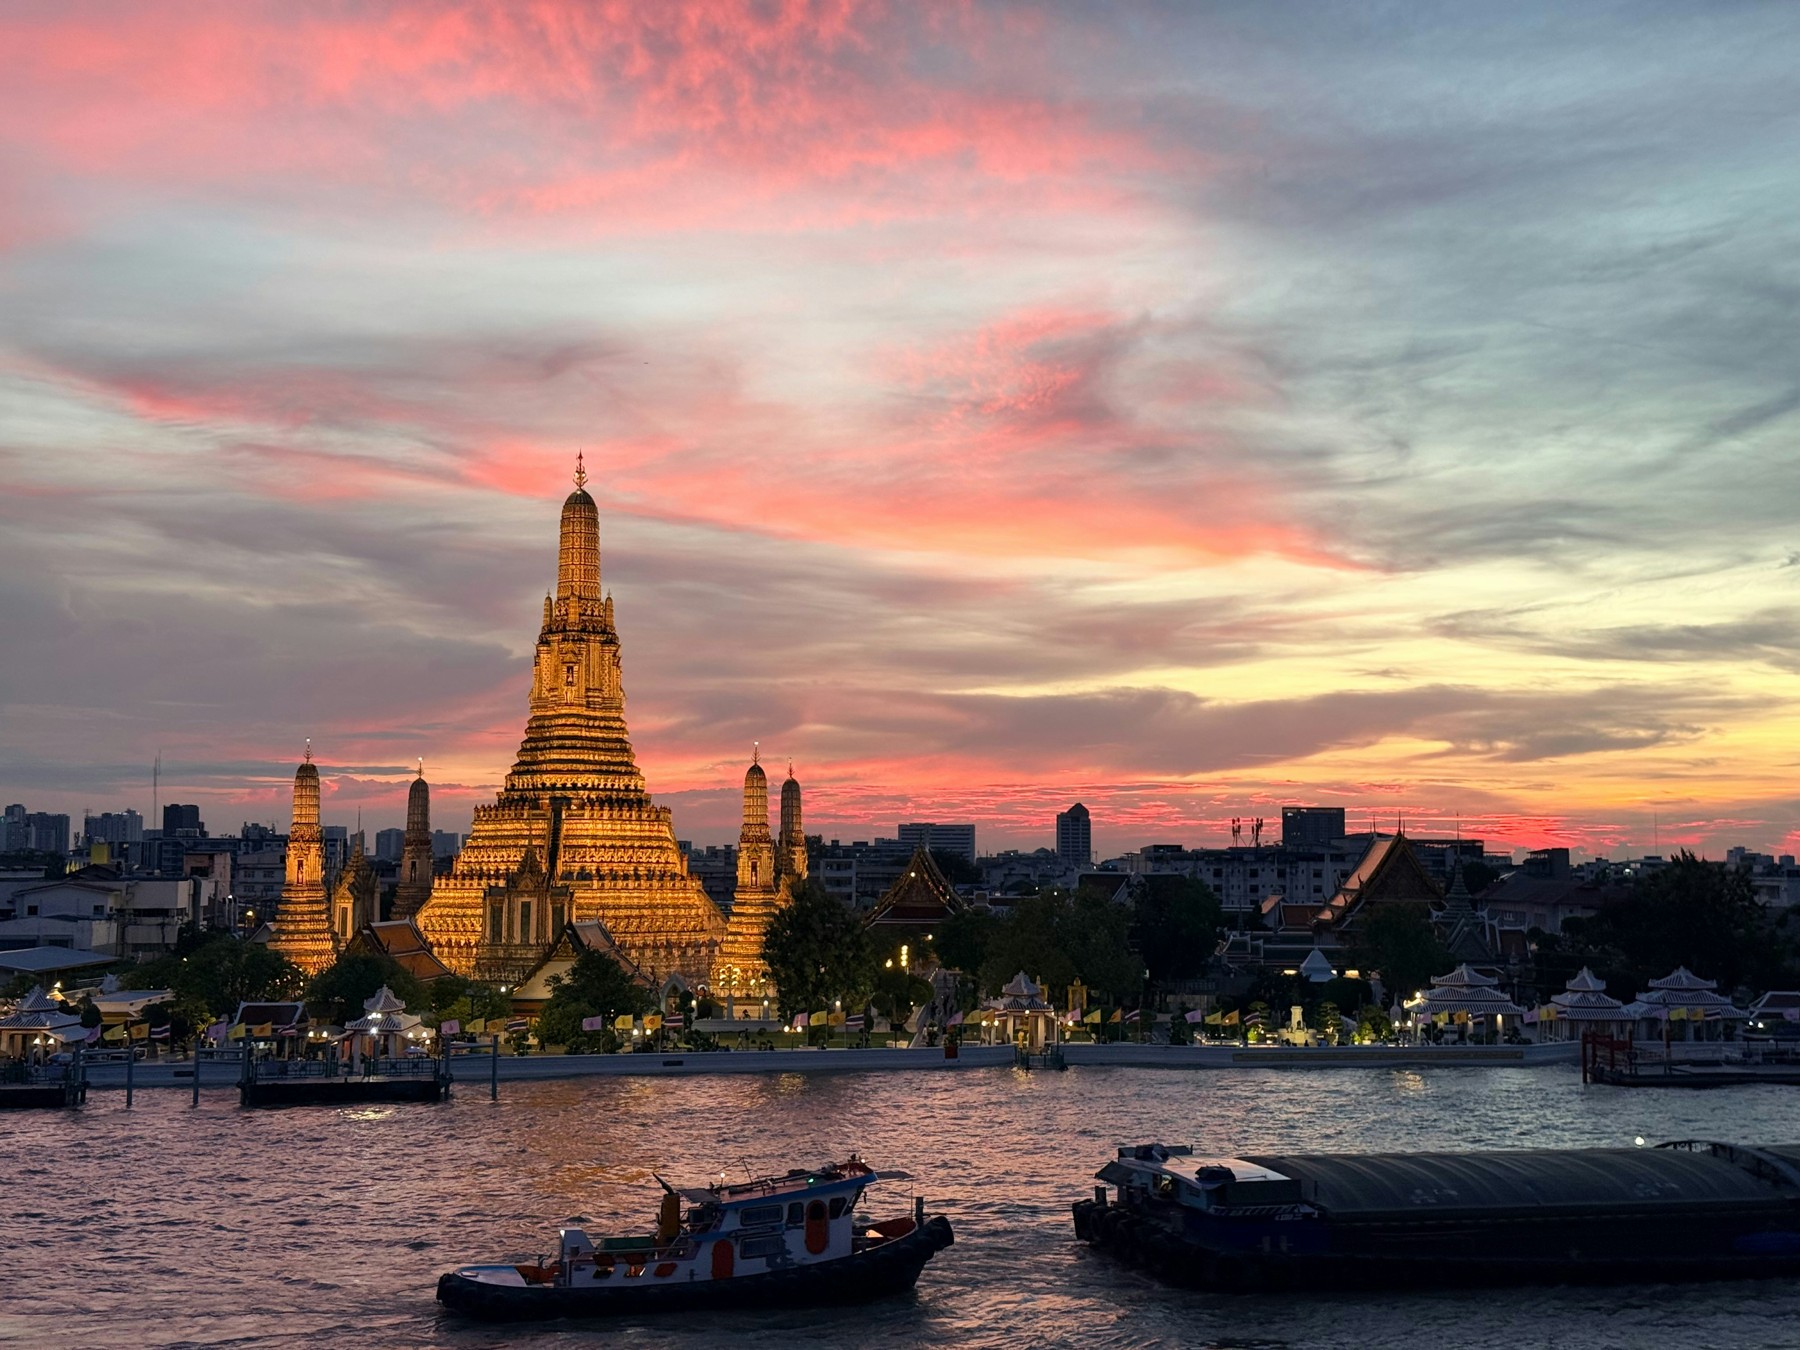
SaveWat Arun is the big, obvious photograph for a reason. The central prang has enough shape to hold a frame even when the sky is doing something spectacular. Put water in front of it and the scene gains space, reflections and movement. A passing boat can be the last piece that makes a good skyline photograph feel like Bangkok.
Start by deciding which photograph you actually want. An opposite-bank exterior with the river in front is one plan. A visit inside the admitted temple grounds for porcelain and architectural details is another. They need different access, different lenses and different timing. Do not build an evening plan around a photograph of the temple interior and assume it gives you after-hours access.
For the river view, scout a lawful open route before the light changes. Check what is public and what belongs to a restaurant, hotel or terrace. A beautiful view does not make a private space a public viewpoint. Keep pier boarding lanes open, and choose a position where you can stop without becoming an obstacle.
Photography tip: Watch the relationship between the brightest part of the sky and the illuminated stone. If you expose only for the dark river, the temple can lose its detail. Take a test frame, check the highlights and adjust. RAW gives you room to work later, but it does not rescue every clipped highlight.
Try a medium-wide composition first. Leave room for the prang, the sky and a strip of river. Then make a tighter frame with a longer lens. You may find that the smaller photograph has more impact because it removes clutter at the edges. A boat moving into a clean patch of water can provide scale without taking over the scene.
Begin around f/8 for a static exterior if the light and your shutter speed allow it. On a stable, permitted support, a slower shutter can smooth water or stretch boat lights. Handheld, keep the shutter suitable for your lens and raise ISO as needed. These are starting points for your own photograph, not the settings used in the stock image above.
2. Grand Palace: make the rooflines work together
The Grand Palace is a different kind of challenge. There is so much color and detail that it is easy to put everything into the frame and lose the subject. Gold, mosaic, roof edges and pointed forms can all compete. Your job is to decide what leads and what supports it.
Choose one relationship. A roof edge below a taller architectural form. A repeated pattern against a simpler background. A detail that shows texture without half a dozen other details fighting for attention. Move your feet before reaching for a wider lens. A small shift can separate overlapping tips and make the scene much easier to read.
A longer focal length can simplify the frame, but watch what it does to the background. Compression can pull distant forms together. That can be beautiful when the shapes line up; it can also turn a clean roofline into a pile of competing edges. Take a moment to look at the corners before you press the shutter.
Photography tip: Do a quick edge check. Look at all four corners and the top of the frame. Are you cutting a tip in half? Is a pole growing out of your subject? Is there a bright patch that pulls your eye away from the architecture? Fix those problems in the field rather than hoping a crop will solve everything.
Treat the visit as a controlled-entry visit, not a free outdoor skyline stop. Check the current admission arrangements, dress requirements and camera signs before going. Work inside the actual visitor window. An elevated nighttime photograph of the district is not proof that palace courtyards are open after dark or that its camera position is available to you.
Make one wider architecture frame and one close study. The wider photograph establishes the scene. The close photograph gives it texture. You do not need ten nearly identical wide shots if two carefully chosen frames tell the story better.
3. Wat Pho: hold the gold without losing the room
 Save
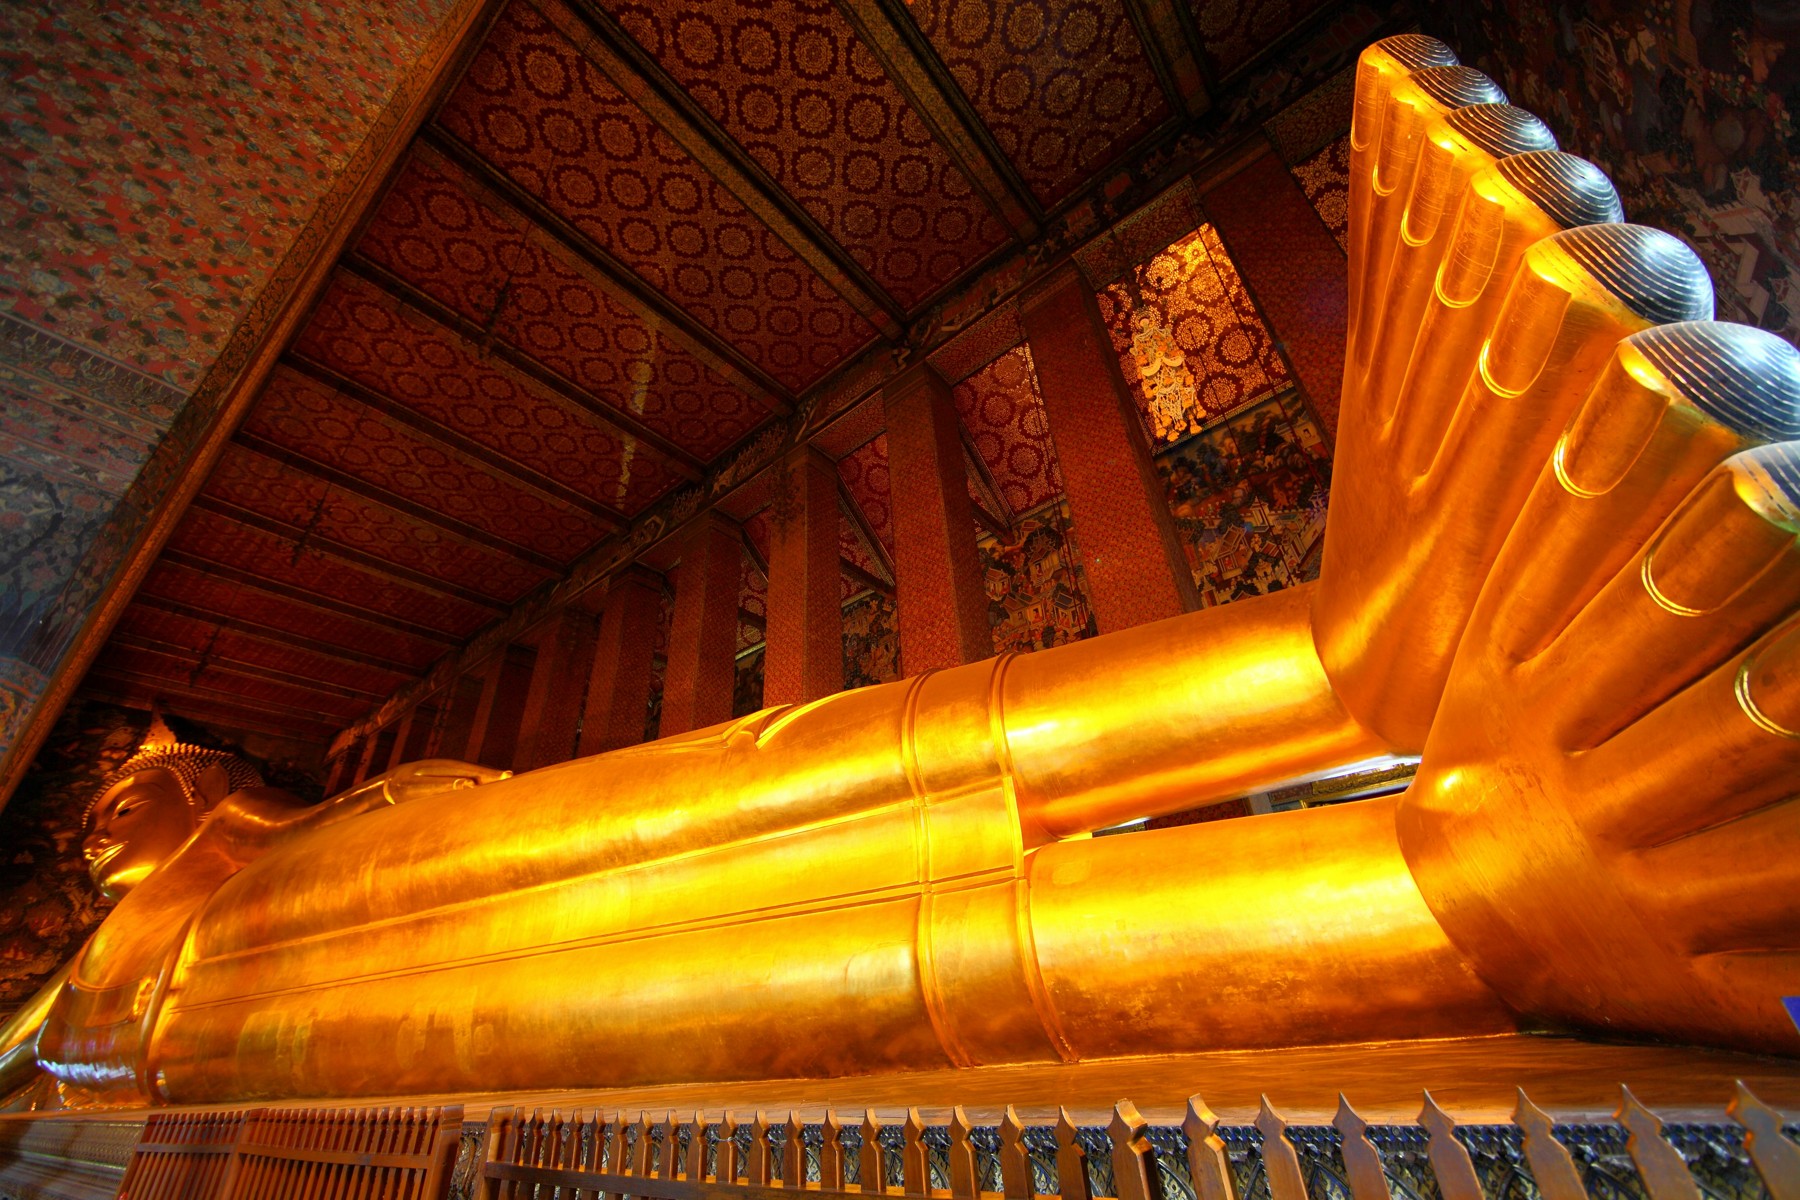
SaveWat Pho gives you a strong interior subject, but the available light is not a reason to use the same settings you used outside. The reclining Buddha, the repeating ceiling detail and the room around it need a deliberate choice. Decide whether the photograph is about scale, the face, the feet or the relationship between the statue and the hall.
A wide lens can emphasize the size of the figure and the room. It also makes foreground objects feel larger. That can be a powerful composition when you intend it, but an awkward one when you simply stand too close. Keep checking the shape of the subject and the edges of the frame as you move.
For a tighter detail, try a standard or longer focal length from a permitted position. Look for clean separation and a quieter background. The gold is the subject, but the patterned room can be part of the photograph rather than visual noise. Make a frame where the patterns lead toward the statue instead of pulling away from it.
Photography tip: Check the gold highlights, not just the overall brightness of the picture. A room can look dark on the screen while the brightest areas of the statue are already too bright. Take a test, inspect it and keep those important highlights under control.
Start handheld. Choose a shutter speed that gives you a sharp result, then adjust aperture and ISO around it. If your first frame is soft, raising ISO is usually more useful than repeating the same slow exposure. Stabilization helps with camera movement; it does not freeze another visitor walking through the frame.
Follow the current signs about flash, support and photography. Do not assume that a temple ticket grants permission for a commercial setup. Keep worshippers’ and visitors’ routes clear. If the only clean photograph requires blocking a passage, it is not the right photograph to make at that moment.
This is also a good place to slow down. Take a wider frame, one detail and one composition built around the room. Then put the camera down for a minute. Seeing the subject without a screen can reveal the angle you missed while working too fast.
4. Yaowarat: edit the neon before you shoot
 Save
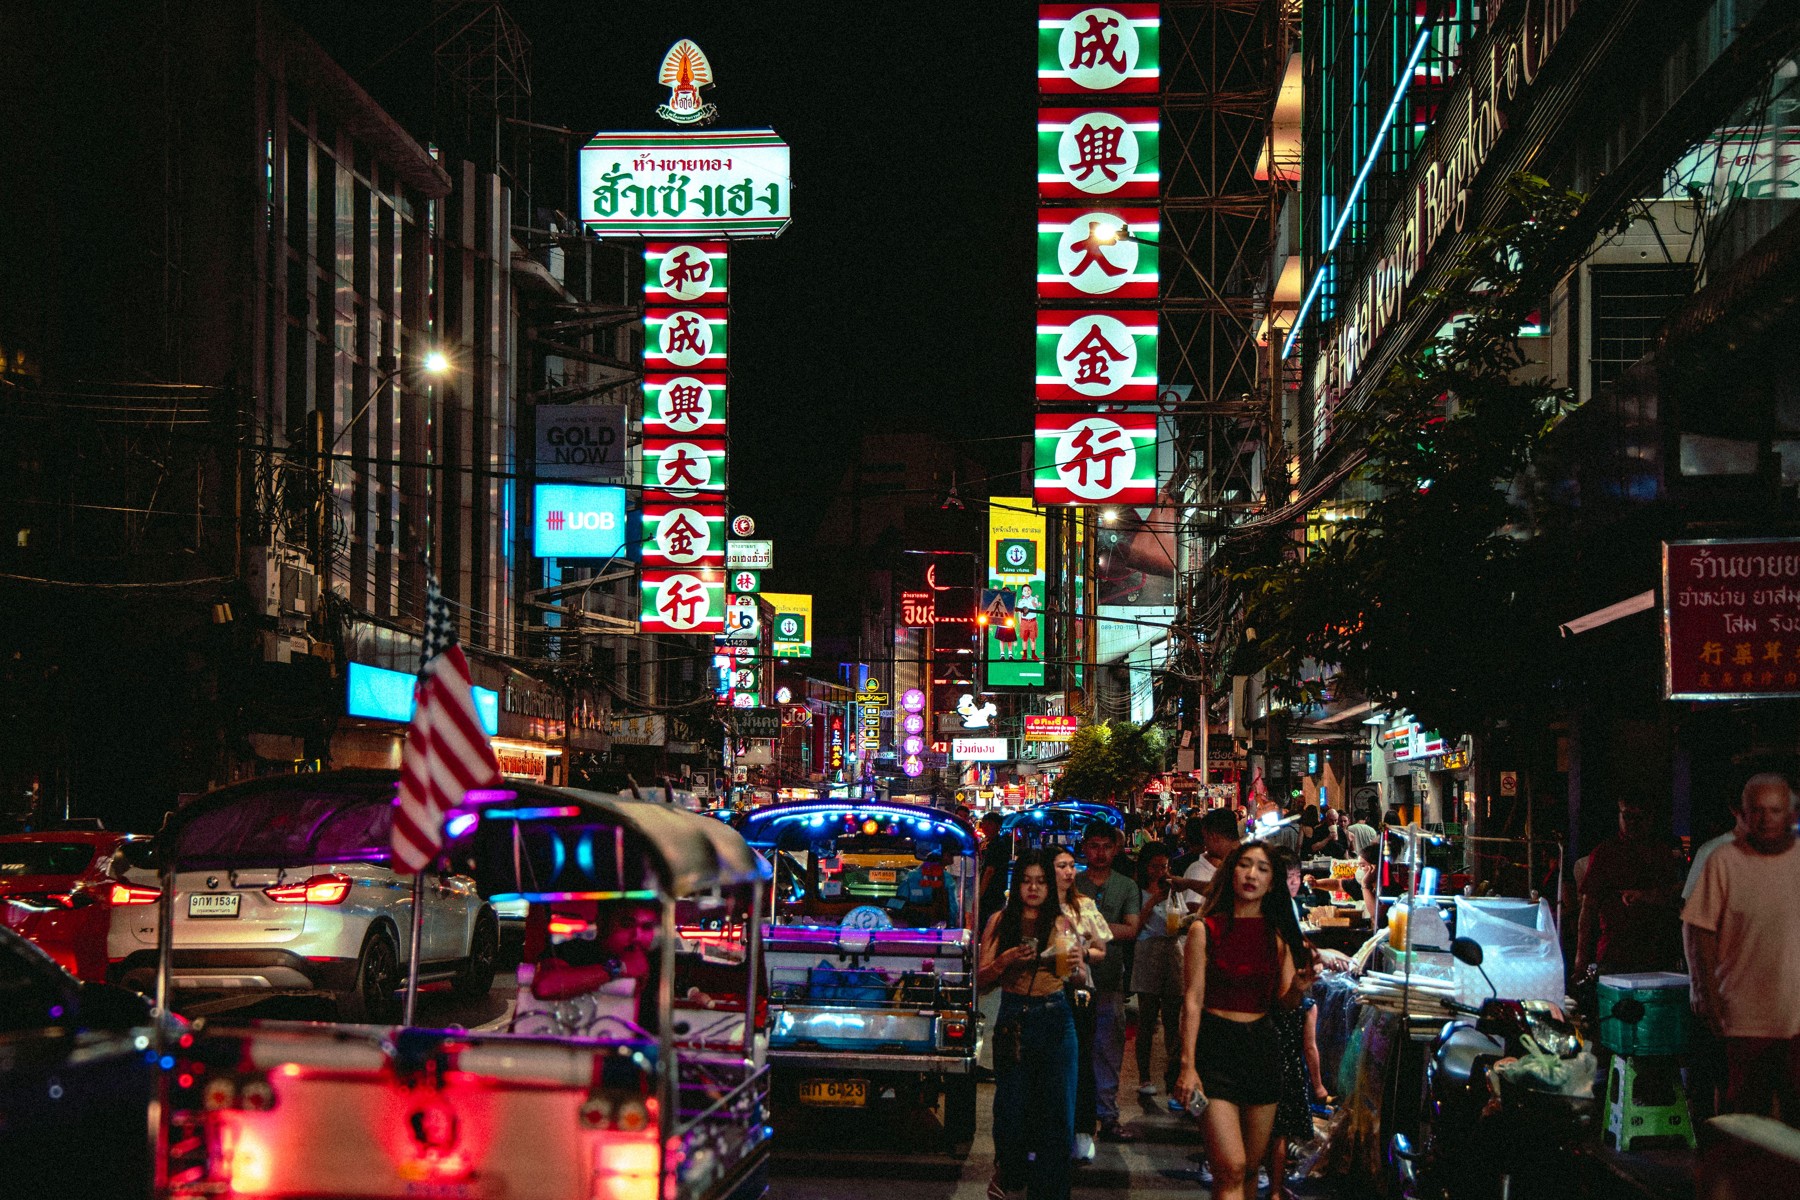
SaveYaowarat has the color, traffic and layered signs that make nighttime street photography exciting. It also has enough going on to turn a photograph into a mess. The answer is not always a wider lens. Find one sign stack, one clean patch of foreground and one moment that gives the frame a clear subject.
Work from a safe pedestrian edge. Look for a place where you can pause without blocking a shop entrance, a food stall or someone trying to get through. Do not step into the road to chase a tuk-tuk. Traffic gives the scene energy, but it does not owe you a composition.
A small camera and one lens can be an advantage here. You can watch the scene instead of changing gear every time a new subject appears. A standard zoom lets you work wide and then tighten the frame without moving into a dangerous spot. A small prime makes you commit to a particular way of seeing.
Photography tip: Decide whether motion is part of the photograph. For ordinary moving pedestrians, begin near 1/250 second and adjust for the movement you see. For a stationary scene, you may be able to work slower. Raise ISO rather than accepting a soft subject just because you want a cleaner-looking file.
Neon can fool a quick glance at the rear screen. Bright signs may clip while faces disappear into the shadows. Take a test frame and look at the important areas, not only the overall exposure. If the signs are the subject, let some shadows stay dark. If a person is the subject, find light that actually reaches them.
Rain can give you reflections, but it is not a guaranteed upgrade. It can also mean slippery pavement, difficult walking and nowhere safe to stop. A dry evening with a clean frame is better than a wet evening spent forcing a photograph from a bad position.
Ask before making close photographs of vendors or using a shop as a set. A busy food stall is someone’s workplace, not a prop. You can make a strong street photograph without pushing a camera into a person’s space.
5. Chao Phraya River: your platform changes the settings
The Chao Phraya gives a Bangkok photograph room to breathe. Buildings, boat traffic and lights across the water can create layers that a street scene cannot. Start with the kind of platform you will use. A stable bank and a moving boat are different photographic problems.
From a moving deck, a long exposure blurs more than water. Your camera, the boat and the scene are moving relative to each other. Raise the shutter speed until the important structures hold, then adjust aperture and ISO. Review a full-size test before assuming the picture is sharp because it looks good on a small screen.
From a stable permitted bank, you have more choices. You can build around reflections, a skyline layer or a boat moving through the frame. A longer lens can pull a distant building forward. A wider lens gives water and sky more weight. Choose the lens according to the relationship you want, not according to a rule that every cityscape needs to be wide.
Photography tip: Keep the horizon honest. River photographs often feel wrong because the camera was tilted while you were watching a boat. Use a level if you have one, and leave enough space to correct a small tilt later without cutting away the subject.
Check the actual route and boarding point before paying for a boat. A river trip, a transport crossing and a private terrace are separate choices. A transport pier is not a place to set up a tripod and wait for the perfect reflection. Keep boarding paths clear and follow staff directions.
Aerial photographs can be useful for understanding the city, but they are not a camera-position instruction or permission to fly a drone. Build your plan around an accessible, lawful position. A good riverside photograph does not require copying a viewpoint you cannot use.
6. Asiatique: give the wheel a second subject
A bright wheel against the night sky is an easy subject to spot. The stronger photograph often includes something that explains where it is: a riverfront layer, a building edge, people or the surrounding lights. That context makes the photograph feel like a place rather than a disconnected circle of color.
Try two shutter approaches. A faster shutter can hold the wheel’s structure. A slower exposure from permitted support can turn movement into color. Compare them instead of deciding that one technique is automatically better. The frame, the light and the speed of the movement decide what works.
Photography tip: Make a second photograph that does not depend on the wheel. Look for riverfront detail, a quieter architectural frame or a pattern of lights. A short sequence with variety tells a better story than a dozen similar pictures of the same bright attraction.
Keep shopping and boarding routes open. Access to the venue, a wheel ride and a boat trip are separate arrangements. Check the current operating information for your visit rather than planning around a photograph’s timestamp. If an area closes or gets too crowded for your setup, change the frame and keep moving.
Put the day together without rushing it
Choose one main subject for each block of time. Temple detail belongs to its own visit. River light needs a position you have already checked. Neon rewards enough patience to see a pattern in the crowd. You can connect those ideas, but do not pack them so tightly that every photograph becomes a hurried stop.
Carry clothing suitable for temple visits, a small kit, water and a return plan. Check weather and current operator notices. Leave space for the conditions you actually find. A sky that stays gray may be better for a detail than a skyline. A crowded passage may lead you to a tighter architectural frame instead of a wide interior.
At the end of the day, choose a small set with different jobs. One photograph establishes Bangkok. One shows scale or architecture. One puts you in the street. One gives you a detail. If every picture looks the same, change your approach on the next outing rather than adding more of the same frame.
Bangkok photography Q&A
What is a good first Bangkok sunset subject?
Wat Arun across the river is a strong place to start because its shape can hold a wide frame. Scout your lawful standing position first. Weather, illumination and access still decide what the evening gives you.
Can I use a tripod everywhere?
No. Public access is not blanket tripod permission. Temple interiors, private spaces, shopping routes and piers have their own rules. Start handheld and check current signs or ask staff before setting up support.
What lens should I bring?
A standard zoom covers much of this plan. A small wide lens can help with architecture and interiors, while a longer lens can simplify skyline layers. Bring lenses you will use, not a bag full of possibilities that slows you down.
Is blue hour always better than daylight?
No. Blue hour can balance city lights and sky, but daylight can be better for mosaic, roof detail and close architecture. Match the light to the subject. Do not force a night recipe onto a room or a detail that needs something else.
Should I lower ISO for the cleanest file?
Only if the shutter still gives you a sharp photograph. A sharp higher-ISO frame is more useful than a soft low-ISO one. Check a test at full size, especially on boats and in dark interiors.
What is in the full Bangkok guide?
The guide covers 11 subjects across 43 pages, with real location photographs, practical access notes, timing advice, shot ideas and linked landmark references. This post covers six subjects and leaves the rest for the fuller planning document.
Recommended travel photography kit
Keep the kit small enough that you want to carry it through the evening. A compact travel camera such as the Ricoh GR IV is an editorial option for street work. If you prefer interchangeable lenses, start with a camera you know and a standard zoom. Add a wider or longer lens only when the photograph calls for it.
Pack spare batteries, a reliable memory card, a lens cloth and simple rain protection. A travel tripod is optional, not a universal requirement. It earns its place only when your chosen locations permit it. Do not buy support equipment expecting it to override a venue’s rules.
A compact street-camera option
Ricoh GR IV: an editorial option for a light street-photography kit, not a hands-on testing claim. Use the camera you know if it already fits your needs.
Compare the Ricoh GR IV on Amazon | Compare the Ricoh GR IV on B&H
Get the Bangkok Photography Guide
If Bangkok is on your calendar, turn these ideas into a plan before you arrive. The full guide gives you 11 subjects and 43 pages of photographs, access notes and shot ideas, so you can spend less of the trip figuring out what comes next and more of it making pictures.
Get the Bangkok Photography Guide – $47 PDF
Researched location advice; access and camera rules can change.
For the foundations behind these starting points, see our shutter-speed guide and aperture guide.
Disclosure: This post contains affiliate links. As an Amazon Associate, we earn from qualifying purchases. Purchases through affiliate links may earn us a commission at no extra cost to you.
Explore Bangkok with a local photographer
Want to be in the photographs for a change? Bangkok Instagram Photoshoot with a Local Photographer. This portrait-focused walk explores locations such as Chinatown and Old Town. The photographer makes your travel portraits; it is not a technical camera workshop. Check the current route before booking.
Tour links are affiliate links. I may earn a commission if you book through them, at no extra cost to you.