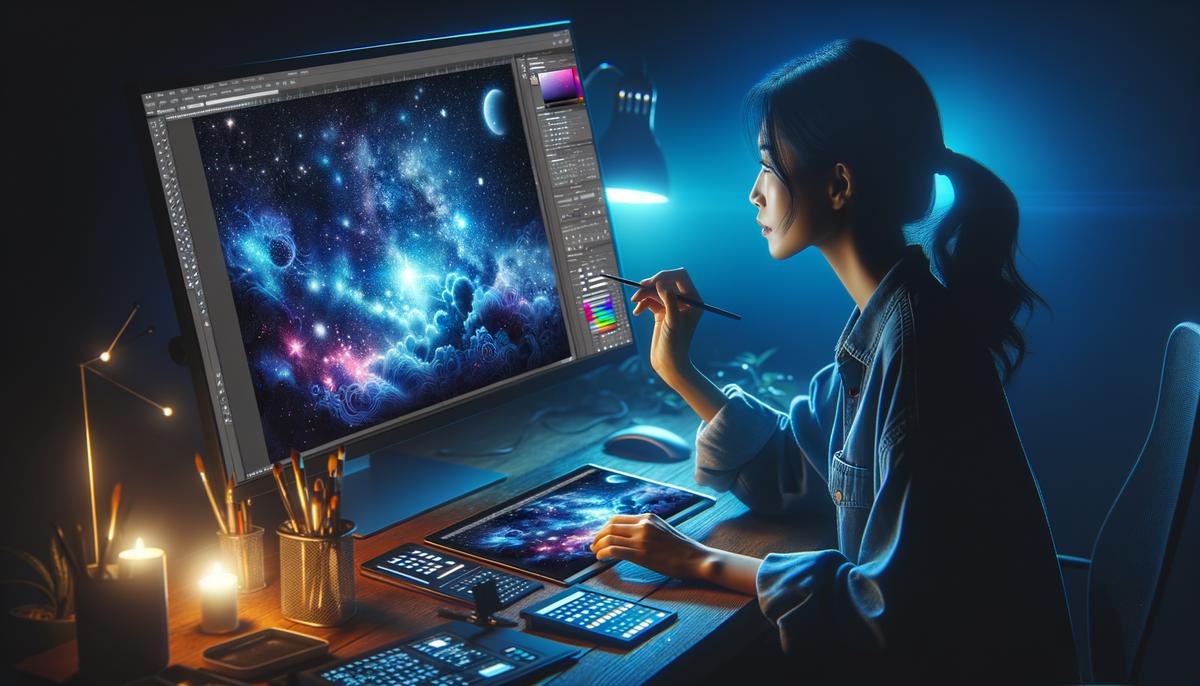
Photoshop offers a vast landscape of tools and features for creative minds. Among these, layers, blending modes, and custom brushes provide a pathway to turn simple images into mesmerizing artworks. This article aims to unlock the secrets of these features, guiding you to enhance your digital art skills. From creating realistic starry nights to adding depth with gradients and noise, get ready to explore the techniques that can elevate your creations.
Understanding Layers and Blending Modes
Creating Complex Visual Effects in Photoshop with Blending Modes and Layers
Photoshop, a powerful tool for digital artists and photographers, allows for intricate visual effects through the use of layers and blending modes. This functionality can transform simple images into captivating pieces of art. Here’s how blending modes and layers interact to produce complex visual effects.
Understanding Layers in Photoshop
Imagine layers as transparent sheets stacked on top of each other, where each sheet contains different elements of an image. You can modify a single layer without affecting others, offering flexible control over how you construct your image. To visualize this, consider a digital painting with separate layers for the sky, the main subject, and the foreground. By manipulating these layers independently, adjustments or additions can be made without disrupting the whole image composition.
Exploring Blending Modes
Blending modes are algorithms that define how the pixels in one layer interact with another. Think of them as the rules for how colors mix at the intersection of two layers. For example, the “Multiply” blending mode simulates drawing with markers on paper, darkening colors as they overlap, ideal for creating shadows or deepening tones. Conversely, “Screen” mode lightens the base color to reflect a lighter result, useful for highlights or creating a glowing effect.
Combining Layers and Blending Modes for Visual Effects
To create a complex visual effect, you should:
- Layer Organization: Begin by organizing your layers in a logical order. The bottom layer typically serves as the background, with successive layers adding details and elements on top.
- Select a Blending Mode: Choose an appropriate blending mode based on the effect you wish to achieve. For affecting the entire image mood, adjust the blending mode of a top layer that might contain a texture or a color overlay.
- Adjust Opacity: Sometimes, the chosen blending mode might produce a strong effect. To control this, adjust the layer’s opacity. Lowering the opacity will reduce the impact of the blending mode, subtly integrating the effect.
- Experiment with Multiple Layers and Modes: For more complex effects, use multiple layers with different blending modes. For instance, combining “Multiply” on a layer with a texture pattern and “Screen” on another with a light flare effect can produce a dynamic and rich visual outcome.
- Masking for Precision: Use layer masks to apply effects to specific parts of your image. Masks allow you to hide or reveal portions of the layer, offering meticulous control over the blending modes’ impact.
Conclusion
By mastering layers and blending modes in Photoshop, you unlock a universe of creativity. This synergy allows for the adjustment of images layer by layer, with blending modes serving as the essential tools for merging these layers into a coherent, visually stunning whole. Whether you’re deepening shadows, adding light, or creating a complex composition, the combination of these features provides the flexibility and power necessary for bringing your digital art visions to life. Remember, the key to mastering Photoshop lies in experimentation and practice, so don’t hesitate to explore different combinations to discover new and exciting visual possibilities.
 Save
SaveCreating Custom Star Brushes
Creating and Utilizing Custom Brushes for Realistic Stars in Photoshop
Photoshop offers an immense playground for digital artists and photographers alike. Among its plethora of features, custom brushes stand out as a powerful tool to add unique elements to your digital canvas. Today, we’ll delve into how one can create and utilize custom brushes to simulate realistic stars, enhancing the celestial feel of your artwork.
Step 1: Creating Your Custom Star Brush
- Open Photoshop and create a new document. For star brushes, a 500px by 500px canvas with a white background works well.
- Select the ‘Brush Tool’ from the tool panel or press ‘B’ on your keyboard.
- Go to ‘Window’ > ‘Brush Settings’ to bring up the brush options.
- Choose a basic, round brush and begin drawing a simple star shape on your canvas. You can also use the ‘Pen Tool’ (P) to create a more precise shape.
- Once satisfied with your star shape, go to ‘Edit’ > ‘Define Brush Preset.’ Name your new star brush and click ‘OK.’ Your custom star brush is now created.
Step 2: Customizing Brush Settings for Realism
- With your new star brush selected, head back to ‘Window’ > ‘Brush Settings.’
- Here, you can play with various settings to simulate realism. Adjust the ‘Shape Dynamics’ to add size variance, making some stars appear closer and others farther away.
- Tweak ‘Scattering’ to spread stars across your canvas with varying distances, resembling a real starry sky.
- Modify ‘Transfer’ to allow opacity variation, giving a sense of depth and luminosity among the stars.
- Experiment with ‘Color Dynamics’ to introduce a slight color variation, mimicking the various hues stars emit.
Step 3: Painting with Your Star Brush
- Select a dark-colored background to simulate the night sky. You can create a new layer for this or use an existing image.
- Choose your custom star brush, and adjust the brush size according to your preference.
- Begin painting on the canvas. Use gentle, sweeping motions to create a natural-looking distribution of stars.
- Consider using different layers for stars of varying brightness and distance. This layering technique can enhance the 3D effect of your starry sky.
Step 4: Finishing Touches
- To add a glow to your stars, duplicate the star layer, then go to ‘Filter’ > ‘Blur’ > ‘Gaussian Blur.’
- Adjust the radius to achieve a soft glow around your stars. Lower the opacity of this layer if the effect is too strong.
- You can also add a gradient overlay to your background layer to simulate the gradual transition of night sky colors.
By following these steps, you can craft a realistic star-filled sky, adding a touch of magic to your digital creations. Remember, the key to mastering Photoshop lies in experimenting with its tools and features. Don’t shy away from trying different settings in the Brush Panel to see how it affects your starry sky. The beauty of custom brushes, especially for elements like stars, is that they open a world of creativity, allowing you to depict the vastness and wonder of the universe right within your digital workspace.
 Save
SavePhoto by linaverovaya on Unsplash
Applying Gradient and Noise for the Night Sky
Creating a Realistic Night Sky Background: The Role of Gradient and Noise Functions
A mesmerizing night sky is not just about the stars; it’s the depth and the aura that lie behind them, which breathes life into the scene. Achieving such realism digitally requires more than just a sprinkle of dots across a black canvas. Enter the dynamic duo of Photoshop’s gradient and noise functions. These features, when wielded with intent, transform a flat, monotonous background into a canvas brimming with the subtle complexities of the night. Let’s dive into how you can utilize these functions to craft a night sky that speaks volumes.
Step 1: Setting the Stage with Gradient
Before the stars take their stand, the night itself must be painted. The gradient tool lays the foundation of our celestial dome. It allows us to create a seamless transition from the deep, velvety blues of twilight to the rich, enveloping darkness of the midnight hour. Here’s how you can create this effect:
- Select the Gradient Tool from the toolbar.
- Choose a radial gradient from the options bar. Why radial? Because it naturally mimics the light diffusion in the sky, offering a more cohesive blend from one hue to another.
- On your gradient editor, select a dark blue color for one end and pitch black for the other. This will be our starting gradient, the backbone of our night sky.
- Click and drag from the center of your canvas outward. Adjust the scale to achieve a smooth transition that captures the depth of the night sky.
Step 2: Sprinkling Stardust with Noise
With the gradient set, it’s time to introduce the first layer of stars—think of it as creating a base texture. This is where the noise function shines, quite literally.
- Create a new layer above your gradient layer; let’s name it ‘Stardust’.
- Fill this layer with black using the Paint Bucket Tool. Black acts as our canvas here, as the noise will generate white specks resembling distant stars.
- Head over to Filter > Noise > Add Noise. A dialog box pops up.
- Adjust the amount to somewhere between 15-25%. This range usually provides a believable scatter of stars without overcrowding the sky. Make sure to tick ‘Uniform’ and ‘Monochromatic’ to ensure the noise remains subtle and star-like.
- Once applied, you might notice the effect is too pronounced. To refine it, navigate to Image > Adjustments > Levels. Here, you can drag the input levels to diminish the visibility of noise, leaving only the most convincing stars visible.
Final Touches: Blending Gradient and Noise
Now, with both the gradient and noise layers set, the magic happens in how we blend them together. Changing the blending mode of the noise layer to something like ‘Screen’ or ‘Lighten’ allows the stars to blend seamlessly with the gradient backdrop, ensuring they pop against the darker hues while melding softly into the lighter portions of the sky.
To further enhance the realism, consider duplicating the noise layer for more star density in some areas, adjusting the opacity to vary the intensity. The gradient layer might also be revisited; tweaking its scale and color to better suit the evolving night sky you’re crafting.
Through these steps, gradient and noise functions collaborate to produce a night sky that’s rich with depth and detail. It’s a testament to how subtle shifts and layers can culminate in a breathtaking digital nightscape, mirroring the quiet complexity of a real star-filled sky. Remember, the essence of realism in digital art lies in the nuances, and mastering these functions puts you one step closer to capturing the enigmatic beauty of the night.
 Save
SaveThe potential of Photoshop in transforming digital art is unparalleled. By mastering the use of layers, blending modes, and custom brushes, artists can breathe life into their creations, making them stand apart. Remember, the key lies in experimenting with these tools to unveil new possibilities. As you continue to explore and apply these techniques, your art will not only grow in complexity but also in beauty, capturing the essence of your creative vision.


