Photoshop offers a diverse palette of tools that opens up a world of creative possibilities, especially when it comes to crafting the perfect skies. Whether you’re aiming to create realistic clouds or something more stylized, understanding the intricacies of brush settings is key. This guide walks you through the crucial steps and settings to create your own custom cloud brushes, ensuring your digital skies are as detailed and lifelike as possible.
Understanding Photoshop Brush Settings
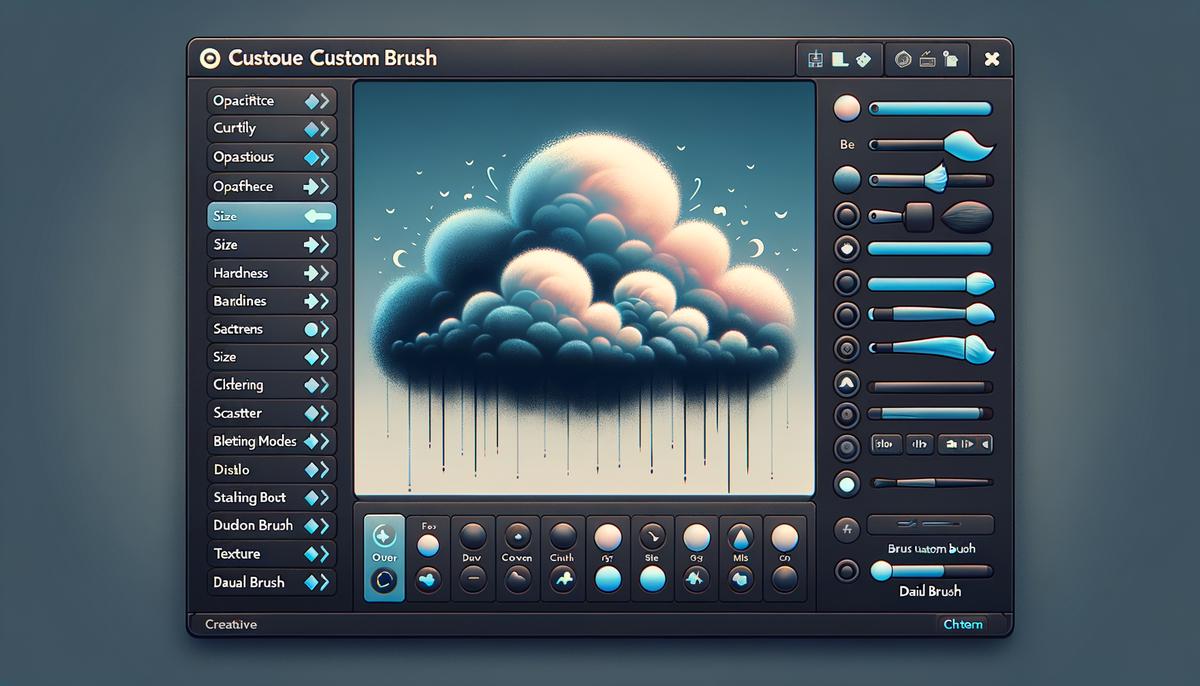
Creating Custom Cloud Brushes in Photoshop: Understanding Brush Settings
Photoshop is a diverse tool allowing creative freedom across various projects, including designing realistic or stylized clouds through custom brushes. To craft your custom cloud brush effectively, knowing how the brush settings affect its behavior and appearance is crucial. These guidelines explore the significant brush settings, ensuring your clouds look exactly as you envision.
Step 1: Load Basic Brushes and Define Shape
Begin by creating a new brush. Access Photoshop’s Brush Presets (Window > Brush Presets) and select a round, soft brush as your starting point. The primary shape of your brush will significantly influence the final appearance of your clouds. Under Brush Tip Shape, adjust the Spacing to prevent the brush strokes from overlapping too closely, generating a more natural cloud texture.
Step 2: Customize Shape Dynamics
Navigate to Shape Dynamics. Here, you can control the Size Jitter and Angle Jitter. The Size Jitter varies the size of your brush strokes, while the Angle Jitter changes their direction. For clouds, setting a higher Size Jitter is beneficial because it adds a variation that mimics the irregular, fluffy outlines of natural clouds. Adjust these parameters while keeping an eye on the Brush Preview window to monitor the changes.
Step 3: Modify Scattering
Scattering disperses the brush marks, making them appear less uniform and more like the random, airy structure of clouds. Adjust the Scatter slider to spread your brush strokes out. Incorporate Count and Count Jitter to increase the number of brush marks and their distribution variance. This setting adds depth and density to your cloud formations, making them appear more voluminous.
Step 4: Tweak the Transfer Settings
Transfer, or what was known as ‘Other Dynamics’ in earlier versions of Photoshop, deals with the brush’s opacity and flow. Adjusting the Opacity Jitter and Flow Jitter makes certain parts of your brush strokes more translucent, providing a sense of lightness and fluffiness pertinent to cloud structures. This feature is crucial for achieving the soft, ethereal quality of clouds.
Step: Adjust Color Dynamics
Color Dynamics allow your brush to blend multiple colors naturally, introducing gradients and subtle color shifts within your cloud. Adjusting the Foreground/Background Jitter will enable the brush to switch between your foreground and background colors. This technique is especially useful when painting sunrise or sunset clouds, where color variation is vital.
Final Touch: Dual Brush
The Dual Brush setting combines two different brush tips into one stroke, offering an intricate cloud texture. Experiment with combining your newly created cloud brush with another, such as a spatter or textured brush, to add detail and complexity to your cloud shapes. Adjust the settings in the Dual Brush tab to blend the brushes effectively.
Remember, creating the perfect custom cloud brush in Photoshop is about experimentation. Utilize these settings as a starting point and modify them according to the specific look you’re aiming for. Each project may require adjustments, so don’t hesitate to explore and tweak settings as you go. This exploration will not only yield a realistic cloud brush but also enhance your overall understanding and proficiency with Photoshop’s brush engine.
 Save
SaveDesigning the Cloud Shape
After establishing the foundational settings for your cloud brush, the next critical steps involve refining its responsiveness and final touches to ensure it captures the ethereal quality of clouds. These steps are pivotal in transforming a basic brush into a tool capable of rendering the subtle nuances of cloudscapes.
1. Incorporate Pen Pressure Sensitivity
- For artists using a graphics tablet, pen pressure sensitivity is a gamechanger. Navigate to your brush settings and find the option for ‘Shape Dynamics’ if not already adjusted. Here, set the ‘Size Jitter’ control to be affected by pen pressure. This adjustment means the harder you press, the larger and more opaque your brush strokes become, mimicking the natural accumulation of cloud masses in the sky.
2. Utilize Texture Setting for Added Realism
- Clouds are not uniform; they possess texture. To replicate this, delve into the ‘Texture’ menu within your brush settings. Select a texture that closely resembles a natural, organic pattern—perhaps a noise or paper grain texture. Adjusting the scale and depth of the texture enables the cloud brush to produce variations in density, offering a more authentic representation of cloud formations.
3. Experiment with Brush Pose Settings
- For those striving for dynamic cloudscapes that stretch across the canvas, the Brush Pose settings offer control over the angle and rotation of your brush stroke relative to your pen’s movement. By experimenting with these settings, you can achieve brush strokes that naturally fan out or swirl, reflecting the chaotic yet harmonious nature of clouds.
4. Adjust Brush Projection for Depth
- When painting clouds, depth is crucial for a convincing depiction. The ‘Brush Projection’ setting, found under ‘Shape Dynamics,’ allows for altering the brush tip’s projection, creating an illusion of depth as you paint. This can be particularly effective for adding voluminous shapes to cumulus clouds or suggesting the misty, wispy quality of cirrus clouds.
5. Blend Modes for Atmospheric Effect
- Upon completing your cloud forms, employ blend modes to integrate them seamlessly into your sky. By creating a new layer for your clouds and experimenting with blend modes such as ‘Screen,’ ‘Soft Light,’ or ‘Overlay,’ you can achieve a natural interaction between the clouds and the varying tones of your skies. This step is where clouds truly become part of your landscape, reflecting the colors of the sunrise, sunset, or the clear blue of a sunny day.
6. Refinement with Eraser Tool
- Finally, clouds are as much about the spaces and openings as they are about the dense areas. Utilizing a soft eraser with low opacity, gently erase portions of your cloud forms. This not only adds to their realism by suggesting layers and density variations but also integrates them more naturally into the background, ensuring there are areas where the sky peeks through.
By following these additional steps and refining your cloud brush, you’ll have a powerful tool at your disposal, capable of producing stunning, lifelike cloud formations that add depth and atmosphere to your digital skies. Remember, the beauty of cloud painting lies in its variability—no two clouds are the same. Therefore, don’t shy away from experimenting with different settings and techniques to find what best suits your artistic vision.
 Save
SaveTesting and Adjusting the Custom Brush
Testing and Refining Your Custom Cloud Brush in Photoshop
After diligently creating your custom cloud brush in Photoshop, incorporating a variety of settings for shape dynamics, color blending, and texture for a lifelike appearance, the next crucial phase is testing and refining your brush to perfection. This phase ensures your cloud brush not only looks plausible but integrates seamlessly into various projects with versatility and realism. Here’s how to effectively test and refine your custom cloud brush:
- Create Test Layers: Open a new document in Photoshop. It’s beneficial to test your brush against different backgrounds. Create several layers with varying shades—from light blue for a bright sky to darker hues for stormy scenes. Testing against multiple backgrounds ensures your cloud brush adapts well to different lighting conditions and color schemes.
- Apply Initial Strokes: Select your custom cloud brush and begin applying strokes on different layers. Observe how the brush interacts with the background colors. Pay attention to edges, texture, and color transitions. Initial strokes offer a firsthand look at the brush’s immediate performance.
- Adjust Brush Size and Opacity: Experiment with varying the brush size and opacity. Larger brush sizes are suitable for foreground clouds, while smaller sizes can mimic distant clouds. Adjusting opacity helps in achieving everything from dense to wispy clouds. These adjustments are crucial for adding depth and dimensionality to cloud formations.
- Dynamic Brush Adjustments: Go back to your brush settings if needed. Depending on your initial test results, you might find that further tweaks are necessary. Perhaps the scatter setting needs adjusting for a more dispersed look, or maybe the transfer settings require fine-tuning to achieve the desired opacity levels. Dynamic adjustments based on testing feedback are essential.
- Layering Techniques: Create depth by layering cloud strokes. Use lighter opacities for distant clouds and increase opacity for clouds you intend to appear closer. This layering technique, coupled with size variation, contributes to a more dynamic and realistic sky. Evaluate how well your brush facilitates this layering process.
- Integration with Other Elements: Import or create other landscape elements in your testing document—such as mountains, trees, or buildings—to see how your clouds integrate with them. This is a critical test to assess the versatility of your brush in actual projects. The goal is for your clouds to complement other elements naturally, without seeming out of place.
- Feedback and Revisions: If possible, solicit feedback from colleagues or friends. Fresh eyes can provide insights you might overlook. Use this feedback to make any necessary revisions. This step is an iterative process; refining your brush might require several rounds of adjustments based on feedback and testing outcomes.
- Final Application Test: Once you’re satisfied with the adjustments, it’s crucial to conduct a final application test. Create a scene intending to use every feature of your cloud brush to its full potential. This final test should mimic a real project to assess how well your brush performs under project conditions.
- Save and Document Settings: After achieving the desired results, ensure you save your refined brush. It’s also wise to document the settings and adjustments made. This documentation will be invaluable for future projects or if you intend to share your brush with the Photoshop community.
In conclusion, effectively testing and refining your custom cloud brush in Photoshop is an iterative process that requires patience, observation, and a willingness to make adjustments based on feedback and testing results. Through meticulous testing and refinement, you can ensure that your cloud brush is versatile, realistic, and ready to elevate the quality of your digital artwork.
 Save
SaveMastering the art of creating custom cloud brushes in Photoshop means embracing a blend of technical know-how and creative experimentation. By following the steps outlined, adjusting settings to fit your vision, and refining your brushes through testing, you’ll unlock new levels of realism and depth in your digital artworks. The perfect cloud is within reach, ready to bring life to your skies and add a touch of realism to your projects.


