Kīlauea is one of the most active volcanoes on Earth, and the national park built around it is one of the few places on the planet where you can photograph a lava fountain, a walk-through lava tube, a petroglyph field and a cloud-forest bird sanctuary in a single day. This field guide covers 5 GPS-tagged photography spots, the light windows that matter at each one, camera settings that work at an active volcano, and the logistics photographers actually need. We researched current NPS maps, trail reports, closure notices and photographer field notes to pick the five spots worth building a shoot day around right now – no recycled decade-old advice. Whether you have one day or a week on the Big Island, use this guide to come home with portfolio frames.
Why Hawaiʻi Volcanoes rewards photographers
Most national parks give you a landscape that changes with the seasons. Hawaiʻi Volcanoes gives you a landscape that changes with the week. Eruption episodes start and pause inside Halemaʻumaʻu, new flows re-draw the map, and the coastline itself is being rebuilt by the ocean – the 90-foot Hōlei Sea Arch, a park icon for generations, collapsed into the Pacific in late September 2026. For a photographer that volatility is the point: this is the rare park where the headline shot might not exist next year, and where being there during an active episode puts images in your portfolio that most visitors only see on the news.
The park is also unusually efficient to shoot. The summit overlooks, the crater-crossing hike and the rainforest lava tube sit within a few miles of each other near the entrance, and the Chain of Craters Road turns the descent to the coast into a 19-mile photo drive. One entrance, one main road system, and subjects that range from macro details in volcanic glass to Milky Way panoramas over a glowing caldera.
One honest caveat before the list: conditions here change daily. Check the NPS alerts page and the USGS Kīlauea update before every visit, and ask rangers about current viewing options during eruptive episodes.
5 photography spots with GPS coordinates
Each spot below includes the exact arrival pin (parking or trailhead), the focal range that earns its keep, and the one-line reason to go. Full breakdowns follow in the detailed guide.
1. Halemaʻumaʻu – Kīlauea Overlook
GPS: 19.423601,-155.284348 · Focal Length: 24-200mm
The crater rim view of lava fountaining when an eruption episode is running; civil twilight is the money window.
2. Uēkahuna
GPS: 19.420033,-155.288893 · Focal Length: 16-35mm
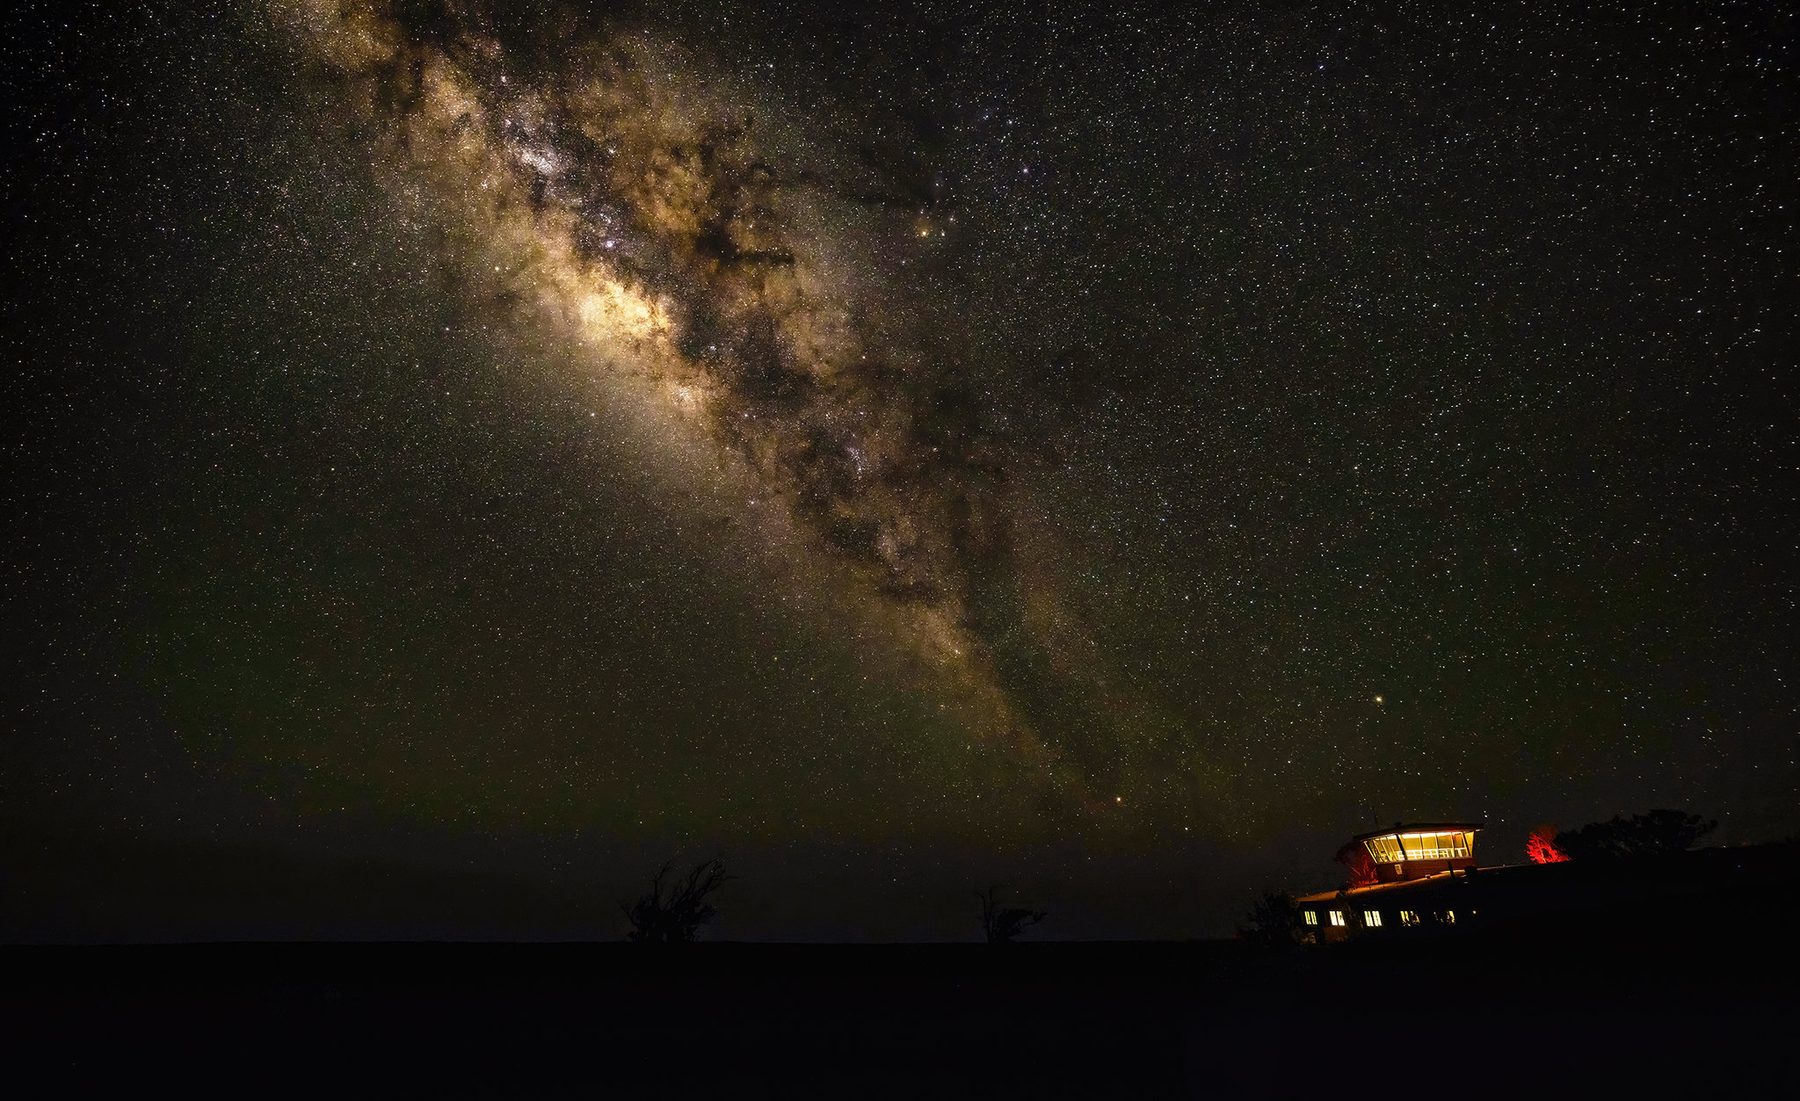
The high ground over the caldera – wide establishing shots by day, Milky Way over the glow by night.
3. Kīlauea Iki
GPS: 19.416455,-155.242927 · Focal Length: 16-70mm
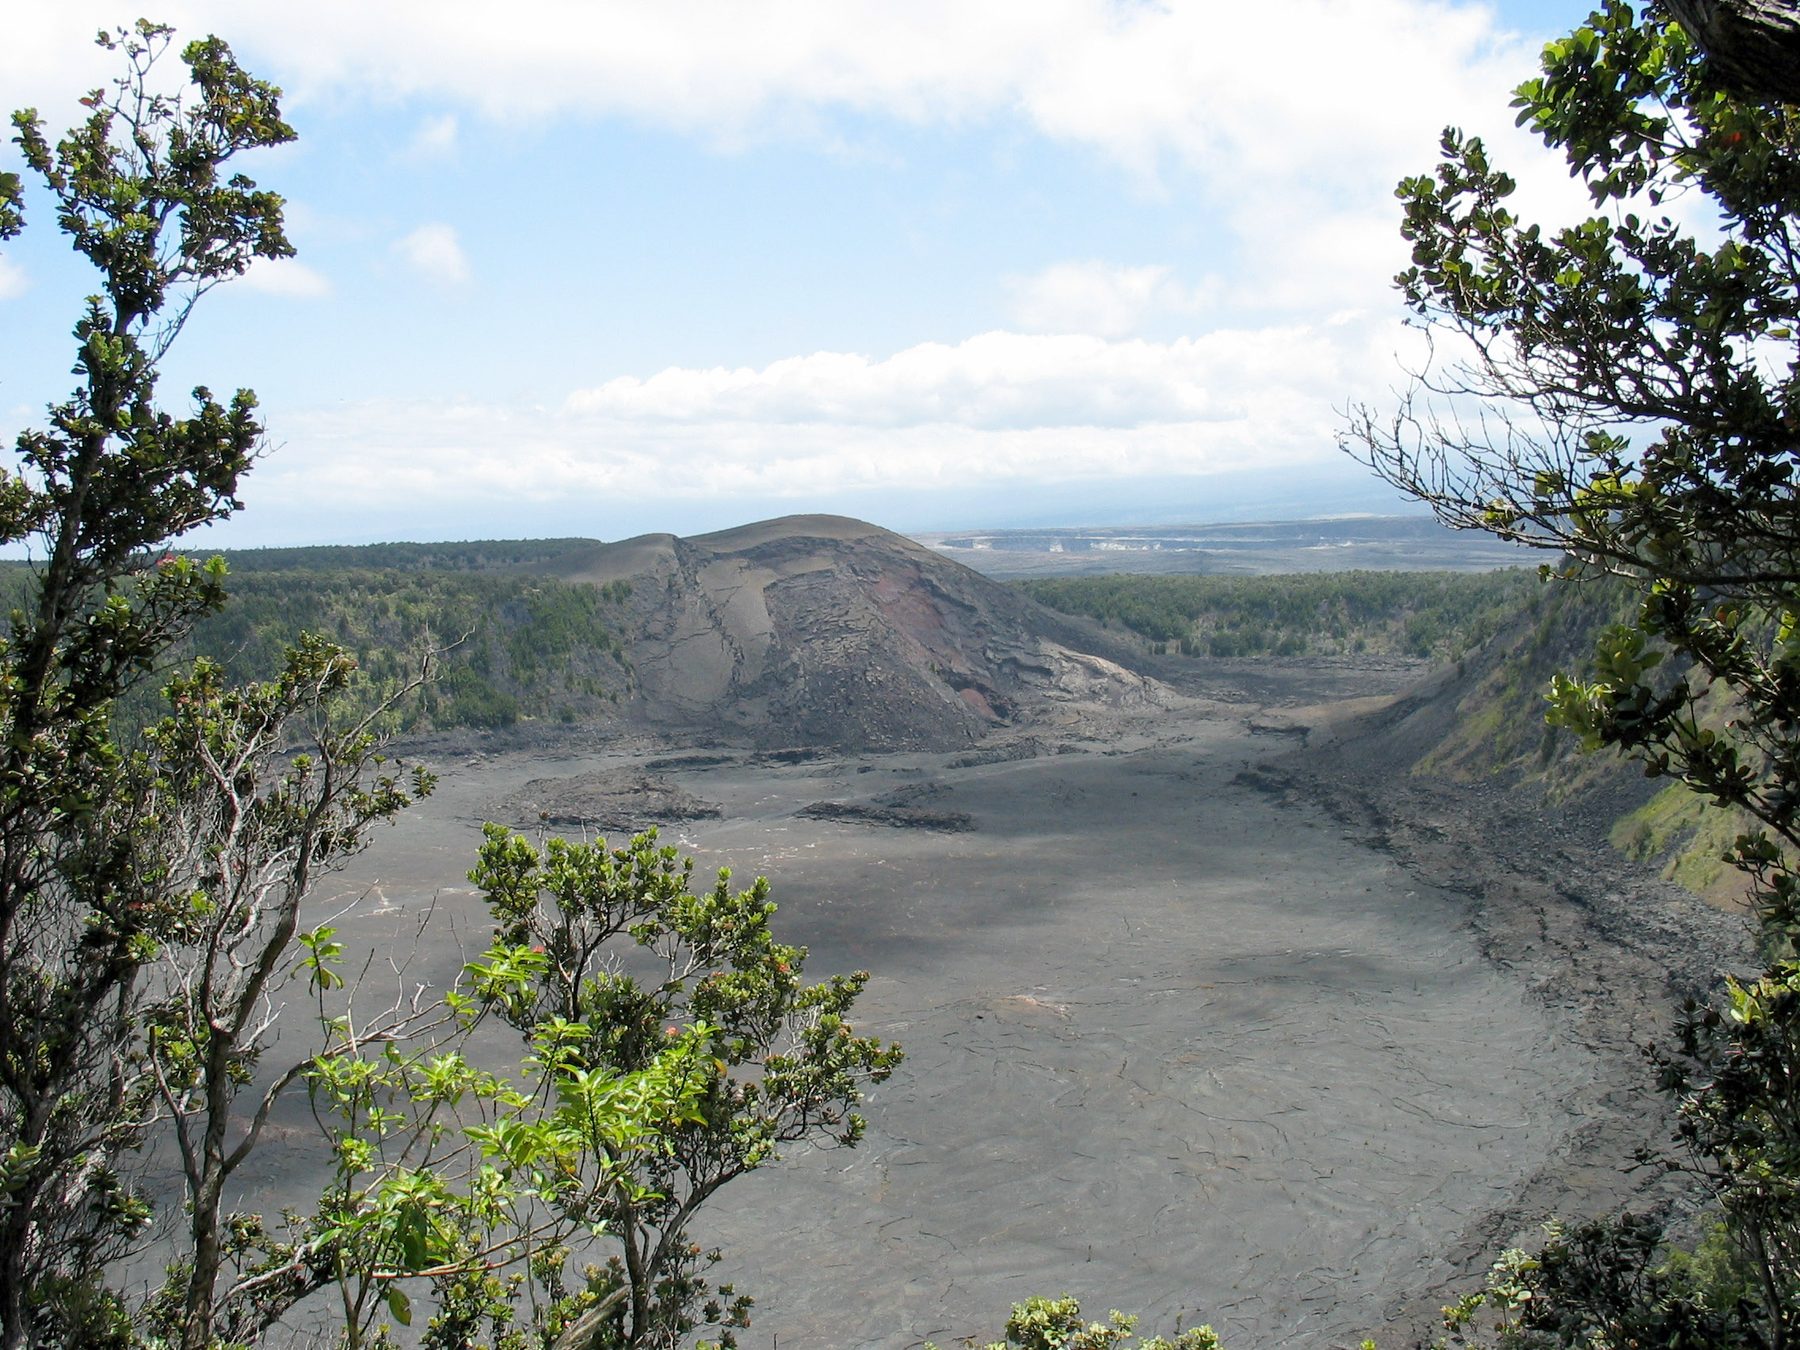
A mile-wide solidified lava lake you can shoot from the rim, then walk across on the crater-floor trail.
4. Nāhuku – Thurston Lava Tube
GPS: 19.413795,-155.238628 · Focal Length: 16-35mm, fast prime
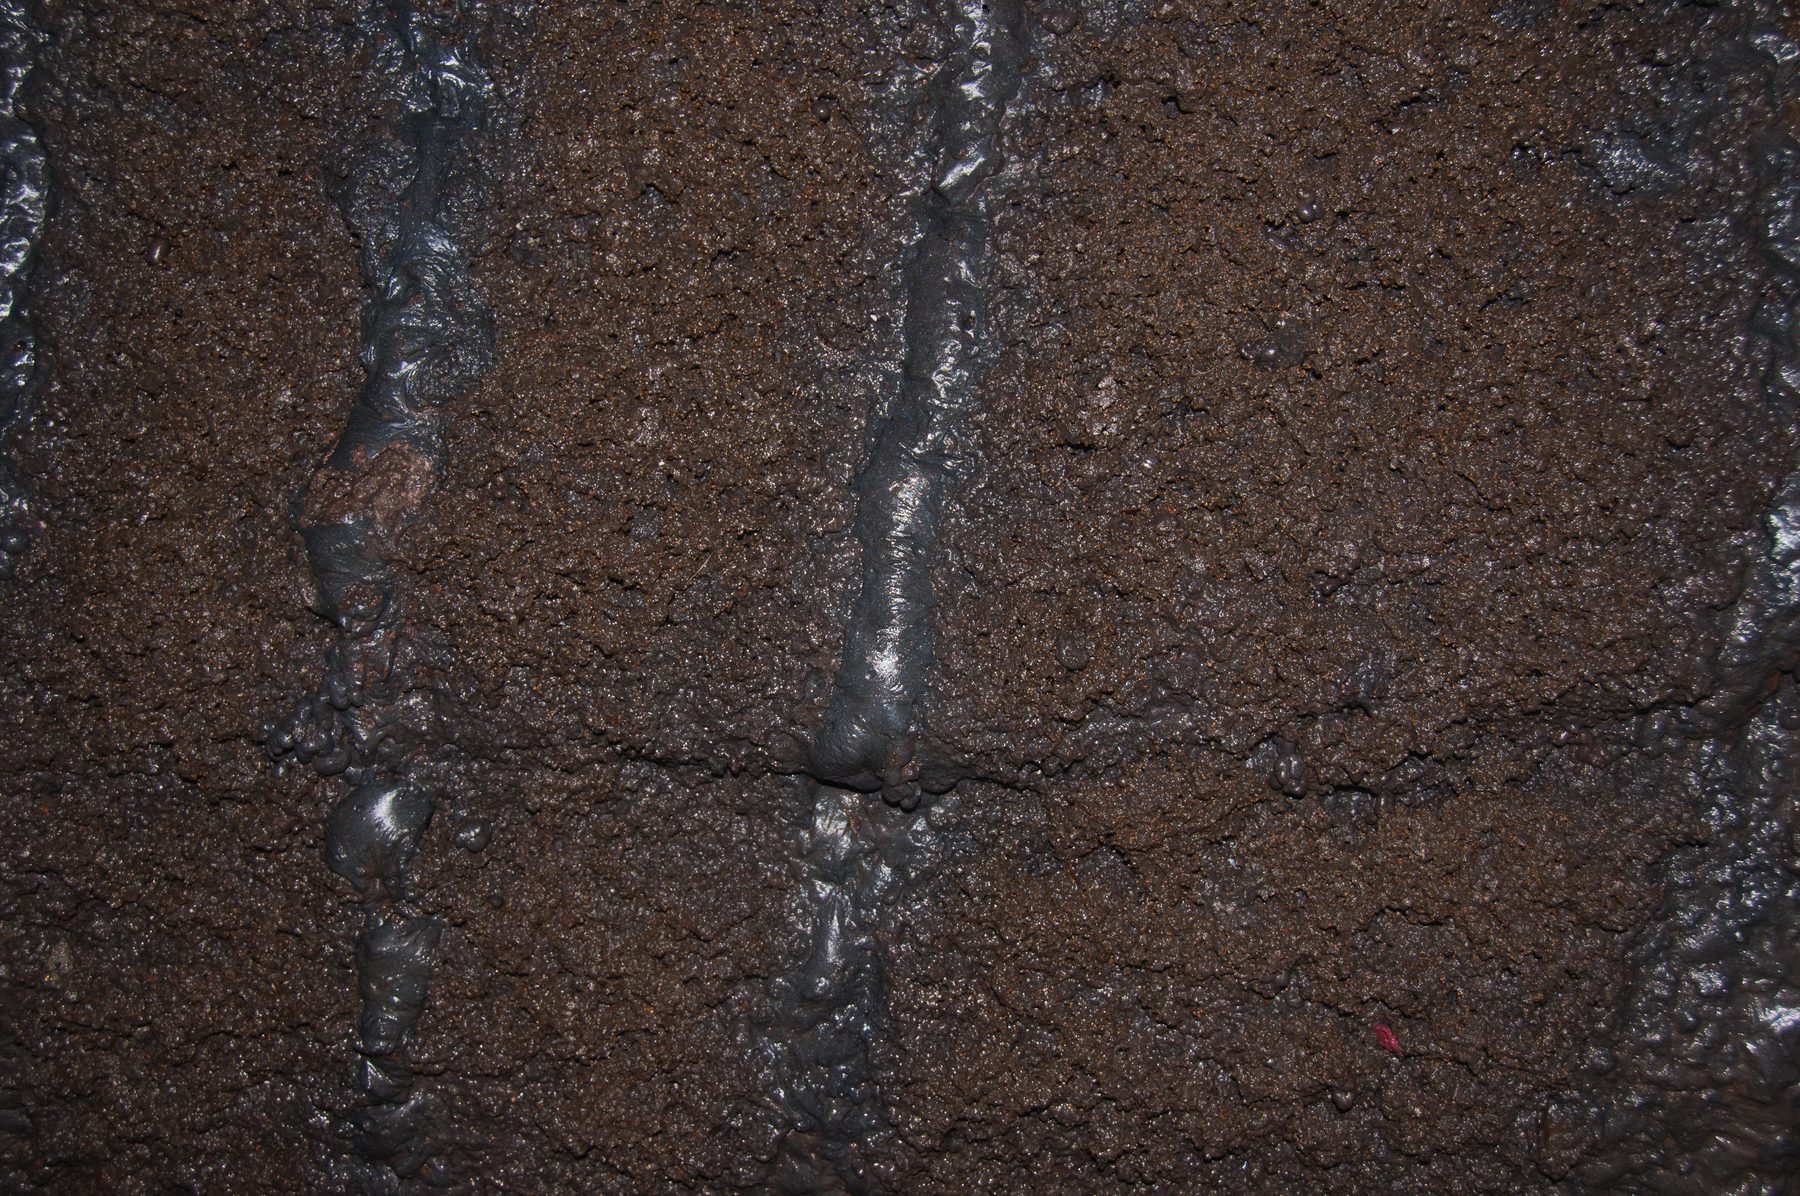
A 500-year-old lava tube in dripping rainforest; soft forest light at the entrance, lit interior inside.
5. Chain of Craters Road – Hōlei Coast
GPS: 19.327393,-155.191857 · Focal Length: 24-200mm
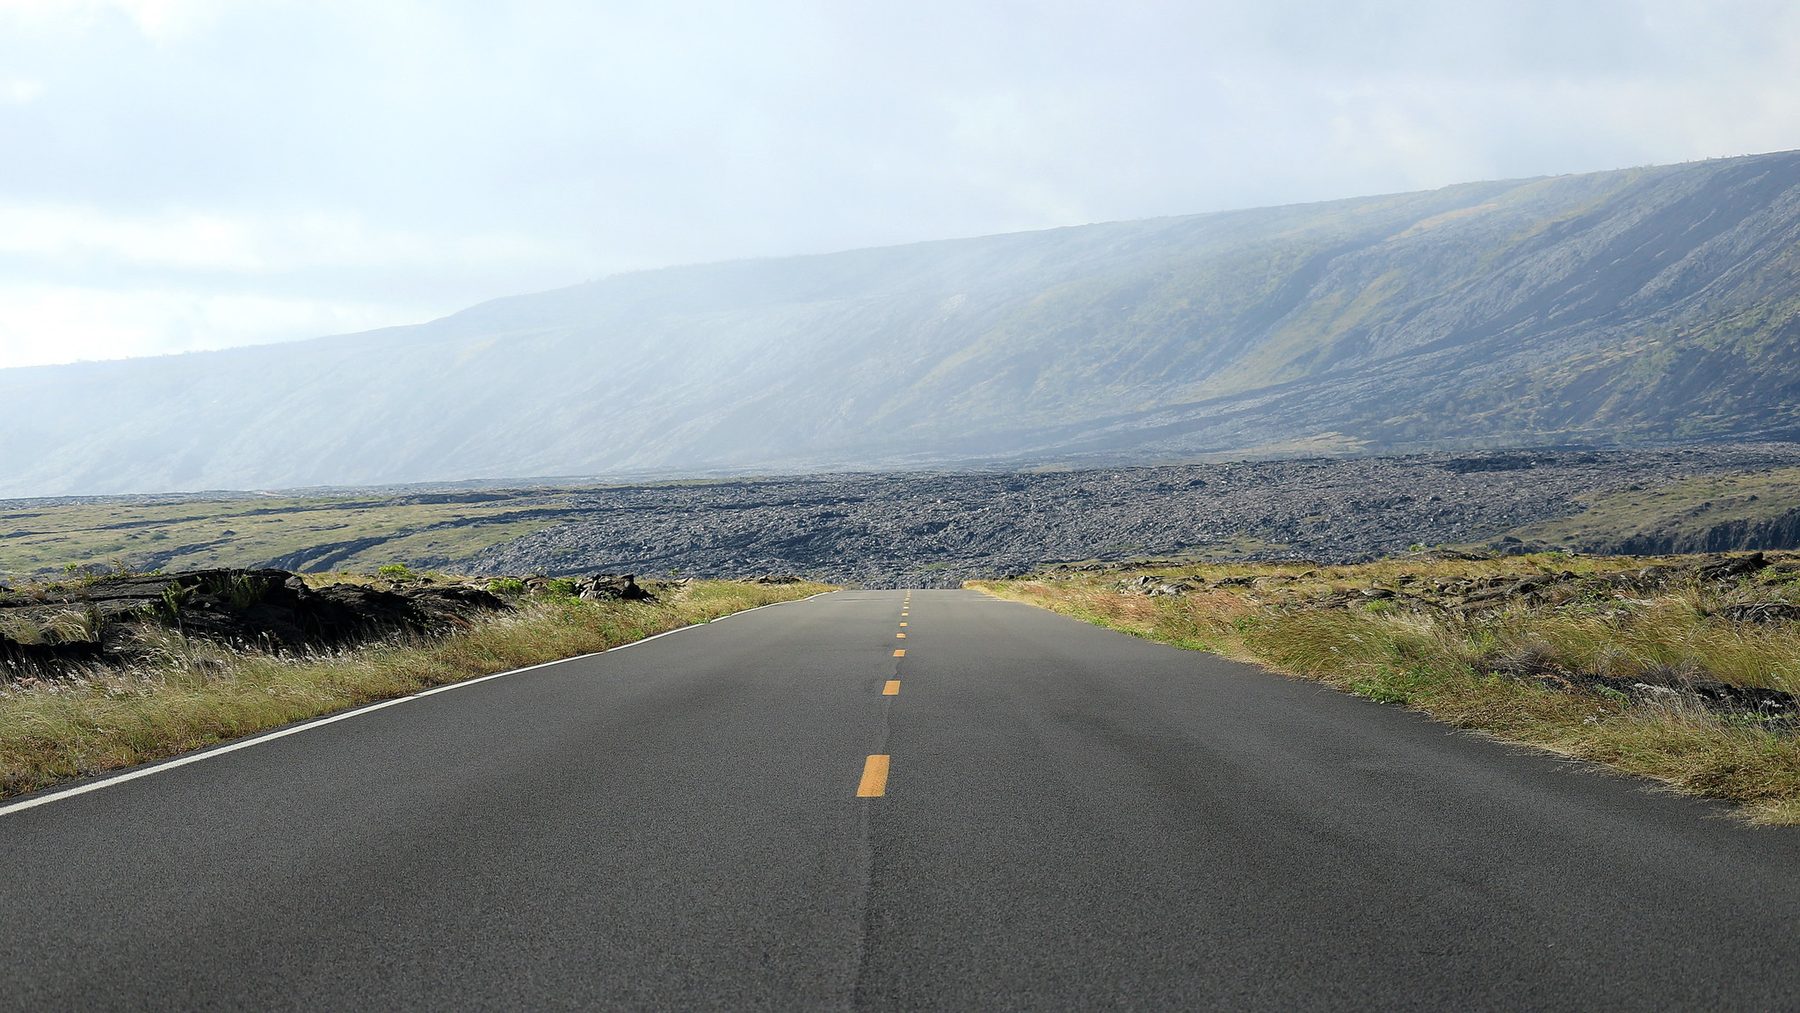
Nineteen miles of black ribbon over fresh flows to the sea cliffs where the Hōlei Sea Arch stood until September 2026.
Detailed spot guide for Hawaiʻi Volcanoes National Park
1. Halemaʻumaʻu – Kīlauea Overlook
 Save
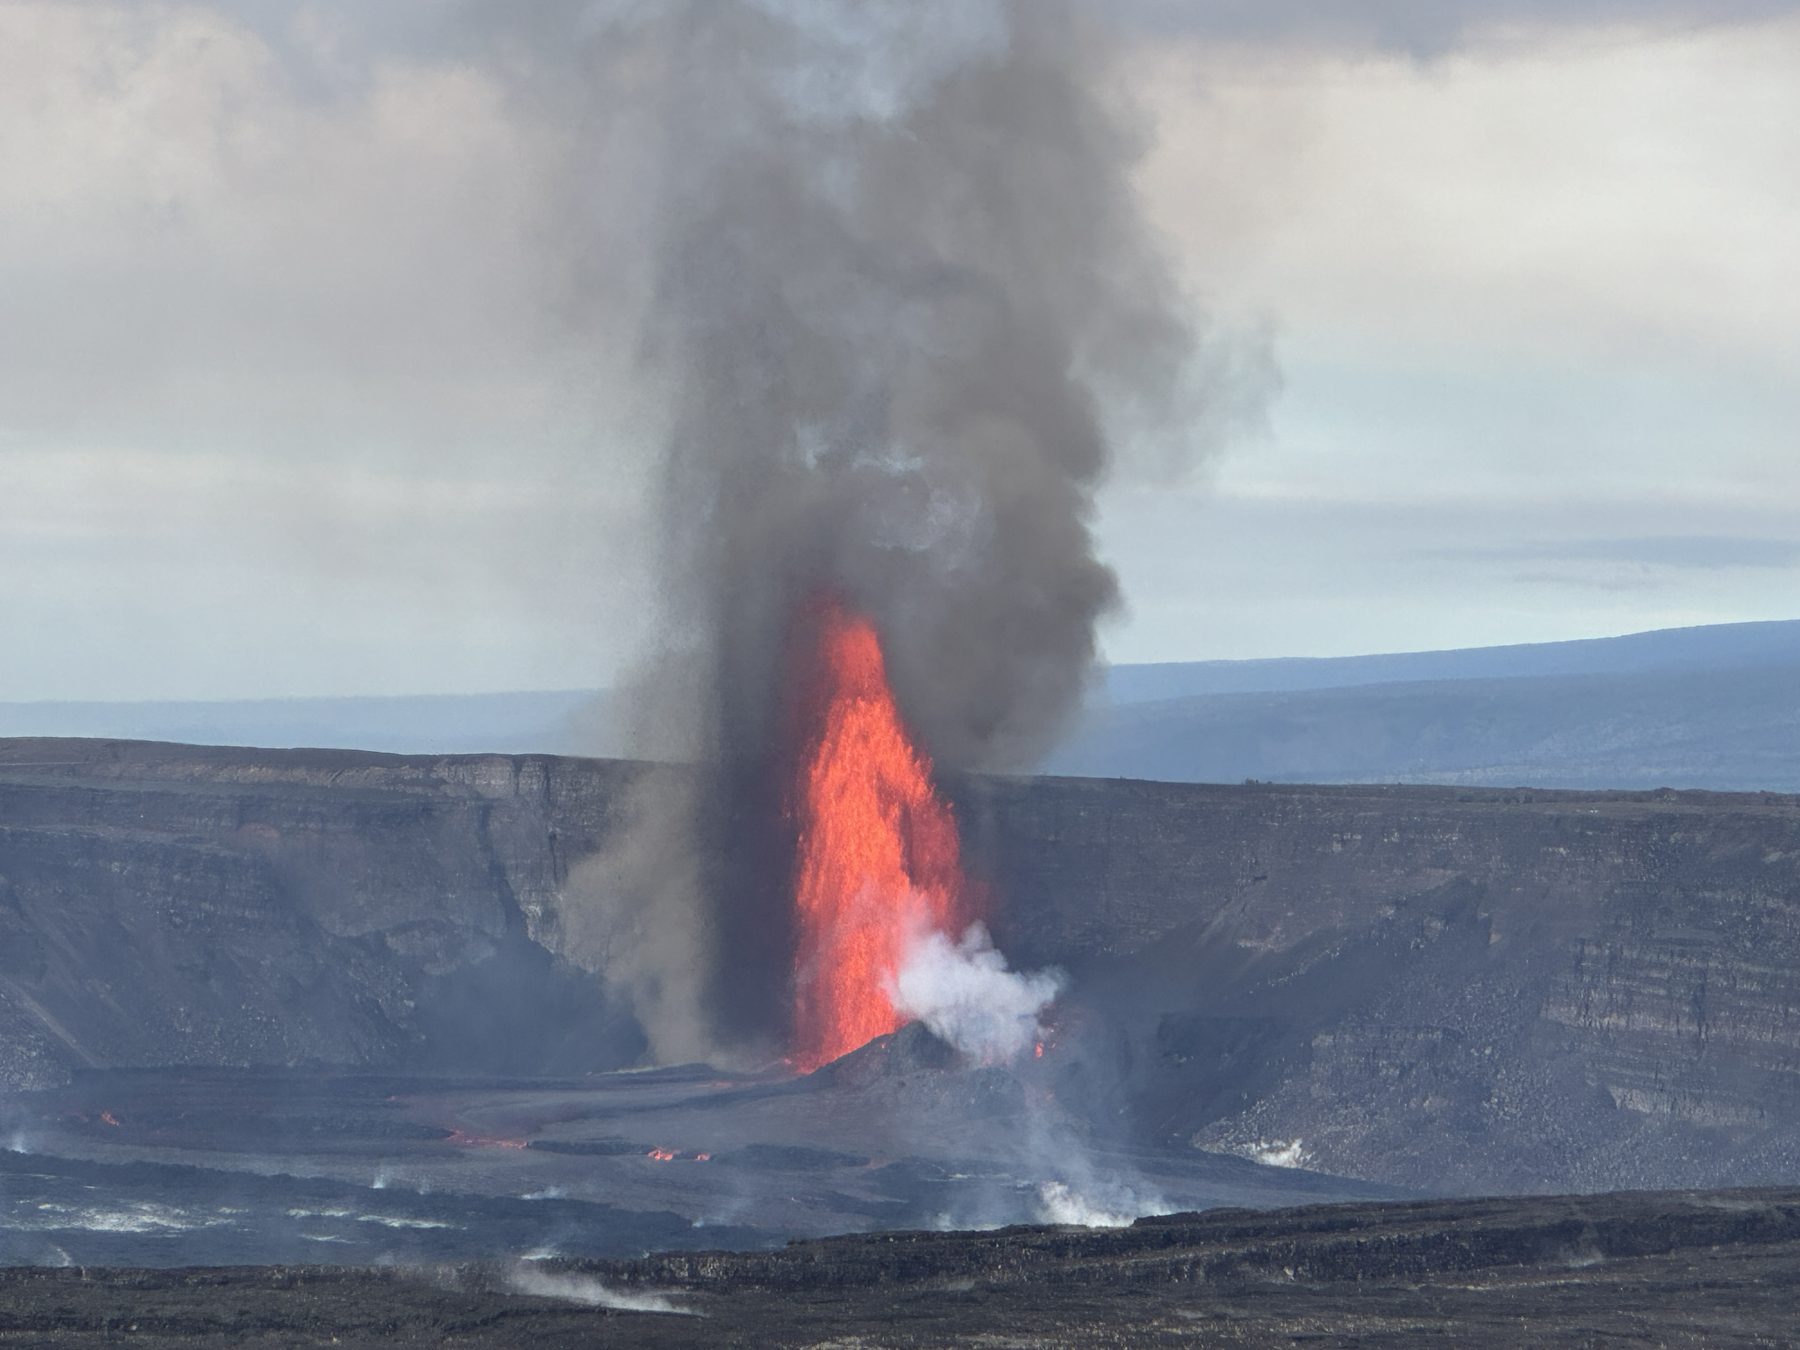
This is the frame that sells the trip. When an eruption episode is running, lava fountains inside Halemaʻumaʻu crater and you photograph it straight from the rim – no helicopter, no backcountry hike. Episodes in the current eruption have been intermittent, each lasting hours, with pauses between them; as of early November 2026 the USGS was forecasting another episode window within days. Treat any forecast as a maybe: check the USGS daily update the morning you go, and have a non-eruption plan (the other four spots) ready.
Arrival GPS: 19.423601, -155.284348 (parking / trailhead)
Light window: civil twilight. The sky still holds blue while the lava reads hot orange against it, and the fountain detail survives instead of blowing out against a black sky. Full night works too, but expose for the lava and let the rim go dark. Midday is the weakest option – haze and flat light – unless fountains are tall and you want the plume against blue sky.
Lens call: start at 70-200mm for compressed fountain frames and flying spatter detail; drop to 24-70mm for the caldera context. A tripod helps at twilight but the fountains are bright enough for handheld work at high ISO. The overlook sits steps from a 36-stall lot, 2.5 miles (about 7 minutes) from the entrance station on Crater Rim Drive West – during episodes expect rangers directing traffic and full lots at peak hours.
2. Uēkahuna
 Save
Uēkahuna is the summit’s high ground: the wide caldera establishing shot by day and one of the best night-sky setups in the park after dark. When the crater glows, you can frame the Milky Way core over the plume – the frame above is exactly that, shot from here in July. The summit region sits above 4,000 feet, so bring a layer even when the coast is warm, and expect wind after sunset.
Arrival GPS: 19.420033, -155.288893 (parking / trailhead)
Light window: the last hour of daylight for the caldera panorama; true dark for stars. A new-moon week gives you the cleanest sky. Blue hour splits the difference – enough ambient light to read the caldera floor, enough dark for the glow to register.
Know before you go: the old Jaggar Museum building is gone – the site is being restored to a more open, culturally appropriate overlook, so expect a working landscape rather than the familiar building. During the summit construction period, oversized vehicles over 25 feet cannot reach Uēkahuna. A sturdy tripod is non-negotiable at night: the wind up here turns cheap tripods into shaky-cam rigs.
3. Kīlauea Iki
 Save
In 1959 this crater held a lake of molten lava 400 feet deep. Today it is a mile-wide solidified surface you can photograph from the rim and then walk across – the crater-crossing trail drops through rainforest and comes out on the pale line that hikers have worn across the frozen lake. From the overlook you get the full crater with the Puʻupuaʻi cinder cone; from the floor you get steam, cracking textures and the eerie feeling of standing on something that was liquid within living memory.
Arrival GPS: 19.416455, -155.242927 (parking / trailhead)
Light window: morning fog drifts through the crater most days and burns off by mid-morning – arrive early for the moody frames, stay for the clear ones. Overcast is fine here; the crater floor’s textures actually prefer soft light to harsh contrast.
Lens call: wide at the rim (16-35mm) to take in the whole bowl; a standard zoom on the floor for steam vents and surface patterns. The loop is about 4 miles with 740 feet of elevation change – carry water, and expect the rainforest section to be muddy after rain.
4. Nāhuku – Thurston Lava Tube
 Save
A river of lava once ran through this 500-year-old tube; now you walk through it under dripping rainforest. The approach through the fern forest is a photo stop on its own – soft, green, diffused light that flatters everything. Inside, the tube is lit, so you can work without a tripod, but the light is dim and warm: a fast prime (35mm or 50mm f/1.8) beats a slow zoom, and a tripod is more trouble than it is worth in the flow of visitors.
Arrival GPS: 19.413795, -155.238628 (parking / trailhead)
Light window: go early. The small parking lot fills fast and the tube experience is better – and easier to photograph without a crowd in every frame – before the mid-morning rush. Rainforest drizzle is common and good for the forest frames; bring a rain cover for the camera rather than waiting for perfect weather.
Fieldcraft: watch your step on wet rock, respect the barriers, and take thirty seconds at the entrance to listen – native forest birds work the canopy here, and the quiet frames are often the ones that make the set.
5. Chain of Craters Road – Hōlei Coast
 Save
The road itself is the subject: a black ribbon dropping 3,700 feet from the summit to the Pacific over 19 miles of lava flows, with pullouts, pit craters and the Puʻu Loa petroglyph field along the way. It ends at the coast where the Hōlei Sea Arch stood until it collapsed into the ocean in late September 2026 – the arch is gone, but the end-of-road viewpoint, the sea cliffs and the wave-swept coastline still deliver long-lens frames, and the pullouts on the way down are the real photo drive.
Arrival GPS: 19.327393, -155.191857 (parking / trailhead)
Safety matters here: the coastal cliffs are unstable and the ground near the old arch site is closed. Stay inside the designated viewing area, stay back from cliff edges, and take the closure signs seriously – people have been photographed standing in the closed zone, and the park is explicit that the edge can collapse without warning.
Light window: late afternoon takes the pale glare out of the black lava and brings out texture on the flows; on a clear morning you can see the coast from the summit pullouts. There is no water or fuel on the road – fuel up and stock water at the top, and expect the coast to be windy and exposed: sun protection and a layer both earn their pack space.
More Hawaiʻi Volcanoes spots are in the full guide
This post shows 5 of the best spots. The Hawaiʻi Volcanoes National Park Photography Guide covers 8 spots plus a bonus frame, each with arrival GPS, a Google Maps link, best light, suggested lens and the fieldcraft for an active volcano. Straight talk included: one included trail is under an active NPS closure right now, and the guide says so on its pages and tells you how to verify reopening before you drive up.
Camera settings cheat sheet for Hawaiʻi Volcanoes National Park
Settings vary by scenario. Use these as starting points and bracket when the light is doing something strange – at a volcano, it usually is:
| Scenario | ISO | Aperture | Shutter | Notes |
|---|---|---|---|---|
| Lava fountaining (twilight) | 400-1600 | f/4-f/5.6 | 1/250-1/1000s | Freeze spatter; expose for the lava, let the rim go dark |
| Caldera at blue hour | 400-800 | f/8 | 1-15s (tripod) | Balance sky and glow; bracket exposures for blending |
| Milky Way over the crater | 3200-6400 | f/1.8-f/2.8 | 10-20s (tripod) | 500-rule for stars; wind-proof the tripod at Uēkahuna |
| Rainforest and lava tube | 800-3200 | f/1.8-f/4 | 1/60-1/250s | Fast prime, no tripod in the tube; embrace the warm light |
| Coastline and flows | 100-400 | f/8-f/11 | 1/125-1/500s | Polarizer cuts glare on black lava; watch salt spray on the front element |
Shoot RAW in every scenario – the dynamic range between hot lava and black basalt will eat a JPEG alive.
Lens and gear recommendations for Hawaiʻi Volcanoes National Park
The essential kit for Hawaiʻi Volcanoes covers three focal ranges: wide (16-35mm or equivalent) for the caldera, the crater rims and the lava tube, standard zoom (24-70mm f/2.8) as the rainforest and walking-around workhorse, and telephoto (70-200mm) for compressed lava fountains, flying spatter and the coastline. If you bring one fast prime, make it a 35mm or 50mm f/1.8 – it earns its keep in the lava tube and at night.
Essential accessories: a sturdy tripod that locks down in wind (the summit is exposed), a circular polarizer for glare on black lava, a rain cover for the camera (rainforest drizzle is a feature, not a bug), a headlamp for pre-dawn and night work, microfiber cloths for salt spray and vog haze, and extra batteries – long nights at the crater drain them faster than you expect.
One volcano-specific note: volcanic gas (vog) is a real hazard for sensitive groups, and conditions shift with wind direction. Check the air-quality advisory the day of your visit, and if rangers close a viewpoint for gas, that is not a suggestion.
National Parks Guide Series
This guide is part of the Shut Your Aperture national parks series: GPS-tagged vantage guides, camera settings cheat sheets, and seasonal light notes for the parks photographers ask about most.
Best months and light conditions for Hawaiʻi Volcanoes National Park
The park photographs well year-round – the real variable is not the season, it is the volcano. Eruptive episodes come and go on their own schedule, so the single best planning tool is the USGS daily update, not the calendar. November through April is the wetter season on the windward side: more dramatic skies and moodier rainforest, but more days of rain and fog at the summit. May through October trends drier and clearer.
Day-to-day, build your schedule around twilight. Civil twilight is the lava window – sky still blue, lava still hot. True dark belongs to the Milky Way at Uēkahuna, best in a new-moon week. Mornings favor Kīlauea Iki (fog for atmosphere, then clear) and the lava tube (empty before the rush). Save the Chain of Craters descent for late afternoon, when the low sun brings out the texture in the flows.
Also plan around people: during active eruption episodes the summit gets congested, popular lots can fill by 10 am, and rangers will direct traffic. The summit construction project runs through late 2026, so expect delays and temporary detours near the entrance.
Getting around Hawaiʻi Volcanoes National Park for photographers
The park has one main entrance on Highway 11 near Volcano Village, about 45 minutes from Hilo and a little over two hours from Kona. Entrance is charged per vehicle – check the current fee on the NPS fees page before you go. The park itself is open around the clock, which is exactly what you want for night and twilight work.
From the entrance, Crater Rim Drive West reaches the Kīlauea Overlook and Uēkahuna in under ten minutes; Kīlauea Iki and Nāhuku are a few minutes further along the loop. The Chain of Craters Road runs 19 miles from the summit to the coast – allow 45 minutes each way without stops, and double that if you are actually shooting. There is no fuel, water or food along it. Cell coverage is spotty away from the summit, so download offline maps before you leave the visitor center area, and screenshot your pins.
The summit sits above 4,000 feet: bring a layer even in summer, and expect wind at the overlooks after dark. Oversized vehicles over 25 feet cannot reach Uēkahuna during the construction period.
Frequently asked questions
Can you photograph lava at Hawaiʻi Volcanoes National Park?
Yes, when an eruptive episode is running – from public overlooks like Kīlauea Overlook and Uēkahuna, no helicopter required. Episodes are intermittent and can pause for days, so check the USGS Kīlauea daily update before you build a trip around lava, and ask rangers about current viewing options when you arrive.
What is the best time of day to photograph in Hawaiʻi Volcanoes National Park?
Civil twilight is the single best window: the sky holds blue while lava and crater glow read hot against it. Night is for the Milky Way at Uēkahuna, mornings for Kīlauea Iki’s fog and an empty lava tube, and late afternoon for the Chain of Craters Road and coast.
Is the Hōlei Sea Arch still standing?
No. The 90-foot arch collapsed into the Pacific between September 23 and 27, 2026. The end of Chain of Craters Road remains worth the drive – sea cliffs, waves and coastline frames – but the cliffs are unstable: stay inside the designated viewing area and out of closed zones.
Do I need a permit to photograph in Hawaiʻi Volcanoes National Park?
Personal and editorial photography generally needs no permit. Commercial shoots may require one – check with the park in advance. Drones are prohibited in national parks, full stop, so leave the quadcopter at the hotel.
Is it safe to photograph at an active volcano?
Yes, if you respect the closures. Stay on trails and inside designated viewing areas, mind the volcanic gas advisories if you are in a sensitive group, keep back from cliff edges at the coast, and check the NPS alerts page before every visit. The rules at this park change with the volcano – that is the deal you make for the shots.
What to Pack
A volcano kit built around a sturdy tripod, weather protection and a fast lens is a useful starting point. Compare the gear and choose what fits your camera, budget, and conditions. These links lead to B&H Photo Video and Amazon.
| What & Why | B&H | Amazon |
|---|---|---|
|
Sturdy travel tripod
Wind at the summit is constant – check the load rating and leg locks before buying.
|
Shop B&H → | Shop Amazon → |
|
70-200mm f/2.8 telephoto zoom
The lava-fountain and coastline lens – pick the version that matches your camera mount.
|
Shop B&H → | Shop Amazon → |
|
50mm f/1.8 prime
The lava tube and night lens – cheap, fast and small; match the mount to your camera.
|
Shop B&H → | Shop Amazon → |
|
Camera rain cover
Rainforest drizzle at Nāhuku is when the forest looks best – keep shooting through it.
|
Shop B&H → | Shop Amazon → |
|
Headlamp
Pre-dawn drives and post-sunset walks back from the overlook – keep both hands free.
|
Shop B&H → | Shop Amazon → |
Conditions and closure notes verified against NPS and USGS sources in early November 2026. Always recheck before visiting – this park changes daily.