So, you bought a camera. Maybe it was a gift, or maybe you finally decided to stop relying on your smartphone to capture life’s biggest moments. You took it out of the box, looked at all those buttons, and felt that immediate wave of "what have I done?"
Don't panic. We’ve all been there.
At Shut Your Aperture, our goal is to turn that confusion into confidence. We want to be the number one photography school online, providing you with the best photography tutorials on the planet. Whether you’re trying to figure out how to take a decent photo of your lunch or you want to master high-end commercial work, you’ve come to the right place.
In this guide, we’re going to break down the walls. We’re moving past the "Auto" mode and diving deep into what actually makes a great photograph. From the technical gears of the exposure triangle to the artistic soul of composition, consider this your roadmap to success behind the lens.
Why You Need Photography Tutorials (And Why Manual Mode Matters)
You might think, "Why do I need to learn how to use manual mode camera settings when my iPhone does it for me?"
The answer is control. When you leave your camera on Auto, the camera is making a guess. It’s looking at the scene and trying to find a balance, but it doesn't know you’re trying to capture the romantic glow of a candle or the split-second splash of a waterfall.
Learning the fundamentals through structured photography tutorials gives you the power to tell the camera exactly what to do. It turns you from a person with a camera into a photographer. If you’re looking for more inspiration on how to view the world, check out what do you see when you look in the mirror.
The Foundation: Mastering the Exposure Triangle
Every single photo you will ever take relies on three things: Aperture, Shutter Speed, and ISO. This is the Exposure Triangle. Think of it like a three-legged stool. If one leg is too short, the whole thing falls over.
1. Aperture (The Eye of the Lens)
Aperture is the opening in your lens. It’s measured in f-stops (like f/1.8 or f/11).
- A wide aperture (small number like f/1.8) lets in a lot of light and gives you that blurry background (bokeh) everyone loves.
- A narrow aperture (large number like f/22) lets in less light but keeps everything from the foreground to the background in sharp focus.
2. Shutter Speed (The Gatekeeper)
Shutter speed is how long the sensor is exposed to light.
- A fast shutter speed (1/1000s) freezes action.
- A slow shutter speed (1/30s or slower) creates motion blur. This is how you get those silky-smooth waterfall photos.
3. ISO (The Sensitivity)
ISO is your camera’s sensitivity to light.
- In bright daylight, keep it low (ISO 100).
- In dark rooms, you’ll need to raise it, but be careful: high ISO can introduce "noise" or grain into your shots.
 Save
Save
Alt text: A side-by-side comparison of three photos showing the effects of aperture, shutter speed, and ISO on image quality and style.
How to Use Manual Mode Camera: A Step-by-Step Guide
Ready to take the training wheels off? Switching to "M" on your dial is the first step toward professional-quality work. Here is the simplest way to get started:
- Check Your Light Meter: Look through your viewfinder. You’ll see a little scale with a "0" in the middle. This is your light meter. Your goal is to get that little tick mark near the zero.
- Decide Your Priority: What are you shooting? If it’s a portrait, set your Aperture first (maybe f/2.8). If it’s a race car, set your Shutter Speed first (1/2000s).
- Balance the Rest: If your photo is too dark according to the meter, you need to either slow down the shutter, open the aperture, or raise the ISO.
- Take the Shot and Adjust: Digital film is free. Take a photo, look at the screen, and adjust one setting at a time until it looks right.
Mastering this takes practice. For a deeper dive into professional workflows, I always recommend checking out proshoot.io for high-level production tips.
Composition: The Art of Seeing
Technical skills are the "how," but composition is the "why." You can have a perfectly exposed photo of a trash can, and it’s still just a photo of a trash can. We want to create art.
The Rule of Thirds
Imagine your frame is divided into a 3×3 grid. Instead of putting your subject dead center, place them on one of the intersecting lines. This creates more balance and interest.
Leading Lines
Use natural lines (roads, fences, shadows) to lead the viewer's eye toward your subject. It creates a sense of depth. You can see great examples of this in our Niagara Falls feature by Christine Hess.
Filling the Frame
Don't be afraid to get close. Sometimes the most powerful part of a photo is the detail you can only see when you eliminate the distractions around it. This is especially true for food photos, where texture is everything.
 Save
Save
Alt text: An example of the rule of thirds and leading lines used in a landscape photography composition.
Tackling Specific Scenarios
As you go through different photography tutorials, you’ll realize that every situation requires a slightly different approach.
Low Light and Action
Shooting in the dark is the ultimate test for any photographer. You have to balance a slow shutter speed with a high ISO without ruining the image with noise. If you’re struggling with this, our guide on how to take low-light action photos and portraits is a must-read.
High Dynamic Range (HDR)
Sometimes the sky is too bright and the ground is too dark for your camera to handle in one shot. That’s where HDR comes in. You take multiple exposures and blend them. Learn the ropes in our original HDR tutorial and the follow-up guide.
Capturing Life on the Road
Photography and travel go hand-in-hand. Whether it’s capturing the 2014 World Cup or planning the best time for USA road trips, you need to be prepared for changing environments.
Post-Processing: Making Your Photos Pop
Taking the photo is only half the battle. The magic often happens in the "digital darkroom."
Adobe Lightroom and Photoshop
These are the industry standards. Whether you need to clean up a portrait in Lightroom or you want to make colors come to life in Photoshop, editing is where you define your "look."
Luminar
If you want a more intuitive, AI-powered approach to editing, Luminar is a game-changer. It simplifies complex tasks like sky replacement and skin retouching, allowing you to focus on the creative side of things without getting bogged down in technical menus.
 Save
Save
Alt text: A screenshot of a photo being edited in a software interface, showing "before" and "after" color grading and retouching.
The Shut Your Aperture Philosophy
We don't just want to teach you which buttons to press. We want to help you find your voice. Photography is a tool for storytelling. It can be a way to process the world, like Kevin Young’s road to recovery, or a way to explore the surreal, like the work of Gesine Marwedel.
We believe that anyone can be a great photographer if they have the right guidance. Our community is built on the idea that "simple is better." You don't need a $10,000 Hasselblad to make a great image (though they are pretty nice to look at). You just need an eye for detail and the willingness to learn.
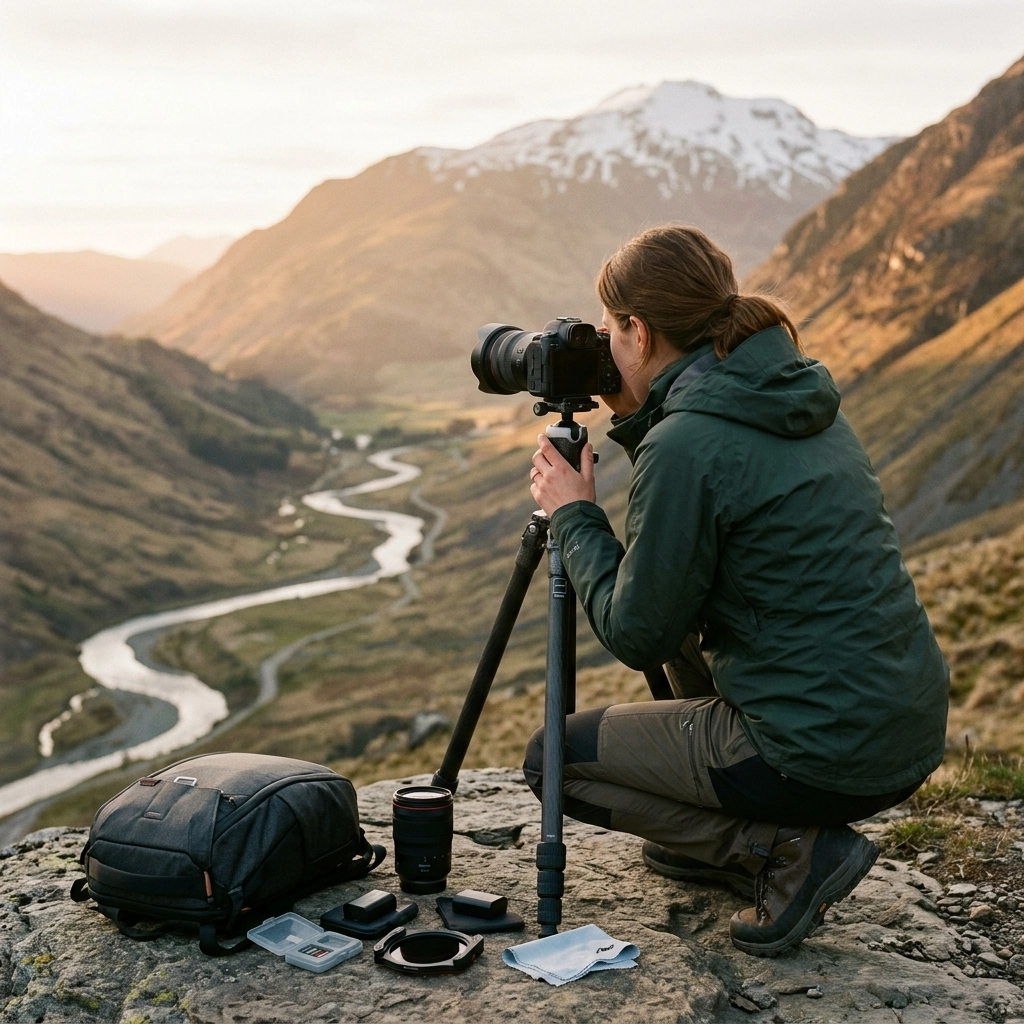
Building Your Gear Bag
While gear isn't everything, having the right tools for the job makes life easier.
- The Body: Start with a solid entry-level DSLR or Mirrorless camera.
- The Lens: A "nifty fifty" (50mm f/1.8) is the best investment you’ll ever make.
- The Support: A sturdy tripod is essential for those long-exposure shots we talked about earlier.
For more gear reviews and specialized advice, don’t forget to visit Shut Your Aperture.
 Save
Save
Alt text: A minimalist flat-lay of essential photography gear, including a mirrorless camera, a 50mm lens, a tripod, and a memory card.
Taking the Next Step
Photography is a journey, not a destination. Even the pros are constantly learning. Whether you’re experimenting with a miniature look in Girona or trying to capture moths in your backyard, every click of the shutter is a lesson.
If you’re feeling stuck, try a challenge. Give yourself 180 seconds like Chase Jarvis to get a killer shot. Limits often breed the most creativity.
Keep exploring our site for more photography tutorials, and if you want to see some world-class fine art for inspiration, head over to blog.edinchavez.com.
Shut Your Aperture is here to help you every step of the way. Now, stop reading and go take some photos! The world is waiting to be seen through your lens.


