Updated October 13, 2026. This guide has been revised with new text and photos; the original publication date is retained.
Light decides how a portrait feels. The same face can look soft and kind, dramatic and moody, or flat and dull, and the only thing that changed was where the light came from. The good news is that portrait lighting is a small set of patterns. Learn them once and you can build any of them with a window, a lamp, a flash or the open sky.
This guide walks through the setups every beginner should know, how to build each one, and how to fix the usual problems. You do not need studio gear. Most of these work with one light source and a piece of white card.
The four things that shape portrait light
Every lighting setup is a mix of four choices. Change one and the picture changes.
- Direction. Where the light hits the face from: front, side, above, below or behind. Direction creates shadows, and shadows create shape.
- Size and softness. A large light source relative to the subject, like a big window, makes soft shadows with gentle edges. A small source, like the bare sun or a bare bulb, makes hard shadows with sharp edges.
- Distance. Two separate things change with distance. First, a source that is close to the subject is large relative to the subject, so its shadows are softer, and the same source moved far away becomes small relative to the subject and its shadows get harder. Second, brightness falls off with distance (the light follows the inverse square law), so a source close to the subject falls off quickly across the face and the background, which tends to go darker. A source far away lights the face and the background more evenly. Contrast, background brightness and flatness depend on those two effects together, not on distance alone.
- Color and brightness. Warm light feels cozy, cool light feels clean, and brightness decides your exposure and how much the background shows.
Start with the easiest light: open shade
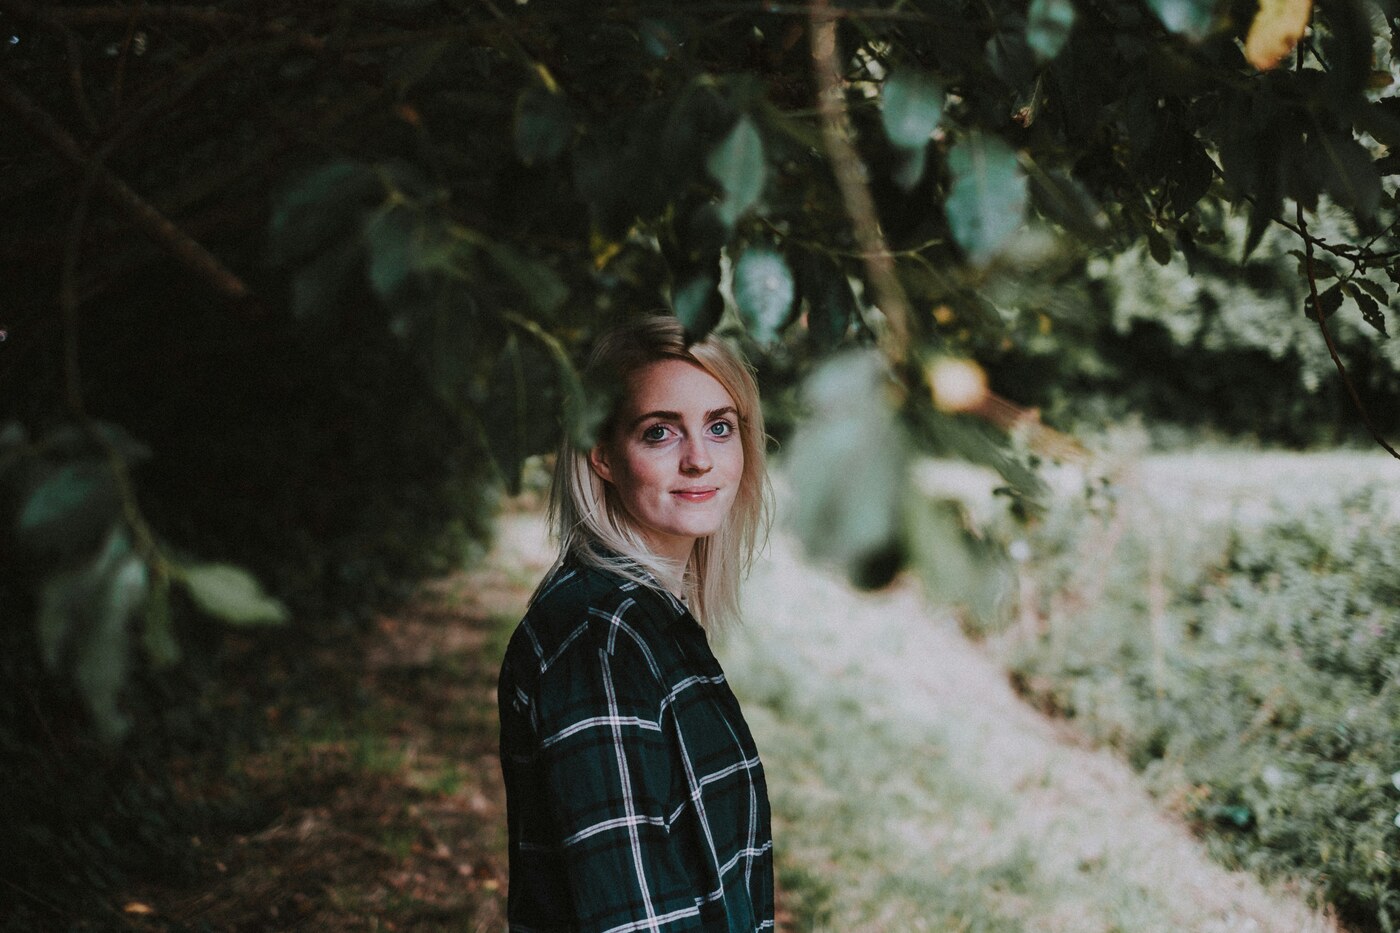
If you only learn one setup, learn open shade. Find a spot where your subject stands in shadow but faces a large bright area, like the edge of a porch, the side of a building or under a tree line with open sky in front. The shade removes harsh sun, and the big sky acts as a giant soft light. Faces look even and clean, with no squinting.
- Place the subject just inside the shadow edge, facing the open sky.
- Check the eyes. You want a little light in them, so turn the subject slightly toward the brightest area.
- Watch the background. Bright patches behind the subject pull the eye away, so move until the background is calm.
- Expose for the face and let the background fall where it falls.
 Save
Window light: the classic one light setup
A window is a large, soft, directional light that costs nothing. Place your subject next to a window, not in front of it, and turn the face a little toward the glass. The side nearest the window is bright, the far side falls into shadow, and the transition between them is smooth.
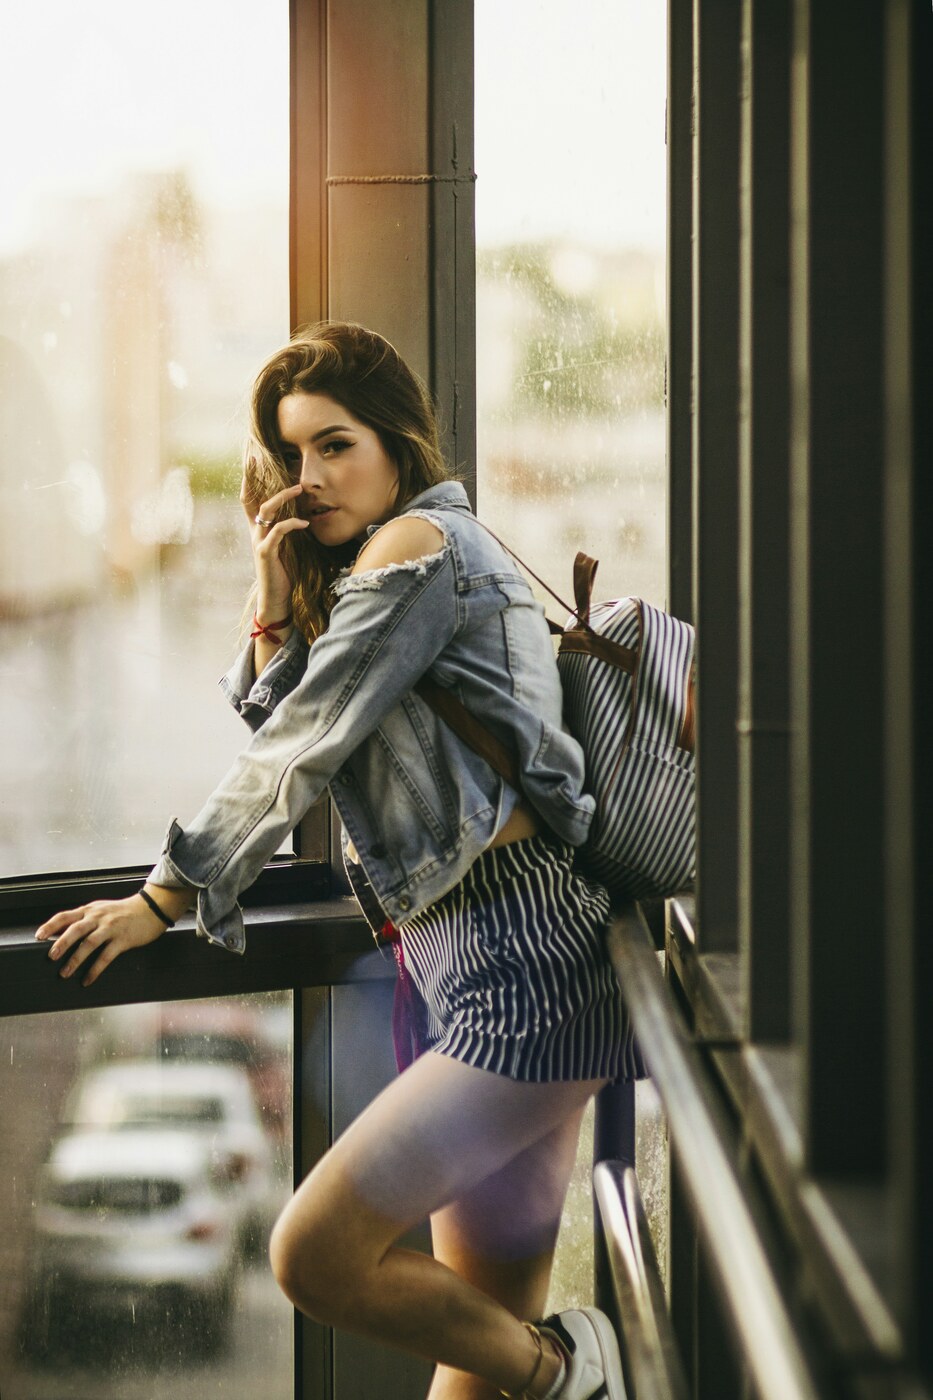 Save
A few details make window light work:
- Use a north-facing window or a window with indirect light if you can. Direct sun through glass is hard light.
- Turn off the room lights. Mixed light sources give mixed color and muddy skin tones.
- Hang a white sheet or thin curtain over the glass to soften direct sun.
- Face the subject toward the window and shoot from a slight angle to the light.
- Watch the shadow side. If it is too dark, move a white card or a reflector close to it.
A word on safety when you use lamps and sheets. Never drape cloth or paper over a lamp. Use only diffusers and modifiers rated for your light, and follow the maker’s instructions for distance and heat. Do not aim a reflector at the sun toward anyone’s eyes. Weight your light stands with sandbags and keep stands and cables out of walkways.
The five classic studio patterns
These patterns come from studio work, but you can build all of them with a window or a single lamp. They are defined by where the key light sits and where the shadows land on the face.
Loop lighting
Place the light slightly above eye level and about 30 to 45 degrees to one side of the camera. A small shadow of the nose falls toward the cheek and forms a little loop, without touching the shadow of the cheek. Loop is flattering for most faces and a safe default.
Rembrandt lighting
Move the light a bit higher and further to the side than loop. The shadow of the nose joins the cheek shadow and leaves a small triangle of light on the shadowed cheek. It looks dramatic, painterly and moody. If the triangle is missing, adjust the height or move the subject a little to turn the face.
Butterfly lighting
Put the light directly in front of the face and above it. A small shadow forms under the nose, shaped like a butterfly. It lifts cheekbones and works well for glamour and beauty portraits. A reflector held below the chin fills the shadows under the eyes.
Split lighting
Place the light at 90 degrees to the side of the face. One half of the face is lit and the other is in shadow. Split lighting is stark and dramatic. Use it for moody or character portraits, not for soft, friendly ones.
Broad and short lighting
These describe which side of the face is lit relative to the camera. In short lighting, the side of the face turned away from the camera gets the light, which slims the face and adds depth. In broad lighting, the side facing the camera gets the light, which widens the face and feels open. Short lighting is a good choice for most faces.
Soft, even light for groups and friendly portraits
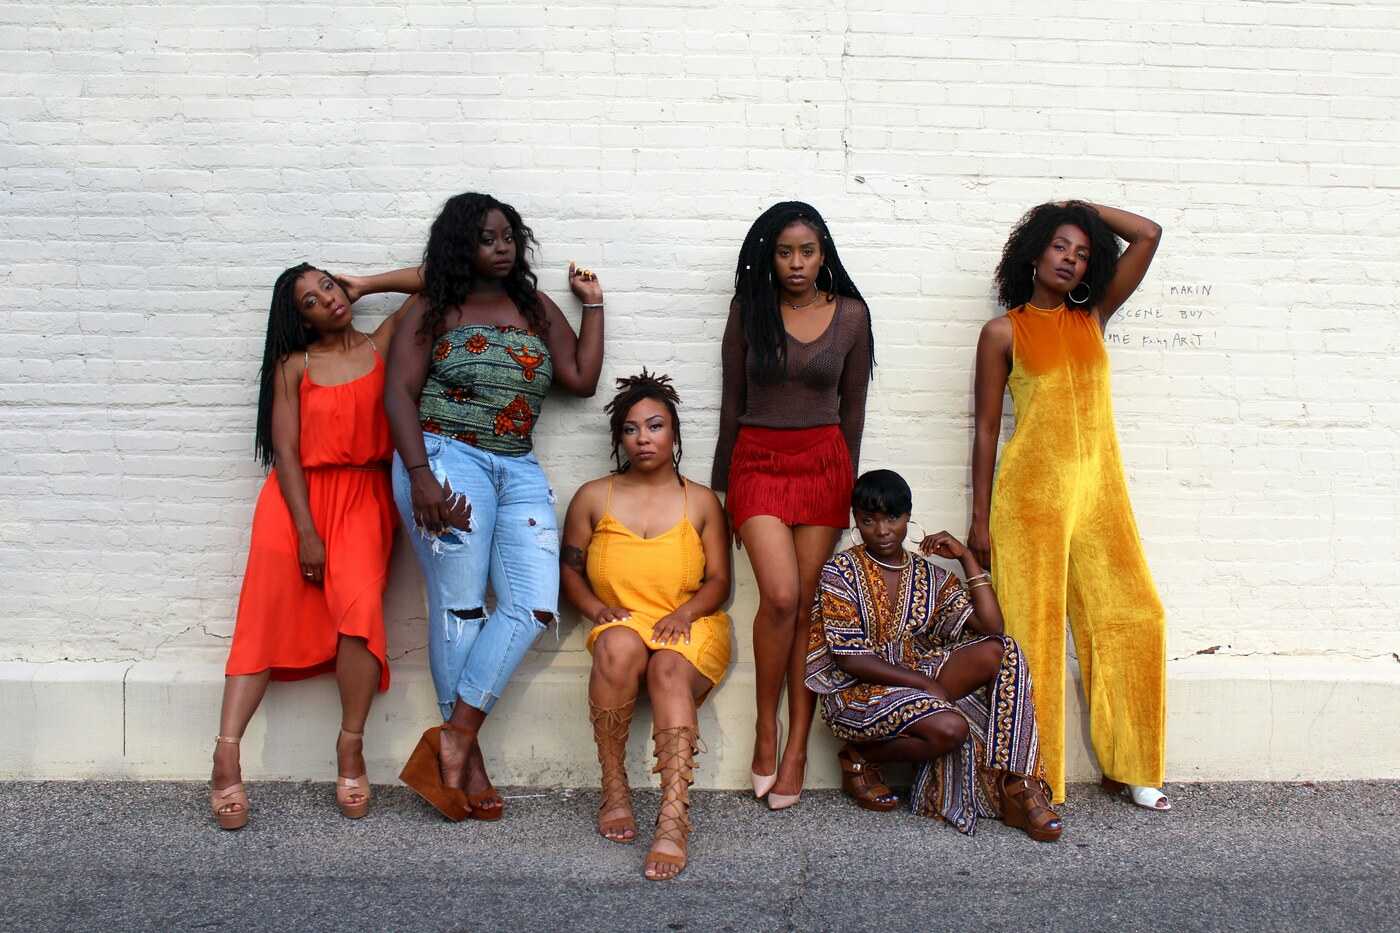
When you want a relaxed, approachable feel, use big, soft, even light. Overcast skies, open shade and shaded forest edges all give this look. Shadows are weak, skin looks smooth and colors stay true. Pair it with a simple background and let expression carry the picture. If you are deciding between daylight and lamps or flash, natural vs artificial light breaks down the choice.
 Save
When you photograph more than one person, check focus as well as light. Try to line the faces up in roughly the same focus plane, stop down the lens as needed, and zoom in to check every face that has to be sharp at full size. An aperture of f/2.8 to f/5.6 does not guarantee that every face is sharp. The group photo above illustrates lighting, not a sharpness pass for every face.
Backlight and rim light
Backlighting puts the sun or a lamp behind the subject. The edge of the hair and shoulders glows, and the picture feels airy. The challenge is exposure, because the face can go dark. Fix it by metering for the face, adding a reflector in front, or using fill flash. A lens hood or your hand above the lens cuts flare. If you want a silhouette, expose for the sky instead.
- Place the subject so the light comes from behind and slightly to the side.
- Expose for the face and let the background brighten.
- Raise your exposure compensation if the face looks too dark.
- Use a white card or reflector in front to bounce light back onto the face.
Using the light you find indoors
Rooms are full of light sources, and many make good portraits. A doorway, a shop front, a bright lamp, a skylight and a bare bulb on the wall all have a direction and a quality you can use. The skill is seeing them. Walk around your subject and watch the face change as you move.
Mixed light is the usual trouble indoors. A window and a warm lamp together put two different colors on the same face, and shooting RAW does not fully fix that, because one white balance setting cannot correct both casts. Better options are to turn one source off, match the two lights, put a color filter over one of them, or accept one color and correct small areas locally in editing.
Practical lights as the key light
A practical light is a lamp you can see in the scene. A bare bulb, a desk lamp or a shop light can work as your key. Keep it close to the subject, point the face toward it and let the rest of the room go dark. You get a strong, moody frame with a little warmth.
Reflectors and fill: control the shadows
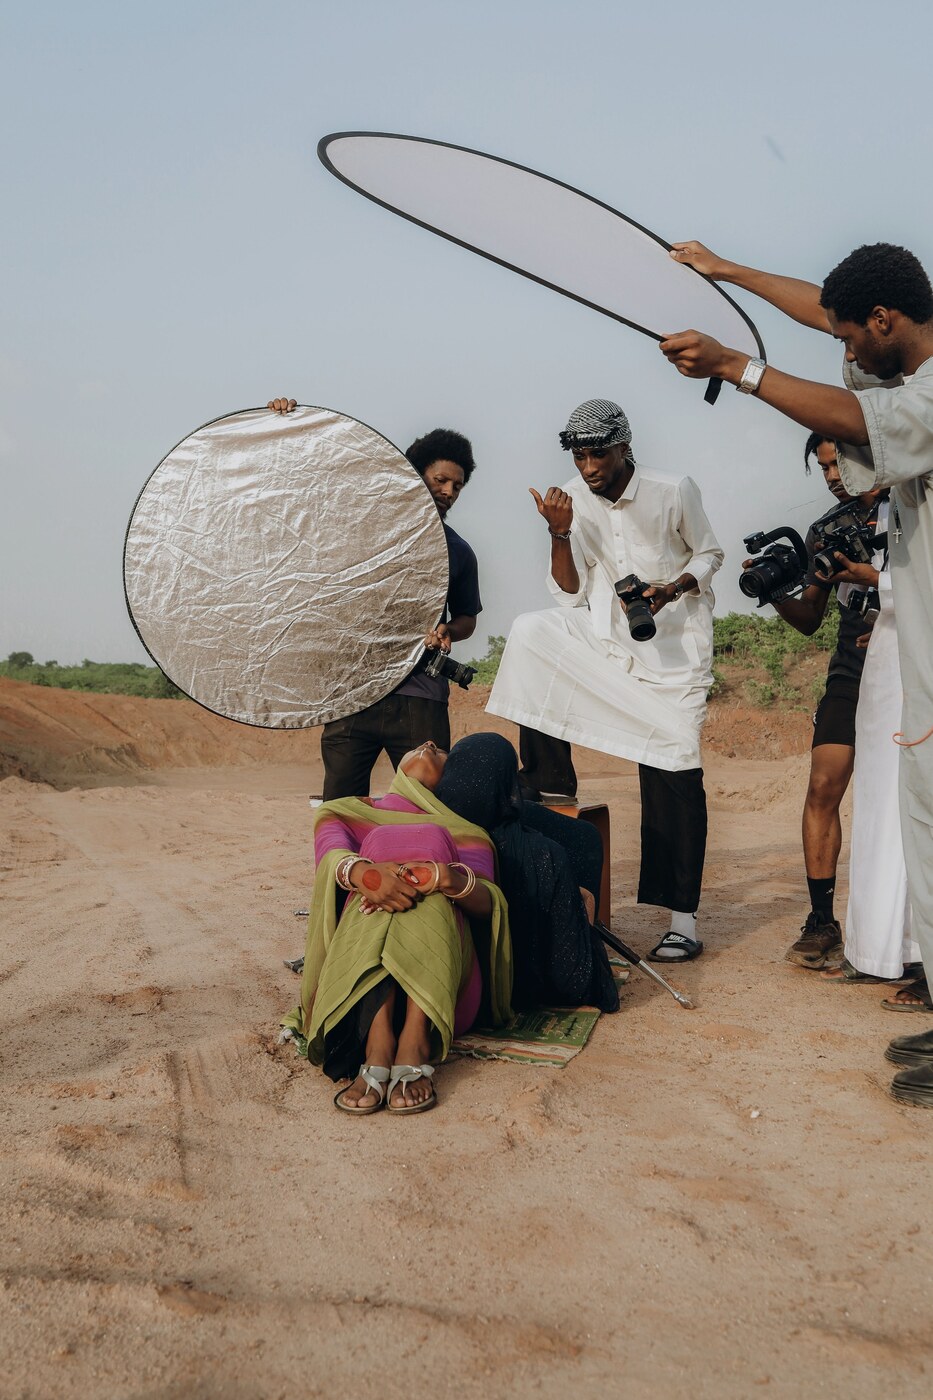
Shadows give shape, but too much shadow hides the face. A reflector bounces light from your main source back into the dark side. White card gives gentle fill, silver is stronger and gold adds warmth. A white wall, a sheet of foam board or a car windshield sun shade all work.
- Hold or prop the reflector close to the shadow side, just outside the frame.
- Move it closer for more fill and further for less.
- Angle it so the light lands on the eyes and under the chin.
- To go moodier, use black card on the shadow side instead to deepen shadows.
 Save
Off-camera flash for beginners
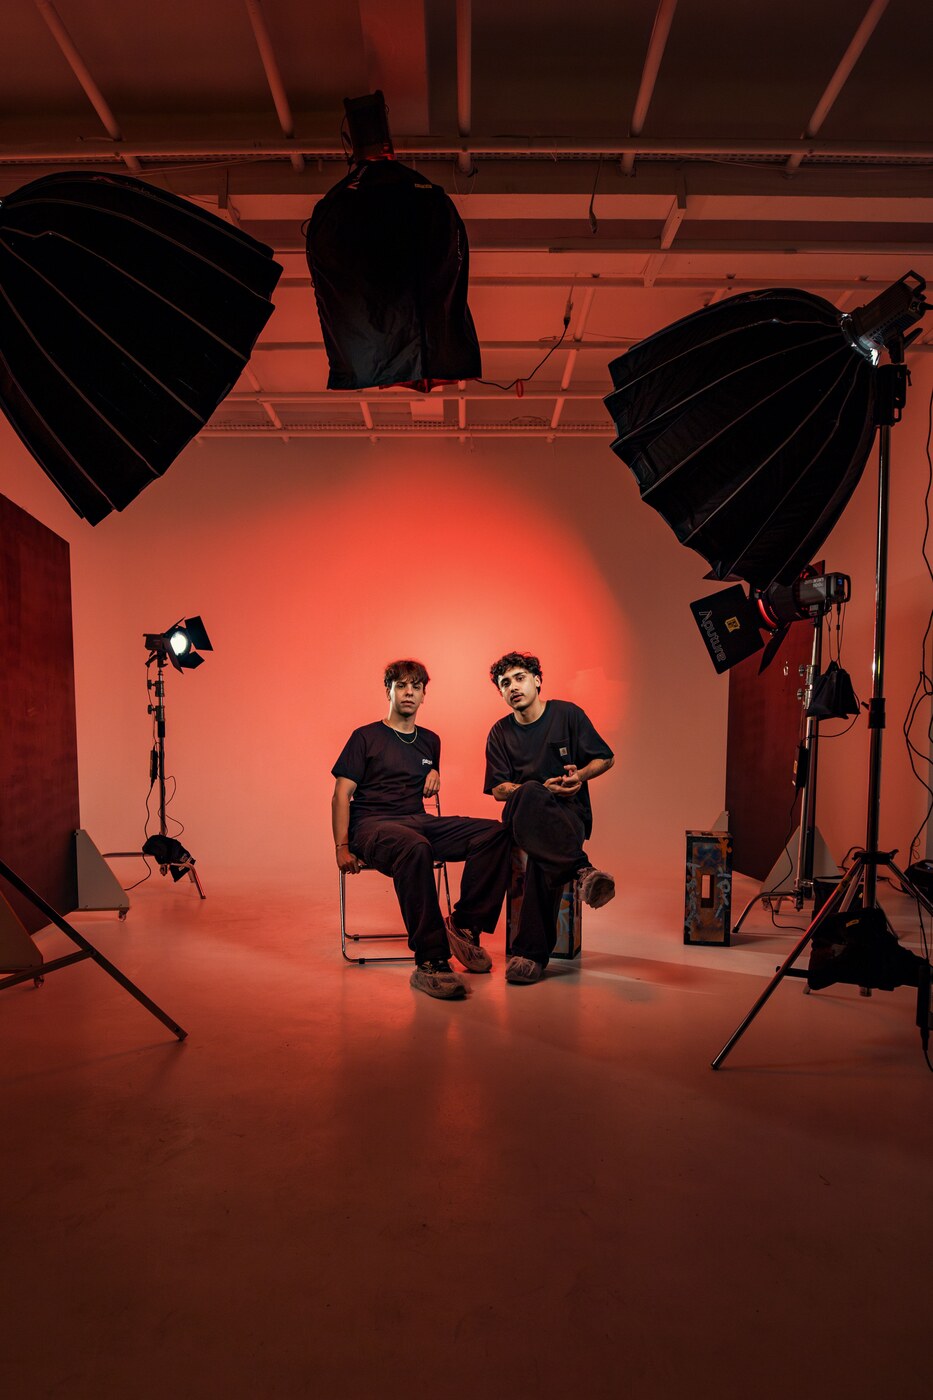
Direct, unmodified flash on top of the camera often gives flat, harsh light, though bounced or modified flash can look very different, and dim rooms add their own problems, which the low-light photography tips cover. Taking it off the camera changes everything. A small flash fired through a softbox or an umbrella gives you window-like light anywhere. Start with one flash, a stand and a modifier, set the power low and move the light until the shadows look right. Treat it like the window: put it to one side, slightly above the eyes, and aim it at the subject.
 Save
- Use the lowest power that gives enough light.
- Bring the modifier as close to the subject as the frame allows.
- Know your camera’s flash sync speed, often around 1/200 or 1/250 second. Above it, a normal flash can leave a dark band across the frame. Balance flash against ambient light with shutter speed only at or below the sync speed. For faster shutter speeds, you need a flash and camera that support high-speed sync (HSS), and the flash is less powerful in that mode. Check that your flash is compatible with your camera, and that the shutter mode you use supports flash, since electronic or silent shutter modes often do not.
- Add a second light or a reflector only after the first one looks right.
Place stands where people will not walk into them, and weight the base of any stand that holds a flash or a modifier, because a softbox acts like a sail in a draft.
Lighting for different faces
Faces are different, and the same setup does not flatter everyone. A few rules of thumb:
- Round faces: short lighting and a bit of side light add shape.
- Narrow faces: broad lighting and softer shadows add width.
- Deep-set eyes: raising the light can deepen the eye sockets. Lower the key light, bring it closer to the camera axis, and check for catchlights in the eyes. A reflector or fill light under the face lifts the shadows.
- Glasses: move the light higher or to the side to avoid reflections. Tilt the glasses slightly down if needed.
- Older skin: large, soft light and gentle fill keep texture natural without being harsh.
Common mistakes to avoid
- Harsh midday sun on the face. It creates dark eye sockets and squinting. Move to shade.
- Light straight from the camera. It flattens the face. Move the light off to the side.
- Ignoring the background. A bright patch behind the head is a distraction. Change angle or move the subject.
- Mixed color. Window light plus lamps gives odd skin tones. Pick one.
- Missing catchlights. If the eyes look dead, turn the face toward the light or add a reflector.
- Overthinking gear. A window and a white card beat an expensive kit used badly.
Practice drills that work
- Photograph one person in one spot and move the light around them, shooting every 30 degrees.
- Take the same portrait in open shade, by a window and near a lamp. Compare skin tone and shadow.
- Hold a white card on each side of the face and watch the fill change.
- Try a backlit portrait three ways: metered for the sky, metered for the face and with a reflector.
- Recreate a favorite portrait from a magazine using one window and one card.
Camera settings to start with
Portraits are forgiving. These starting points work in most light:
- Aperture priority or manual mode.
- An aperture around f/2.8 to f/5.6 as a starting range for a single subject, adjusted for how much depth of field you need and checked at full size.
- ISO as low as the light allows, and higher if you need a faster shutter speed.
- Shutter speed fast enough to avoid blur from movement, often 1/125 or faster for handheld work.
- Single point autofocus placed on the nearest eye.
- RAW format for flexible color and exposure in editing.
Editing to support the light
Good light needs only gentle editing. Fix exposure and white balance first, then add a little contrast and a touch of shadow lift if the dark side is too heavy. Use local adjustments, a soft brush or radial filter, to brighten the eyes or tone down a distracting bright patch. Keep skin texture. If you like the look of black and white for a dramatic pattern like split lighting, black and white techniques has a good starting point. Over-smoothing removes the shape your lighting built.
For more on the patterns, the Professional Photographers of America has a guide to 9 types of portrait lighting, and Expert Photography explains high-speed sync flash in more detail.
A simple one hour lesson plan
- Minutes 0 to 10: Find open shade and shoot a few frames facing the sky.
- Minutes 10 to 25: Move to a window. Shoot loop, then Rembrandt, by turning the face.
- Minutes 25 to 40: Add a white card for fill and compare with and without.
- Minutes 40 to 50: Try a backlit frame and a practical lamp.
- Minutes 50 to 60: Review the pictures and write down which setup you like best and why.
Frequently asked questions
What is the easiest portrait lighting setup for a beginner?
Open shade. Place your subject at the edge of shadow, facing a large bright area like open sky. The light is soft and even and flatters most faces.
How do I get Rembrandt lighting?
Place a single soft light higher and further to the side of the subject than for loop lighting, then turn the face until a small triangle of light appears on the shadowed cheek.
Do I need a flash or studio lights to learn portrait lighting?
No. A window, a lamp and a white card or reflector let you build all the main patterns. Flash helps when there is no good natural light, but you can add it later.
What is the difference between loop and butterfly lighting?
In loop lighting the light is off to one side and the nose shadow forms a small loop on the cheek. In butterfly lighting the light is in front and above the face, and the shadow falls straight under the nose.
How do I fix dark shadows on one side of the face?
Add fill with a reflector or a white card placed close to the shadow side, or move the subject nearer to the light source so the light wraps around more.
What camera settings are best for portraits?
Start with an aperture of f/2.8 to f/5.6, a low ISO, a shutter speed that avoids blur, single point autofocus on the nearest eye and RAW format. Adjust from there for the light you have.
Learn to see the light before you reach for gear. Look at where it comes from, how big it is and what it does to the face. Pick a pattern, build it with what you have and adjust until the shadows look right. A little practice with one window will teach you more than any gadget.