Updated October 2026 | By Edin Chavez, owner of Edin Studios
Heads up: some links below are affiliate links. If you start an Aftershoot plan through them, Shut Your Aperture earns a commission at no extra cost to you. Readers who sign up through my link also get a 15% discount coupon.
Here is the dirty secret of wedding photography: the shoot is the fun part. The real grind starts at 11 PM on Sunday, when you are staring at 4,000 frames on a laptop and the couple expects a gallery in a few weeks. Culling is where wedding workflows go to die.
It does not have to be that way. AI culling has matured fast, and the right workflow turns the worst job in your pipeline into a quick review pass. This guide walks through exactly how to build that workflow, what the software can and cannot do, and how to keep your creative eye in charge of the final gallery.
I will use Aftershoot as the example tool, because its culling features are well documented and built around this exact problem. Feature claims below come from Aftershoot’s own pages, and I link to them so you can check.
My numbers, straight from the app. I run Edin Studios, a national event photography business, and Aftershoot is in my workflow every single day. The “You & Aftershoot” screen in my own app currently shows 343K total photos, 657 albums culled, 155K selected photos, 333K edited photos, and 61 days and 9 hours of time saved. That time figure is the app’s own tally, so read it as an estimate, not a stopwatch. Still, 657 albums is a lot of real work to run through one tool.
Table of Contents
- Why culling a wedding hurts so much
- What AI culling actually does
- The 7-step wedding culling workflow
- Cull to Target: deliver the number you promised
- Reviewing fast without losing your eye
- Sneak peeks and first looks
- Privacy, NDAs, and offline processing
- What it costs
- Mistakes to avoid
- Questions photographers ask
- Gear that makes culling easier
Why culling a wedding hurts so much
A full wedding day can easily produce thousands of frames. You shoot bursts during the processional, three or four takes of every group shot, and a dozen near-identical frames of the first dance because the light was good and you wanted one with open eyes. All of that is smart shooting. All of it creates a pile you now have to sort.
Manual culling is slow for three reasons.
You make the same micro-decision thousands of times. Blink or no blink. Sharp or soft. Which of these six frames is the keeper. Each choice is small, but decision fatigue is real, and by frame 2,500 your standards drift. The frames you rate at the end of the night are not judged by the same eye as the ones at the start.
Duplicates hide in plain sight. Burst sequences look alike on a thumbnail grid, so you zoom, compare, zoom again. That is where the hours go.
The stakes are asymmetric. Missing the one frame where Grandma is laughing at the toast is worse than keeping five extra decent ones. So you over-keep, then you over-edit, and the whole pipeline bloats.
Aftershoot’s own comparison puts manual culling at roughly 3 to 5 hours per shoot, against about 20 to 30 minutes of review when AI surfaces its top picks of around 200 to 500 images. Those are the company’s figures, not an independent test, and your numbers will depend on your shooting style and gallery size. But the direction is the point: AI removes the grunt work and leaves you the judgment calls.
 Save
SaveWhat AI culling actually does
Let’s be clear about what we are buying, because “AI culling” gets oversold. According to Aftershoot, the software works through your whole album, picks keepers, groups duplicates, and flags blurry photos using 30+ factors. In practice that breaks down into a few jobs:
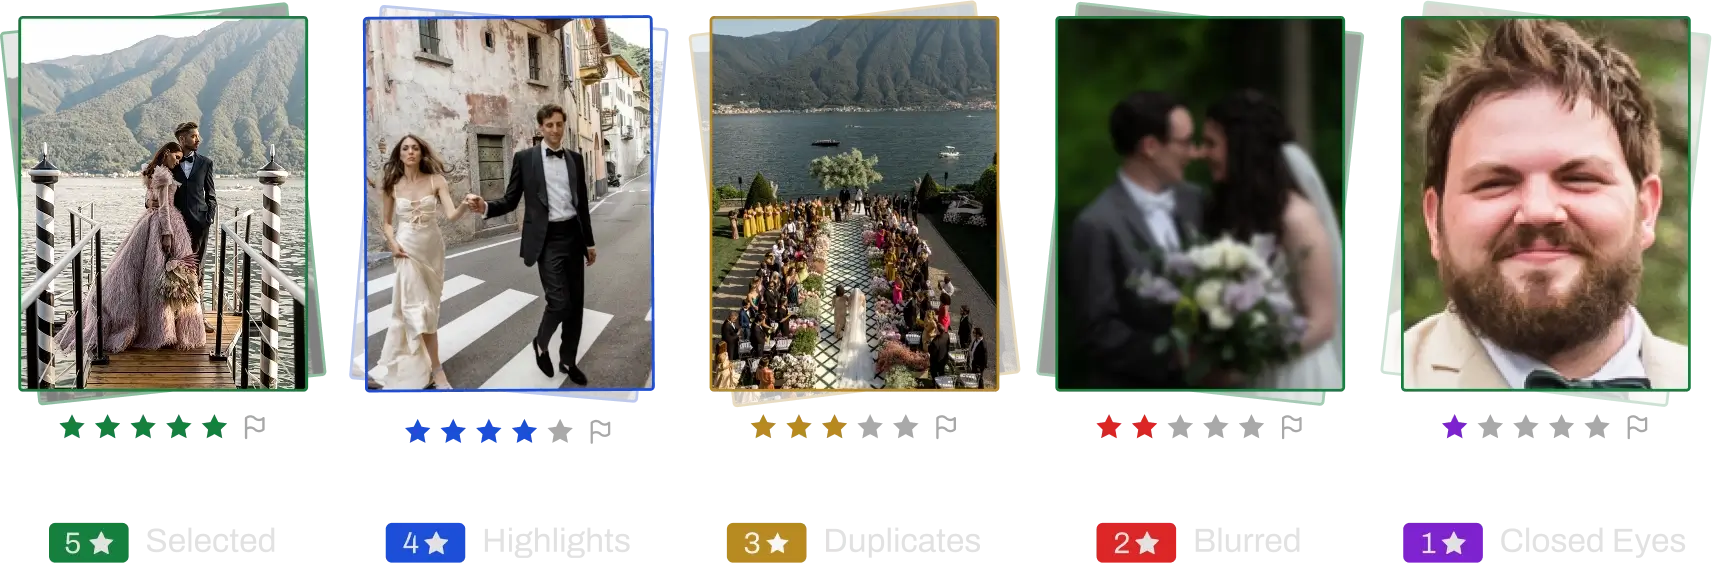
- Duplicate grouping. It tries to tell true duplicates apart from intentional variations, so a burst becomes one stack with a suggested best frame instead of twelve loose thumbnails. Aftershoot says this gives you 15 to 20 percent fewer files heading into editing.
- Technical flags. Closed eyes, blur, and other technical misses get flagged and filtered automatically.
- Key face detection. It highlights the moments where everyone looks their best, which matters a lot for group shots and family formals.
- Image scoring. Every photo is ranked for quality so standouts rise to the top.
- Learning your style. Aftershoot says it adapts from your corrections, so it moves closer to how you would cull it yourself over time.
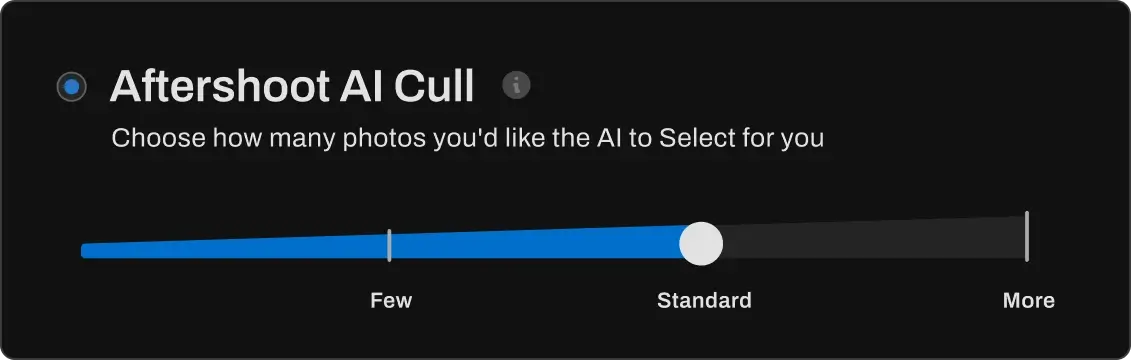
What it does not do is replace your taste. Aftershoot’s own copy says the AI handles the 90 percent and your eye perfects the rest, and that is the right mental model. The AI gives you a strong first draft. You are still the editor.
The 7-step wedding culling workflow
This is the workflow I would build around AI culling for a wedding. It assumes you shoot RAW (Aftershoot supports the major RAW formats and JPEGs) and finish in Lightroom Classic or Capture One, both of which Aftershoot exports to.
Step 1: Ingest and back up first
Before any software touches your files, copy the cards to two separate drives. This is not an AI tip, it is a wedding tip. Culling software works on a copy of your workflow, but your backup habit is what protects you when a drive fails. Only start culling once the backup is verified.
Step 2: Keep the folder structure clean
Import the whole day as one project, but if you shoot with a second shooter, keep their cards in a separate folder. It makes it easier to spot coverage gaps later. Name folders by date and couple, nothing clever.
Step 3: Decide your delivery number before you cull
This is the step most photographers skip, and it is where Cull to Target earns its keep (more on that below). If your wedding package promises roughly 500 to 800 images, write that number down now. Culling toward a target is faster than culling until it feels right.
Step 4: Let the AI take the first pass
Import your RAW or JPEG files and run the cull. Per Aftershoot, this works offline, with no internet needed. The software analyzes and scores images, groups duplicates, and sorts the shoot into two clear groups: Selections and For Review. That split tells you where to spend your attention.
Step 5: Review the Selections like an editor
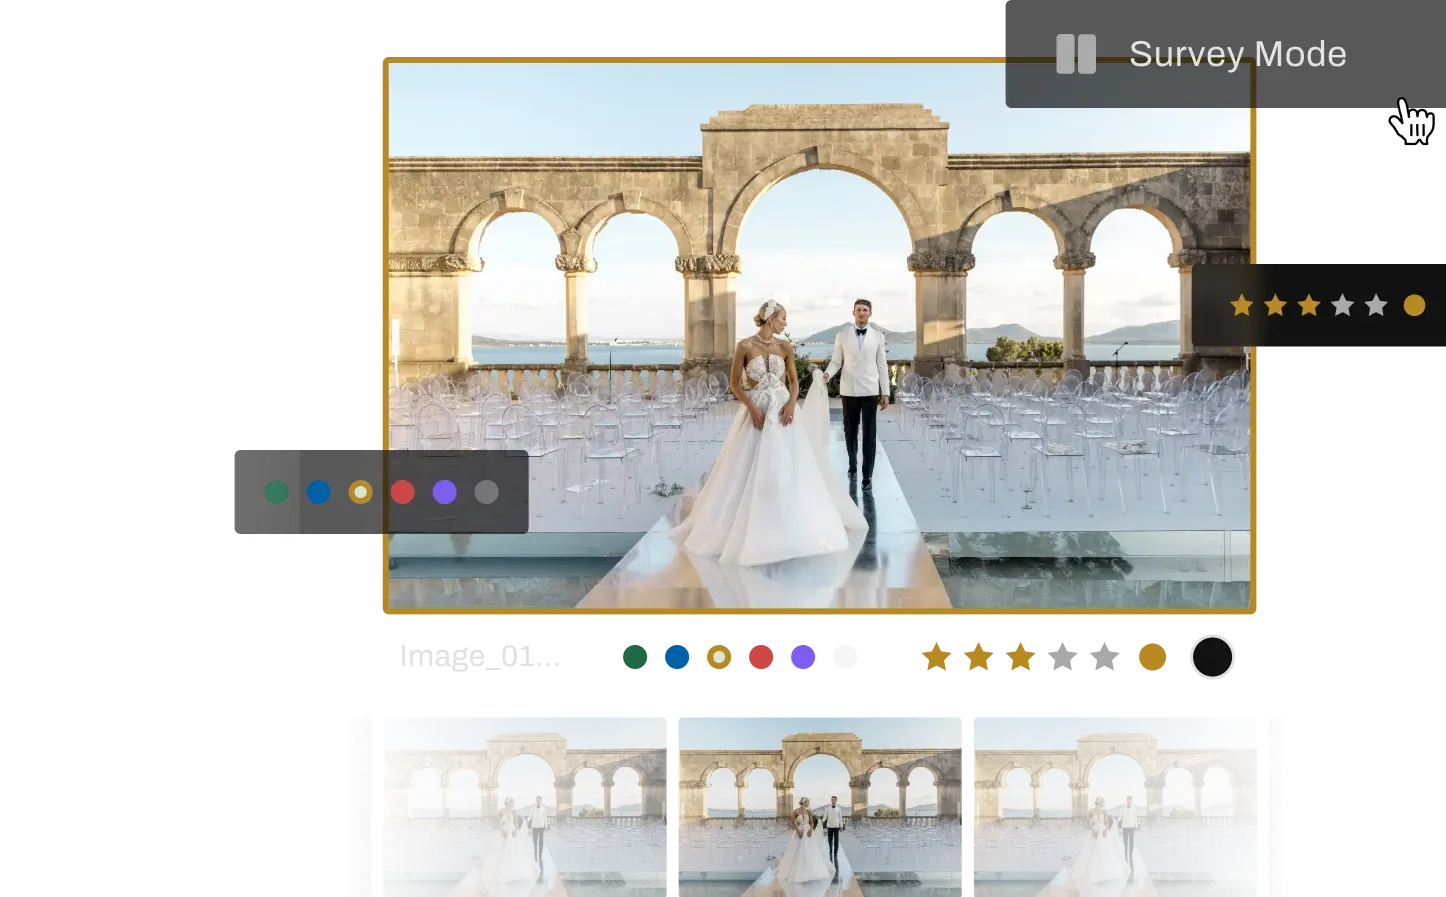
Open the Selections and move quickly. You are not hunting for problems yet, you are checking that the AI’s picks match your sense of the day. Use Survey Mode, which lets you compare up to 16 images side by side, to settle the close calls in group shots and bursts. Use the Spray Can tool to sort frames into categories in a single pass, such as album picks versus client gallery.
Step 6: Skim For Review, do not skip it
The For Review pile is not trash. It is the AI saying “I am less sure about these.” Scroll through it at grid size. You are looking for the moment the AI could not appreciate: the tear mid-vow, the flower girl mid-spin, the imperfect-but-perfect frame with feeling. Rescue what you need.
Step 7: Export and move to editing
Aftershoot exports ratings and labels to Lightroom Classic, Capture One, and local storage. For RAW workflows, ratings are typically written to XMP sidecar files rather than changing the source files. Your originals stay untouched, which means you can always reopen a selection and change your mind.
If you want to see what comes next in the chain, our import-to-export photo editing workflow breaks down the editing steps, from white balance to sync settings, that follow a cull.
 Save
SaveCull to Target: deliver the number you promised
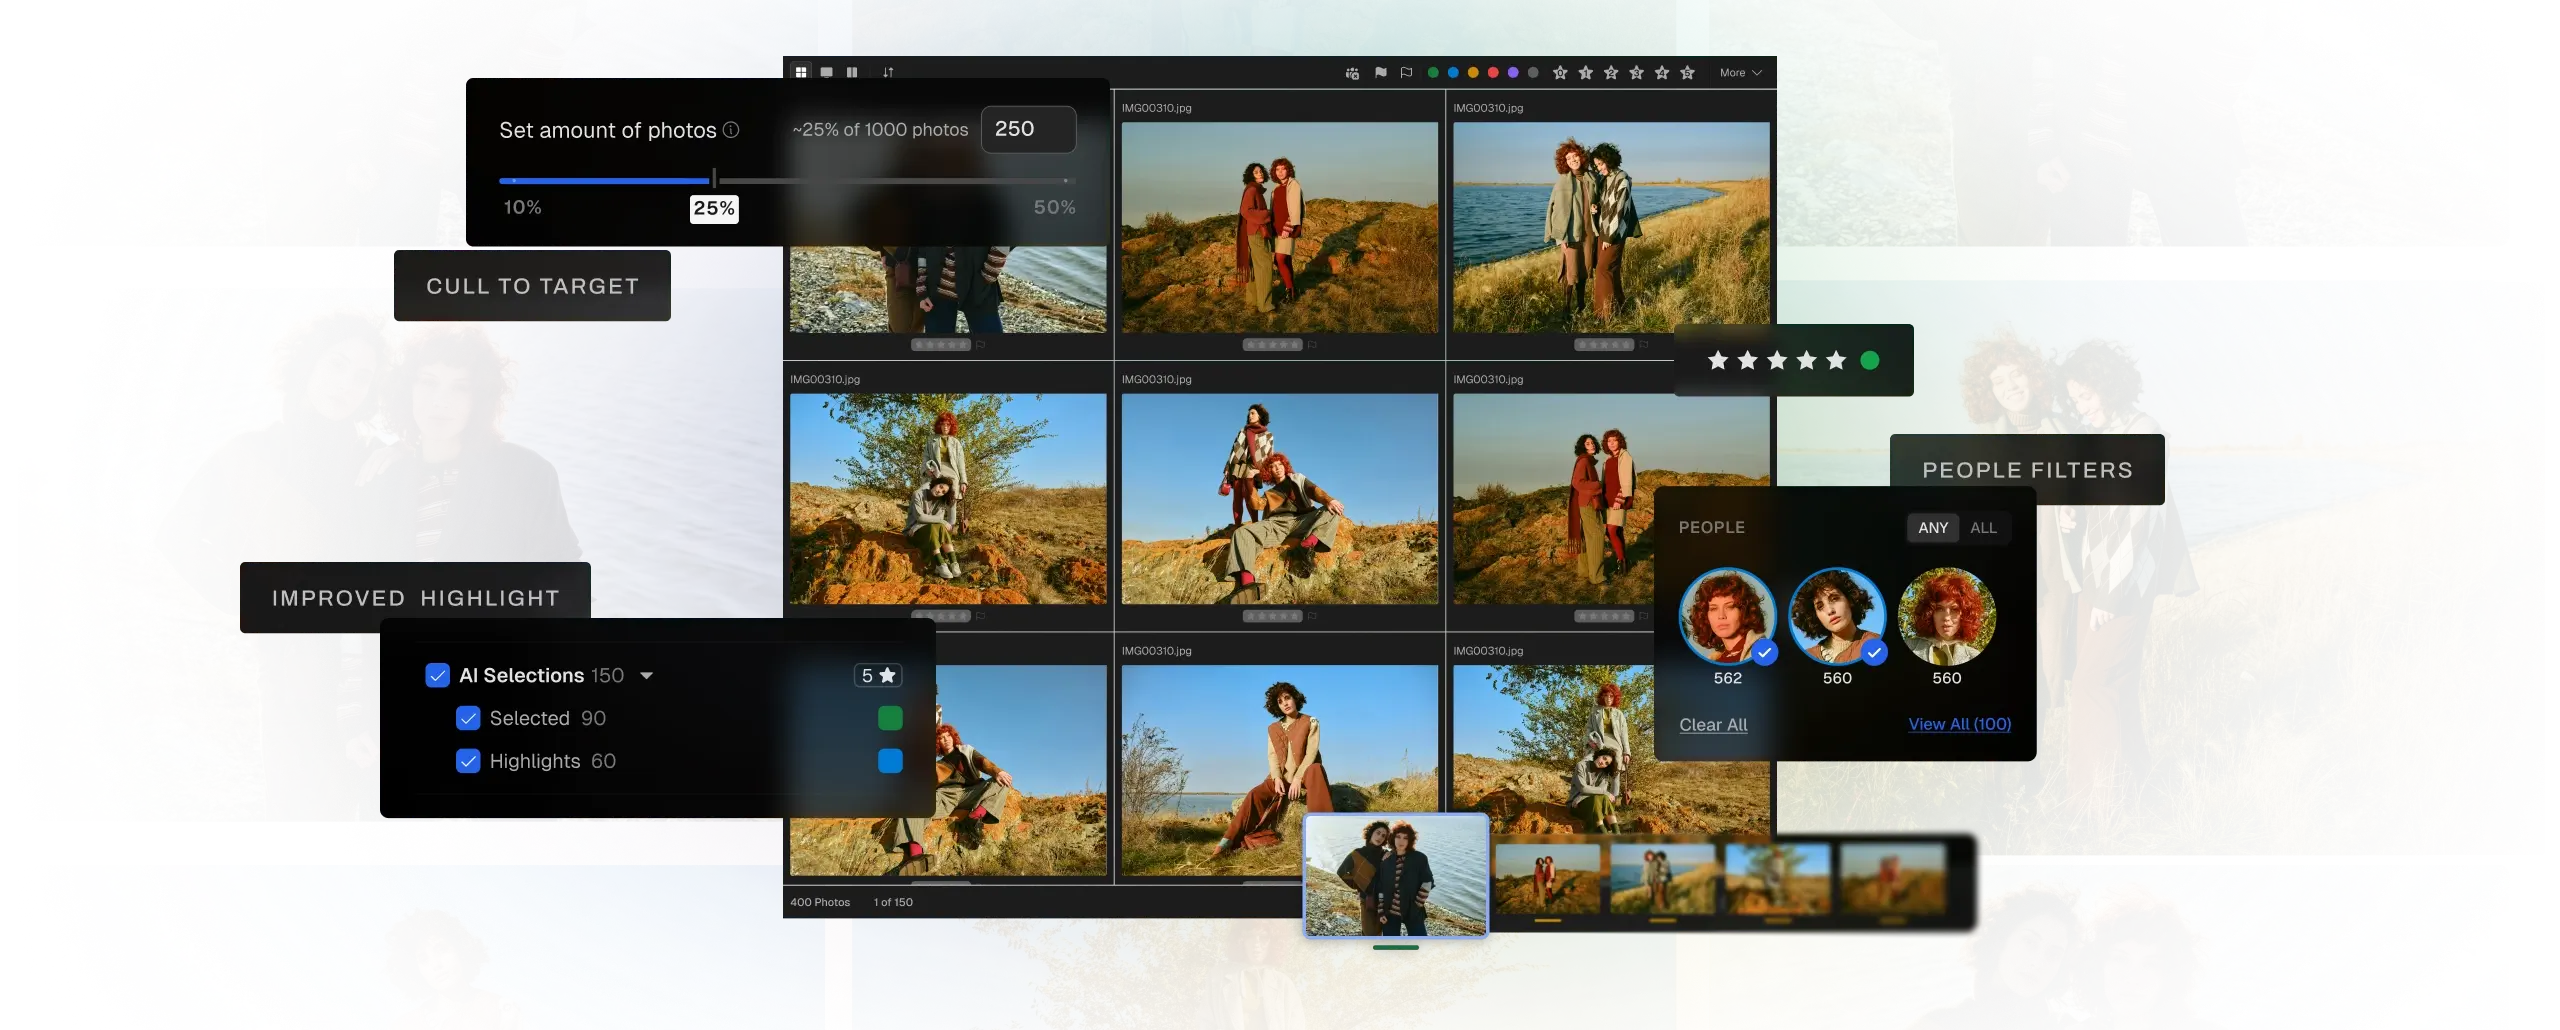
One of the newer features on Aftershoot’s cull page is Cull to Target. The idea is simple and, for wedding work, very practical: you set your photo count before you cull, and Aftershoot builds the selection around that number from the start, balancing quality with coverage of the whole shoot.
Why does that matter? Because the classic multi-round cull looks like this. Round one gets you to 1,400. Round two gets you to 950. Round three, you are agonizing over whether to cut to 700. Each round is another pass through the same images.
With a target, you tell the software the answer up front. If your package promises about 600, you ask for about 600, then spend your time on the swaps. Aftershoot also lets you choose how broad or selective the cull is, from lenient to strict outputs, so you can run a looser pass for a big family-heavy wedding and a tighter one for an elopement.
Two wedding photographers quoted on Aftershoot’s offer page, Allan Elly and Lucas Lermen, both single out this feature for making the final count more predictable. Those are testimonials on the company’s own page, so weigh them accordingly, but the benefit they describe is the one most wedding shooters want: stop reviewing until you finally land on the number.
Aftershoot is currently promoting Cull to Target with a limited-time offer: six months of Aftershoot Select for $49, with a limited number of seats. Check the offer page for whether seats are still available, since that changes.
Reviewing fast without losing your eye
Speed is worthless if the gallery gets worse. Here is how to keep quality high while the AI does the heavy lifting.
Trust, then verify, in a consistent order. Always review in the same sequence: getting ready, ceremony, portraits, family formals, cocktail hour, reception, dancing. Reviewing in the order the day happened helps you see storytelling gaps, such as too many reception frames and not enough ceremony.
Judge by story, not just sharpness. A technically perfect frame can be emotionally dead, and a slightly soft frame of a real moment can be the picture the couple frames on the wall. The AI scores technical and compositional factors well. It cannot know that the man in the back row is the groom’s late grandfather’s best friend. You know that.
Use Find Anyone for the people who matter. Aftershoot’s new face search lets you search a name and find that person wherever you are working, in Cull, Edit, or Retouch. For wedding work, that is a quick way to confirm you have solid coverage of the parents, grandparents, and wedding party before you finalize.
Check your must-haves list. Most photographers work from a shot list: rings, first look, first kiss, cake cut, bouquet toss, each family combination. Once the cull finishes, run through that list and confirm each moment has at least one strong frame.
Take a break before final delivery picks. The best thing AI culling gives you is spare energy. Spend a little of it on a fresh-eyes pass the next morning. You will make better calls on hero images than you would at midnight.
 Save
SaveSneak peeks and first looks
Clients love an early taste of the gallery. A handful of frames posted within a day or two builds excitement and gives you something shareable. Aftershoot says it rebuilt how its Highlights feature picks your best shots, so you can get to delivering that first look to clients faster. Whether you use that or pick manually, the principle holds: build a short sneak-peek set while the cull is fresh, before you start the full edit.
A good sneak peek set is 10 to 20 frames. Mix details, emotion, and one or two wide frames that set the scene. Edit only those images first, deliver, and let the rest of the gallery follow on your normal timeline.
Privacy, NDAs, and offline processing
Wedding galleries are personal. Some clients are public figures, some venues have strict rules, and some couples simply do not want their photos on someone else’s server. This is where it is worth knowing how a tool handles your files.
Per Aftershoot’s pages, processing is local. Your photos stay on your hard drive, there are no cloud uploads for culling, and you can work without an internet connection. Aftershoot also states that you can opt out of data sharing right on the import screen, which it positions as useful for photographers who work under NDAs. It also notes its workflow is non-destructive and does not overwrite originals.
Whatever tool you use, read the current privacy terms yourself before you put a high-profile client through it. Product details change, and your contracts are your responsibility.
 Save
SaveWhat it costs
Pricing is where AI tools often get slippery, so here are the numbers straight from Aftershoot’s pricing and culling pages at the time of writing:
- Free trial: 30 days, full access to AI culling features, no credit card required.
- Select (culling): starts at $10 per month, billed annually, with unlimited photos and no per-image fees. Monthly billing is also offered.
- Edit: $30 per month. Retouch: $20 per month.
- Complete bundle (Cull + Edit + Retouch): listed at $45 per month against $60 for the plans bought separately.
Check the Aftershoot site before you commit, because plans and promotions change. If you are only after culling, the Select plan is the one to look at, and the Select page lays out what it includes.
Now do the simple math for your own business. Take the hours you spend culling per wedding, multiply by the number of weddings you shoot per year, then multiply by what an hour of your time is worth. If you shoot 25 weddings and AI culling saves you even two hours each, that is 50 hours back. Whether that is worth a subscription of around $10 a month is your call, but for most working wedding photographers the answer is not close.
Mistakes to avoid
Skipping the test run. Do not run your first AI cull on a client wedding with a deadline looming. Use the free trial on a past gallery you already culled by hand, then compare. Where does the AI agree with you? Where does it differ? That tells you how much review you need and where to be careful.
Treating the output as final. The AI gives you a starting point. Every selection should be yours to review, adjust, and approve before anything goes to a client.
Ignoring the style learning. If the software adapts from your corrections, then your corrections are training. Be deliberate. If you keep rescuing candid laughing frames over posed smiles, keep doing that consistently so the pattern is clear.
Over-promising counts to clients. A target is a tool, not a contract. Promise your couples a quality range, not an exact number, so you have room to include a few extra moments that matter.
Forgetting your back-up discipline. Faster culling should not mean sloppier file handling. Keep two copies of everything until the gallery is delivered and paid for.
Want to go deeper on this? Take a look at the ShutYourAperture Academy, our photography school.
Questions photographers ask
Does AI culling replace the photographer’s eye?
No. Aftershoot describes its AI as making suggestions while you make the decisions. You can override any selection, review the full rejected pile, adjust strictness, and fine-tune with Survey Mode, the Spray Can tool, and side-by-side views.
Do I need an internet connection to cull?
Per Aftershoot, no. It works locally on your computer, so you can process images without cloud uploads or a constant connection.
Will it change or delete my original files?
Aftershoot states that nothing gets deleted or changed and every image stays as it was. For RAW workflows, ratings are typically written to XMP sidecar files instead of the source files.
Which programs does it work with?
Aftershoot lists Lightroom Classic, Capture One, PhotoMechanic, and Bridge among its integrations, and exports to local storage as well.
What file types are supported?
All major RAW formats and JPEGs, so it should work with files from most cameras.
Is there a free trial, and do I need a card?
Yes. There is a 30-day trial with full access to AI culling features, and no credit card is needed to start.
Can I use it for more than weddings?
Yes. The same workflow suits events, portraits, and other high-volume shoots. Aftershoot also offers editing and retouching plans if you want to extend AI into later steps of your pipeline.
How fast will I actually get through a wedding?
It depends on your shooting volume and how picky you are. Aftershoot’s published comparison says 3 to 5 hours of manual culling can come down to 20 to 30 minutes of review. Test it on one of your own past weddings to see your own number.
Gear that makes culling easier
Software is half the equation. A few pieces of hardware make high-volume review far less painful.
- A color-accurate monitor. You cannot judge exposure or skin tones on a screen that lies to you.
- Fast card readers and external SSDs. Importing thousands of RAW files over a slow reader wastes the time AI just saved you.
- A comfortable mouse or a dedicated editing keyboard. You will be rating and flagging thousands of frames.
Gear that helps a high-volume workflow
These are categories worth browsing, not specific picks I am recommending. Check specs and reviews for your own camera and computer. Not sure what to buy? See my camera buyer guide.
- A color-accurate monitor. Judge exposure and skin tones on a screen you can trust. Browse on Amazon | on B&H
- A fast card reader. Import thousands of RAW files without waiting on a slow reader. Browse on Amazon | on B&H
- A portable SSD. Keep shoots and exports on fast external storage. Browse on Amazon | on B&H
- A comfortable keyboard and mouse. You will rate and flag thousands of frames. Browse on Amazon | on B&H
Amazon and B&H links are affiliate links. I may earn a commission at no extra cost to you.
The bottom line
Culling is not where your art lives. It is the toll road between the wedding and the work you actually love. AI culling will not make you a better photographer, but it can give you your evenings back and let you put your energy where it counts: the hero shots, the story, and the client relationship.
If you shoot weddings and still cull every frame by hand, try it once on a past gallery. The trial is free for 30 days and needs no card. Start your Aftershoot trial here, run a wedding you already know by heart, and see how close its picks land to yours.
Feature and pricing details were checked against aftershoot.com in October 2026 and can change. Verify on the official site before you buy.
Images: Aftershoot.