Updated October 2026 | By Edin Chavez, owner of Edin Studios
Heads up: some links below are affiliate links. If you start an Aftershoot plan through them, Shut Your Aperture earns a commission at no extra cost to you. Readers who sign up through my link also get a 15% discount coupon.
Every photographer has a number. Maybe your wedding package says 600 images. Maybe your corporate event contract says 150 finals per session. Maybe your own rule is “never deliver more than I can edit properly.” The number is in your head, in your contract, or both. And then the culling begins, and somehow you end up at 1,100 images wondering where it went wrong.
Culling toward a number is a different job than culling until it feels done. The first one has a finish line. The second is a slow leak of your evenings. This article is about how to set the finish line first, and how Aftershoot’s Cull to Target is built to do exactly that.
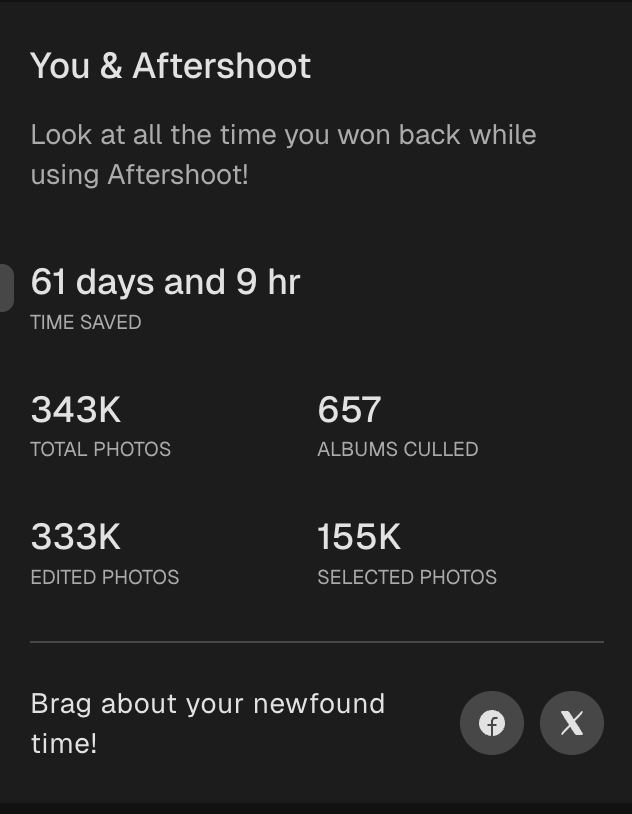
My numbers, straight from the app. I run Edin Studios, a national event photography business, and Aftershoot is in my workflow every single day. The “You & Aftershoot” screen in my own app currently shows 343K total photos, 657 albums culled, 155K selected photos, 333K edited photos, and 61 days and 9 hours of time saved. That time figure is the app’s own tally, so read it as an estimate, not a stopwatch. Still, 657 albums is a lot of real work to run through one tool.
Quick math on those numbers: 343K photos across 657 albums is roughly 520 photos per album, and 155K selected out of 343K means I keep a bit under half of what goes in. That ratio is only a rough average across very different jobs, but it shows why a fixed target matters. When you shoot that many frames, your final count is a decision you should make on purpose, not a number you land on by accident.
Table of Contents
- The multi-round cull problem
- What Cull to Target actually is
- How to pick your target number
- Strictness: lenient to strict
- A walkthrough for one shoot
- What to review after the cull
- Targets by shoot type
- Mistakes to avoid
- Questions photographers ask
The multi-round cull problem
The classic approach goes like this. Round one: knock out the obvious junk, the blinks, the soft frames, the accidental floor shots. You go from 4,000 to maybe 2,200. Round two: hunt down the duplicates and pick the best of each burst. Now you are at 1,300. Round three: you look at the number, feel guilty about delivering that many, and start second-guessing every keeper. You trim to 900. Round four happens the next morning when you realize you cut the best frame of the mother of the bride.
Each round is another trip through the same images. Each trip burns attention. And the final number is still a guess, because you only found it by exhaustion.
The deeper problem is that “good enough to keep” is a moving bar. Early in a session you are generous. Late at night you get stingy. Without a fixed target, the quality of your cull depends on your energy level, not the quality of the pictures.
 Save
SaveWhat Cull to Target actually is
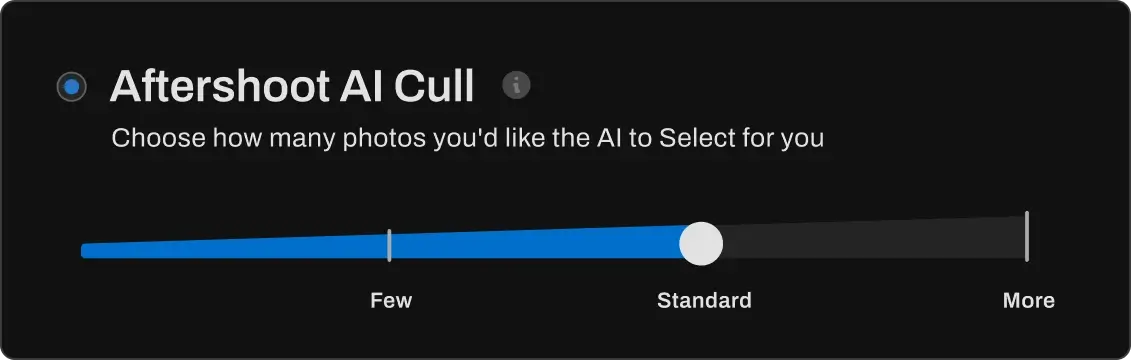
According to Aftershoot, Cull to Target lets you set your photo count before you cull. The software then builds the selection around that number from the start, balancing quality with full coverage of your shoot. So instead of cutting down from a huge pile in rounds, you tell it the answer you need and it works backward.
The “coverage” part matters. A cull that just picked the highest-scoring frames could hand you 400 beautiful images of the same twenty minutes. A good selection has range: getting ready, ceremony, portraits, reception, the small moments in between. Aftershoot describes balancing quality with full coverage of the shoot, which is the right goal. I would still check that coverage myself after any cull, and I will show you how below.
Aftershoot also reports that photographers who tried it like the predictability. Two photographers quoted on the company’s offer page, Allan Elly and Lucas Lermen, both say it fixed the habit of reviewing photos again and again until they reached the number they deliver. Those are testimonials on Aftershoot’s own page, so treat them as the company’s marketing, but the problem they describe is real and common.
At the time of writing, Aftershoot is running a limited-time offer tied to this feature: six months of Aftershoot Select for $49, with a limited number of seats. Seat counts change, so check the offer page for what is left.
How to pick your target number
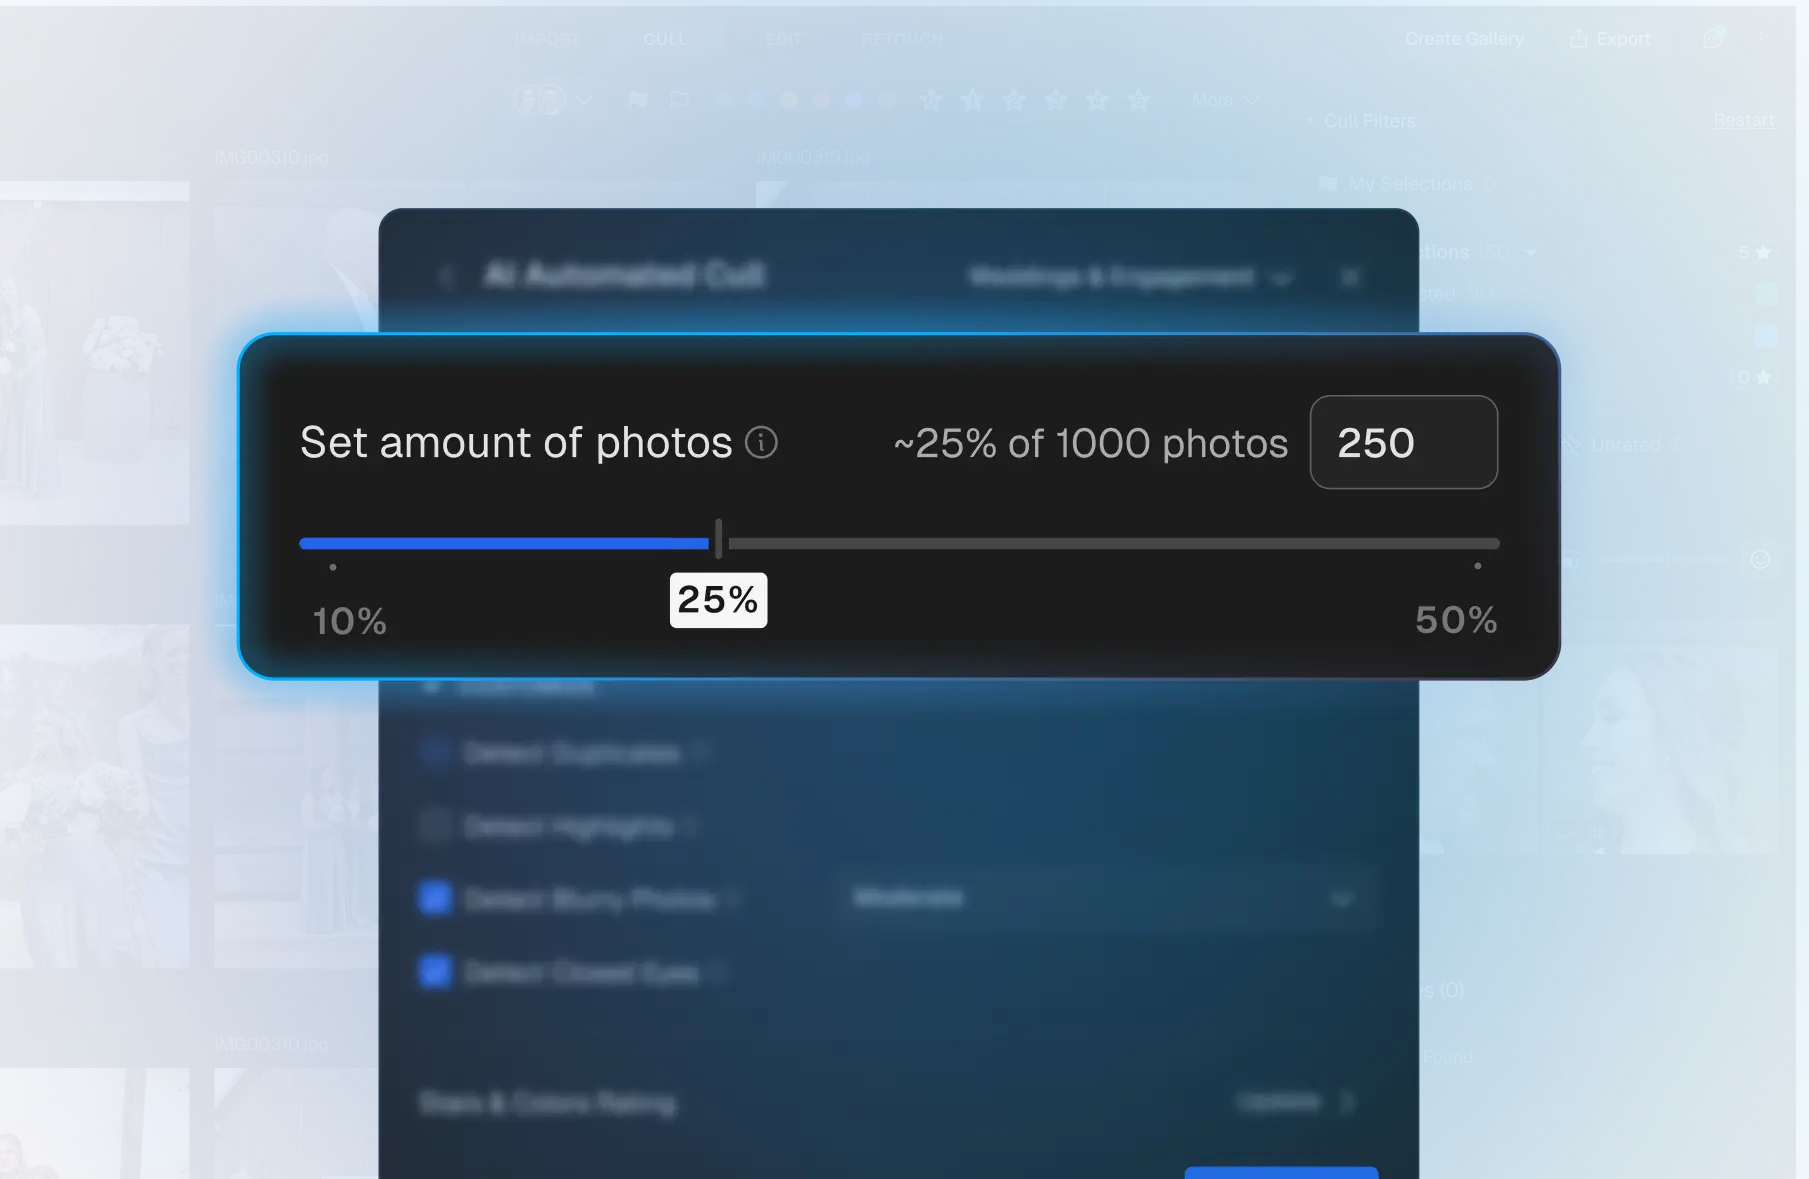
The tool needs a number from you, and that number should come from three places, in this order.
1. Your contract or package. If you promise “approximately 500 to 700 edited images,” your target is inside that range. Pick a number near the middle, not the top. Hitting the top of your range leaves no room for extra rescues later.
2. Your editing capacity. Every image you keep is an image you have to edit, retouch, and deliver. If you edit by hand, a lower target is kinder to your future self. If you use AI editing, you have more headroom. Be honest about how much finishing work you really want to do per shoot.
3. The shoot itself. A four-hour corporate mixer and a ten-hour wedding do not deserve the same count. Match the number to the length and the story density of the day. A good rule of thumb is to think in terms of keepers per hour of coverage and adjust from there. Use your own past galleries to calibrate. If your last five weddings landed around the same count and clients were happy, you already have your number.
One more tip: write the target in your shoot notes before the event even starts. When the number is decided before you see a single frame, you cannot bargain with yourself at midnight.
 Save
SaveStrictness: lenient to strict
Aftershoot says you can choose how broad or selective the cull is, from lenient to strict outputs. That is a separate control from the target count, and it is worth understanding how the two work together.
Think of the target as how many frames you want, and strictness as how fussy the software should be about technical quality when it chooses them. A lenient setting is useful when the shoot was full of moments you want to preserve even if a few are imperfect: a rushed ceremony, low light, a candid reception with lots of motion. A strict setting is useful when you shot a lot of similar frames and want only the cleanest versions.
My advice is to start in the middle, review the output, and adjust. After a few shoots you will learn which setting matches your shooting style. Aftershoot also says it learns from your corrections, adapting to your culling preferences over time, so the more deliberately you correct it, the closer its first pass should get to your own.
A walkthrough for one shoot
Here is how I would run a typical event through a target-based cull. Adjust the numbers to your own work.
- Back up the cards first. Two copies on two drives before anything else.
- Import into Aftershoot. RAW or JPEG both work. Per Aftershoot, this runs locally and does not need an internet connection.
- Set your target. Use the number you wrote in your shoot notes.
- Pick a strictness level. Start in the middle unless you know the shoot calls for something else.
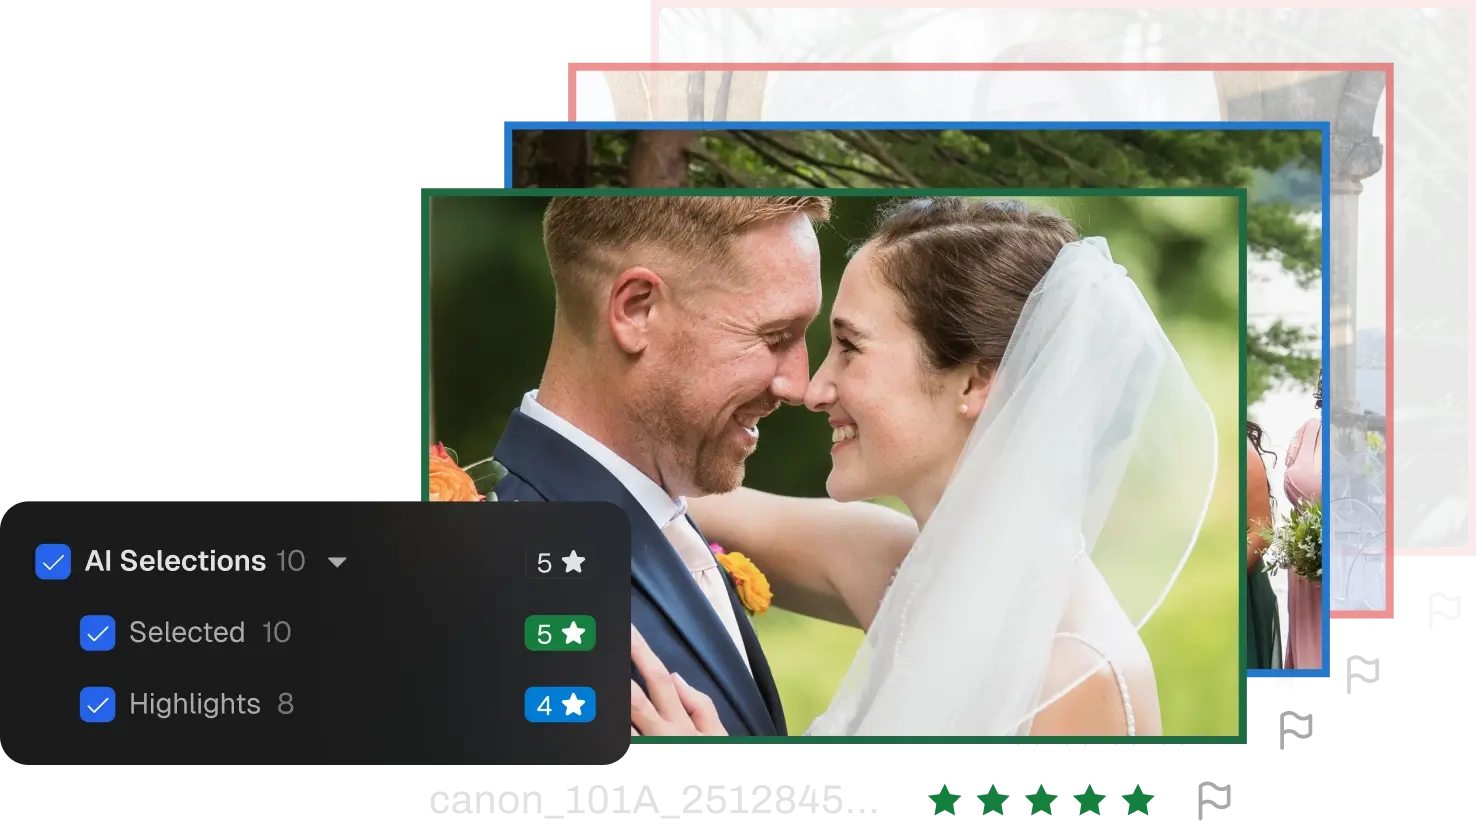
- Run the cull. Aftershoot sorts the shoot into two groups, Selections and For Review, so you know where to focus.
- Review Selections quickly. You are checking that these match your read of the day.
- Check For Review at grid size. Rescue the frames with feeling that the AI could not rate.
- Swap, do not add. If you rescue a frame, remove a weaker one. Keep to your number.
- Export ratings to your editor. Aftershoot exports to Lightroom Classic and Capture One, with ratings and labels intact.
Step eight is the discipline that makes the whole system work. If you let yourself add without removing, your target becomes a suggestion, and you are back where you started.
 Save
SaveWhat to review after the cull
The AI gives you a first draft. Here is what I check before I call a selection done.
Coverage across the day. Scroll the selection in time order. Are there gaps? Is there a stretch of ten minutes with nothing, or a long run of near-identical moments? Aftershoot’s coverage balancing should handle most of this, but verify.
Key people. Aftershoot’s face search lets you search a name and find that person in Cull, Edit, or Retouch. I use that kind of check to make sure the people who matter most have strong frames in the set.
Group shots. Use Survey Mode to compare up to 16 images side by side. Group shots are where one person blinks in the otherwise perfect frame, and where you most want a human decision.
The emotional frames. Skim the For Review pile for the moments the AI would not weight highly: a tear, a laugh with the mouth full, a motion blur that tells the story. These are the images clients remember, and the ones you will be glad you checked for.
Targets by shoot type
I am not going to hand you universal numbers, because they do not exist. What works for one photographer is wrong for another. But here is how to think about each type.
Weddings. Long days, many storylines, family expectations. Your target should reflect your package promise. Weddings reward a slightly generous cull because couples often want more than you think, but not so generous that you drown them. Read our wedding culling workflow for the full process.
Corporate and conference events. Shorter shoots, lots of repeated situations such as speakers, networking, and booths. A lower target works well, with an emphasis on variety and on faces. Clients usually want a clean, useful set, not a documentary.
Portrait sessions. You often shoot many near-identical frames of one pose. Strict settings help you pick the best expression, and Survey Mode makes the final pick quick.
Mixed event days. If you shoot back-to-back sessions, cull each session as its own album with its own target. That keeps one busy session from eating the whole count.
For scale, here is my own Aftershoot account summary. It shows the time the software has saved me across the albums I have run through it so far.
 Save
SaveMistakes to avoid
Setting the target too low to feel productive. A tiny number makes the cull fast but forces painful cuts during review. Pick a realistic number.
Setting it so high that it means nothing. If your target is nearly the size of the full shoot, you have not culled, you have just reorganized.
Trusting the output blindly. Aftershoot describes itself as a starting point, not a final answer, and says every selection is yours to review, adjust, and approve. Take it at its word.
Skipping a test. Run a past gallery you already culled by hand and compare. Aftershoot offers a free 30-day trial with full access to AI culling features and no credit card required, so you can test without risk.
Forgetting the client. Your target is for you. The client just wants a gallery that feels complete. If a moment matters to them, it goes in, even if you have to swap something out.
Want to go deeper on this? Take a look at the ShutYourAperture Academy, our photography school.
Questions photographers ask
What is Cull to Target?
It is an Aftershoot feature that lets you set your photo count before you cull. The software builds the selection around that number while balancing quality with coverage of the whole shoot.
Does it work offline?
Per Aftershoot, yes. Processing is local, there are no cloud uploads, and you do not need an internet connection.
Will it change my original files?
Aftershoot says nothing gets deleted or changed and every image stays as it was. For RAW workflows, ratings are typically written to XMP sidecar files.
Can I override what the AI picks?
Yes. You can review the full rejected pile, adjust strictness, and fine-tune with Survey Mode, the Spray Can tool, and side-by-side views.
Does culling to a number mean I might lose important photos?
It can if you treat the output as final. Always check the For Review group and the key people before you finish. The tool is there to give you a strong draft, and the last say stays with you.
How much does culling cost?
Aftershoot’s Select plan for AI culling starts at $10 per month, billed annually, with unlimited photos and no per-image fees. Monthly billing is also offered. Check the Select page for current details.
Is there a free trial?
Yes, 30 days with full access to AI culling features, and no credit card to start.
What programs does it export to?
Lightroom Classic and Capture One, plus local storage.
The bottom line
A finish line changes how you cull. Set the number, run the pass, review with your own eye, swap instead of add, and move on to the work you actually enjoy. If you want to try it, the 30-day trial is free. Run it on a gallery you already know by heart and see how close its picks land to yours. Once you are happy with the cull, our import-to-export editing workflow picks up where this article stops.
Gear that helps a high-volume workflow
These are categories worth browsing, not specific picks I am recommending. Check specs and reviews for your own camera and computer. Not sure what to buy? See my camera buyer guide.
- A portable SSD. Keep shoots and exports on fast external storage. Browse on Amazon | on B&H
- A fast card reader. Import thousands of RAW files without waiting on a slow reader. Browse on Amazon | on B&H
- A color-accurate monitor. Judge exposure and skin tones on a screen you can trust. Browse on Amazon | on B&H
Amazon and B&H links are affiliate links. I may earn a commission at no extra cost to you.
Aftershoot feature and pricing details were checked against aftershoot.com in October 2026 and can change. Verify on the official site before you buy. Usage numbers are from the author’s own Aftershoot app.
Images: Aftershoot.