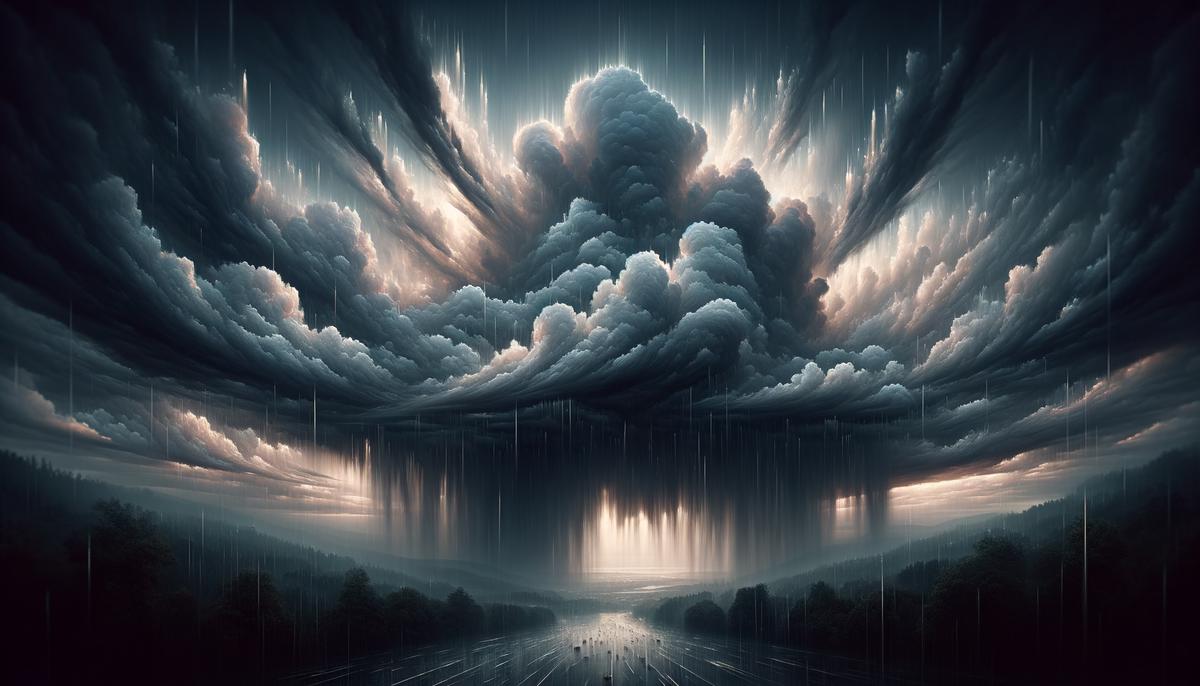
Imagine the gentle patter of rain against a windowpane, the distant rumble of thunder, and the soft, diffused light that accompanies a downpour. Now envision capturing that essence and bringing it to life in your digital artistry with Adobe Photoshop. Our journey into the digital storm begins by demystifying the powerful tools at our disposal. Layers and blending modes are the cornerstones of creating compelling visual narratives in Photoshop. These foundational elements allow for the seamless integration of rain textures into background images, weaving together the perfect stormy tableau. As we explore the intricacies of these features, you will gain the confidence to craft spectacular rainy sky effects that evoke emotion and depth in any scene you desire.
Understanding Layers and Blending Modes
Title: Unveiling The Art of Rainy Skies in Photoshop: Blending Modes Unleashed
There’s a raw, emotive quality to a rain-soaked atmosphere—something that can turn a simple photograph into a stirring piece of art. For the creatives who seek to capture such evocative moments, Photoshop presents an endless canvas. At the heart of this digital alchemy are blending modes, mysterious and powerful tools that seamlessly infuse photos with the mood and drama of a rainy day.
Imagine you have a photograph. The sky, the protagonist of our narrative, seems to lack the moodiness of an impending deluge. It’s in this moment that blending modes become the brushes through which we paint a more compelling story. Allow us to walk through the steps to enhance your sky effects in Photoshop, layer by layer.
Step 1: The Rainy Sky Selection
Begin by choosing an image of a sky laden with storm clouds or, if none are at hand, search for a stock photo that stirs the ominous feel of an approaching storm. Place this image above your original photo in a new layer. This layer will serve as the raw material for our rainy day transformation.
Step 2: Unleashing the Power of Blending Modes
Once your stormy sky is in position, explore the blending modes located within the Layers panel. Hover over options such as “Multiply,” “Overlay,” “Soft Light,” and “Hard Light.” “Multiply” will darken and intensify the original image, absorbing the light and merging the moods of the two layers. “Overlay” and “Soft Light” are subtler, caressing your photograph with a blend of highlights and shadows that echo the complexities of a rain-heavy skyline.
Step 3: Adjusting the Intensity
With the blending mode selected, witness the transformation as the stormy atmosphere intertwines with the original sky. To fine-tune the effect, adjust the opacity of the stormy sky layer. Reducing the opacity allows for a softer touch, weaving in just a hint of the tempest’s mood. Alternatively, increase the opacity to summon the full force of the stormy essence.
Step 4: The Magic of Masks
Now, to ensure that the power of the stormy sky does not overwhelm the photographic canvas, a layer mask becomes essential. Paint on the mask where the effect should be lessened, allowing the original sky’s character to peek through. At this juncture, the artist’s intuition guides the hand, as the brush reveals or conceals portions of the rainy sky effect.
Step 5: Final Atmospheric Touches
To elevate the composition further, consider adding rain itself. This can be achieved by creating a new layer and using brushes that mimic the appearance of raindrops and streaks, again employing blending modes to integrate them organically into the scene. “Screen” might be just right for these droplets, letting them shimmer against the darkened sky.
These steps taken are not mere clicks and adjustments. They are akin to brushstrokes on canvas, each guided by an understanding of light, shadow, and emotion. The blending modes in Photoshop serve as a gateway to a new realm of artistic expression, unlocking the ability to conjure up the perfect storm within a photograph. Such tools are not just features; they are the silent accomplices to a creative mind striving to share their story—a story now veiled in the evocative shroud of a rain-kissed world.
 Save
SaveCreating and Applying Rain Textures
Embarking on the continuation of our artistic endeavor in Photoshop, we infuse life into any composition by crafting custom rain textures that whisper tales of drizzly serenity or shout the drama of a tempest. The next steps will guide any art enthusiast through the delicate process of rainmaking in the digital realm, ensuring that the final piece not only captivates but speaks volumes of its creator’s finesse.
Step 6: Create a New Layer for Rain Effect
Begin by introducing a new layer atop your already-striking stormy sky. This layer will serve as the canvas upon which the rain will dance. A fresh layer provides flexibility, allowing adjustments free from the constraints of the underlying image.
Step 7: Select the Right Brush
Now, dive into the repertoire of brushes available in Photoshop. For rain, a slender-shaped brush will mimic the natural streak of a raindrop plunging from the heavens. Tailor the brush’s size, spacing, and angle to replicate the variety and randomness with which rain falls.
Step 8: Apply Brush Strokes for Rain
With the brush at the ready, it’s time to stroke the canvas, creating vertical lines that will soon transform into believable precipitation. Remember, layers of light, airy strokes will conjure a soft drizzle, while bold and heavy-handed lines evoke the intensity of a downpour.
Step 9: Play With Motion Blur
Once satisfied with the painted rain’s density and direction, the Motion Blur filter steps into the spotlight. Applying this filter adds a sense of velocity and directionality, embodying the rain’s swift descent. Adjust the blur’s angle and distance to perfect the illusion of movement and depth.
Step 10: Fine-Tune Rain’s Appearance
It’s now time to refine the rain’s presence within the scene. Diminish or amplify the layer’s opacity, allowing for a soft mist or a shroud of rain. Blend modes like “Screen” can introduce a subtle gloss to each drop, conveying the light reflecting off a wet world.
Step 11: Color and Tone Adjustment
To harmonize the rain with the overarching ambiance, tweaking its color and tone is vital. Color balance and photo filters can cool or warm the rain to match the temperature of the moment, while adjusting the contrast can distinguish a gentle shower from a fierce flood.
Step 12: Unified Atmospheric Cohesion
The final touch ensures that the rain does not merely sit atop the image but is woven integrally into the scene. Merge the effect with atmospheric nuances, such as fog or splashes. This unity crafts a convincing setting where every element participates in the visual symphony.
With the completion of these steps, the artistic piece defies its digital canvas, inviting viewers to feel the rain’s rhythm and embrace its mood-laden embrace. Herein lies the power of Photoshop – a tool that, when wielded with creativity, turns the ordinary into the extraordinary. Through the rain, stories find a voice and visions resonate with the palpable essence of the world’s natural cadence.
 Save
SavePhoto by josenothose on Unsplash
Adjusting Lighting and Color for Mood
Delving deeper into the atmospheric realm of Photoshop, the manipulation of lighting and color adjustments acts as the soulful conduit that conveys the very essence of mood in a rainy sky scene. Let’s elucidate how these subtle yet significant manipulations can elevate the ordinary to the ethereal, providing an emotive resonance to the visual narrative.
Step 6: Manipulate Lighting to Evoke Emotional Depth
To instill a mood that is as palpable as the damp air of a rainsoaked milieu, the focus must shift to shaping the scene’s lighting. Begin by selecting ‘Curves’ from the ‘Adjustments’ panel. This powerful tool allows the bending of light and shadow, deepening the brooding underbelly of the clouds or illuminating them with a silver lining. A gentle S-curve can add a vivid contrast, instrumental in depicting the capricious nature of a storm.
Under the ‘Adjustments’ menu again, ‘Levels’ provides a straightforward way to fine-tune the brightness and contrast. It’s a technique akin to adjusting the iris of an eye, enhancing detail where shadows dominate or toning down overly bright zones.
Step 7: Adjust Color to Set the Rainy Day Palette
Rain does not merely suggest water cascading from the heavens; it’s an alchemy of hue that casts the world in a different light. Navigate to ‘Color Balance’ in the ‘Adjustments’ panel to embark on this chromatic journey. Here, the subtle play of cool and warm tones can mimic the temperature of the downpour—blues and greens for a chilly deluge or reds and yellows for an evening’s summer shower.
‘Selective Color’ adjustment should be considered a boon for artists seeking granular control over specific colors within their composition. One can tweak the umbers and grays lurking within the clouds or the myriad reflections in the puddles below, ensuring that each hue sings in harmony with the scene’s overall tone.
Step 8: Harness the Power of Gradient Maps for Atmosphere
A gradient map casts a unifying atmospheric light over the scene and can be particularly evocative. Imagine draping the sky in a gradient that transitions from the ominous charcoal of a storm’s heart to the soft pearl-gray at its edge. This can be achieved by creating a new ‘Gradient Map’ adjustment layer and selecting a suitable gradient. Set the blending mode to ‘Soft Light’ or ‘Overlay’ to imbue the image with the mood of the gradient colors while maintaining its textural integrity.
Step 9: Apply Photo Filters for Instantaneous Mood Swings
For a swift yet masterful tonal shift, the ‘Photo Filter’ adjustment can simulate the effect of different times of day or weather conditions on the rainy scene. A cooling filter can evoke a sodden, wintry feel, while a warmer filter might suggest the golden hour of a setting sun piercing through the tail-end of a storm.
Finally, as the canvas of clouds and cascades receives its finishing touches, the strokes of light and hue merges in a crescendo of emotional depth. The once singularly captured moment is now a symphony of mood, its luminous particles and spectral tones conducting the viewer’s experience. The tale that began with a digital snapshot of a stormy sky now whispers its narrative through a rain-soaked lens, touching the heart with its transformed, artistic serenity.
 Save
SaveMastering the digital art of rain requires patience and creativity, but the reward is the ability to convey the unique atmosphere of a rainy day in any visual story you choose to tell. The interplay of deftly applied rain textures, fine-tuned lighting, and moody coloration can transform an ordinary image into a window looking out onto a world shrouded in rain. By harnessing the tools and techniques outlined, you have stepped into a realm where you control the weather, invoking the power of the elements to create scenes that resonate with the soul-stirring essence of a rain-soaked landscape.


