Stargazing transforms a clear night sky into a canvas of cosmic wonder, where each twinkling star tells a tale of distant worlds and ancient light. The artistry of the heavens has long inspired humanity, and with Photoshop, we can bring that celestial magic to our digital creations. By unlocking the potential of Photoshop brushes, we can simulate the captivating patterns of a star-filled sky with just a few expert strokes. Whether you’re a seasoned designer or a budding enthusiast looking to enrich your digital art, this essay demystifies the process of using and creating starry sky brushes, offering insight into the intricate brush settings that breathe life into the stars. Size, shape dynamics, scattering, and opacity—these are the tools we wield to paint our very own nocturnal masterpiece. Join us as we embark on a journey to harness the sparkling allure of the night sky, enhancing your projects with a touch of cosmic splendor.
For a deeper foundation on night photography, see our complete guide.
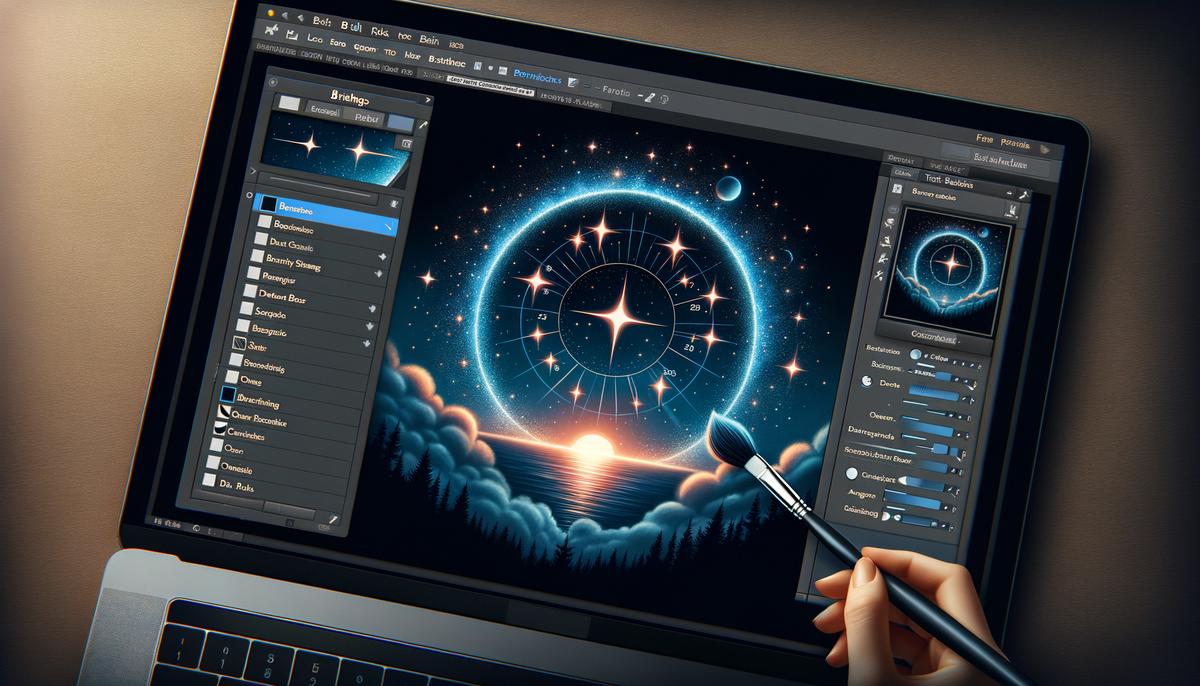
Understanding Photoshop Brushes
The Stellar Spectrum: Mastering Photoshop Brushes for Starry Skies
In the expansive canvas of the digital cosmos, Photoshop brushes become the artist’s celestial quill, crafting starry skies that rival the beauty of a moonlit night. Embracing the basic functionalities of these brushes can transform the ordinary into the extraordinary, propelling artworks into the interstellar.
Understanding the Basics: Brush Presets
Firstly, navigate to the Brush Preset Picker. With an array of options at your fingertips, you’ll find brushes that mimic the delicate scatter of stars. Begin with a standard round brush; it’s your foundation for creating starry magic.
Size Matters: Adjusting Brush Diameter
Adjust the size of your brush for variety. Larger diameters birth bright, prominent stars, while smaller ones sprinkle the sky with distant, twinkling lights. Adjusting your brush size breathes life and depth into your nocturnal masterpiece.
Scattering Stars: Exploring Brush Settings
The scattering setting is your cosmic dance. With a slide and a click, stars disperse across the digital black, mimicking the random, yet ordered chaos of the night sky. Adjust both scatter percentage and count to achieve the desired density and dispersion
.Dynamic Color Range: Utilizing Foreground and Background Colors
Your foreground and background colors set the tonal stage for your astral creations. Cycle through blues, purples, and greys, selecting colors that harmonize with the night. Utilize the Brush Tool in conjunction with the X key to fluidly switch between your chosen colors, generating a rich, multi-hued tapestry.
Opacity and Flow: Fine-Tuning Intensity
Modify the Opacity and Flow settings to master the intensity of your starlight. Decreased opacity offers a soft, subtle glow, while full opacity carves out bright, bold spheres. Flow regulates the paint application, a tool for artists seeking control over the gradual buildup of their celestial bodies.
Starlight Brush Dynamics: Unleashing Creativity with Texture
Introduce texture to your stars for additional dimension. From dusty nebulas to the rough granularity of the Milky Way, textures endow your work with a tactile quality that beckons viewers to reach out and touch the cosmos.
Spatiotemporal Control: Using Pen Pressure
For those wielding a stylus, pen pressure grants immense control over the birth of stars. Gentle pressure summons faint glimmers, while increased force ushers in dramatic flares. This dynamic interaction between artist and tablet mirrors the very pulse of stardust formation.
Final Illumination: Adding Outer Glows
Magnify your stars’ luminescence with Layer Styles. Adding an Outer Glow can bestow a halo of light, reflecting the ethereal glow that real stars emit. Utilize blend modes to seamlessly integrate your stars into the celestial sphere.
In conclusion, mastering the basic functionalities of Photoshop brushes unlocks the artist’s ability to craft starry skies that resonate with the wonder of the universe. Each setting and stroke holds the potential to define new constellations, to narrate tales of distant suns, and to illustrate the nocturnal poetry we all admire. With these tools, digital skies are not just designed—they are discovered.
 Save
SavePhoto by finding_dan on Unsplash
Finding and Installing Brushes
Title: Painting the Heavens: Your Guide to Installing Custom Starry Sky Brushes in Photoshop
Have you ever gazed into the night sky and wished to capture its resplendent beauty in your digital art? Photoshop, a beloved canvas for countless artists, provides a platform for imagination to flourish. Custom starry sky brushes can transform your celestial visions into striking artworks that twinkle with life. Let’s embark on a journey to find and install these ethereal brushes, to sprinkle your digital landscapes with stars.
Discovering Stellar BrushesBefore harnessing the night sky’s magic, one must venture into the vast digital cosmos to find suitable brushes. Websites like BrushKing, Brusheezy, and DeviantArt are treasure troves where professional and amateur artists alike share their custom brush creations. Look for brush packs with names that evoke the astral theme, such as “starry nights,” “galactic brushes,” or “cosmic lights.” Ensure compatibility with your version of Photoshop before downloading.
A Brush with Destiny: Installation Steps- Download the Brush Pack: Most custom brushes come in .abr files. Click “Download” and save the file in a location you can easily find.
- Open Photoshop: Launch your bridge to the stars—your Photoshop application.
- Access the Brushes Panel: Navigate to Window > Brushes to open the brushes panel if it isn’t already visible.
- Import Custom Brushes: Click on the small menu icon in the top right corner of the Brushes Panel and select Import Brushes from the drop-down list. Navigate to where you saved your downloaded .abr file and select it.
- Adding to the Brush Library: Once imported, the new starry sky brushes will appear at the bottom of your brush library. Scroll down to see your newly acquired celestial tools.
Crafting Night Skies
With these custom brushes in your artistic toolkit, let your creativity soar. Layer stars over inky nightscapes, or craft galaxies that dance with color and light. Blend brushes with varying textures and incorporate flares to create a universe that is uniquely yours.
Artists revel in the power to invoke emotions and tell stories through their works. With these starry sky brushes, the narrative potential is as limitless as the universe itself. Picture a serene scene where each star seems to convey part of a greater narrative, or a dramatic backdrop for characters set against the cosmos. These celestial strokes empower artists to transcend the ordinary, leading viewers on an interstellar voyage crafted from bursts of digital stardust.
Now, equipped with your custom starry sky brushes, gaze into the boundless sky of Photoshop and let the astral symphony begin to play beneath your fingertips.
 Save
SavePhoto by jeremythomasphoto on Unsplash
Creating Custom Starry Brushes
Title: Illuminating the Digital Heavens: Creating Custom Starry Brushes in Photoshop
Step into the realm of digital cosmos builders, where artistry meets the vast expanse of the night sky. The twinkle of a star has captivated many, but today, we wield the power to scatter constellations with a click. With the foundational knowledge of Photoshop’s Brush Preset Picker and the mystical layering of inky blackness with translucent stars at hand, the journey to craft your custom starry brushes beckons.
Delving deep into the celestial brush-making process, let’s begin by unlocking the secrets of shape dynamics. This feature empowers artists to infuse a touch of randomness into their starry brushes, ensuring each stroke on this digital canvas mirrors the unique randomness of the cosmos. Adjust the ‘Size Jitter’ and ‘Angle Jitter’ to breathe life into static stars, allowing them to dance across your burgeoning sky with a natural variation in size and angle—each star an individual, much like in the realms above.
Now, to marry movement with the static night, as no real sky is ever truly still. The ‘Dual Brush’ setting beckons, letting you combine two brush shapes into one. Imagine two celestial bodies in a majestic dance—select a secondary starry brush, adjust the settings to complement your primary brush, and witness a dynamic interplay of stars that imbues depth and intricacy into your nocturnal masterpiece.
In crafting your stellar array, consider the harmony between sharpness and glow. The ‘Transfer’ section is where the soft whispers of distant suns are born. Plying with ‘Opacity Jitter’ and ‘Flow Jitter’, you assign to each star a breath of light that fades into the darkened tapestry, a ghostly softness that speaks of eons and lightyears.
Dare to play with color dynamics, for the universe is a riotous festival of hues—each star a note in a symphony of spectral radiance. Within this realm, let the ‘Foreground/Background Jitter’ be your paintbrush, offering a celestial chorus of colors every time your stylus kisses the metaphorical parchment. The gentle fluctuation from your chosen foreground to background colors lends an ethereal quality to your astral creations, mimicking the luminous glow of stars both near and far.
Finally, an artist’s flourish—the ‘Spacing’ attribute within Brush Tip Shape. It’s the rhythm of your starscape. Here, one can control the density of the starfield; tighten the spacing for milky swathes of light or widen for a sparser, more deliberate placement. It’s the artist’s prerogative, crafting vignettes of the heavens where stars cluster in the creation of galaxies or spread out into the dark void.
With these advanced tweaks etched into your brush, save this celestial marvel by clicking on the ‘New Brush Preset’ button, bestowing upon your creation a name that echoes its intended use—perhaps ‘Galactic Wisp’ or ‘Nebular Dream.’
And there, amidst the digital cosmos, the stage is set for transcendent narratives to unfold. Each brush stroke carries not just specks of white against black but the seeds of stories yet to be told. In bringing forth new constellations, the creative soul does not merely render images but composes symphonies of light and dark, orchestrating a universe that lives, breathes, and inspires within the confines of a canvas—one that challenges the observer to wander and wonder, lost in the boundless possibilities that lie within the digital heavens.
Elevate your digital art and touch the stars; it’s not just a landscape you’re creating—it’s an experience, a realm where each star you place holds the potential to shine a light on the unknown, inviting observers to dream alongside you, in the limitless expanse wrought from your own imagination and the tips of your starry brushes in Photoshop.
 Save
SavePhoto by markbasarabvisuals on Unsplash
The night sky holds an allure that has captivated artists for millennia, and with the knowledge you’ve now acquired, you stand at the threshold of that timeless tradition. Your digital canvas awaits, an expanse ready to be adorned with the celestial beauty you have learned to create. Remember, the starry brushes you’ve discovered or crafted are more than mere tools; they are your connection to the cosmos, ready to ignite the imagination with every stroke. So venture forth with confidence, and let the stars you place upon the sky of your artwork remind you of the boundless creativity that resides within. May each project you undertake shimmer with the same brilliance as the starlit tapestry that dances above us each night.


