Best Photography Spots in Hong Kong: 12 Locations With GPS
edinchavez01-20). Buying through these links costs you nothing extra and helps fund our free guides.
Hong Kong, Hong Kong is one of the most photogenic cities in the world. If you have a camera and the patience to show up before dawn, Hong Kong will give you images that last a career — but only if you know where and when to point it.
This is the definitive field guide to the 12 best photography spots in Hong Kong, with GPS coordinates you can drop straight into Google Maps, exact camera settings tuned to Hong Kong’s unique light, precise timing for every location, and the access notes nobody else bothers to document. It mirrors the intel inside our Hong Kong Ultimate Photographer’s Guide ($47 PDF) — a downloadable field guide with full-page hero images, GPS maps, seasonal tables, a city safety briefing, and a complete photographer’s packing list. Get the guide →
Planning multi-city travel? See also: U.S. cities photography hub and the National Parks Photography Guides.
12 GPS-mapped locations · Exact camera settings · Multi-season shooting calendar · Free annual updates
Download the PDF guide →
Get the Hong Kong Ultimate Photographer’s Guide
Every location below — pre-mapped with GPS, golden-hour timing, gear recommendations, cultural rules, and a 14-day itinerary. Downloaded by 200+ working photographers.
Quick jump to the 12 spots
- Victoria Peak — Sky Terrace 428
- Tsim Sha Tsui Promenade — Symphony of Lights
- Choi Hung Estate Rooftop Basketball Court
- Quarry Bay Monster Building — Yick Cheong Building Courtyard
- Central–Mid-Levels Escalator
- Star Ferry — Victoria Harbour Crossing
- Man Mo Temple — Hollywood Road
- Sky100 ICC Observation Deck
- Sai Wan Pier — Western District Cargo Working Area
- Tian Tan Buddha — Lantau Island
- Mong Kok — Goldfish Market and Ladies Market
- Ten Thousand Buddhas Monastery — Sha Tin
A look inside the Hong Kong Photographer’s Guide
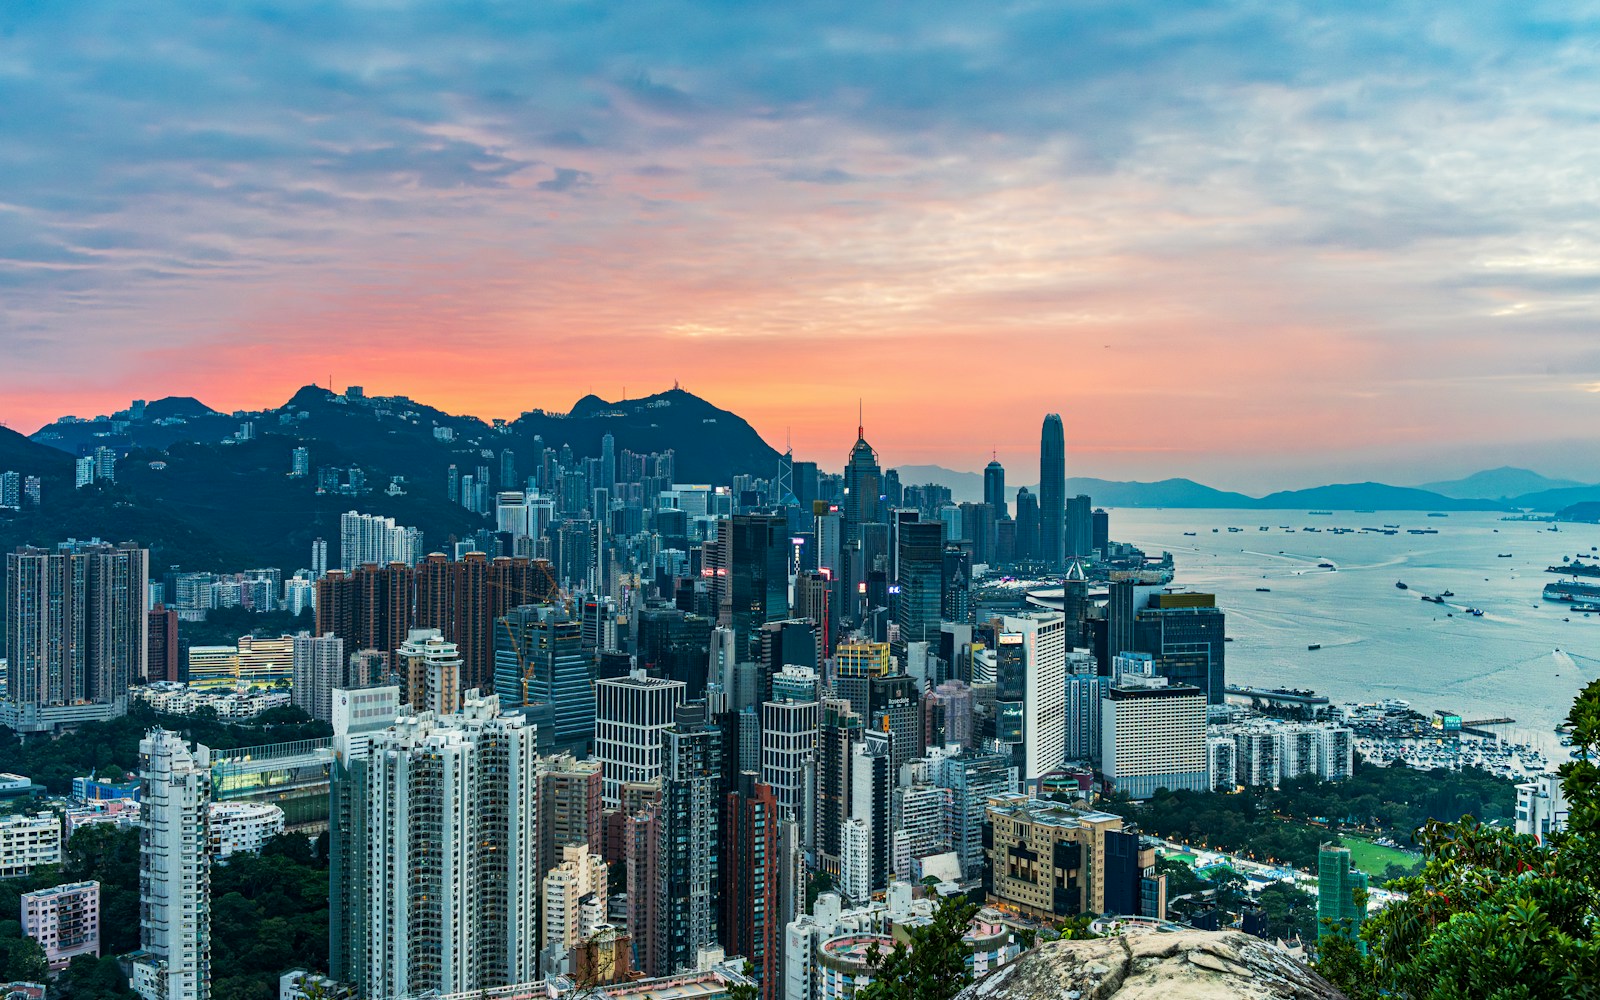
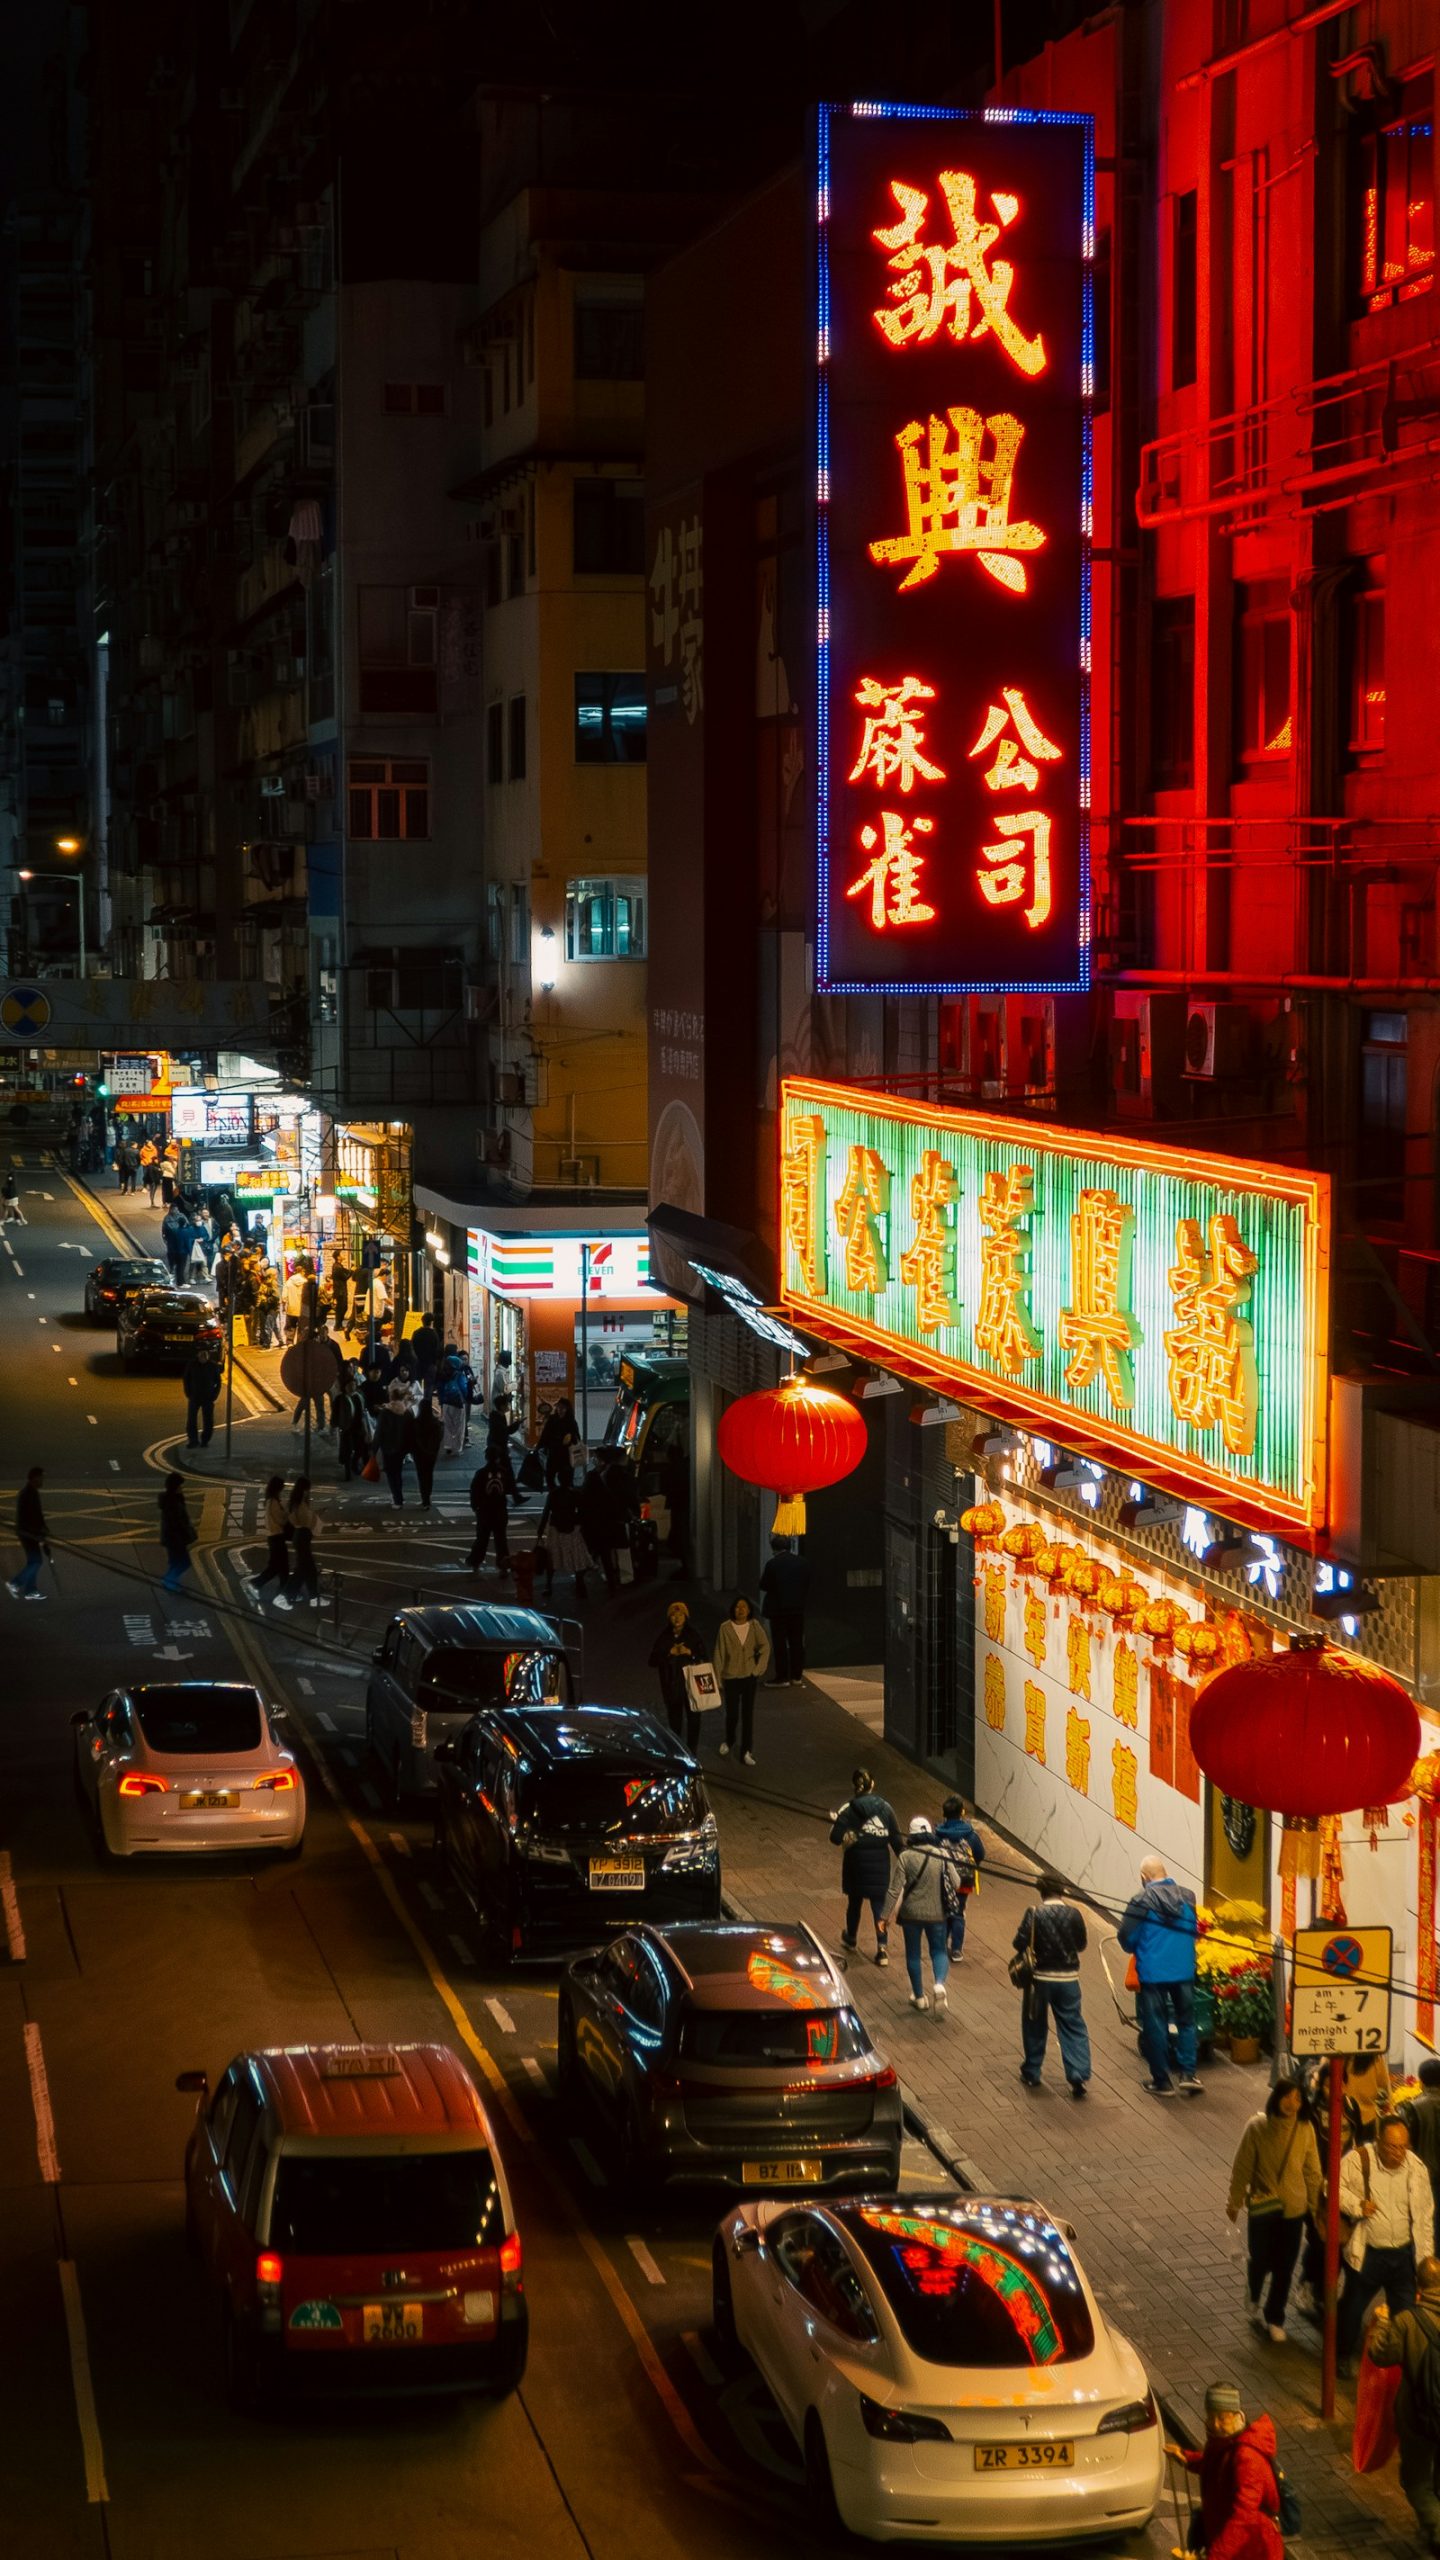
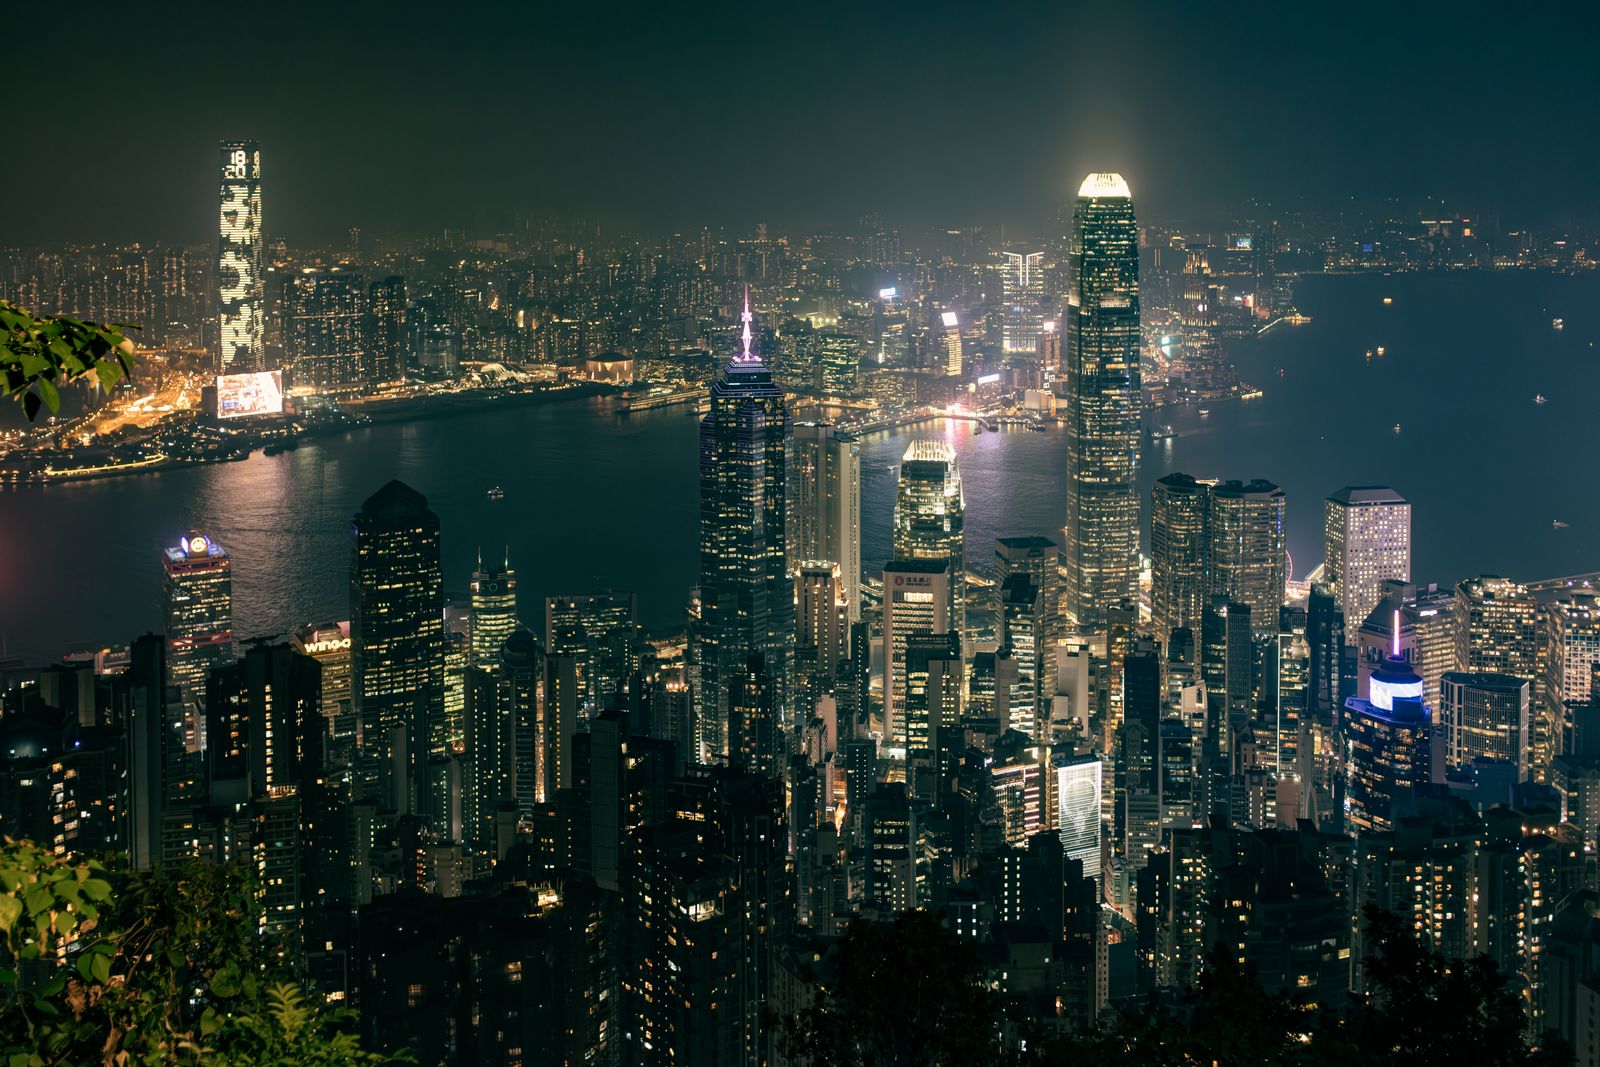
Here are three of the actual shots you’ll find inside the PDF — cinematic full-page references for the exact spots, lenses, and lighting conditions documented in the guide. The full guide includes 12 locations, each with a hero image, GPS map, settings table, and a five-shot list.
Save
Before you shoot Hong Kong: the essentials
- Free public access: Tsim Sha Tsui Promenade and Avenue of Stars are free; Symphony of Lights show free nightly at 20:00; Choi Hung Estate basketball court free; Central-Mid-Levels Escalator free; Man Mo Temple free; Mong Kok Goldfish Market and Ladies Market free; Sai Wan Pier free; Ten Thousand Buddhas Monastery free admission; Star Ferry cross-harbour HK$5.0 adult upper deck weekday; Peak Tram round-trip adult HK$116, Sky Pass (tram + Sky Terrace 428) HK$168 adult round-trip (as of 2025); Sky100 ICC HK$188 adult standard (online 10% off to HK$169); Ngong Ping 360 cable car (to Tian Tan Buddha) HK$295 adult round-trip standard cabin (as of June 2025)
- Commercial permits: Personal and tourist photography in all public outdoor spaces is unrestricted. Photography inside temples is generally permitted but flash is prohibited and worshippers must not be disturbed. The Monster Building / Yick Cheong courtyard is semi-public residential space — photograph respectfully and do not block access. Drone flights require Civil Aviation Department authorization (HKCAR 48) and are prohibited in many urban areas; strictly banned at Tian Tan Buddha. Commercial shoots may require permissions from individual venue operators.
- Best photography seasons: October–December (clear skies, low humidity, excellent air quality, comfortable temperatures 18–25°C) and March–April (mild spring light before haze season)
- Blue hour notes: Hong Kong sits at 22.3°N — a subtropical latitude where blue hour is brief (10–15 minutes after sunset) compared to European cities. The low-angle winter sun (November–January, setting ~17:45–18:00) produces long dramatic shadows across the Kowloon peninsula and Victoria Harbour, making winter the premium season for city photography. Summer sunsets (June–August) arrive later (~19:00–19:10) but are often obscured by haze and monsoon cloud.
- Drone policy: Drone laws vary widely by country and city — many capital and tourist zones are no-fly. Verify the local civil aviation authority’s current rules before launching.
- Local resource: Official visitor information
The full-resolution version of every map below — plus seasonal calendars, gear notes per location, sun-angle diagrams, and a complete photographer’s packing checklist — is inside the Hong Kong Photographer’s Guide PDF ($47).
1. Victoria Peak — Sky Terrace 428
Sky Terrace 428, on the roof of Peak Tower at 428 metres above sea level, is Hong Kong’s highest outdoor viewing platform and delivers the single most iconic urban panorama in Asia. The 360° view sweeps across Victoria Harbour, the entire central business district skyline, Kowloon peninsula, Lantau Island, and on clear days to Macau’s towers 65 km away. At night, the city becomes a luminous carpet of neon, fluorescent towers, and harbour traffic — one of the densest concentrations of illuminated skyscrapers on earth. The northward-facing aspect places the photographer above the action with a commanding, unobstructed perspective that no other vantage in Hong Kong replicates.
- GPS: 22.2759, 114.1455
- Elevation: 1,404 ft
- Best time of day: blue hour — 15–20 minutes after sunset when the harbour’s neon grid ignites against a deep cerulean sky and the city lights achieve maximum contrast; also spectacular at dawn (requires taxi, as Peak Tram opens at 07:00) for fog-filled harbour scenes
- Sun direction: From Sky Terrace 428, the harbour and Kowloon lie to the north-northwest at azimuth ~340°. The sun rises in the east-northeast in summer (azimuth ~70°) and southeast in winter (azimuth ~115°), tracking a low arc across the southern sky at 22°N latitude. In winter (October–February), sunset swings to the west-southwest (~245°), delivering warm golden-hour light across the Kowloon peninsula facade from behind the viewer. In summer, the sun sets farther north (~290°), producing cooler side-light. The peak faces north: all meaningful harbour light comes from the city itself rather than natural sun, making artificial-light blue hour the definitive shooting window.
- Access: Peak Tower, 128 Peak Road, The Peak, Hong Kong Island. Peak Tram departs from 33 Garden Road, Central (MTR Central Station, Exit J2 or K, then 10-min walk uphill, or free bus C to tram terminal). Peak Tram round-trip adult HK$116 (weekday)/HK$136 (weekend); Peak Tram Sky Pass (tram return + Sky Terrace 428) HK$168 adult, HK$88 child round-trip (2025 pricing). Peak Tram Ruby Special (priority lane + Sky Terrace 428) HK$342 adult (2025). Alternative: Bus 15 from Exchange Square Bus Terminus (HK$10.60 adult) drops at The Peak — no tram wait. Sky Terrace 428 standalone entry also available. Book online at thepeak.com.hk to avoid queues.
- Difficulty: easy
- Recommended settings: Blue Hour Cityscape: f/8, 4 sec, ISO 100, 24mm, tripod · Night Wide Panorama: f/11, 8 sec, ISO 100, 16mm, tripod · Golden Hour Ambient: f/8, 1/250 sec, ISO 200, 50mm · Telephoto Compression: f/8, 1/60 sec, ISO 800, 200mm
Shots to chase:
- Classic blue-hour long exposure with the harbour’s neon reflections and the Twin IFC towers flanking the frame at 24mm from the north-facing rail
- Telephoto compression at 200mm showing the Star Ferry mid-crossing between Tsim Sha Tsui and Central, dwarfed by the skyscraper wall
- Sunrise (taxi required): soft pink and gold fog blanket filling the harbour basin between Victoria Peak and Lion Rock — a rare atmospheric inversion unique to winter mornings
- Symphony of Lights at 20:00 viewed from the terrace: wide-angle capture showing both Hong Kong Island’s illuminated facades and the laser beams projecting north toward Kowloon
- Human element: silhouette portrait of a person at the railing against the blazing city grid at blue hour, using the city illumination as natural backlight
Pro tip: Arrive 45 minutes before sunset on a weekday to secure a front-rail position — weekend evenings pack out. Pre-buy the Sky Pass online (thepeak.com.hk) to skip tram queues that regularly exceed 45 minutes. The Lugard Road Lookout (free, 20-minute walk westward from Peak Tower along Lugard Road) offers an equally spectacular and far less crowded alternative vantage — ideal for sunrise when the tram is not yet running. October–January provides the clearest air; avoid May–September when monsoon haze frequently obscures the middle distance. Bring a tripod: handheld shooting at night produces blurred citylights. The platform has a slight eastward lean at the northeast corner that gives a more dramatic angle toward Central.
Common mistake to avoid: Using an ultra-wide lens (12–14mm) introduces severe barrel distortion across the curved horizon of the cityscape; 24–35mm produces the most natural and flattering skyline perspective. Shooting only from inside the glass-enclosed lower level — glass reflects ambient light and degrades image sharpness; always shoot from the open-air outer rail. Visiting during typhoon season (June–September) without checking air quality — an AQI above 100 wipes out the mid-distance Kowloon skyline behind a grey wall of haze.
2. Tsim Sha Tsui Promenade — Symphony of Lights
The Tsim Sha Tsui Promenade is Hong Kong’s definitive ground-level cityscape vantage: 1.7 km of unobstructed waterfront looking directly across the narrowest point of Victoria Harbour at the world-famous Hong Kong Island skyline — the IFC towers, Bank of China, HSBC, and over 40 illuminated skyscrapers in a dense half-kilometre-wide wall. The nightly Symphony of Lights (Guinness World Record: world’s largest permanent light and sound show) transforms 47 buildings into a synchronised laser-and-LED spectacle for 10 minutes at 20:00. The Bruce Lee statue and Avenue of Stars handprints add foreground cultural interest. No other city delivers this combination of maritime foreground, reflective harbour water, and vertical urban density in a single composition.
- GPS: 22.2939, 114.1722
- Elevation: 10 ft
- Best time of day: golden hour (45 minutes before sunset) through blue hour and into Symphony of Lights at 20:00; the most compressed window of photographic opportunity in Hong Kong — sky colour, city illumination, and laser show all within 90 minutes
- Sun direction: The Tsim Sha Tsui waterfront faces south-southeast, looking across Victoria Harbour toward Hong Kong Island (azimuth ~160–180°). The sun sets to the west-southwest in winter (~245°) and west-northwest in summer (~290°), meaning the sun never sets directly behind Hong Kong Island from this vantage — it sinks to the left (west) of the skyline. This creates a warm side-light on the Central and Wan Chai towers in the late afternoon. Blue hour produces a deep cobalt sky above the backlit skyline silhouette — the most photogenic condition at this location. The eastern-facing towers catch first light at sunrise if shooting from the far east end of the promenade near the ICC clock tower.
- Access: Salisbury Road waterfront, Tsim Sha Tsui, Kowloon. MTR Tsim Sha Tsui Station, Exit L6 (1 minute walk to waterfront). MTR East Tsim Sha Tsui Station, Exit J (3 minutes). Avenue of Stars is immediately east. No entry fee. Open 24 hours. Symphony of Lights show starts 20:00 daily (weather dependent, cancelled in heavy rain/typhoon signal 3+). Star Ferry Pier Tsim Sha Tsui is at the west end of the promenade.
- Difficulty: easy
- Recommended settings: Blue Hour Skyline: f/11, 6 sec, ISO 100, 24mm, tripod · Symphony Of Lights Lasers: f/8, 1/15 sec, ISO 800, 35mm · Golden Hour Handheld: f/8, 1/500 sec, ISO 200, 50mm · Star Trails Water Reflection: f/8, 20 sec, ISO 200, 16mm, tripod
Shots to chase:
- Blue-hour long exposure at 24mm with the IFC towers and Bank of China perfectly centred in the frame, harbour water blurred into a mirror reflection of the illuminated skyline
- Symphony of Lights: wide 16mm capture encompassing the full skyline width with visible laser beams shooting north toward Kowloon — shoot at 1/15 sec to record the beams without full motion blur
- Bruce Lee statue silhouette at blue hour with the lit skyline as backdrop — shoot from low angle looking up slightly toward Lion Rock beyond
- Star Ferry wake: position at the railing near the clock tower and shoot at 8 seconds during a ferry crossing — the green-and-white vessel trailing a luminous wake across the harbour reflection
- Telephoto compression (200mm) from the eastern end of the Avenue of Stars, flattening the layered skyline into a dense vertical forest with the harbour in the foreground
Pro tip: Arrive by 19:15 on weekends to claim a front-rail position before the Symphony of Lights crowd builds. For the cleanest harbour reflection shots, visit on a windless weekday evening when the water surface is glassy — weekend ferry traffic creates chop. Shoot from slightly east of centre (near the ICC clock tower at the Kowloon–Canton Railway clock tower) rather than in front of the Cultural Centre for the most balanced skyline composition. The show audio is broadcast via speakers along the Avenue of Stars section — position there to synchronise music with your shooting. A 2-stop ND filter is useful during golden hour to extend exposures and smooth harbour water.
Common mistake to avoid: Pointing the camera too far west during the Symphony of Lights — the show’s buildings span east from Central to Wan Chai; a 16–24mm lens from the promenade centre captures them all. Arriving exactly at 20:00 — by then the front row is full. Shooting with a polarising filter at night (renders the harbour reflection dark and muddy). Underestimating the brief duration of blue hour at this latitude — from golden to full dark is only 25–30 minutes; have settings dialled in before the sun touches the horizon.
3. Choi Hung Estate Rooftop Basketball Court
Choi Hung, meaning ‘rainbow’ in Cantonese, is a 1964 public housing estate whose eleven residential towers are painted in a graduated spectrum of pastel hues — coral, turquoise, yellow, and mint. The rooftop car park basketball court — positioned at the foot of the estate’s most colourful Tan Fung House block — creates an extraordinary juxtaposition: a plain concrete sports court dwarfed by a towering wall of rainbow architecture. It is one of the most photographed locations in Asia, simultaneously an honest slice of Hong Kong working-class life and an accidental masterpiece of urban colour design. No other housing estate anywhere in the world produces this particular combination of scale, colour saturation, and verticality.
- GPS: 22.3346, 114.2072
- Elevation: 98 ft
- Best time of day: morning — 07:00–10:00 for soft directional light illuminating the rainbow building facades; the sun rises in the northeast in summer and strikes the coloured panels directly at low angle; avoid midday when harsh overhead light bleaches the colours and the court fills with local players
- Sun direction: The basketball court sits on Level 2 of the car park facing generally north-northwest toward the Tan Fung House rainbow façade (the ‘hero’ building in most photographs). In summer, the northeast sunrise at azimuth ~65° casts warm directional light across the coloured building panels from the left side of the composition by 08:00–09:00. In winter, the sun rises more to the south-east (~115°), reaching the court face by 09:30. The ‘rainbow’ pastel panels are at their most saturated in overcast-bright conditions (light cloud diffuser) and lose vibrancy in harsh midday sun. Shoot under a thin overcast or in the first 2 hours of morning sunlight for richest colour.
- Access: Choi Hung Estate, 2 Tse Wai Ave, Ngau Chi Wan, Kowloon. MTR Choi Hung Station (Kwun Tong Line), Exit C3 — turn right, follow the walkway between the building wall, then right again and cross the street; the car park staircase (Staircase 2) leads to Level 2 rooftop court. Total walk from MTR: 5–8 minutes. Address: 2 Tse Wai Ave, Ngau Chi Wan. Free access. This is a public housing estate — residents have right of way; be considerate.
- Difficulty: easy
- Recommended settings: Wide Rainbow Facade: f/8, 1/500 sec, ISO 200, 16mm · Overcast Colour Saturation: f/8, 1/250 sec, ISO 400, 24mm · Low Angle Portrait: f/2.8, 1/1000 sec, ISO 100, 35mm · Evening Ambient Light: f/4, 1/60 sec, ISO 800, 24mm
Shots to chase:
- Classic wide-angle (16mm) composition from the far end of the court using the basketball hoops as foreground framing elements with the full rainbow facade rising behind
- Long exposure at dusk: 15-second exposure of the empty court with interior apartment windows beginning to glow, creating a warm-light accent on the coloured panels
- Human element: a lone basketball player mid-jump with the rainbow towers filling the entire background — communicate the lived-in character of the estate vs. Instagram backdrop
- Flat-lay perspective: crouch at court level and shoot along the painted court lines toward the building, using the coloured boundary lines as leading lines into the multi-coloured facade
- Telephoto detail (100mm): tight shot on a single row of balconies isolating 3–4 different pastel floors — washing lines, potted plants, air-con units against a saturated colour block
Pro tip: Arrive before 08:30 on weekdays for minimal tourist crowds; by 10:30 the court hosts multiple photographic posing sessions simultaneously. Wear a bright single-colour outfit (red or yellow works particularly well) for striking contrast against the pastels — this is standard practice among visiting photographers and locals will be accustomed to it. Staircase 2 is the correct entrance — look for the signage on the car park exterior; other staircases do not reach the rooftop court level. Be silent near the residential windows; voices carry into apartments directly above. The court is still used by local residents for sports — yield to players and move for games in progress.
Common mistake to avoid: Visiting in the afternoon when the facade enters shadow and the building colours go flat and grey. Using a very long telephoto to compress the scene removes the sense of the enormous scale of the building towers looming overhead — a 24mm–35mm captures the scale relationship more truthfully. Shooting at midday: overhead sun creates blown-out highlights on the top floors and deep shadow under balcony overhangs, reducing colour impact. Being disrespectful to residents — this is a home, not a photo studio.
4. Quarry Bay Monster Building — Yick Cheong Building Courtyard
Five interconnected 1960s residential buildings — Fook Cheong Building, Yick Cheong Building, Yick Fat Building, Montane Mansion, and Oceanic Mansion — form one of the most visually overwhelming pieces of accidental architecture on earth. When viewed from the internal courtyard looking straight up, the buildings create a near-closed canyon of stacked balconies, laundry lines, air-conditioning units, and human life that appears to fold inward from all four sides. The density and repetition of domestic detail at this scale is unique to Hong Kong and has made this courtyard one of the defining images of the city’s vertical urbanism. Featured in Transformers: Age of Extinction (2014) and countless fashion editorials.
- GPS: 22.2876, 114.2141
- Elevation: 20 ft
- Best time of day: evening blue hour (20 minutes after sunset) for long exposures when apartment windows glow warm against a deep blue sky; day visits work well under overcast sky which evenly lights the internal courtyard and reduces hard balcony shadows
- Sun direction: The Yick Cheong Building complex forms an E-shaped plan; the main courtyard opens to the south. Direct sunlight enters the courtyard from the south in winter (sun at lower altitude, azimuth ~165° at noon), producing dramatic light shafts between the building wings around 13:00–14:00. In summer, the sun tracks nearly overhead (altitude ~85°) and barely penetrates the courtyard — creating near-uniform shade that actually benefits colour-accurate photography. For the classic upward-looking shot (shooting straight up through the courtyard toward the sky), the most dramatic sky contrast occurs with a blue sky directly above around 11:00–14:00.
- Access: Yick Cheong Building, 1028 King’s Road, Quarry Bay, Hong Kong Island. MTR Quarry Bay Station (Island Line or Tseung Kwan O Line), Exit A — turn right onto King’s Road toward Tai Koo. Pass Taikoo Place and the Mount Parker Road junction; the entrance to the complex is approximately 5 minutes’ walk. Look for the arched entryway marked ‘Montane Mansion / Oceanic Mansion.’ The main photographic courtyard is accessed by walking through Montane Mansion to Fook Cheong Building — the second courtyard at 1032 King’s Road is the most photographed. Free public access (residential complex). No fee.
- Difficulty: easy
- Recommended settings: Upward Courtyard Blue Hour: f/8, 8 sec, ISO 100, 16mm, tripod (shoot straight up) · Daytime Overcast Wide: f/8, 1/125 sec, ISO 400, 16mm · Window Glow Evening: f/4, 2 sec, ISO 400, 24mm, tripod · Tram Plus Facade Telephoto: f/8, 1/500 sec, ISO 200, 200mm (from King’s Road tram stop)
Shots to chase:
- Classic upward-looking composition: lie on the courtyard floor with a 16mm ultra-wide lens pointing directly at the sky — the building walls converge to a dramatic rectangular aperture above
- Evening long exposure from the same upward position: apartment windows illuminate the canyon walls in warm amber as the sky turns cerulean — 8-second exposure creates a perfect contrast
- Street-level telephoto (200mm) from the tram stop opposite: compress the Monster Building facade behind a passing Hong Kong tram for a layered urban shot
- Shop details: the courtyard-level shops — fish mongers, mahjong parlours, barbershops — provide rich street photography opportunities with the wall of apartments as backdrop
- Night: wide shot from inside the courtyard with all apartment lights on and a few lit windows revealing silhouettes — captures the collective intimacy of tens of thousands of co-residents stacked vertically
Pro tip: Visit both courtyards — the second (accessible through the back at 1032 King’s Road or from Fook Cheong Building interior stairs) is less visited and many photographers consider it the more atmospheric of the two. Night photography is far more rewarding than daytime: the warm-lit apartments create an organic lighting rig that no daylight scene can match. Bring a remote shutter release and use mirror lock-up for the upward courtyard shots — the 16mm lens must be absolutely vertical for the symmetrical converging-wall effect. Do not use flash — it disturbs residents. The estate is a working residential community; avoid loud conversation, do not photograph individuals without consent, and do not block ground-level shop entrances.
Common mistake to avoid: Shooting only in the first courtyard and missing the more famous second courtyard. Using a 24mm or longer lens for the upward shot — the walls will not appear to converge properly; 14–16mm is essential. Visiting on a clear sunny midday — harsh shadows across the balconies create an ugly chequerboard pattern. Forgetting that this is a residential building: leaving bags in walkways, standing in front of shops, or generating noise in stairwells are common tourist mistakes that antagonise residents.
Want this in your pocket on the street?
The full-resolution version of every spot above — with full-page hero photography, GPS maps with gold location pins, sun direction diagrams, multi-season tables, and a complete safety + packing checklist — is inside the Hong Kong Ultimate Photographer’s Guide PDF ($47). Print it, save it offline, take it on the walk. Get the guide →
5. Central–Mid-Levels Escalator
Save
At 800 metres long and rising 135 metres in elevation, the Central–Mid-Levels escalator is the world’s longest outdoor covered escalator system and a bona fide piece of urban infrastructure art. Built in 1993 to ease commuting from the hillside residential Mid-Levels district into the Central business district, it passes through one of Hong Kong’s most layered urban environments: Central’s glass towers dissolve into the antique Hollywood Road gallery district, then the bars and restaurants of SoHo (South of Hollywood Road), before climbing into colonial-era residential apartment blocks. The journey is a compressed tour through four distinct social strata of Hong Kong life in under 20 minutes, with an ever-changing visual backdrop.
- GPS: 22.2829, 114.1524
- Elevation: 131 ft
- Best time of day: evening 18:30–22:00 when the sheltered escalator canopy lights up against the surrounding SoHo bar and restaurant illumination; also excellent during the morning commute (06:00–10:00 downhill) for candid street photography of office workers
- Sun direction: The escalator runs northeast-to-southwest (upward direction to the south-southwest toward Conduit Road). The covered canopy means natural light conditions have limited impact on the covered walkway itself, though the streets intersecting the escalator — especially Cochrane Street, Hollywood Road, and Shelley Street — receive afternoon western light that illuminates the surrounding facades from 14:00 onward. The most atmospheric light occurs at dusk when the canopy lights contrast against a still-glowing sky above the dense SoHo residential facades.
- Access: Lower terminus: Des Voeux Road Central / Jubilee Street, Central, Hong Kong Island. MTR Central Station, Exit D1 or D2 — then walk north toward the escalator base at Jubilee Street. The system runs 800 m from Central up to Conduit Road, Mid-Levels, rising 135 m in elevation. Operating hours: 06:00–10:00 (downhill) and 10:30–24:00 (uphill). Free to use — no ticket required. Intermediate access streets include Cochrane Street, Hollywood Road (for Man Mo Temple, 3 minutes east), Shelley Street, and Mosque Street.
- Difficulty: easy
- Recommended settings: Night Neon Street: f/2.8, 1/60 sec, ISO 1600, 35mm · Morning Commute Handheld: f/4, 1/250 sec, ISO 800, 50mm · Long Exposure Canopy: f/8, 4 sec, ISO 200, 16mm, tripod or railing brace · Hollywood Road Facade: f/5.6, 1/125 sec, ISO 400, 50mm
Shots to chase:
- Long-exposure from the escalator handrail (camera braced on rail) pointing downhill: people become ghostly motion-blurred streaks while the static neon signs of SoHo remain sharp
- Candid portrait series on the morning downhill run: Hong Kong office workers in suits, phones in hand, framed against the repeating escalator canopy overhead — an intimate document of commuter culture
- Intersection with Cochrane Street: stand at ground level and shoot upward as the escalator crosses the street overhead — a graphic architectural image of the canopy against Central skyscrapers
- Hollywood Road antique shop facades from the escalator mid-platform: telephoto compression of the layered shopfronts, Chinese lanterns, and passing escalator riders
- SoHo bar district at 21:00: wide street shot looking east on Staunton Street with the escalator running in the background and restaurant terraces spilling into the foreground
Pro tip: The most photogenic section is between Cochrane Street and Hollywood Road — both sides of this 200-metre stretch are dense with neon, traditional shopfronts, and the contrast of old and new Hong Kong. Position yourself on a pedestrian street crossing the escalator route rather than on the moving escalator itself for the most controlled compositions. The escalator reverses direction at 10:00 from downhill to uphill — the morning downhill run (06:00–10:00) has heavier commuter traffic for street photography but the uphill evening run has better ambient light from the SoHo restaurant glow. Bring a small gorilla pod or lean your camera on the escalator handrail for long exposures — a full-size tripod obstructs the walkway.
Common mistake to avoid: Riding the full length without stopping to explore side streets — Man Mo Temple on Hollywood Road is 3 minutes east of the escalator at Ladder Street; Tai Kwun heritage complex is 2 minutes south. Shooting only in the SoHo bar section and missing the architecturally richer Central lower section and Mid-Levels upper section. Using slow shutter speeds while standing on the moving escalator results in motion blur; either brace against the handrail or step off onto a cross-street platform before shooting.
6. Star Ferry — Victoria Harbour Crossing
Since 1888, the Star Ferry’s green-and-white double-decker vessels have been the most beloved transport link in Hong Kong — a 137-year-old tradition operating at the heart of one of the world’s most dramatic urban waterscapes. The 8-minute crossing positions the photographer at water level, below the height of the lowest skyscraper floors, producing a perspective impossible from any land vantage: the full vertical height of the Central skyline towers appearing to rise directly from the harbour’s surface. The gentle vessel motion, passing marine traffic (cargo lighters, luxury yachts, sampans), and the dual skyline of Kowloon and Hong Kong Island create a cinematic, kinetic photography environment unmatched in any other world city.
- GPS: 22.2937, 114.1687
- Elevation: 5 ft
- Best time of day: blue hour crossing (18:30–19:30, earlier in winter) — the 8-minute harbour crossing during blue hour places the photographer at water level as city illumination builds against a cobalt sky, creating unmatched dual-shoreline compositions; also excellent at sunrise for empty harbour with reflection
- Sun direction: The Star Ferry crosses Victoria Harbour on a roughly north-south axis, from Tsim Sha Tsui (Kowloon, north side) to Central Pier (Hong Kong Island, south side). In winter, the setting sun (azimuth ~245°) disappears behind Lantau Island to the west during the crossing, casting warm light on the western facades of the Central skyscrapers for a brief window. In summer, sunset (azimuth ~290°) partially illuminates the ICC tower to the northwest. The Hong Kong Island skyline faces north and is generally side-lit in afternoon, front-lit at blue hour by its own illumination. The Kowloon skyline (viewed from the Island side) faces south and is backlit at sunset.
- Access: Tsim Sha Tsui Star Ferry Pier, Salisbury Road, Kowloon — MTR Tsim Sha Tsui Station, Exit E (5 minutes). Central Star Ferry Pier 7, Edinburgh Place, Central, Hong Kong Island — MTR Hong Kong Station, Exit A (10 minutes). Wan Chai pier also operates. Ferry fare: Adult upper deck HK$5.0 weekday / HK$6.5 weekend; lower deck HK$4.0 weekday / HK$5.6 weekend (as of 2025). Octopus card or cash accepted. Crossing time: approximately 8 minutes. Service hours: 06:30–23:30. Harbour tour with Symphony of Lights (19:45 departure): HK$280 adult from Tsim Sha Tsui pier.
- Difficulty: easy
- Recommended settings: Blue Hour From Deck: f/4, 1/30 sec, ISO 1600, 35mm (handheld, brace against rail) · Wide Dual Skyline: f/5.6, 1/60 sec, ISO 800, 16mm · Telephoto Skyline Detail: f/8, 1/250 sec, ISO 400, 200mm · Long Exposure At Pier: f/11, 20 sec, ISO 100, 24mm, tripod (from pier dock before boarding)
Shots to chase:
- Blue-hour crossing on the upper deck: 35mm shot looking toward the Central skyline as the IFC towers reflect in the chop of the wake — brace against the bow railing for a stable shot at 1/30 sec
- Aboard the ferry in the lower saloon: interior wooden-slatted seats, brass fixtures, and porthole windows framing the passing skyline — a timeless image of Hong Kong’s maritime identity
- Looking aft from the upper deck: the Kowloon skyline of West Kowloon receding as the ICC tower is silhouetted against the western sky with the vessel’s stern in the foreground
- From Central Pier dock at dusk: long exposure of the green-and-white ferry approaching the pier, bow wave spreading into the foreground as the Tsim Sha Tsui clock tower glows in the background
- Sunrise crossing: pre-dawn departure in winter catches first light on the Bank of China building’s triangular facets and the HSBC building’s distinctive steel frame — empty harbour, empty decks
Pro tip: Claim a position on the bow of the upper deck for the clearest forward skyline views — board early (5 minutes before departure) and walk directly to the bow. For long exposures from the pier, use the concrete dock bollards as tripod anchors before the gate opens for boarding. The Wan Chai to Hung Hom route (HK$4.0 weekday adult) is less tourist-heavy and passes closer to the eastern Central skyline — excellent for uncrowded photography. The Harbour Tour with Symphony of Lights (19:45 departure, HK$280 adult) provides the unique perspective of the laser show from water level — book at the Tsim Sha Tsui pier ticket counter on the day.
Common mistake to avoid: Standing below deck in the enclosed lower saloon for the entire crossing — the lower deck has lower windows with restricted skyline angles and reflective glass; the open upper deck is the only option for sharp photography. Using a polarising filter during the crossing — the constant movement makes precise polarisation adjustments impossible. Arriving exactly at departure time — the upper deck fills within 3 minutes; early boarding is essential for bow positions. Forgetting image stabilisation with handheld shooting on a moving vessel at 1/30 sec.
7. Man Mo Temple — Hollywood Road
Built in 1847 during the Qing Dynasty, Man Mo Temple is one of the oldest and most atmospheric temples in Hong Kong — a place where the smoke of thousands of burning incense coils has turned the walls amber over 175 years. Dozens of enormous spiral incense coils (some 60 cm in diameter) hang from the ceiling, burning continuously for weeks at a time and filling the interior with a layered, diffused amber smoke haze. The combination of red lacquered altars, golden deity figures, candle glow, smoke-filtered light, and the ancient blackened ceiling creates an interior photography environment of extraordinary richness. Unusually for a Hong Kong temple, it is relaxed about photography and heavily visited by both worshippers and visitors.
- GPS: 22.284, 114.1495
- Elevation: 148 ft
- Best time of day: late morning to early afternoon (10:00–14:00) on a sunny day when natural light filters through the smoke-haze dormer windows, creating visible light shafts through the incense smoke — a rare atmospheric effect that transforms the interior into something between a photograph and a painting
- Sun direction: Man Mo Temple faces south on Hollywood Road, Sheung Wan. The temple interior is lit almost entirely by the ambient glow of candles and incense coils, supplemented by small dormer windows on the south facade. Late morning sun (east-southeast azimuth ~120° in winter) produces the most angled light shafts through the smoke because the sun is low enough to project beams horizontally through the dormer openings. After 14:00, the sun moves too high to create visible shafts. Overcast days eliminate shafts but produce softer, more even colour rendering of the gold and red interior. Avoid hazy days — diffuse exterior light produces flat, underexposed interior shots.
- Access: 124–126 Hollywood Road, Sheung Wan, Hong Kong Island. MTR Sheung Wan Station, Exit A2 — walk along Hillier Street to Hollywood Road (approximately 5 minutes). Alternatively, access via the Central–Mid-Levels Escalator (exit at Hollywood Road level) and walk 3 minutes east. Also accessible from Central MTR (Exit D2) via the escalator. Opening hours: 08:00–18:00 daily. Free admission. No flash photography permitted. Donation box available.
- Difficulty: easy
- Recommended settings: Incense Coils Wide: f/2.8, 1/60 sec, ISO 3200, 24mm (no flash, high ISO essential) · Light Shaft Through Smoke: f/4, 1/125 sec, ISO 1600, 35mm · Altar Detail Close: f/2.8, 1/30 sec, ISO 6400, 50mm · Exterior Facade Midday: f/8, 1/500 sec, ISO 200, 24mm
Shots to chase:
- Upward view into the hanging incense coils: shoot from below at f/2.8, using the wide aperture to blur the coils at varying depths into soft amber bokeh discs against the smoke-darkened ceiling
- Light shaft at 11:00–12:30: position yourself at the back of the temple and shoot toward the south dormer windows — visible beams of sunlight cutting through the incense smoke create a cathedral-like interior scene
- Worshipper at prayer: with permission (or candid, respectful distance), a devotee holding incense sticks before the golden altar — the smoke trails rising and the deity’s gilded face behind — captures 175 years of unbroken religious practice
- Exterior at golden hour: the green tiled roof and white plastered facade of Man Mo Temple contrasting against the surrounding contemporary shophouses on Hollywood Road — 50mm, shoot from across the road
- Spiral incense coil close-up detail: a single 60 cm coil with its burning ember tip, glowing red against the dark smoke-stained ceiling — use a 50–85mm macro-capable lens, f/2.8, available light
Pro tip: Arrive at 10:00 when morning worshippers are active and the incense smoke builds to maximum density — this creates the richest atmospheric diffusion. Turn off your flash (mandatory): not only is it prohibited but it strips the amber incense-smoke ambience and leaves a flat, overly detailed image. Shoot at ISO 1600–6400 — modern cameras handle this well and the ambient light level is genuinely low. A 24–35mm f/2.8 lens is ideal for the interior; wider lenses distort the altar area. The fortune stick (kau cim) practitioners near the side altar provide a compelling portrait subject if approached respectfully and granted permission.
Common mistake to avoid: Using flash — the temple prohibits it and the resulting photograph loses all atmospheric quality. Visiting in mid-afternoon when the sun has moved too high for light shafts and the worshippers have thinned. Shooting only the wide interior and missing the extraordinary close-up details: the carved wooden altar panels, the worn brass offering bowls, the centuries of smoke-blackened ceiling beams. Underexposing in-camera and trying to rescue in post — the extreme dynamic range between the bright doorway and the dark interior requires deliberate exposure compensation of +1.5 to +2 stops.
8. Sky100 ICC Observation Deck
At 393 metres above sea level on the 100th floor of Hong Kong’s tallest building, Sky100 provides the reverse perspective to Victoria Peak — looking south from Kowloon toward Hong Kong Island across the full width of Victoria Harbour. This view uniquely shows the dramatic topography of Hong Kong Island’s mountainous interior (Victoria Peak, The Peak) rising behind the flat grid of Central’s skyscraper district, making it apparent that the city is built on the thin coastal edge of a steep mountain. The fully enclosed glass-panel deck provides unobstructed 360° photography, with the airport to the west, Kowloon’s residential density to the north, and the double-harbour panorama to the south.
- GPS: 22.3035, 114.1601
- Elevation: 1,289 ft
- Best time of day: dusk — arrive 45 minutes before sunset (approximately 17:15 in January, 18:30 in June) to capture the transition from golden hour cityscape to full night — the 20-minute window when city lights ignite against the last glow of blue sky is the peak photographic opportunity at this location
- Sun direction: Sky100 sits on the 100th floor of the ICC tower in West Kowloon (22.3035°N), facing predominantly south over Victoria Harbour and Hong Kong Island. The panoramic deck wraps 360°: the south-facing aspect delivers the famous view toward Central, Wan Chai, and the Peak. The sun sets to the west-southwest in winter (~245°) and west-northwest in summer (~290°) — always west of the deck’s south face — meaning winter sunsets illuminate the western facade of the ICC building itself from outside while the deck faces the silhouetted Hong Kong Island. For maximum visual drama, position at the southwest corner of the deck in the last 30 minutes before sunset.
- Access: 100/F, International Commerce Centre (ICC), 1 Austin Road West, West Kowloon, Kowloon. MTR Kowloon Station, Exit C (3-minute walk). Standard adult admission HK$188 (HK$169 with 10% online discount, valid 30 days); child (3–11) and senior (65+) HK$128. Opening hours: 10:00–21:00 (last admission 20:00). Book at sky100.com.hk. Café 100 by The Ritz-Carlton on the same floor (HK$50 minimum spend for access to seated terrace area).
- Difficulty: easy
- Recommended settings: Blue Hour South Facing: f/8, 2 sec, ISO 200, 24mm, tripod or railing brace · Night Cityscape Wide: f/11, 4 sec, ISO 100, 16mm, tripod · Golden Hour Icc Shadow: f/8, 1/250 sec, ISO 200, 50mm · Telephoto Peak Compression: f/8, 1/125 sec, ISO 400, 200mm (compress Victoria Peak against Central)
Shots to chase:
- Long exposure looking south from the floor-to-ceiling glass wall: the full Victoria Harbour visible with both shorelines illuminated, the ICC’s own reflection on the glass creating a subtle double-exposure frame
- Telephoto compression (200mm) looking south: the Victoria Peak summit and Sky Terrace 428 visible above the dense Central skyline — reverse perspective showing the two iconic viewpoints simultaneously
- Westward shot at sunset: the airport’s parallel runways lit in amber on Lantau Island, the Hong Kong–Zhuhai–Macau Bridge visible on clear days as a thin white line across the South China Sea
- Looking north: Kowloon’s residential grid at night — a sea of warm-toned apartment windows fading into the darkness of the New Territories, with Lion Rock’s ridge lit by the city glow
- Sky100 interior reflection: the observation deck’s own glass creates a partial reflection that can be leveraged for double-exposure compositions — the cityscape inside the reflection of your own silhouette
Pro tip: Book online for the 10% discount and to guarantee entry during peak periods (New Year, Chinese New Year, public holidays). Visit twice if the budget allows — the daytime view shows the geography clearly (all islands, mountains, bridges) while the night view shows the neon city grid; they are complementary rather than redundant. The glass panels are cleaned daily but show smear marks from fingers — use the topmost glass surface and shoot at a slight upward angle to avoid fingerprints on the inner surface in your frame. For tripod use, the floor corners provide the most stable positions; the handrail sections have slight vibration from HVAC systems.
Common mistake to avoid: Pressing the lens directly against the glass to eliminate reflections — this often introduces heat shimmer from the climate-controlled interior meeting the cooler glass. A better approach is to use a rubber lens hood or hold a dark jacket around the lens barrel as a light baffle. Visiting at midday for ‘daytime’ photos — the flat overhead light makes the cityscape look washed out; overcast mornings at 10:00–11:00 provide softer and more even light for geographic/architectural documentation. Forgetting that the Café 100 terrace (with its open-air outdoor section) provides a slightly different and sometimes cleaner shooting angle than the main deck.
Want this in your pocket on the street?
The full-resolution version of every spot above — with full-page hero photography, GPS maps with gold location pins, sun direction diagrams, multi-season tables, and a complete safety + packing checklist — is inside the Hong Kong Ultimate Photographer’s Guide PDF ($47). Print it, save it offline, take it on the walk. Get the guide →
9. Sai Wan Pier — Western District Cargo Working Area
Save
Known colloquially as ‘Instagram Pier’ or ‘Mirror Pier,’ the Western District Public Cargo Working Area is one of Hong Kong’s most spectacular and unexpected photography locations. The long concrete pier extends directly into the open western harbour, providing an unobstructed 270° view of sky, water, and mountain horizon unavailable from any other urban vantage on Hong Kong Island. When wind drops at dusk, the working pier’s wet concrete reflects the sunset sky in a perfect mirror — the double-horizon effect that made this pier internationally famous. Old cargo lamp posts, industrial machinery, and freight containers add a gritty foreground interest entirely absent from manicured promenade viewpoints.
- GPS: 22.2891, 114.1333
- Elevation: 5 ft
- Best time of day: sunset (30 minutes before to 20 minutes after) — the pier faces directly west into Victoria Harbour’s open western channel, giving an unobstructed view of the sun setting over Lantau Island and the Hong Kong–Zhuhai–Macau Bridge on clear days; the ‘mirror of the sky’ still-water reflection effect occurs when harbour chop subsides after ferry traffic dies down near dusk
- Sun direction: Sai Wan Pier extends into the western end of Victoria Harbour, facing due west (azimuth ~270°). The sun sets almost directly ahead of the pier in March and September (near equinox), shifting north-northwest (~290°) in summer and south-southwest (~250°) in winter. In summer, the sunset occurs over the open water channel between Hong Kong Island and Lantau — the most dramatic position with Lantau’s silhouetted hills framing the colour. In winter, the lower sun arc means sunset occurs earlier (~17:45) but still over the water, with the HZMB bridge sometimes visible as a faint arc on the horizon in very clear conditions.
- Access: Western District Public Cargo Working Area, junction of Connaught Road West and Hill Road, Sai Wan, Hong Kong Island. MTR HKU Station, Exit B2 — walk toward the harbour (northward) approximately 10 minutes to the waterfront. The pier area is technically a working cargo area (not a public recreational space); during busy working hours, vehicles operate and pedestrians should keep clear. Most productive photography access is evenings and weekends when cargo operations are minimal. Free access. No facilities.
- Difficulty: easy
- Recommended settings: Golden Hour Mirror Reflection: f/11, 1/30 sec, ISO 200, 24mm, tripod (low to wet concrete surface) · Sunset Silhouette: f/11, 1/500 sec, ISO 100, 50mm · Blue Hour Long Exposure: f/11, 30 sec, ISO 100, 16mm, tripod · Industrial Foreground Detail: f/8, 1/250 sec, ISO 400, 35mm
Shots to chase:
- Low-angle concrete mirror: crouch or lie prone on the wet pier surface at f/11 with a 24mm lens — the reflection creates a perfect vertical symmetry with the sunset colours above and their mirror below
- Silhouette of a person (or lamp post) at the pier edge against the full sunset behind Lantau Island — expose for the sky, allow the foreground to go black
- Long exposure (30 seconds) during blue hour: passing container ships and ferry traffic create light trails across the water surface while the sky holds deep cobalt above Lantau’s dark profile
- Industrial detail: rusted cargo lamp post base in sharp focus at f/2.8 with the blurred sunset tones behind — the industrial aesthetic of the pier as subject, not just backdrop
- Wide panoramic (16mm) capturing the arc from the Tsing Ma Bridge on the north horizon through the open water to the Lamma Island silhouette on the south — only achievable from this unobstructed pier position
Pro tip: The mirror reflection effect requires the concrete surface to be damp (from sea spray or light rain) and the wind to be calm — check weather forecasts for low wind speed (under 10 km/h). Arrive 30 minutes before sunset to scout the concrete surface for the best wet patches and choose your foreground framing before the light changes. Working vehicles (forklifts, cargo trucks) operate on the pier during business hours — be alert to vehicle movement and keep clear of active loading areas. The pier is at its most accessible on evenings and weekends. In summer, the best ‘mirror sky’ conditions often occur in the 15-minute post-rain window when concrete is wet but the sky has cleared.
Common mistake to avoid: Arriving too late (after sunset when blue hour has faded) — the mirror effect is a sunset phenomenon and disappears in darkness. Standing upright and shooting from chest height for the reflection shot — you must be nearly prone with the camera 5–15 cm from the wet concrete surface for the reflection angle to work. Visiting during business hours with heavy cargo operations — not dangerous but limiting for photography. Ignoring the western horizon direction: pointing the camera north or south eliminates the unobstructed horizon that makes this location unique.
10. Tian Tan Buddha — Lantau Island
At 34 metres tall (bronze statue only) and situated at 482 metres above sea level on Ngong Ping’s forested ridge, Tian Tan Buddha is the world’s second-largest outdoor seated bronze Buddha and one of the most architecturally extraordinary religious sites in East Asia. The Buddha’s northward-facing stance atop a three-platform lotus throne commands a panoramic view of Lantau Island’s mountain ridges, the South China Sea, and (on clear days) the Hong Kong–Zhuhai–Macau Bridge spanning to the horizon. The cable car approach — 5.7 km over Tung Chung Bay and Lantau’s peaks — delivers passengers progressively closer to the statue as it looms larger through the cabin windows, an approach sequence unmatched by any other major monument.
- GPS: 22.254, 113.905
- Elevation: 1,581 ft
- Best time of day: morning (09:00–11:00) on a clear autumn or winter day — the statue faces north, so morning light from the east catches its left cheek and the flowing robes in directional illumination; October to December provides the clearest air quality and most cloud-free mornings; mist and fog cloud the site frequently in spring and summer
- Sun direction: Tian Tan Buddha faces north (toward Beijing by design). At 482 m elevation on Lantau Island at 22.25°N, the sun at solar noon is approximately 45° above the southern horizon in summer and 24° in winter. Morning sun from the east-northeast illuminates the Buddha’s right-facing (east-looking) side at low angle — ideal for catching the bronze surface texture. For composition from the base of the 268 steps looking up at the statue, the clearest blue-sky backdrop occurs when shooting with the sun to the left (east) in the morning, backlighting the robes. The surrounding forested Lantau hills are at their most saturated in autumn golden-hour light (east-facing slopes catch morning warmth).
- Access: Po Lin Monastery, Ngong Ping Village, Lantau Island, Hong Kong. Primary route: MTR Tung Chung Station (Tung Chung Line), Exit B — walk to Ngong Ping 360 cable car terminal (5 minutes). Cable car: Standard cabin round-trip HK$295 adult / HK$150 child (2025 prices, effective June 2025); Crystal Cabin round-trip HK$365 adult; journey ~25 minutes. Book at np360.com.hk. Alternative: Bus 23 from Tung Chung Station bus terminus (HK$20.70, ~45 minutes). Tian Tan Buddha is free to visit. Interior exhibition inside the Buddha: HK$35 adult. Po Lin Monastery: free. Open: 10:00–17:30 daily (grounds accessible from 09:00).
- Difficulty: moderate (268 steps to the statue base; cable car for access)
- Recommended settings: Statue From Steps Wide: f/8, 1/500 sec, ISO 200, 16mm (looking up from base of 268 steps) · Cable Car Approach: f/4, 1/500 sec, ISO 400, 35mm (through glass, minimise reflections) · Buddha Detail Telephoto: f/8, 1/500 sec, ISO 200, 200mm (isolate face detail against sky) · Morning Mist Landscape: f/11, 1/125 sec, ISO 400, 24mm (valley mist framing the statue from distance)
Shots to chase:
- Wide-angle (16mm) composition from the base of the 268 steps with the stone staircase as a leading line converging on the bronze statue against the blue morning sky — shoot early to catch the steps without the ascending crowd
- Cable car glass composition: brace the lens against the Crystal Cabin’s transparent floor-to-ceiling glass and frame the Buddha as the cable car crests the ridge and the statue appears in full against the sky for 45 seconds
- Telephoto detail (200mm) of the Buddha’s face: the serene bronze expression, the ushnisha crown, and the morning light revealing the oxidised surface texture — a meditative close portrait of the statue
- From Wisdom Path (15 minutes’ walk south of Ngong Ping Village): 38 wooden pillars inscribed with the Heart Sutra arranged in a figure-eight through the forest valley — the Buddha visible on the distant ridge — a composition combining natural and spiritual elements
- Cloud inversion from distance: if staying overnight at Ngong Ping or arriving via early bus, the Buddha sometimes emerges above a sea of low cloud — a dramatic image of the bronze colossus floating above white mist while the valleys below are obscured
Pro tip: October to December delivers the clearest air quality for photography; spring (March–May) brings frequent low cloud that can shroud the statue entirely — check the weather forecast and cancel if the Ngong Ping area shows cloud below 500 m. Arrive on the first cable car of the day (09:30–10:00) or on a weekday for uncrowded steps — by 11:00 the 268 steps are packed and ascending crowds appear in every composition. Drone photography is strictly prohibited at the site. The Po Lin Monastery directly adjacent to the statue provides a colourful foreground — the red-and-gold temple buildings with incense smoke against the green hills compose naturally into the wider landscape. The Buddhist vegetarian restaurant at Po Lin (10:30–16:30) is excellent — the lunchtime queue provides a useful photography break.
Common mistake to avoid: Visiting during Chinese public holidays or Golden Week — the site receives 10,000+ daily visitors and the steps and statue platform are near-impassable for photography. Shooting only from the steps base and not climbing to the statue platform level, where the outward views of Lantau Island and the South China Sea are themselves stunning compositions. Using a polarising filter to deepen the sky but forgetting to rotate it correctly when the camera is pointing upward — the polarising effect at the zenith requires a 90° rotation from horizontal landscape use. Visiting from Tung Chung only — the bus route via Tai O Fishing Village to the west provides a scenic alternative approach with additional photography opportunities.
11. Mong Kok — Goldfish Market and Ladies Market
Mong Kok is Hong Kong’s densest district — by population density per square kilometre, one of the most crowded urban areas on earth — and its street markets compress that intensity to street level. The Goldfish Market (Tung Choi Street North) is globally unique: approximately 40 specialised aquarium shops line both sides of the street, their shopfronts stacked floor-to-ceiling with transparent plastic bags of water containing thousands of fish in every colour, catching and refracting the ambient light into a luminous wall of living jewels. The adjacent Ladies Market, running south on the same street, is a 200-stall clothing and accessory bazaar beneath full neon signage — a document of authentic Hong Kong commercial street culture. The combination in a single 500-metre walk constitutes one of the world’s most visually saturated street photography environments.
- GPS: 22.3239, 114.1694
- Elevation: 20 ft
- Best time of day: evening 19:00–22:00 for maximum neon illumination and market density; golden hour (16:00–18:00) for warm light filtering between towers with natural-plus-neon combined; Goldfish Market is best 10:00–11:00 when shop aquariums are freshest and crowds lightest
- Sun direction: Tung Choi Street (Goldfish Market north, Ladies Market south) runs roughly north-south through the Mong Kok urban grid. The surrounding tower blocks create a classic urban canyon: direct sunlight reaches the street from the east in the morning and from the west in the afternoon, but is blocked by buildings for most of the day. The most photogenic natural light period is around 16:30–17:30 in summer when the low western sun rakes across the street at a low angle, briefly illuminating the hanging fish bags and market stalls in warm directional light. After 19:00, neon signage from the surrounding streets (especially Nathan Road, Portland Street, and Argyle Street) provides the dominant ambient light.
- Access: Goldfish Market: Tung Choi Street North (between Nelson Street and Bute Street), Prince Edward, Kowloon. MTR Prince Edward Station, Exit B2 (3 minutes). Ladies Market: Tung Choi Street South (between Dundas Street and Argyle Street), Mong Kok. MTR Mong Kok Station, Exit E2 (2 minutes). Both markets free, no entry fee. Goldfish Market hours: 10:00–21:00. Ladies Market: 12:00–23:00 (most stalls). Octopus card works on Kwun Tong and Tsuen Wan MTR lines serving both stations.
- Difficulty: easy
- Recommended settings: Goldfish Bags Backlit: f/2.8, 1/250 sec, ISO 400, 50mm (shoot toward the light source behind aquarium bags) · Neon Street Evening: f/2.8, 1/60 sec, ISO 1600, 35mm · Ladies Market Stall Detail: f/4, 1/125 sec, ISO 800, 50mm · Wide Street Long Exposure: f/8, 4 sec, ISO 100, 16mm, tripod (minimal foot traffic before 12:00)
Shots to chase:
- Goldfish bag macro: shoot at 50mm with the aquarium bags backlit by the shop interior lights — the fish appear suspended in glowing spheres of light, abstract and jewel-like at f/2.8
- Street portrait: a goldfish market vendor holding a bag of fish at arm’s length, face behind the fish bag, colourful shop interior as background — requires courteous permission
- Ladies Market neon canyon at 21:00: wide 16mm looking south down Tung Choi Street as stalls begin to close — vendors loading garments onto handcarts under full neon illumination with motion-blurred shoppers
- Park-In Commercial Centre rooftop view: the multi-storey car park at the corner of Mong Kok Road offers an aerial perspective down onto the Ladies Market stalls and the Nathan Road neon canyon to the west (free access via lift to top floor)
- Flower Market (Flower Market Road, 2 minutes north of Goldfish Market): colour-saturated buckets of fresh cut flowers create macro and compression photography opportunities in morning light before the crowds — pair with the Goldfish Market in a single morning route
Pro tip: For the Goldfish Market, visit at 10:00–11:00 on a weekday — vendors are restocking, the light is good, and tourist crowds have not yet arrived; by 14:00 the street is packed. Always ask permission before photographing individual vendors; showing them the image on the screen immediately builds goodwill. Avoid using flash inside the fish shops — it stresses the fish and most shops have ‘no flash’ signs. For the Ladies Market neon shots, position at the Mong Kok Road footbridge crossing Tung Choi Street for an elevated view of both the market below and the Nathan Road neon to the west simultaneously — a dual-layer urban composition available from no other position.
Common mistake to avoid: Using a wide-angle lens for the goldfish bag shots and losing the intimate macro quality that makes them extraordinary — 50mm or slightly longer focuses on individual fish within the bag against a blurred, colour-saturated background. Visiting the Ladies Market before 17:00 when many stalls are still setting up and the neon signage is dormant. Photographing stall owners without asking — the Ladies Market vendors are well accustomed to photographers but cultural respect requires at minimum eye contact and a nod. Shooting only in colour when the neon-lit Mong Kok street scenes can produce extraordinary black-and-white images emphasising texture and crowd geometry.
12. Ten Thousand Buddhas Monastery — Sha Tin
Founded in 1951 by the Buddhist monk Yuet Kai, the Ten Thousand Buddhas Monastery is built into the forested hillside above Sha Tin and comprises five temples, four pavilions, and a nine-storey pagoda — all connected by a winding stairway lined with 13,000 individually distinct life-size gilded ceramic statues of arhats (Buddhist saints), no two alike. Each figure was created separately and shows a unique facial expression, gesture, and posture — representing the complete human range of spiritual attainment. The interior of the main temple contains rows of small Buddha figures covering every surface of the walls and ceiling, creating a golden kaleidoscopic space unlike any other religious interior. Wild rhesus macaques inhabit the surrounding forest and occasionally appear on the path.
- GPS: 22.3875, 114.1847
- Elevation: 394 ft
- Best time of day: early morning (09:00–11:00) on a clear autumn or winter day — morning light from the east illuminates the gold and orange deity statues lining the 431-step approach path; arrive at opening to catch the monastery in quiet pre-tourist calm with incense smoke still rising from overnight offering coils
- Sun direction: The monastery is built on a northeast-facing hillside in Pai Tau Village, Sha Tin. The main pagoda and temple complex face generally southeast, receiving direct morning sun from approximately 08:30–12:00 in autumn and winter. The 431-step approach path lined with life-size golden arhats runs roughly west-east up the hillside — morning light hits the statues on the uphill (east-facing) side, illuminating the gold paint and painted porcelain faces directly. By 13:00, the sun has moved behind the hill to the south and the path enters mixed shade. Overcast conditions provide more even illumination across the gold statues without harsh shadows.
- Access: 221 Pai Tau Village, Sha Tin, New Territories. MTR Sha Tin Station (East Rail Line / Ma On Shan Line), Exit B — take the elevated walkway across the road, turn right at the bottom, pass Pai Tau Village houses on the left, turn left at Pau Tai Street, then right onto Sheung Wo Che Road (alongside the government offices); follow yellow monastery signs to the unmarked entrance path at the end of the building. Total walk from station: approximately 10–15 minutes. Free admission. Open 09:00–17:00 daily (may close during heavy rain or Typhoon Signal 8+). No photography in designated prayer areas inside main temple.
- Difficulty: moderate (431 steep steps to the main temple complex; no lift or alternative route)
- Recommended settings: Arhat Pathway Morning: f/5.6, 1/250 sec, ISO 400, 50mm · Interior Gold Buddha Walls: f/2.8, 1/30 sec, ISO 3200, 24mm (no flash) · Pagoda With Forest: f/8, 1/500 sec, ISO 200, 35mm · Macaque Encounter: f/4, 1/1000 sec, ISO 800, 200mm (minimum safe shooting distance)
Shots to chase:
- The arhat pathway at 09:30: wide shot down the 431 steps with golden statues receding in perspective on both sides — a geometric tunnel of gold converging toward the valley floor and the distant Sha Tin New Town below
- Close portrait of an individual arhat at 50mm: the extraordinary range of handmade expressions — one laughing, one stern, one in contemplative peace — each statue has a unique face that rewards individual framing
- Main temple interior: shoot with a high-ISO wide-angle from the entrance doorway — the thousands of small Buddha figures covering every wall surface create a golden mosaic effect that conveys the monastery’s name visually
- The nine-storey pagoda: wide angle from the temple forecourt at f/8 with the red pagoda tiers rising against the forested hillside — shoot in morning light when eastern sun illuminates the ornate eaves
- Wild macaque: with a 200mm telephoto and patience, the rhesus macaques that inhabit the surrounding forest occasionally sit on the stair railings — do not approach or offer food
Pro tip: Navigation to the monastery entrance is genuinely confusing — many visitors give up or get lost. Save the exact GPS coordinates (22.3875°N, 114.1847°E) and use them from the MTR station rather than relying on signage. The entrance path looks like an unmarked dead end in the village — push through and the monastery path is clearly marked once you start ascending. Wild monkeys are present and have been known to grab food, bags, and camera straps from visitors — keep loose items close. Photography is prohibited inside the main prayer hall nearest the altar but permitted throughout the rest of the complex. The monastery vegetarian restaurant is excellent and serves lunch 10:30–16:00 (closed Thursdays).
Common mistake to avoid: Arriving after 11:00 on weekends — tour groups from Sha Tin completely fill the stairway by midday and the 431-step ascent becomes a shuffling queue rather than a photography experience. Underestimating the stair climbing: the steps are steep and numerous; flat shoes are dangerous on the smooth stone surface — wear trainers. Flash photography anywhere in the complex disturbs worshippers and is culturally inappropriate. Leaving without visiting the pagoda at the complex’s highest point — the 360° view of Sha Tin New Town, the Shing Mun River, and the surrounding hills from the pagoda top level is a memorable counterpoint to the intimate temple atmosphere below.
When to photograph Hong Kong: a year-round breakdown
Hong Kong is photogenic every month of the year — but the conditions differ radically by season. Here is what to expect:
October–December (clear skies, low humidity, excellent air quality, comfortable temperatures 18–25°C) and March–April (mild spring light before haze season)
Photographer safety in Hong Kong: read this
City photography has its own risks: gear visibility, neighborhood timing, traffic, weather. Read the briefing before you go.
- Gear visibility: Use a discreet bag with no obvious camera branding. Keep a body strapped under a jacket on transit.
- Neighborhood timing: Pre-dawn and post-sunset shoots reward early scouting. Cross-reference each location with current local guidance and choose well-lit transit routes.
- Situational awareness: Headphones out. One eye in the viewfinder, one on the street.
- Traffic: Bridges, medians, and bike lanes are not setup zones. Shoot from sidewalks and pedestrian areas only.
- Weather: Summer storms move quickly; winter cold drains batteries. Layer up, keep gear dry, watch for ice on cobblestones at blue hour.
The complete safety briefing is inside the Hong Kong Photographer’s Guide PDF.
Take this guide into the city
This post is the complete field reference. The Hong Kong Ultimate Photographer’s Guide PDF is the field-deployable version: full-page resolution hero photography, GPS maps with gold pins for every location, multi-season shooting calendars, gear notes per location, sun-angle diagrams, the full city safety briefing, and a print-ready editorial layout in Framehaus black and gold. Save it offline. Print it. Take it on the walk.
Hong Kong Ultimate Photographer’s Guide
Downloadable PDF · 12 GPS-mapped locations · Multi-season calendar · City safety briefing · Packing checklist
Get the Hong Kong guide — $47
Get the Hong Kong Guide + Preset Pack
Photograph it. Edit it. Done.
All links go to Viator (a TripAdvisor company), the world’s largest marketplace for guided experiences. Tagged as affiliate per FTC.
Quick Amazon shortcuts to the gear most useful for this kind of shot. Use them if Prime shipping or Amazon credit makes more sense than B&H. As an Amazon Associate ShutYourAperture earns from qualifying purchases.
Take Hong Kong home in your pocket.
Every shot location, every angle, every time of day worth shooting. Printable PDF + GPS-tagged map.
Instant download. Works on phone, tablet, and printed.
Continue reading
- International Cities Photography Guides — every city, mapped
- U.S. Cities Photography Hub
- National Parks Photography Guides
- Travel photography destinations
- Travel photography pillar
- How to shoot golden hour like a pro
- Blue hour photography settings and locations
← Back to International Cities Photography Guides
Related guides nearby
Three more photography guides within striking distance — perfect for combining into one trip.
The complete Hong Kong guide is $47
All vantage points above + 5 bonus secret spots, printable map, gear pack list, and editing recipes. One-time payment, instant download, lifetime updates.
Common questions about the Hong Kong guide
Is the Hong Kong photography guide worth $47?
For most photographers, yes. The guide saves 8-12 hours of trip-planning research and prevents the most common mistake of Hong Kong photography: shooting at the wrong time of day. If a single better frame is worth $47 to you, the guide pays for itself on day one. Buyers get every GPS coordinate, every golden-hour window, every cultural rule, and a printable shot list.
Does the Hong Kong guide include GPS coordinates?
Yes — every vantage point in the guide has Google Maps-ready GPS coordinates so you can pin them before you fly. The guide also includes a printable map showing all locations clustered by walking distance, so you can build efficient half-day routes.
What's in the Hong Kong PDF that isn't in this article?
The article shows the highlights. The PDF includes: 5 additional secret spots not published online, a 14-day itinerary with daily routes, the full camera-settings cheat sheet for every scenario in Hong Kong, a printable gear packing list, post-processing recipes with screenshot examples, and a list of local guides we trust for portrait commissions.
Do I get the Lightroom presets too?
The $47 guide is the PDF only. The matching Hong Kong preset pack is a separate $19 download — most buyers grab both as a bundle and save the editing time. Both are instant download, both work on Lightroom Classic and Lightroom Mobile.
Will the guide work for a Hong Kong trip in 2026?
Yes. The guide is updated annually as fees, restrictions, and new vantage points change. All buyers get free lifetime updates. The 2026 edition includes the latest drone rules, museum photography policies, and seasonal light data for the year.
Visiting more than Hong Kong?
Bundle multiple destination guides and save planning time across the trip:
- Bali Photographer’s Guide ($47)
- Tokyo Photographer’s Guide ($47)
- Kyoto Photographer’s Guide ($47)
- Singapore Photographer’s Guide ($47)
- Bangkok Photographer’s Guide ($47)
Or get all 60+ destinations in one bundle: Photo Atlas — every guide, every map, $97.