How to Photograph Mount Fuji: A Mountain Photographer’s Guide
Japan’s iconic volcanic cone with rare summit clarity, layered lake reflections, and sunrise views above the clouds.
Mount Fuji is the country’s most recognizable landscape subject, and it rewards photographers with a mix of summit drama, seasonal snow, and strong foreground options from lakes, pagodas, and roadside overlooks. The mountain’s isolation creates clean silhouettes at dawn and blue hour, while the Fuji Five Lakes region adds reflection scenes and compressed telephoto layers. Summer climbing is tightly managed, but the lower viewpoints remain accessible for sunrise, alpenglow, and starry pre-dawn compositions.
Why photograph Mount Fuji
Mount Fuji is the country’s most recognizable landscape subject, and it rewards photographers with a mix of summit drama, seasonal snow, and strong foreground options from lakes, pagodas, and roadside overlooks. The mountain’s isolation creates clean silhouettes at dawn and blue hour, while the Fuji Five Lakes region adds reflection scenes and compressed telephoto layers. Summer climbing is tightly managed, but the lower viewpoints remain accessible for sunrise, alpenglow, and starry pre-dawn compositions.
Best months and best time of day
Best months: November-April for the clearest air and snow cap; late May-June for green foregrounds; July-September for summit access and alpine dawns, though clouds build quickly.
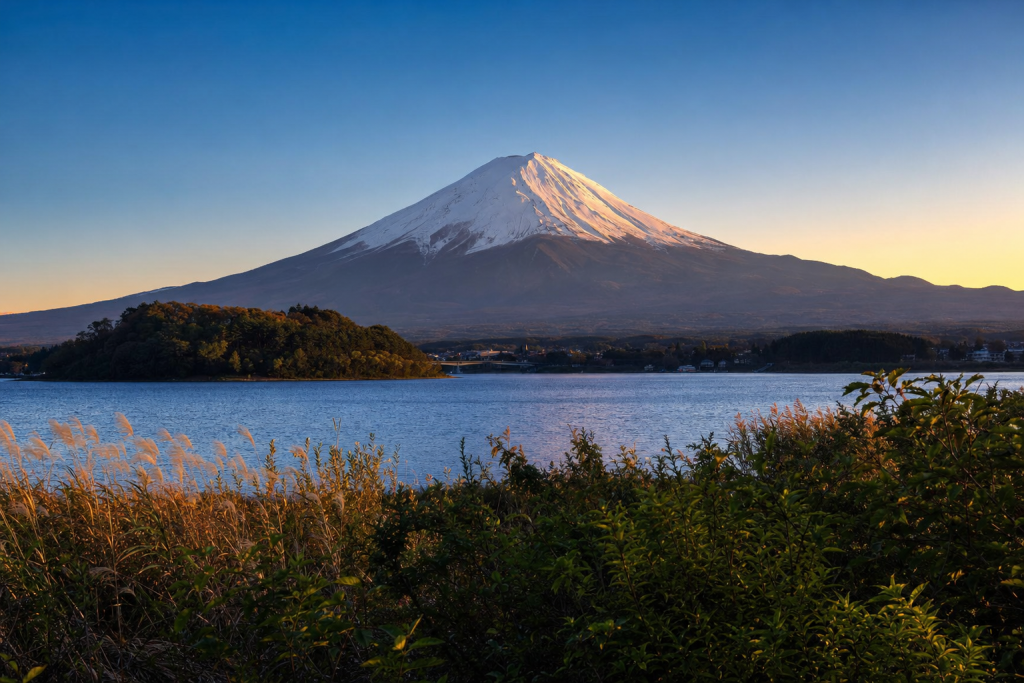
Best time of day: Blue hour to sunrise; second-best is late afternoon into golden hour when the western slopes catch alpenglow.
| Summit Elevation M | 3776.0 |
| Summit Accessibility | Hike-only summit via regulated climbing trails; no cable car or drive-up to the summit. Trailhead access by bus/taxi to the 5th stations, then a strenuous alpine ascent. |
| Clear Weather Window | Best clear views are typically early morning; Mt. Fuji weather changes rapidly, summer thunderstorms are common, and summit temperatures can drop near 0°C before sunrise. |
GPS vantage point map
| Vantage point | GPS | Best time | Lens |
|---|---|---|---|
| Chureito Pagoda, Arakurayama Sengen Park | 35.5013, 138.8079 | Sunrise | 70-200mm |
| Shimoyoshida Honcho Street | 35.4856, 138.8035 | Early morning | 35-85mm |
| Oishi Park, Lake Kawaguchi | 35.5032, 138.7557 | Sunrise | 24-70mm |
| Kawaguchiko Tenjoyama Park (Mt. Fuji Panoramic Ropeway area) | 35.5018, 138.7528 | Blue hour | 24-105mm |
| Lake Yamanaka Nagaike Shinsui Park | 35.4096, 138.872 | Sunrise | 24-70mm |
| Fuji Subaru Line 5th Station | 35.3606, 138.7274 | Late afternoon | 24-70mm |
| Gotemba New 5th Station | 35.3604, 138.7724 | Sunset | 70-200mm |
Detailed vantage points
Chureito Pagoda, Arakurayama Sengen Park
GPS: 35.5013, 138.8079 | Best time: Sunrise | Lens: 70-200mm
Classic layered composition with the pagoda, town grid, and Fuji behind it. Best when the summit is dusted with snow and the foreground is still in shade, giving strong separation and a postcard silhouette.
Shimoyoshida Honcho Street
GPS: 35.4856, 138.8035 | Best time: Early morning | Lens: 35-85mm
Straight-street Fuji framing with low traffic and strong leading lines. Works best on clear days before heat shimmer rises, using a narrower focal length to compress storefronts and center the mountain over the avenue.
Oishi Park, Lake Kawaguchi
GPS: 35.5032, 138.7557 | Best time: Sunrise | Lens: 24-70mm
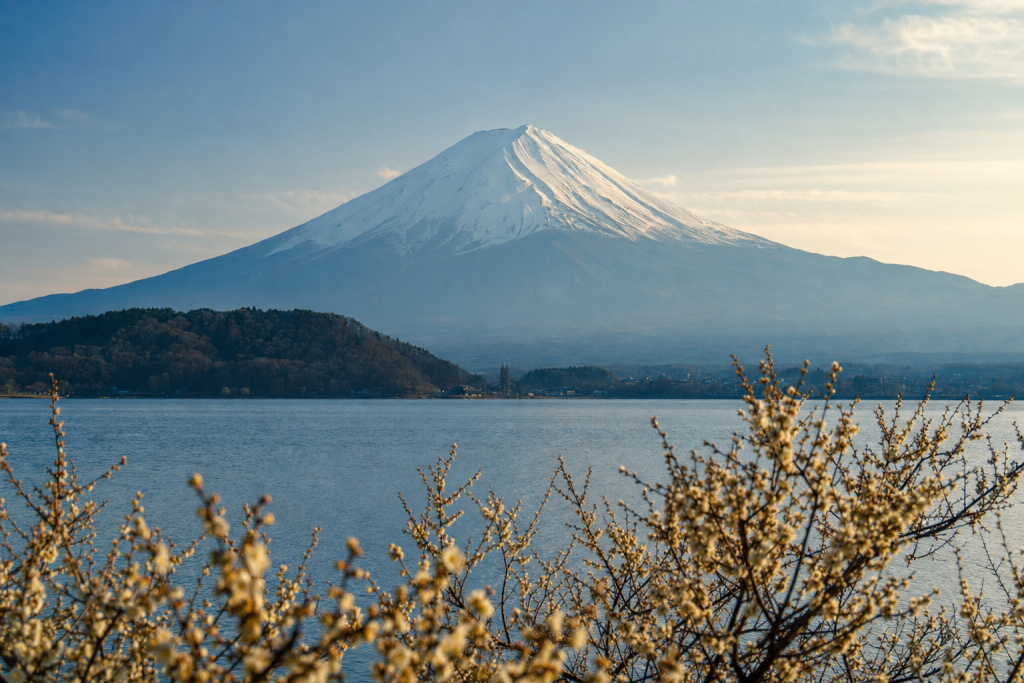
Lake-edge perspective with seasonal flowers in the foreground and Fuji across the water. A wide lens captures reflection bands, cloud texture, and the mountain’s full cone without crowding the frame.
Kawaguchiko Tenjoyama Park (Mt. Fuji Panoramic Ropeway area)
GPS: 35.5018, 138.7528 | Best time: Blue hour | Lens: 24-105mm
Elevated overlook with a broad lake basin and cleaner separation from roadside clutter. Use moderate wide to short telephoto for layered shoreline curves, fog in the basin, and a crisp summit outline at first light.
Lake Yamanaka Nagaike Shinsui Park
GPS: 35.4096, 138.872 | Best time: Sunrise | Lens: 24-70mm
One of the best reflection-lake scenes when wind is calm. The low shoreline gives a mirror-like Fuji reflection, especially in cold seasons when the air is clear and the lake surface stays glassy.
Fuji Subaru Line 5th Station
GPS: 35.3606, 138.7274 | Best time: Late afternoon | Lens: 24-70mm
High-altitude base viewpoint with immediate scale and crater-side texture. Good for shooting the mountain’s lower structure, hikers, and the cloud sea rolling through the valley, especially when access to higher ground is limited.
Gotemba New 5th Station
GPS: 35.3604, 138.7724 | Best time: Sunset | Lens: 70-200mm
More distant, sweeping angle on the southeast side with broad volcanic slopes and dramatic sky room. Telephoto compression helps isolate snow streaks, ash textures, and moving weather bands over the cone.
Gear for mountains
Bring a sturdy tripod, wide-angle and short telephoto lenses, headlamp, gloves, wind shell, insulated mid-layer, and waterproof outer layer. Even summer sunrise sessions near the summit can feel winter-cold, so pack hand warmers, hat, and spare batteries kept warm in an inner pocket. For lake and roadside viewpoints, a CPL can help manage glare, while a graduated ND filter is useful for bright dawn skies over darker foregrounds.
Restrictions, permits, and ethics
Official climbing season is typically July 1 to September 10 or July 10 to September 10 depending on trail; Shizuoka requires pre-climbing training, a 4,000-yen hiking fee, and 14:00–03:00 night entry is restricted unless staying in a mountain hut. Mount Fuji’s official site does not state drone rules on the pages reviewed; check local aviation and park regulations before flying. Entry can be refused if equipment is unsuitable.
Transit and access
From Tokyo Haneda Airport, take a highway bus or train to Kawaguchiko/Fujiyoshida, then connect by bus or taxi to the relevant 5th station or lake viewpoint. For the summit routes, Kawaguchiko Station is the common gateway to the Fuji Subaru Line 5th Station; Shinjuku and Tokyo Station also have direct seasonal buses.
 Save
SavePost-processing approach
Aim for a natural alpine look with restrained contrast, clean whites, and careful shadow lifting so the snow cap and ridgelines stay crisp. Subtle dehaze works well on summit scenes, but avoid over-darkening the sky. For lake reflections, preserve gentle saturation and mirror symmetry; for pagoda or street frames, keep reds and architectural details vivid while holding highlights in the summit snow.
Complete lens kit for Mount Fuji
Mountain photography at Mount Fuji rewards careful kit choices because every gram you carry matters above tree line. A 24-105mm or 24-120mm zoom is the most useful single lens because it covers most working focal lengths without a swap, and modern versions are sharp wide open. A 16-35mm wide angle captures the scale of ridgelines and the sky that earns those photos. A 70-200mm telephoto compresses distant ranges and lets you isolate a single peak across miles. Consider a 100-400mm if wildlife and remote summit detail matter to you. A circular polarizer manages glacier glare and saturates blue sky; a 6-stop ND filter helps with long-exposure cloud movement. Carry a compact tripod that fits inside a pack, a remote shutter release, spare batteries kept warm against your body, and lens hoods for snow glare. Layered clothing and waterproof shells protect both you and the camera when weather changes on Mount Fuji fast.
Light and timing playbook
Alpine light at Mount Fuji changes minute by minute. Plan for two windows: alpenglow at sunrise (the pink-orange light on peaks before the sun hits the valley floor) and the final 45 minutes before sunset when ridges side-light dramatically. Pre-dawn is often the most rewarding window because the sky is still cool, the foreground is shadowed, and the highest peaks catch the first warm light alone. Storms, mist, and partial cloud cover make better images than blue-sky days because they add depth and mood. Check forecast wind and freezing levels — a layer of fresh snow above a partial cloud bank produces some of the most photogenic conditions you can find anywhere in Mount Fuji.
Planning your mountain photography session
Plan a Mount Fuji session in three blocks. First, scout from home using satellite imagery, sun-position tools like PhotoPills or The Photographer’s Ephemeris, and recent images from photographers who have worked the same vantage points. Second, plan a buffer arrival of 60 to 90 minutes before your target light so you have time to set up the tripod, dial in composition, and watch the light change before you press the shutter. Third, plan a contingency: an alternate vantage point a few minutes away that works when weather, crowds, or closures spoil your first choice. Bring a paper or offline-saved map; cell coverage is unreliable at many of the best vantage points at Mount Fuji. Carry water, snacks, sunscreen, and a headlamp with red-light mode for pre-dawn and post-sunset work. Tell someone where you are going and when you expect to be back if the location is remote or off-trail in any way. Most of the best images at Mount Fuji come from photographers who arrived early, stayed late, and were willing to come back twice when the first session did not deliver the light they had hoped for.
Post-processing workflow
A reliable post-processing workflow for Mount Fuji starts in the field. Shoot RAW at the lowest native ISO that still gives you the shutter speed you need; bracket exposures when dynamic range is tight. In Lightroom or Capture One, begin with lens and chromatic-aberration corrections, then set the white balance by eye against a known neutral tone. Pull highlights down before lifting shadows so you preserve texture in the brightest part of the frame. Use the tone curve for global contrast and the HSL panel for color refinement — small luminance adjustments on the dominant colors of Mount Fuji (water, foliage, stone, sky) often do more for the image than any saturation slider. Local adjustments come last: a graduated filter to balance sky, a radial filter to draw attention to the subject, and selective sharpening on the area of detail you want the eye to land. Export at full resolution for prints and at 2048px on the long edge for web. Skylum Luminar Neo is a strong companion tool for sky replacement and atmosphere on weather-challenged days; Photoshop is the right call for composite-style edits and serious dust spot work. Save preset stacks tuned to Mount Fuji so the second visit is faster to edit than the first.
Photography ethics and permits at Mount Fuji
Photography ethics at matter both for the location and for your ability to keep working there. Stay on marked paths and viewing platforms; off-trail boot prints damage soil and vegetation that take decades to recover. Respect closures, seasonal restrictions, and the working hours of staff. If a sign or staff member tells you to move, move — those rules usually exist for safety or preservation reasons that are not always obvious. Pack out every scrap of gear, food wrapper, and microfiber cloth you bring in. Drones are restricted or banned in many protected areas — check with local civil aviation rules and the site’s own policy before flying, and never fly within sight of wildlife. Model releases are required for any identifiable person you photograph commercially; commercial-use permits are required at many sites and the fees are usually small compared with the consequences of being asked to delete a card. If you publish identifiable locations of sensitive places, consider whether geotagging will make the spot crowded for the next visitor. Leave a place better than you found it and the next photographer benefits, too.
Common mistakes and how to avoid them
A short list of avoidable mistakes will dramatically improve your hit rate at Mount Fuji. First, do not arrive at golden hour and start scouting then — scout earlier or on a separate trip so the best light is spent shooting, not finding the spot. Second, do not rely on auto white balance when warm or cool ambient color is part of the image you want; set it manually and trust the RAW file for recovery. Third, do not shoot at the highest ISO without thinking — modern sensors are clean to ISO 6400 but a polished, low-ISO long exposure on a tripod almost always beats a hand-held high-ISO frame for landscape work. Fourth, do not ignore the foreground; a strong foreground anchor is what separates a snapshot from a Mount Fuji image that people stop scrolling on. Fifth, do not over-process. A muted, restrained edit ages well; an oversaturated, over-sharpened, sky-replaced edit looks dated within a year. Finally, do not skip backup. Format one card at a time, dual-card record when possible, and back up to a portable SSD before leaving the trip.
 Save
SaveFrequently asked questions
Can I fly a drone around Mount Fuji?
Drone use is not covered on the official pages reviewed, so treat it as restricted until you verify local rules, aviation regulations, and any prefectural or municipal bans. Around busy viewpoints, protected land, and climbing zones, flight permissions can be limited or prohibited. Plan for ground-based photography unless you have explicit clearance.
Do I need a permit to climb Mount Fuji?
Yes, access is managed during the official season. Current official guidance says climbers entering from the 5th station may need pre-climbing training, pay a 4,000-yen hiking fee, and complete entry procedures through FUJI NAVI or on site. Some hours are restricted, and hut guests are exempt from the nighttime gate rules.
When is the best weather for photos?
The clearest mountain views usually come in the colder, drier months, especially autumn through early spring. Even then, Fuji can hide in cloud, so early morning offers the best odds. In summer, the mountain changes quickly, thunderstorms are common, and pre-dawn summit temperatures can be near freezing.
What gear should I bring?
For summit or high-lake shoots, carry insulated layers, wind protection, gloves, and a headlamp even in summer. A tripod is essential for blue hour and dawn, and a 24-70mm plus 70-200mm pair covers most compositions. Bring extra batteries, water, and snacks because wind and altitude reduce comfort and battery life.
Is the summit reachable by car or cable car?
No. Mount Fuji’s summit is reached by hiking only. The accessible road endpoints are the 5th stations, which vary by trail and season. From there, the climb is steep, alpine, and weather-sensitive, so plan for a long ascent and a slow, careful descent.
All links go to B&H Photo Video, the trusted pro source. Tagged as affiliate per FTC.
What to Pack
A focused landscape kit handles every shot at Mount Fuji without breaking your back. Here is the working photographer's pack list — every link goes to B&H Photo Video (our primary supplier) or Amazon (for accessories and same-day delivery in the US).
| What & Why | B&H | Amazon |
|---|---|---|
Wide-angle zoom (14-35mm range) The single most important lens for sweeping vistas. Pair with a circular polarizer for skies and water. | Shop B&H → | Shop Amazon → |
Sturdy travel tripod Carbon fiber, packs to 15 inches, holds steady in wind off the coast. Essential for blue-hour and long-exposure work. | Shop B&H → | Shop Amazon → |
Circular polarizer (77mm or 82mm) Cuts haze, deepens sky, reveals texture in water. Non-negotiable for landscape work. | Shop B&H → | Shop Amazon → |
10-stop ND filter For 30-second exposures that turn moving water and clouds into silk. | Shop B&H → | Shop Amazon → |
Extra batteries (3 minimum) Cold weather and long exposures eat batteries. Carry triple what you think you need. | Shop B&H → | Shop Amazon → |
Fast SD/CFexpress cards V90 or CFexpress depending on your body. Two cards minimum so a failure mid-trip is recoverable. | Shop B&H → | Shop Amazon → |
Microfiber lens cloths Salt spray, mist, and dust will ruin every shot if you don't carry a cloth. | Shop B&H → | Shop Amazon → |
B&H and Amazon links are affiliate links. We earn a small commission on purchases at no extra cost to you. We only recommend gear we use or would buy ourselves.