Best Photography Spots in Joshua Tree National Park: 12 Locations With GPS
edinchavez01-20). Buying through these links costs you nothing extra and helps fund our free guides.
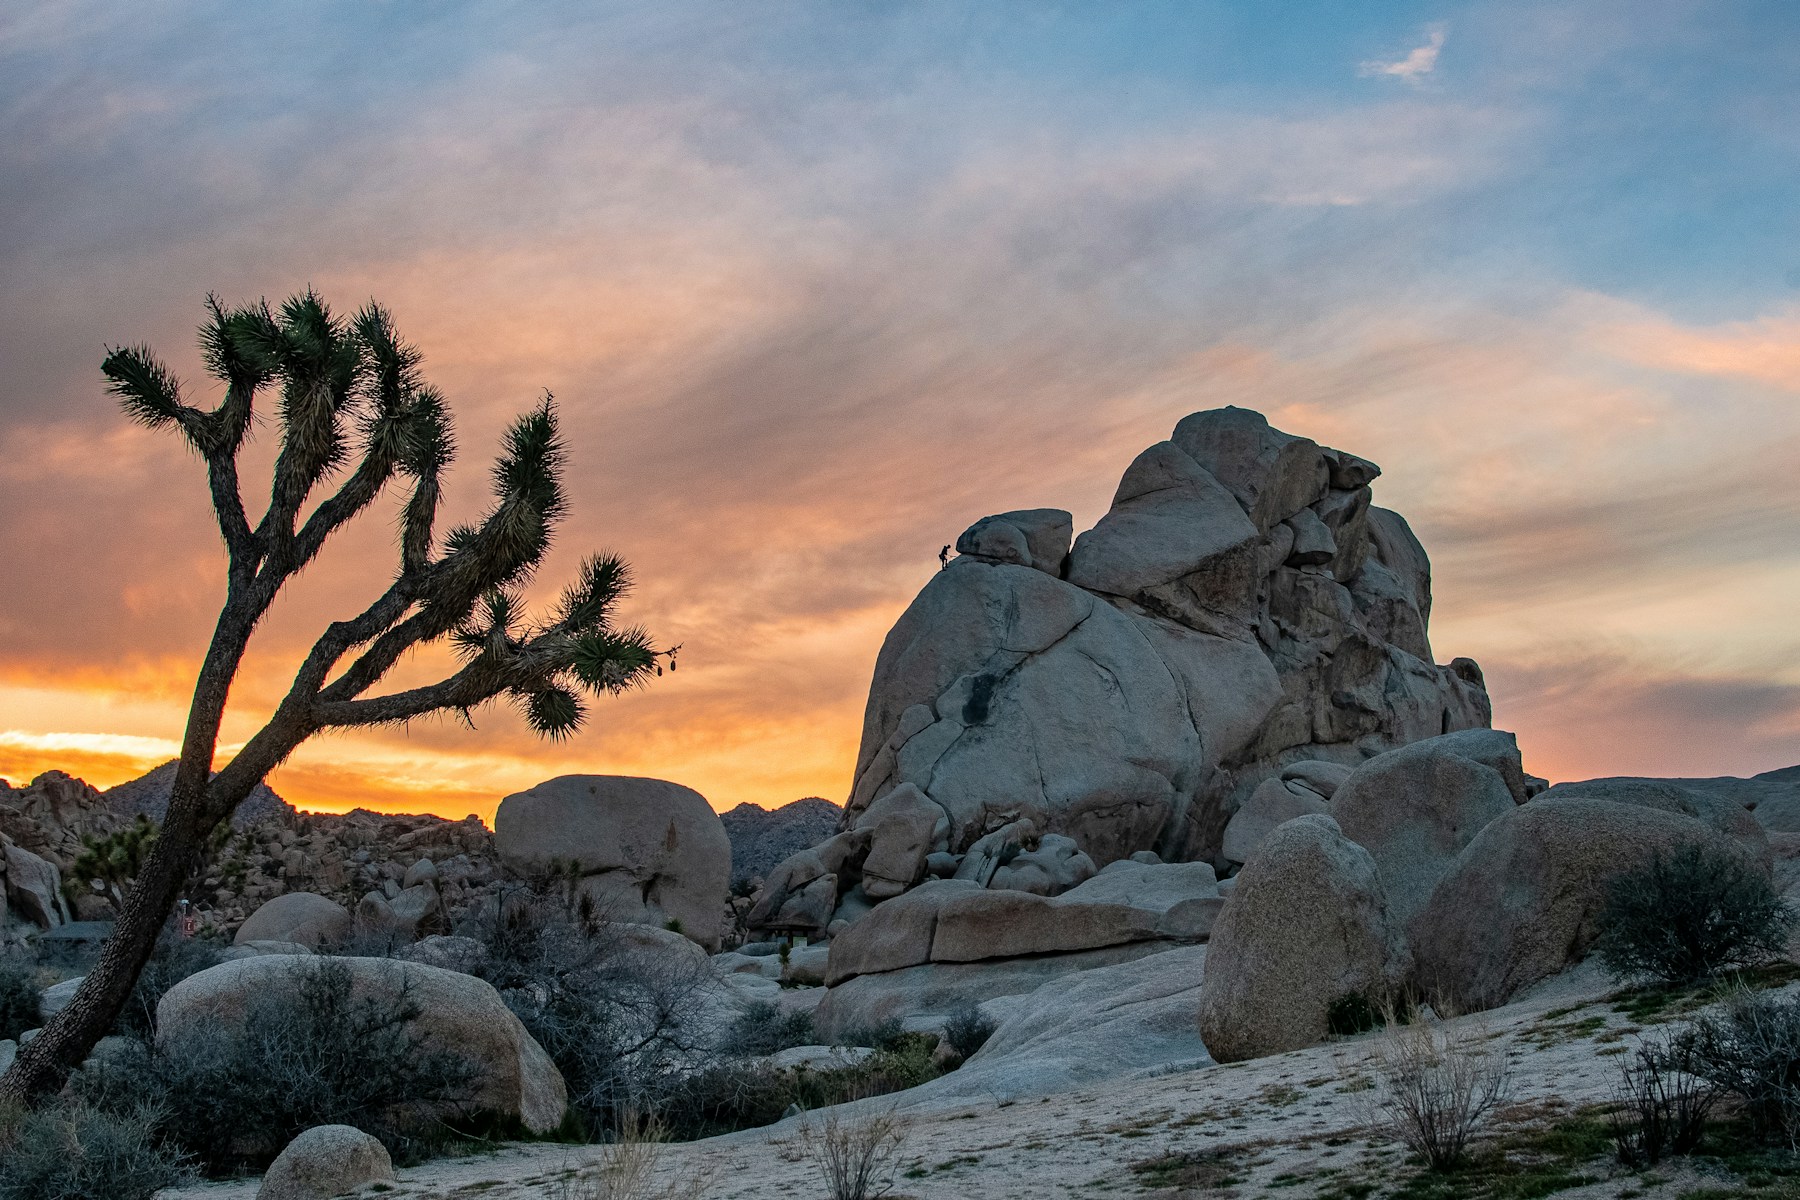
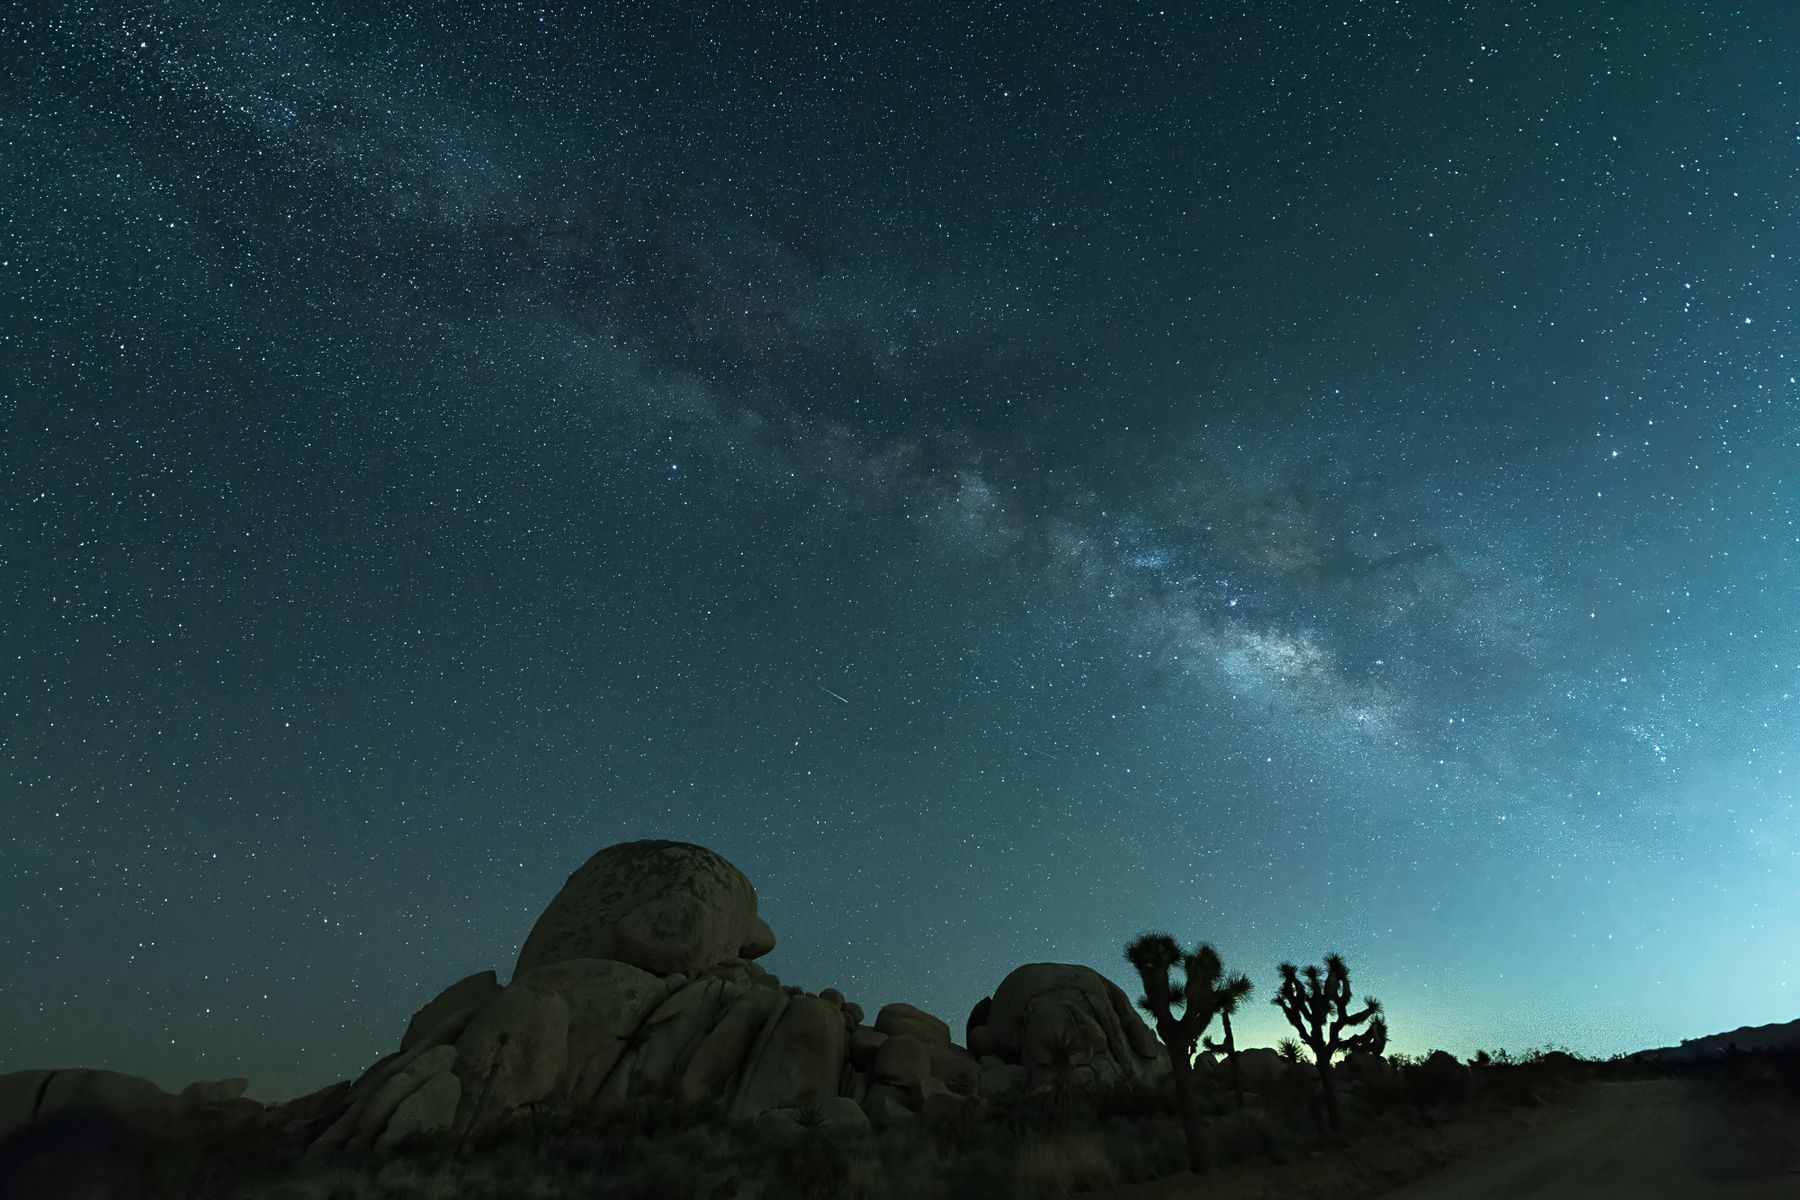
Joshua Tree National Park is one of the most photogenic landscapes in the United States. If you have a camera and the patience to show up before dawn, Joshua Tree will give you images that last a career — but only if you know where and when to point it.
This is the definitive field guide to the 12 best photography spots in Joshua Tree National Park, with GPS coordinates you can drop straight into Google Maps, exact camera settings tuned to Joshua Tree’s unique light, precise timing for every location, and the access notes nobody else bothers to document. It mirrors the intel inside our Joshua Tree Ultimate Photographer’s Guide ($47 PDF) — a downloadable field guide with full-page hero images, GPS maps, seasonal tables, a safety briefing, and a complete photographer’s packing list. Get the guide →
Planning multiple parks? See also: best photography spots in Zion, Grand Canyon, and the full National Parks Photography Guides hub.
12 GPS-mapped locations · Exact camera settings · Multi-season shooting calendar · Free annual updates
Download the PDF guide →
Quick jump to the 12 spots
- Keys View
- Cholla Cactus Garden
- Skull Rock
- Hidden Valley
- Barker Dam
- Arch Rock
- Jumbo Rocks
- Cap Rock
- Ryan Mountain Summit
- Hall of Horrors
- Quail Springs
- Live Oak Picnic Area
Before you shoot Joshua Tree: the essentials
- Park entrance fee (2026): $30 per vehicle (7-day pass); $25 motorcycle; $15 individual/pedestrian/cyclist; $55 Joshua Tree annual pass; $80 America the Beautiful annual pass. Children under 16 free. Digital passes available online at recreation.gov. Current rates at nps.gov.
- Best photography seasons: Fall (Oct–Nov) for clearest stable air and best light-to-heat ratio; Winter (Dec–Feb) for Milky Way cold dark nights and no crowds; Spring (Mar–May) for wildflowers and Joshua tree bloom potential; Summer (Jun–Sep) dawn/dusk only due to 100°F+ heat.
- Dark sky / Milky Way: International Dark Sky Park, designated by DarkSky International. Bortle Class 3–4 in eastern portions of the park (Pinto Basin Road between Cholla Garden and Cottonwood has least traffic and darkest skies). Eastern park significantly darker than western due to minimal light pollution from the east; Palm Springs causes moderate glow to the southwest..
- Drone policy: Drones are completely prohibited on all NPS land under 36 CFR § 1.5. Fines up to $5,000.
The full-resolution version of every map below — plus seasonal calendars, gear matrices per location, sun-angle diagrams, and a complete photographer’s packing checklist — is inside the Joshua Tree Photographer’s Guide PDF ($47).
1. Keys View
The highest accessible overlook in the park at 5,185 ft, Keys View delivers a 200-mile panorama on clear days encompassing the Coachella Valley floor, the Salton Sea (at 230 ft below sea level — one of the lowest points in North America), Palm Springs’ urban sprawl, the 10,834-ft San Jacinto peak rising behind it, 11,503-ft San Gorgonio to the northwest, and on exceptionally clear days, Signal Mountain in Mexico. The San Andreas Fault is visible as a linear vegetation boundary running north-south through the valley floor — one of the few places in Southern California where the fault is clearly legible in landscape photography. The transition from boulder-strewn Mojave Desert at your feet to the below-sea-level desert floor far below creates extraordinary depth and scale.
- GPS: 33.9263, -116.1859
- Elevation: 5,185 ft
- Best time of day: Sunset (primary) — west-facing overlook; Belt of Venus before sunrise (secondary). Avoid midday glare across Coachella Valley haze.
- Sun direction: Keys View faces due west over the Coachella Valley. At sunset, the sun drops directly toward the horizon in front of the camera, backlighting the San Bernardino Mountains and silhouetting ridgelines. The last 30 minutes before sunset paint the valley in orange-gold tones while the Salton Sea (below sea level) takes on a metallic copper shimmer. At pre-sunrise, face east for the Belt of Venus — the soft pink band of anti-twilight glows over the Little San Bernardino Mountains while the blue shadow of Earth rises below it. In winter, low sun angle creates long shadows across the valley floor and the San Andreas Fault scarp becomes readable in raking light.
- Access: Drive Keys View Road south from Cap Rock junction (off Park Blvd); 5-mile paved road ending at a developed overlook with paved observation deck, wall, and interpretive signs. No shuttle — self-drive. Parking lot holds ~50 vehicles; arrive 45 minutes before sunset in peak season (Oct–Apr). No hiking required; ADA accessible.
- Difficulty: Easy — fully paved drive-up overlook, ADA accessible
- Recommended settings: Sunset: aperture: f/11, shutter: 1/60s, iso: 100, lens: 24-70mm or 70-200mm, notes: Telephoto (70-200mm) compresses San Jacinto and valley depth dramatically. Use polarizer to cut valley haze and deepen Salton Sea color. Bracket ±2 EV for sky/foreground blend. · Pre Sunrise: aperture: f/8, shutter: 1/30s, iso: 200, lens: 16-35mm, notes: Face east for Belt of Venus — shoot at nautical twilight. Wide angle captures the full arc of mountains and the valley below. Use foreground boulders to anchor composition. · Blue Hour: aperture: f/2.8, shutter: 25s, iso: 1600, lens: 16-35mm, notes: Post-sunset blue hour: valley city lights begin appearing; silhouette the overlook wall against deep blue sky. 20-30 second exposures capture Palm Springs glow. · Milky Way: aperture: f/2.8, shutter: 20s, iso: 3200, lens: 14-24mm, notes: West-facing position makes Milky Way framing less optimal than east-side locations (galactic core rises southeast). Best for valley city light + stars layered composition from Oct-Feb when core is absent.
Shots to chase:
- Sunset panorama: telephoto (100-200mm) compressed shot of San Jacinto peak silhouetted against orange sky, with Salton Sea metallic shimmer in mid-ground — the stacked layers of desert, sea, and mountain create a uniquely California image
- Belt of Venus pre-dawn: position against the low stone wall with the pink arc glowing behind you, capturing the shadow of Earth rising while Palm Springs lights still twinkle below
- San Andreas Fault documentary: 24-70mm mid-range shot emphasizing the linear fault scarp; include informational sign as context for editorial use
- Winter clear day: on days with Santa Ana winds, 100+ mile visibility reveals Signal Mountain in Mexico on the horizon — rare and worth documenting with telephoto
- Silhouette of lone visitor against golden sunset valley — the overlook’s low stone wall provides a natural platform for backlit human scale
Pro tip: Arrive 45 minutes before sunset to claim a spot — the parking lot fills in peak season. Walk 200 m northeast from the main overlook platform along the unmarked gravel path to escape crowds and find boulder foreground compositions. Haze from the Coachella Valley agricultural areas is worst on still afternoons in summer — a Santa Ana wind event (Oct–Dec) clears the air for visibility exceeding 100 miles. Carry a telephoto regardless: the compressed San Jacinto-valley-fault shot is the iconic Keys View image, not the wide angle.
Common mistake to avoid: Shooting wide angle into the direct setting sun — this blows highlights and produces a flat orange disc image with no foreground detail. Instead, use a moderate telephoto at f/11 and expose for the mountains. Also: ignoring the pre-sunrise Belt of Venus. Most visitors only come at sunset; the pre-dawn east-facing sky is often more dramatic and completely uncrowded.
2. Cholla Cactus Garden
One of the highest concentrations of Bigelow cholla (teddy bear cholla) in the world, packed into a 10-acre bowl. The backlighting effect at sunrise is unique in the park — no other location transforms golden-hour light into an other-worldly luminescence this dramatically. During spring blooms, cholla produce small yellow-pink flowers at branch tips. The Pinto Mountains form a dramatic backdrop to the north and east. Because this location is in the lower Colorado Desert portion of the park, it’s also the best spot to combine cholla photography with star trails and Milky Way (the eastern sky here is extremely dark; Bortle Class 3 territory), making it a day-to-night photography location.
- GPS: 33.9252, -115.929
- Elevation: 1,765 ft
- Best time of day: Sunrise (primary) — golden low-angle light through cholla spines creates incandescent glow; sunset (secondary) with backlighting from west hills. Avoid midday: harsh shadows, spine detail lost, extreme heat at this lower elevation.
- Sun direction: Cholla Garden sits in the low Colorado Desert transition zone (lowest major photo location in the park at ~1,765 ft). At sunrise, the sun rises over the Pinto Mountains to the east, sending low-angle warm light directly through the dense silver-white spines of the teddy bear cholla — each spine becomes a luminous needle of light, transforming the cacti into glowing golden sculptures. Face west into the garden with the rising sun behind you. At sunset, the nearby hills to the west block the horizon, cutting sunset short but producing beautifully backlit silhouette opportunities. The Pinto Basin Road runs east-west here, making it easy to position the car without blocking other photographers.
- Access: Located on Pinto Basin Road in the southeastern section of the park, 20 miles south of Jumbo Rocks. Large paved pullout with restrooms. No shuttle — drive south on Pinto Basin Road from Park Blvd. Interpretive loop trail through the garden (~0.25 mi). Night access: area stays open; NPS notes Pinto Basin Road between Cholla Garden and Cottonwood has the least traffic and darkest skies — ideal for astrophotography without disturbing vehicles.
- Difficulty: Easy — flat interpretive loop, paved parking. WARNING: cholla spines detach easily and embed in skin, clothing, and shoes; maintain 3+ foot clearance from all cacti, especially in the dark.
- Recommended settings: Sunrise: aperture: f/8, shutter: 1/125s, iso: 200, lens: 70-200mm or 100mm macro, notes: Medium telephoto isolates individual cholla arms against glowing background. Macro reveals spine structure backlit like fiber optics. Expose for the highlights (spines), let background go dark. · Sunset: aperture: f/11, shutter: 1/60s, iso: 100, lens: 16-35mm, notes: Wide angle captures full garden silhouette against western sky. Bracket for dynamic range. Golden rim lighting on spine tips is most dramatic 15 min before sunset. · Milky Way: aperture: f/2.8, shutter: 20s, iso: 3200, lens: 14-24mm, notes: Face southeast toward galactic core (Apr-Oct). Cholla silhouettes in foreground create alien landscape. Stack 5-10 frames for noise reduction. Galaxy core rises southeast at ~10PM in June, earlier in July-Aug. · Star Trails: aperture: f/4, shutter: intervalometer, 30s frames x 120+ shots (60 min), iso: 800, lens: 16-35mm, notes: Capture 90-120 minutes of 30-second frames; stack in Sequator or StarStaX. Face north for Polaris rotation center above cholla silhouettes. Foreground exposed separately at blue hour to blend.
Shots to chase:
- Dawn golden glow through cholla: crouch low, backlight spines with rising sun behind you, telephoto to compress spine-sky contrast — the signature cholla photograph that photographers travel across the country to capture
- Macro spine detail: 100mm macro at f/5.6, focus on individual spine tips backlit by sunrise, bokeh background of adjacent cholla arms — unique abstract desert image
- Milky Way arch over cholla: face southeast in June-August, 14mm at f/2.8, 20s, ISO 3200 — galactic core rises above Pinto Mountains with cholla silhouettes in foreground
- Star trails with cholla: 90-minute intervalometer sequence, north-facing, cholla silhouettes against circular star trail arcs — combine with blue hour foreground frame for detail
- Spring bloom: telephoto close-up of cholla arms with yellow-pink flowers, mountains as defocused background, shoot at sunrise for warm color temperature
Pro tip: Use a telephoto (70-200mm) to stay safe distance from cholla while isolating the glowing spine backlight — do NOT approach within 3 feet, especially in the dark when you cannot see fallen cholla balls on the ground. Carry needle-nosed pliers or two sticks to remove embedded cholla balls from clothing. Arrive 20 minutes before astronomical sunrise to set up composition before first light. For night photography, this is the darkest easily accessible location in the park — the Pinto Basin Road essentially has no traffic after 10PM, allowing long exposures without light interference.
Common mistake to avoid: Shooting cholla in harsh midday light — spines look flat and harsh, heat is brutal at this low elevation. Also: standing too close to establish ‘a better angle’ and getting cholla balls on boots or pants. A telephoto accomplishes everything a close approach does, minus the injury. Do not light paint at this location (prohibited park-wide).
3. Skull Rock
The most iconic single rock formation in Joshua Tree — its eye-socket basins were carved by millennia of wind, rain, and chemical weathering that dissolved soft minerals in the granite, creating perfectly rounded cavities that uncannily resemble a human skull. The natural pothole depressions collect rainwater and dew, sometimes holding small pools that add reflective foreground elements after winter rains. As an astrophotography location, Skull Rock is significantly more accessible than Arch Rock (roadside vs. trail hike) but faces more light pollution from passing park road traffic. For Milky Way photography, Arch Rock is superior; for star trails in a dramatic rock context with easy access, Skull Rock is excellent.
- GPS: 33.9989, -116.0338
- Elevation: 4,180 ft
- Best time of day: Early morning (primary) — deep crevices catch raking east light, skull features emerge dramatically; late afternoon/golden hour (secondary) for warm side-lit textures. Milky Way: viable but more light pollution than Arch Rock due to proximity to park road traffic.
- Sun direction: Skull Rock sits south of Park Blvd with its most photogenic face (the skull-like depression with two ‘eye socket’ basins) oriented to the south-southwest. The sun crosses south of the formation year-round, meaning photographers face somewhat into the sun during most daylight hours. Early morning provides the best conditions: the low eastern sun rakes across the rock face from the left (east), casting deep shadows into the eye-socket basins and creating the illusion of depth that makes the skull face recognizable. In late afternoon/golden hour, warm directional light from the west illuminates the rock from the right. Overcast days with diffused light are excellent — they eliminate the contrast challenge and reveal the subtle purple-brown-orange mineral coloring in the granite.
- Access: Roadside formation directly off Park Blvd, between Twentynine Palms and Jumbo Rocks. Small pull-off parking (~20 spaces) on south side of road; the rock is visible from the car. 1.7-mile Skull Rock Nature Trail begins at Jumbo Rocks Campground and passes Skull Rock. No shuttle. Can be busy even midweek; arrive before 8AM for uncrowded morning shots.
- Difficulty: Easy — roadside access. The 1.7-mile nature trail is flat to gently rolling; no technical scrambling required to photograph the main face.
- Recommended settings: Early Morning: aperture: f/8, shutter: 1/125s, iso: 200, lens: 16-35mm, notes: Wide angle captures full skull formation with blue sky above. Position 20-30 m back from rock to include boulders and Joshua trees in foreground. Sun rakes from east — deep eye sockets shadow dramatically. · Golden Hour: aperture: f/11, shutter: 1/60s, iso: 100, lens: 24-70mm, notes: Late afternoon warm light from west lights the face directly. 50mm-equivalent gives natural perspective avoiding distortion. A polarizer reduces glare on the smooth granite surface. · Milky Way: aperture: f/2.8, shutter: 20s, iso: 3200, lens: 14-24mm, notes: Face south-southeast toward galactic core. Skull Rock as foreground silhouette. Expect occasional headlight interference from park road — use remote trigger and delete light-contaminated frames. · Overcast: aperture: f/8, shutter: 1/30s, iso: 400, lens: 24-70mm, notes: Diffuse light best for revealing full mineral color range (rust, ochre, purple) of granite. No harsh shadows competing with skull shape.
Shots to chase:
- Classic skull portrait: 24mm from 25 m back, f/11, foreground small boulders and desert scrub, rock centered against blue or dawn sky — the quintessential Joshua Tree postcard image
- Eye-socket close-up: 70-200mm telephoto, compress and fill frame with the two weathered basins — abstract texture image that reads as landscape AND portrait
- Silhouette at sunset: position behind Skull Rock with camera facing the last light, rock silhouetted against orange-pink western sky — highly effective social media image
- Human scale: position a person on top of the rock at golden hour — their silhouette against warm sky provides scale and adventure narrative; telephoto from 50+ m
- Star trails at night: 90-minute north-facing sequence with Skull Rock as lower anchor, Polaris directly above — pure circular star trail converging point above the skull
Pro tip: The trail that runs past Skull Rock starts at Jumbo Rocks Campground (1.7-mile loop). If the parking lot at Skull Rock is full (common on weekends), park at Jumbo Rocks and walk the nature trail — you’ll pass Skull Rock with a more natural approach and better foreground boulder options. Note the critical difference from Arch Rock for night photography: Arch Rock (4 miles south) sits in White Tank Campground with no through-traffic; Skull Rock is adjacent to the main park road with occasional vehicle headlights interrupting long exposures. Plan for Arch Rock for Milky Way, Skull Rock for star trails when road traffic is minimal (after midnight).
Common mistake to avoid: Shooting from the road shoulder without moving to the south side of the formation for the head-on skull view — from the road, the rock reads as a generic boulder. Cross to the south side. Also: shooting only the skull face and missing the wider Jumbo Rocks landscape context — the rock exists within a dramatic boulder field that provides editorial context and scale.
4. Hidden Valley
Hidden Valley is the heart of the Mojave Desert section of Joshua Tree — the highest density of classic Joshua trees, surrounded by vertical monzogranite walls that create an outdoor amphitheater effect. The enclosed space means you can shoot in all 360° — there is always a lit surface regardless of time of day. The valley itself was legendarily used by cattle rustlers in the 1880s who hid stolen cattle inside the rock ring (the single narrow entrance through a crevice could be easily guarded). Today it’s Joshua Tree’s most popular climbing area, offering human-interest photography of climbers on named routes. As one of four NPS-designated stargazing areas, Hidden Valley offers dark sky access with the added drama of boulder walls framing star fields.
- GPS: 34.0127, -116.1684
- Elevation: 4,200 ft
- Best time of day: Sunrise (primary) — monzogranite walls catch first warm light from the east; late afternoon golden hour (secondary). One of four NPS-designated official stargazing areas.
- Sun direction: Hidden Valley is an enclosed valley ringed by granite walls 20-50 ft high on all sides. At sunrise, the eastern rim catches warm direct light first while the valley floor remains in shadow — creating dramatic contrast between glowing upper walls and dark foreground. By 45 minutes post-sunrise, light fills the valley floor and Joshua trees glow in warm yellow tones. The enclosed nature creates a directionality challenge: on the western inner walls, sunset light hits perfectly from behind the photographer; the eastern walls receive beautiful sunrise alpenglow. The NPS-designated stargazing parking area is here — dark sky access is officially recognized, and 360° rock walls eliminate distant horizon light pollution from ground-level sources.
- Access: Large paved parking lot directly off Park Blvd at Hidden Valley Campground intersection, 11 miles east of West Entrance. One-mile scenic loop trail through the valley. No shuttle. NPS designated stargazing parking area — visitors may remain in the parking lot after dark. Restrooms at trailhead. Popular bouldering area (Intersection Rock adjacent); expect climbers all day.
- Difficulty: Easy — 1-mile flat loop through sandy wash and around valley floor. Some narrow boulder passages on trail. Parking lot is ADA accessible.
- Recommended settings: Sunrise: aperture: f/8, shutter: 1/125s, iso: 200, lens: 16-35mm, notes: Face east through the valley opening; expose for warm lit granite walls with dark foreground shadowed valley. Bracket 3 shots at ±2 EV for blend. Joshua tree foreground at 24mm gives iconic Mojave composition. · Golden Hour: aperture: f/11, shutter: 1/60s, iso: 100, lens: 24-70mm, notes: Inside the valley, face west in late afternoon — sunlight streams over the eastern rim and backlights Joshua trees and boulders simultaneously. Long shadows across sandy wash floor add depth. · Milky Way: aperture: f/2.8, shutter: 20s, iso: 3200, lens: 14-24mm, notes: NPS designated stargazing area — park in lot. Face southeast for galactic core (Apr-Oct). Rock wall framing provides natural foreground frame for night sky. Stay within 20 ft of vehicle per NPS guidelines. · Climber Action: aperture: f/5.6, shutter: 1/500s, iso: 400, lens: 70-200mm, notes: Telephoto isolates climbers on Intersection Rock walls. Shoot from valley floor below for dramatic low-angle heroic perspective. Morning light from east illuminates west-facing Intersection Rock faces.
Shots to chase:
- Low-angle dawn shot through the valley entrance crevice: 16mm ultra-wide, lens at rock level, Joshua tree silhouetted against the glowing eastern granite wall beyond — a layered depth composition
- Climber silhouette: telephoto (200mm) catching a climber in full stretch against the sky at the rock top — human scale transforms the scale of the boulders
- Valley loop at blue hour: wide shot of the full valley from the eastern rim looking west, capturing the enclosed circular nature of the rock ring with sky above — requires a short scramble up eastern boulders
- Star field through rock arch: find the narrow boulder arches along the valley trail; wide angle (14-20mm) captures star field through the rock frame — miniature arch-rock effect without the hike
- Spring wildflowers in wash: 50mm macro equivalent, focus on individual blooms (Desert Globemallow, Indian Paintbrush in Mar-May) against sandy wash with out-of-focus boulders behind
Pro tip: Scout the valley the afternoon before your sunrise shoot — the trail entrance narrows through a boulder crevice and is disorienting in pre-dawn darkness without prior knowledge. Pre-planning on PhotoPills or The Photographer’s Ephemeris shows the exact sun angle at your chosen time. The valley’s east-facing wall is lit at sunrise but also means hikers start arriving by 8AM — plan to be shooting by 6AM. For stargazing, the NPS specifically calls out this parking lot: no permit needed, vehicles may remain, and restrooms are available.
Common mistake to avoid: Staying on the main loop without exploring the inner boulder clusters where more intimate compositions exist. Also: arriving at ‘sunrise’ time instead of 30-40 minutes before — the pre-sunrise alpenglow on the eastern wall is often the most beautiful light of the day and lasts only 10-15 minutes.
Want this in your pocket on the trail?
The full-resolution version of every spot above — with full-page hero photography, GPS maps with gold location pins, sun direction diagrams, multi-season tables, and a complete safety + packing checklist — is inside the Joshua Tree Ultimate Photographer’s Guide PDF ($47). Print it, save it offline, take it into the park. Get the guide →
5. Barker Dam
Barker Dam is one of the few places in Joshua Tree where water exists above-ground year-round (in most years). The small reservoir provides reflections impossible elsewhere in the park — doubled boulder formations, inverted Joshua trees, and sky-in-desert imagery. The dam was originally built by cattlemen around 1900 and raised by legendary rancher William F. Keys in 1949. The area is also home to Native American petroglyphs (rock art created by the Serrano people) viewable along the trail. Bighorn sheep water here regularly — early morning visitors occasionally photograph them at the water’s edge. The Wonderland of Rocks surrounds the trail with massive granite formations and dense Joshua tree forest.
- GPS: 34.0235, -116.1418
- Elevation: 4,300 ft
- Best time of day: Sunrise (primary) — water reflection photography; late afternoon golden hour for Joshua tree fields and boulder backlighting. Best water reflections November–February when dam holds maximum water.
- Sun direction: Barker Dam is oriented in an open basin surrounded by boulders and Joshua tree forest. At sunrise, the eastern sky reflects in the dam water when water levels are sufficient — this creates a rare mirror-flat reflection of boulder formations and Joshua trees in the Mojave Desert. The dam itself faces roughly east-northeast, making it an exceptional sunrise reflection location. In late afternoon, the descending sun from the southwest backlights the Joshua tree forest and boulder fields in all directions. The 360° shooting opportunities are notable: unlike Keys View or Cholla Garden which require specific lighting direction, Barker Dam offers compelling imagery at any time with any light.
- Access: Parking lot off Barker Dam Road (turnoff from Park Blvd west of Skull Rock). 1.5-mile loop trail from parking to dam and back through the Wonderland of Rocks. No shuttle. Moderately popular; weekend morning parking lot fills by 8AM. No restrooms at trailhead parking; restrooms at Hidden Valley Campground nearby.
- Difficulty: Easy — flat 1.5-mile loop through sandy wash and boulder-lined trail. Some minor rock scrambling optional for better viewpoints above the dam.
- Recommended settings: Sunrise Reflection: aperture: f/11, shutter: 1/30s, iso: 100, lens: 16-35mm, notes: Polarizer is crucial — rotate to maximize water reflection (different from removing reflection; find the angle that deepens sky color while preserving water mirror). Low tripod position for 50/50 sky-reflection split. Nov-Feb for best water levels. · Golden Hour: aperture: f/8, shutter: 1/125s, iso: 200, lens: 24-70mm, notes: Face any direction — 360° compositions available. Long shadows across boulder field and sandy wash create maximum texture. Joshua trees backlit in late afternoon glow most dramatically at f/8. · Wildlife: aperture: f/5.6, shutter: 1/500s, iso: 400, lens: 100-400mm, notes: Bighorn sheep photograph well with telephoto at waterline; arrive before dawn to catch them before hikers appear. Bird photography also excellent — many species use water source. · Petroglyph: aperture: f/8, shutter: 1/60s, iso: 200, lens: 50-100mm, notes: Photograph petroglyphs in raking morning or afternoon light for maximum carving depth visibility. Do NOT use flash. Overcast provides even light revealing full glyph detail.
Shots to chase:
- Boulder reflection at sunrise: tripod at water edge, 16-35mm, polarizer, early November light catching the full rock ensemble reflected in still water — the only true reflection shot in Joshua Tree
- Bighorn sheep at water: telephoto (300-400mm), arrive before dawn and position downwind of the dam trail; wait quietly; sheep arrive in early morning before hikers
- Petroglyph documentation: 100mm macro equivalent in raking afternoon light, capturing the Serrano rock art at the cave shelter — historical context for editorial or fine art photography
- Joshua tree forest panorama: from the boulder rise west of the dam, a wide 16mm panorama captures the largest concentration of Joshua trees visible from any single point in the park
- Winter low-water ice: in rare hard freeze years (Dec-Jan), ice forms at dam edges creating semi-frozen reflection shots unique in the Mojave
Pro tip: Water level fluctuates dramatically with seasonal rainfall. Call the park visitor center (760-367-5500) the week before visiting to ask about current dam water levels. Best reflections occur from November through February after autumn rains. Spring visits offer wildflower meadows along the trail but often lower water. Arrive before 7:30AM on weekends — the parking lot fills by 8AM and cars line Barker Dam Road in a way that makes exit tricky.
Common mistake to avoid: Visiting without checking water levels — in dry years the dam can be a mud flat with no reflection. Also: only photographing the dam itself and missing the exceptional Joshua tree forest and boulder formations that line the 1.5-mile loop trail. The trail beyond the dam to the petroglyphs (another 0.3 miles) is visited by very few photographers and offers entirely different compositions.
6. Arch Rock
Arch Rock is Joshua Tree’s premier astrophotography location because the 30-foot granite arch frames the Milky Way galactic core with architectural precision from April through October. The arch opening faces southeast — directly aligned with the galactic core’s rise path. When the core clears the Pinto Mountains and rises through the arch aperture (approximately 1:00-2:00 AM at peak spring season), the visual effect of the galaxy arcing through a stone frame is one of the most dramatic astrophotography compositions available in Southern California. Unlike Skull Rock (roadside, vehicle light interference), Arch Rock sits inside White Tank Campground away from through-traffic. The east side of the park here has Bortle Class 3-4 darkness — significantly darker than the western park sections.
- GPS: 33.9836, -116.0177
- Elevation: 3,900 ft
- Best time of day: Milky Way (primary) — galactic core arcs through the arch aperture April–October, optimally at 1:00–2:00 AM in spring/early summer; sunrise (secondary) for warm granite backlighting through the arch opening.
- Sun direction: Arch Rock is a 30-foot natural granite archway whose primary photogenic face is oriented to the southeast. This southeast-facing orientation is the key to its astrophotography dominance: the Milky Way galactic core rises in the south-southeast from April through October, meaning the arch frames the galaxy naturally as the core rises through the arch aperture. By approximately 1:00–1:30 AM in April-May, the galactic core has risen enough to appear centered in or above the arch opening. In June-July, the core is visible by 10PM and fully within the arch framing by midnight. Sunrise light entering from the east illuminates the arch’s inner face with warm tones; the arch frames an eastern sky composition at dawn.
- Access: White Tank Campground (paid camping required to drive in; non-campers park at Twin Tanks roadside pullout on Pinto Basin Road and walk ~1 mile, or at White Tank campground day-use area). Arch Rock Nature Trail begins at campsite #9. Trail to Arch Rock: ~0.5 miles (15-25 minutes walk). Loop trail with interpretive signs. Night access: White Tank Campground is a campsite area; respect quiet hours. The trail is marked with cairns — bring headlamp. Light painting is prohibited.
- Difficulty: Easy-Moderate — flat trail to the arch with some sandy stretches and minor rock scrambling around the arch for optimal viewpoints. Night navigation requires prior daylight scouting.
- Recommended settings: Milky Way Core: aperture: f/2.8, shutter: 20s, iso: 3200, lens: 14-20mm, notes: Ultra-wide (14-16mm) to capture full arch span plus galaxy above. Use PhotoPills ‘Night AR’ to preview exact galaxy position through arch before committing to position. Face southeast. Galactic core peaks in arch from approximately 11PM (July-Aug) to 1:30AM (April-May). · Star Trails Arch: aperture: f/4, shutter: 30s per frame, 150 frames (75 min), iso: 800, lens: 16-35mm, notes: Face due east/southeast; star trails will arc through the arch opening. Blend blue hour foreground frame (shot at 20 min after sunset) with dark-sky star trail composite for maximum foreground detail. · Sunrise: aperture: f/8, shutter: 1/125s, iso: 200, lens: 16-35mm, notes: Face east through the arch at sunrise — arch frames the eastern desert landscape beyond. First light warms the inner granite face while outer surface remains cool — expose for the illuminated inner arch. · Arch Silhouette: aperture: f/11, shutter: 1/250s, iso: 100, lens: 24-70mm, notes: Expose for bright sky through arch opening, letting arch frame go dark — graphic silhouette composition. Works at sunrise, sunset west-facing view, or with bright moon behind arch.
Shots to chase:
- Milky Way through the arch — the defining shot: 15mm at f/2.8, ISO 3200, 20s, position south of the arch looking north through the opening with galactic core centered in the aperture; take multiple frames for foreground blend
- Blue hour arch layering: shoot foreground (arch and boulder field) at 20-30 minutes post-sunset for ambient detail, then composite with later dark-sky Milky Way frame — eliminates the ‘black blob foreground’ problem of pure night shots
- Dawn arch framing: tripod inside the arch looking east, 24mm, early June when sun rises near northeast — arch frames the desert landscape at near-perfect angles
- Full moon arch: on full moon nights (avoid for Milky Way), the arch glows in silver moonlight; shoot at f/8, ISO 400, 30s — the arch face is lit without artificial light
- Human scale in arch: person standing inside the 30-foot arch at dusk provides scale and adventure context — silhouette against twilight sky through arch opening
Pro tip: Scout the arch during daylight the same day as your night shoot — the trail from campsite #9 is marked with cairns but disorienting in total darkness without prior knowledge of the rock formations. Use PhotoPills ‘Night Augmented Reality’ feature to visualize exactly where the Milky Way will appear relative to the arch at your target time. The most coveted position (arch centered with core rising through the opening) is found by standing approximately 8-12 meters south-southeast of the arch — test this during daylight. Parking: if not camping, use the White Tank Campground day-use area or Twin Tanks trailhead parking and walk 1 mile. The arch becomes crowded on Saturday nights in spring (peak season) — arrive by 9PM to claim your spot.
Common mistake to avoid: Confusing Arch Rock with Skull Rock for Milky Way photography — they are fundamentally different locations with different strengths. Arch Rock faces southeast (directly into the galactic core rise path); Skull Rock faces south-southwest and has road traffic light interference. Also: shooting without prior daylight scouting and then being unable to find the arch in darkness, or choosing the wrong angle (the arch from the north side frames desert, not galaxy). Always preview with PhotoPills before arriving.
7. Jumbo Rocks
Jumbo Rocks is the largest concentration of photogenic boulder formations accessible without a significant hike in Joshua Tree. The interplay of massive rounded monzogranite boulders with a dense Joshua tree forest creates the park’s most emblematic landscape — the image most people associate with Joshua Tree photography. Notable formations include Penguin Rock (a distinctive silhouette near site 18-20), the Juniper-Monolith composition (an ancient juniper tree against a sheer granite face), and dozens of unnamed balanced rocks and boulder stacks. For astrophotography, the open sky between boulder clusters and tree canopies creates natural frames for star fields and the Milky Way.
- GPS: 33.9918, -116.0499
- Elevation: 4,320 ft
- Best time of day: Sunrise (primary) — low eastern light rakes across boulder stacks and adjacent Joshua trees, creating dramatic long shadows; golden hour sunset for backlit Joshua trees with warm boulder glow.
- Sun direction: Jumbo Rocks Campground is surrounded by massive monzogranite boulders that rise 20-60 feet above the desert floor, interspersed with a dense Joshua tree forest. At sunrise, the low eastern sun creates maximum shadow relief across the textured boulder faces — deep crevices go black while sunlit faces glow orange-amber. By 2 hours post-sunrise, the angular sun causes harsh shadows that reduce the boulder texture to flat surfaces. Late afternoon golden hour produces equally dramatic conditions: the sun from the southwest backlights Joshua trees (their spiky silhouettes glow against orange sky) while warm horizontal light rakes the boulder faces from the opposite direction. The campground offers multiple named formations accessible within a 5-minute walk from sites.
- Access: Jumbo Rocks Campground off Park Blvd, 13 miles from North Entrance and 10 miles from West Entrance. Day-use visitors may park at the campground entrance area without a campsite fee during daylight. Skull Rock Nature Trail connects Jumbo Rocks to Skull Rock (1.7 miles). No shuttle. Most accessible boulder formation complex in the park — dozens of compositions within 0.5-mile walk from parking.
- Difficulty: Easy — flat campground roads with easy access to boulder bases; moderate for climbing on top of boulders for elevated views (no technical gear required, good footwear recommended).
- Recommended settings: Sunrise Boulders: aperture: f/11, shutter: 1/125s, iso: 200, lens: 16-35mm, notes: Wide angle captures boulder stacks with Joshua tree foreground. Arrive 30 min before sunrise to set up while still dark. Face east — first light hits boulder faces at 5-15 degrees above horizon, maximum raking angle. · Golden Hour Joshua Trees: aperture: f/8, shutter: 1/250s, iso: 100, lens: 50-100mm, notes: Position the sun behind Joshua tree branches (use trunk to block direct sun orb), f/8 for sunburst effect through branches. The rim-lit spine glow on Joshua tree arms at f/8-f/11 is the classic backlit desert image. · Milky Way: aperture: f/2.8, shutter: 20s, iso: 3200, lens: 14-24mm, notes: Multiple composition options: boulder silhouette foreground, Joshua tree foreground, or rock-framed sky. Face southeast for galactic core. The campground’s open areas provide dark sky access without trail navigation. · Star Trails: aperture: f/4, shutter: 25s frames x 150 shots, iso: 800, lens: 16-35mm, notes: Juniper-Monolith and Penguin Rock are iconic foregrounds for star trails. 90-minute sequences, intervalometer, face north. Blend with blue hour foreground for sharpness.
Shots to chase:
- Penguin Rock sunrise: find the distinctive penguin-shaped silhouette near campsites 18-20, shoot from 30 m at 24mm with a companion juniper tree — the pair’s silhouette against the dawn sky is a Joshua Tree icon
- Juniper-Monolith composition: ancient juniper tree against a sheer granite face, backlit at golden hour — trunk texture against smooth rock face creates strong textural contrast
- Joshua tree backlit branches: position with sun blocked behind a central Joshua tree trunk, expose for the sky, let the radiating arms create a starburst silhouette against orange/gold sky
- Boulder stacking at sunrise: low angle (camera at ground level), 16mm ultra-wide, massive granite boulders filling 60% of frame with Joshua trees and warming sky behind — maximum drama from minimum elevation
- Milky Way between boulders: find a natural gap between two large granite slabs that frames the southeastern sky, position 5-8 m back, 14mm ultra-wide — galaxy appears framed by granite walls
Pro tip: Camping inside Jumbo Rocks gives access before dawn without headlamp navigation concerns — reserve sites 3-4 months in advance for peak season (Oct-Apr). Day visitors: park at the campground entrance and walk in; many excellent compositions are within 10-15 minutes of the parking area. The best boulder complexes are not signed — explore on foot during afternoon scouting. Look for boulder gaps that face southeast (for Milky Way) or northeast (for sunrise) — these are your compositions for the night/morning session.
Common mistake to avoid: Photographing in midday light — the harsh overhead sun eliminates the raking shadow relief that makes boulder photography exceptional. Also: staying near the campground road instead of walking 200-400 m into the boulder clusters where crowding disappears and more intimate compositions exist.
8. Cap Rock
Cap Rock’s claim to photography fame is both photographic and cultural: this is where musician Gram Parsons’ body was illegally burned by friends in 1973 (a countercultural legend), and the rock’s flat cap shape is immediately recognizable as a geographic landmark. For photographers, the interest lies in the 360° open Joshua tree forest that surrounds the formation — unobstructed views of sunrise and sunset over an ocean of Joshua trees. As one of the four NPS-designated stargazing spots, it offers permitted night use with parking, restrooms, and clear access. In spring, the Joshua tree forest around Cap Rock can contain high concentrations of wildflowers (Desert Globemallow, Indian Paintbrush) that frame the formation in color.
- GPS: 33.9898, -116.1635
- Elevation: 4,200 ft
- Best time of day: Sunrise or sunset (both viable — 360° compositions); one of four NPS-designated official stargazing areas. Low human traffic after dark makes it an underrated astrophotography location.
- Sun direction: Cap Rock sits at the junction of Park Blvd and Keys View Road — the park’s central crossroads. The flat, cap-shaped formation rises gently above the Joshua tree plain with 360° visibility in all directions. At sunrise, the low eastern sun creates long shadows from the cap formation and surrounding boulder clusters across the sandy desert floor. At golden hour sunset, the cap rock is nicely lit from the west while Joshua trees to the east are silhouetted. The open sky exposure makes this one of the best locations for pre-dawn planet imaging and post-sunset twilight belt photography.
- Access: Large paved parking area at Cap Rock junction (Park Blvd and Keys View Road intersection). NPS-designated stargazing area — remain in parking lot area, within 20 ft of vehicle. Short 0.4-mile interpretive loop around the cap formation. Restrooms available. No shuttle. One of the most centrally located spots for photography — Keys View Road to Keys View begins here.
- Difficulty: Easy — paved parking, flat 0.4-mile interpretive loop, ADA accessible.
- Recommended settings: Sunrise: aperture: f/11, shutter: 1/125s, iso: 200, lens: 16-35mm or 24-70mm, notes: Face east from south side of Cap Rock; sun rises behind boulders creating rim-lit golden boulder outline. Long desert shadows from Joshua trees stretch toward camera. · Sunset: aperture: f/11, shutter: 1/60s, iso: 100, lens: 24-70mm, notes: Cap formation lit from west; Joshua tree forest behind glows in orange. The cap silhouette against gradient sky — use the rock’s distinctive flat-top outline. · Milky Way: aperture: f/2.8, shutter: 20s, iso: 3200, lens: 14-24mm, notes: NPS designated area — park and set up. Face southeast for galactic core (Apr-Oct). Joshua tree silhouettes in foreground with Cap Rock off to one side. Less traffic than Hidden Valley. · Wildflowers: aperture: f/8, shutter: 1/125s, iso: 200, lens: 50mm macro, notes: Low angle (ground level), individual blooms in foreground with Cap Rock and Joshua tree forest behind — spring blooms March-May dependent on winter rainfall.
Shots to chase:
- Joshua tree forest at sunrise: wide angle (16mm) from south of Cap Rock, horizon line filled with Joshua trees, formation on right of frame, sun rising left — horizontal forest panorama
- Cap silhouette at sunset: telephoto (100mm) from 100 m, compress the cap outline against gradient western sky — graphic shape against color
- NPS stargazing zone at night: the designated parking area provides comfortable setup for Milky Way with car as foreground scale element — unique ‘photographer at work’ meta-image
- Spring wildflower carpet: macro ground-level shot with wildflowers sharp in foreground, Cap Rock formation soft in background — requires exceptional rain year (2019, 2023 were notable)
Pro tip: Cap Rock is centrally located between all key photography sites — use it as a basecamp orientation point. The junction is where Keys View Road splits south; use it to plan your shooting day. As a stargazing area, it’s lower traffic than Hidden Valley (most visitors choose Hidden Valley or Ryan Mountain), meaning you’ll have more space for tripod setup. The interpretive trail around the rock takes 15 minutes and reveals several textured boulder compositions not visible from the parking lot.
Common mistake to avoid: Treating Cap Rock as only a transit point between Hidden Valley and Keys View rather than its own photography destination. The Joshua tree forest surrounding the formation is exceptionally dense and photogenic — explore 100-200 m in any direction from the parking lot for forest photography without the formation at all.
Want this in your pocket on the trail?
The full-resolution version of every spot above — with full-page hero photography, GPS maps with gold location pins, sun direction diagrams, multi-season tables, and a complete safety + packing checklist — is inside the Joshua Tree Ultimate Photographer’s Guide PDF ($47). Print it, save it offline, take it into the park. Get the guide →
9. Ryan Mountain Summit
Ryan Mountain is the only photograph-accessible summit in the park that provides a true aerial-perspective view of the Joshua tree forest and boulder landscape. From ground level, the forest of Joshua trees (10-25 ft tall) obscures the landscape scale; from 5,457 ft, the forest becomes a textured carpet stretching to all horizons. The summit also provides the clearest view of the park’s dual-desert geology — the Mojave (higher, Joshua tree) transitions visible to the west and the lower Colorado Desert floor (cholla, ocotillo) opening to the east in the Pinto Basin. At night, the summit (accessed by headlamp) is darker than most park locations and provides a 360° star dome — however, no vehicle access means all gear must be carried up (lightweight astrophotography setup recommended).
- GPS: 34.0026, -116.1359
- Elevation: 5,457 ft
- Best time of day: Sunrise (primary) — summit view of entire park illuminating in warm light; golden hour (secondary); avoid midday heat and afternoon lightning risk.
- Sun direction: Ryan Mountain is the highest easily summitable peak in the central park at 5,457 ft. The summit provides a genuine 360° panorama over the entire heart of Joshua Tree — from the Wonderland of Rocks to the northwest, Lost Horse Valley to the southwest, Pinto Basin stretching east to the park’s eastern wilderness, and Little San Bernardino Mountains to the west. At sunrise, the park below illuminates progressively — first the high ridgelines catch warm amber light while valleys remain in dark blue shadow, then the Joshua tree forests emerge in gold, and finally the entire basin floor is bathed. The low-angle sun rakes the boulder fields visible far below, creating thousands of shadow lines visible from the summit’s height. No flat desert horizon here — the elevated perspective reveals topographic complexity impossible to see from ground level.
- Access: Ryan Mountain Trailhead parking lot off Park Blvd (2.1 miles east of Keys View Road junction). 3-mile round-trip trail (1.5 miles each way), 1,050 ft elevation gain. Stone steps built into the steep sections. No shuttle — drive to trailhead. Trail is well-maintained with clear markers. Restroom at parking lot. Expect 1-1.5 hours to summit. Start before nautical twilight for sunrise at summit.
- Difficulty: Moderate — 1,050 ft elevation gain over 1.5 miles, stone steps, sustained ascent. Excellent fitness or prior hiking experience recommended. Allow extra time in summer heat or winter cold. Exposed summit — wind and cold amplified at elevation.
- Recommended settings: Sunrise Summit: aperture: f/11, shutter: 1/125s, iso: 200, lens: 16-35mm, notes: Wide angle captures the full 360° panorama — shoot multiple exposures for a panoramic stitch. Face east first, then rotate clockwise. Bracket ±2 EV for the bright rising sun vs. shadowed valley below. · Telephoto Forest: aperture: f/8, shutter: 1/500s, iso: 400, lens: 70-200mm, notes: Telephoto compresses the Joshua tree forest below — the aerial-perspective compression is unique to this elevation. Pinto Basin appears closer; individual boulder clusters legible at 200mm. · Astrophotography: aperture: f/2.8, shutter: 20s, iso: 3200, lens: 14-24mm, notes: Carry a lightweight tripod (carbon fiber); the 1.5-mile hike discourages casual visitors — you’ll likely have the summit to yourself. 360° star dome without horizon obstructions. Milky Way faces southeast. · Blue Hour Descent: aperture: f/4, shutter: 1/30s, iso: 800, lens: 16-35mm, notes: After sunrise, descend by 8AM to avoid heat. The descent itself offers changing perspectives of the boulder landscape with morning light from behind (west-facing foreground) — stop at the stone steps for natural-frame compositions.
Shots to chase:
- Park-wide panoramic stitch: 6-12 vertical frames at 35mm, rotate 360°, stitch in Lightroom — the only location in Joshua Tree that reveals the entire park in a single image
- Forest carpet at sunrise: telephoto compression (200mm) looking northwest over Joshua tree forest from summit — trees become a textured abstract pattern bathed in warm light
- Pinto Basin dawn: face east from summit at first light — the vast Pinto Basin (Colorado Desert transition) illuminating in front of you while Mojave desert rises behind gives the dual-desert story in one frame
- Summit cairn with Joshua trees: foreground stone cairn with panoramic forest view behind, wide angle — the summit marker provides scale and compositional anchor
- Night sky 360°: on moonless nights, hike up by headlamp at 11PM for 360° star dome photography — very few photographers make this effort, and the dark, elevated position produces extraordinary results
Pro tip: Start hiking 90 minutes before desired summit sunrise time — the trail is steep and 1.5 miles long. In summer (May-September), this means departing trailhead by 4:00-4:30AM. Carry 1.5 liters water minimum for the round trip. The summit is fully exposed to wind — temperatures at 5,457 ft can be 15-20°F colder than the parking lot. In winter, ice forms on the stone steps in shade zones; trekking poles essential. The Indian Cave at the trailhead’s western end is worth photographing before the hike (ancient bedrock mortar holes used by Serrano people for grinding seeds).
Common mistake to avoid: Starting too late and arriving at the summit 30 minutes after sunrise — golden hour lasts only 15-20 minutes at the top. The hike looks short on a map but 1,050 ft elevation gain takes longer than expected. Also: not bringing a warm layer for the summit — cold and wind at this elevation are consistently surprising to visitors from the valley floor.
10. Hall of Horrors
The Hall of Horrors is one of the park’s best-kept photography secrets, overshadowed by Skull Rock and Arch Rock in most guides. The two slot canyons (side-by-side, separated by vertical boulders) are genuine narrow-passage canyons in granite — unusual in Joshua Tree where most formations are open boulder piles. Inside the hall, the sky is a vertical stripe above steep canyon walls — a completely different compositional environment than the park’s open landscapes. The astrophotography potential is documented by professional photographers who use the blue hour / star trail layering technique here: shoot the slot canyon floor at blue hour for sharp foreground detail, then stack star trail frames to create a composite of sharp rock walls with circular star arcs overhead.
- GPS: 33.9986, -116.145
- Elevation: 4,400 ft
- Best time of day: Sunset (primary) — western light illuminates rock clusters dramatically; golden hour for Joshua tree photography in the surrounding plain; blue hour for star trail setup (blue foreground capture + dark sky star frame technique).
- Sun direction: Hall of Horrors is located on the north side of Park Blvd, west of Ryan Mountain. Three major rock clusters define the area — the main large central cluster visible from the road, a second cluster behind/west (where the actual ‘hall’ slot canyons are found), and a third smaller cluster. At sunset, the descending sun from the west illuminates the main cluster faces in warm raking light that reveals the rock texture and deep crevice shadows simultaneously. The Joshua trees surrounding the formation glow in backlit gold. Blue hour arrives quickly after sunset — the slot canyons catch the last ambient light while the sky transitions to deep blue above.
- Access: Small paved parking lot on the north side of Park Blvd, approximately 0.7 miles west of Ryan Mountain trailhead. Parking for ~24 vehicles with vault toilets. 0.6-mile loop trail; 0.28 miles from parking to scrambling area. No shuttle. Note: when parking fills (common on weekends), Ryan Mountain parking (0.7 miles east) is an overflow option — walk back to Hall of Horrors along Park Blvd.
- Difficulty: Easy-Moderate — 0.6-mile loop, but accessing the slot canyon interior requires scrambling over several large boulders (moderate); the surrounding formation exterior is easy.
- Recommended settings: Sunset Exterior: aperture: f/11, shutter: 1/60s, iso: 100, lens: 24-70mm, notes: Shoot the main cluster from the south side at sunset. Warm raking light from the west across the rock faces. Joshua trees frame the formation in golden backlight. · Blue Hour Slot: aperture: f/4, shutter: 15-30s, iso: 800, lens: 16-35mm, notes: Inside the slot canyon at blue hour — enough ambient sky light to expose the canyon walls without artificial light. This is the foreground frame for star trail composite. Shoot multiple exposures for best wall detail. · Star Trail Composite: aperture: f/4, shutter: intervalometer, 30s x 120 frames, iso: 800, lens: 16-35mm, notes: From same position as blue hour shot. 60-90 minutes of 30-second frames. Stack in Sequator or StarStaX. Composite with blue hour foreground in Photoshop for sharp canyon walls + star trails above. · Golden Hour Jtrees: aperture: f/8, shutter: 1/250s, iso: 100, lens: 70-200mm, notes: Telephoto compression of Joshua trees with Hall of Horrors formation in background at golden hour — this area has one of the best Joshua tree concentrations adjacent to a prominent rock formation.
Shots to chase:
- Slot canyon star trail composite: blue hour canyon walls + 90-minute star trail overlay — the slot canyon’s narrow sky stripe creates a shooting-gallery effect with star trails converging toward a vanishing point
- Sunset rock cluster: from 40 m south, telephoto (135mm) captures the main cluster in warm raking light, Joshua trees in foreground — the formation’s scale reads correctly with compression
- Interior boulder corridor: inside the rock clusters, natural corridors of 3-5 meter gaps between boulders create frame-within-frame compositions at any light
- Dusk-to-dark transition: blue hour sky (deep blue) above the dark slot canyon walls with one or two stars becoming visible — the 5-10 minute window of this transition is extremely photogenic
- Joshua tree forest with formation: 16mm wide, park road in foreground (if no traffic), Hall of Horrors left of frame, Joshua tree forest right, open desert sky above — panoramic western vista
Pro tip: The Hall of Horrors interior (the actual slot canyons) requires scrambling over several boulders to enter — scout in daylight before any night photography attempt. The entrance to the slot is on the southwest corner of the second (rear) rock cluster, two-thirds of the way down if you go right around the main cluster. At night, this scramble requires clear prior knowledge. The professional blue hour/star trail layering technique pioneered at this location by astrophotography instructors requires precise camera positioning consistency between the foreground (blue hour) and star trail (dark) frames — use a remote trigger and do not touch the tripod between sequences.
Common mistake to avoid: Visiting only the exterior of the main rock cluster visible from the road and missing the actual Hall of Horrors slot canyons entirely. The sign at the parking lot does not clearly direct visitors to the narrow canyon interior — most casual visitors see only the outer boulders. Also: treating this as only a daytime stop; its best photography value is at dusk and in night/blue hour composite work.
11. Quail Springs
Quail Springs is the park’s western gateway photography location — the first chance for photographers arriving from Palm Springs to photograph in Joshua Tree’s classic environment. The picnic area sits in an open desert with excellent Joshua tree density and a wide-open eastern horizon for sunrise photography. As the closest designated stargazing area to the West Entrance, it provides easy night-sky access for visitors staying in Joshua Tree town or Yucca Valley without deep park driving. In the extremely rare event of winter snowfall (occurs perhaps once every 5-10 years when temperature drops below freezing during a Pacific storm), the Joshua trees around Quail Springs are dusted in white — a surreal and highly collectible image.
- GPS: 34.0402, -116.1976
- Elevation: 3,976 ft
- Best time of day: Sunrise (primary) — the westernmost NPS-designated stargazing area; early morning golden light through dense Joshua tree forest; winter months for snow-dusted Joshua trees after rare cold events.
- Sun direction: Quail Springs Picnic Area is the first major landmark encountered entering the park from the West Entrance (Joshua Tree town). The open Joshua tree plain here catches unobstructed sunrise light from the east — the flat terrain means shadow lines from Joshua trees extend hundreds of meters across the sandy desert floor in morning light. At sunrise, the low-angle sun backlights Joshua tree branches from the east, creating rim-lit arm silhouettes and long shadows pointing toward the camera for photographers facing east. For astrophotography, the NPS designates this as one of four official stargazing parking areas; the western location means some Palm Springs light pollution from the southwest, but north and east skies remain dark.
- Access: First right turn after the West Entrance station on Park Blvd (approximately 1.5 miles in). Paved parking area with restrooms. NPS designated stargazing area. Open day and night. Bouldering in the Quail Springs area is popular — Morning Wall and other formations nearby. No shuttle.
- Difficulty: Easy — flat open area with parking, no trail required for photography. Quail Springs Trail (3 miles) available for those wanting deeper access into the Joshua tree forest.
- Recommended settings: Sunrise: aperture: f/11, shutter: 1/125s, iso: 200, lens: 16-35mm, notes: Face east from the picnic area for unobstructed horizon sunrise. Long shadows from Joshua trees toward camera. Include multiple Joshua trees in frame for the ‘forest of silhouettes’ composition. · Golden Hour: aperture: f/8, shutter: 1/500s, iso: 100, lens: 70-200mm, notes: Telephoto compression (150-200mm) reduces the desert landscape to a compressed plane of Joshua trees. The spiky silhouettes against warm gradient sky are the quintessential J-Tree image. · Milky Way: aperture: f/2.8, shutter: 20s, iso: 3200, lens: 14-24mm, notes: NPS designated area — park legally and set up. Face north or northeast for least Palm Springs light pollution. Joshua tree in foreground against star field is the classic night composition here. · Winter Snow: aperture: f/8, shutter: 1/250s, iso: 400, lens: 24-70mm, notes: If snow falls (rare), shoot within the first 2-4 hours before melting in the low desert sun. Snow on Joshua tree arms at sunrise creates extraordinary surreal images — no filters needed.
Shots to chase:
- Joshua tree silhouette forest at dawn: 16mm, multiple Joshua trees lined up against pre-dawn orange horizon — the classic ‘army of Joshua trees’ composition
- Telephoto compression of desert: 200mm, Joshua trees compressed into a dense forest wall against warm sky — eliminates the empty ground space and creates an abstract desert image
- Night foreground Joshua tree: single distinctive Joshua tree as foreground anchor against Milky Way rising to the southeast — stay 3-4 m from tree to include full tree in 14mm frame with galaxy above
- Winter snow moment: if snowfall occurs (monitor weather in January-February), be at Quail Springs by 7AM before sun reaches the trees — Joshua tree snow is an extremely rare and documented phenomenon
Pro tip: Quail Springs is the least crowded of the four NPS-designated stargazing areas — it’s close to the entrance but most night visitors don’t stop before driving deeper into the park. The parking lot here has the widest selection of foreground Joshua trees within walking distance for night photography. Monitor NPS social media and park webcams in January-February for rare snowfall events — conditions can change within 24 hours and photographers who respond quickly capture images that circulate for years.
Common mistake to avoid: Skipping Quail Springs for ‘more iconic’ locations deeper in the park without considering that this open Joshua tree plain at the western entrance may have excellent composition opportunities. Also: overlooking the Quail Springs area bouldering formations (Morning Wall) a short walk from the picnic area — they provide boulder + Joshua tree compositions at this westernmost location.
12. Live Oak Picnic Area
Live Oak is the park’s most photogenic picnic area — the surrounding large granite boulder clusters provide significant compositional interest beyond a typical roadside stop. The namesake Live Oak tree (Quercus turbinella) is a rarety in this desert landscape — its presence indicates a hidden water source in the fractured granite. The area is adjacent to Live Oak Dam and Ivanpah Dam wash, which after good winter rains becomes a corridor of desert wildflowers (Desert Bluebells, Desert Globemallow, Brittlebush). The intrusive dike patterns in the granite (dark bands of fine-grained rock injected into the surrounding granite millions of years ago) are particularly well-developed here and provide strong graphic lines for photography. A small semi-arch formation and several ‘balanced rock’ compositions exist within 200 m of the picnic tables.
- GPS: 34.0013, -116.0498
- Elevation: 4,100 ft
- Best time of day: Morning golden hour (primary) — low-angle eastern sun rakes across large boulder clusters and lights the namesake Live Oak tree; spring (secondary) for wildflower wash photography when winter rains were sufficient.
- Sun direction: Live Oak Picnic Area sits nestled among rock formations on Park Blvd approximately two miles west of its intersection with Pinto Basin Road — positioned between Skull Rock to the west and Arch Rock to the east. At sunrise and morning golden hour, the low eastern sun creates long shadow lines from the large granite boulders across the sandy desert floor. The namesake Live Oak tree (a native scrub oak surviving in this rocky microhabitat) is lit beautifully by morning side-light from the east. The rock formations here include natural dike intrusions (darker bands running through the granite) that are highly photogenic when caught in raking light — patterns visible clearly at low sun angles are invisible at midday.
- Access: Along Park Blvd approximately 2 miles west of the Pinto Basin Road intersection. Paved parking area with picnic tables, grills, vault restrooms, and accessible facilities. No shuttle — self-drive. Day use area; closed from dusk to dawn per NPS policy (Day Use Only designation protects wildlife). This is an important note: Live Oak is NOT available for night photography unlike Hidden Valley, Cap Rock, Quail Springs, and Ryan Mountain (which are the four designated stargazing areas).
- Difficulty: Easy — flat picnic area with immediate rock access. Short informal hikes (1 hour or less) possible through adjacent boulder fields; no maintained trail. Bring a map or GPS — it’s easy to get turned around in the boulder maze.
- Recommended settings: Morning: aperture: f/8, shutter: 1/125s, iso: 200, lens: 24-70mm, notes: Shoot the large boulder clusters in morning raking light — the dike bands in the granite glow warm against the dark host rock. Include the Live Oak tree for scale and botanical interest. · Spring Wildflowers: aperture: f/8, shutter: 1/250s, iso: 200, lens: 50mm macro, notes: Low-angle ground-level shot of blooms in the wash, with boulders and Joshua trees in soft background. Best March-April dependent on winter rainfall. Shoot in morning before wind picks up. · Dike Detail: aperture: f/11, shutter: 1/60s, iso: 200, lens: 70-200mm, notes: Telephoto to isolate dike banding patterns in rock face in strong raking light — the graphic lines create a strong abstract image. Morning or late afternoon light required. · Wide Boulders: aperture: f/11, shutter: 1/125s, iso: 200, lens: 16-35mm, notes: Wide angle capturing large boulder cluster + Joshua trees in morning light. Include human scale (companion photographer) against the boulders to convey immense size.
Shots to chase:
- Live Oak tree portrait: 50mm at f/8, the oak framed against granite boulders in morning light — the oak’s rounded canopy contrasts with the angular rock faces
- Dike pattern abstract: 100-200mm telephoto, isolated section of dike banding in raking morning light — the dark intrusive bands against warm granite read as architectural geometry
- Boulder cluster with Joshua trees: 16mm ultra-wide, multiple boulders stacked in mid-ground, scattering of Joshua trees, open desert sky — the classic mid-park composition
- Spring wash wildflowers: walk 200 m south into the Live Oak Dam wash after good winter rains; carpet of Desert Bluebell and Globemallow with granite walls of wash on both sides
- Granite mini-arch: a small natural arch formation 150 m northwest of picnic area — 14-20mm, arch framing desert landscape or early morning sky
Pro tip: Note the Day Use Only designation — Live Oak closes at dusk and is not available for night photography. Plan accordingly: schedule Live Oak for morning golden hour photography and move to a designated stargazing area (Jumbo Rocks campground, Cap Rock, or Arch Rock via White Tank Campground) for night sessions. Scout the boulder field east of the picnic tables for the best compositions — the area within 200 m of parking contains excellent material that most visitors never find because they stay at the picnic tables.
Common mistake to avoid: Attempting night photography here — the Day Use Only designation means rangers do close and monitor this area after dark. Use the four designated stargazing areas (Quail Springs, Hidden Valley, Cap Rock, Ryan Mountain parking lots) for legal night photography access. Also: staying only at the picnic tables and not exploring the adjacent boulder field which is where the most interesting compositions exist.
When to photograph Joshua Tree: a year-round breakdown
Joshua Tree is photogenic every month of the year — but the conditions differ radically by season. Here is what to expect:
Spring (March–May)
Most variable season — temperatures comfortable (60–85°F) but wildflower potential is the major variable. After above-average winter rainfall (typically El Niño years), spectacular wildflower displays emerge March–April at mid-elevations (Hidden Valley, Jumbo Rocks, Joshua tree forests on Park Blvd). ‘Superblooms’ — carpets of Desert Gold, Arizona Lupine, Desert Verbena — occur only in exceptional rain years, roughly once every 5-10 years (notable recent examples: 2019 with 229% of average winter rainfall, partial bloom 2023). Even in average years, some blooms appear consistently.
Highlights: Joshua tree bloom: the park’s namesake trees produce white flower clusters at branch tips in February–April at lower elevations and March–May at higher elevations. This requires a winter cold snap followed by warmth — again unpredictable but documented annually. Desert wildflowers begin at Cottonwood/Pinto Basin (January–March) and move upslope to Hidden Valley and Park Blvd elevations (March–May) and Black Rock/higher areas (April–June). Clear stable weather typical — good visibility for Keys View panoramas. Low light pollution season (no summer haze). The Milky Way galactic core becomes visible after 2 AM in late March, moving to midnight by May.
Challenges: Spring winds can be severe (30–45 mph gusts) on exposed ridges and overlooks — wide-angle shots with slow shutters may show camera shake on tripod; use shutter speeds above 1/60s even for static landscapes. Wildflower peak is impossible to predict — visit nps.gov/jotr for real-time bloom reports. Crowds build from mid-March through spring break season; popular spots fill parking by 7–8 AM on weekends.
Summer (June–August)
Extreme heat season. Temperatures at mid-elevation: 90–105°F; Cholla Garden/lower Pinto Basin: 105–115°F. Heat index higher in humidity following monsoon moisture. Dawn (4:30–6:30 AM) and dusk (7:00–9:00 PM) are the only safe photography windows.
Highlights: Best Milky Way season: galactic core visible from dusk (9–10 PM in June-July, immediately after dark in July-August). The horizontal Milky Way in June-July with the core in the south-southeast is the prime astrophotography season — Joshua trees silhouetted against the full galactic core is the signature summer image. Perseid Meteor Shower peaks mid-August — one of the most reliable meteor showers of the year, with Joshua Tree as one of the best viewing locations in Southern California. Park is relatively uncrowded on weekdays in summer (most visitors avoid heat).
Challenges: Safety critical — dawn and dusk only, May through September. Carry 1 gallon of water per person minimum even for a 3-hour dawn session. Afternoon thunderstorms possible July-September (monsoon moisture) — build in shelter time if storms develop. Afternoon photography essentially impossible due to heat and harsh overhead light.
Fall (September–November)
Best season for photography overall — stable high-pressure weather, clearest air of the year (summer dust and haze has cleared), comfortable temperatures (55–80°F), and reduced crowds after Labor Day. October is the consensus peak photography month.
Highlights: Exceptional air clarity: Santa Ana wind events (dry north winds) periodically clear the air to 100+ mile visibility, making Keys View panoramas extend to Signal Mountain in Mexico. Fall wildflowers after monsoon rains: some desert annuals bloom late August–October (Chinchweed, Fringed Amaranth). Warm days and cold nights create perfect photography conditions — golden hour at 9-10 AM and 5-6 PM. The Milky Way galactic core is still visible through October (gradually earlier in the evening then disappearing by November). Full moon in October/November provides moonlit landscape photography opportunities without needing headlamps.
Challenges: Milky Way season ending — core visible only in October (setting earlier each week); by November the core is no longer visible. Temperatures drop rapidly at night (30–45°F) — bring warm layers for all night sessions. Weekends in October can be crowded as LA-area photographers make fall pilgrimages.
Winter (December–February)
Coldest season but not extreme — daytime 50–70°F, nighttime 25–45°F. The park’s best season for astrophotography: longest nights (sunset 4:30 PM in December), coldest air (less atmospheric turbulence), no Milky Way galactic core (but spectacular star fields and constellations visible all night). Extremely light crowds on weekdays. Rare snowfall (once every 5-10 years) creates extraordinary Joshua tree snow photography opportunities.
Highlights: Longest nights for star trail photography (8+ hours of darkness). The winter constellations (Orion, Gemini, Taurus) visible in the southern sky create stunning compositions over Joshua trees. Cold, stable air provides the sharpest stars and best image quality of any season. Zero humidity — electronics function well in cold, but battery life reduced (carry spares, keep in inner pockets). Cottonwood Campground has darkest skies in winter; Barker Dam area open for stargazing. No heat safety concerns — photography sessions can run from 5 PM to 7 AM.
Challenges: No Milky Way galactic core. Cold temperatures require layering (4-6 layers for all-night sessions). Ice possible on park roads at higher elevations (Ryan Mountain area, Keys View road) — carry chains or check conditions. Barker Dam reflection photography at its best (November-February maximum water levels). Some campgrounds may be temporarily closed — check nps.gov/jotr for current conditions.
How to get to Joshua Tree National Park
Nearest airports
- PSP — Palm Springs International Airport: ~1 hour to West Entrance. Closest airport by far. All major US airlines fly to PSP, though many are seasonal and may require connections through hubs. No park shuttle from PSP — rental car required. All major rental companies at PSP. Best choice for weekend/photography-focused trips.
- ONT — Ontario International Airport: ~1 hour 45 minutes to West Entrance (varies with I-10 traffic). Second closest major airport. Located in Inland Empire east of Los Angeles — avoids most LA traffic. All major airlines including Southwest. Excellent choice for photographers combining Joshua Tree with other Inland Empire or Palm Springs destinations.
- LAX — Los Angeles International Airport: 3+ hours (highly traffic-dependent; plan for Thursdays/Fridays worst case 4+ hours). Most international connections. High traffic risk on I-10 east — use Waze/Google Maps departure timing. Best for international visitors or those combining with LA itineraries.
- LAS — Harry Reid International Airport, Las Vegas: 3–3.5 hours to North Entrance (via I-15 south and Highway 62 west). Good option for photographers combining Joshua Tree with a Las Vegas stay. Avoids LA traffic entirely. Scenic desert drive through Mojave.
Photographer safety at Joshua Tree: read this
Every national park has its own hazards. Read the briefing before you go.
- Heat: Summer (May–September) sees temperatures regularly exceeding 100°F at lower elevations (Cholla Garden, Cottonwood) and 95°F+ at mid-elevations. Heat stroke and dehydration are the leading causes of visitor emergencies. Photographers must schedule field work at dawn (golden hour begins ~5:15 AM in June) and dusk (golden hour ends ~7:45 PM in July) only during May–September. Avoid being outside between 9 AM and 5 PM in summer. Recognize heat exhaustion symptoms: heavy sweating, weakness, pale and moist skin, nausea, headache. Heat stroke (dry skin, confusion, loss of consciousness) is a life-threatening emergency — call 911 immediately (from a cell-signal area or with a satellite communicator).
- Water: Carry minimum 1 gallon (4 liters) per person per day in summer; 2 liters per person per day in other seasons. There is NO potable water available inside the park at most locations — the only water sources are at the three visitor centers (Joshua Tree, Oasis of Mara at 29 Palms, and Cottonwood) and Black Rock Campground. Fill containers before entering from Joshua Tree town or Twentynine Palms. A 6-person photography group on a full summer day needs 6+ gallons — plan vehicle capacity accordingly.
- Cell Service: No cell service throughout most of the park interior. Partial signal possible at elevated locations (Ryan Mountain summit, Keys View) and near park entrances. Inform someone outside the park of your planned locations and expected return time before each session. Carry a personal locator beacon (PLB) or satellite communicator (Garmin inReach, SPOT) for emergency use — strongly recommended for solo photographers doing pre-dawn or post-sunset sessions.
- Drone Policy: BANNED — Launching, landing, or operating any unmanned aircraft (drone) on NPS lands and waters is prohibited under 36 CFR § 1.5 and NPS Policy Memorandum 14-05. This applies to all recreational and commercial drone pilots without exception in Joshua Tree National Park. Violations are misdemeanors with penalties up to $5,000 fine and/or six months in jail. Equipment including SD cards can be confiscated. Special Use Permits are theoretically available but extremely rarely granted. No exceptions for commercial photographers without written superintendent approval.
- Light Painting: NOT permitted in Joshua Tree National Park per NPS policy. This restriction is explicitly stated on the NPS stargazing page. Plan all night photography without artificial light painting techniques.
- Rattlesnakes: Three species of rattlesnakes inhabit Joshua Tree, most commonly the Southern Pacific rattlesnake and the Speckled rattlesnake. Most active April–October, especially at dawn, dusk, and at night when air temperatures moderate. Photographers conducting pre-dawn and post-sunset sessions face elevated exposure risk. Protective practices: wear leather boots (not trail runners), watch where you place hands and feet especially when scrambling on boulders or setting up low-angle shots, use a headlamp or red-light to check the ground around your tripod setup, listen for rattling before moving. Carry a charged cell phone (with offline maps) and know the nearest road exit. Scorpions are also common — check shoes left outside overnight and use a UV flashlight at night to spot them (scorpions fluoresce under UV).
- Wildlife Distances: Bighorn sheep: 100-foot minimum distance. Coyotes and kit foxes: do not approach or feed. Desert tortoise: do not touch — it is a threatened species. All wildlife: federal law prohibits harassment or disturbance; for photographers, use telephoto lenses (minimum 300mm for bighorn) rather than approaching.
- Desert Navigation: No shuttle or public transit inside the park. Park roads are paved (Park Blvd and Pinto Basin Road) but 4-wheel drive and high-clearance recommended for the Geology Tour Road and all backcountry roads. Fill fuel tank before entering — no fuel available inside the park. Printed maps available at entrance stations; download offline maps (AllTrails, Gaia GPS, Avenza) before entering due to no cell service.
- Permits: No photography permit required for personal use. Commercial photography may require a Special Use Permit — contact the park permit office at (760) 367-5500. Wilderness backpacking requires self-registration at backcountry boards.
The complete safety briefing is inside the Joshua Tree Photographer’s Guide PDF.
Luminar Neo’s Sky AI, atmosphere AI and SuperSharp are designed for landscape work — replace flat skies, add depth, and recover detail in seconds. Tagged as affiliate per FTC.
Related guides nearby
Three more photography guides within striking distance — perfect for combining into one trip.
- San Diego 172 km away · city · USA
- Los Angeles 206 km away · city · USA
- Las Vegas 250 km away · city · USA
Quick Amazon shortcuts to the gear most useful for this kind of shot. Use them if Prime shipping or Amazon credit makes more sense than B&H. As an Amazon Associate ShutYourAperture earns from qualifying purchases.
Frequently asked questions
When is the best time to photograph the Milky Way at Arch Rock, and exactly where do I stand?
The galactic core frames through Arch Rock’s aperture from April through October. In June and July (peak season), the core rises in the south-southeast around 10 PM and enters optimal arch framing by 11 PM–midnight, remaining well-positioned until 1–1:30 AM. In April-May, the window shifts to 1:00–2:30 AM (requiring a late-night session or all-nighter). In August-September, the core is visible from 9 PM with a narrowing window. To find your exact position: stand 8–12 meters south-southeast of the arch (roughly GPS 33.9832, -116.0182 — adjust by trial during daylight scouting) and look north-northwest through the arch opening at the southeast sky. Use PhotoPills Night Augmented Reality feature to visualize the galaxy’s position at your target time before committing. Moonless nights (within 5 days of new moon) are essential — consult a lunar calendar before planning. The trail from campsite #9 at White Tank Campground is ~0.5 miles and must be scouted in daylight before night use.
Are drones allowed in Joshua Tree National Park?
No — drones are completely banned in Joshua Tree and all National Parks under NPS Policy Memorandum 14-05 (issued June 2014), implemented via 36 CFR § 1.5. This prohibition covers launching, landing, or operating any unmanned aircraft on NPS lands and waters, and applies to both recreational and commercial pilots. Violations are misdemeanors with penalties up to $5,000 fine and/or six months in jail; equipment including SD cards can be confiscated. A Special Use Permit is theoretically available by applying to the park superintendent, but these are extremely rarely granted and require significant advance notice and justification. Plan all Joshua Tree photography without drone footage — the park’s landscapes are fully accessible via ground-level photography with wide angle and telephoto lenses.
How do I avoid parking lot crowds at popular spots like Arch Rock, Barker Dam, and Keys View?
Joshua Tree has no shuttle system — all visitors self-drive, making parking a genuine constraint. Arch Rock (White Tank Campground): campground sites fill on weekends; non-campers arrive before 9 AM for the campground day-use area, or park at Twin Tanks pullout on Pinto Basin Road (1-mile walk). For night Milky Way sessions, arrive by 8–9 PM. Barker Dam: weekend parking fills by 8 AM in peak season (Oct–Apr). Arrive before 7 AM for sunrise session; or visit weekdays. Keys View: arrive 45 minutes before sunset on weekends; walk 200 m along the rim to escape the overlook platform crowds. Hall of Horrors: the small lot holds ~24 cars; Ryan Mountain parking (0.7 miles east) serves as overflow and the walk back is safe along Park Blvd. For sunrise photography at all locations: arriving in the pre-dawn dark (5–6 AM) eliminates competition for nearly every spot in the park.
What’s the difference between Arch Rock and Skull Rock for astrophotography — they both look like great spots?
These two formations serve very different astrophotography roles. Arch Rock (33.9836, -116.0177): faces southeast, perfectly aligned with the Milky Way galactic core’s rise path; located in White Tank Campground away from through-traffic; requires a 0.5-mile night hike; Bortle Class 3-4 darkness. The defining feature is the arch aperture itself, which frames the galaxy as it rises — the canonical Milky Way-through-arch shot that defines Joshua Tree astrophotography. Skull Rock (33.9989, -116.0338): faces south-southwest, offset from the galactic core rise direction; sits directly adjacent to Park Blvd with passing vehicle headlights; very easy roadside access. Better suited for star trails (north-facing for Polaris circulation patterns) and moonlit landscape photography. The summary: for Milky Way galactic core framing, use Arch Rock. For accessible star trails and moonlit rock photography with dramatic silhouette, use Skull Rock. Many photographers use both locations in the same night — Arch Rock for the Milky Way session, then drive to Skull Rock for a star trail sequence while the core sets.
What are the must-know safety rules for photographers doing pre-dawn and post-sunset sessions in Joshua Tree in summer?
May through September safety requirements for any pre-dawn or night photography session: (1) Water — carry a minimum of 1 gallon (4 liters) per person even for a 3-hour session; dehydration accelerates in desert heat even at night. (2) Heat exposure — even at 3 AM in July, surface temperatures can exceed 90°F; do not underestimate nighttime heat. If you feel unwell, stop and hydrate immediately. (3) Communication — no cell service inside most of the park; carry a personal locator beacon (Garmin inReach, SPOT) and tell someone your planned location and expected return time. (4) Rattlesnakes — most active at night when temperatures moderate from daytime extremes; wear leather boots (not trail runners), use a headlamp to check the ground around your tripod setup, listen before moving in darkness. (5) Navigation — pre-download offline maps (Gaia GPS, AllTrails) before entering. Trails look different in darkness; daytime scouting of Arch Rock, Hall of Horrors, and Ryan Mountain is mandatory before night use. (6) Light painting — prohibited in Joshua Tree; all foreground illumination must be from natural sources. (7) Day Use Only areas — Live Oak Picnic Area and some other locations close at dusk; use only the four designated stargazing parking areas (Quail Springs, Hidden Valley, Cap Rock, Ryan Mountain) for legal night vehicle access.
Take this guide into the park
This post is the complete field reference. The Joshua Tree Ultimate Photographer’s Guide PDF is the field-deployable version: full-page resolution hero photography, GPS maps with gold pins for every location, multi-season shooting calendars, gear matrices per location, sun-angle diagrams, the full safety briefing, and a print-ready editorial layout in Framehaus black and gold. Save it offline. Print it. Take it into the park.
Joshua Tree Ultimate Photographer’s Guide
Downloadable PDF · 12 GPS-mapped locations · Multi-season calendar · Safety briefing · Packing checklist
Get the Joshua Tree guide — $47
Or get the National Parks Bundle — $197
Get the Joshua Tree National Park Guide + Preset Pack
Photograph it. Edit it. Done.
All links go to Viator (a TripAdvisor company), the world’s largest marketplace for guided experiences. Tagged as affiliate per FTC.
Take Joshua Tree National Park home in your pocket.
Every shot location, every angle, every time of day worth shooting. Printable PDF + GPS-tagged map.
Instant download. Works on phone, tablet, and printed.