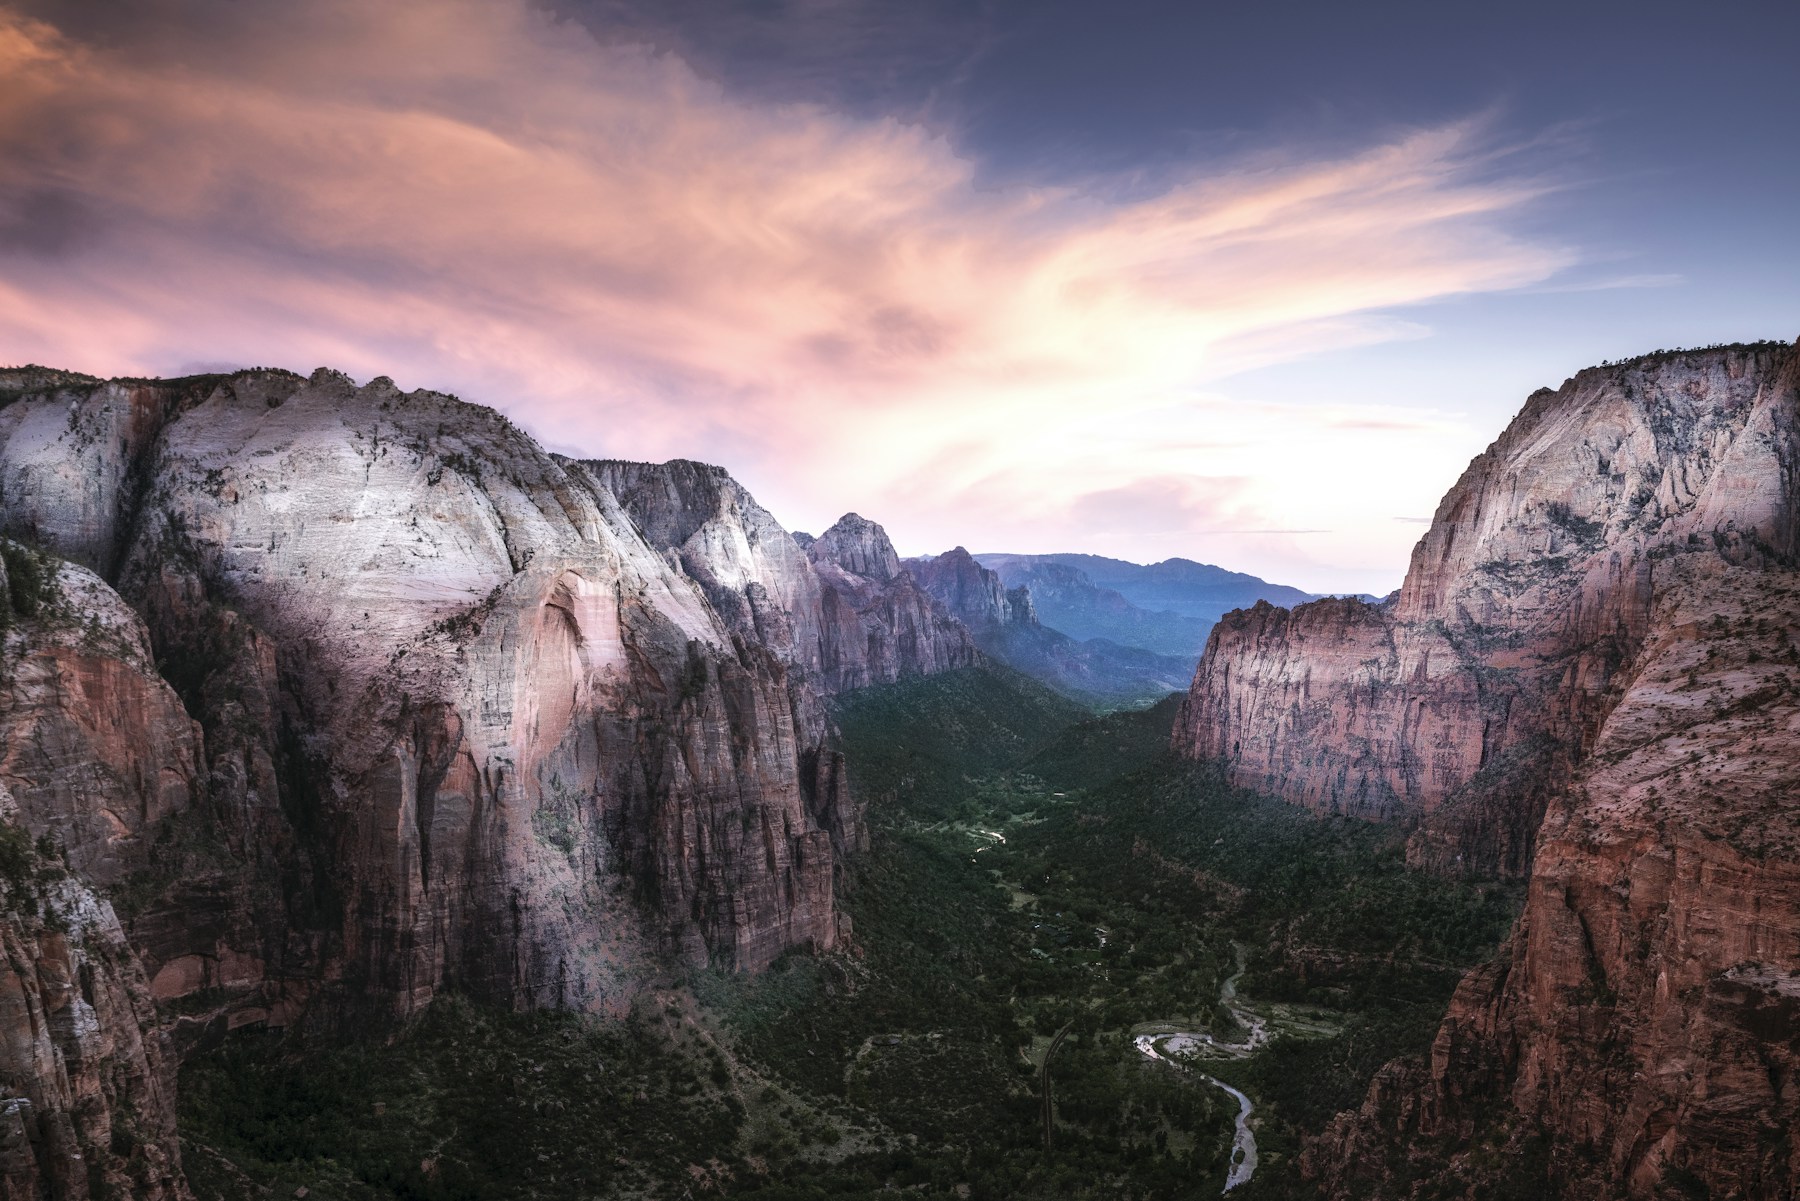
Best Photography Spots in Zion National Park: 12 Locations With GPS
edinchavez01-20). Buying through these links costs you nothing extra and helps fund our free guides.
Zion National Park is the most photogenic 229 square miles in the American Southwest. Vermilion sandstone walls 2,000 feet tall. A river that has carved a slot canyon barely 20 feet wide. Cottonwood gold against red rock in October. Snow on slickrock in January. If you have a camera and a sense of light, Zion will reward every hour you spend there — but only if you know where and when to point it.
This is the field-tested list of the 12 best photography spots in Zion National Park, with GPS coordinates you can drop into Google Maps, exact camera settings for the conditions you’ll find, the precise time of day each location works, and the access notes nobody bothers to write down. It’s the same intel inside our flagship Zion Ultimate Photographer’s Guide ($47 PDF) — a 50-page downloadable field guide with full-page hero images, OSM maps with location pins, seasonal tables, a packing checklist, and a complete safety briefing. Get the guide →
Get the Zion Ultimate Photographer’s Guide
Every location below — pre-mapped with GPS, golden-hour timing, gear recommendations, cultural rules, and a 14-day itinerary. Downloaded by 200+ working photographers.
Quick jump to the spots
- Canyon Junction Bridge
- The Watchman from Pa’rus Trail
- Court of the Patriarchs
- Emerald Pools (Lower, Middle, and Upper)
- The Grotto / Big Bend
- Weeping Rock
- Angels Landing Summit
- The Narrows (Bottom-Up Wade)
- Observation Point (via East Mesa / Stave Spring Trailhead)
- Canyon Overlook Trail
- Checkerboard Mesa
- Kolob Canyons (Timber Creek Overlook + Kolob Arch)
Before you shoot Zion: the essentials
- Park entrance fee: $35 — admits private non-commercial vehicle with up to 15 passengers; valid 7 consecutive days. Current rates at nps.gov.
- Shuttle: Zion Canyon Scenic Drive is closed to private vehicles roughly March through late November. The free park shuttle runs from the Zion Visitor Center to nine stops along the canyon. Check current operating dates.
- Best photography seasons: Late September through early November (autumn cottonwood gold, low water in The Narrows, comfortable hiking temperatures), and late February through April (wildflowers, snow on slickrock).
- Avoid midday in summer: Direct overhead light flattens the canyon. Shoot before 10 a.m. and after 5 p.m. June through August.
- Flash flood awareness: Check the daily flash flood potential rating at the visitor center or nps.gov before entering The Narrows or any slot canyon.
The full-resolution version of every map below — plus seasonal calendars, camera body/lens recommendations per location, and a complete photographer’s packing checklist — is inside the Zion Photographer’s Guide PDF ($47).
1. Canyon Junction Bridge
Canyon Junction sits at the intersection of UT-9 and the Zion Canyon Scenic Drive, where the Virgin River curves beneath the red-rock flanks of The Watchman (6,545 ft). The automobile bridge crossing here was immortalized by photographers capturing the peak’s reflection in still pools of the Virgin River. As of 2022, NPS has prohibited pedestrians from standing on the bridge for photography due to safety and access concerns — the nearby Pa’rus Trail riverbank offers comparable (and in many ways superior) compositions with foreground flexibility unavailable from the fixed bridge deck. This is the single most photographed Zion location, and arriving at least 45 minutes before sunset is essential to claim a riverbank position.
- GPS: 37.2175, -112.9762
- Where exactly: Canyon Junction, Zion National Park, Springdale, UT 84767 — park at the pullout on Zion Park Blvd (UT-9) west of the bridge near GPS 37.2176, -112.9750; do NOT stand on bridge
- Best time of day: Sunset (45 min before to 30 min after) — The Watchman is a west-facing peak that catches warm golden and alpenglow light at sunset. Blue hour after sunset produces ethereal pastel reflections in the river. Sunrise here is backlit and less dramatic.
- Best season: Late October to mid-November for peak cottonwood gold; spring (April–May) for green foliage and good light positioning; any season at sunset produces strong images
- Sun direction: Sun sets roughly northwest of the viewpoint; The Watchman’s west-facing summit catches direct alpenglow 20–40 minutes before sunset. After sunset, warm reflected light fills the canyon. Shoot east toward the peak.
- Recommended lens: 24–70mm standard zoom (most used: 35–50mm equivalent); bring 70–200mm to compress the peak against cottonwoods from a more distant riverbank position
- Recommended settings: Landscape: f/11, ISO 100, 1/30s–1/4s on tripod; bracket 3 exposures for HDR to manage bright sky vs dark river · Long Exposure: f/16, ISO 100, 2–8s with 6-stop ND filter to silk the river surface and capture reflection
- Access: Park on the road shoulder west of the bridge (limited spots, GPS: 37.2176, -112.9750). Walk the Pa’rus Trail south toward the river. Pa’rus Trail is paved, accessible to cyclists and leashed pets, and connects the Visitor Center to Canyon Junction (~1.5 miles). Also accessible on Shuttle Stop 3 (Canyon Junction) — northbound boarding not permitted here.
Shots to chase:
- Classic Watchman reflection: wide-angle 24mm, tripod at river’s edge on Pa’rus Trail, Watchman centered above river bend with full reflection in calm pool at sunset
- Cottonwood foreground frame: 35mm, position cottonwood branches in upper corners to frame The Watchman peak with golden autumn foliage
- Long exposure silk: 10-stop ND filter at f/16, 20–30s exposure transforms the river into a smooth mirror while clouds streak overhead
- Blue hour after sunset: switch to ISO 400, f/8, 15–30s to capture deep blue sky against warm remaining glow on peak and city lights of Springdale beginning to appear
- Telephoto compression (200mm): from 300–400 meters north on Pa’rus Trail, compress The Watchman with cottonwood groves and layered canyon walls
Weather note: Clouds building over The Watchman from monsoon or winter storms dramatically enhance the scene — look for isolated clouds illuminated by late light while the canyon below stays calm. Completely clear skies produce flat, featureless backgrounds.
2. The Watchman from Pa’rus Trail
The Pa’rus Trail is a 3.5-mile paved path along the Virgin River connecting the Visitor Center to Canyon Junction, open to hikers, cyclists, and leashed pets. Photographers gravitate to the stretch approximately 0.75–1.5 miles from the Visitor Center, where the trail crosses the river twice and passes through cottonwood groves offering unobstructed sightlines to The Watchman. The NPS specifically recommends this trail as the alternative to Canyon Junction Bridge for Watchman photography. In autumn, the golden cottonwood canopy creates a natural frame; in spring, chartreuse new growth contrasts beautifully with red sandstone. The paved surface makes tripod placement easy.
- GPS: 37.2034, -112.9868
- Where exactly: Pa’rus Trail, Zion National Park — trailhead at Zion Canyon Visitor Center, 1 Zion Park Blvd, Springdale, UT 84767
- Best time of day: Sunset (30–60 min before to 20 min after) for warm light on The Watchman; early morning for soft side-light and solitude; blue hour after sunset for pastel skies
- Best season: Late October to early November for peak cottonwood gold — this is the definitive autumn Watchman shot; April–May for lush green foliage and good light
- Sun direction: The Watchman faces west-northwest; it catches direct sunset light and alpenglow. Shoot generally east to northeast depending on your position along the trail.
- Recommended lens: 16–35mm ultra-wide for sweeping compositions including sky and river; 70–200mm telephoto to compress the Watchman against autumn cottonwood groves
- Recommended settings: Landscape: f/11, ISO 100, 1/15s–1/2s on tripod at golden hour; add polarizer to saturate sky and reduce glare on water · Long Exposure: f/16, ISO 100, 4–15s to smooth river surface and enhance reflections
- Access: Free access from Zion Canyon Visitor Center (Shuttle Stop 1) — park at Visitor Center parking (arrives early, often full by 8 am). Trail is paved, flat, stroller and wheelchair accessible. Pets allowed on leash. No shuttle required; walk directly from Visitor Center.
Shots to chase:
- Autumn cottonwood frame: position large golden cottonwood in foreground-left, Watchman peak upper-right, river weaving through mid-ground — the quintessential Zion autumn image
- Virgin River reflection: low tripod position just above water level, calm pool reflection of Watchman under clear blue hour sky
- Pa’rus Trail leading line: shoot down the paved trail curving into the canyon with Watchman and West Temple framing the vanishing point
- Silhouette against alpenglow: expose for the bright sky as Watchman peak catches final red-orange glow, let foreground go to deep shadow
- Wide panoramic stitched: 24mm lens, shoot 5–7 overlapping frames to create a ultra-wide panorama from river to canyon rim on both sides
Weather note: Partial cloud cover creates dramatic skies behind The Watchman. In monsoon season (July–September), clearing storms late afternoon produce vivid rainbow opportunities with the Watchman as backdrop.
3. Court of the Patriarchs
The Court of the Patriarchs is a cluster of three soaring Navajo sandstone peaks on the west wall of Zion Canyon — Abraham (6,890 ft), Isaac (6,831 ft), and Jacob (6,831 ft) — visible from a short 0.1-mile spur trail above the canyon trees. The viewpoint sits atop a small rise, clearing the cottonwood canopy to reveal the full height of the formation. The peaks catch early-morning sun on their east-facing flanks, making this one of the few canyon-floor viewpoints with strong morning light. The perspective compresses the three peaks into a sweeping vertical panorama with the Virgin River and canyon floor in the foreground.
- GPS: 37.2372, -112.9649
- Where exactly: Court of the Patriarchs Viewpoint, Floor of the Valley Road (Zion Canyon Scenic Drive), Zion National Park, Springdale, UT 84767 — Shuttle Stop 4
- Best time of day: Mid-morning (1–2 hours after sunrise) — east-facing peaks catch morning sunlight illuminating the cream and orange sandstone; late afternoon for warm side-light; avoid harsh midday when contrast is extreme
- Best season: Spring (April–May) for clean light and moderate crowds; autumn (October–November) for cottonwood gold in the foreground; any season produces strong images from this viewpoint
- Sun direction: Peaks face east to northeast; morning sun illuminates the formation directly. By early afternoon, the peaks are in shadow. Shoot west toward the peaks from the viewpoint.
- Recommended lens: 70–200mm telephoto to compress the three peaks into a tight, layered composition isolating the vertical sandstone faces; 24–70mm standard zoom for wider environmental shots including cottonwood foreground
- Recommended settings: Landscape: f/8, ISO 100, 1/125s in morning sun; expose for the rock face and allow sky to blow slightly · High Contrast: f/11, ISO 100, bracket ±2 stops for HDR blend to manage bright sky against shadowed cliff bases
- Access: Take the free Zion Canyon Shuttle to Stop 4 (Court of the Patriarchs). A 0.1-mile paved spur trail leads to the viewpoint. During winter (shuttle off-season) drive directly to the parking area. Free access included with park entrance.
Shots to chase:
- Classic three-peaks composition: 100mm focal length, frame Abraham, Isaac, and Jacob in one image with the canyon floor visible at bottom — use the natural ridgeline to separate the peaks visually
- Morning light on Abraham: 200mm zoom isolates the highest peak catching first warm light while lower formations remain in shadow
- Cottonwood foreground in autumn: wide-angle 24mm, golden cottonwoods in foreground lower third with all three peaks rising behind
- Evening silhouette: expose for the backlit sky as peaks go into shadow, creating graphic monolithic shapes against an orange-pink sky
- Sand Bench Trail perspective: hike 3.5 miles round trip on the Sand Bench Trail for a closer, lower-angle view of the formation unavailable from the viewpoint
Weather note: Dappled cloud cover reduces harsh shadows between peaks and canyon walls. After rain, wet sandstone surfaces deepen color saturation — some of the most vivid Court of the Patriarchs images come immediately after a storm clears.
4. Emerald Pools (Lower, Middle, and Upper)
The Emerald Pools trail system ascends 350 feet from the Virgin River to three pools fed by springs and seasonal waterfalls on the red Navajo sandstone walls. Lower Emerald Pool (0.6 miles RT, flat) features a dramatic alcove beneath a weeping overhang where dozens of small waterfalls cascade from the cliff edge — hikers walk behind the falls on a shelf trail. Middle Pool (1.2 miles RT) holds the largest, most reflective pool with clear views back down the canyon. Upper Pool (3 miles RT, significant elevation gain on rocky trail) is the most serene, a quiet reflecting pool beneath a sheer cliff face. Spring and early summer after snowmelt produce the strongest waterfall flow.
- GPS: 37.251, -112.958
- Where exactly: Emerald Pools Trailhead, Floor of the Valley Road (Zion Canyon Scenic Drive), Zion National Park, Springdale, UT 84767 — Shuttle Stop 5 (Zion Lodge), cross the footbridge
- Best time of day: Midday for waterfall shots when overhead light penetrates the alcoves at Lower Pool; early morning for Middle Pool reflection shots before wind disturbs the surface; all day for Upper Pool (shaded, diffuse light all day)
- Best season: Spring (April–early June) for maximum waterfall flow from snowmelt; autumn for low-angle light and cottonwood color on the approach trail; summer gives dramatic canyon light on upper walls
- Sun direction: Lower Pool alcove faces east; morning sun illuminates the far wall while the falls are in shadow. By midday, light angles into the alcove ceiling. Middle Pool open to the sky — morning light best for reflection clarity.
- Recommended lens: 16–35mm ultra-wide for the Lower Pool alcove — you need to capture ceiling, falls, and pool in a single frame; 24–70mm for Middle Pool landscape; circular polarizer essential for all three pools to reduce water glare and deepen color
- Recommended settings: Landscape: f/11, ISO 200, 1/15s–1/2s on tripod at Lower Pool; polarizer cuts glare and increases waterfall detail · Long Exposure: f/16, ISO 100, 1–4s to silk the waterfalls at Lower Pool; avoid going too long or falls lose texture entirely · Reflection: f/8, ISO 100, 1/30s at Middle Pool on a still morning; use a circular polarizer only if breeze creates ripples and you want to eliminate them
- Access: Take free shuttle to Stop 5 (Zion Lodge). Follow the sidewalk across the Lodge lawn and cross the footbridge over the Virgin River. Lower and Middle Pools accessible via relatively easy trails; Upper Pool trail is rocky and requires good footwear. All three are accessible without a permit.
Shots to chase:
- Lower Pool alcove: tripod, ultra-wide 16mm, shoot from inside the alcove looking out toward the canyon with the curtain of falls hanging from the overhang edge framing the composition
- Behind-the-falls shelf trail: 24mm, long exposure 1–2s, silking the falling water while capturing the orange sandstone wall visible through the veil of water
- Middle Pool reflection: 28mm, dead calm morning before 8 am, near-perfect mirror of canyon walls — symmetric composition split at the waterline
- Upper Pool intimacy: 50mm, tight composition of the pool surface with cliff reflection, moss, and fern fringe — intimate rather than grand
- Trail cascade: 70–200mm at 120mm, isolate a single cascade with compression showing the textured sandstone cliff face behind
Weather note: Overcast or partly cloudy days are ideal — direct sun creates harsh contrast inside the alcove at Lower Pool. Rain actually enhances the waterfall flow; hike the day after a storm for impressive falls.
Want this in your pocket on the trail?
The full-resolution version of every spot above — with full-page hero photography, OSM maps with gold location pins, sun direction diagrams, multi-season tables, and a complete safety + packing checklist — is inside the Zion Ultimate Photographer’s Guide PDF ($47). Print it, save it offline, take it into the canyon. Get the guide →
5. The Grotto / Big Bend
The Grotto (Stop 6) is a shaded picnic area and trailhead cluster where the Virgin River is accessible for flat riverbank photography with Angel’s Landing looming 1,488 feet overhead. Big Bend (Stop 8, about 1 mile north) is a pronounced curve in the canyon road where the walls narrow and soar to their most dramatic heights — the Great White Throne, Angels Landing, and the massive monolith of Cable Mountain are all visible from the road. Photographers who cannot hike Angels Landing still find Big Bend produces some of the most awe-inspiring in-canyon compositions in the park, especially with a telephoto lens compressing the layered walls.
- GPS: 37.2698, -112.9521
- Where exactly: The Grotto (Shuttle Stop 6), Zion Canyon Scenic Drive, Zion National Park, Springdale, UT 84767; Big Bend is Shuttle Stop 8, approximately 37.2790, -112.9460
- Best time of day: Big Bend: late afternoon/sunset when canyon walls catch warm reflected light; The Grotto: midday when the narrow canyon admits light to the river level; blue hour at either location produces deep shadow with luminous upper cliff glow
- Best season: Spring through autumn (all good); autumn cottonwoods along the river near The Grotto in October–November are spectacular
- Sun direction: Canyon runs roughly north-south here; direct sun reaches the floor for only 1–2 hours around solar noon in summer. Upper west-facing walls catch afternoon and sunset light. Shoot north or south to capture wall-to-wall canyon framing.
- Recommended lens: 16–35mm for the canyon-wall-to-wall wide compositions; 70–200mm to isolate the upper cliff faces with compression and reveal the layered horizontal strata in the Navajo sandstone
- Recommended settings: Landscape: f/11, ISO 200–400, 1/30s–1/8s — manage extreme dynamic range between dark canyon floor and bright upper cliffs; bracket exposures · Telephoto Compression: f/8, ISO 200, 1/125s at 200mm to compress canyon walls; use slower shutter and tripod when shooting for detail in shadow areas
- Access: The Grotto: free shuttle Stop 6 (cannot board northbound at Big Bend). Big Bend: free shuttle Stop 8 (southbound only — cannot board to go further up canyon here). Both stops have river access and flat terrain suitable for tripod use.
Shots to chase:
- Big Bend looking north: ultra-wide 16mm from road edge captures walls rising 2,000 feet on both sides with the canyon road as a leading line — the most dramatic sense-of-scale composition in the park
- Virgin River at The Grotto: low angle at river’s edge, long exposure to silk water with Angels Landing silhouette visible through the canyon frame
- Telephoto canyon layers: 200mm at Big Bend, isolate the banded horizontal strata of the Great White Throne against a sky slice — reveals the geological age of the rock layers in abstract detail
- Canyon glow: after sunset, canyon walls catch reflected warm light for 15–30 minutes while the floor is in deep blue shadow — expose for the glowing walls at f/8, ISO 800, 1/15s
- Cottonwood grove frame at Grotto: 35mm, position cottonwood trunks as vertical frame elements with Angels Landing visible in the background gap
Weather note: Canyon is deep enough that direct sun only reaches the floor briefly. Cloudy days with diffuse light actually produce more even exposures with less HDR blending required. Storm light bouncing off far walls creates a warm glow that is uniquely Zion.
6. Weeping Rock
Weeping Rock’s concave overhang is one of Zion’s most intimate photography subjects — not a grand panorama but a geological and botanical wonder in miniature. Water that fell on the mesa top more than 1,000 years ago percolates through Navajo sandstone and exits as a permanent seep at this overhang, nurturing a lush hanging garden of maidenhair fern, monkeyflower, and scarlet-red cardinal flowers. The paved 0.4-mile round-trip trail ascends 100 feet to a viewing platform beneath the overhang. Hikers get lightly sprinkled standing at the platform, which also offers canyon views including The Organ and the canyon beyond. The botanical detail — jewel-like water droplets on fern fronds lit by soft indirect light — is a macro photographer’s paradise.
- GPS: 37.2709, -112.9385
- Where exactly: Weeping Rock Trailhead, Floor of the Valley Road (Zion Canyon Scenic Drive), Zion National Park, Springdale, UT 84767 — Shuttle Stop 7
- Best time of day: Late morning (10 am–12 pm) when soft overhead light penetrates the alcove without harsh shadows; avoid midday in summer when contrast is extreme; overcast days ideal for even illumination of the hanging gardens
- Best season: Spring (April–June) for maximum waterfall flow and wildflower bloom; autumn for softer light and quieter crowds; summer for full green garden at peak growth
- Sun direction: Alcove faces generally south; light enters obliquely. Late morning provides the best compromise between shadow and illumination in the overhang interior. The canyon views from the platform (looking south) catch afternoon light.
- Recommended lens: 24–70mm for mid-range alcove compositions; 100mm macro for water droplets on fern fronds and flower detail; polarizer removes glare from the wet rock face and deepens color
- Recommended settings: Landscape: f/8, ISO 400, 1/30s in the shaded alcove; polarizer to cut glare on wet surfaces · Macro: f/5.6, ISO 800, 1/60s for fern-and-droplet details; use image stabilization or tripod; focus stack 3–5 frames for depth through the frond · Long Exposure: f/11, ISO 100, 2–4s on tripod to blur the falling water curtain while keeping rock face sharp
- Access: Take free shuttle to Stop 7 (Weeping Rock). Walk east through the parking lot, cross the small footbridge, and follow the paved trail 0.2 miles uphill to the alcove. Trail has significant grade — not wheelchair accessible. The wet stairs at the top are slippery.
Shots to chase:
- Hanging garden close-up: 100mm macro, isolate a single maidenhair fern frond backlit by diffuse light with water droplets visible — botanical abstract
- Alcove overhang frame: 24mm ultra-wide, shoot from inside the viewing platform looking outward — the curved sandstone overhang frames the canyon and sky beyond
- Water veil curtain: long exposure at f/11, 2–3s, tripod, blurs the continuous dripping into a smooth veil against the dark orange sandstone face
- Cardinal flowers in context: 70mm, frame bright red wildflowers against the wet seeping wall with soft directional light — strong color contrast between red flower and orange stone
- Canyon view from platform: 50mm standard, look south from the viewing platform across the Virgin River valley toward The Organ rock feature with afternoon light on the west walls
Weather note: Overcast is actually preferred here — the alcove is inherently shaded and diffuse cloudy light reduces the harsh contrast that occurs when patches of direct sun hit the dark sandstone. Post-rain the rock face is deeply saturated in color.
7. Angels Landing Summit
Angels Landing is arguably the most iconic hike in the American Southwest, a narrow sandstone fin rising sheer from the Virgin River with 360-degree views of the entire Zion Canyon system. The 5-mile round-trip trail climbs 1,488 feet via Walter’s Wiggles — 21 steep zigzag switchbacks cut into solid rock — before the final half-mile along a knife-edge ridge with chains anchored in the rock for handholds. From the summit at 5,790 feet, photographers shoot down into the main canyon, across to Great White Throne and Cable Mountain, and along the sculpted gorge in both directions. Scout’s Lookout (4.8 miles RT, 1,050 ft gain, no permit required to this point) provides nearly as dramatic a viewpoint without the chains section.
- GPS: 37.2694, -112.9469
- Where exactly: Angels Landing Trail — begin at The Grotto Trailhead, Shuttle Stop 6, Zion Canyon Scenic Drive, Zion National Park, Springdale, UT 84767
- Best time of day: Sunrise (arrive at Grotto by 5:30–6 am in summer, 6:30 am in shoulder season) — summit in early morning light with fewer people and canyon shadow creating dramatic contrast; sunset equally beautiful but hiking down the chains in failing light is dangerous
- Best season: Spring (April–May) and Autumn (September–October) — ideal temperatures for the sustained uphill climb; avoid summer midday heat; winter requires microspikes for icy sections
- Sun direction: Summit faces all directions — at sunrise, eastern canyon walls are in shadow while western peaks (The Watchman, Bridge Mountain) are lit. Best shooting direction is south down the main canyon corridor and northwest toward the canyon narrows.
- Recommended lens: 16–35mm ultra-wide for the dizzying drop-off compositions; 24–70mm standard zoom for the sweeping canyon panoramas; leave heavy telephoto in the pack — you need both hands free for chains
- Recommended settings: Landscape: f/11, ISO 100, 1/125s in bright conditions; shade areas require ISO 400 and 1/30s — bracket for HDR · Sunrise: f/8, ISO 400, 1/60s at first light when contrast is building; ±2 stop brackets to capture deep shadow canyon and bright upper cliff simultaneously
- Access: Begin at The Grotto (Shuttle Stop 6). PERMIT REQUIRED for the chain section beyond Scout’s Lookout. Two lottery types: (1) Seasonal lottery — apply on recreation.gov for 3-month windows; $6 application fee (non-refundable), $3/person if selected. (2) Day-before lottery — opens 12:01 am MT, closes 3 pm MT the day before; permits issued at 4 pm MT. Apply at recreation.gov. Permit covers up to 6 people per application. No permit required to Scout’s Lookout.
Shots to chase:
- Looking south down Zion Canyon: ultra-wide 16mm from summit, canyon walls converge to a vanishing point 15 miles south with the Virgin River a silver thread far below
- The spine: 28mm, shoot along the narrow ridge from the chains section toward the summit block — vertiginous perspective with drops of 1,000+ feet on each side
- Canyon shadow/light divide: at sunrise or sunset, shoot the diagonal line where direct sun meets shadow on the canyon walls below, creating a graphic light-and-dark division across the entire panorama
- Scout’s Lookout portrait of Angels Landing: from Scout’s Lookout looking at the summit, 70mm compresses the chains section hikers against the summit fin for a sense-of-scale composition
- West Rim Trail continuation: from the summit, look north along the West Rim Trail where the canyon widens to reveal Coalpits Wash and the distant Pine Valley Mountains
Weather note: Do not attempt if thunderstorms are forecast — summit is fully exposed with no shelter and lightning is a lethal risk. The best summit photography occurs when cumulus clouds build in the distance (afternoon in monsoon season) creating dramatic sky backdrops — but descend before storms arrive.
8. The Narrows (Bottom-Up Wade)
The Narrows is the pinnacle of Zion’s photography experiences — a section where the Virgin River has carved a slot canyon barely 20 feet wide at the base while walls soar 1,000+ feet overhead. The bottom-up route starts at Temple of Sinawava (Shuttle Stop 9) with a 1-mile flat riverside paved walk (Riverside Walk), then enters the river itself for wading. Within 0.5 miles of entering the water, Mystery Falls appears on the left wall — one of the first iconic Narrows compositions. The reflected light bouncing between the polychrome walls (orange, cream, purple, black) creates a luminous, cathedral-like quality unique in North American landscape photography. Water depth ranges from ankle-deep to chest-deep; expect to swim short sections at high water.
- GPS: 37.299, -112.9476
- Where exactly: Temple of Sinawava, Zion Canyon Scenic Drive, Zion National Park, Springdale, UT 84767 — Shuttle Stop 9 (final stop)
- Best time of day: Mid-morning to early afternoon — direct sun never penetrates the deepest narrows, but indirect light quality peaks when the sun is high enough to illuminate the upper walls, bouncing warm reflected light into the canyon floor (approximately 3 hours after sunrise to 3 hours before sunset). Avoid early morning when the canyon is in full shadow and extremely dark.
- Best season: Late September through October for the most dramatic combination: low water levels after summer monsoons recede, autumn cottonwood gold at the canyon mouth, optimal reflected light from a lower sun angle. June (low water, good light) is best before monsoon season begins. Avoid May/June if runoff is high.
- Sun direction: No direct sun reaches the canyon floor in The Narrows proper. Light is entirely reflected off the upper walls — warm and orange when sun hits the sandstone, cool blue when in shadow. The most magical light occurs when the narrow strip of sky above is bright but the canyon floor is still in shadow.
- Recommended lens: 16–35mm ultra-wide — nearly all Narrows images are shot at 16–24mm; the canyon walls are too close for anything wider, and telephoto creates distortion between near and far walls; keep lenses dry in a sealed bag when not shooting
- Recommended settings: Landscape: f/9, ISO 400–800, 1/30s–1s on tripod; the dynamic range is extreme — use HDR bracketing (±2 stops, 3–9 frames) to capture the full range from dark canyon floor to bright sky sliver · Long Exposure: f/16, ISO 100, 4–15s on tripod (plant legs on solid rocks, not sand) to silk the river; polarizer reduces water glare — essential · High Dynamic Range: Shoot 9 bracketed exposures at 1 stop apart for the most demanding high-contrast sections; blend in Lightroom or Photoshop
- Access: Take free shuttle to Stop 9 (Temple of Sinawava, final stop — everyone must exit here). Follow the 1-mile paved Riverside Walk north; it ends at the river entry point. No permit required for the bottom-up day hike. Rentals available in Springdale (Zion Guru, Zion Outfitter) — wetsuit/drysuit, neoprene socks, waterproof boots, and trekking poles strongly recommended. Top-to-bottom (overnight) Narrows hike DOES require a wilderness permit.
Shots to chase:
- Classic Narrows bend: tripod in the river at a canyon bend, 16mm, frame the curving walls converging toward a vanishing point — the quintessential Narrows image
- Mystery Falls: approximately 0.5 miles into the river section, a spring pours from the left wall — 24mm, long exposure 2–4s to silk the falling water against the orange rock face
- Canyon wall texture: 35mm, tight composition of a single canyon wall section showing the undulating, smooth water-carved curves of the Navajo sandstone in raking side-light
- Looking up: plant tripod in stable position and shoot straight up — the narrow slot of blue sky between walls is a striking minimalist abstract
- Autumn cottonwoods at mouth: at the transition from Riverside Walk to the river section, golden cottonwoods overhang the water — wide-angle composition with both foliage and canyon walls
Weather note: Never enter when flash flood potential is POSSIBLE or higher (check nps.gov/zion/planyourvisit/conditions.htm every morning). The Narrows closes automatically when NWS issues a Flash Flood Warning. Monitor upstream weather — storms 50+ miles away can send a flood wave with no local rainfall.
Want this in your pocket on the trail?
The full-resolution version of every spot above — with full-page hero photography, OSM maps with gold location pins, sun direction diagrams, multi-season tables, and a complete safety + packing checklist — is inside the Zion Ultimate Photographer’s Guide PDF ($47). Print it, save it offline, take it into the canyon. Get the guide →
9. Observation Point (via East Mesa / Stave Spring Trailhead)
Observation Point is the highest easily accessible viewpoint in Zion Canyon, towering 2,100 feet above the canyon floor — 600 feet higher than Angels Landing. The original trail from the canyon floor via Weeping Rock has been indefinitely closed since 2019 due to a catastrophic rockfall event. The East Mesa approach (via a dirt road outside the park’s east entrance) is now the primary route — a moderately strenuous 6.6–7 miles round trip through a ponderosa pine forest on the canyon rim. The payoff is staggering: looking south, the entire Zion Canyon system unfolds, with Angels Landing’s narrow ridge visible as a tiny ribbon far below, the Virgin River a silver thread, and canyon walls stretching 15 miles to the south entrance. Sunrise and sunset both produce strong light from this elevated vantage.
- GPS: 37.2782, -112.9403
- Where exactly: East Mesa Trailhead — from Springdale, drive UT-9 east through the Zion Tunnel to Mt. Carmel Junction, then north on UT-9 to North Fork County Road; follow signs to Zion Ponderosa Ranch Resort; continue 3 miles on dirt road to trailhead at approximately 37.2970, -112.9001
- Best time of day: Sunrise and sunset both excellent — at sunrise, warm light hits the east-facing walls of the canyon below while you stand in direct light on the rim; at sunset, west-facing walls glow orange and the canyon fills with shadow creating dramatic contrast
- Best season: Spring (April–May) when snow has melted from the dirt road access but lingering snow on the canyon floor below adds graphic contrast; autumn (September–October) for comfortable temperatures and autumn color in the ponderosa forest
- Sun direction: At sunrise: light comes from the east behind you, illuminating west-facing canyon walls below in warm orange. At sunset: you face west looking down into the shadowing canyon while the upper canyon walls catch last light. Morning shooting (east-facing orientation of the viewpoint) is ideal.
- Recommended lens: 16–35mm ultra-wide for the sweeping panoramic compositions; 70–200mm to isolate Angels Landing far below with the canyon walls compressed — the telephoto compression is what makes the scale of this viewpoint truly comprehensible
- Recommended settings: Landscape: f/11, ISO 100, 1/60s–1/250s; bracket 3 frames ±1 stop for dynamic range between deep canyon shadow and bright sky · Telephoto Compression: f/8, ISO 100, 1/250s at 200mm isolating Angels Landing ridge with layered canyon walls behind — the definitive ‘how small Angels Landing really is’ composition
- Access: Drive from Springdale approximately 1 hour via UT-9 east through the tunnel, then north on North Fork County Road past Zion Ponderosa Ranch Resort. The final 3 miles are on a dirt road — requires 4WD or high-clearance in wet conditions. No shuttle access. Trailhead GPS: 37.2970, -112.9001. No entrance fee at this trailhead (outside park boundary); parking is free.
Shots to chase:
- Grand panorama looking south: ultra-wide 16mm, the entire canyon system from rim to horizon — stitch 5 frames for a print-worthy panorama
- Angels Landing from above: 200mm telephoto, isolate the narrow spine of Angels Landing with tiny hikers visible, compressed against the canyon walls behind — provides devastating perspective on scale
- Canyon shadow at sunrise: shoot the diagonal shadow line moving across the canyon floor as the sun rises over the east rim — time-lapse sequence of this movement is spectacular
- Rim portrait: shoot hikers silhouetted at the viewpoint edge against the canyon — the scale contrast between human figure and 2,100-foot drop is striking
- East Mesa forest approach: 24mm, capture the ponderosa pine forest trail with light streaming through the trees in early morning before reaching the viewpoint
Weather note: The rim is exposed and lightning-prone in afternoon monsoon season — begin descent by 1 pm in July–September. After rain, the dirt access road becomes muddy and may require 4WD. Clear winter days offer extraordinary solitude and snow-on-red-rock photography.
10. Canyon Overlook Trail
Canyon Overlook Trail is the east side’s crown jewel — a compact 1-mile round-trip hike with 163 feet of elevation gain that delivers a viewpoint overlooking Pine Creek Canyon and the upper reaches of the main Zion Canyon. The trailhead is immediately east of the Zion-Mt. Carmel Tunnel exit, accessible by private vehicle year-round since it’s on the Zion-Mt. Carmel Highway (UT-9), which remains open to private vehicles even during shuttle season. This east-facing viewpoint makes it Zion’s premier sunrise location — photographers are looking west into the canyon as first light strikes the east-facing walls. The trail traverses slickrock ledges, passes through short narrow passages, and offers multiple composition opportunities before the main viewpoint.
- GPS: 37.2134, -112.9405
- Where exactly: Canyon Overlook Trailhead, Utah Route 9 (Zion-Mt. Carmel Highway), Zion National Park — parking lot immediately east of the Zion-Mt. Carmel Tunnel east exit. Type into GPS: ‘37.2134, -112.9405’ or ‘Canyon Overlook Trailhead, Springdale, UT 84767’
- Best time of day: Sunrise (30–45 min before to 30 min after) — the east-facing viewpoint receives direct early morning light; shoot due west to capture canyon walls lit by first sun. Also excellent at sunset for warm canyon glow. Blue hour both directions beautiful.
- Best season: Year-round accessible by private vehicle; spring (April–May) for waterfalls in Pine Creek Canyon below; autumn (October–November) for warm canyon light and cottonwood color in the canyon below; winter for snow on red rock with the canyon extending beyond
- Sun direction: Viewpoint faces west-northwest into Zion Canyon. At sunrise, early light hits the canyon walls directly. At sunset, you are shooting into the setting sun — better for silhouette compositions or wide scenes where the lit sky is the subject.
- Recommended lens: 16–35mm ultra-wide for the sweeping canyon panorama; 70–200mm to zoom into the canyon interior and compress the Great White Throne, Angels Landing, and other formations visible in the mid-canyon distance
- Recommended settings: Landscape: f/11, ISO 100, 1/30s–1/125s; at sunrise expose for the lit canyon walls and let the sky blow slightly for saturation in the rock · Sunrise: f/8, ISO 400, 1/60s for pre-sunrise blue light; switch to f/11, ISO 100, 1/125s as direct sun hits the walls · Long Exposure: f/16, ISO 50, 15–30s at blue hour to capture canyon glow with smooth sky
- Access: Drive UT-9 from Springdale through the Zion-Mt. Carmel Tunnel (approximately 20 min from Visitor Center). Immediately after exiting the tunnel on the east side, turn right into the parking lot. Note: Large vehicles (over 7’10” wide or 11’4″ tall) require a NPS escort through the tunnel — stop at the entrance station. Private vehicles permitted year-round on this road. The trailhead is across the road from the parking lot.
Shots to chase:
- Classic viewpoint panorama: 16mm, morning, west-facing canyon with Great White Throne visible center-distance, pine trees framing the foreground, canyon walls in warm first light — stitch 3 frames horizontally for wide panorama
- Narrow canyon below: look directly down into Pine Creek Canyon from the viewpoint edge — 35mm, the tight slot below contrasts with the wide canyon in the distance
- Trail slickrock composition: shoot back along the trail itself — smooth orange slickrock ledges with the canyon backdrop create a minimalist desert composition
- Telephoto canyon compression: 200mm zoomed into the main canyon distance — Angels Landing and the Great White Throne appear much closer together and larger than in wide-angle
- Pre-dawn blue hour: arrive 45 min before sunrise, shoot in deep blue pre-dawn light using ISO 1600, f/4, 15s to capture canyon shapes and the first pale glow of dawn on the east rim
Weather note: Morning clouds from overnight storms often clear by sunrise to produce dramatic lit-cloud backgrounds. The east-side location means it sees weather systems first — monitor forecast the night before. The parking lot fills by 7 am in peak season for sunrise shoots.
11. Checkerboard Mesa
Checkerboard Mesa is a 6,520-foot Navajo sandstone dome immediately west of Zion’s east entrance, rising 900 feet above the Zion-Mt. Carmel Highway. Its defining feature is the extraordinary crosshatch pattern of intersecting horizontal bedding planes (formed by ancient windblown sand dunes) and vertical fractures (formed by freeze-thaw weathering), creating a natural grid that looks almost architectural. The formation is visible and photographable from the highway parking area without hiking, though a 2-mile round-trip informal path allows close approach. Compared to the canyon’s red-and-orange palette, Checkerboard Mesa’s cream-white color produces stark images, especially dramatic when backlit by a setting sun or snow-dusted in winter.
- GPS: 37.2156, -112.88
- Where exactly: Checkerboard Mesa Viewpoint Parking, Utah Route 9 (Zion-Mt. Carmel Highway), Zion National Park, Kane County, UT 84757 — just west of the east entrance station; GPS: 37.2156, -112.8800
- Best time of day: Late afternoon/sunset — the setting sun rakes across the checkered surface at a low angle, deepening the shadow in every crack and maximizing the three-dimensional texture; also excellent at golden hour and blue hour; avoid midday when overhead light flattens the crosshatch pattern
- Best season: Winter for snow catching in the horizontal cracks — the contrast between white snow and cream sandstone on a blue-sky day is exceptional and rarely photographed; autumn for low-angle raking light and occasional storms; spring for green rabbitbrush and wildflowers against the pale dome
- Sun direction: The mesa faces generally east and south; it catches warm afternoon and evening side-light from the west. Late afternoon sun rakes from the northwest in autumn and winter, creating maximum shadow depth in the crosshatch cracks. Shoot with sun at your back or from the southwest to maximize texture.
- Recommended lens: 70–200mm telephoto essential for isolating sections of the crosshatch pattern and compressing the texture; 24–70mm standard for environmental shots including the highway and surrounding scrubland; 16–35mm for dramatic wide shots with the full 900-foot dome dominating the frame
- Recommended settings: Landscape: f/11, ISO 100, 1/60s in afternoon light; expose for the highlighted dome face and let shadows deepen the crosshatch detail · Texture Detail: f/8, ISO 100, 1/125s at 200mm — shallow enough to separate the dome face from the sky but with sufficient depth to keep the entire visible face sharp · Winter Snow: f/11, ISO 200, 1/125s; the white dome in snow needs exposure compensation +0.5 to +1 stop to prevent underexposure from the meter trying to make the snow gray
- Access: Drive UT-9 east from Canyon Junction (15–20 min) or enter from the east via Mount Carmel Junction. The viewpoint parking lot is on the south side of UT-9, immediately west of the east entrance station. Signed and easy to find. Private vehicle accessible year-round. No shuttle service to this location. Entrance fee required (use park pass).
Shots to chase:
- Full dome at golden hour: 35mm, position the entire dome in the frame with UT-9 as a leading line from the lower left — the highway scale establishes the mesa’s overwhelming size
- Crosshatch texture abstract: 200mm isolated on a central section of the mesa face, raking late-afternoon light deepening every crack — resembles a topographic map
- Snow-filled cracks (winter): 100mm, close-in on the horizontal and vertical cracks filled with snow against cream-white sandstone — near-abstract pattern image
- Storm backlight: expose for the dark sky behind the dome, letting the dome itself become a bright silhouette against churning grey clouds
- Vertical panorama: ultra-wide 16mm, shoot straight up the face from the highway shoulder — from ground-level wildflowers to the summit dome in a single vertical frame
Weather note: A light dusting of snow in the cracks of Checkerboard Mesa is one of the most coveted winter images in southern Utah — it enhances the grid pattern dramatically. Backlit stormy skies add drama against the light-toned dome.
12. Kolob Canyons (Timber Creek Overlook + Kolob Arch)
The Kolob Canyons section of Zion National Park is often overlooked by visitors focused on the main canyon, but it offers some of the park’s most dramatic scenery in a far less crowded setting. A 5-mile scenic drive climbs into a landscape of narrow finger canyons whose walls — the Finger Canyons of the Kolob — glow vivid crimson and scarlet, a deeper red than the main canyon’s orange Navajo sandstone. The Timber Creek Overlook Trail (1.1 miles RT, easy) at the road’s end delivers panoramic views of the Kolob Terrace, Pine Valley Mountains, and on clear days the North Rim of the Grand Canyon 100 miles south. Kolob Arch (14 miles RT from Lee Pass, strenuous) is one of the world’s largest natural freestanding arches, with a 287-foot span, and sits deep in La Verkin Creek canyon — a full-day or overnight commitment for photographers.
- GPS: 37.4348, -113.2035
- Where exactly: Timber Creek Overlook Trailhead — end of Kolob Canyons Road, Kolob Canyons District, Zion National Park. From I-15 take Exit 40, follow Kolob Canyons Road 5.2 miles to the end. GPS: 37.4348, -113.2035. Kolob Arch (14-mile RT from Lee Pass Trailhead): Lee Pass at 37.4521, -113.1914
- Best time of day: Timber Creek Overlook: late afternoon/sunset when the finger canyon walls glow in direct warm light from the west; avoid midday when the narrow canyons create harsh shadows. Kolob Arch: midday provides the best overhead light illuminating the arch span from above (arch faces generally south)
- Best season: Second week of October for peak fall color in the finger canyons — Kolob sees fall color slightly earlier than the main canyon; also dramatic in winter with snow on the crimson walls; spring for wildflowers in La Verkin Creek meadows
- Sun direction: Finger canyons run east-west; the south-facing walls catch full afternoon light. Shoot north into the canyons in the afternoon for the most vivid wall illumination. Timber Creek Overlook faces south — sunset light from the west rakes across the canyon ridges.
- Recommended lens: 70–200mm telephoto for compressing the layered red canyon walls from viewpoints on the scenic drive; 24–70mm for Timber Creek Overlook panoramas; ultra-wide 16–35mm for Kolob Arch interior (the arch is enormous — need ultra-wide to capture it all)
- Recommended settings: Landscape: f/11, ISO 100, 1/125s in afternoon canyon light; polarizer saturates the vivid red canyon walls · Arch: f/11, ISO 200, 1/60s for the arch interior; bracket to handle the bright sky visible through the arch span vs dark underside · Long Exposure: f/16, ISO 100, 2–4s at blue hour from Timber Creek Overlook to smooth clouds and capture remaining glow on canyon ridges
- Access: From Springdale: drive UT-9 west to La Verkin, north on UT-17 to I-15, north on I-15 to Exit 40 (approx 45 min). Follow brown signs to Kolob Canyons Visitor Center. Separate entrance to the Kolob Canyons district — your standard Zion entrance pass is valid here. Timber Creek Overlook: drive 5.2 miles on Kolob Canyons Road to the end. Kolob Arch: begin at Lee Pass Trailhead, 3.7 miles up the scenic drive from the Visitor Center (GPS: 37.4521, -113.1914); 14 miles RT, strenuous, requires a full day and water sources along the route.
Shots to chase:
- Finger canyon walls from scenic drive pullouts: 200mm telephoto compresses successive canyon ridges into layered abstract of crimson and orange — the most vivid red-rock color in the park
- Timber Creek Overlook at sunset: ultra-wide 16mm, facing south from the overlook — canyon ridges converge toward the distance with warm sunset light on the upper walls and deep shadow in the canyons between
- Kolob Arch span: 16mm ultra-wide shot from below the arch looking straight up — the 287-foot span fills the frame; shoot at midday when overhead light illuminates the underside
- La Verkin Creek meadow approach: 35mm, shot from the creek with Kolob Arch just visible on the canyon wall above the tree line — gives context to the arch’s setting in the backcountry
- Autumn color from scenic drive: park at a pullout and shoot 70mm telephoto into the finger canyons with turning oak and maple in the foreground against the crimson walls behind
Weather note: Kolob Canyons receives more precipitation than the main canyon due to higher elevation (5,000–7,000 ft). After winter storms, the road may close — call ahead. Afternoon thunderstorms build quickly in summer; begin descent from overlook by 1 pm. La Verkin Creek is subject to flash flooding — check conditions before the Kolob Arch hike.
When to photograph Zion: a year-round breakdown
Zion is shootable every month of the year — but the conditions are radically different. Here’s what to expect by season:
Spring (March–May)
Wildflowers in the lower canyon, cottonwoods leafing out in vivid green, the Virgin River running high with snowmelt (cold and fast — Narrows is often closed or dangerous through April). Daytime temperatures 60–80°F. Storms move through quickly and create dramatic light. Best for: The Watchman, Pa’rus Trail, Court of the Patriarchs, Canyon Overlook, Emerald Pools (the waterfalls are at peak flow).
Summer (June–August)
Hot — canyon floor temperatures routinely exceed 100°F. Monsoon thunderstorms roll in afternoons (July–early September), bringing flash flood risk and dramatic skies. Crowds peak. Shoot before 10 a.m. and after 5 p.m. Best for: Sunrise at Towers of the Virgin, Canyon Overlook at first light, Milky Way over Kolob Canyons (low light pollution), monsoon storm light over the canyon.
Autumn (mid-September–early November)
The photographer’s season. Cottonwood and maple gold against red rock. The Narrows runs at lowest, clearest, warmest level. Comfortable temperatures (60–80°F daytime, 40s at night). Shoulder crowds. Best for: The Narrows wade, Court of the Patriarchs, Canyon Junction Bridge, Pa’rus Trail in cottonwood gold.
Winter (December–February)
Snow on red sandstone is one of the great photography phenomena of the American Southwest. Quiet park, no shuttle November–March (drive your own car into Zion Canyon), 30–50°F daytime. Some trails closed (Angels Landing chains can ice up). Best for: Checkerboard Mesa with snow in cracks, Canyon Junction Bridge after a storm, Watchman Trail at sunset, Kolob Canyons in winter light.
How to get to Zion National Park
Zion sits in southwest Utah, three hours northeast of Las Vegas (the closest major airport, LAS). The town of Springdale sits at the south entrance — most lodging is here. The east entrance is via the Zion-Mt. Carmel Highway through the tunnel; the Kolob Canyons district is a separate entrance off I-15 Exit 40.
- From Las Vegas: 2hr 45min via I-15 N and UT-9 E.
- From Salt Lake City: 4hr 30min via I-15 S.
- From St. George: 1hr (closest regional airport).
Photographer safety in Zion: read this once
Zion is wild country in a small footprint. The same canyon walls that make your photographs extraordinary can drop a flash flood on your head in 12 minutes.
- Flash floods in The Narrows and slot canyons are the leading life-safety hazard for Zion photographers. Check the daily flash flood potential rating at the visitor center every morning. Never enter when rated POSSIBLE or higher.
- Heat — summer canyon floor exceeds 105°F. Carry a minimum 1 gallon of water per person per day. Start hikes before 7 a.m.
- Falls — Angels Landing’s chained section has fatal exposure. Never lean out for a photo near a cliff edge.
- Hypothermia — the Virgin River runs 56–68°F in summer, 38–45°F in winter. Wear neoprene in spring and fall. Cotton kills.
The full safety briefing — flash flood signs, heat illness symptoms, lightning protocol, hypothermia recovery — is inside the Zion Photographer’s Guide PDF.
Luminar Neo’s Sky AI, atmosphere AI and SuperSharp are designed for landscape work — replace flat skies, add depth, and recover detail in seconds. Tagged as affiliate per FTC.
Related guides nearby
Three more photography guides within striking distance — perfect for combining into one trip.
- Bryce Canyon 78 km away · national park · USA
- Grand Canyon 159 km away · national park · USA
- Las Vegas 232 km away · city · USA
Quick Amazon shortcuts to the gear most useful for this kind of shot. Use them if Prime shipping or Amazon credit makes more sense than B&H. As an Amazon Associate ShutYourAperture earns from qualifying purchases.
Frequently asked questions
What’s the single best photography spot in Zion?
For first-time visitors and pure iconic value: Canyon Junction Bridge at sunset. It frames The Watchman with the Virgin River winding toward you — the most-photographed view in the park, and for good reason. For something more rare: The Narrows wade in late October, when low water and cottonwood gold combine.
What camera settings work best in Zion’s canyons?
For wide canyon scenes: aperture f/8–f/11, ISO 100–400, shutter speed varies with tripod use. For The Narrows interior: f/8, ISO 400–800 (light is dim), and a polarizer to cut river glare. For Milky Way at Kolob: f/2.8 (or as wide as your lens goes), ISO 3200–6400, 20-second exposure on tracker or 15s static.
Do I need a permit to photograph in Zion?
For personal photography, no permit is required. Commercial photography (paid shoots, weddings, ad work) requires a Special Use Permit from the park — apply at nps.gov/zion. Drone photography is prohibited park-wide.
How many days do I need to photograph Zion well?
Three full days is the minimum to hit the iconic spots in good light without burning out. Five days lets you add Kolob Canyons, attempt The Narrows, and re-shoot any location that gets bad weather the first time. Photographers serious about a portfolio piece should plan 7–10 days across two seasons.
Where can I download the full Zion photography guide?
The 50-page Zion Ultimate Photographer’s Guide PDF is $47, includes every spot above with full-page hero images, OSM maps with location pins, sun direction diagrams, seasonal tables, packing checklist, and the complete safety briefing. Or get the National Parks Bundle ($197) for every park guide we publish, including all future releases and annual refreshes.
Take this guide into the canyon
This post is the SEO entry point. The Zion Ultimate Photographer’s Guide PDF is the field-deployable version: 50 pages of full-resolution photography, OSM maps with gold pins for every location, multi-season shooting calendars, gear matrices per location, sun-angle diagrams, the full safety briefing, and a print-ready editorial layout designed in black and gold. Save it offline. Print it. Take it into the canyon.
Zion Ultimate Photographer’s Guide
50-page downloadable PDF · 12 GPS-mapped locations · Sun direction diagrams · Multi-season calendar · Safety briefing · Packing checklist
Get the Zion guide — $47
Or get the National Parks Bundle — $197
Get the Zion National Park Guide + Preset Pack
Photograph it. Edit it. Done.
All links go to Viator (a TripAdvisor company), the world’s largest marketplace for guided experiences. Tagged as affiliate per FTC.
Take Zion National Park home in your pocket.
Every shot location, every angle, every time of day worth shooting. Printable PDF + GPS-tagged map.
Instant download. Works on phone, tablet, and printed.
Continue reading
- National Parks Photography Guides — every park, mapped
- How to shoot golden hour like a pro
- Best lens for landscape photography
- Filters every landscape photographer needs
- Milky Way photography settings and locations
← Back to National Parks Photography Guides
Headed to Arizona too? See our best photography spots in Grand Canyon National Park guide — 12 GPS-tagged locations with monsoon lightning and Milky Way settings.
More park photography guides
- Yellowstone — 12 GPS locations
- Yosemite — 12 GPS locations
- Great Smoky Mountains — 12 GPS locations
- Bryce Canyon — 12 GPS locations
- Grand Teton — 12 GPS locations
- Glacier — 12 GPS locations
- Rocky Mountain — 12 GPS locations
- Arches — 12 GPS locations
- Joshua Tree — 12 GPS locations
- Acadia — 12 GPS locations
The complete Zion guide is $47
All vantage points above + 5 bonus secret spots, printable map, gear pack list, and editing recipes. One-time payment, instant download, lifetime updates.
Common questions about the Zion guide
Is the Zion photography guide worth $47?
For most photographers, yes. The guide saves 8-12 hours of trip-planning research and prevents the most common mistake of Zion photography: shooting at the wrong time of day. If a single better frame is worth $47 to you, the guide pays for itself on day one. Buyers get every GPS coordinate, every golden-hour window, every cultural rule, and a printable shot list.
Does the Zion guide include GPS coordinates?
Yes — every vantage point in the guide has Google Maps-ready GPS coordinates so you can pin them before you fly. The guide also includes a printable map showing all locations clustered by walking distance, so you can build efficient half-day routes.
What's in the Zion PDF that isn't in this article?
The article shows the highlights. The PDF includes: 5 additional secret spots not published online, a 14-day itinerary with daily routes, the full camera-settings cheat sheet for every scenario in Zion, a printable gear packing list, post-processing recipes with screenshot examples, and a list of local guides we trust for portrait commissions.
Do I get the Lightroom presets too?
The $47 guide is the PDF only. The matching Zion preset pack is a separate $19 download — most buyers grab both as a bundle and save the editing time. Both are instant download, both work on Lightroom Classic and Lightroom Mobile.
Will the guide work for a Zion trip in 2026?
Yes. The guide is updated annually as fees, restrictions, and new vantage points change. All buyers get free lifetime updates. The 2026 edition includes the latest drone rules, museum photography policies, and seasonal light data for the year.
Visiting more than Zion?
Bundle multiple destination guides and save planning time across the trip:
- Acadia Photographer’s Guide ($47)
- Joshua Tree Photographer’s Guide ($47)
- Arches Photographer’s Guide ($47)
- Rocky Mountain Photographer’s Guide ($47)
- Glacier Photographer’s Guide ($47)
Or get all 60+ destinations in one bundle: Photo Atlas — every guide, every map, $97.