How to Photograph Niagara Falls: A Photographer’s Guide
A world-famous, high-volume triple cascade with multiple close-access viewpoints on both sides of the border.
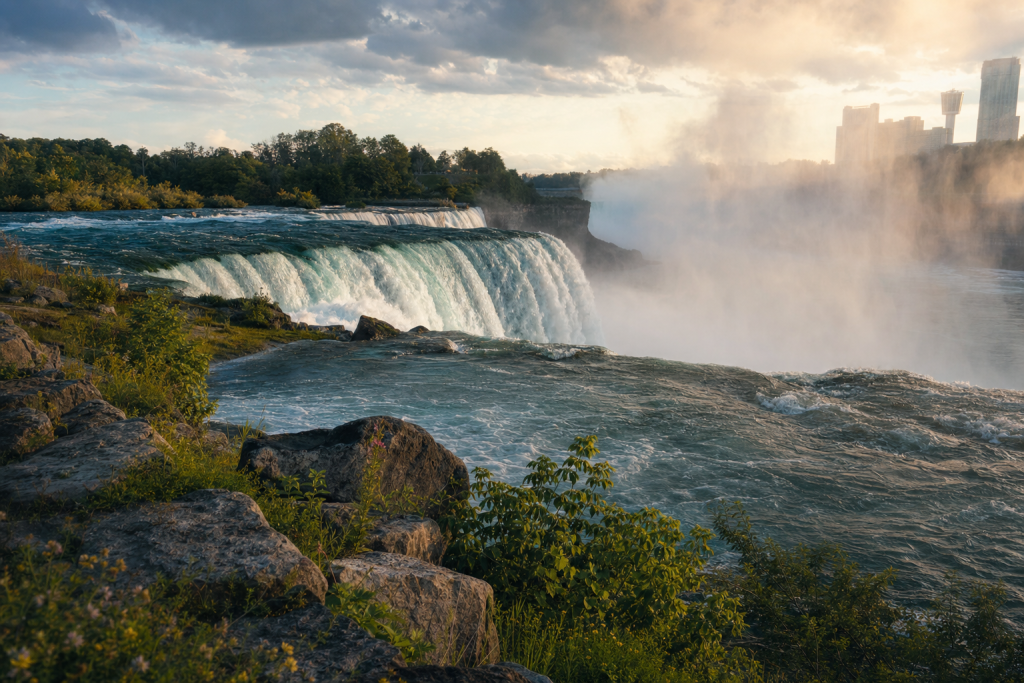
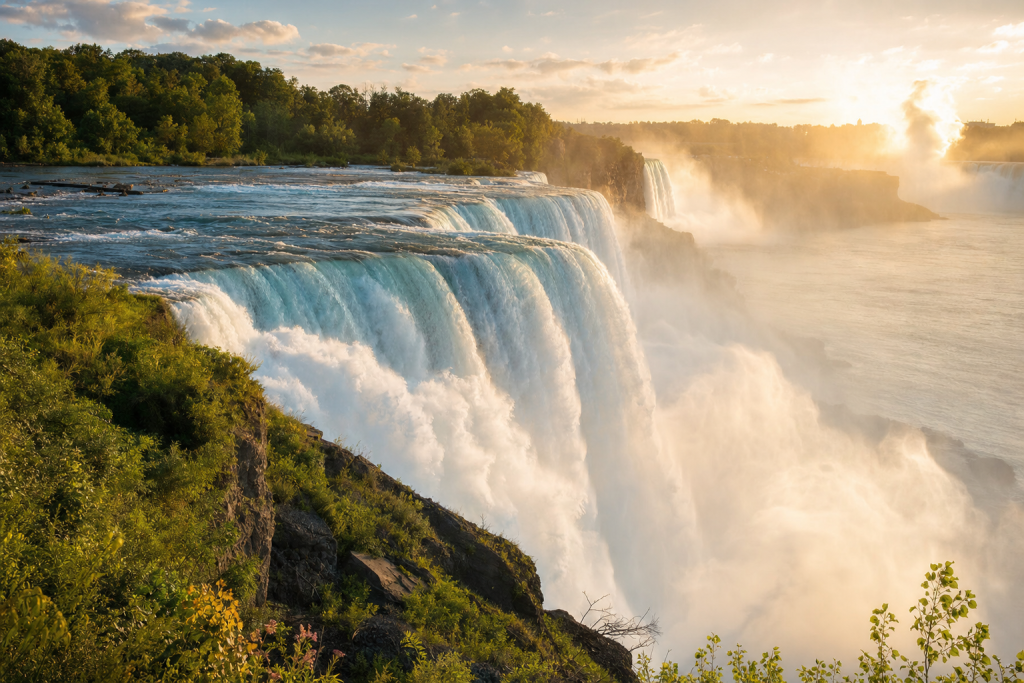
Niagara Falls combines sheer scale, intense spray, and exceptional access for photographers. Horseshoe Falls drops about 57 m, with average flow around 2,400 m³/s and summer volumes often higher, so the scene feels powerful even from the safest overlooks. The Canadian side offers the strongest all-around compositions, while the U.S. side gives intimate foregrounds and river textures. After dark, the falls are floodlit, and the power station tunnel adds a rare river-edge perspective.
Why photograph Niagara Falls
Niagara Falls combines sheer scale, intense spray, and exceptional access for photographers. Horseshoe Falls drops about 57 m, with average flow around 2,400 m³/s and summer volumes often higher, so the scene feels powerful even from the safest overlooks. The Canadian side offers the strongest all-around compositions, while the U.S. side gives intimate foregrounds and river textures. After dark, the falls are floodlit, and the power station tunnel adds a rare river-edge perspective.
Best months and best time of day
Best months: May to October
Best time of day: Sunrise to 2 hours after sunrise; blue hour after sunset for illumination
| Drop Height M | 57.0 |
| Water Volume M3S | Average about 2,400 m³/s; summer flow at least 2,800 m³/s; peak recorded flow 6,370 m³/s |
| Recommended Shutter | 1/2s to 2s for silky water at f/11–f/16, ISO 100, with ND8–ND64; 1/500s to 1/2000s for frozen spray and detail |
| Polarizer Notes | Yes — it cuts glare on wet rocks and railings, deepens sky color, and helps control reflections in the river, though strong spray can still overwhelm it close to the brink. |
GPS vantage point map
| Vantage point | GPS | Best time | Lens |
|---|---|---|---|
| Table Rock Welcome Centre | 43.0789, -79.0761 | Sunrise | 24-70mm |
| Queen Victoria Park | 43.0822, -79.0746 | Blue hour | 70-200mm |
| Prospect Point Observation Tower | 43.0813, -79.0728 | Sunrise | 16-35mm |
| Goat Island South Overlook | 43.0804, -79.0674 | Early morning | 24-105mm |
| Terrapin Point | 43.08, -79.0717 | Sunrise | 16-35mm |
| Niagara Parks Power Station Tunnel Deck | 43.0792, -79.0704 | Blue hour | 24-70mm |
Detailed vantage points
Table Rock Welcome Centre
GPS: 43.0789, -79.0761 | Best time: Sunrise | Lens: 24-70mm
Classic frontal view of Horseshoe Falls with the full curtain in frame. Use the parapet and lower terraces for layered compositions, mist, and rainbow potential. Best at sunrise before crowds and when the gorge light begins to strike the plume.
Queen Victoria Park
GPS: 43.0822, -79.0746 | Best time: Blue hour | Lens: 70-200mm
Broad, elevated views of Horseshoe and American Falls with landscaping in the foreground. Ideal for compressed telephoto scenes, night illumination, and seasonal flower borders that add scale and a foreground anchor.
Prospect Point Observation Tower
GPS: 43.0813, -79.0728 | Best time: Sunrise | Lens: 16-35mm
Elevated U.S. side platform with sweeping perspectives of American Falls and the river leading toward Horseshoe Falls. Great for wide environmental frames, layered water textures, and transitions from dawn color to bright daylight.
Goat Island South Overlook
GPS: 43.0804, -79.0674 | Best time: Early morning | Lens: 24-105mm
Strong side view over the river and across toward the Canadian Horseshoe Falls. Use the shoreline, rapids, and bridge lines as leading elements. Good for balancing scale with foreground texture and for tighter detail shots of churning water.
Terrapin Point
GPS: 43.08, -79.0717 | Best time: Sunrise | Lens: 16-35mm
One of the closest public U.S. viewpoints to Horseshoe Falls, with powerful edge-of-gorge compositions. Excellent for moody mist, diagonal falls lines, and dramatic close framing that emphasizes vertical drop and spray.
Niagara Parks Power Station Tunnel Deck
GPS: 43.0792, -79.0704 | Best time: Blue hour | Lens: 24-70mm
River-edge deck with a unique low-angle perspective and a rare side-on view of the illuminated falls. Best for after-dark compositions, reflections, and long exposures that capture light in the mist and the tunnel approach as a leading line.
Gear for waterfalls
Bring a sturdy tripod, a microfiber cloth, and a rain cover or weather-sealed body and lens; spray is constant near the brink, especially at Table Rock and Journey Behind the Falls. A 16–35mm or 24–70mm covers classic vistas, while a 70–200mm isolates sheets of water and tower details. ND filters are useful for long exposures, and a polarizer helps manage glare. Waterproof footwear matters on wet stone and boardwalks.
Restrictions, permits, and ethics
Niagara Parks states that drones are not permitted on Niagara Parks property, and commercial filming/photography/drone use requires prior approval and permits. Niagara Parks also notes a restricted Canadian airspace zone above Niagara Falls (CYR518) that covers the area from the ground up to 3,500 ft ASL. Journey Behind the Falls adult admission is CAD 33, White Water Walk adult admission is CAD 21, and the Power Station regular admission is CAD 33; prices are in CAD and exclude HST. Some attractions are seasonal or partially accessible.
Transit and access
From Buffalo Niagara International Airport, drive about 40–50 minutes via I-190 and the Rainbow Bridge or Queen Elizabeth Way, depending on your side of entry. From Toronto Pearson, plan roughly 1.5 to 2 hours by car via Highway 403/QEW toward Niagara Falls. On arrival, park near Table Rock/Falls Parking and use the Niagara Parks walkable corridor, WEGO, or local taxis to move between viewpoints.
 Save
SavePost-processing approach
Aim for deep greens, clean whites, and restrained cyan in the water to keep the scene natural rather than overcooked. Pull back highlights in the mist and foam first, then add a touch of dehaze to define the curtain without making it harsh. For blue-hour frames, keep the glow in the floodlit mist and soften shadows so the falls remain luminous and dimensional. Avoid heavy clarity that makes spray look gritty.
Complete lens kit for Niagara Falls
For waterfall photography at Niagara Falls a three-lens kit covers nearly every scenario. A wide-angle 16-35mm lens lets you place the falls inside a landscape — foreground rocks, the river above, and a sky that holds weather. A standard 24-70mm zoom is your workhorse for portrait-orientation frames that isolate the cascade and for tighter compositions when you cannot get closer because of viewing-area boundaries. A 70-200mm telephoto compresses distance, picks out individual streams of water, and lets you shoot from across a gorge without losing detail. Add a circular polarizer (the single most important filter for Niagara Falls) to cut surface reflections on wet rock and saturate foliage, plus a 6-stop and 10-stop ND filter pair so you can use shutter speeds between 0.5s and 30s in any light. A sturdy tripod with rubber-tipped legs that bite onto wet rock is non-negotiable. A weather-sealed body and a microfiber cloth in a sealed pocket round out the kit.
Light and timing playbook
Golden hour at Niagara Falls is short and often canyon-shadowed, so plan two windows: the 45 minutes before sunset for warm side-light on the cliff face, and the 30 minutes after sunset (the "after-glow") when the sky goes pastel and the water still reads bright against the rock. Cloud cover is your friend here — overcast days even out the dynamic range between bright water and dark wet stone, often producing the cleanest images. Mid-day, look for shaded compositions deeper inside the gorge where soft indirect light wraps the falls without blowing highlights. Use a polarizer at all times and remember that the closer to vertical the sun, the harder the polarizer works to cut surface reflections.
Planning your waterfall photography session
Plan a Niagara Falls session in three blocks. First, scout from home using satellite imagery, sun-position tools like PhotoPills or The Photographer’s Ephemeris, and recent images from photographers who have worked the same vantage points. Second, plan a buffer arrival of 60 to 90 minutes before your target light so you have time to set up the tripod, dial in composition, and watch the light change before you press the shutter. Third, plan a contingency: an alternate vantage point a few minutes away that works when weather, crowds, or closures spoil your first choice. Bring a paper or offline-saved map; cell coverage is unreliable at many of the best vantage points at Niagara Falls. Carry water, snacks, sunscreen, and a headlamp with red-light mode for pre-dawn and post-sunset work. Tell someone where you are going and when you expect to be back if the location is remote or off-trail in any way. Most of the best images at Niagara Falls come from photographers who arrived early, stayed late, and were willing to come back twice when the first session did not deliver the light they had hoped for.
Post-processing workflow
A reliable post-processing workflow for Niagara Falls starts in the field. Shoot RAW at the lowest native ISO that still gives you the shutter speed you need; bracket exposures when dynamic range is tight. In Lightroom or Capture One, begin with lens and chromatic-aberration corrections, then set the white balance by eye against a known neutral tone. Pull highlights down before lifting shadows so you preserve texture in the brightest part of the frame. Use the tone curve for global contrast and the HSL panel for color refinement — small luminance adjustments on the dominant colors of Niagara Falls (water, foliage, stone, sky) often do more for the image than any saturation slider. Local adjustments come last: a graduated filter to balance sky, a radial filter to draw attention to the subject, and selective sharpening on the area of detail you want the eye to land. Export at full resolution for prints and at 2048px on the long edge for web. Skylum Luminar Neo is a strong companion tool for sky replacement and atmosphere on weather-challenged days; Photoshop is the right call for composite-style edits and serious dust spot work. Save preset stacks tuned to Niagara Falls so the second visit is faster to edit than the first.
Photography ethics and permits at Niagara Falls
Photography ethics at matter both for the location and for your ability to keep working there. Stay on marked paths and viewing platforms; off-trail boot prints damage soil and vegetation that take decades to recover. Respect closures, seasonal restrictions, and the working hours of staff. If a sign or staff member tells you to move, move — those rules usually exist for safety or preservation reasons that are not always obvious. Pack out every scrap of gear, food wrapper, and microfiber cloth you bring in. Drones are restricted or banned in many protected areas — check with local civil aviation rules and the site’s own policy before flying, and never fly within sight of wildlife. Model releases are required for any identifiable person you photograph commercially; commercial-use permits are required at many sites and the fees are usually small compared with the consequences of being asked to delete a card. If you publish identifiable locations of sensitive places, consider whether geotagging will make the spot crowded for the next visitor. Leave a place better than you found it and the next photographer benefits, too.
Common mistakes and how to avoid them
A short list of avoidable mistakes will dramatically improve your hit rate at Niagara Falls. First, do not arrive at golden hour and start scouting then — scout earlier or on a separate trip so the best light is spent shooting, not finding the spot. Second, do not rely on auto white balance when warm or cool ambient color is part of the image you want; set it manually and trust the RAW file for recovery. Third, do not shoot at the highest ISO without thinking — modern sensors are clean to ISO 6400 but a polished, low-ISO long exposure on a tripod almost always beats a hand-held high-ISO frame for landscape work. Fourth, do not ignore the foreground; a strong foreground anchor is what separates a snapshot from a Niagara Falls image that people stop scrolling on. Fifth, do not over-process. A muted, restrained edit ages well; an oversaturated, over-sharpened, sky-replaced edit looks dated within a year. Finally, do not skip backup. Format one card at a time, dual-card record when possible, and back up to a portable SSD before leaving the trip.
 Save
SaveFrequently asked questions
Are drones allowed at Niagara Falls?
Not on Niagara Parks property, according to Niagara Parks, and the Canadian side includes a restricted airspace zone over the falls. Recreational drone flight is therefore not a practical option for most visitors, and commercial use needs advance approval and permits. Even if you are licensed, you should plan to shoot from ground viewpoints only and check both park and aviation rules before traveling.
What is the best month to photograph Niagara Falls?
Late spring through early autumn is the safest pick, with May and June often excellent because water volume is strong from seasonal runoff and weather is still comfortable. July to October adds longer daylight and reliable access to most attractions, while winter can create dramatic ice scenes but some areas operate seasonally. If you want the classic full-volume look, prioritize spring.
Which gear matters most for this waterfall?
A tripod, lens cloths, ND filters, and a polarizer are the essentials. Spray can hit your front element every few minutes, so a cloth in your pocket is not optional. A wide lens handles the broad panorama, while a telephoto is useful for isolating the falls, mist, and river texture. Waterproof shoes and a rain shell also make a big difference in comfort and stamina.
Is Niagara Falls accessible for photographers with limited mobility?
Many major viewpoints are accessible or partially accessible, including the Niagara Parks Power Station, which is fully accessible, and Journey Behind the Falls, which is partially accessible. Table Rock and nearby promenades also offer easy access to core views. That said, wet surfaces, stairs, and crowded railings can still make movement slower, so allow extra time and keep equipment compact.
How close can you get to the water safely?
Very close in designated areas such as Journey Behind the Falls, White Water Walk, and the Power Station tunnel deck, but always behind barriers and on marked paths. These locations are designed for public access, yet the mist, slippery rock, and turbulence are real hazards. Keep a firm grip on gear, protect electronics, and avoid leaning over railings or stepping off designated platforms.
All links go to B&H Photo Video, the trusted pro source. Tagged as affiliate per FTC.
What to Pack
A focused landscape kit handles every shot at Niagara Falls without breaking your back. Here is the working photographer's pack list — every link goes to B&H Photo Video (our primary supplier) or Amazon (for accessories and same-day delivery in the US).
| What & Why | B&H | Amazon |
|---|---|---|
Wide-angle zoom (14-35mm range) The single most important lens for sweeping vistas. Pair with a circular polarizer for skies and water. | Shop B&H → | Shop Amazon → |
Sturdy travel tripod Carbon fiber, packs to 15 inches, holds steady in wind off the coast. Essential for blue-hour and long-exposure work. | Shop B&H → | Shop Amazon → |
Circular polarizer (77mm or 82mm) Cuts haze, deepens sky, reveals texture in water. Non-negotiable for landscape work. | Shop B&H → | Shop Amazon → |
10-stop ND filter For 30-second exposures that turn moving water and clouds into silk. | Shop B&H → | Shop Amazon → |
Extra batteries (3 minimum) Cold weather and long exposures eat batteries. Carry triple what you think you need. | Shop B&H → | Shop Amazon → |
Fast SD/CFexpress cards V90 or CFexpress depending on your body. Two cards minimum so a failure mid-trip is recoverable. | Shop B&H → | Shop Amazon → |
Microfiber lens cloths Salt spray, mist, and dust will ruin every shot if you don't carry a cloth. | Shop B&H → | Shop Amazon → |
B&H and Amazon links are affiliate links. We earn a small commission on purchases at no extra cost to you. We only recommend gear we use or would buy ourselves.